

Strawberries are, by far, my favorite fruit to eat. When they’re in season, strawberries are the perfect balance between sweet and tart, with their own unique flavor. However, because of their high water content, they can be a little tricky to bake with! It’s very easy to end up with a soggy mess when you add fresh strawberries to cookies, cakes, scones, quickbreads, and any other number of desserts. There’s nothing less appetizing and more disheartening when you’re baking than having it come out soggy after all that hard work.
That’s why it’s so crucial to pre-cook your strawberry pie filling. Berries with a lower water content can just be tossed in a sugar-thickener-spice mixture and baked in the crust from fresh or frozen, but strawberries don’t have that luxury. Cooking the filling along with the flour and cornstarch allows the extra water to evaporate, and activates the thickening agents in the starch and flour. This way, when it’s all fully baked and ready to serve, it will stay in one beautiful and delicious slice rather than becoming a runny mess!
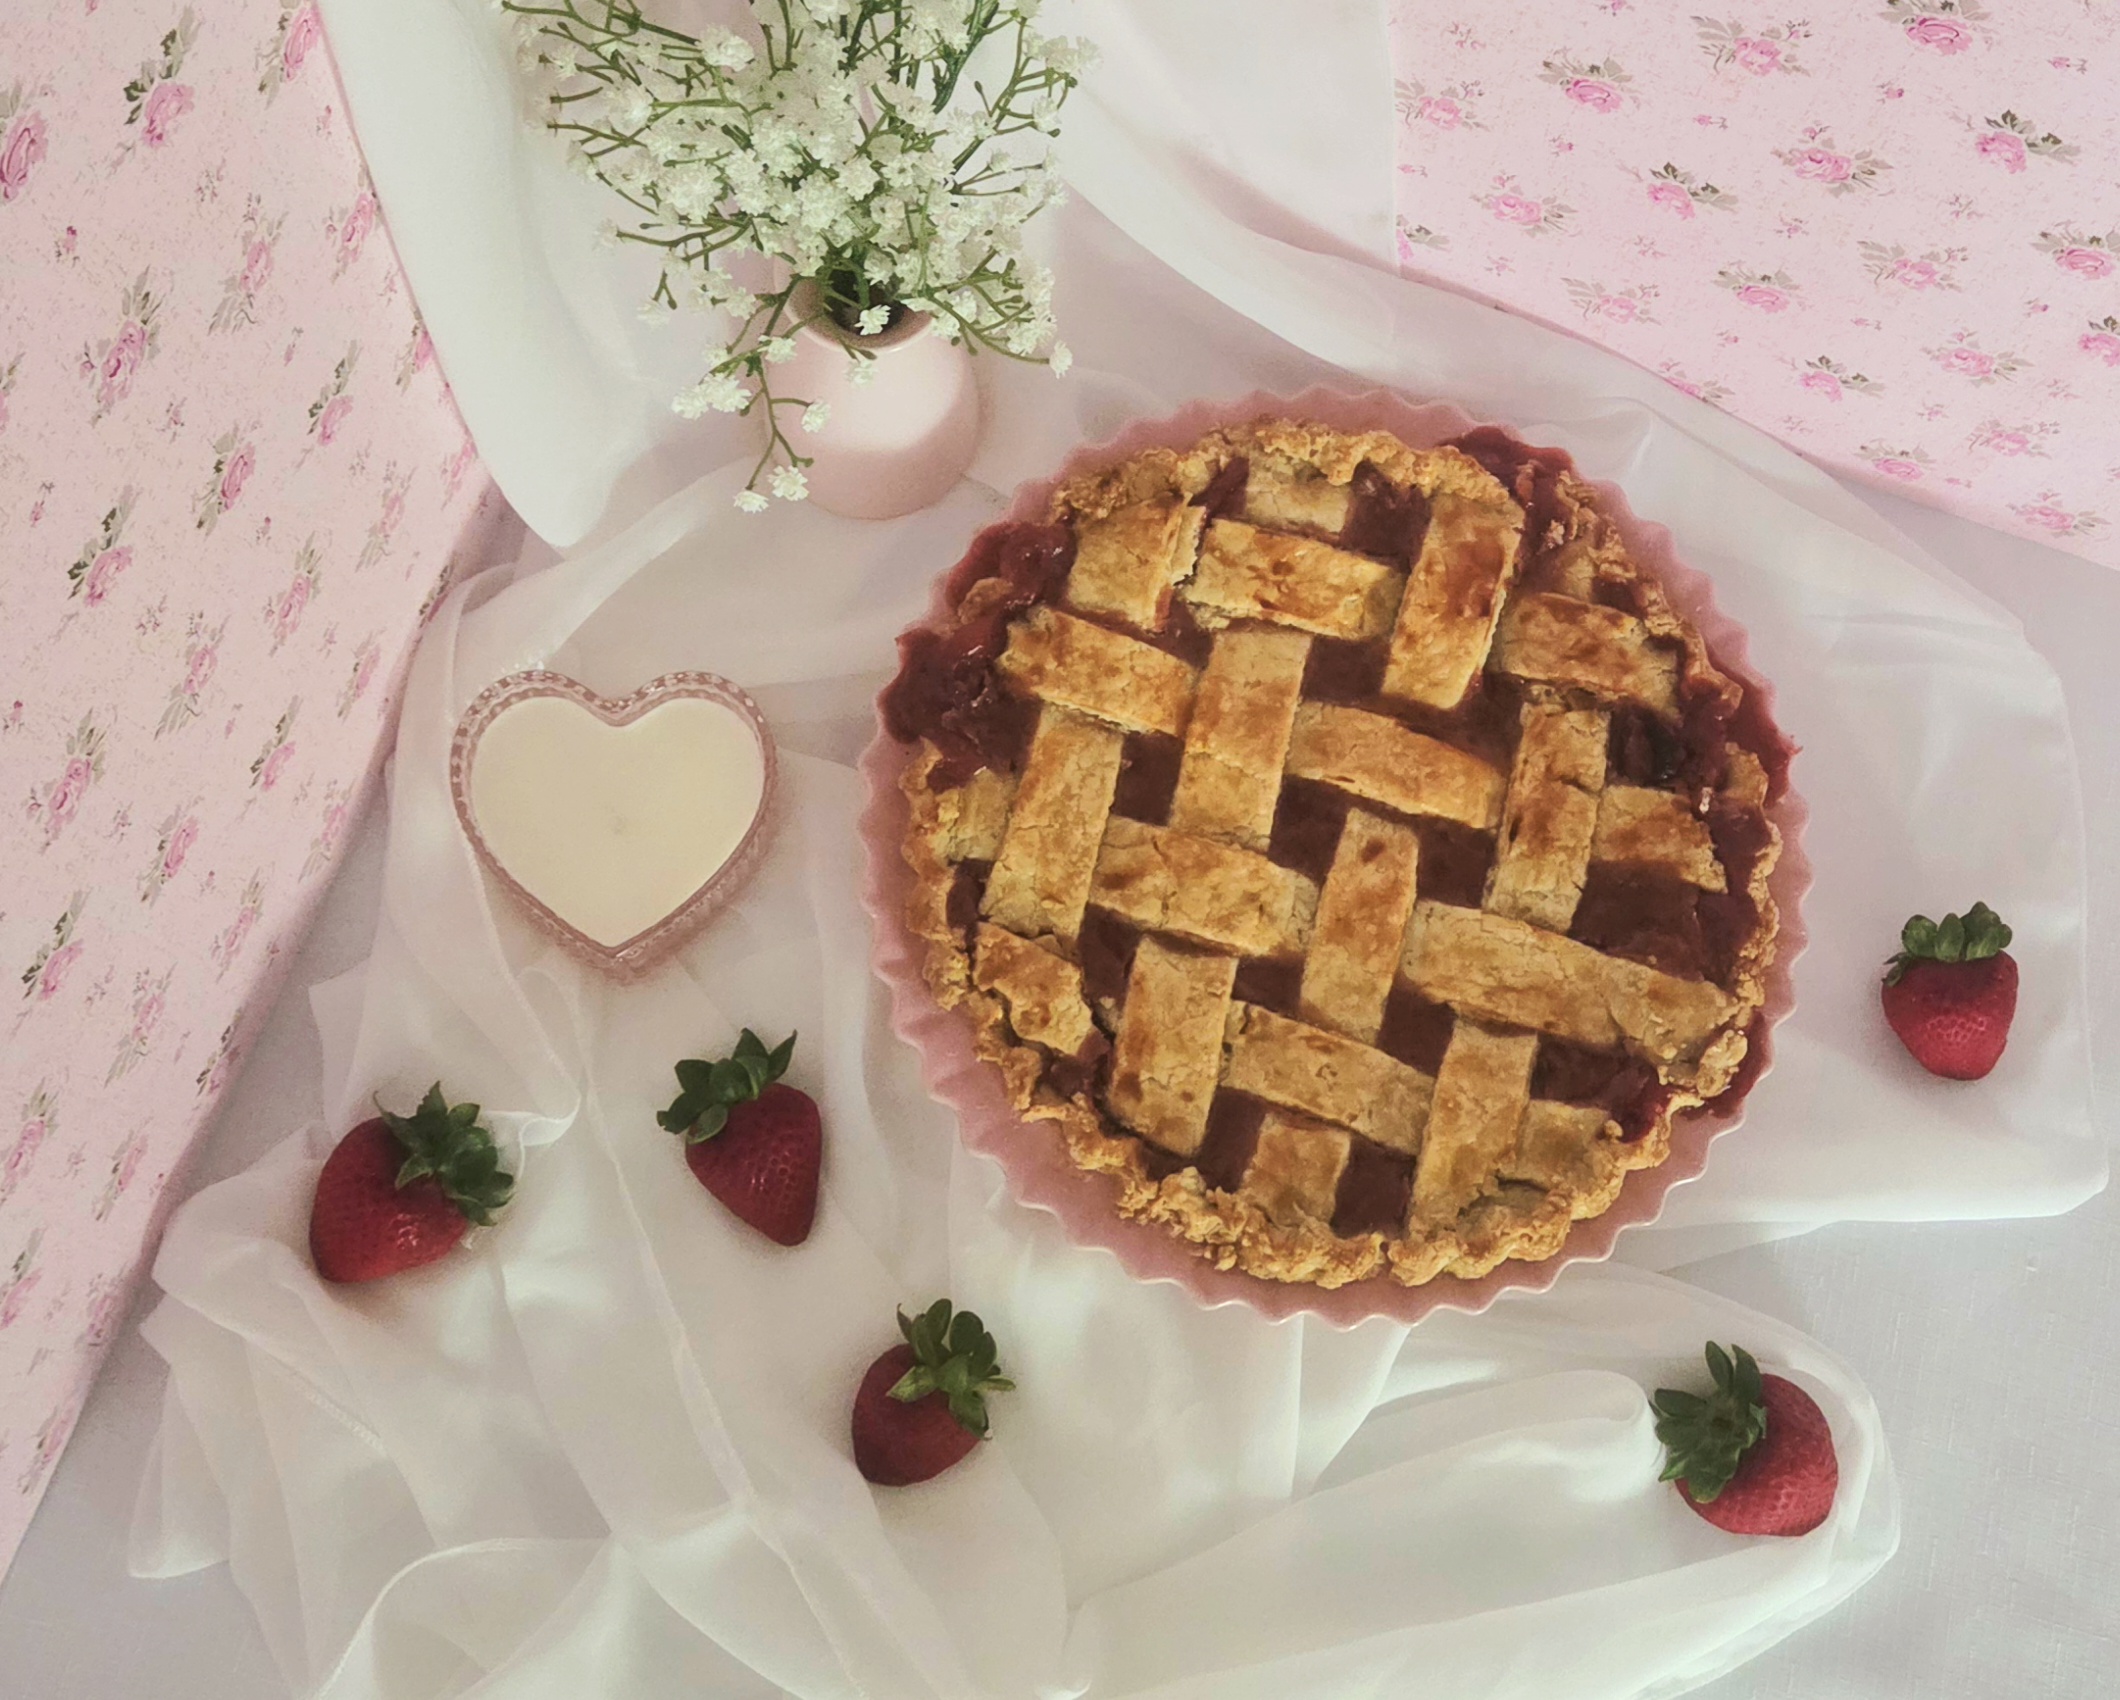
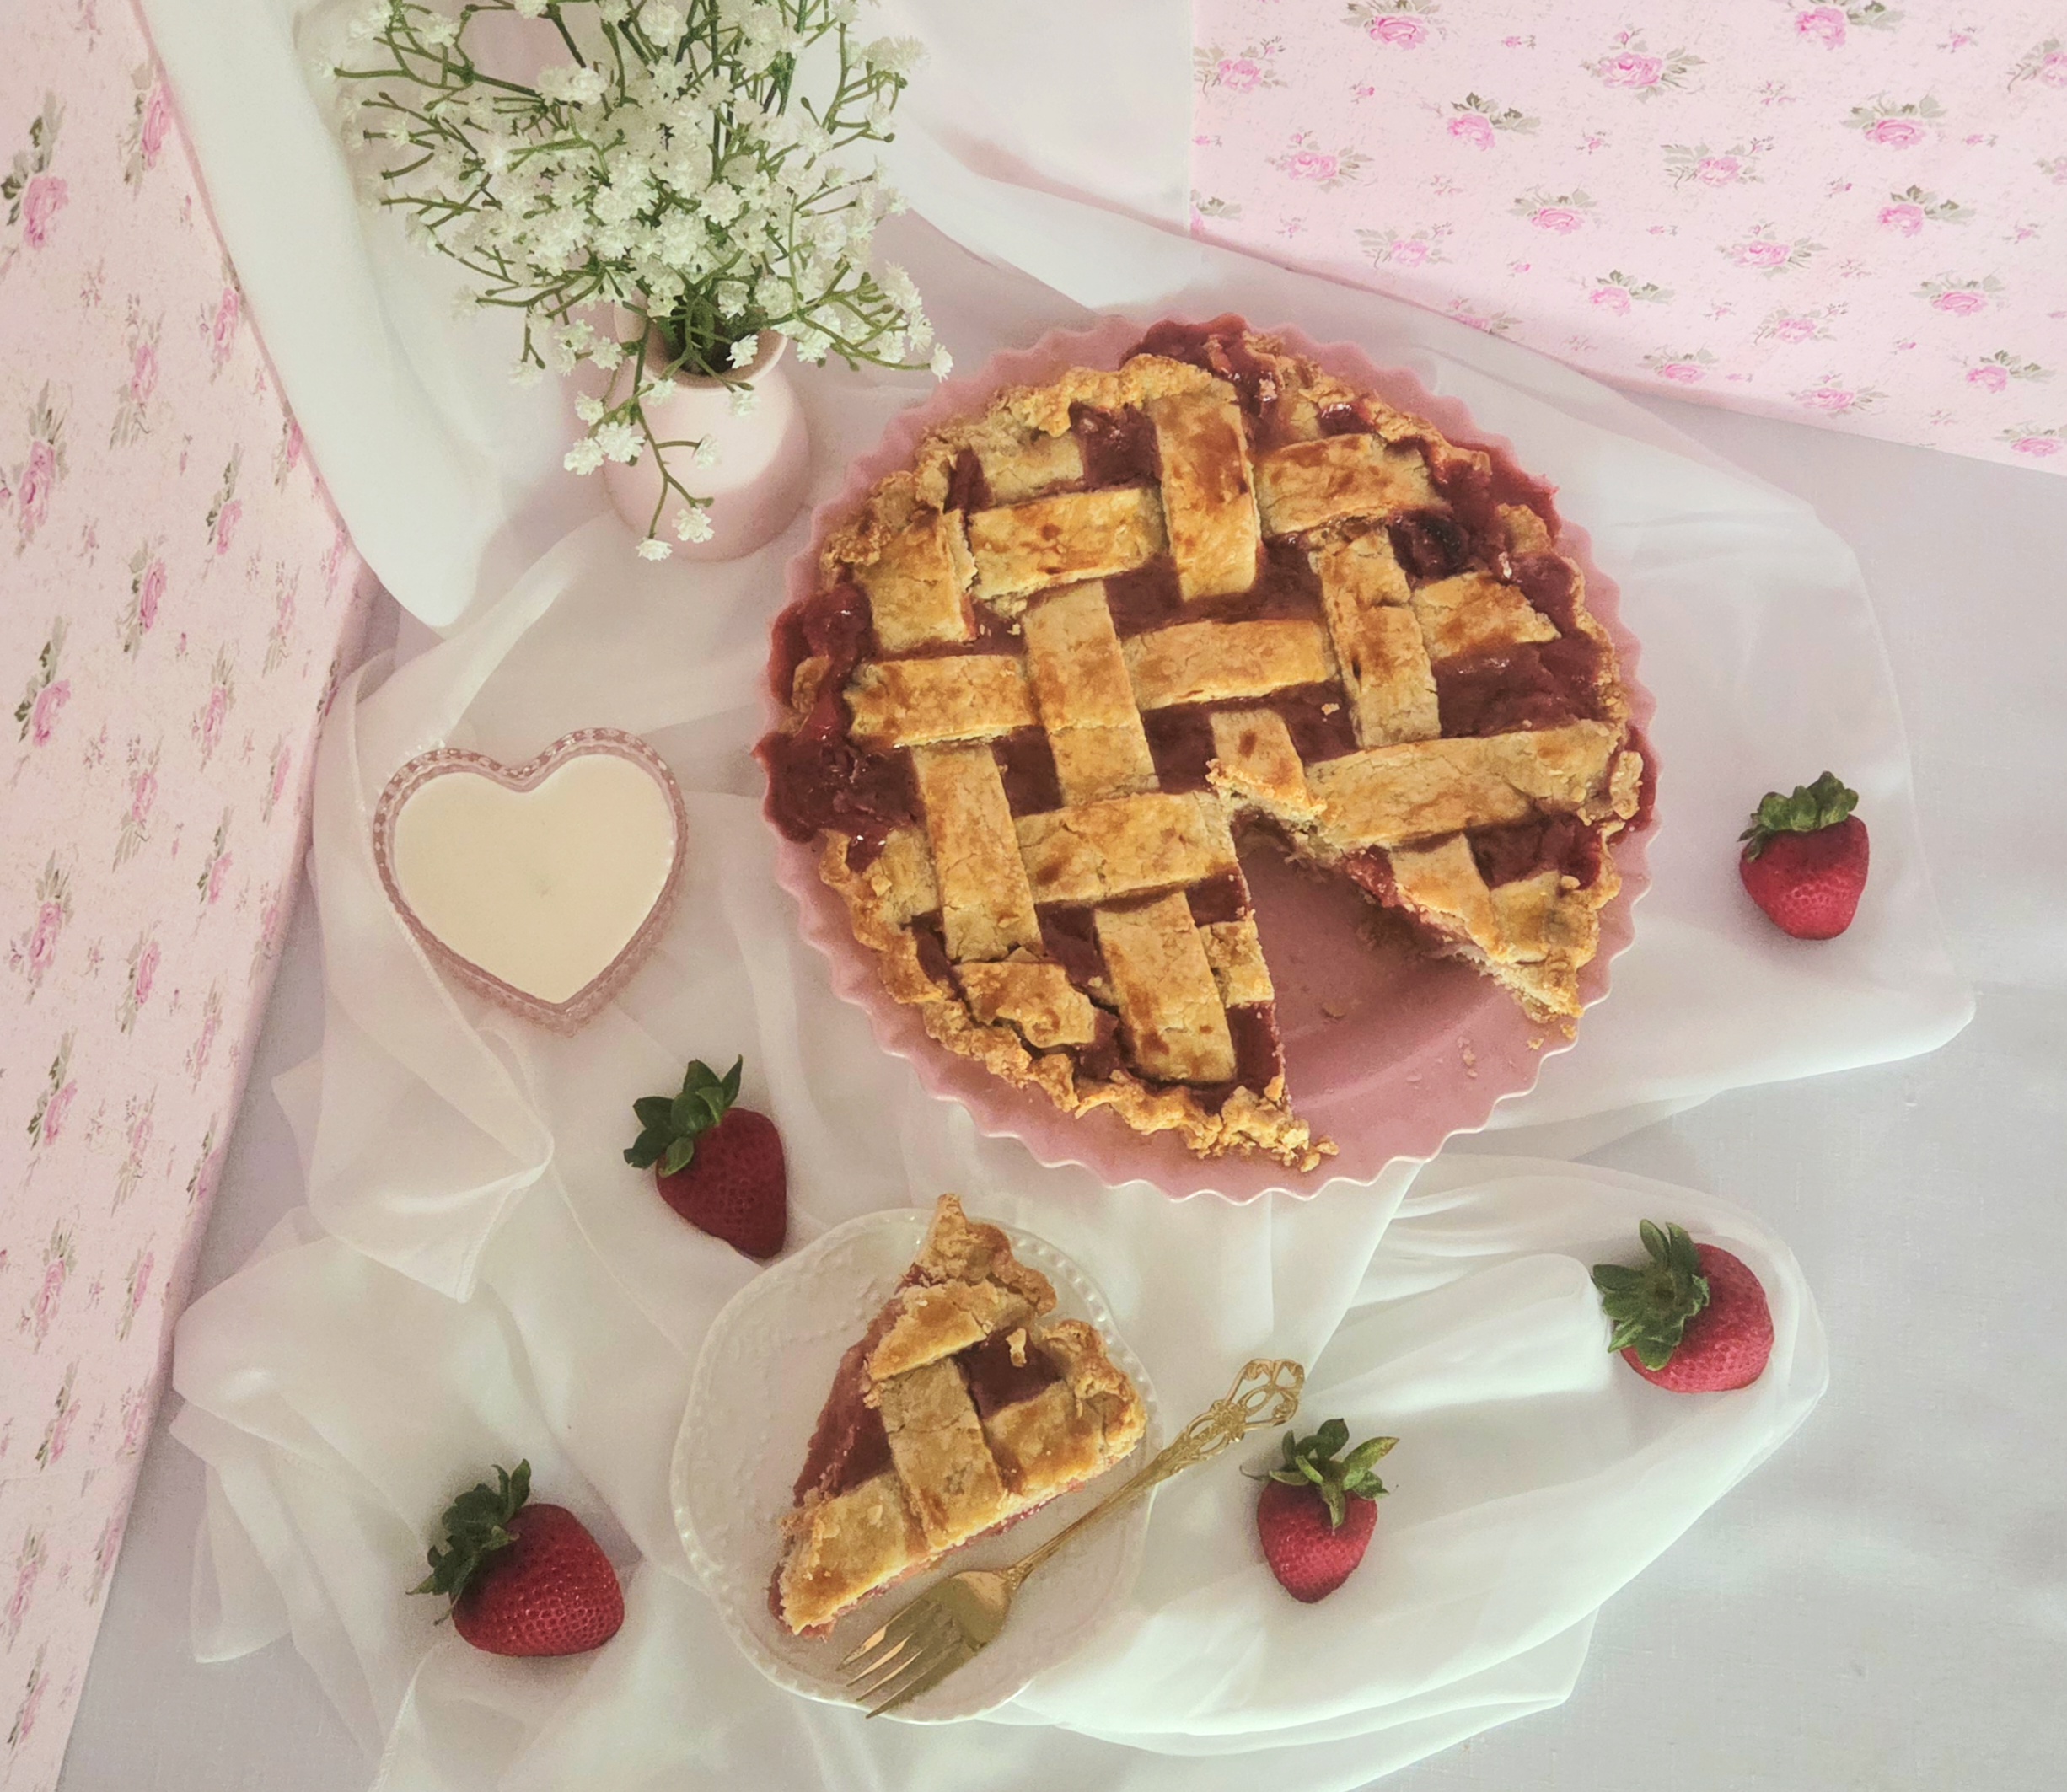
This pie is just the right amount of sweet, with brightness from the lemon and a pleasant crunch from the crust. No need for the supporting role that rhubarb so often plays in a strawberry pie, this recipe allows the strawberries to shine on their own. It’s the perfect addition to any Spring or Summertime picnic, cookout, special event, or random Tuesday. Let’s get baking!
FAQs and Science
Why use both flour and cornstarch in the filling? I prefer the flavor, consistency, and appearance of a combination of flour and cornstarch in this recipe, rather than one on its own.
Can fresh strawberries be used rather than frozen? This recipe was designed with frozen strawberries in mind, as they’re cheaper and frozen fruit is picked and processed at peak ripeness. I haven’t tested it with fresh strawberries because of this, so I can’t say with certainty how the end result would be.
Will the lemon juice make it taste like lemon? Not at all, the lemon juice will just add a little brightness to the filling and it gives it a bit more dimension. There won’t be any discernible lemon flavor.
Do I have to make a lattice top? That seems more difficult than I’m comfortable with. Absolutely not! If it sounds too intimidating to create your own lattice top, you can just roll out the dough to the same diameter as the top of the pie. Place it on top and cut 4 small slits near the center of the circle. This way, the pie still has a ventilation point for steam to escape from but it’s a much easier process to create.
Does it matter what material the pie dish I use is made from? The material your pan is made from actually does make a huge impact on how your pie comes out, as different materials conduct heat differently. A dark metal pie dish will conduct the most heat, while glass conducts the least. I prefer to go somewhere in the middle, with either a lighter metal or ceramic dish.
What You’ll Need
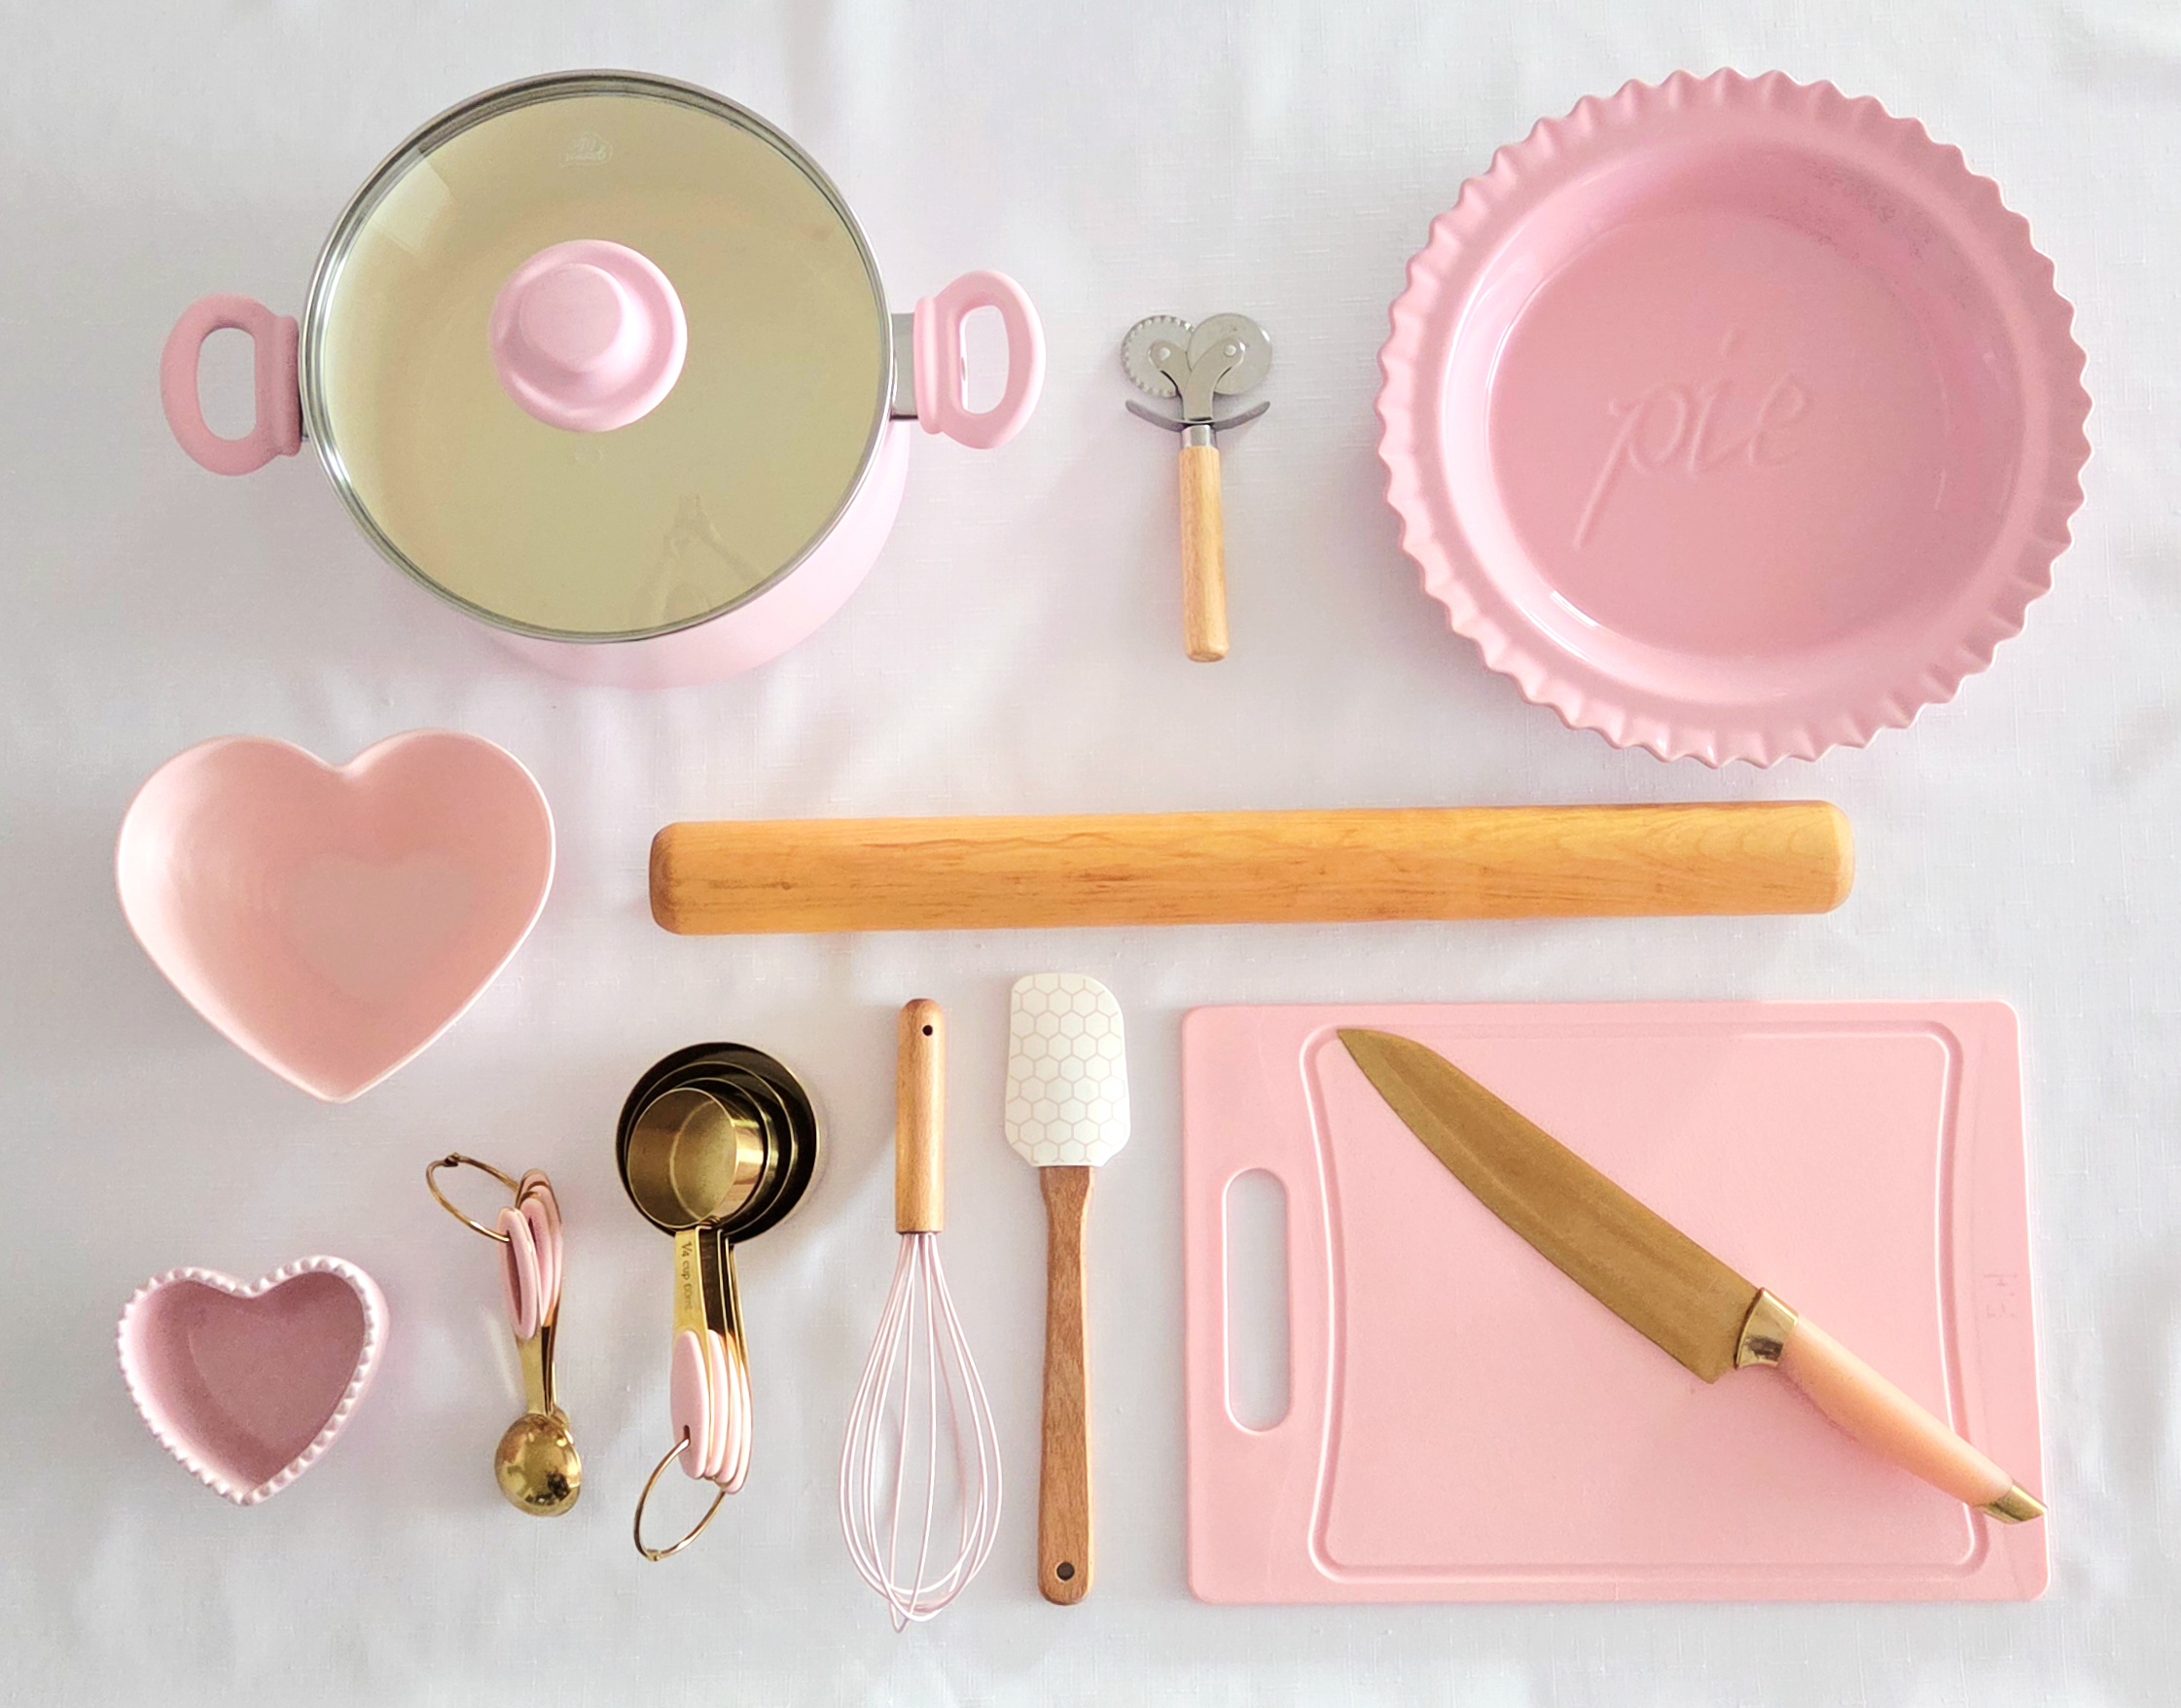
- Ceramic or light colored metal pie dish
- Nonstick baking spray
- 4-Quart heavy duty saucepan with lid
- Whisk
- Heat resistant rubber spatula
- Dry measuring cups
- Measuring spoons
- Citrus reamer or citrus squeezer
- Chef’s knife
- Cutting board
- Small mixing bowl
- Rolling pin
- Baking sheet
- Pizza wheel, bench scraper, or chef’s knife
- Paring knife or kitchen scissors
- Pastry brush (optional)
- Aluminum foil or pie crust shield
The Process
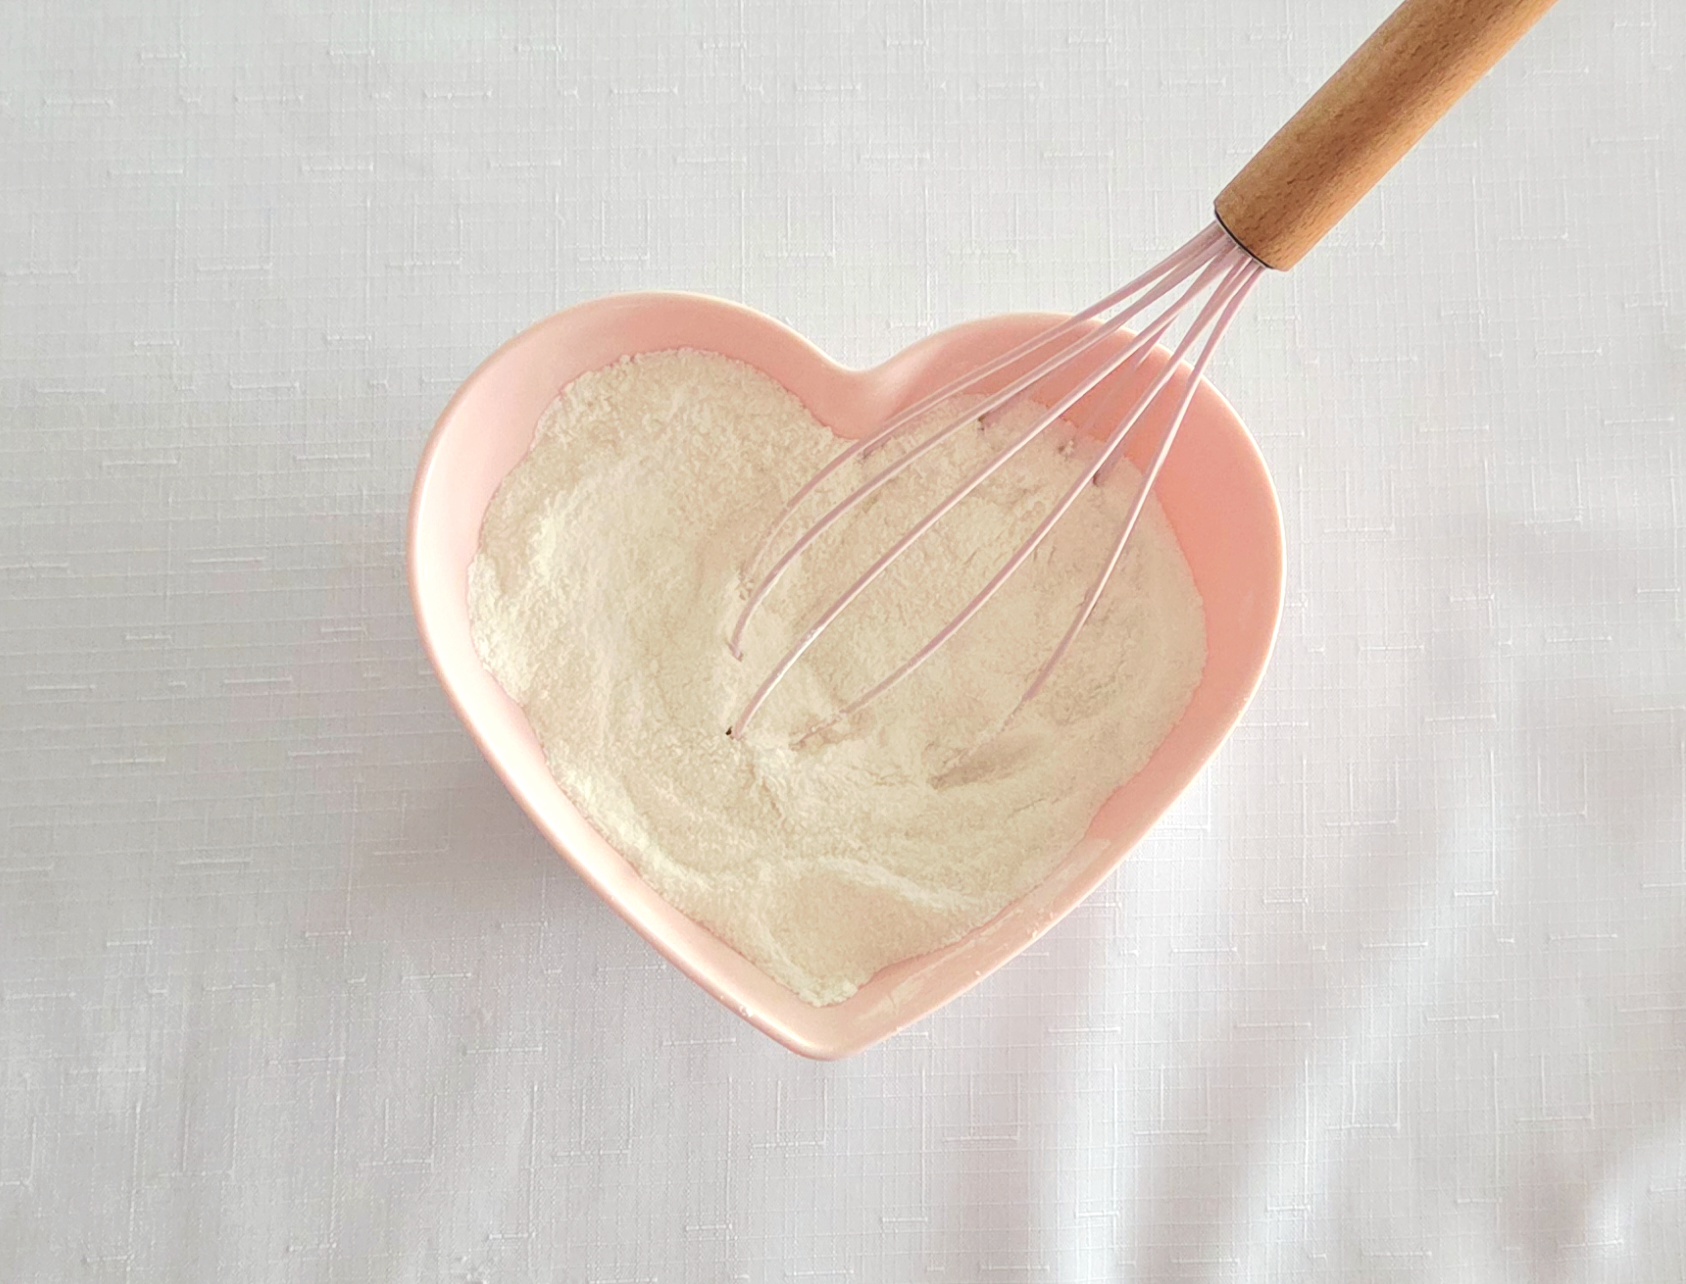
Make sure your pie crust is ready to use in the fridge, then start on the filling. In a small mixing bowl, whisk together the sugar, flour, cornstarch, and salt. Set this aside.
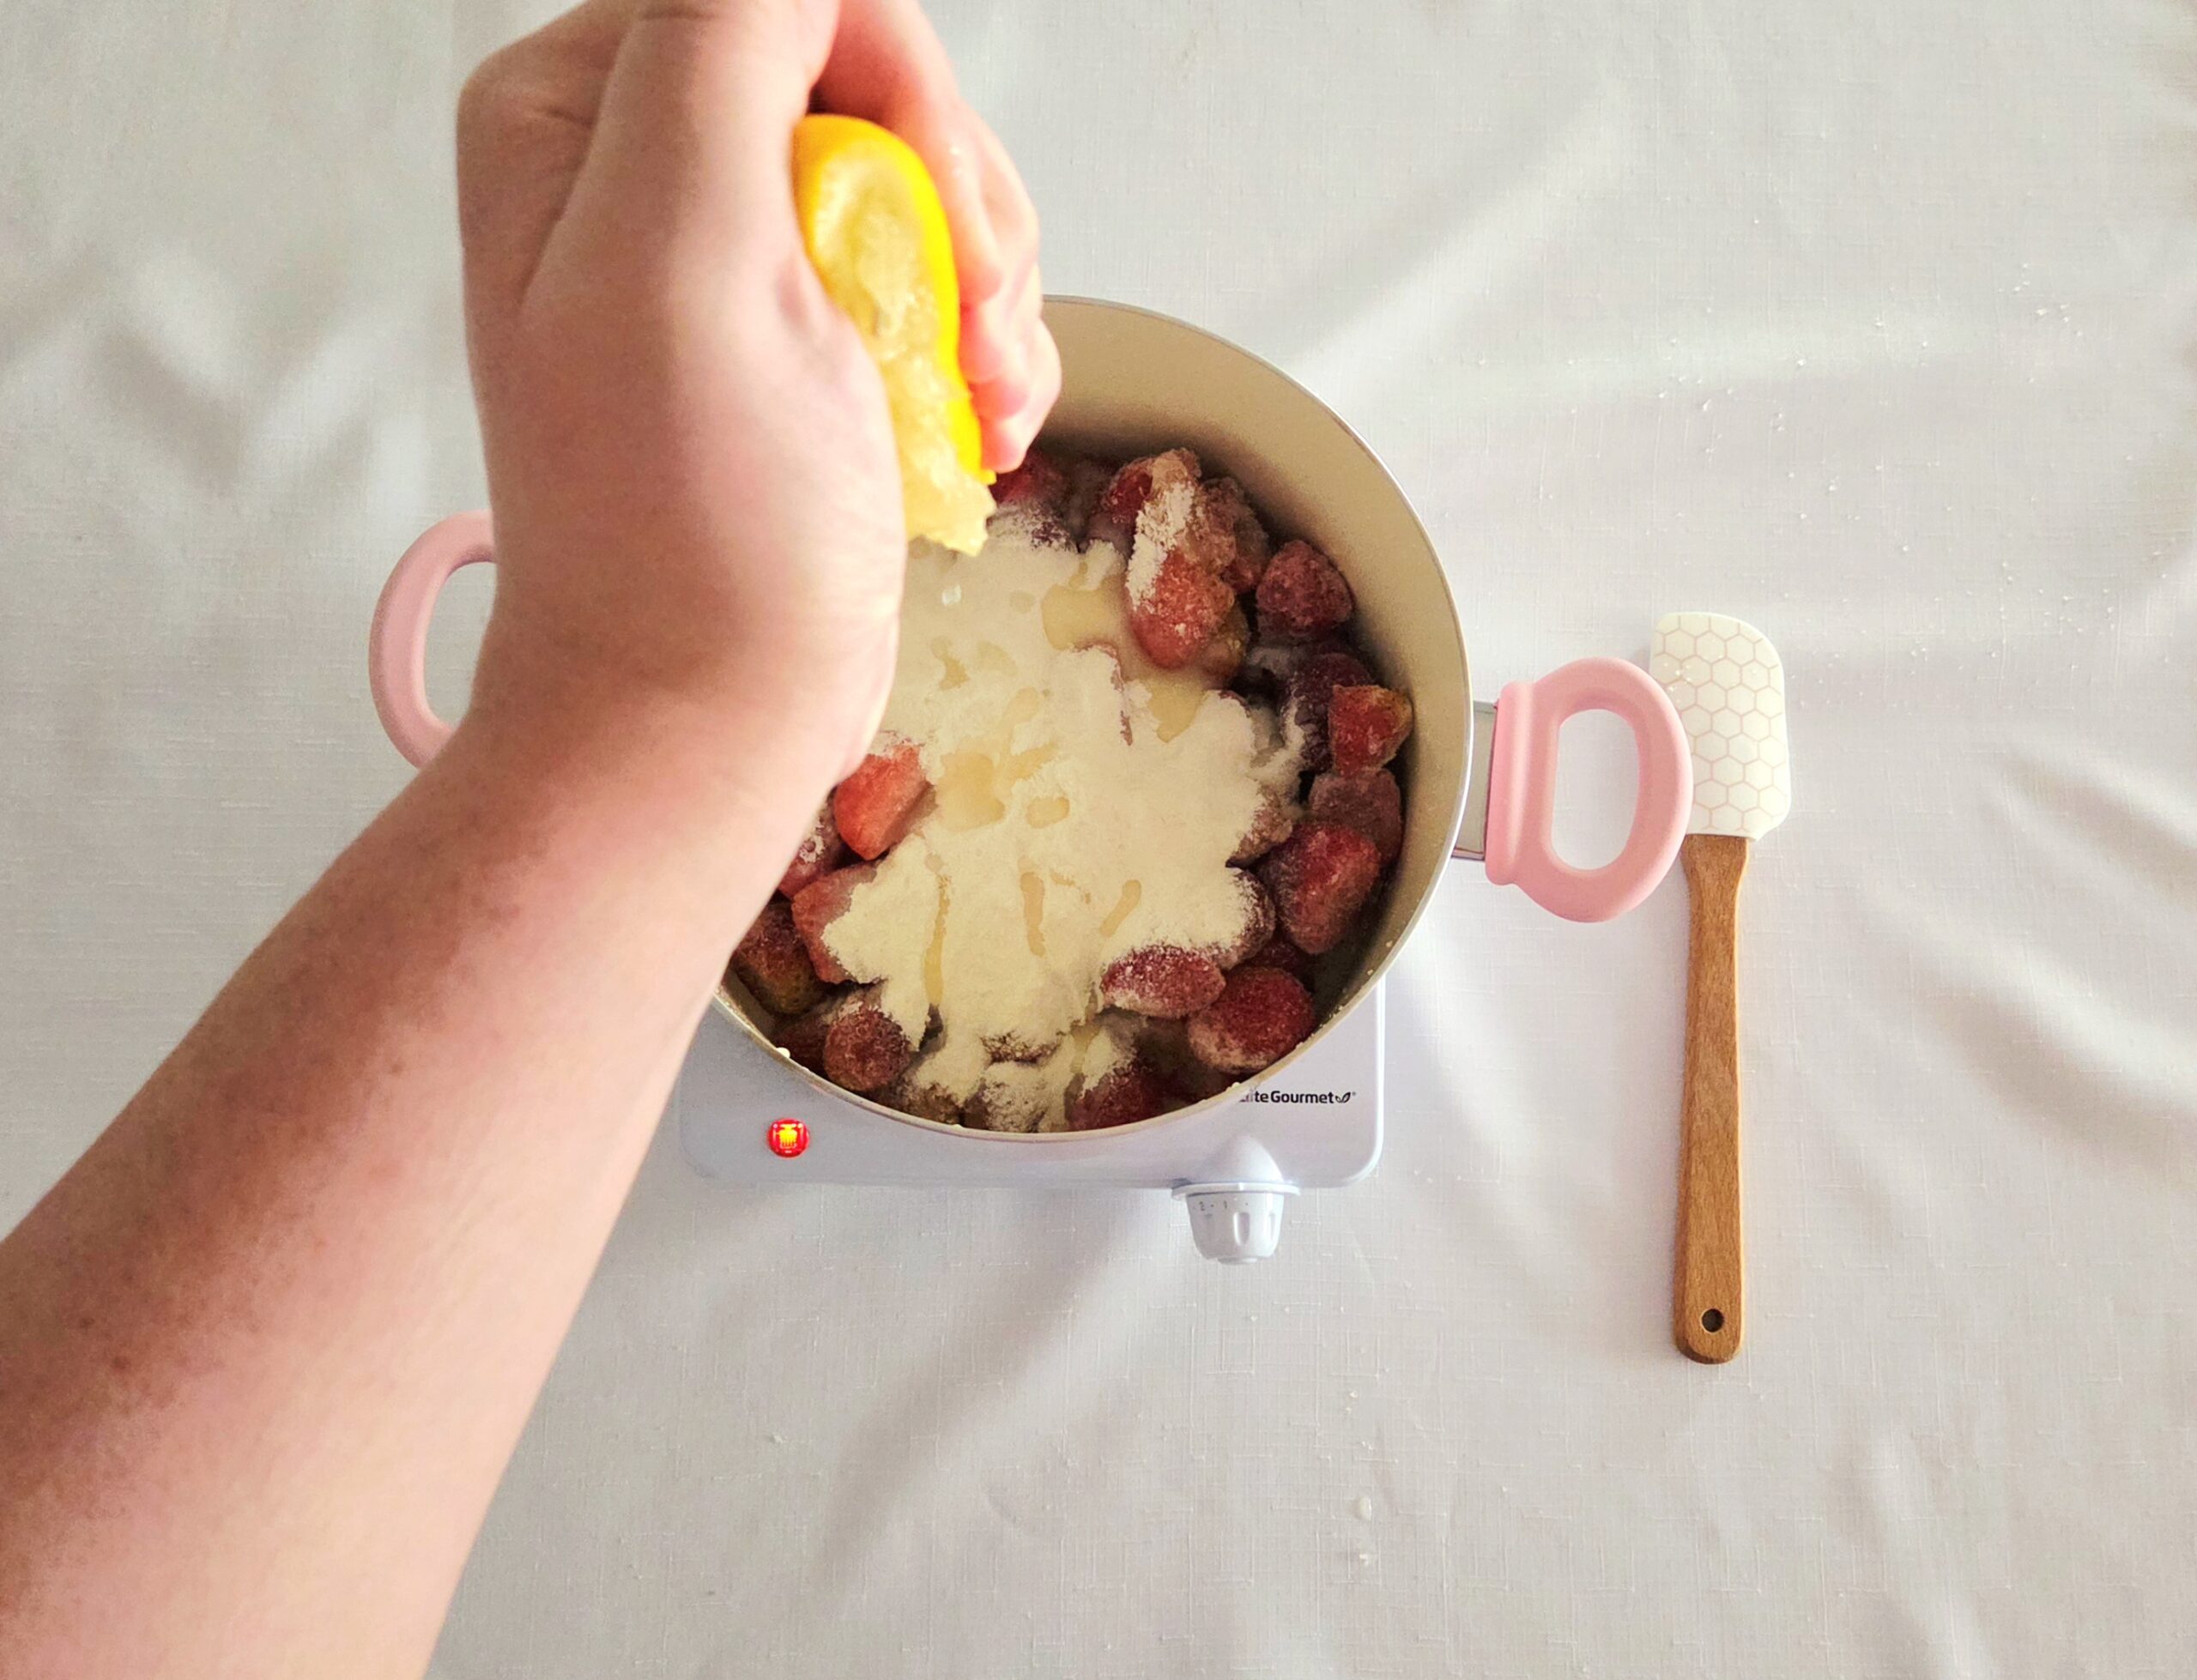
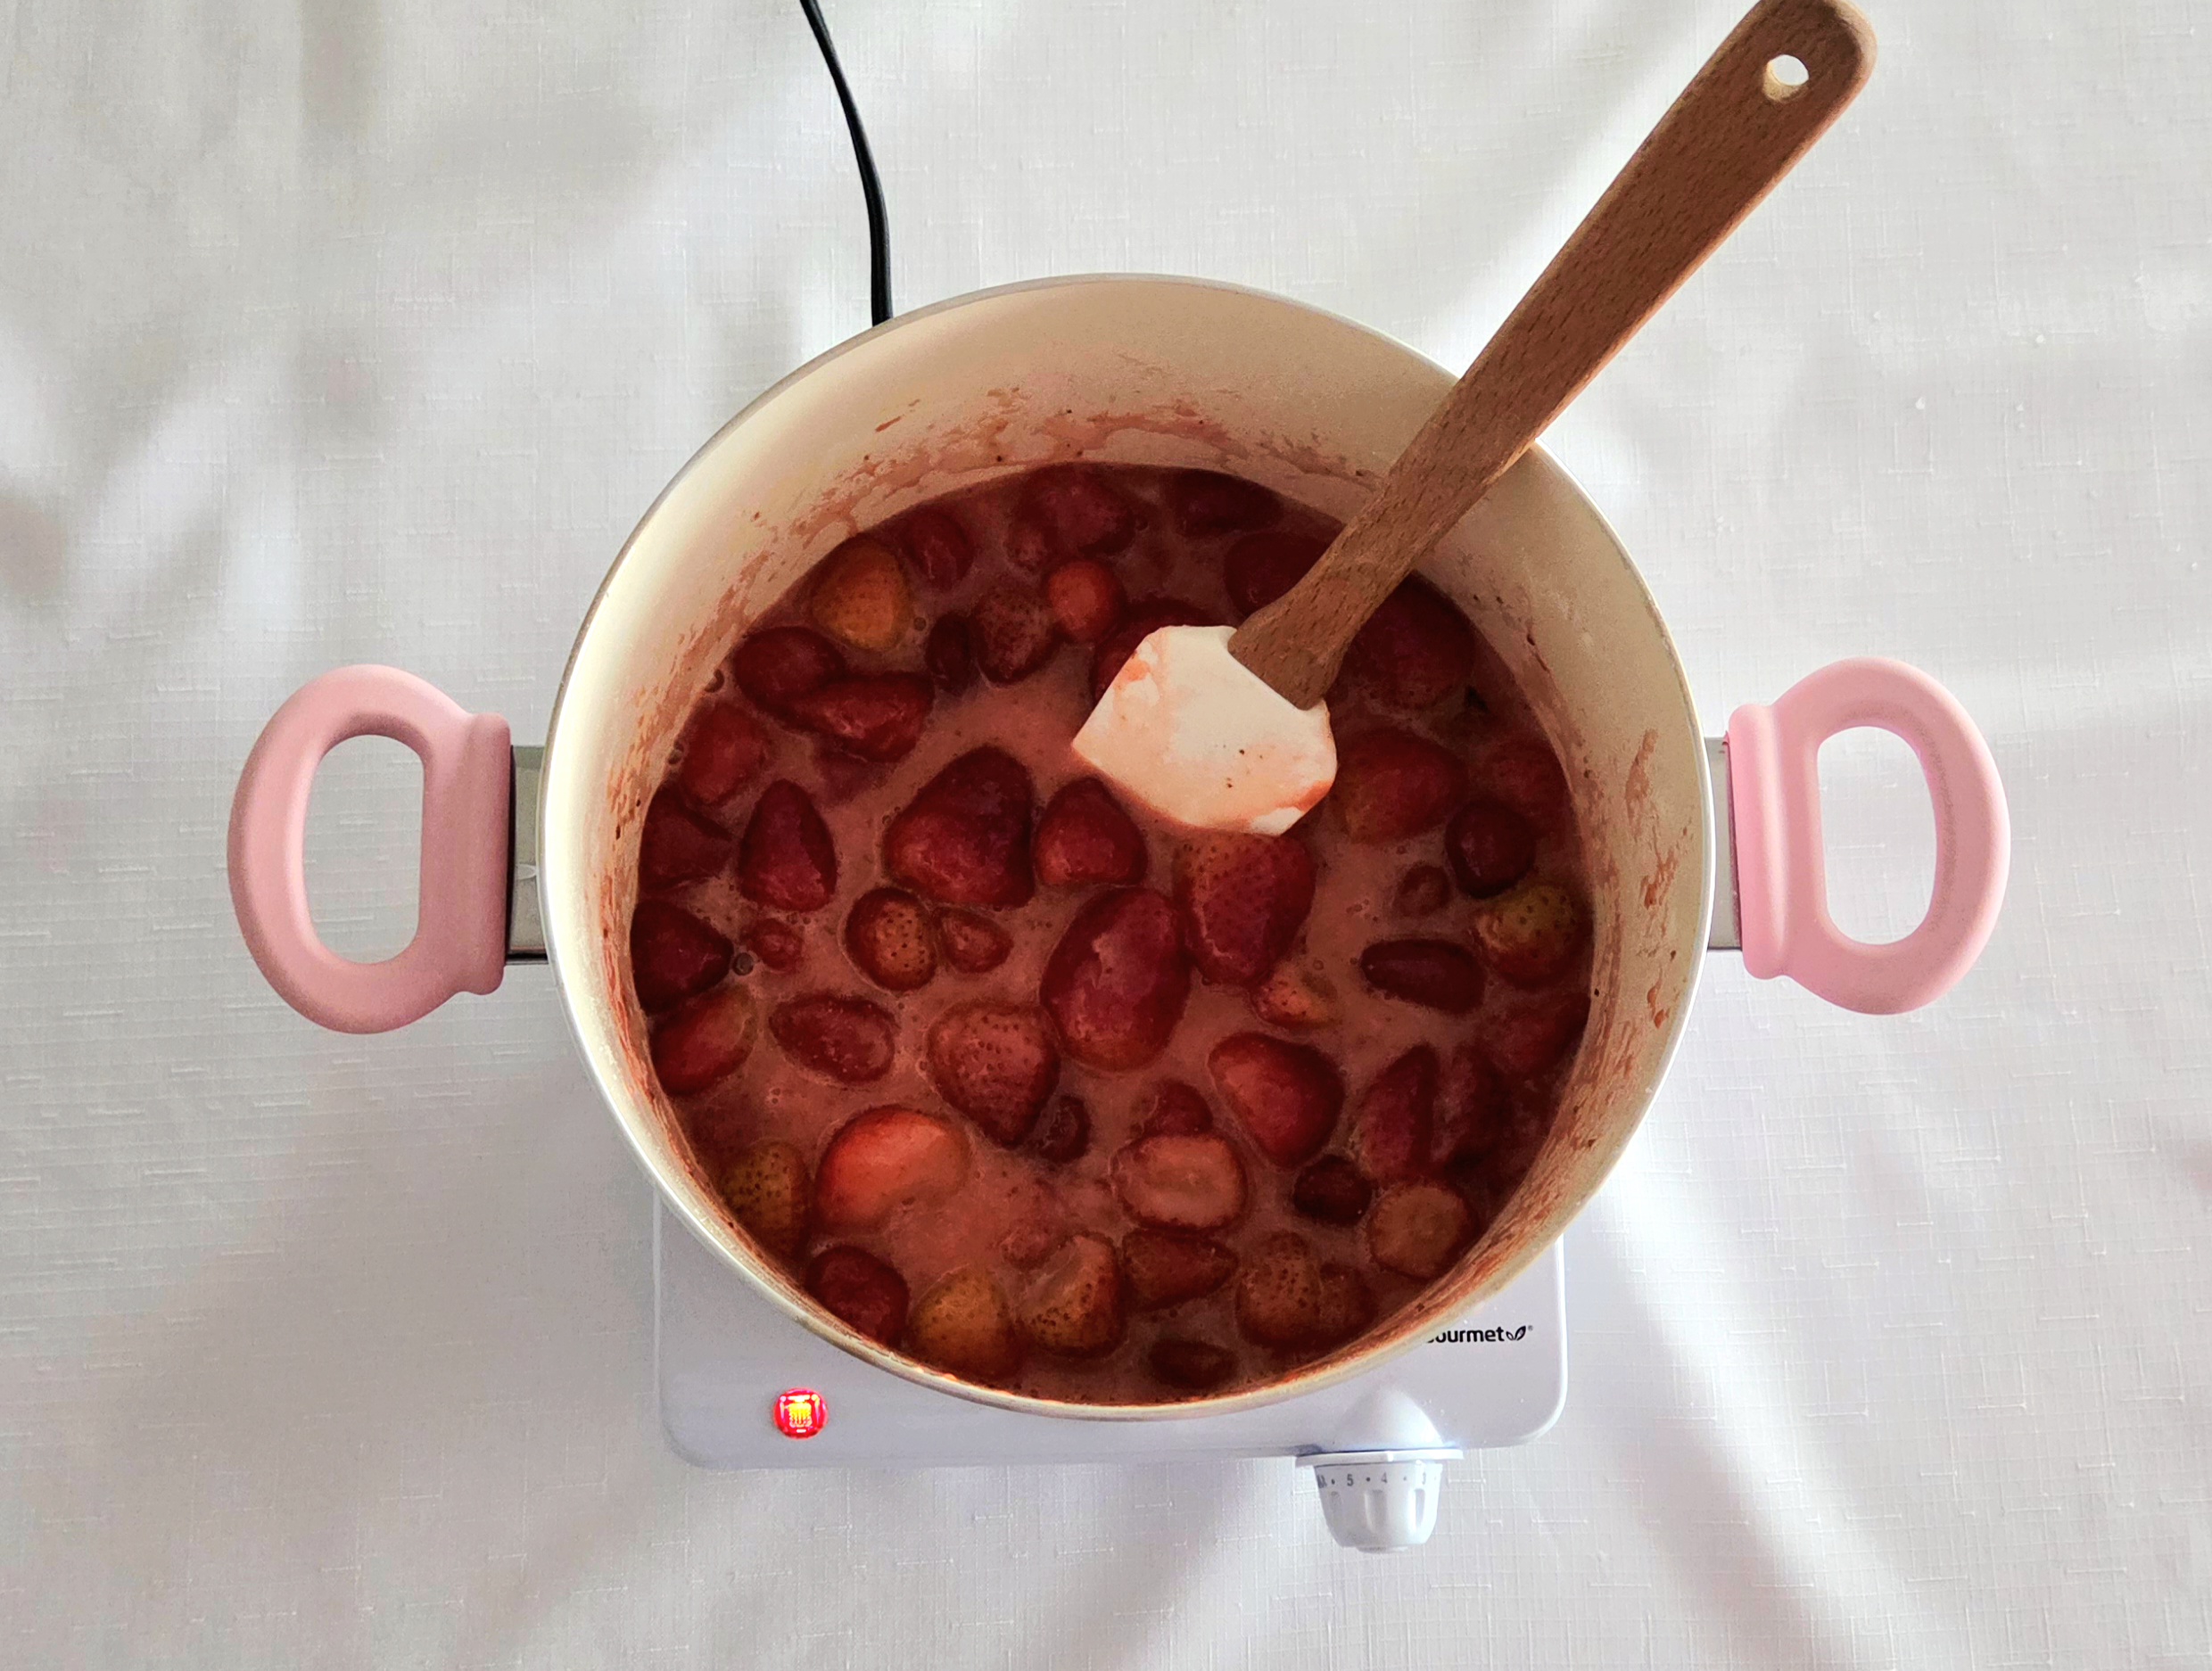
In a 4-quart heavy bottom sauce pan, add the strawberries, lemon juice, and sugar mixture. Place the pan over medium heat and, using a heat safe rubber spatula, stir to coat the strawberries. Cover the pan with a lid, and allow it to heat undisturbed for a few minutes.
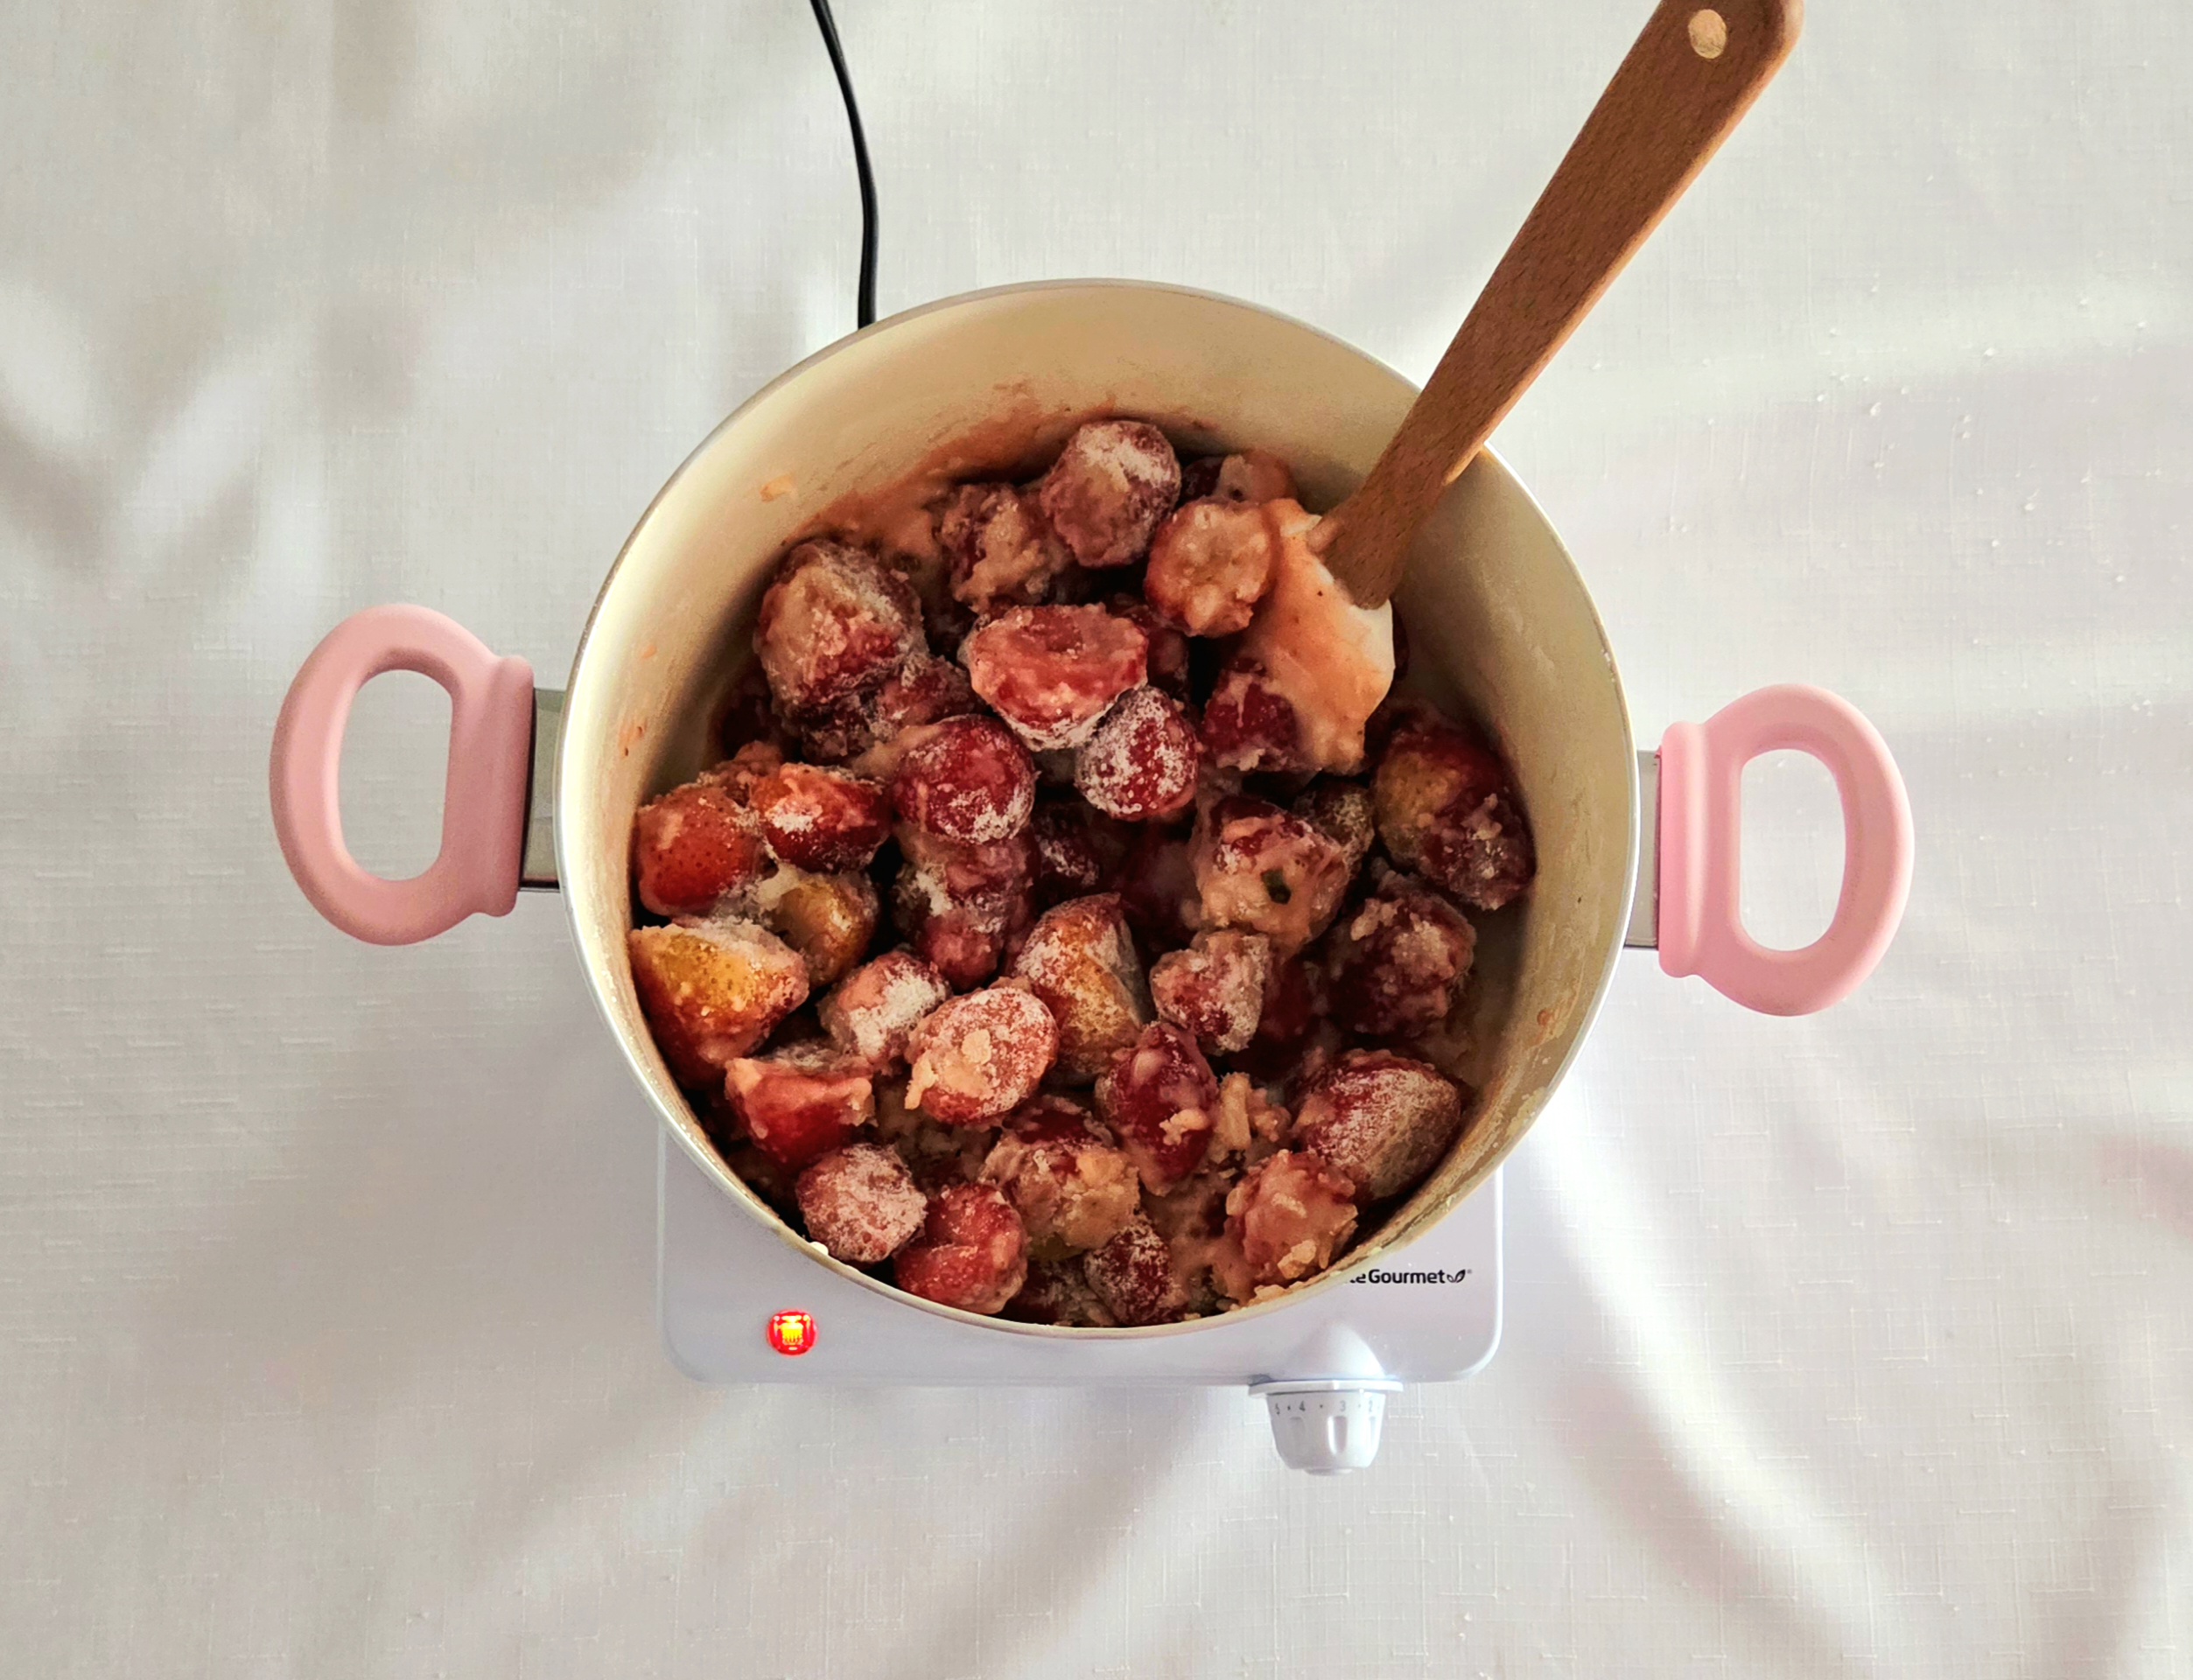
Uncover the pan and stir the berries. If they’ve started to get juicy, leave the lid off and stir occasionally. If they’re still mostly frozen, cover them once more and allow them to sit for a few minutes longer. Do this until the strawberries release their juices and the mixture has started to come to a boil.
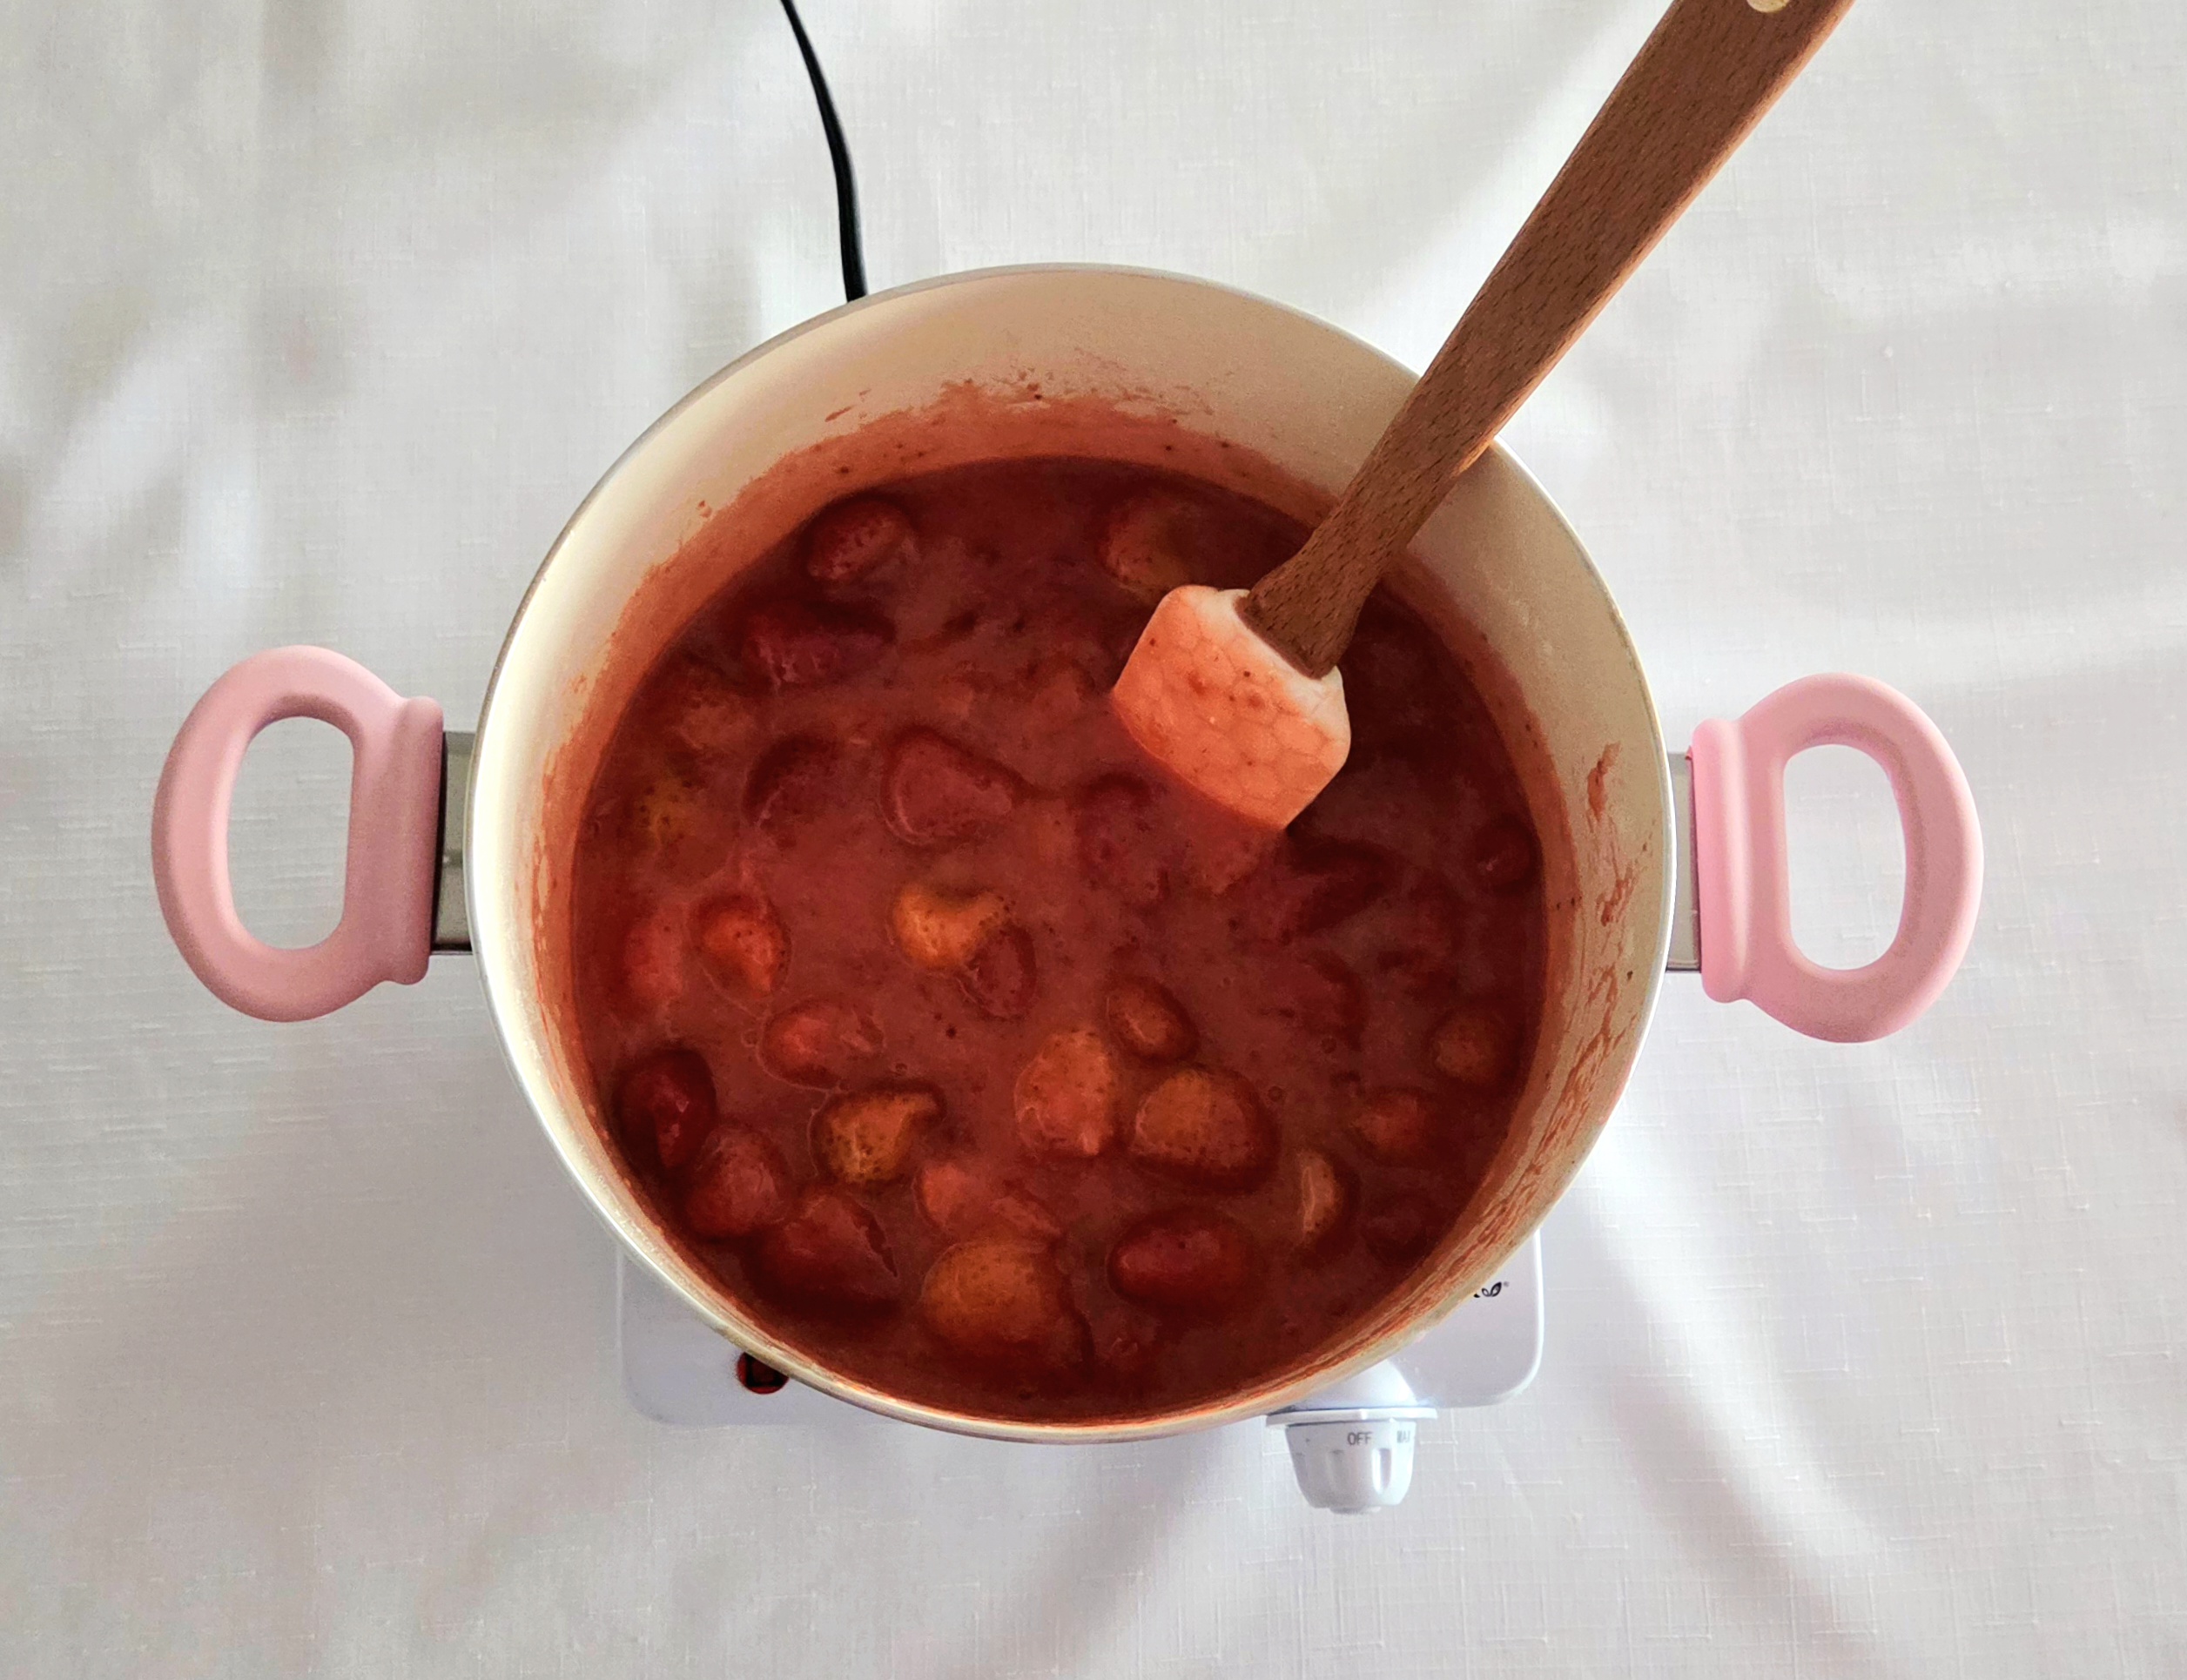
Once the filling has reached a boiling point, stir it continuously until it’s begun to thicken, about 10 minutes. Take the pan off the heat, stir in the vanilla extract, and allow it to sit uncovered and cool down. Adding the vanilla at the end like this prevents the flavor from completely cooking off. It will thicken further as it cools, and further still in the oven.
Time to assemble and bake your pie! Preheat the oven to 375F, on the convection setting if possible, and prepare your pie dish by coating it with a nonstick baking spray. I’d highly recommend this pan be made either out of ceramic or a light colored metal, as that’s what I’ve tested this recipe with. Set the pan aside.
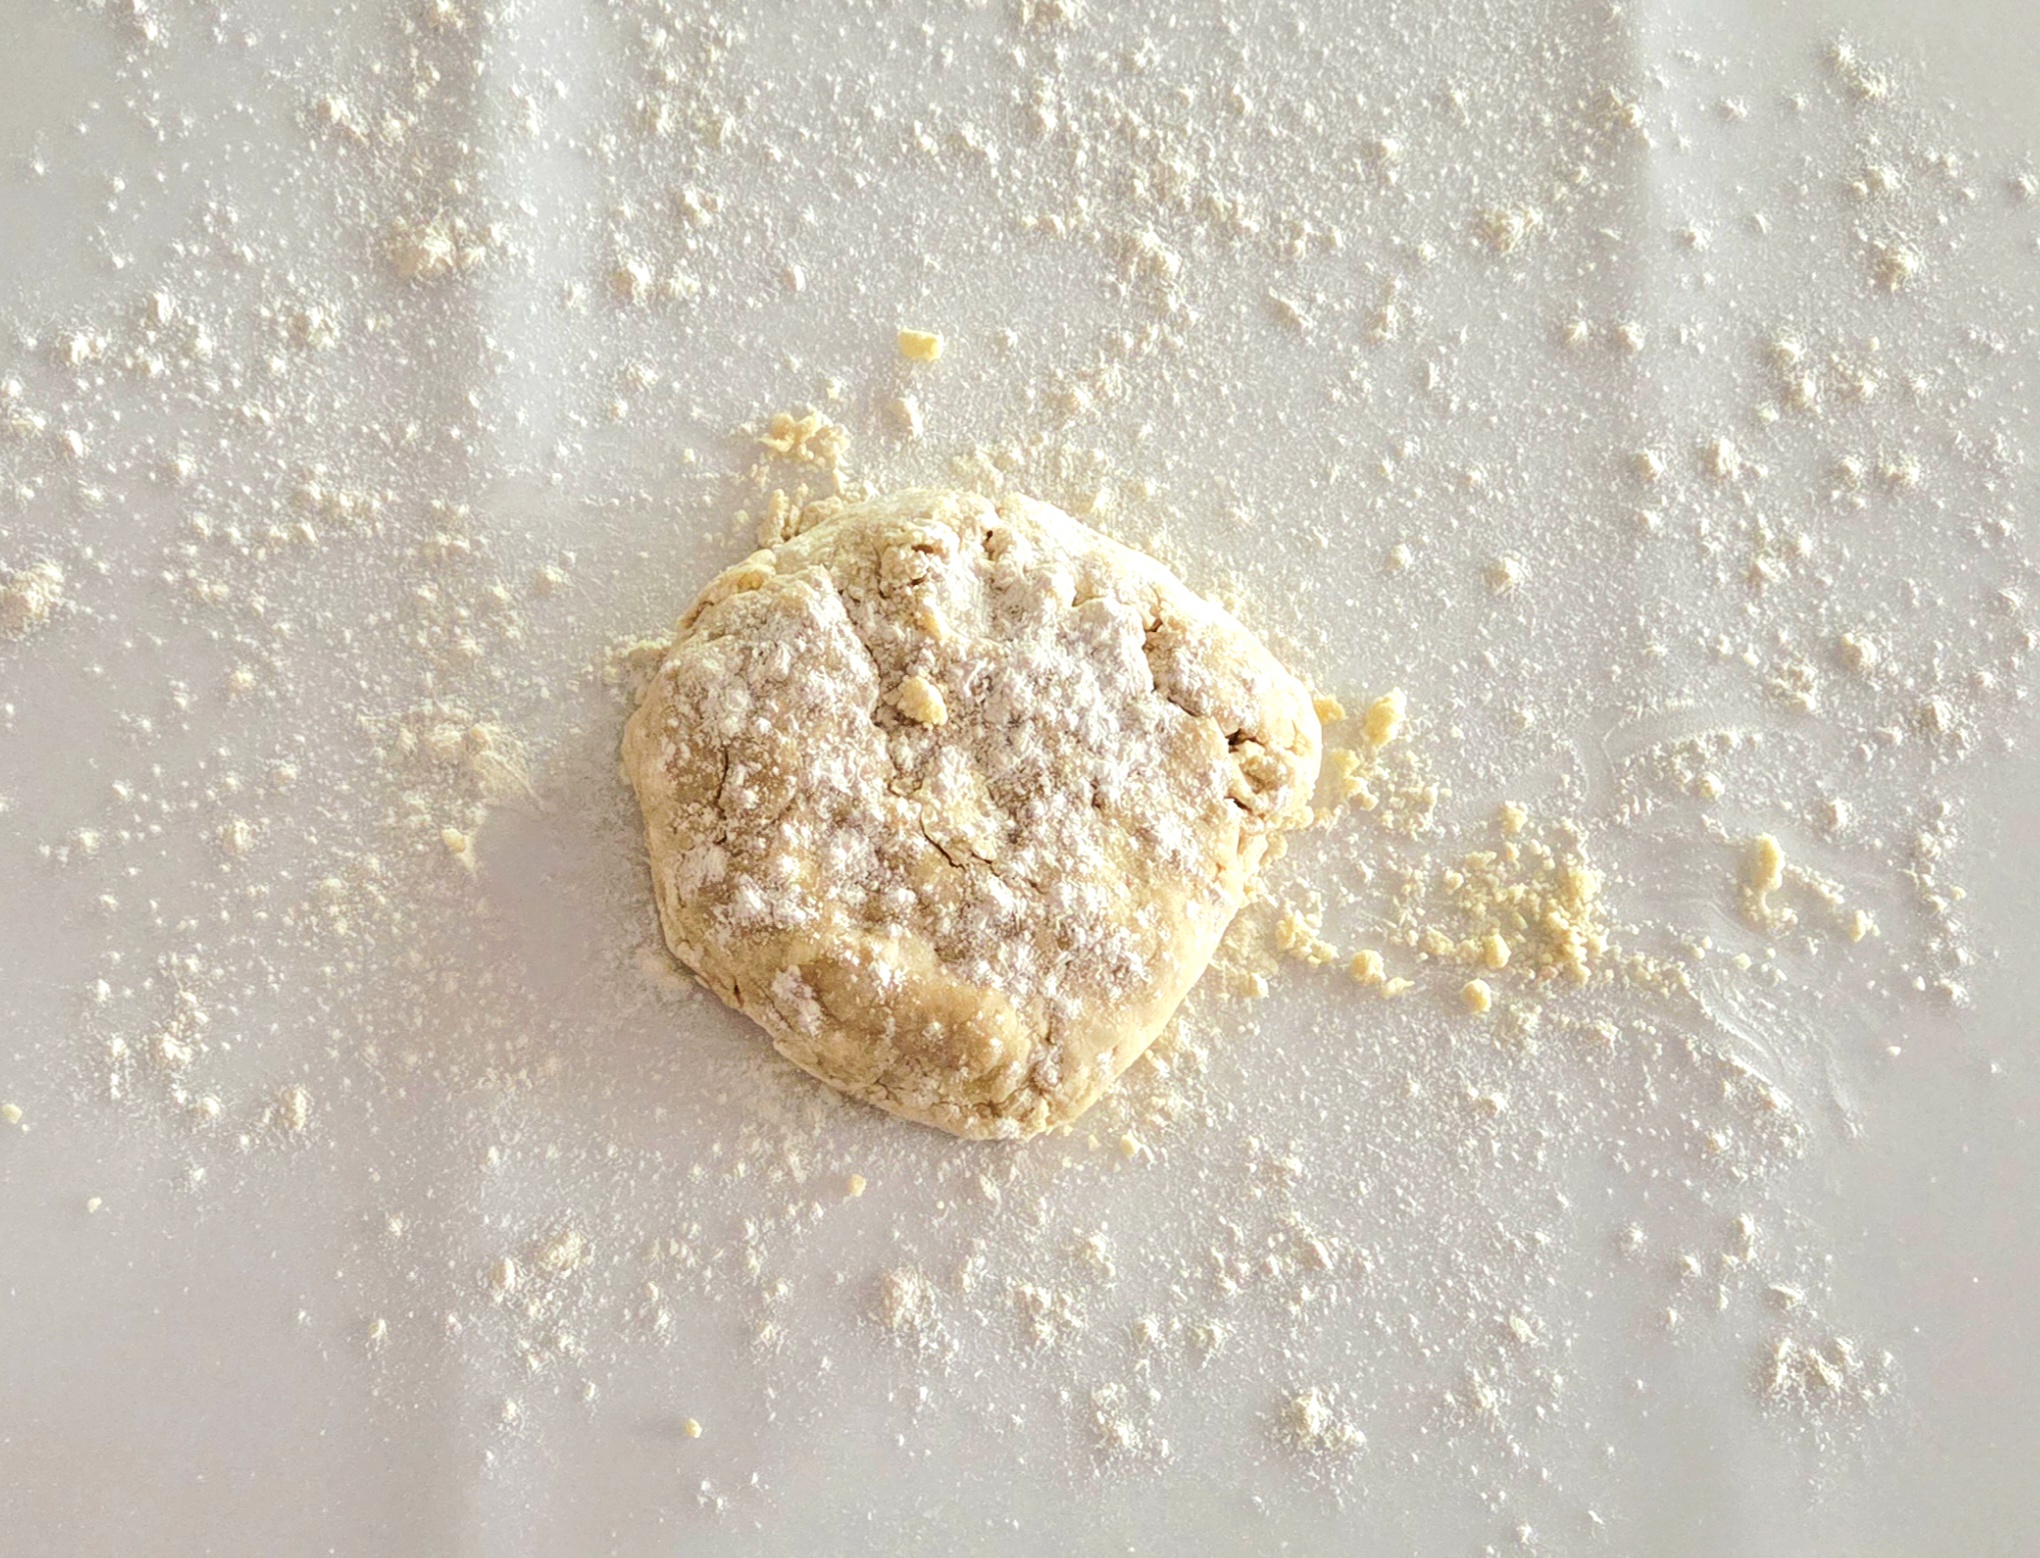
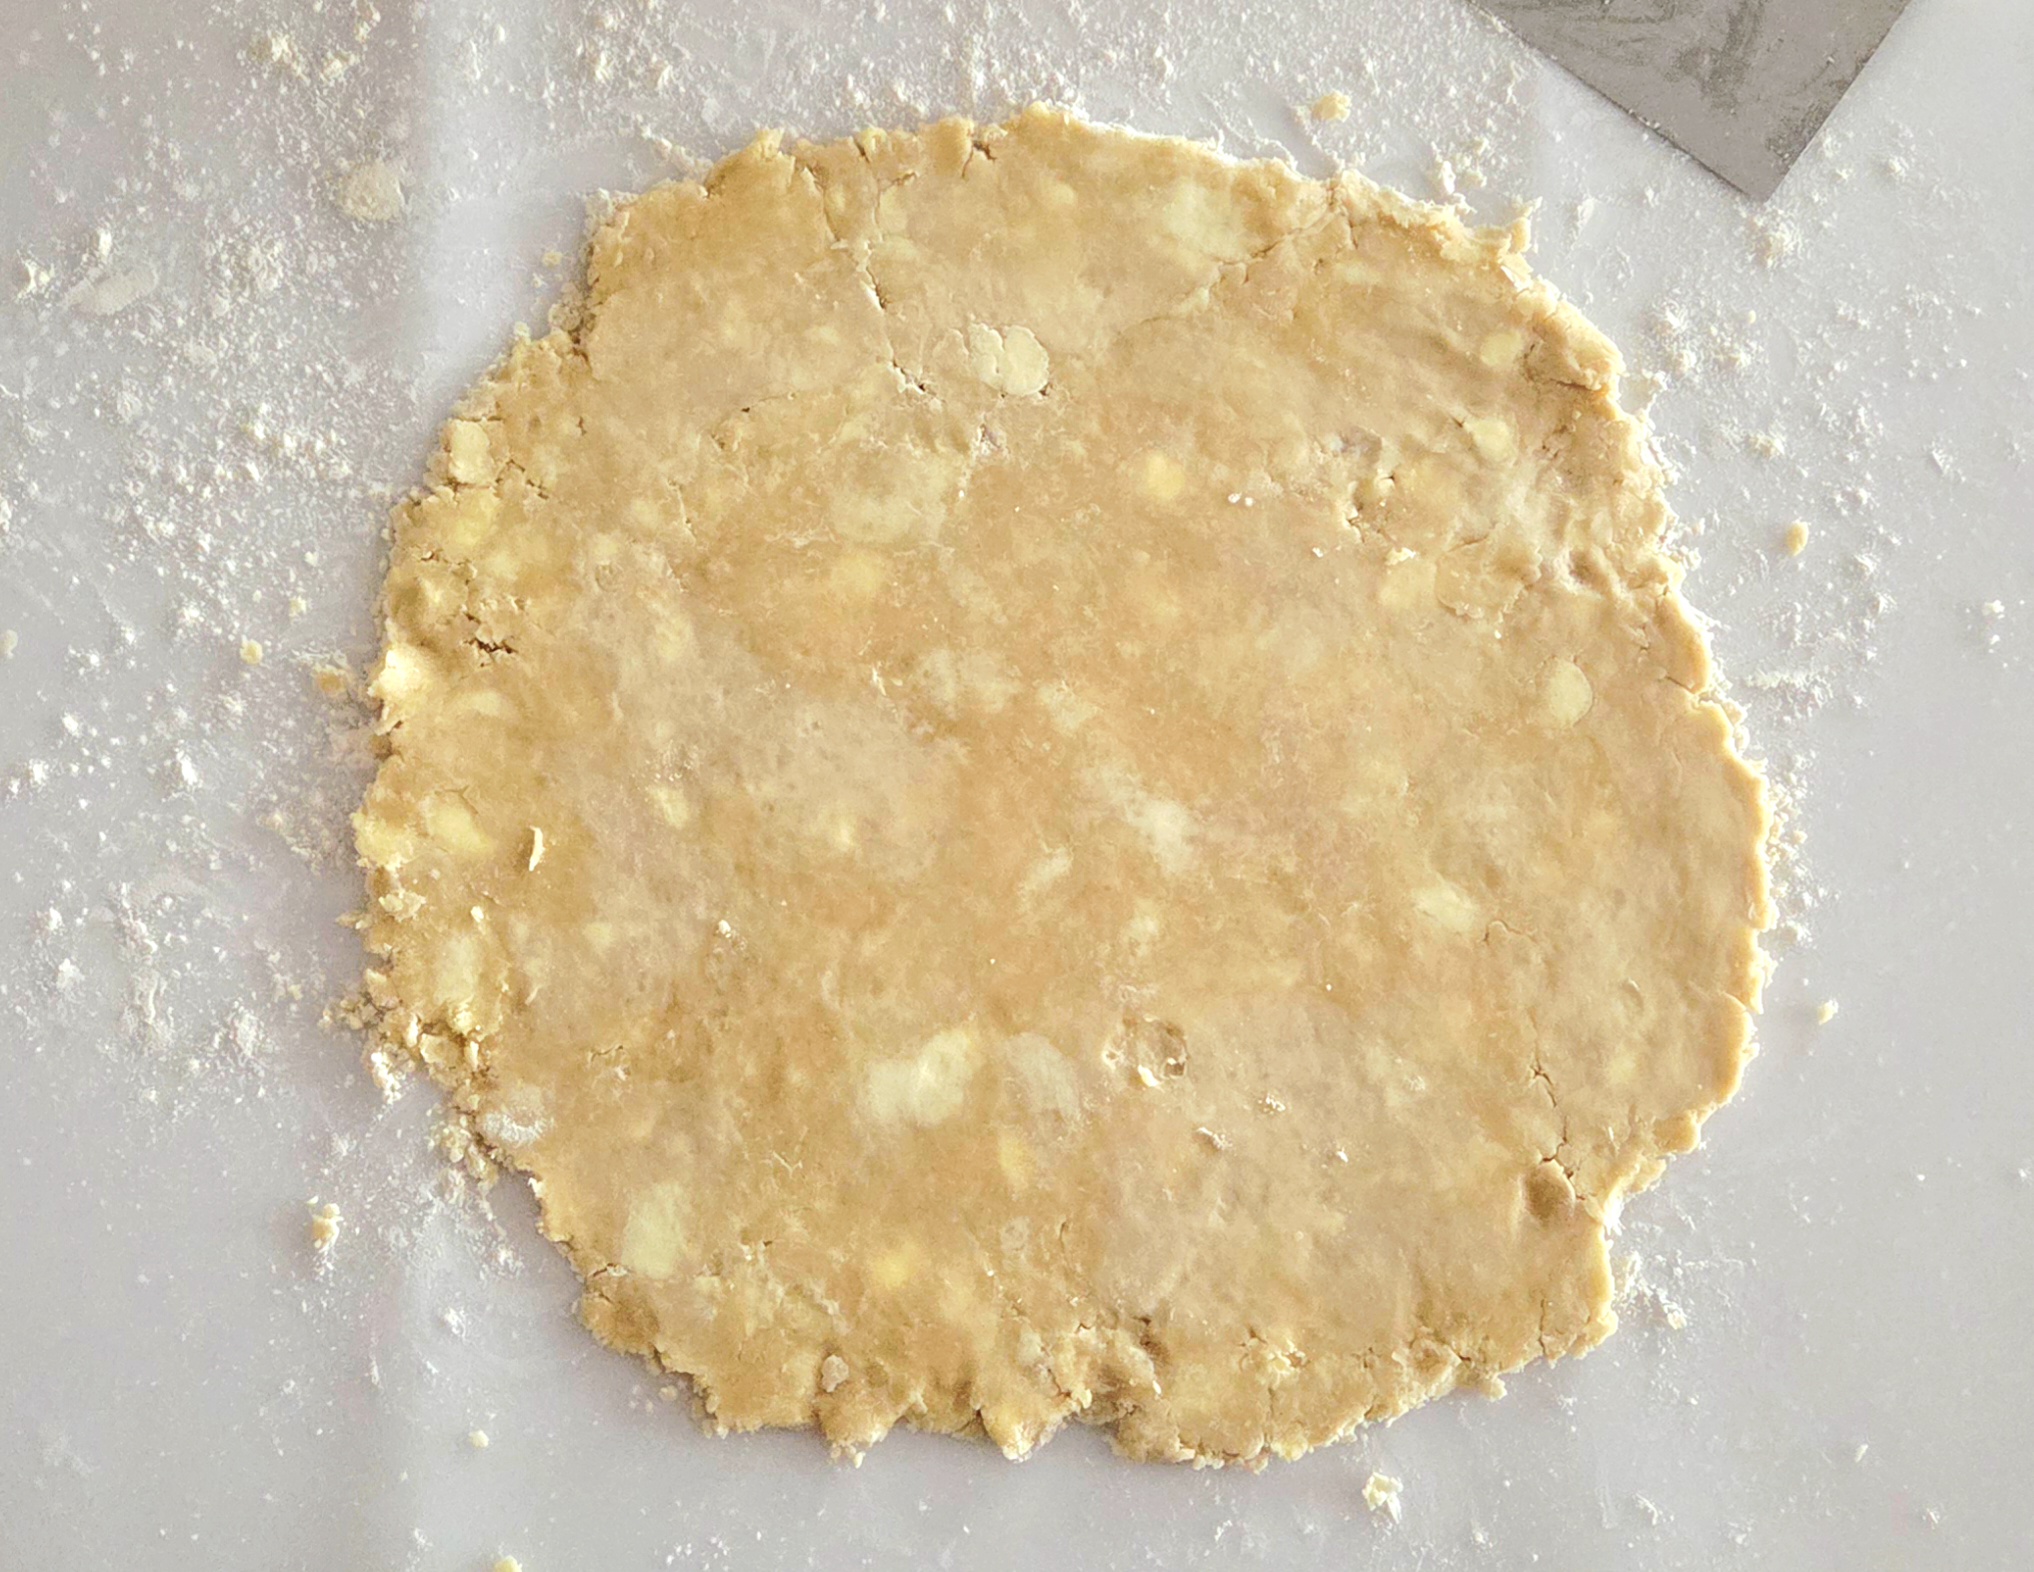
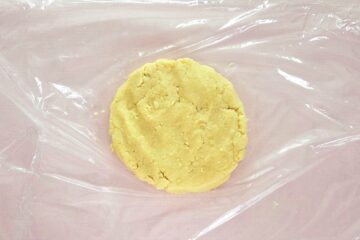
Take out one portion of dough, and unwrap it. Lightly flour a clean counter, place the disc in the center, and lightly flour the top of the disc. Using a rolling pin, roll out the dough into a circle with a 13 inch diameter. If at any point the dough starts to stick to either the counter or the rolling pin, gently peel it away and add a little more flour.
Fold the circle of dough in half, and transfer it over to the pie dish. Some people find it easiest to fold the dough over the rolling pin to transfer it, as it can be more comfortable to lift this way. I prefer just folding the dough onto itself and moving quickly. All it takes is a bit of confidence in yourself and dough that’s not sticky! If it’s sticky, either way, you’re going to have a stressful time.
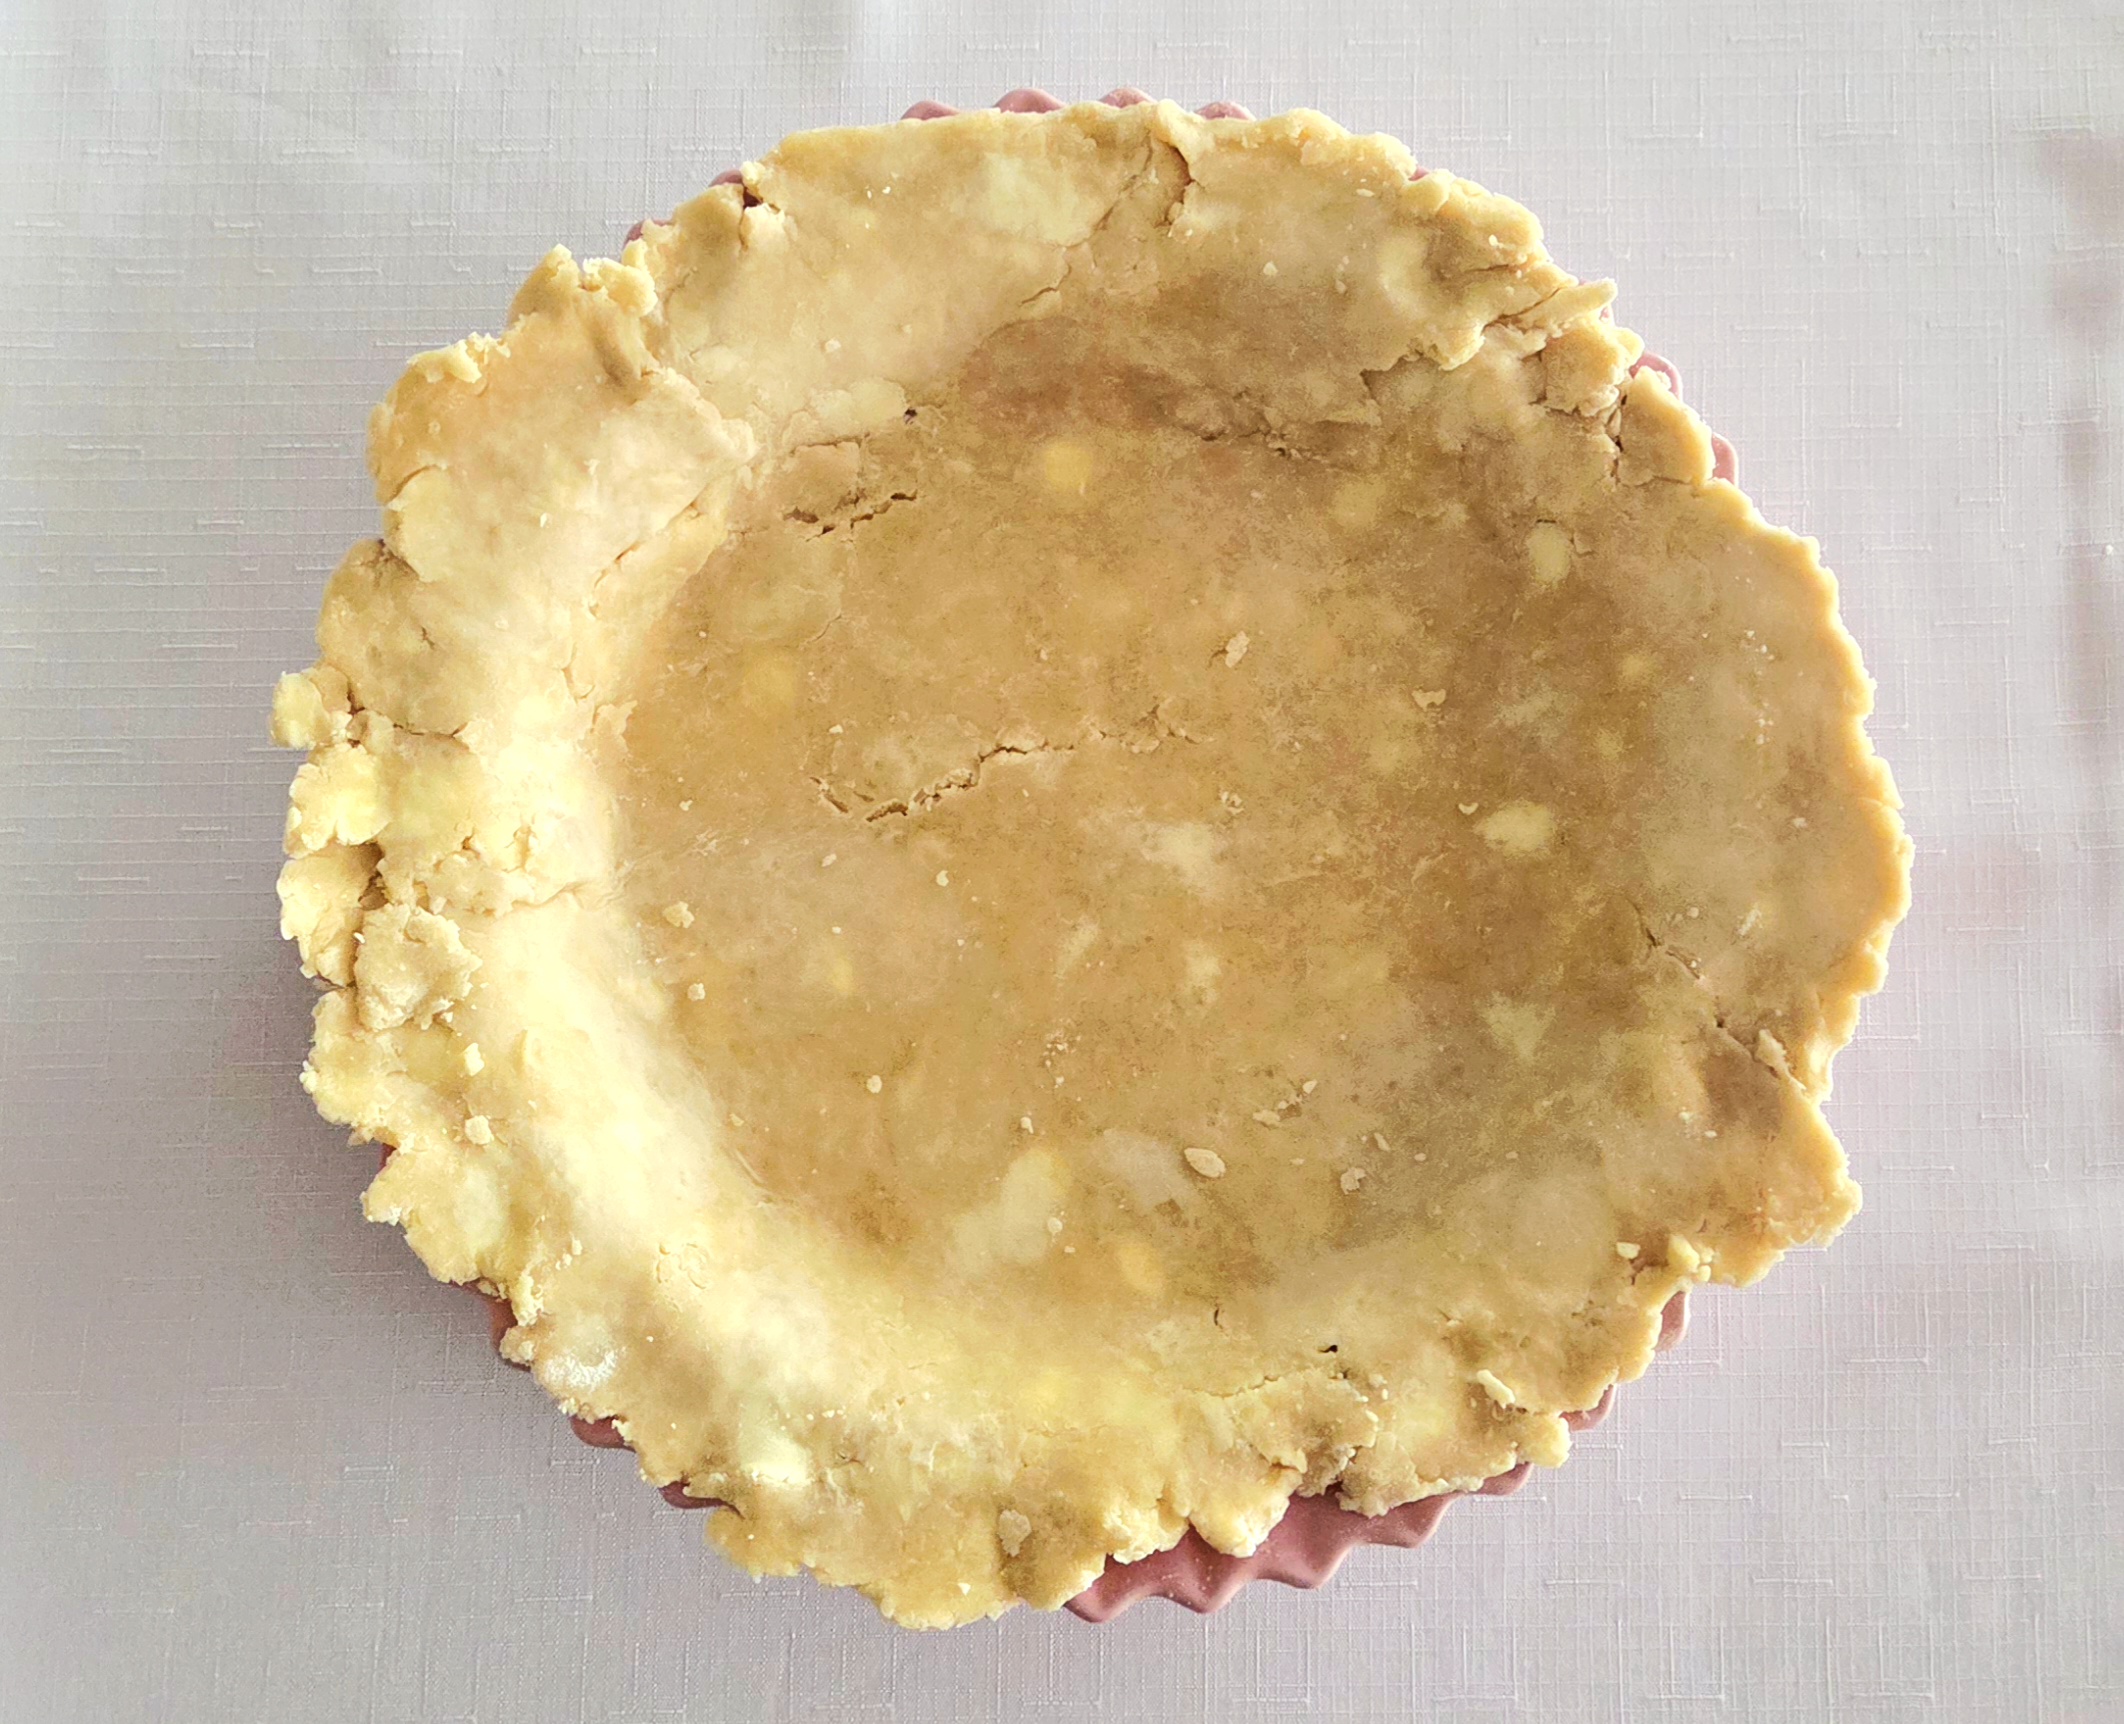
Gently fit the dough snug into the pie dish, ensuring it’s touching the bottom, all sides, and where the bottom and sides meet. Making sure the dough is flush to the pan prevents it from thinning out where the bottom meets the sides. Allow any excess dough to hang over the sides of the dish.
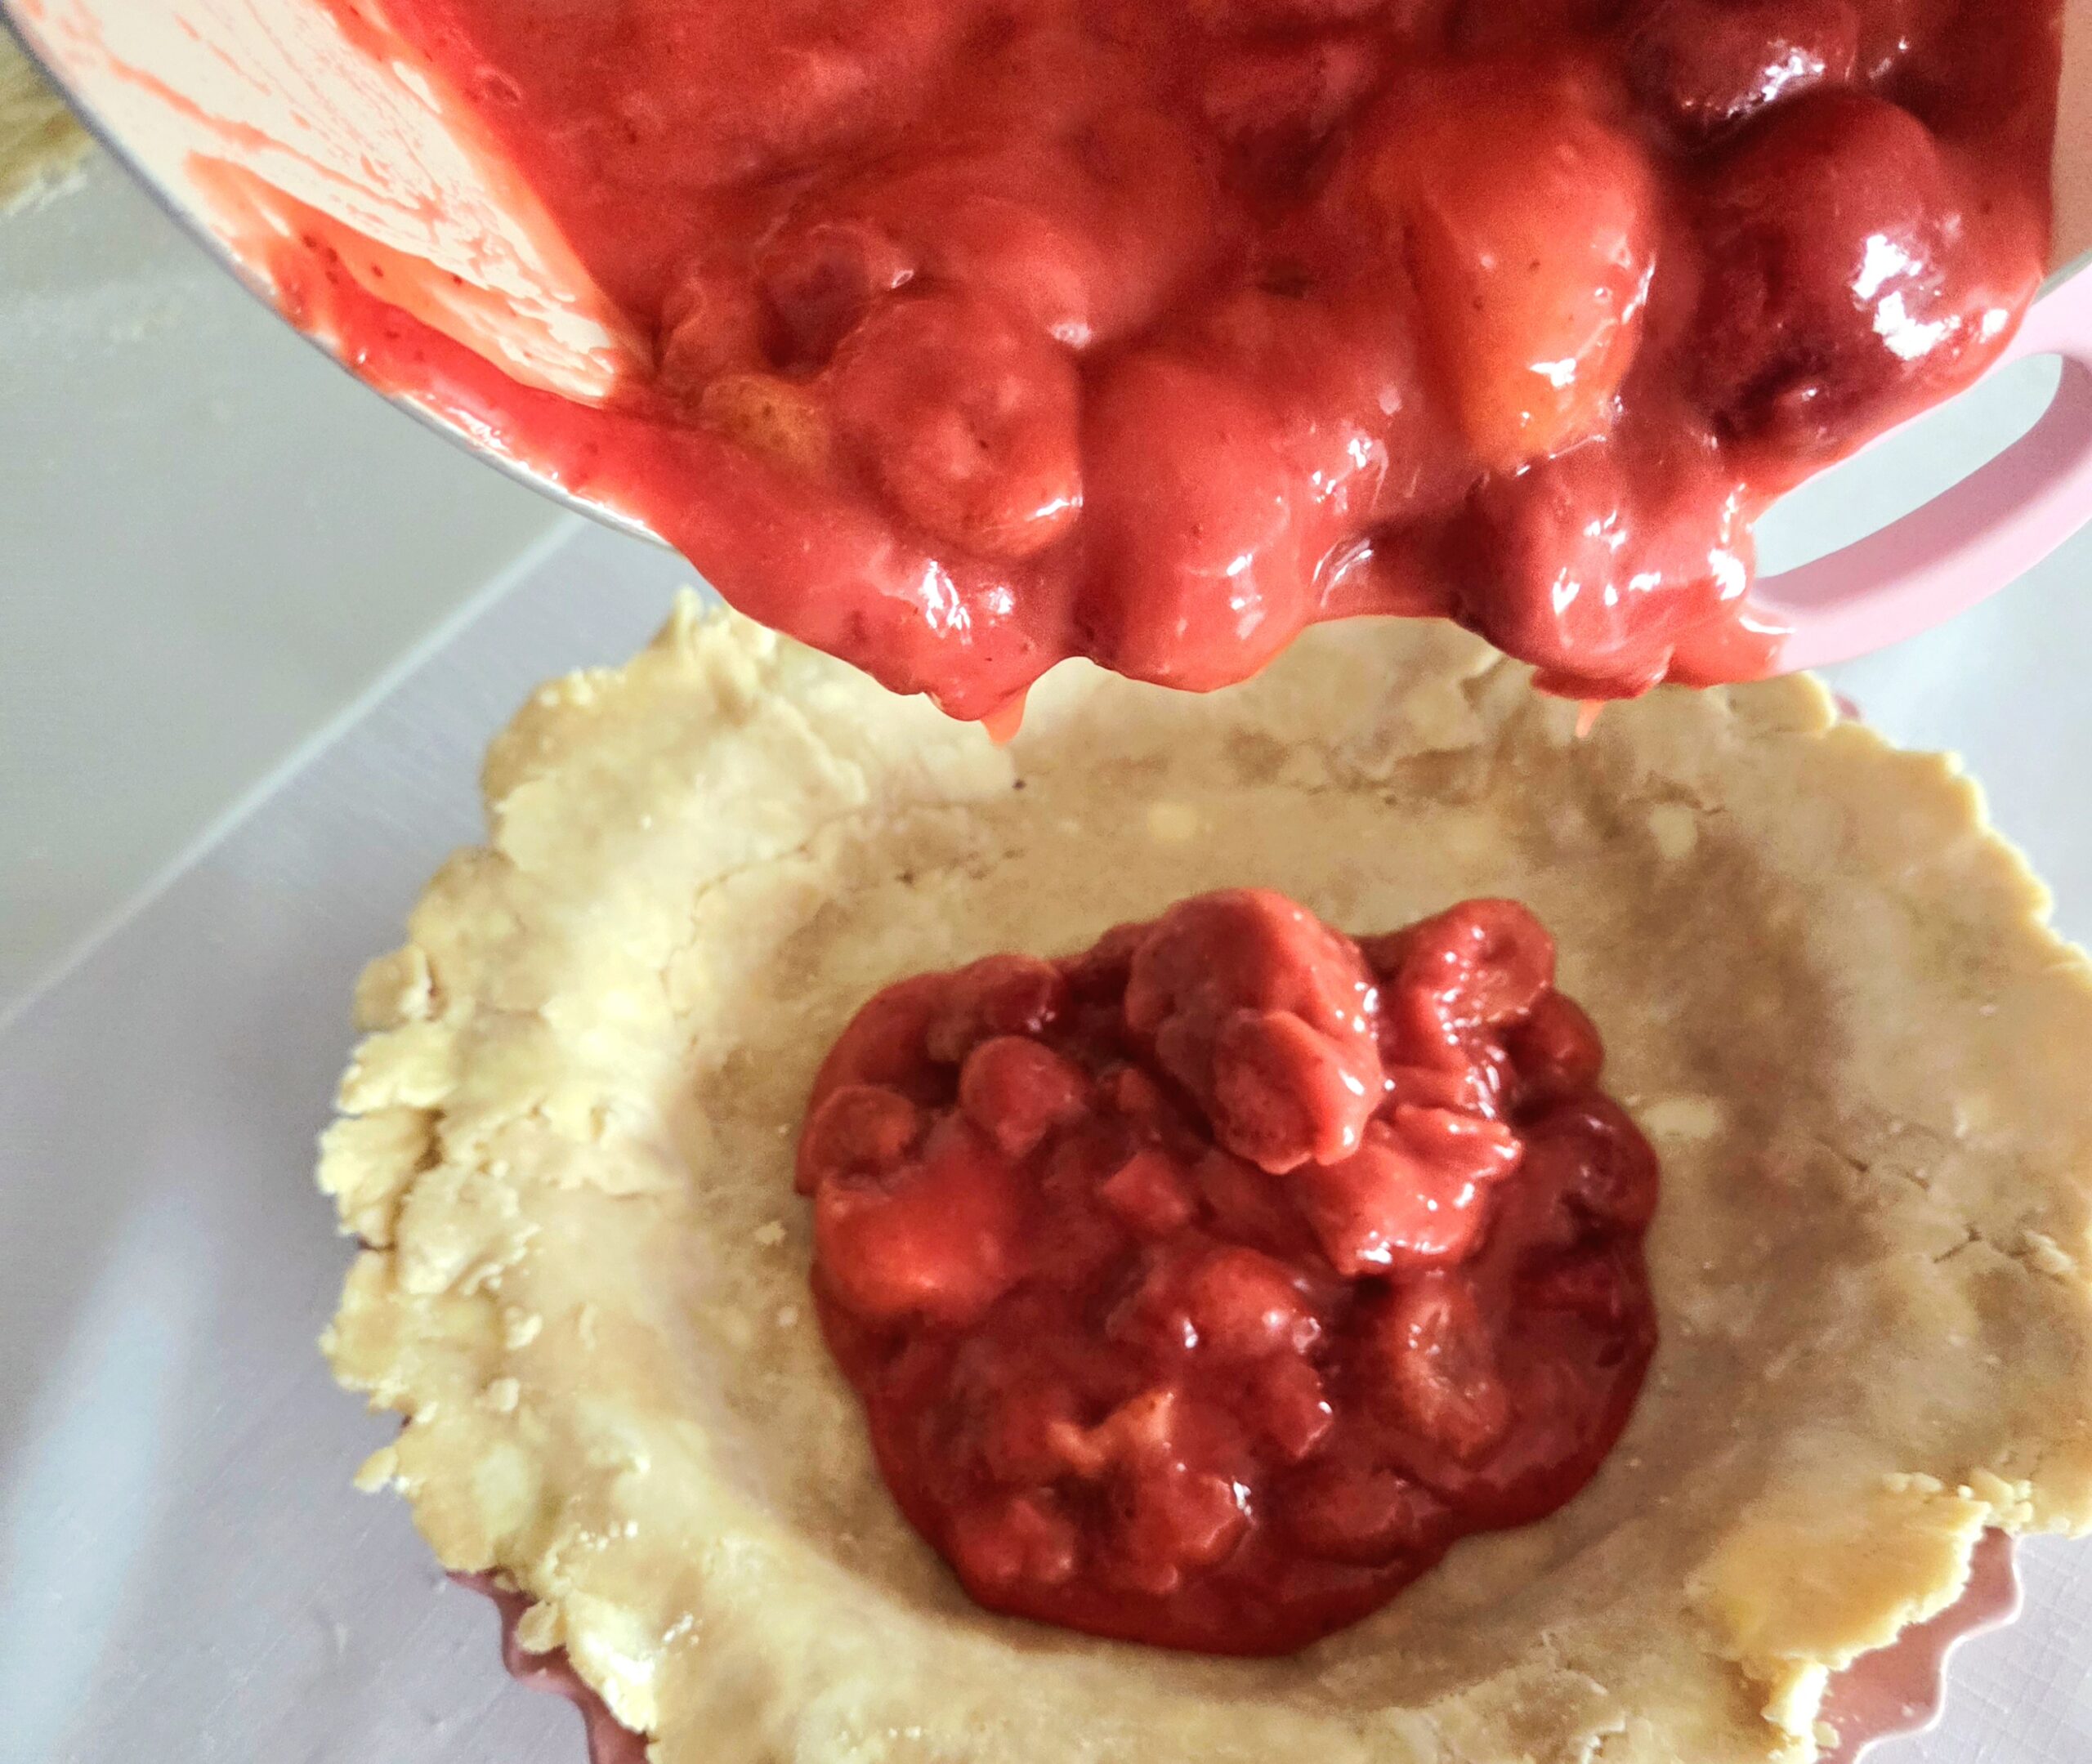
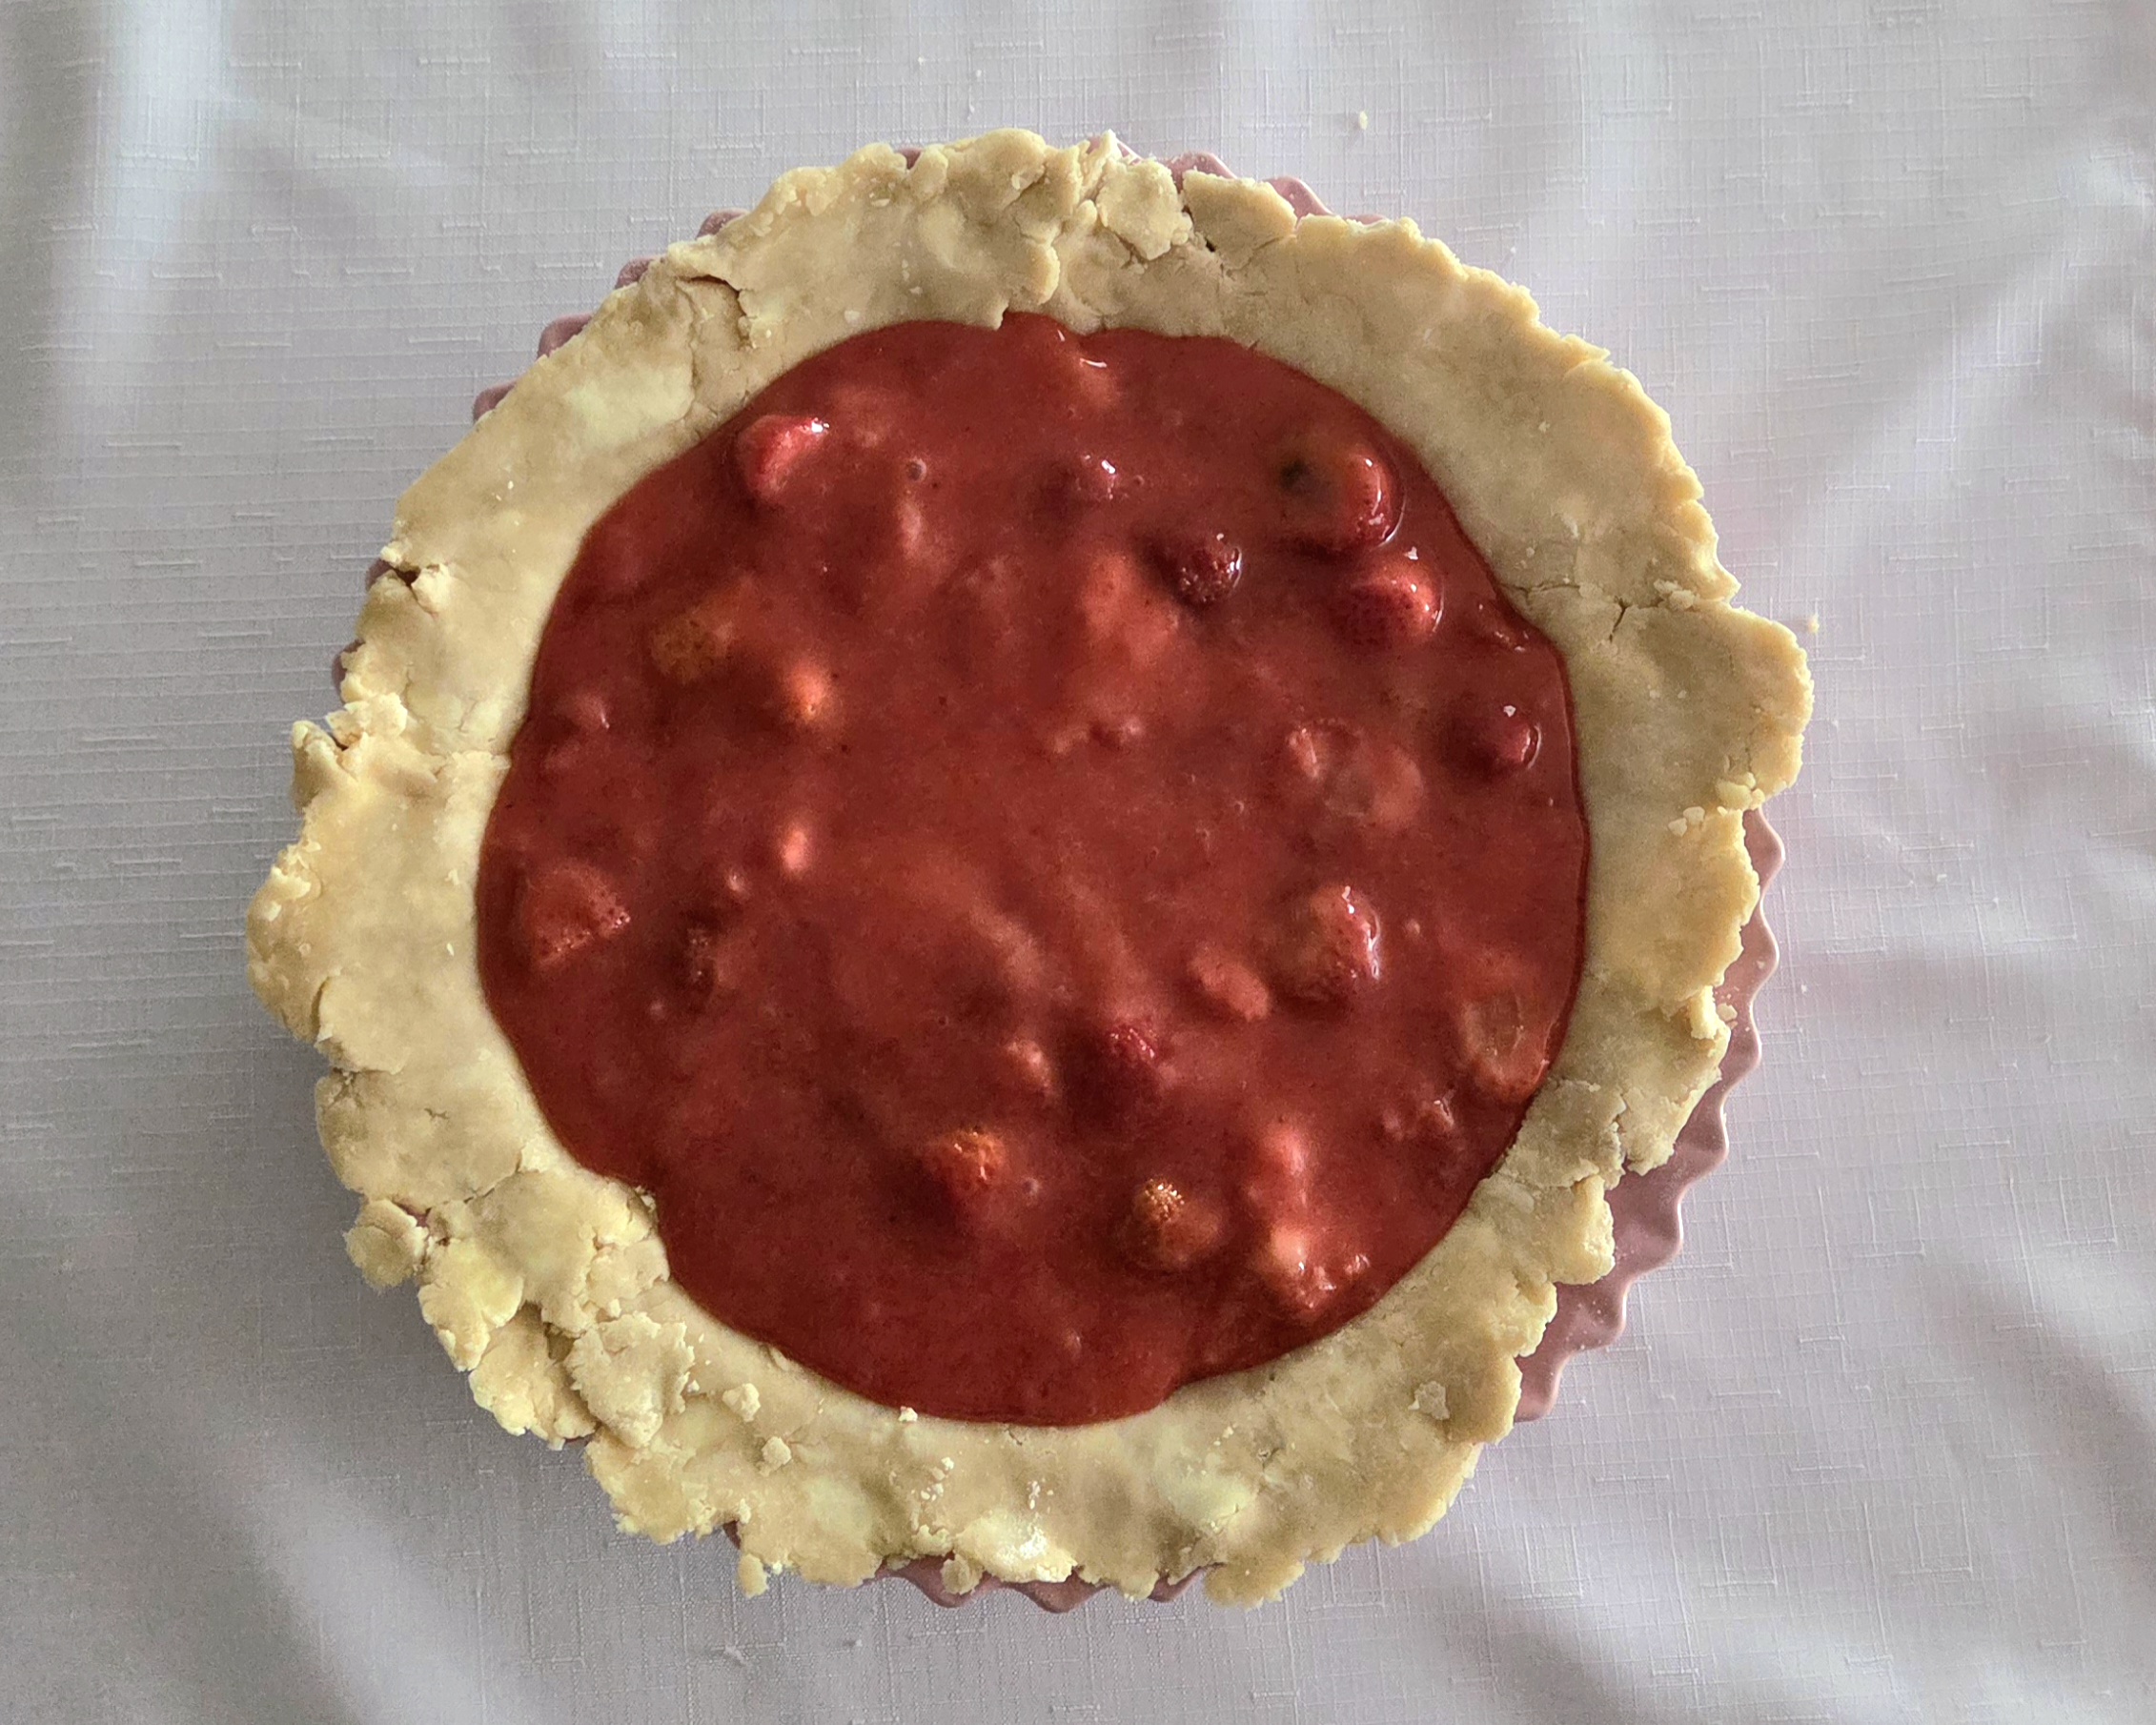
Pour the cooled off filling into the dough lined pie dish, and place it in the fridge to chill while you finish preparing the top crust. As I’m sure you’ve noticed by now, keeping everything chilled before hitting the hot oven is the name of the game here.
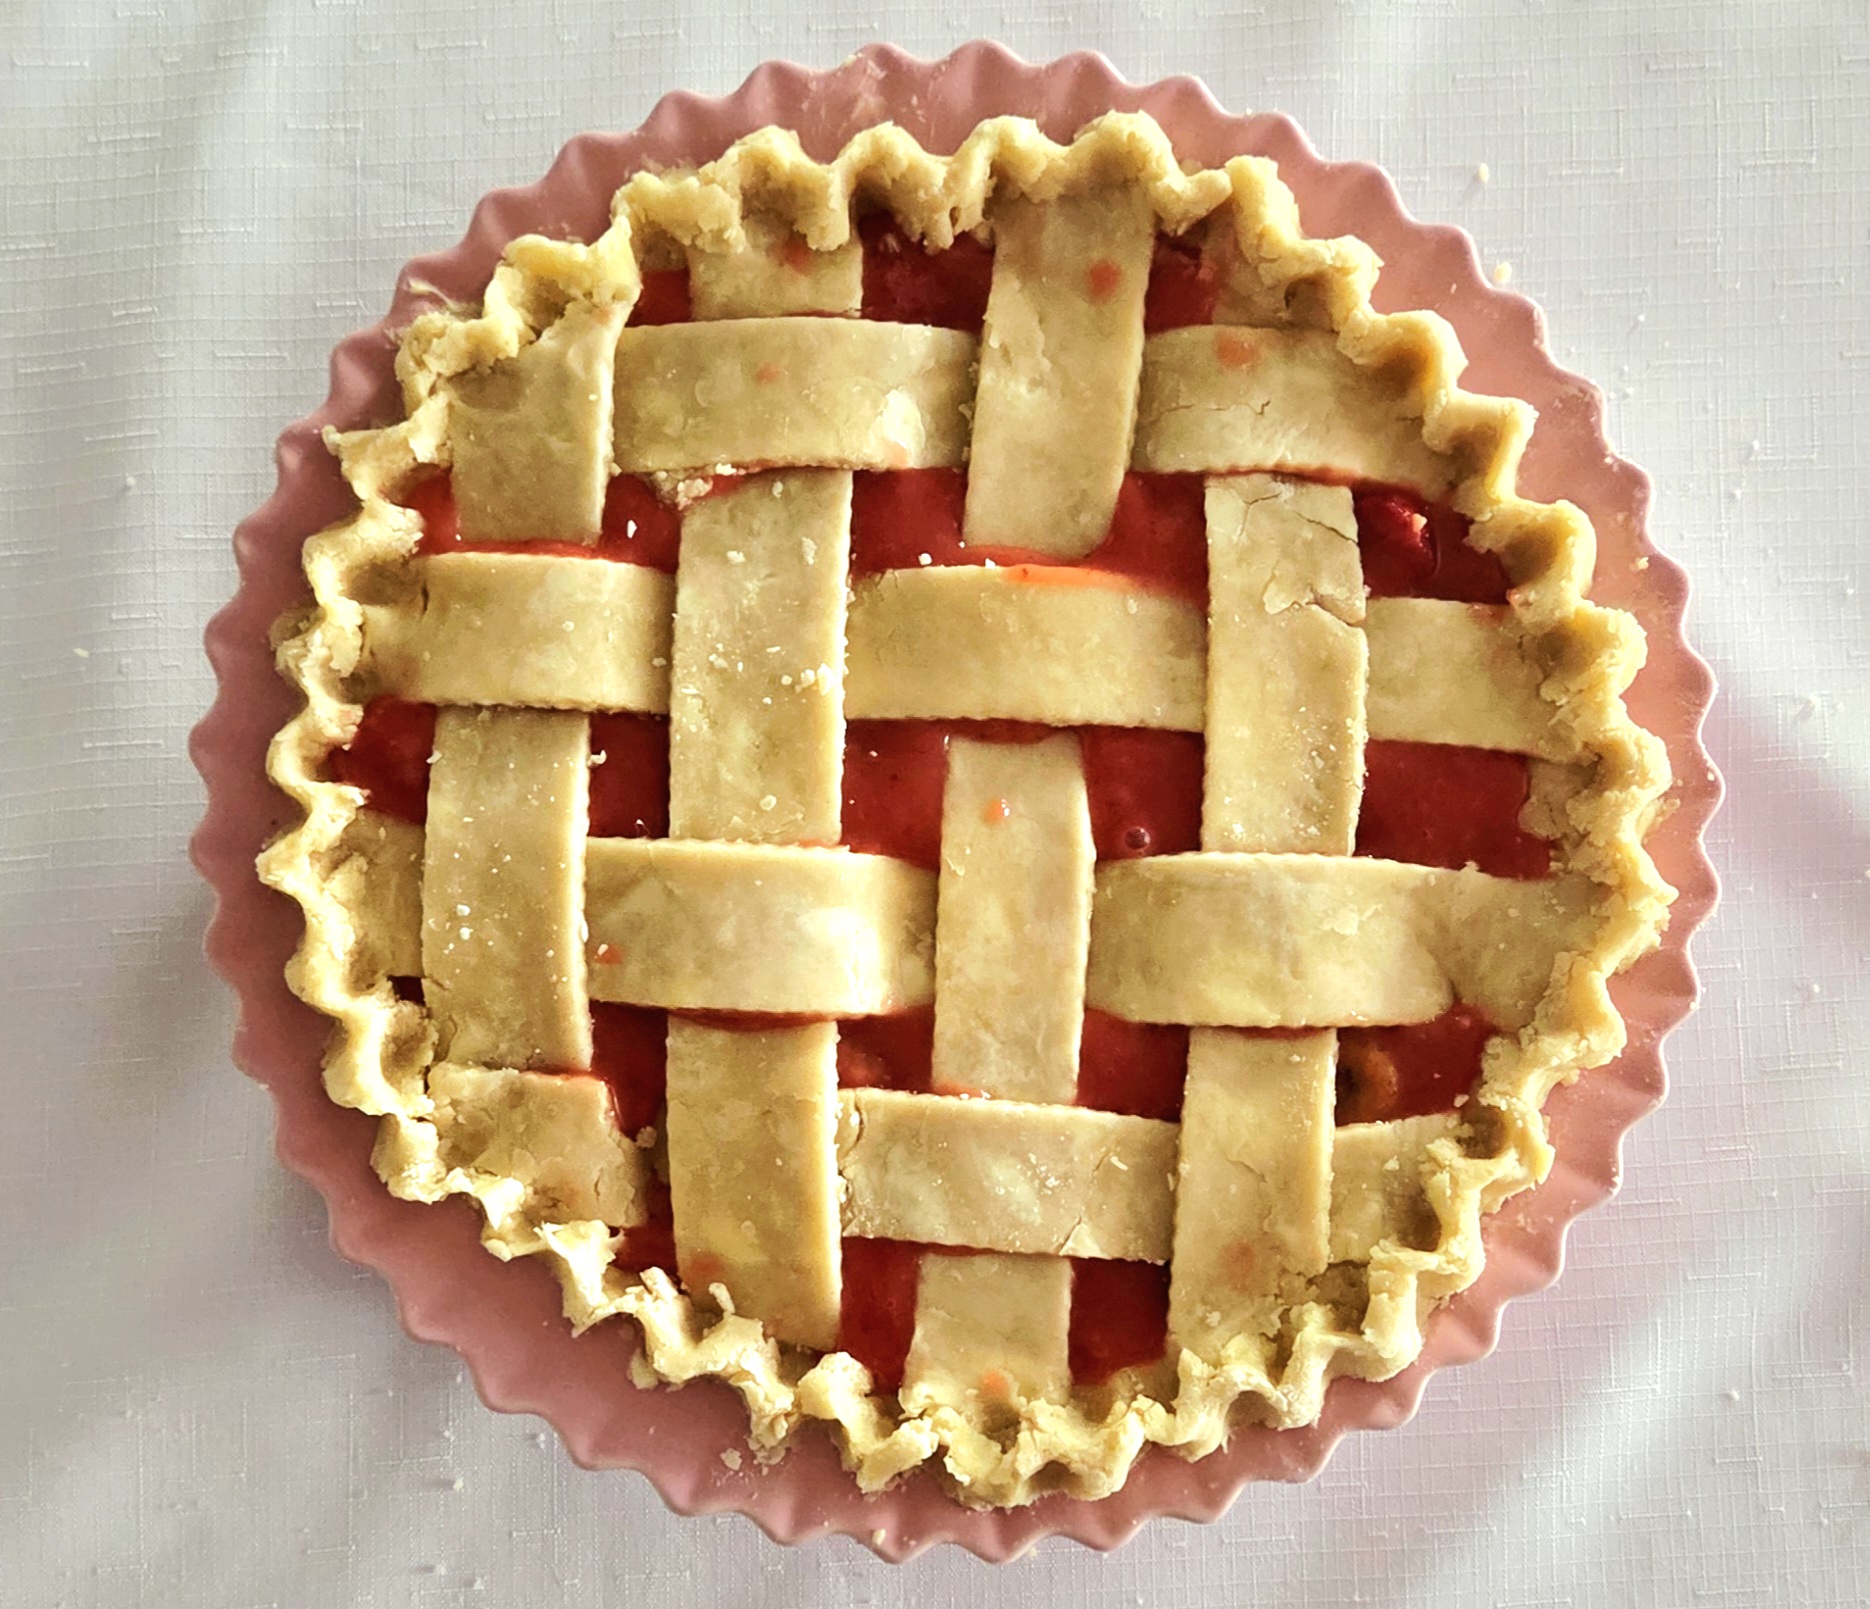
Time to make the lattice woven top crust. This may sound intimidating, and you’re free to skip the fancy top and go for something more simple, but if you’re up for the challenge, trust yourself. You can do this. I’ve made the description of the process as clear as I could write out below, but if any part of this is confusing you’re always welcome to shoot me an email or send me a DM on Instagram, TikTok, or Pinterest and I’ll answer any questions when I’m able to.
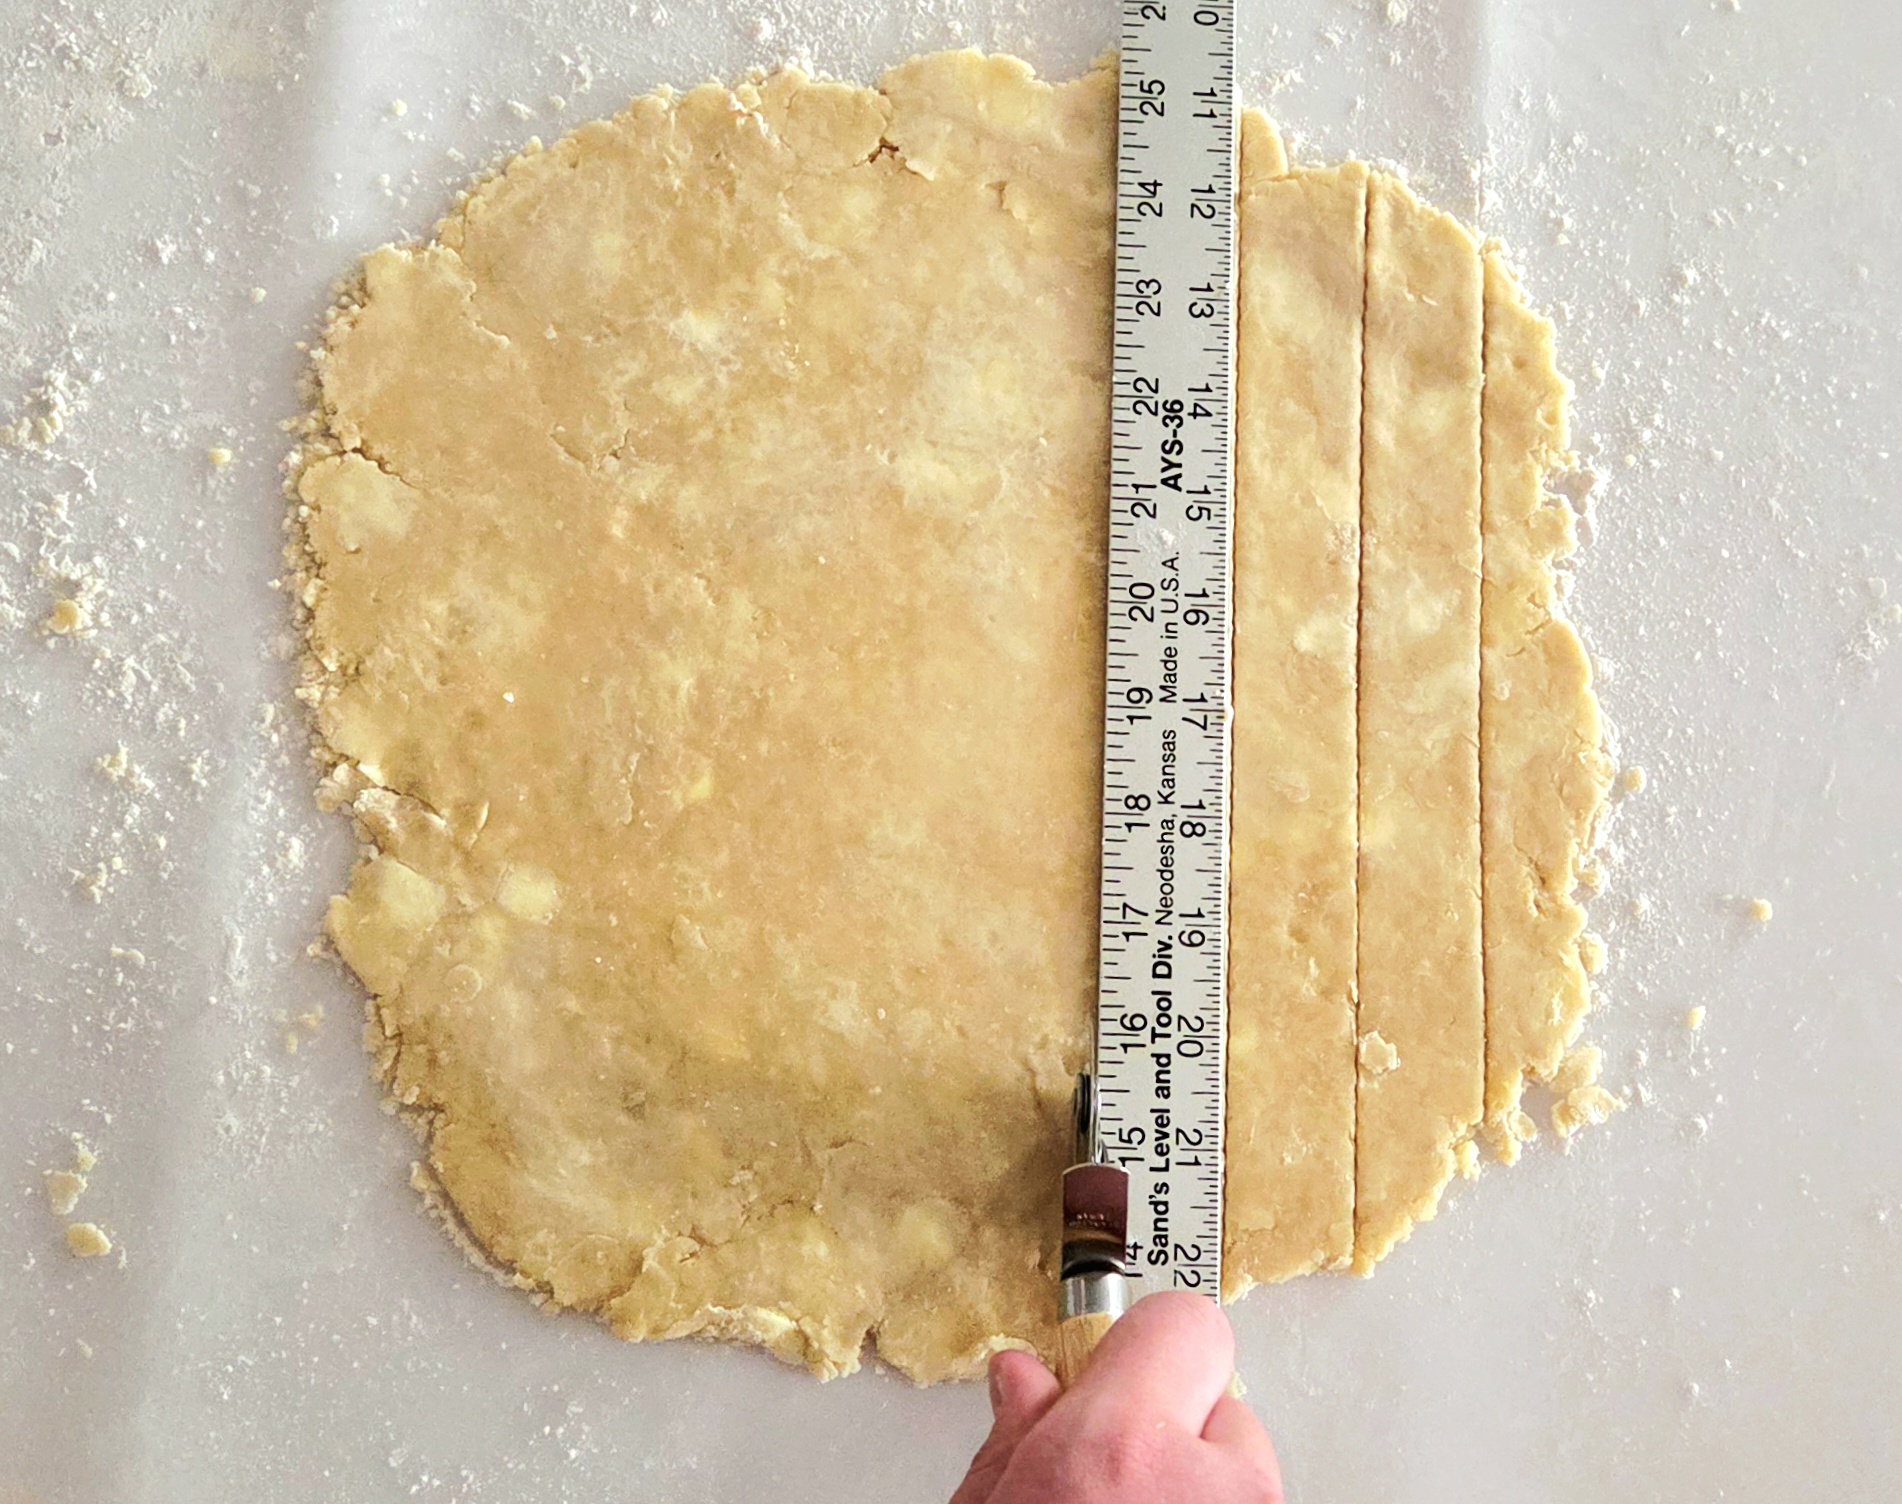
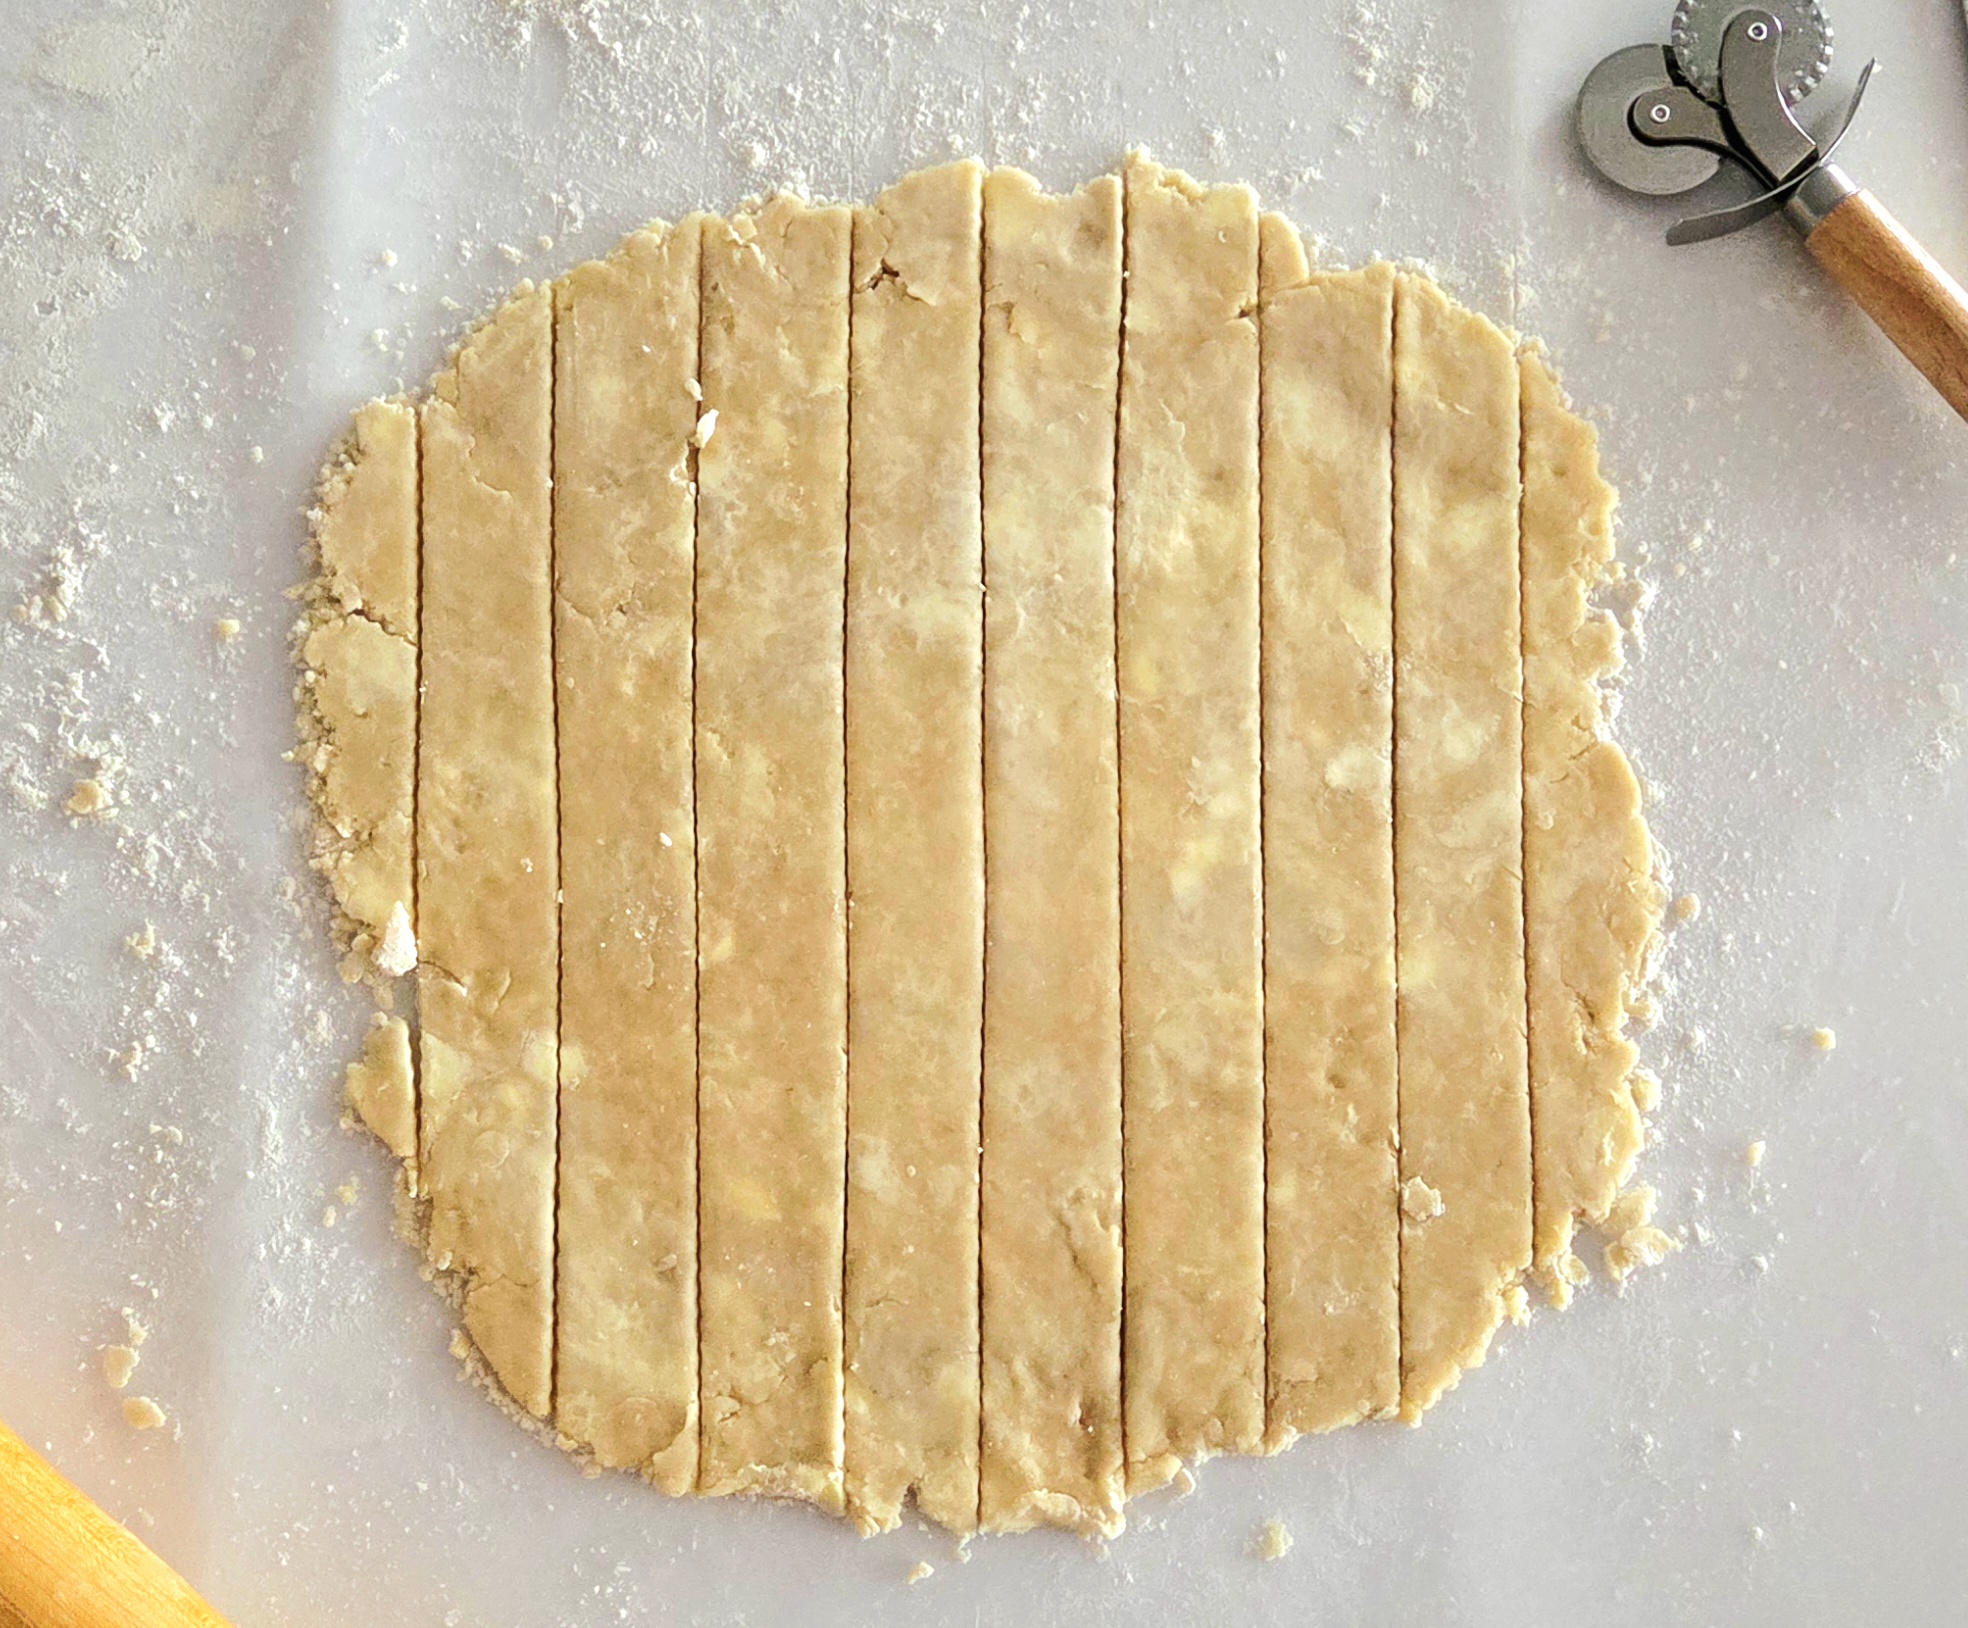
Using a knife, bench scraper, or pizza wheel, cut the dough into 1 inch strips. To make it easier to get straight, even lines, I just take a ruler as a guide. A standard ruler is approximately 1 inch wide, so I utilize the straight edge to cut along and then move the ruler across so it’s lined up perfectly with the previous cut before making another one.
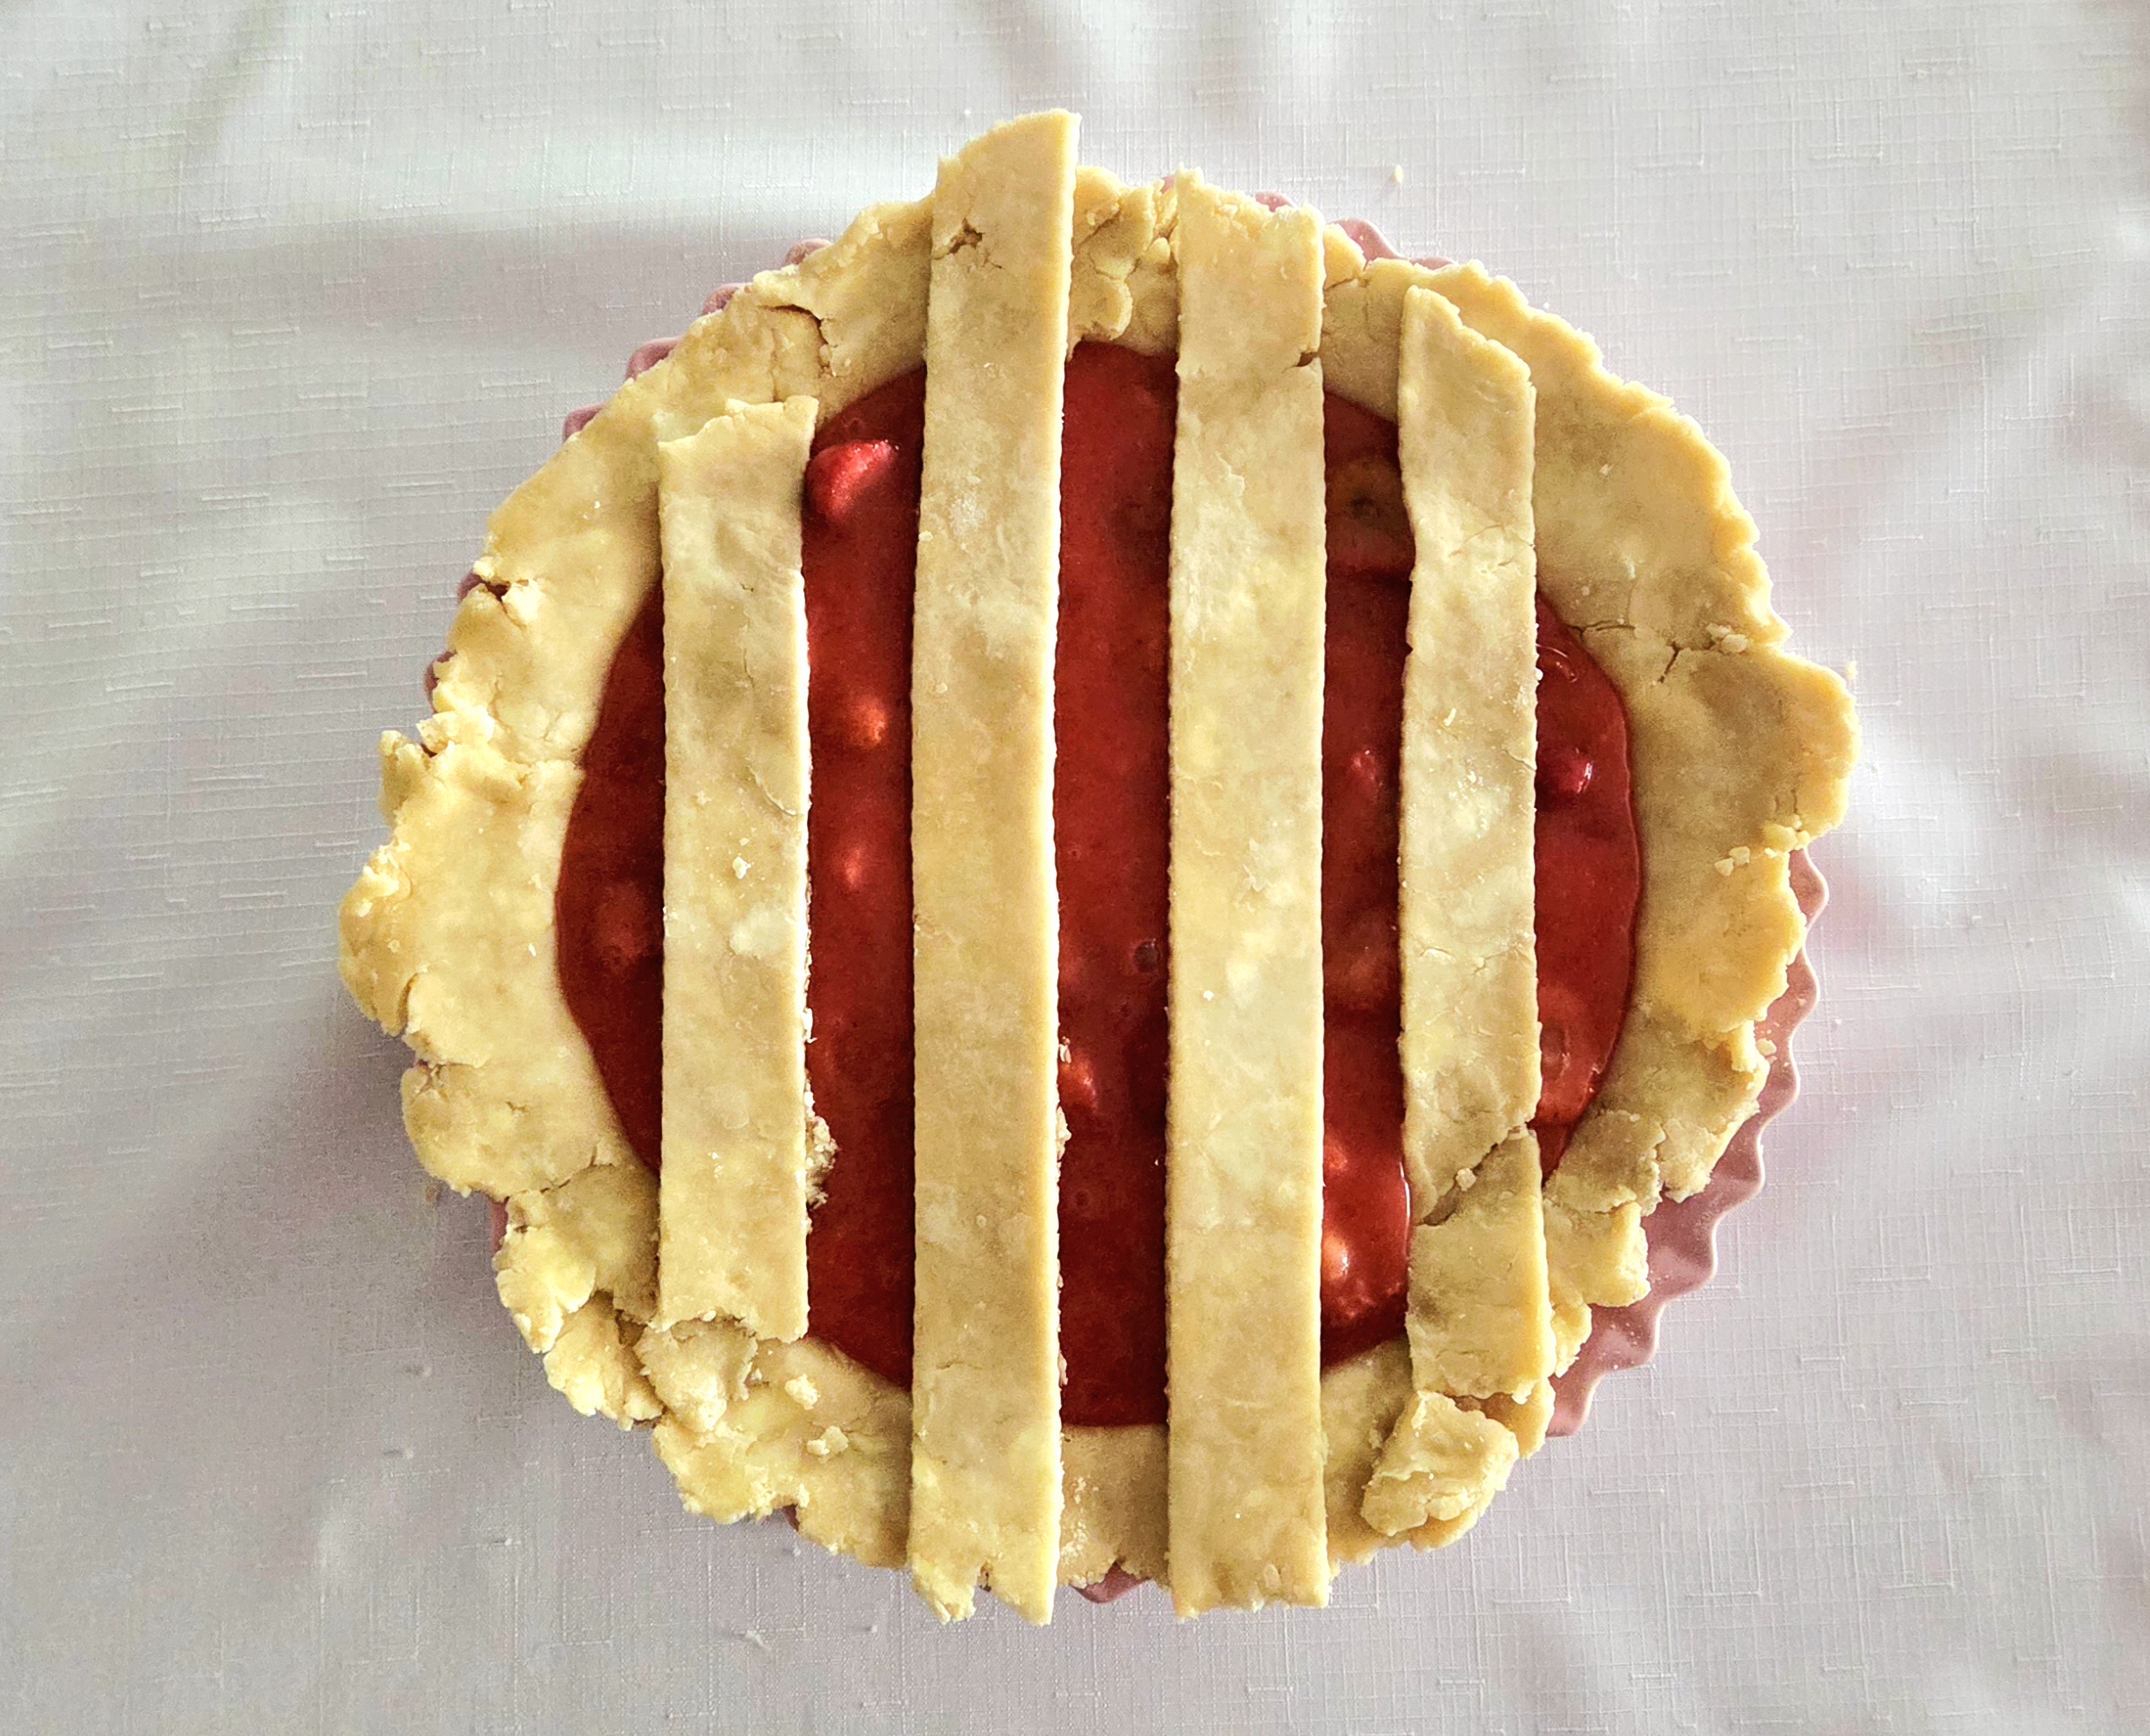
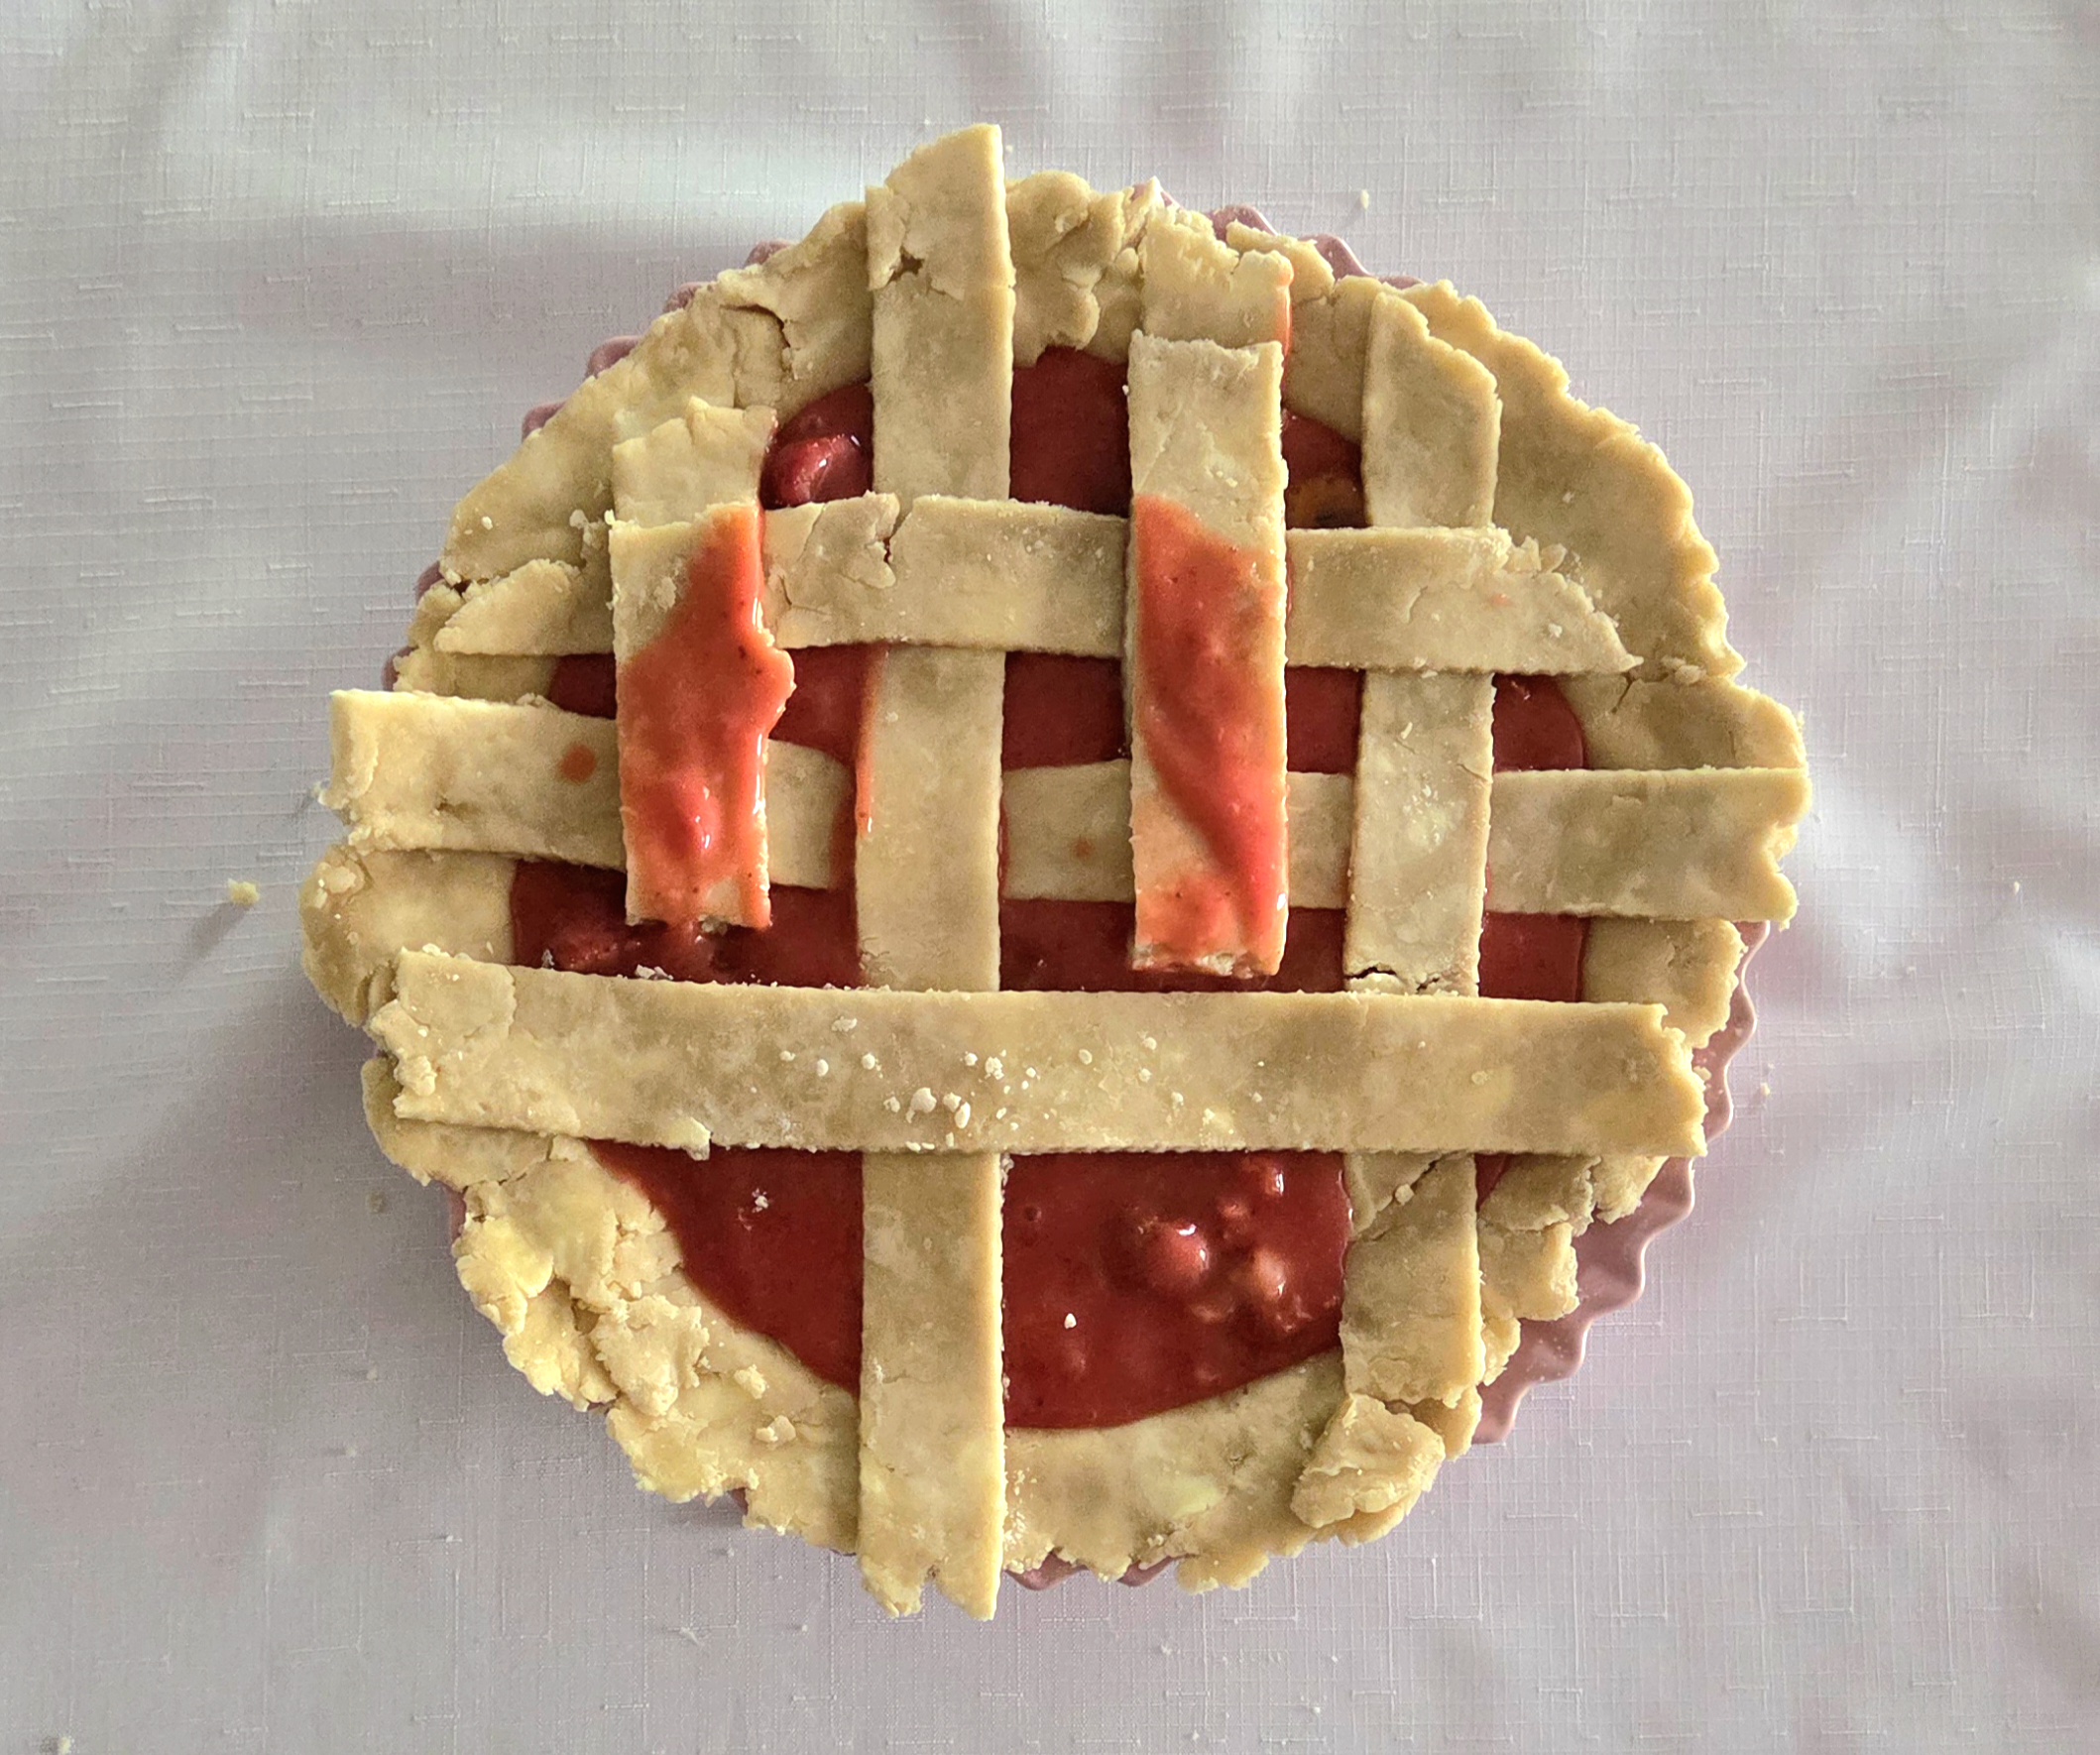
Place 4 of the strips of dough on top of the filled pie vertically, leaving about an inch of space in between each. Fold back every other strip halfway and place another strip of dough horizontally across it.
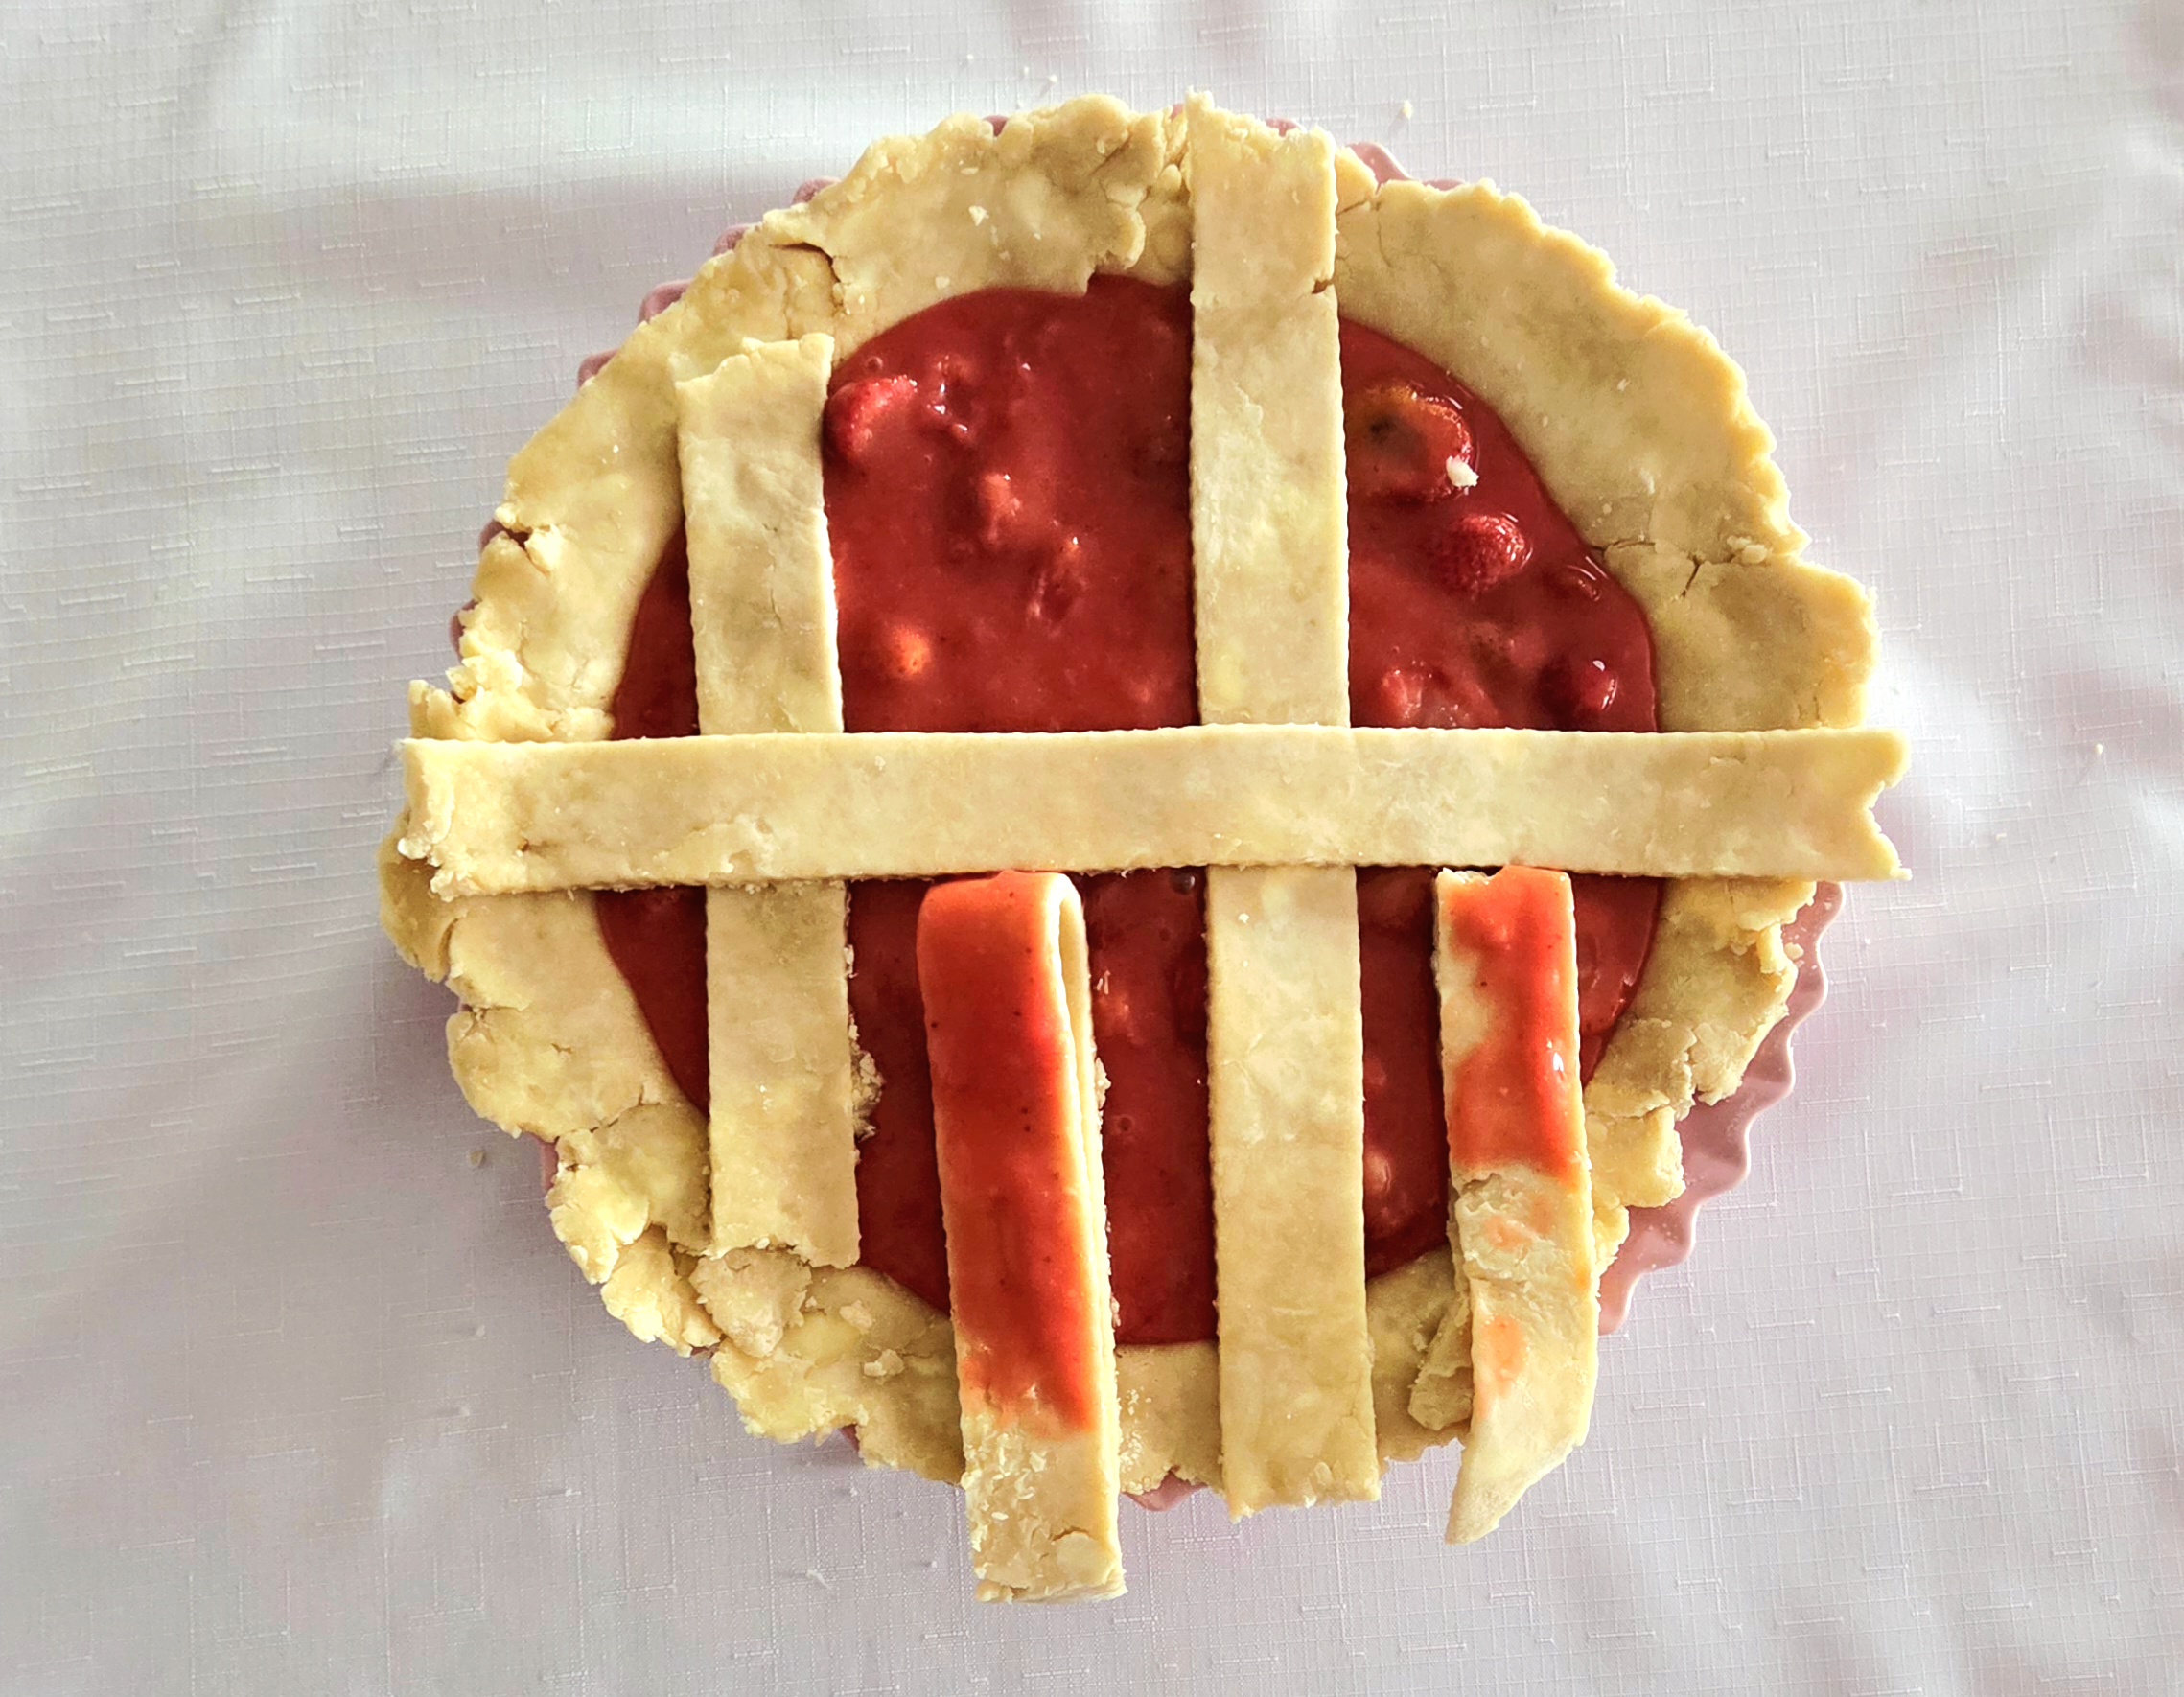
Lay the folded strips back down again, then unfold the opposite two strips against the horizontal strip. Place another horizontal strip about an inch away from the first, and lay down the folded strips.
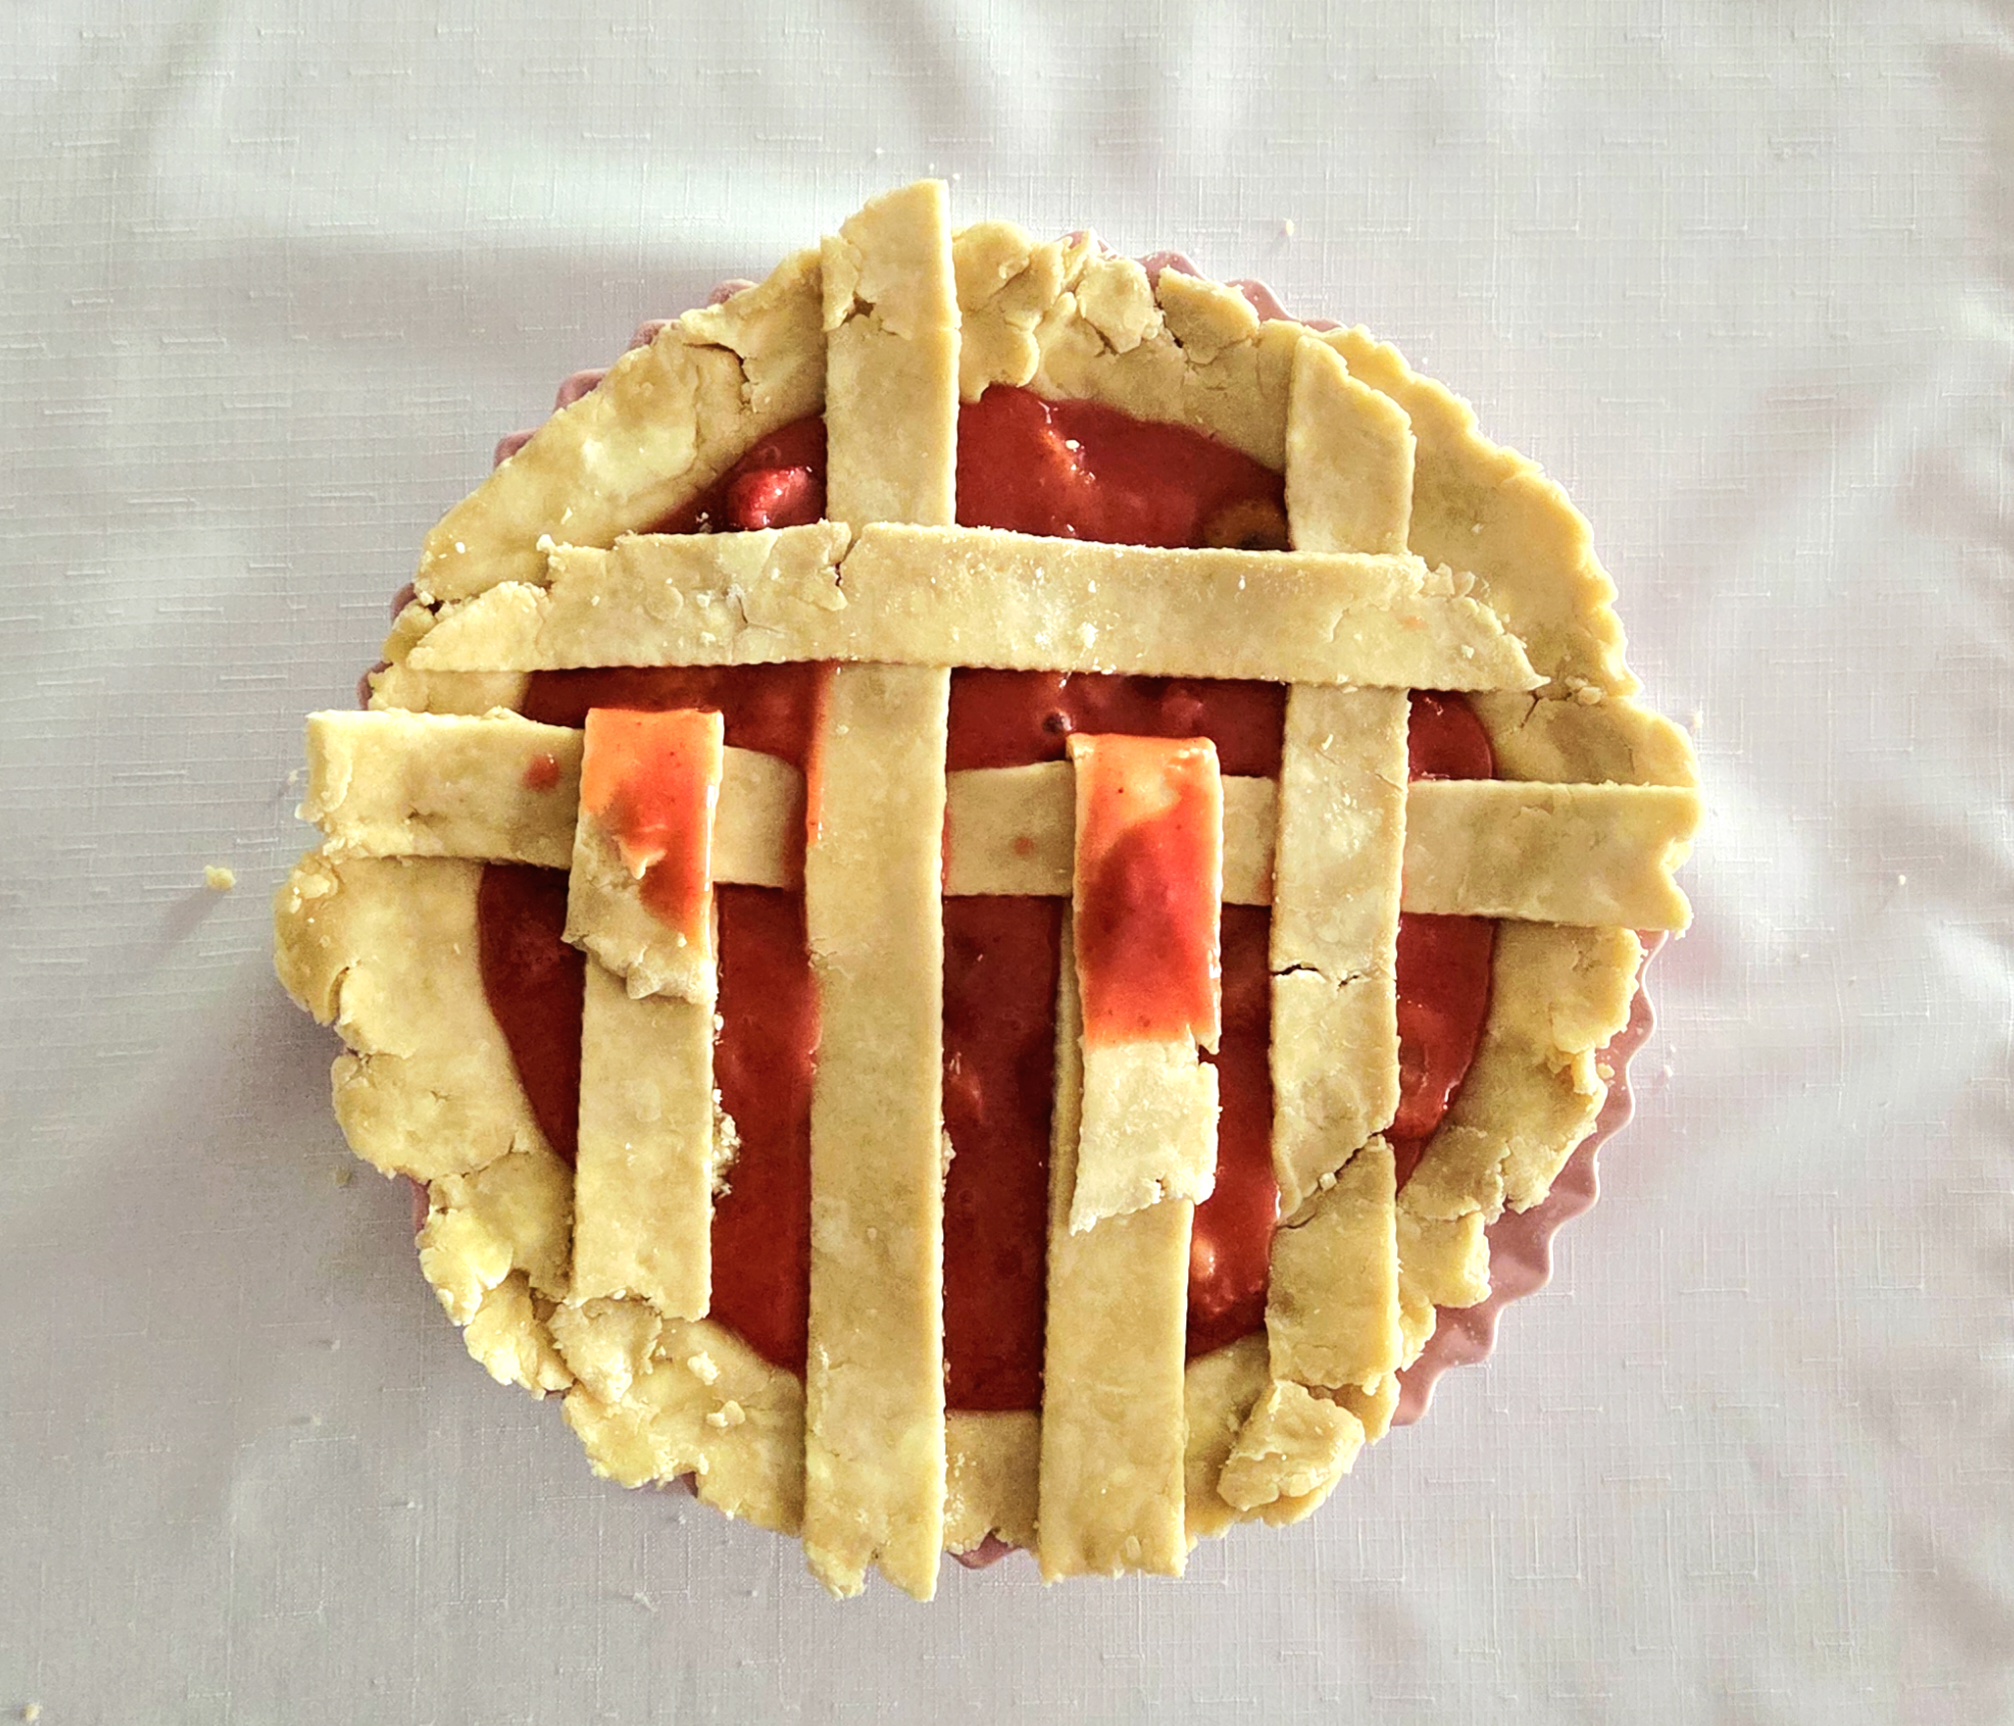
Repeat the process on the other end of the pie, so you have a 4×4 strip lattice top. If at any point the dough becomes difficult to work with, place everything in the fridge for a few minutes to firm up once more.

Trim anything over the sides of the pan with a paring knife or kitchen scissors. Fold the remaining excess bottom crust that you did not trim off in half over the top lattice crust, and press down gently to seal it.
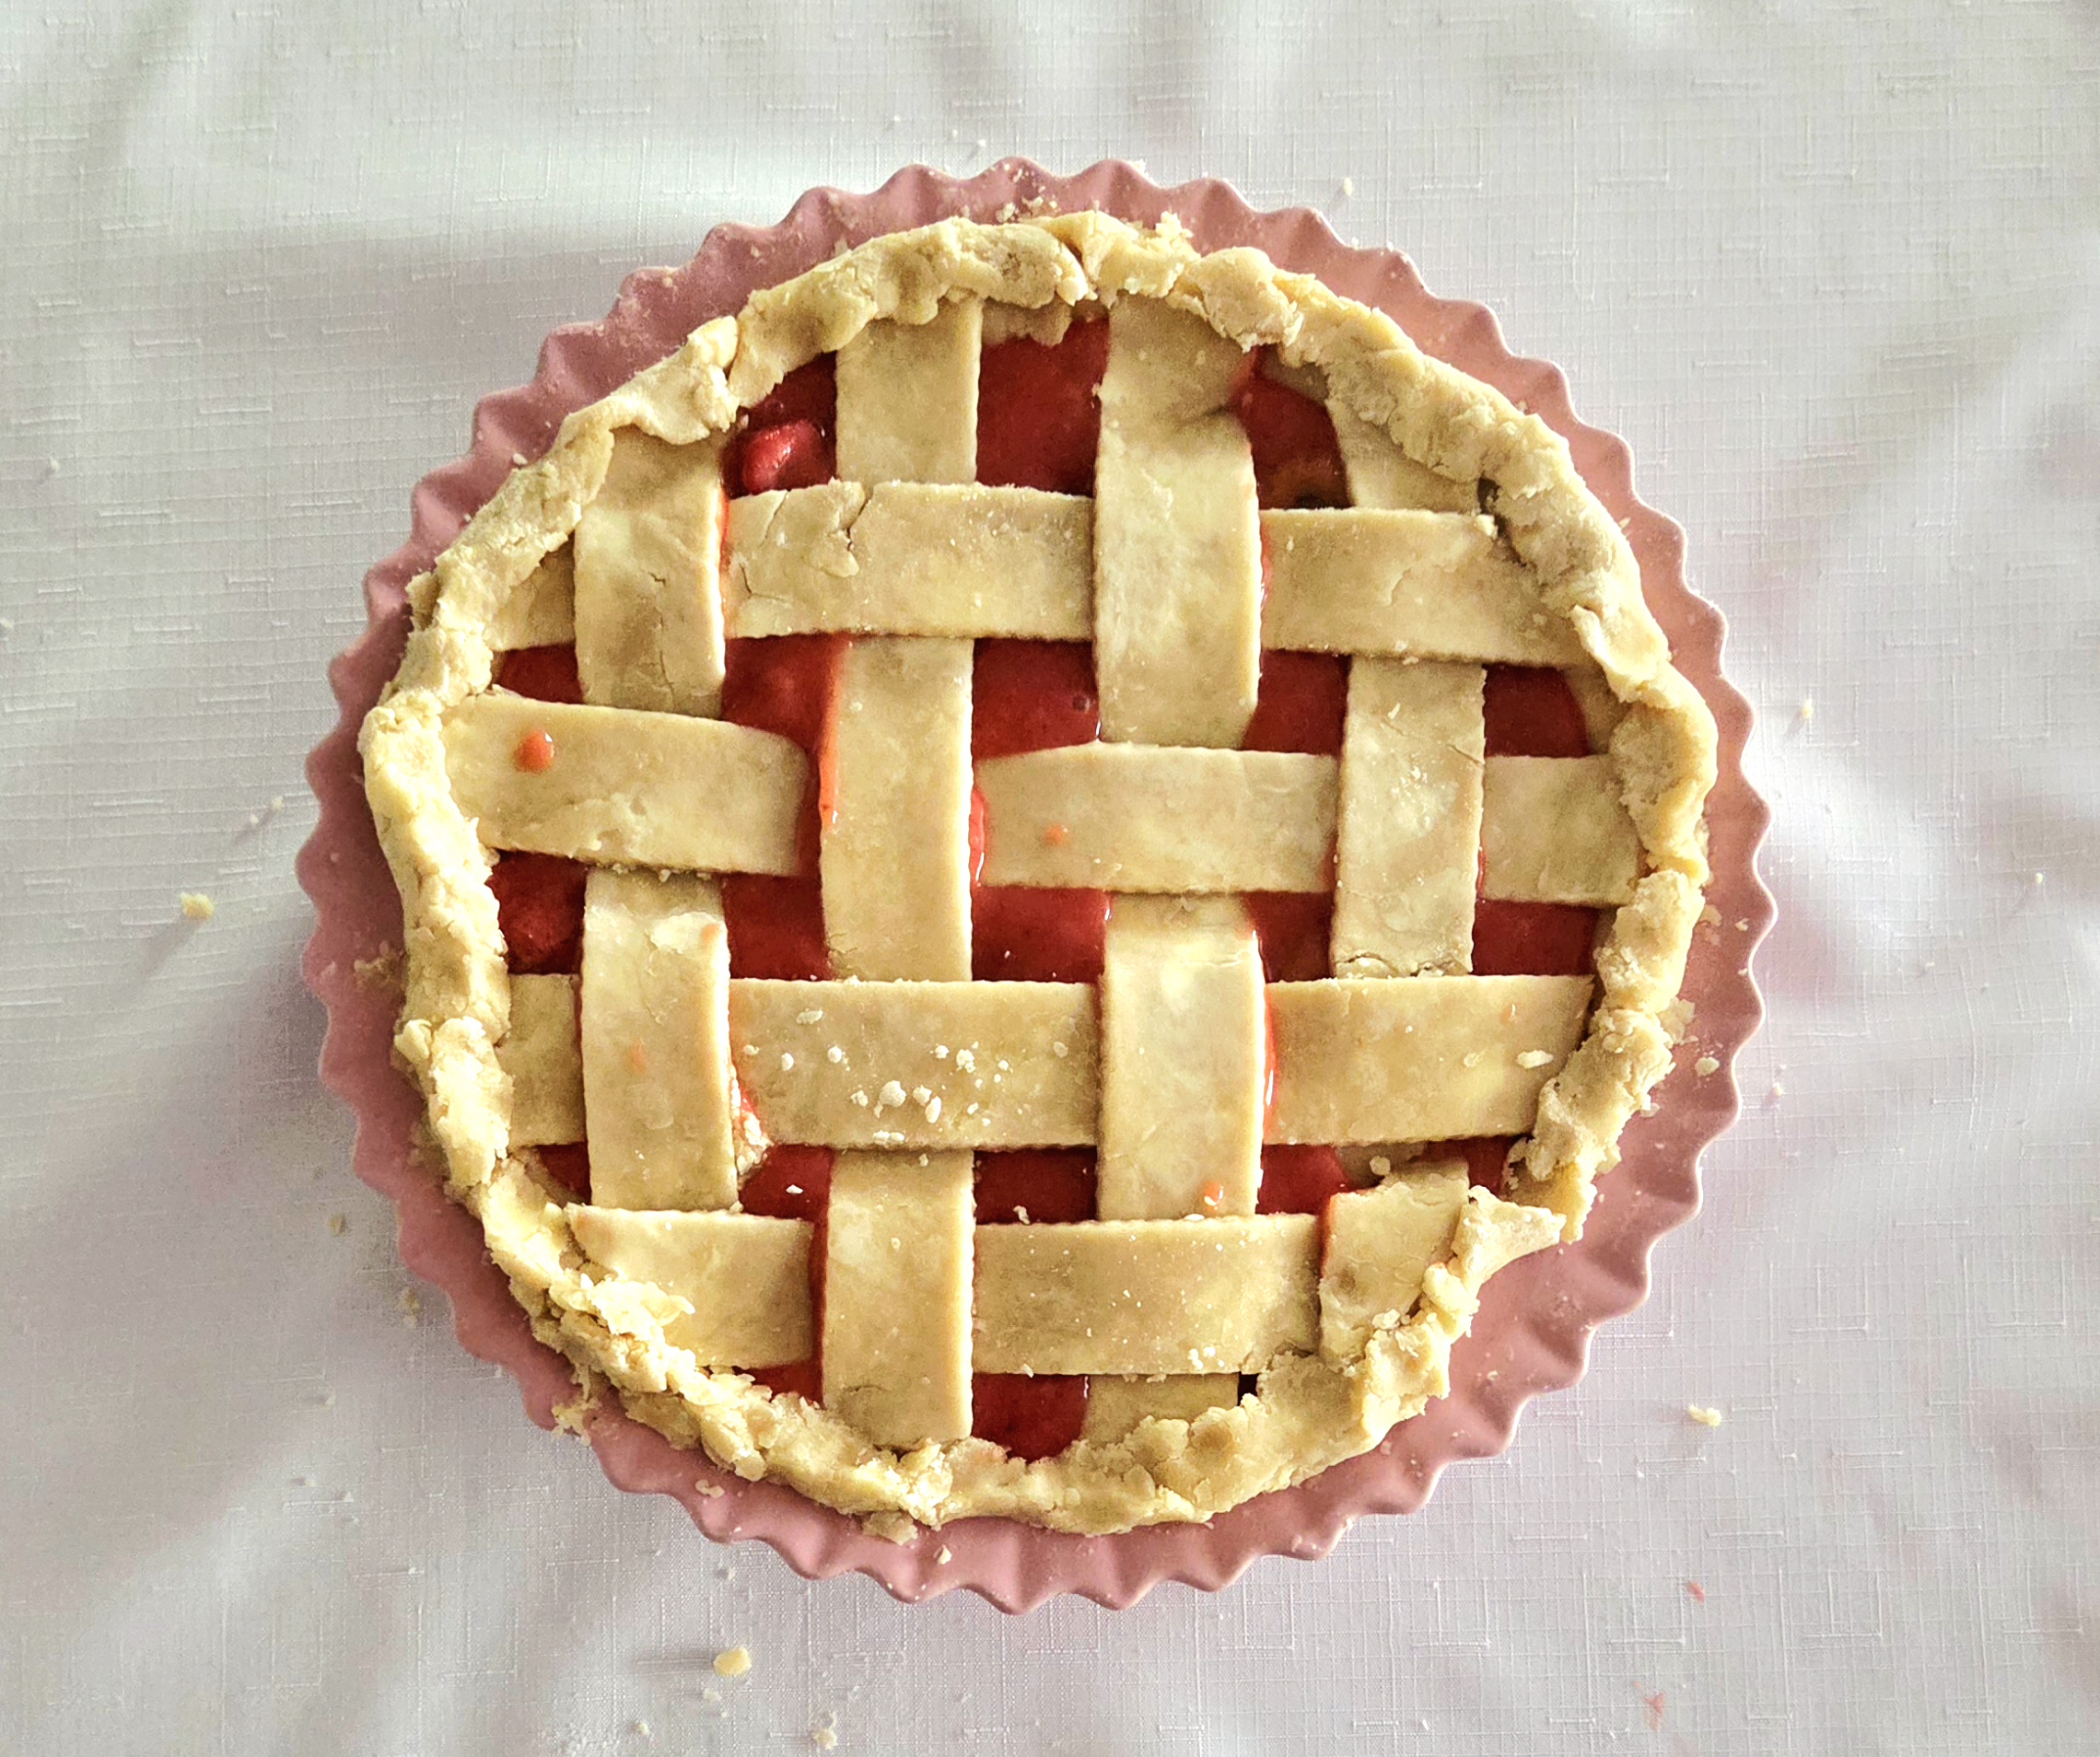
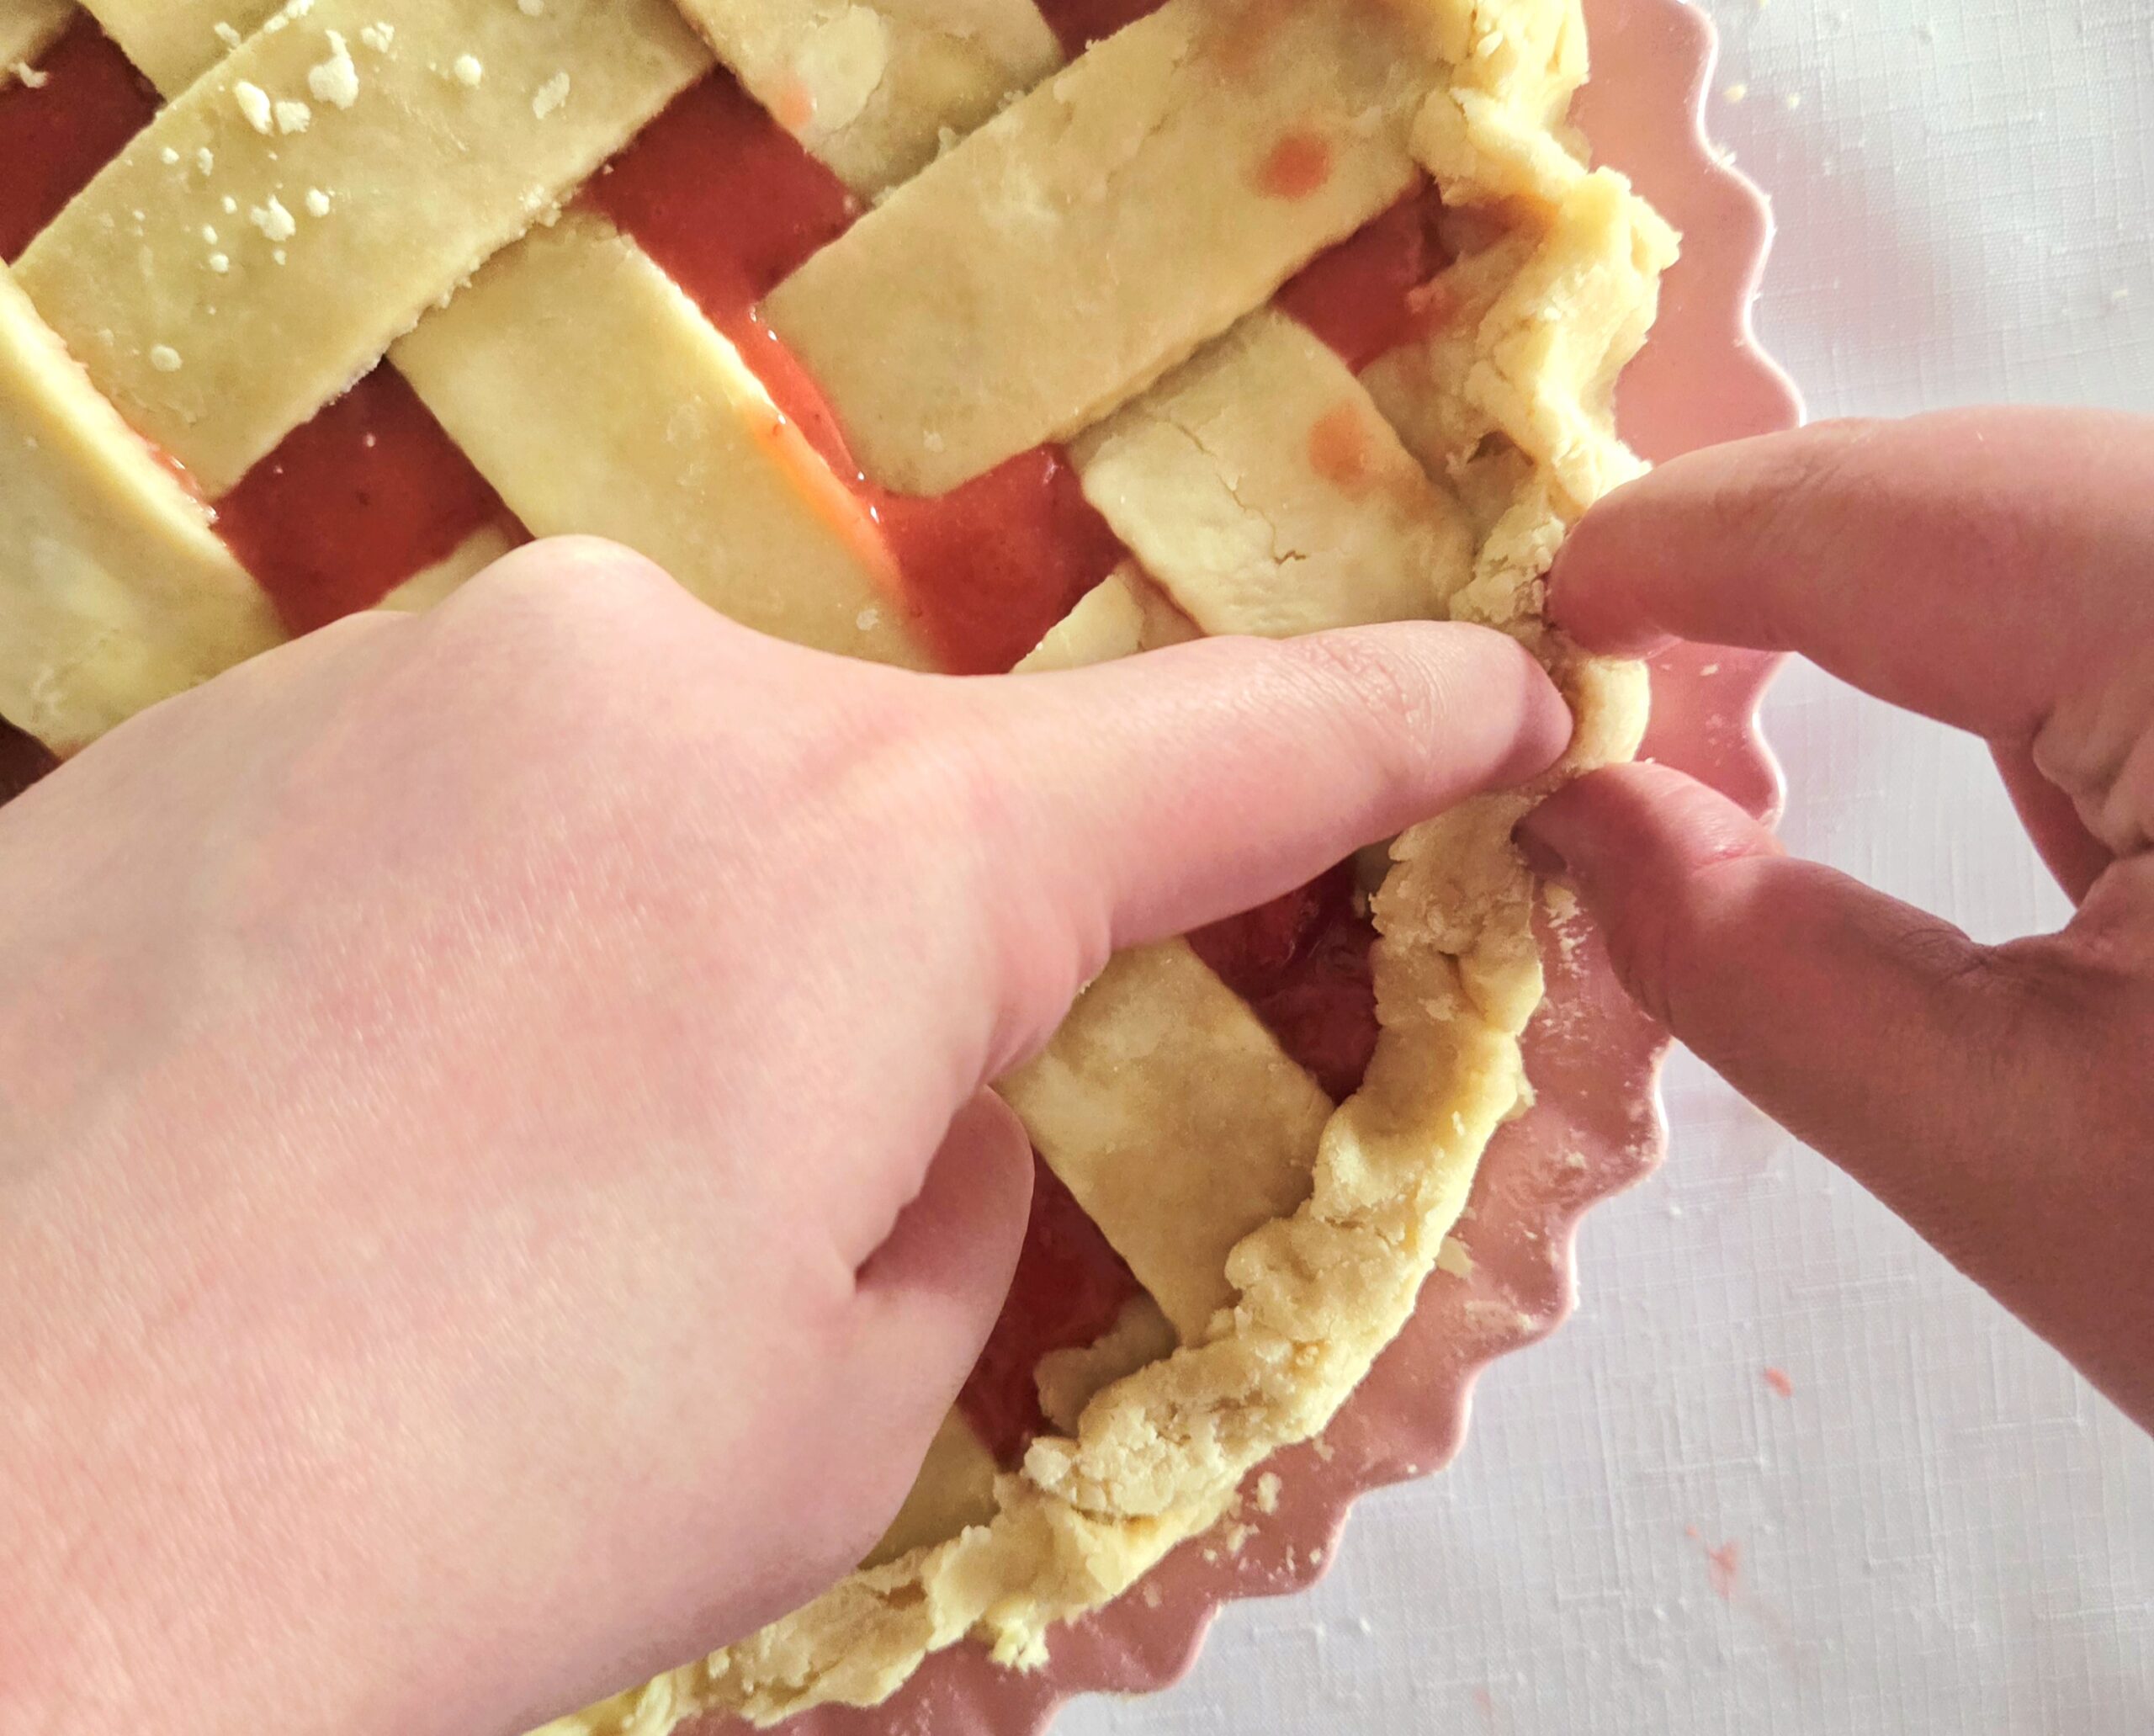
Now to crimp the edges. The reason we crimp is to seal the filling into the pie, so it’s less likely to leak out all over the place. For an easy crimp, take a fork and gently press the tines into the rim of dough you just folded over. To ensure that it’s even, start the next crimp by placing the tine on the end into the previously made impression on the end. Continue all the way around the rim of dough.
For a slightly fancier crimp, take your pointer finger and thumb on one hand and hold them about an inch apart. Gently press them against the sides of the rim of dough and use the pointer finger on the opposite hand to make a moderately deep impression in the space between your two fingers. Start the next finger crimp by placing your pointer finger against the previously made indent, and repeat the same actions as before. Repeat this process all the way around the rim.
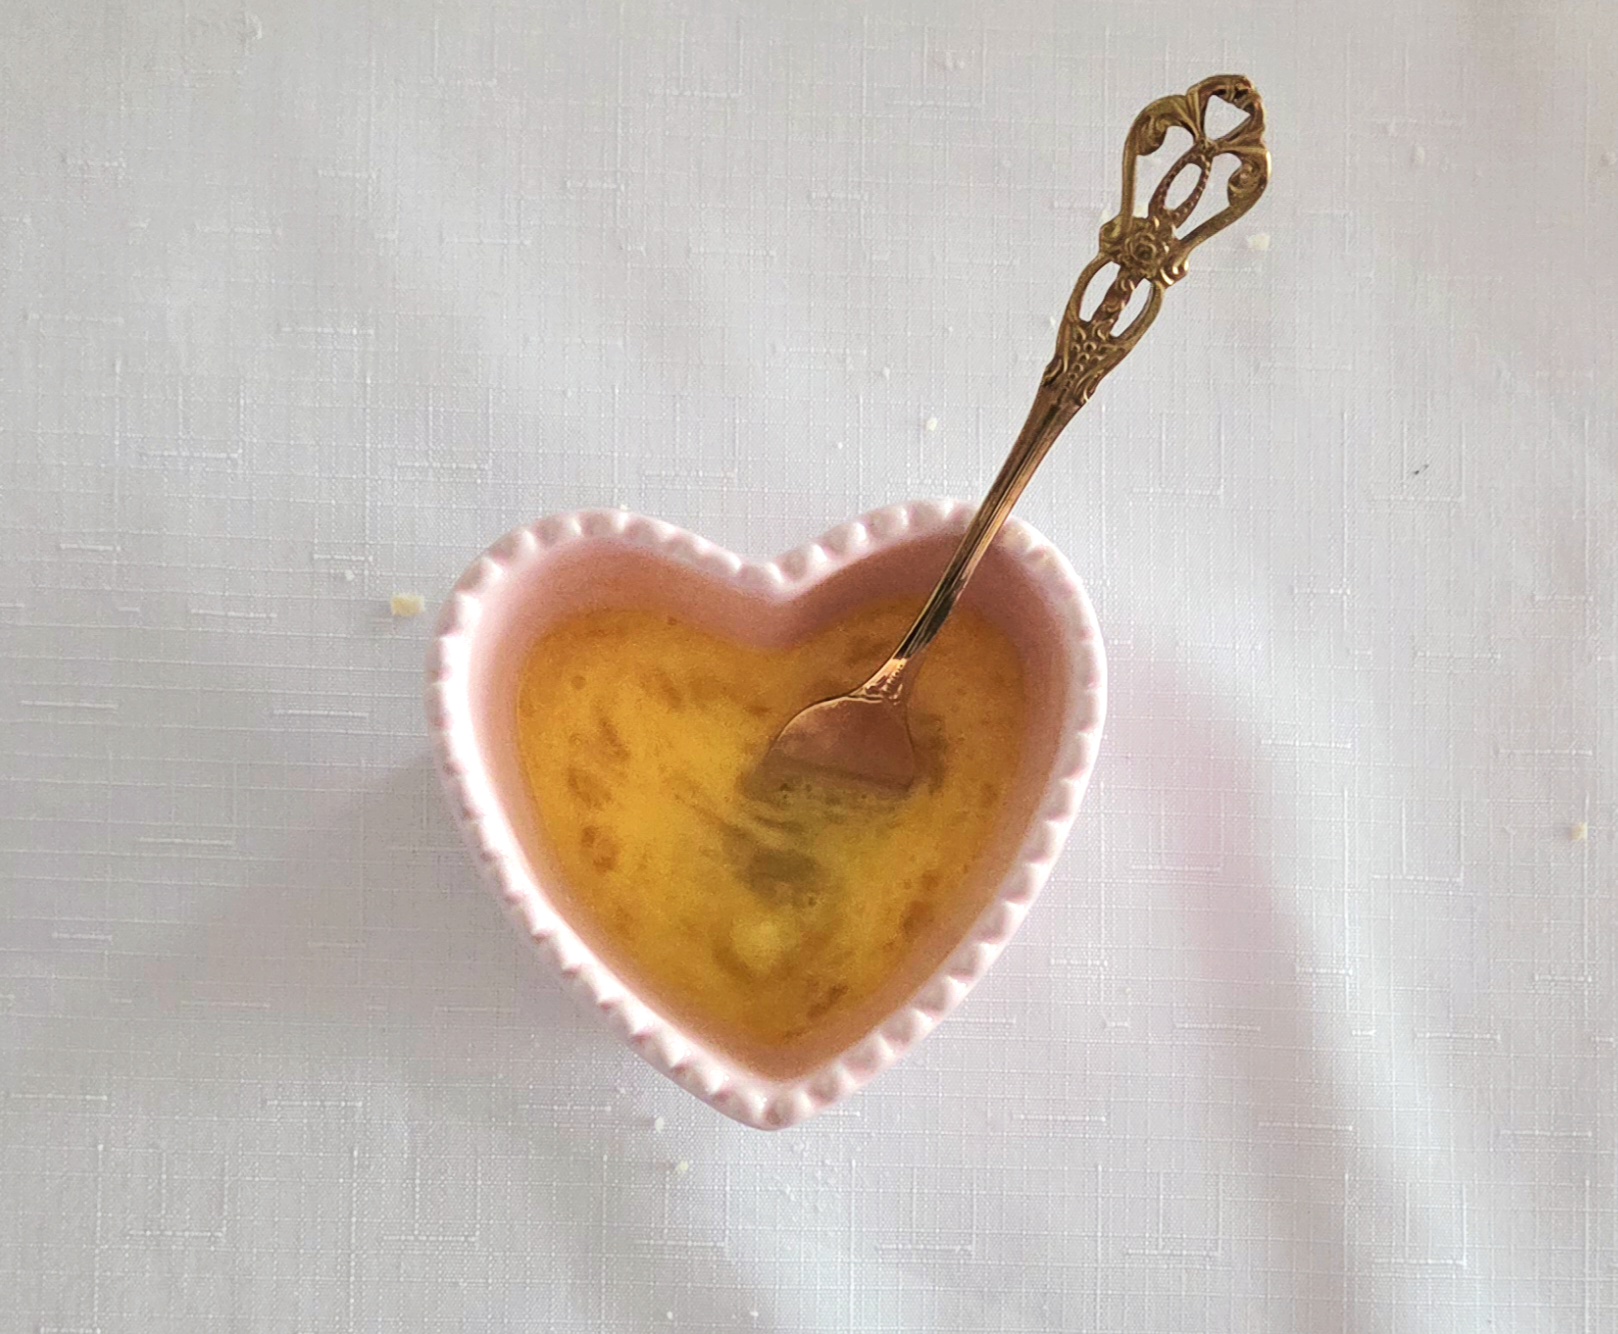
Mix together the egg wash. In a small bowl, whisk together the egg, splash of water, and a pinch of salt. Take a pastry brush, or your fingers, and gently paint a layer of egg wash over the top of the lattice crust. If you want, you can also sprinkle some chunky sugar on top for an extra crunch. Brushing on an egg wash will give you a more beautiful, even finish.
Place the pie in the oven for 60 minutes, rotating it halfway through. At the 45 minute mark, you may need to cover the crimped rim with foil or a pie crust shield to prevent it from getting too dark. Take the pan all the way out of the oven and shut the door to do this, so the oven won’t cool down in the process, then return it to the oven once more.

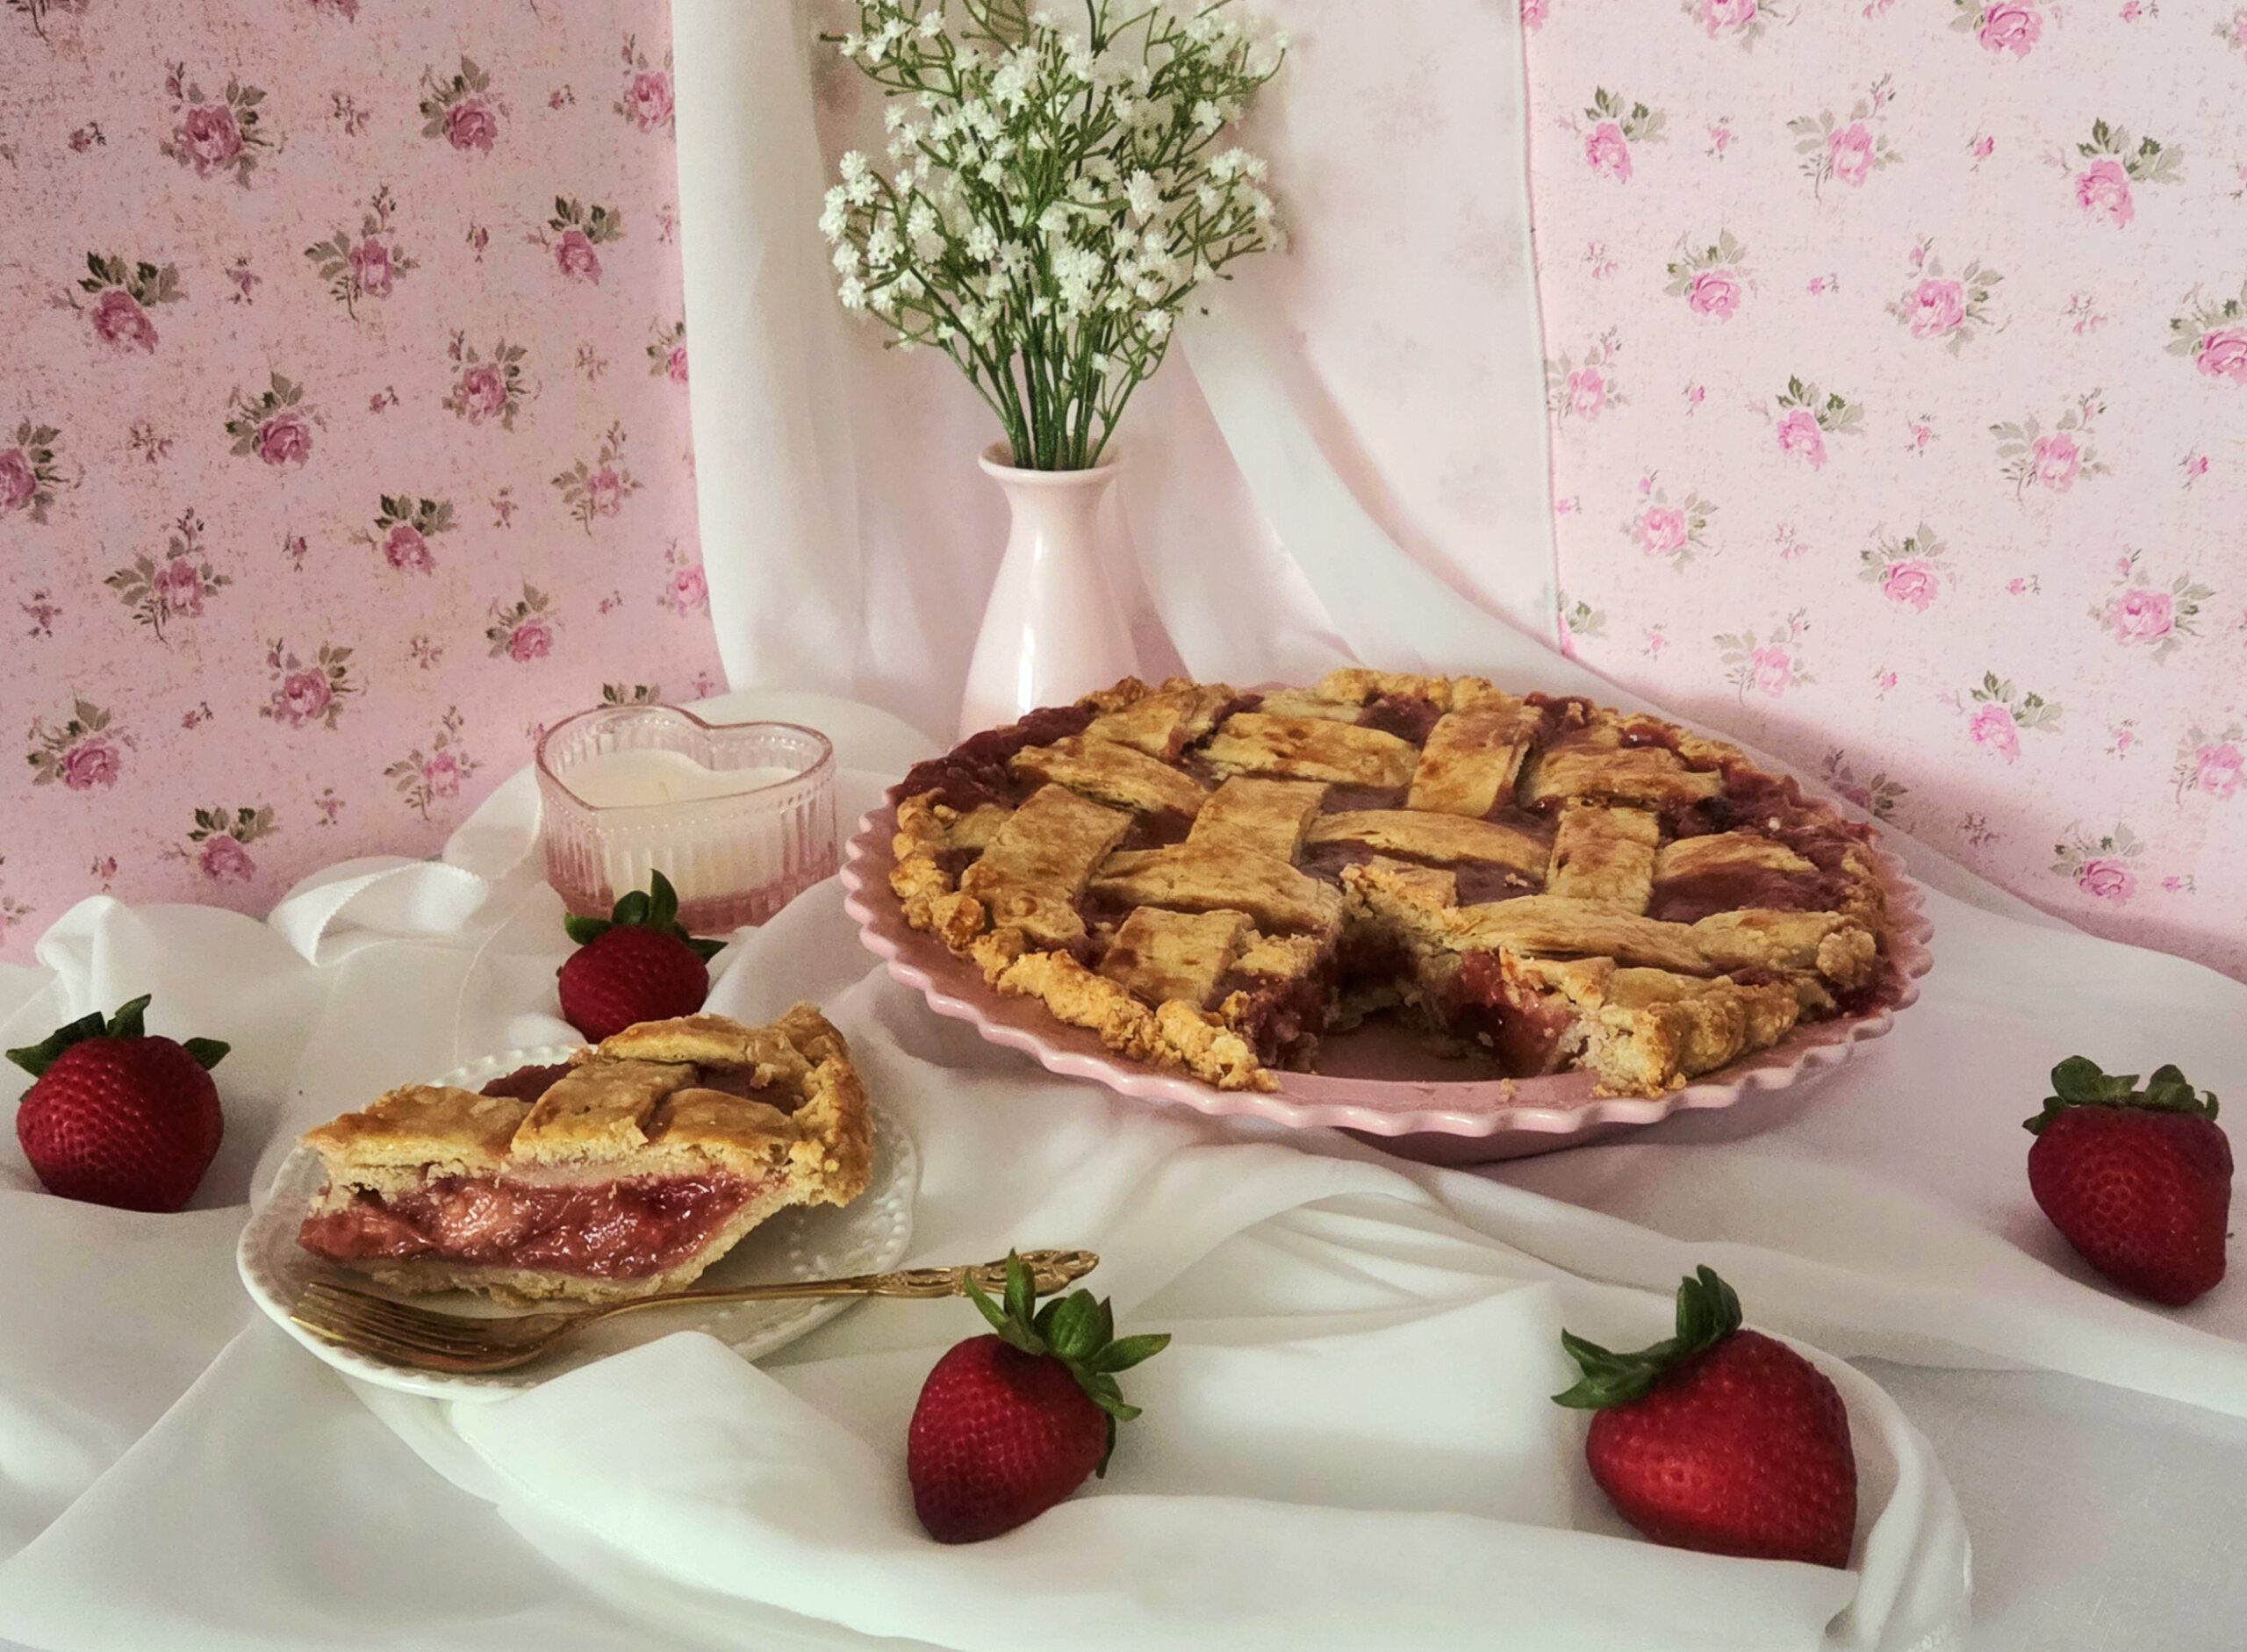
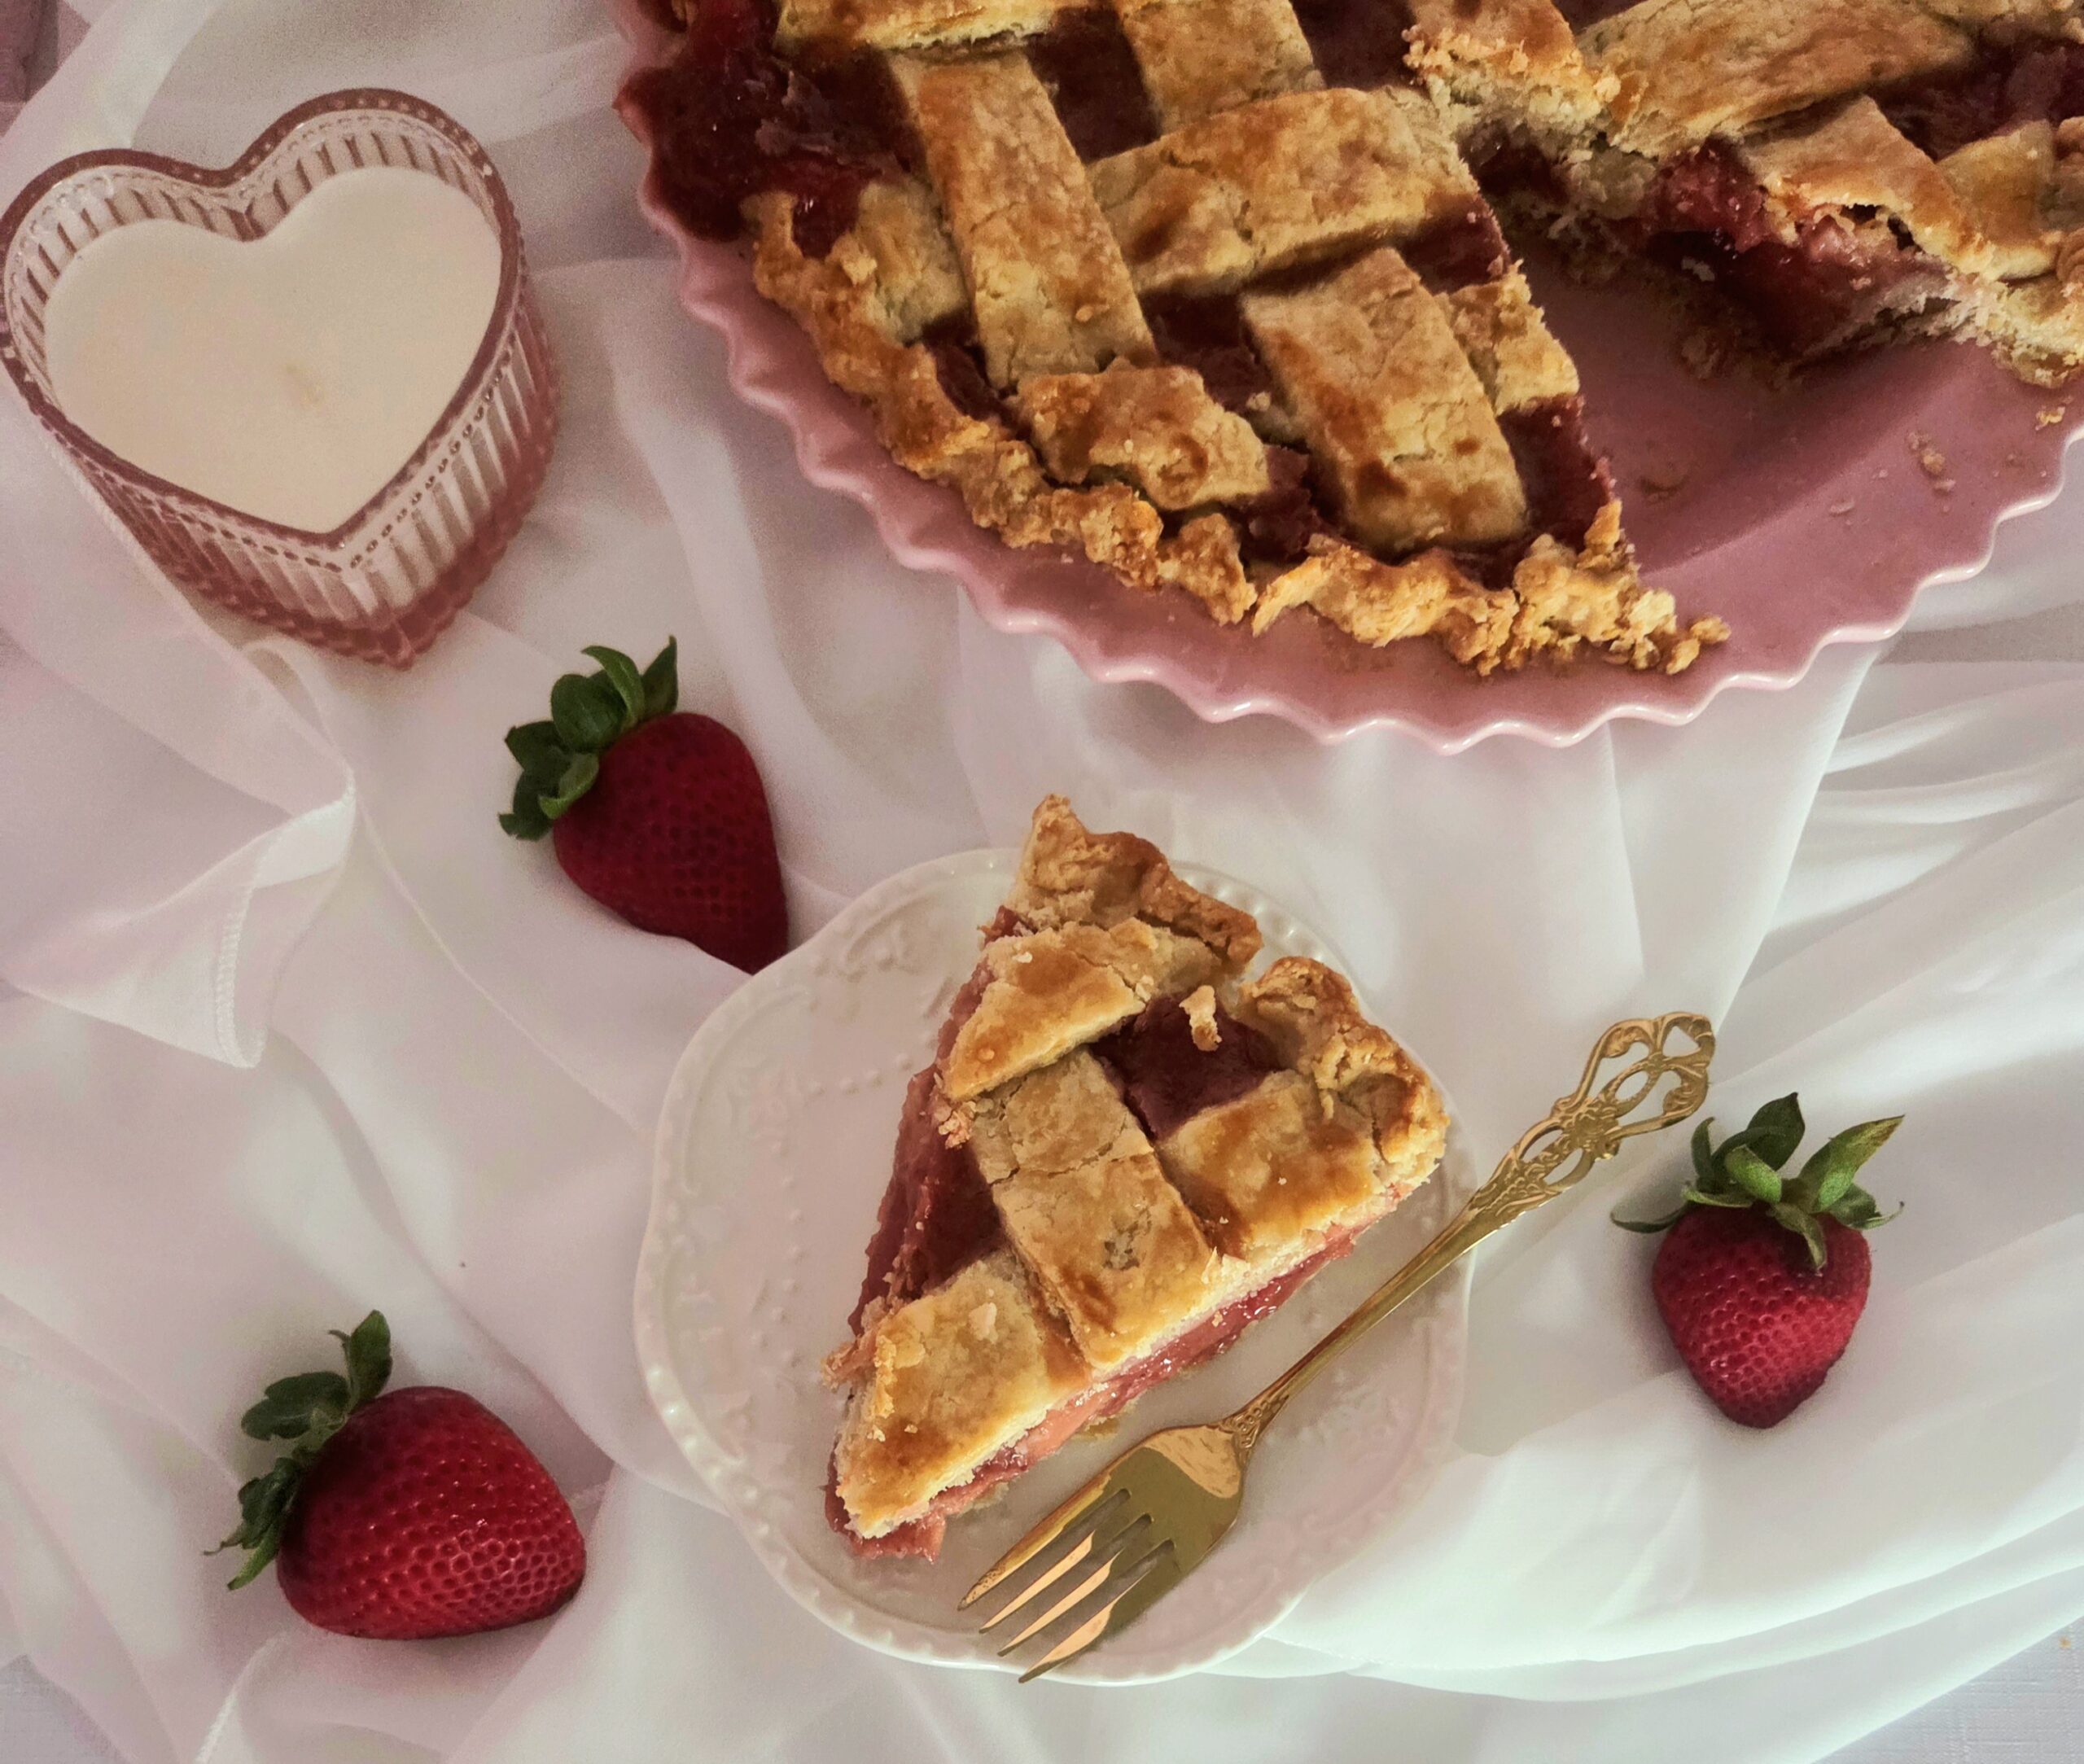
Once it’s finished baking, allow the pie to cool down to room temperature. To get 12 even servings, slice the pie in half one way, then slice it in half the other way. Slice each of these quarters of pie into 3 equal triangles. But at the end of the day, it’s your pie to portion out how you’d like to!
Store the pie either at room temperature or in the fridge in an air tight container for up to 3 days. Serve at room temperature with some vanilla or strawberry ice cream, and enjoy!
Strawberry Pie
Bake Time: 375F for 60 minutes
Servings: 12 Slices
Total Time: 2 hours
Prep Time: 1 hour
Ingredients
Filling:
- 2 lbs frozen strawberries
- 1 cup granulated sugar
- ⅓ cup all-purpose flour
- 2 Tablespoons cornstarch
- 1 teaspoon salt
- Juice of 1 lemon
- 1 teaspoon vanilla extract
Easy Pie Crust-Double Batch
Egg Wash
- 1 large egg
- Pinch of salt
- Splash of water
Directions:
Filling:
- Begin with the filling. In a small mixing bowl, whisk together the sugar, flour, cornstarch, and salt. Set this aside.
- In a 4-quart heavy bottom sauce pan, add the strawberries, lemon juice, and sugar mixture. Place the pan over medium heat and, using a heat safe rubber spatula, stir to coat the strawberries. Cover the pan with a lid, and allow it to heat undisturbed for a few minutes.
- Uncover the pan and stir the berries. If they’ve started to get juicy, leave the lid off and stir occasionally. If they’re still mostly frozen, cover them again and allow them to sit for a few minutes more. Repeat this process until the berries are juicy and the mixture has started to come to a boil.
- Once the filling has reached a boiling point, stir it continuously until it’s begun to thicken, about 10 minutes. Take the pan off the heat, stir in the vanilla extract, and allow it to sit uncovered and cool down. It will thicken further as it cools, and further still in the oven.
Assemble and Bake:
- Preheat the oven to 375F, on the convection setting if possible, and prepare your pie dish by coating it with a nonstick baking spray. Set the pan aside.
- Take out one portion of dough and unwrap it. Lightly flour a clean counter, place the disc in the center, and lightly flour the top of the disc. Using a rolling pin, roll out the dough into a circle with a 13 inch diameter. If at any point the dough starts to anything, gently peel it away and add a little more flour.
- Fold the circle of dough in half and transfer it over to the pie dish. Gently unfold it, and fit the dough snug into the pie dish, ensuring it’s touching the bottom, all sides, and where the bottom and sides meet. Allow any excess dough to hang over the sides of the dish.
- Pour the completely cooled filling into the dough lined pie dish. Set it aside while you prepare the top crust.
- Lightly flour the counter once more, and place the larger unwrapped disc of dough in the center. Lightly flour the disc and roll it out into a 10-11 inch square. Slice the square into 1-inch strips, using a ruler as a guide if desired.
- Place 4 of the strips of dough on top of the filled pie vertically, leaving about an inch of space in between each. Fold back every other strip halfway, as shown above, and place another strip of dough horizontally across it. Lay the folded strips back down again, then unfold the opposite two strips against the horizontal strip. Place another horizontal strip about an inch away from the first, and lay down the folded strips. Repeat the process on the other end of the pie, so you have a 4×4 strip lattice top. Use the photos above as a reference, if necessary.
- Trim anything hanging over the sides of the pan with a paring knife or kitchen scissors. Fold the remaining excess bottom crust that you did not trim off in half over the top lattice crust, and press down gently to seal it.
- For an easy crimp, take a fork and gently press the tines into the rim of dough you just folded over. To ensure that it’s even, start the next crimp by placing the tine on the end into the previously made impression on the end. Continue all the way around the rim of dough.
- For a slightly fancier crimp, take your pointer finger and thumb on one hand and hold them about an inch apart. Gently press them against the sides of the rim of dough. Use the pointer finger on the opposite hand to press into the space between your two fingers. Place one of the spaced out fingers into the previously made indent to begin the next crimp. Press the dough between those fingers with the opposite index finger again. Repeat this process all the way around the rim. See reference photos above.
- Mix together the egg wash. In a small bowl, whisk together the egg, splash of water, and a pinch of salt. Take a pastry brush, or your fingers, and gently paint a layer of egg wash on top of the lattice crust. If you want, you can also sprinkle some chunky sugar on top for an extra crunch.
- Place the pie in the oven for 60 minutes, rotating it halfway through. At the 45 minute mark, you may need to cover the edges of crust to prevent it from getting too dark. Either wrap aluminum foil or a pie crust shield around the rim of the pie plate. Take the pan all the way out of the oven and shut the door to do this, so the oven won’t cool down in the process, then return it to the oven once more.
- Once it’s finished baking, allow the pie to cool down to room temperature. To get 12 even servings, slice the pie in half one way, then slice it in half the other way. Slice each of these quarters of pie into 3 equal triangles. Store the pie either at room temperature or in the fridge in an air tight container for up to 3 days. Serve at room temperature, with some vanilla ice cream if you’d like, and enjoy!
Tips
- If you don’t want to create your own lattice top, you can do a simpler top instead. Roll out the dough in a circle the same diameter as the top of the pie and cut 4 small slits near the center of the circle. The slits offer a ventilation system for any steam to escape from, so do not skip this step!
- If your kitchen is particularly warm, place everything in the fridge to chill anytime it becomes difficult to work with. It would also be a good idea to chill the pie before baking, in this case! Cover the unbaked pie with plastic wrap and chill it for at least an hour, until the crust is cold and firm. Cold crust bakes flaky, warm crust bakes greasy.
- Place a baking sheet underneath the pie while it’s baking, to catch any filling that may leak over the sides.
- This pie can be assembled, covered, and placed in the fridge unbaked up to a day ahead of time. Follow the recipe as written to bake it fresh when the time comes.

0 Comments