

The French truly have mastered the art of the pastry. Tarts, éclairs, palmiers, pithiviers, mille-feuilles, macarons, madeleines, profiteroles, there are countless ways this culture has managed to combine sugar, butter, and flour in a unique and heavenly manner. I was blessed with a trip to France at the age of 19, and I still dream of returning to the endless string of boulangeries and patisseries. And at every one of those shops I walked into, I came out with at least one croissant of my own.
I love a good croissant. They’re flaky, buttery, and instantly boost how fancy I’m feeling. I’m no longer sitting in my own living room in Massachusetts, but in an apartment in Avignon, reading in the nook by the window while it rains. Ham and cheese, almond, pain de chocolat, some creative new filling or just a traditional plain croissant, I’ve never met one I don’t love. But, I’m not in France. I can’t just waltz into one of 17 bakeries on any given street to buy the croissant I’ve been dreaming of all night. And although it’s nice for grocery stores to make the attempt at fulfilling that desire, nothing beats bakery quality. That’s what I’m here for, to help you achieve that bakery level croissant right in your own kitchen.
FAQs and Science
Why fold the dough so many times?
Folding the dough onto itself is what’s referred to as lamination. This creates an obscene amount of very thin alternating layers of dough and butter. When that butter heats up from the sudden heat of the oven, the water in the butter evaporates quickly in a burst of steam. This is where the signature flaky texture in a croissant comes from.
Can I use active dry yeast instead of instant?
Of course! Instead of adding the yeast directly to the dry goods, add it to the warm water, along with a teaspoon of the sugar. Gently mix it and allow it to sit for 5 minutes or so. If it blooms, your yeast is alive and ready to go. If it doesn’t, the yeast is either too old or you’ve used the wrong temperature of water and need to start again.
Does the temperature of the water and milk matter that much?
Yes, it does. Yeast dies at 130F, but too cold and it wont activate. It should feel slightly warm to the touch, which will give you somewhere between 100-110F.
Why tuck the extra bit of dough in the center of each croissant?
It plumps up the croissants a bit more, and ensures no dough waste!
What is a turned-off oven?
An oven that has been heated to the lowest setting, then turned off. Yeasted doughs prefer a warm environment to rise in, and this is an easy way to create that in your home kitchen.
Do I really need to be so precise with measuring out the dough before shaping the croissants?
Yes, I would highly recommend following my measuring instructions before shaping. Doing this keeps the croissants all the same size, which means they’ll rise and bake evenly.
What You’ll Need
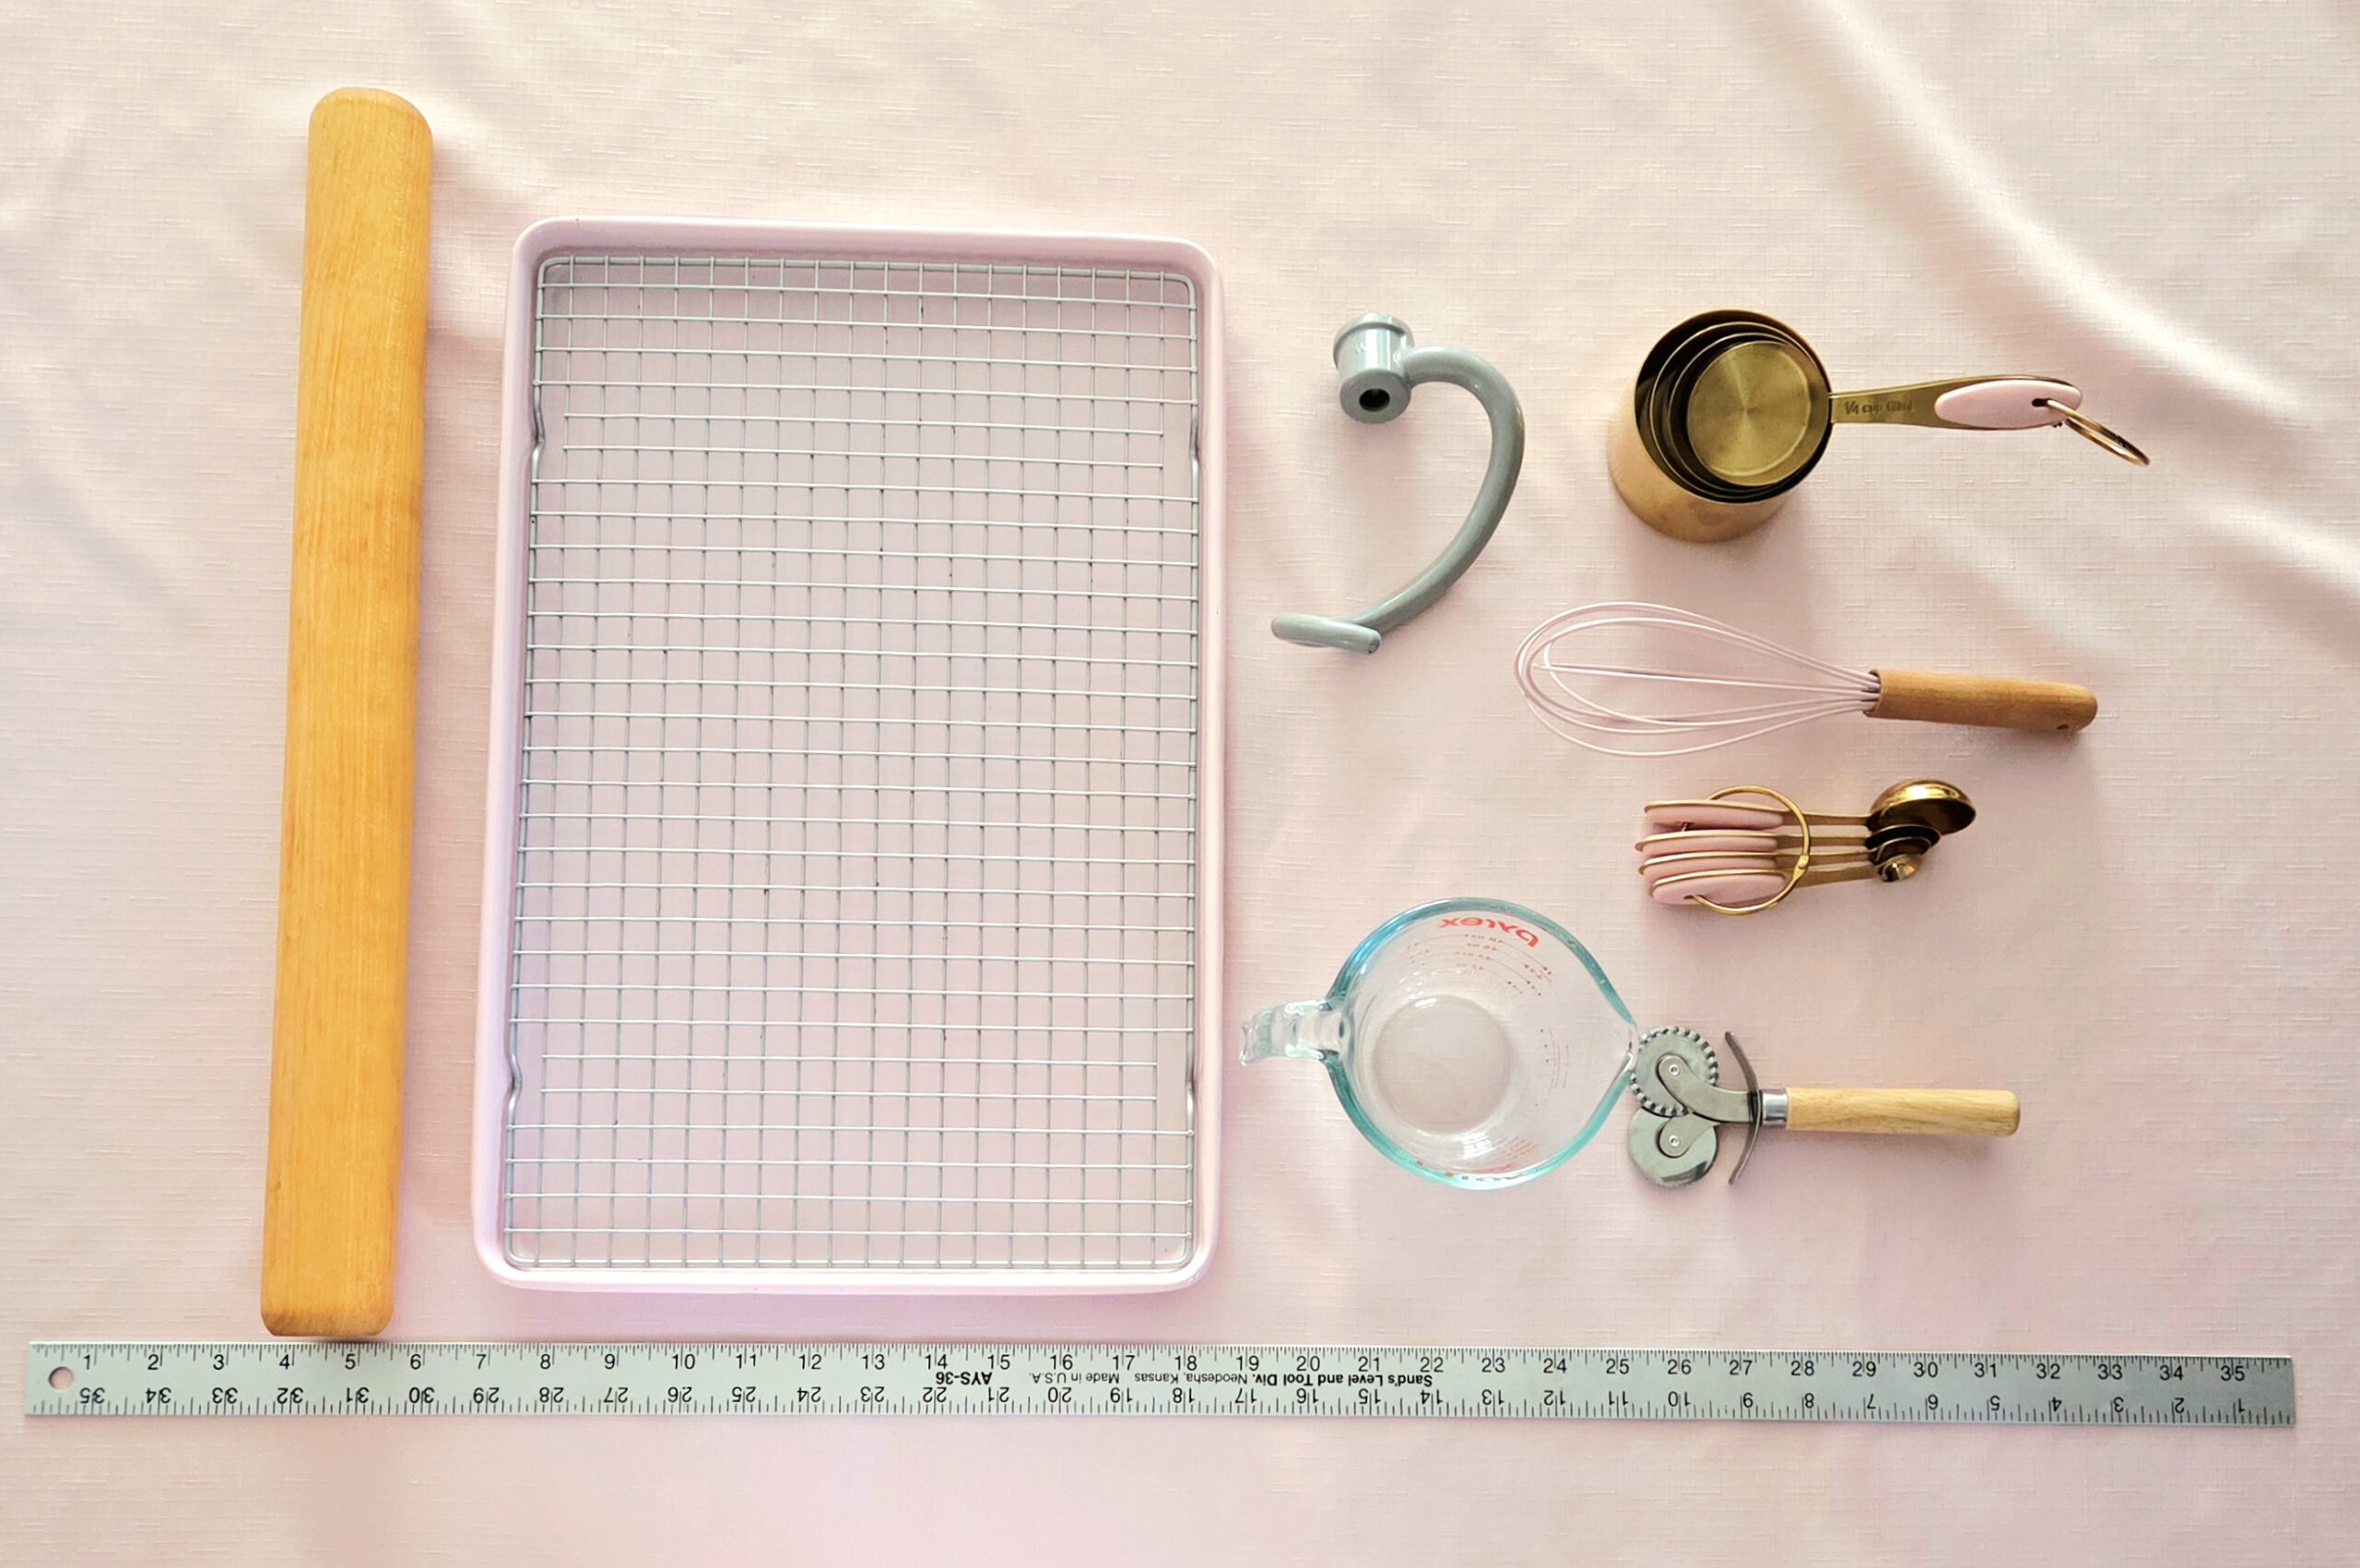
- Plastic wrap
- Stand mixer fitted with dough hook
- Dry measuring cups
- Liquid measuring cup
- Measuring spoons
- Whisk
- Rolling pin
- Pizza wheel
- Ruler
- 2 baking sheets
- Cooling rack
The Process
The Dough
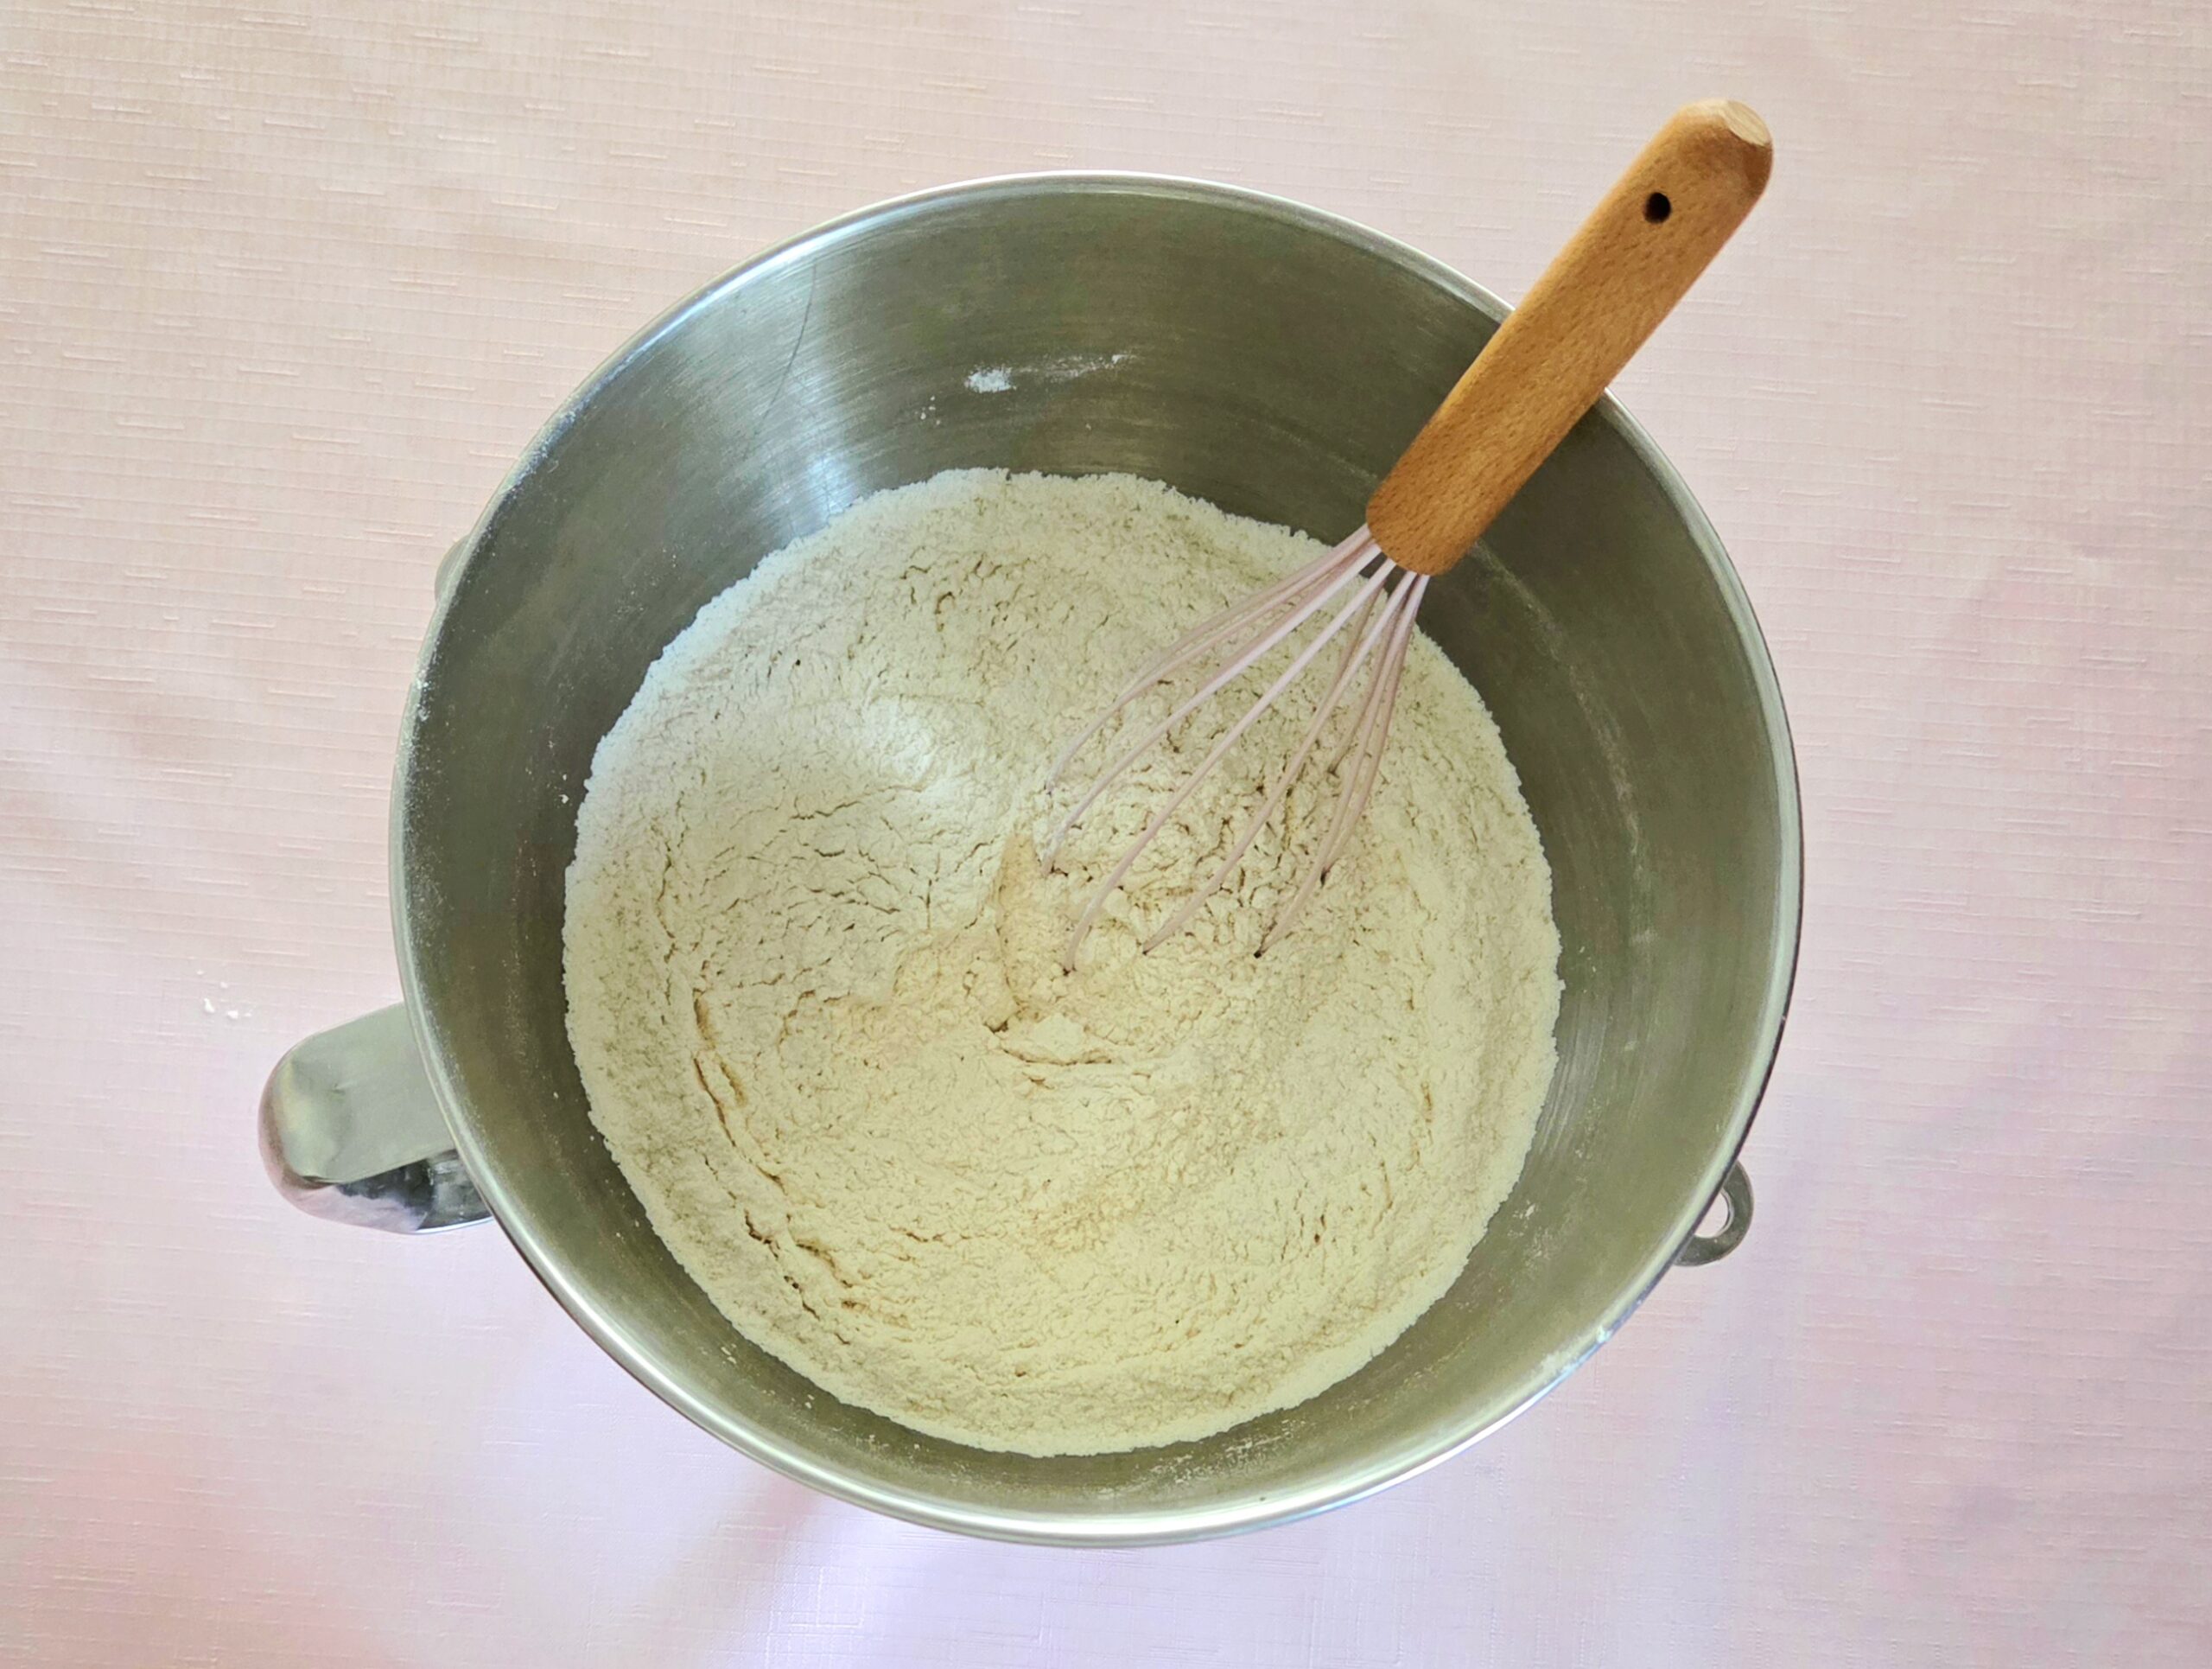
Croissants may seem intimidating to the novice baker, but I promise, you’ve got this! Take a deep breath, and jump right in.Begin by bringing together the base dough, or détrempe. In the bowl of a stand mixer fitted with a dough hook, whisk together the bread flour, sugar, yeast, and salt. Set this aside.
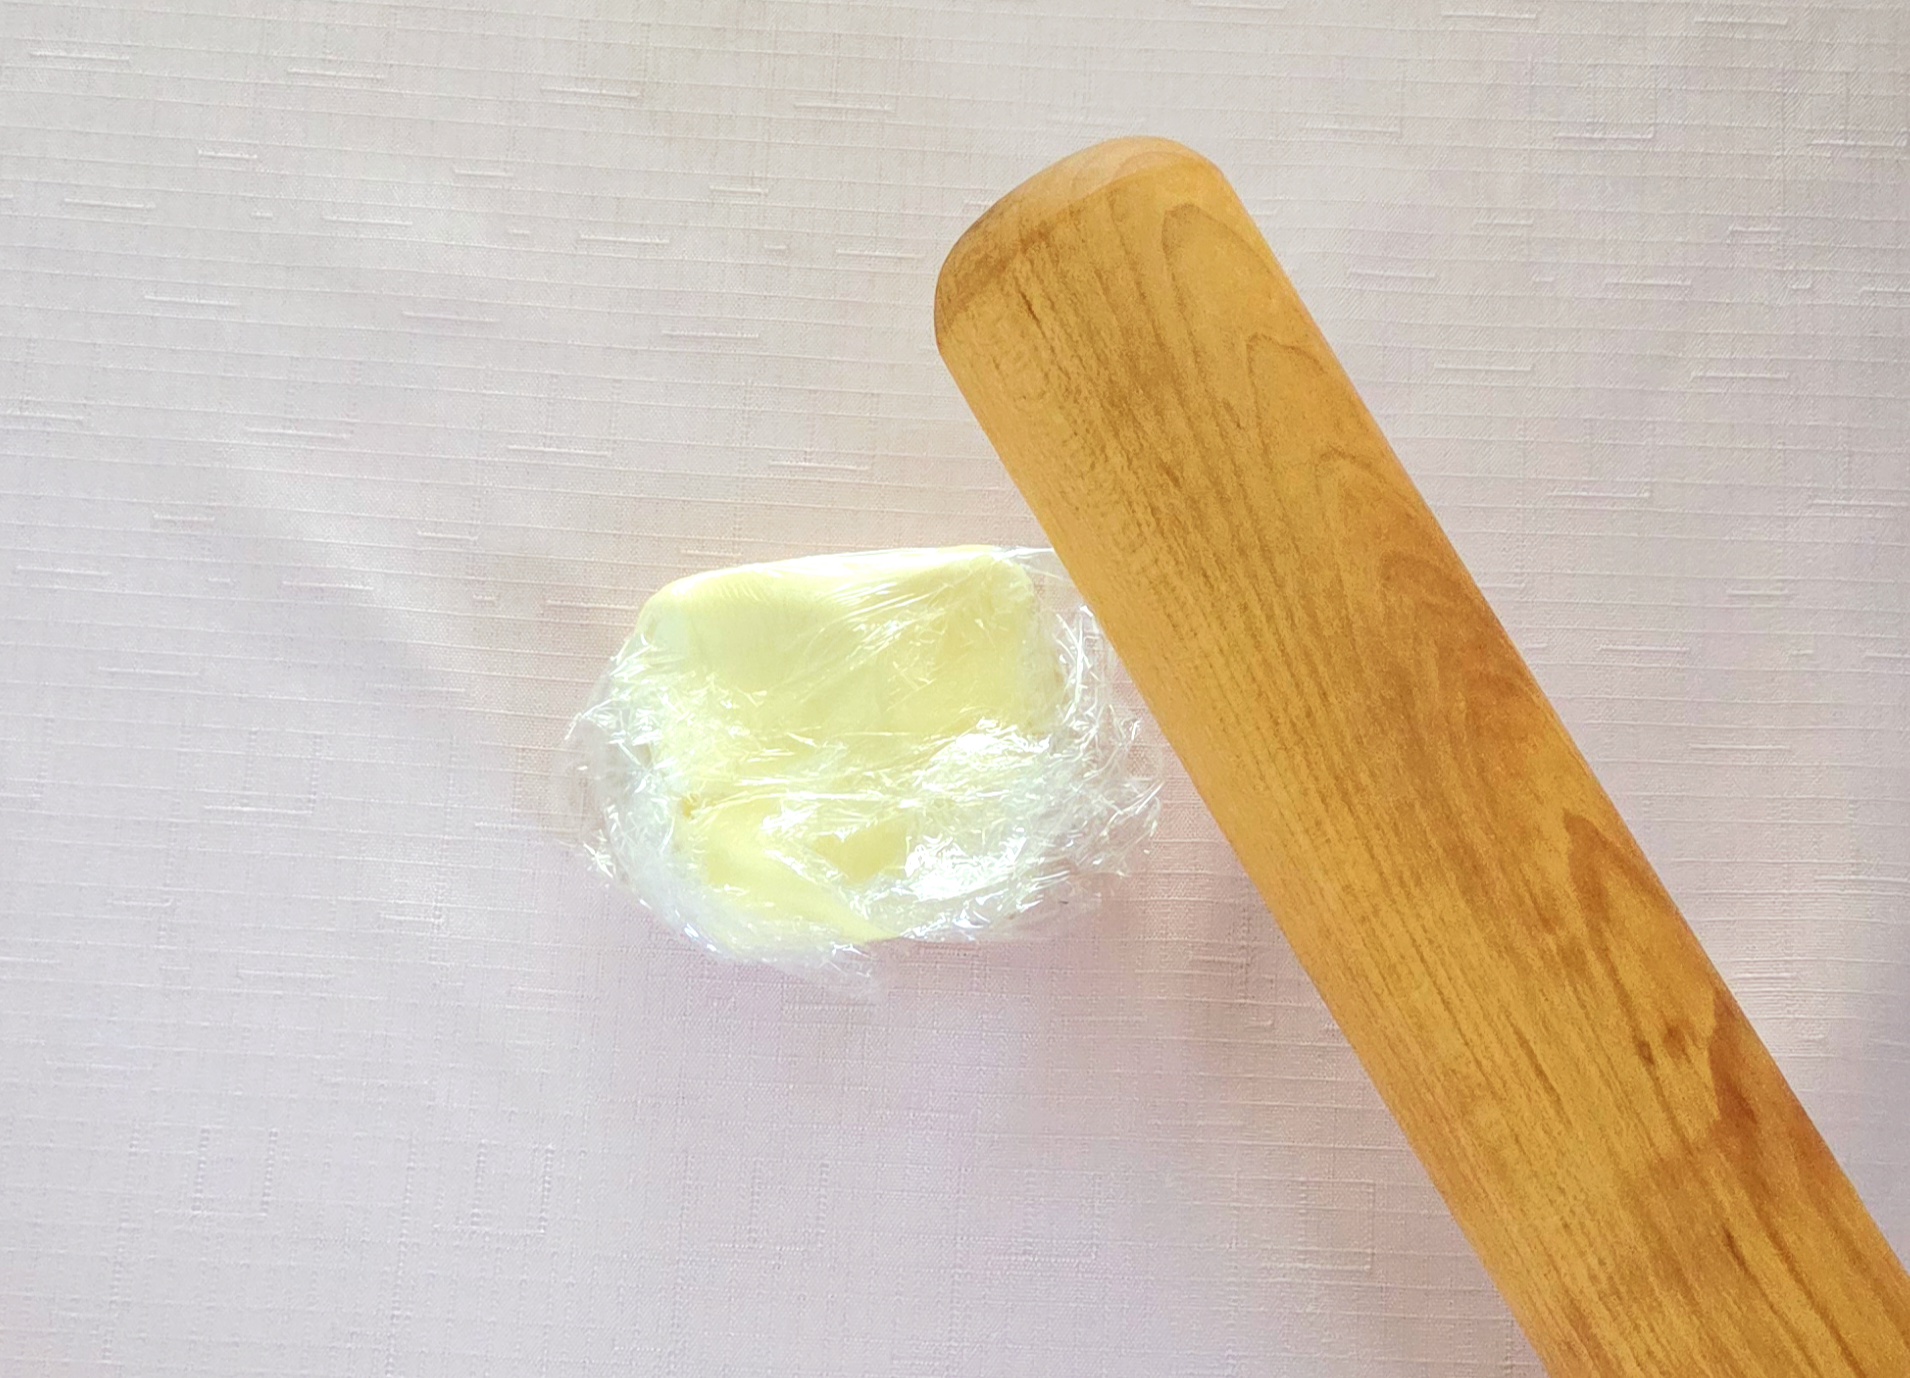
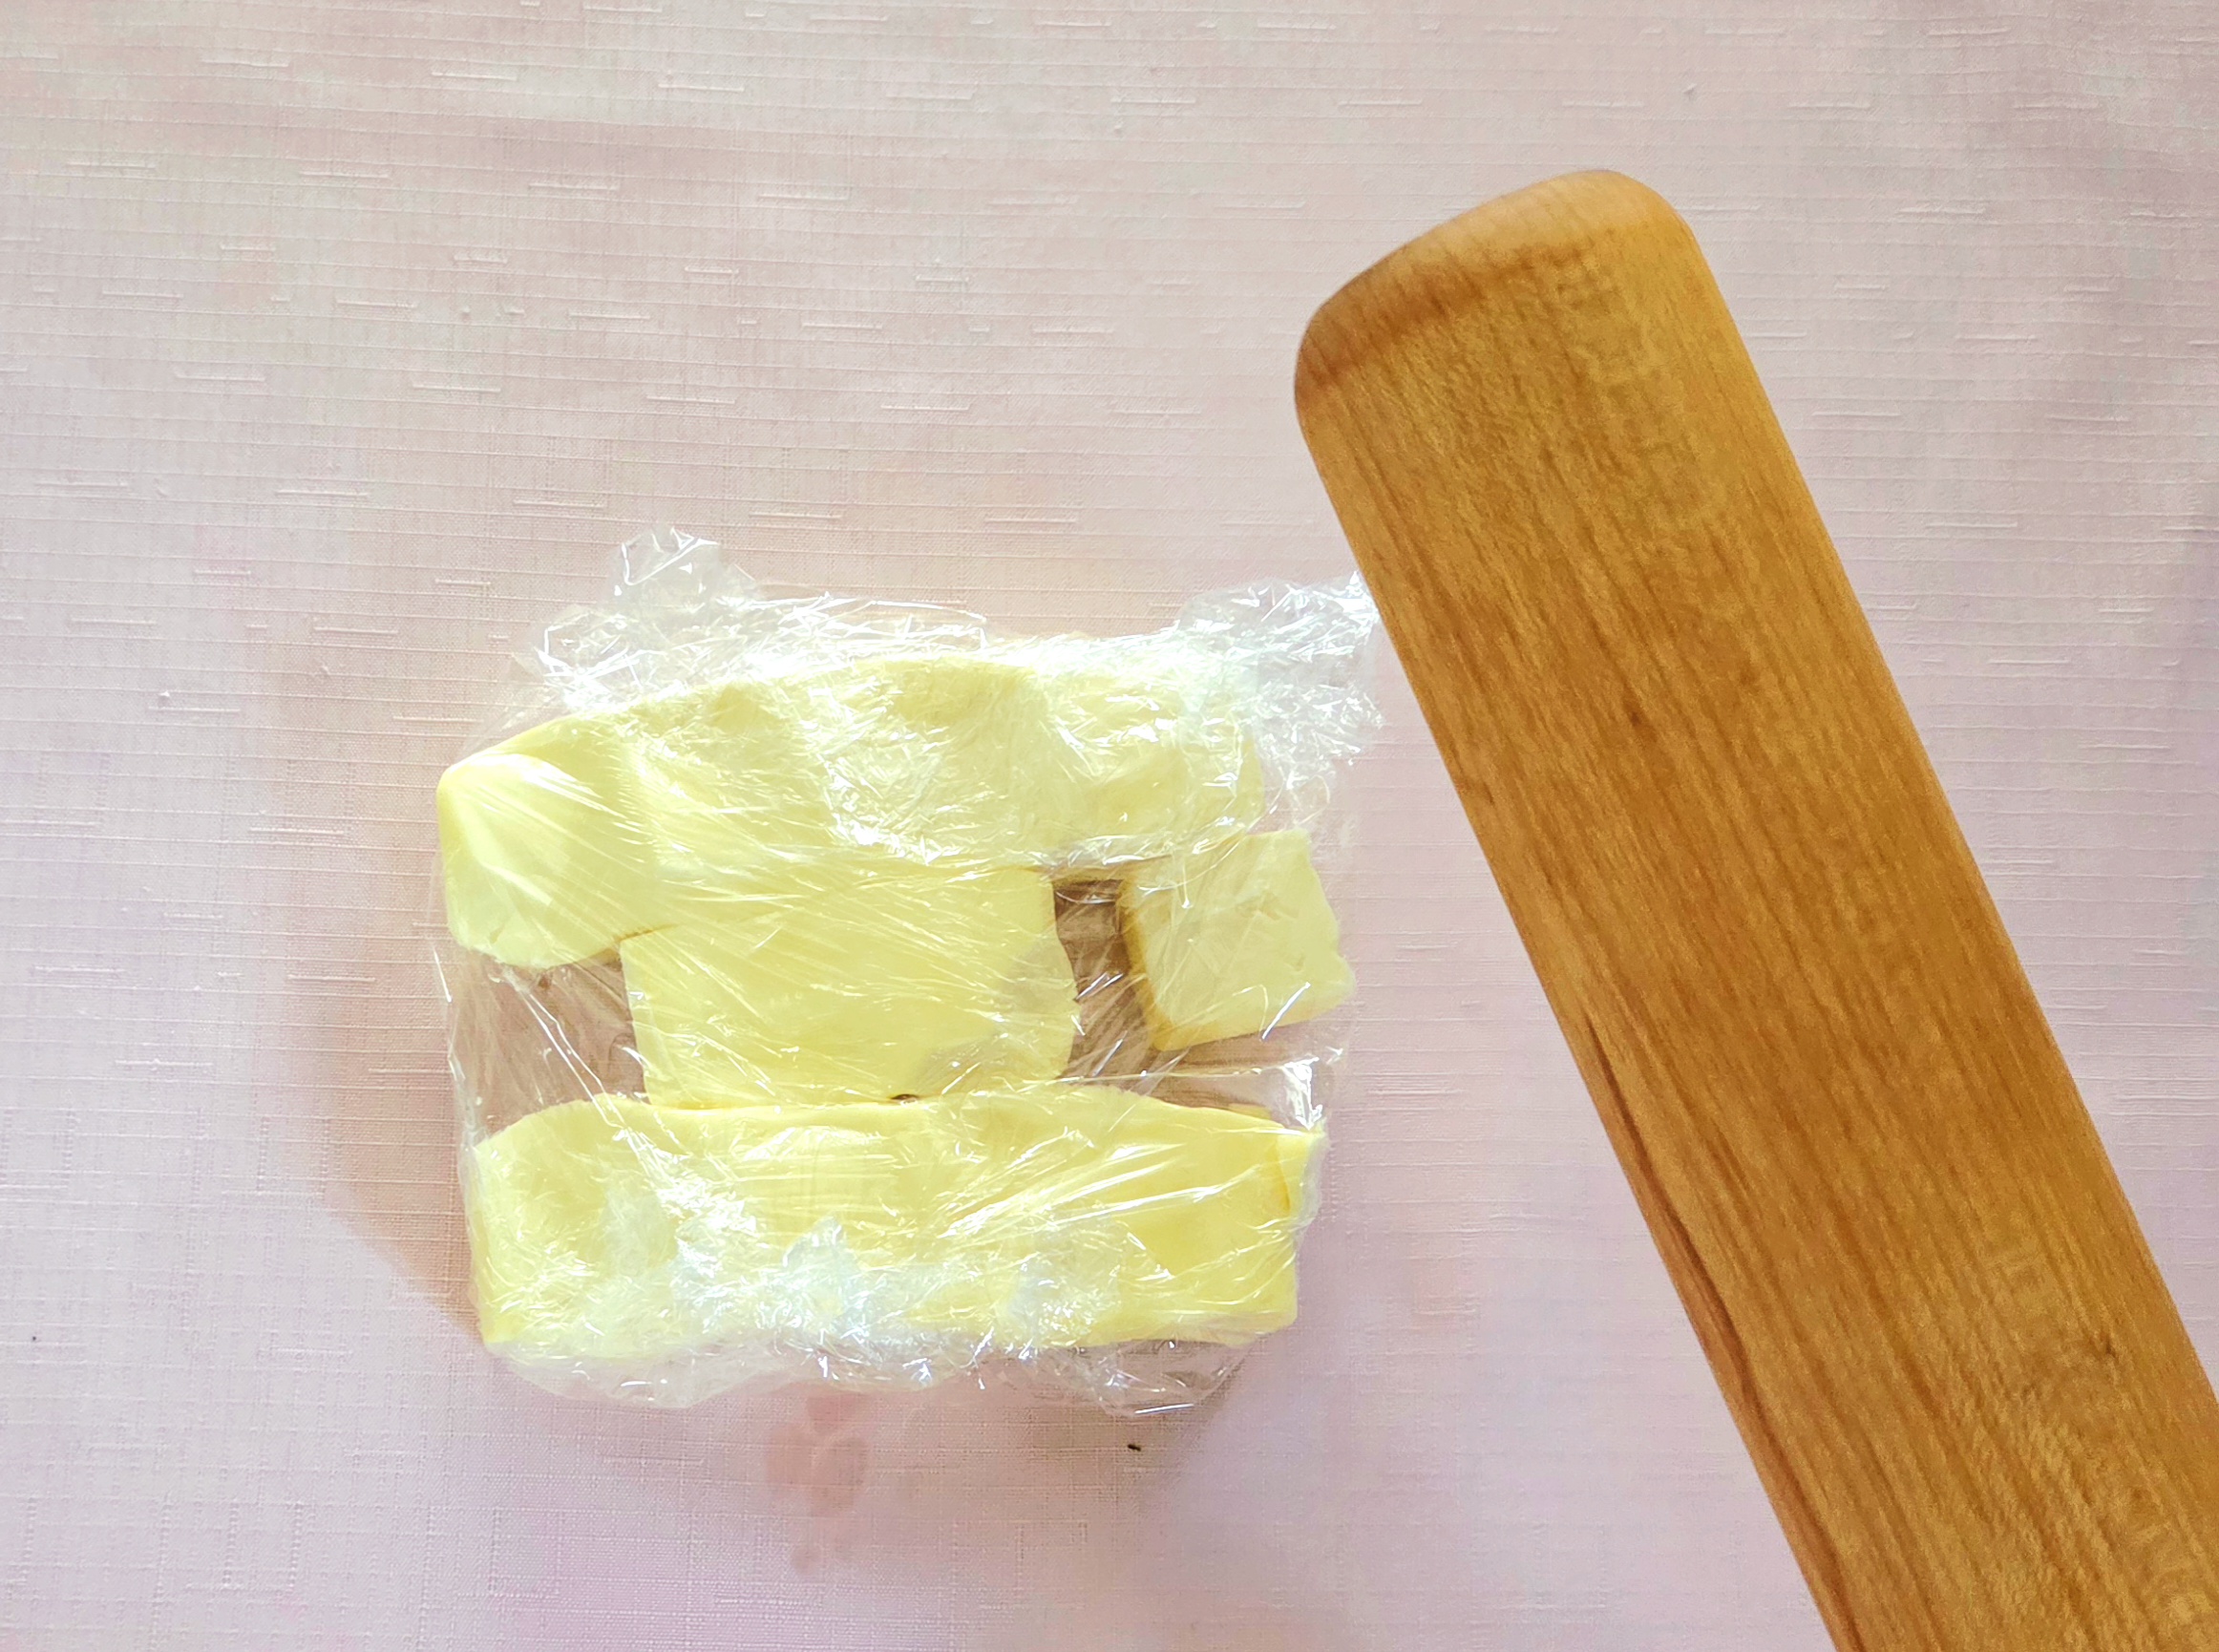
Take the 3 Tablespoons of butter and gently wrap it entirely in plastic (you could also place it in a small zip-top bag). Take a rolling pin and beat the butter, so it becomes pliable while staying cool. Really wack it. This is where baking gets therapeutic, the perfect healthy place to take out your daily frustrations! Fold the butter over itself a few times in between pounding it, so the whole thing softens.
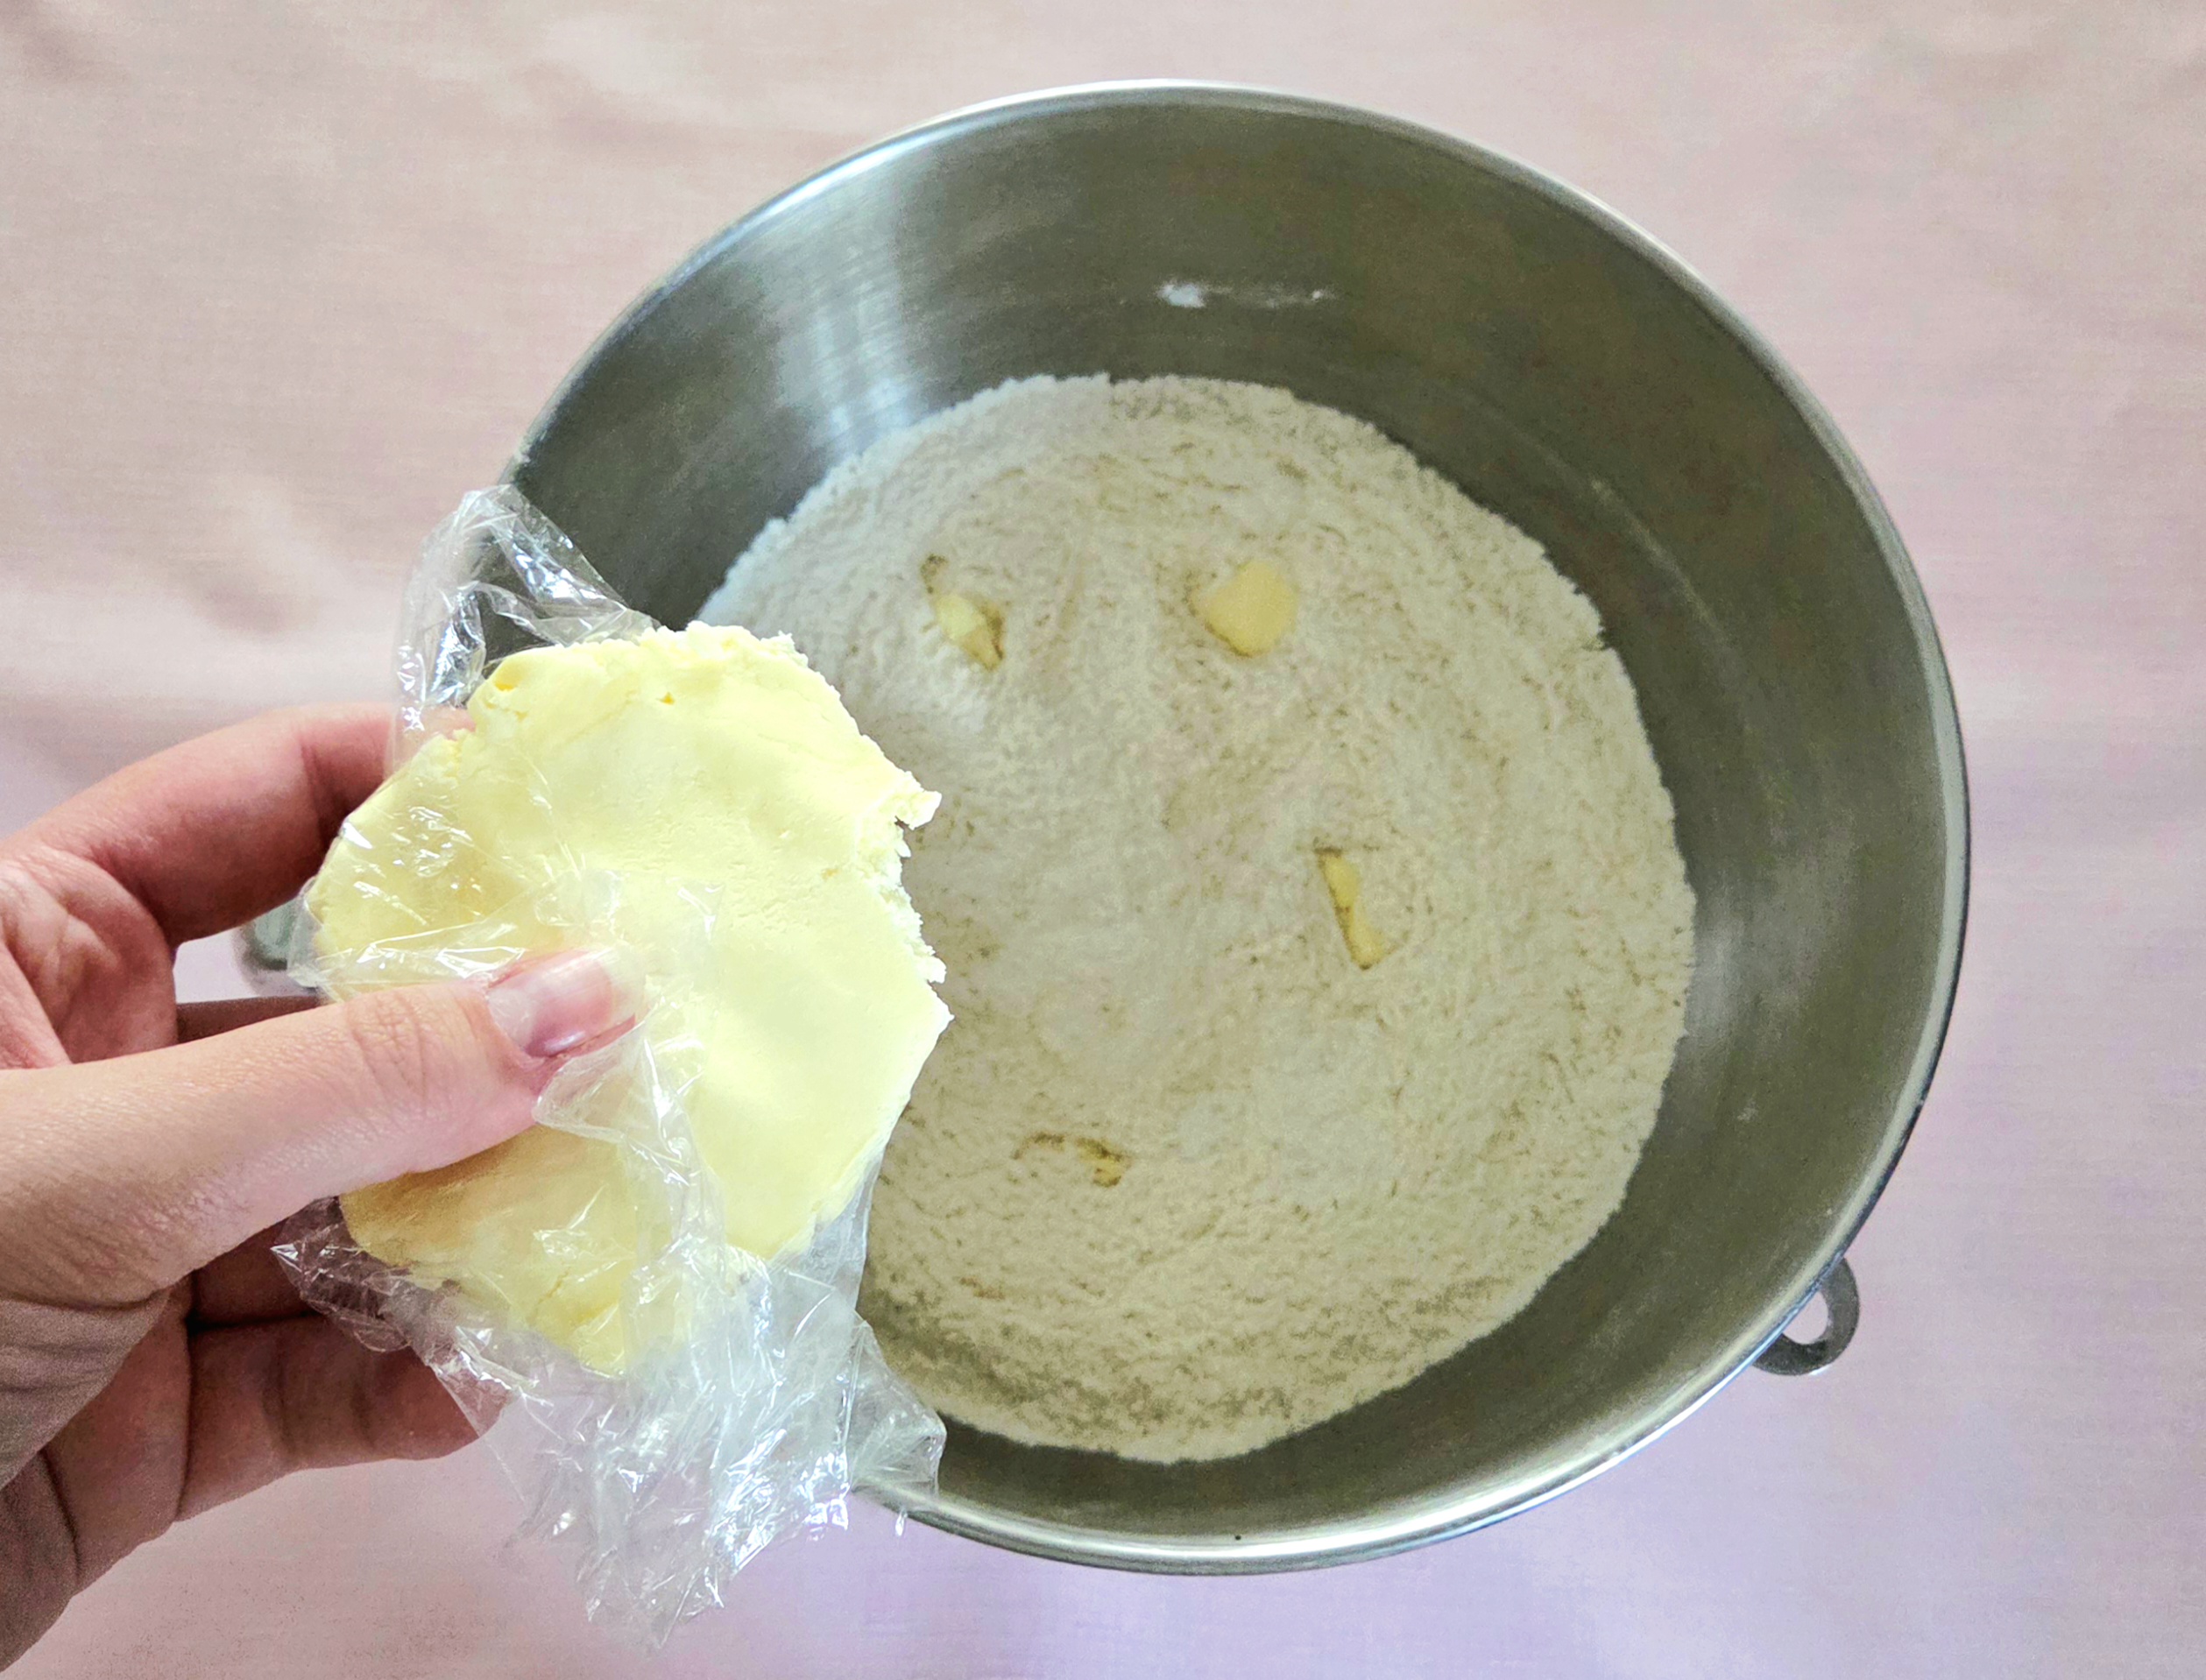
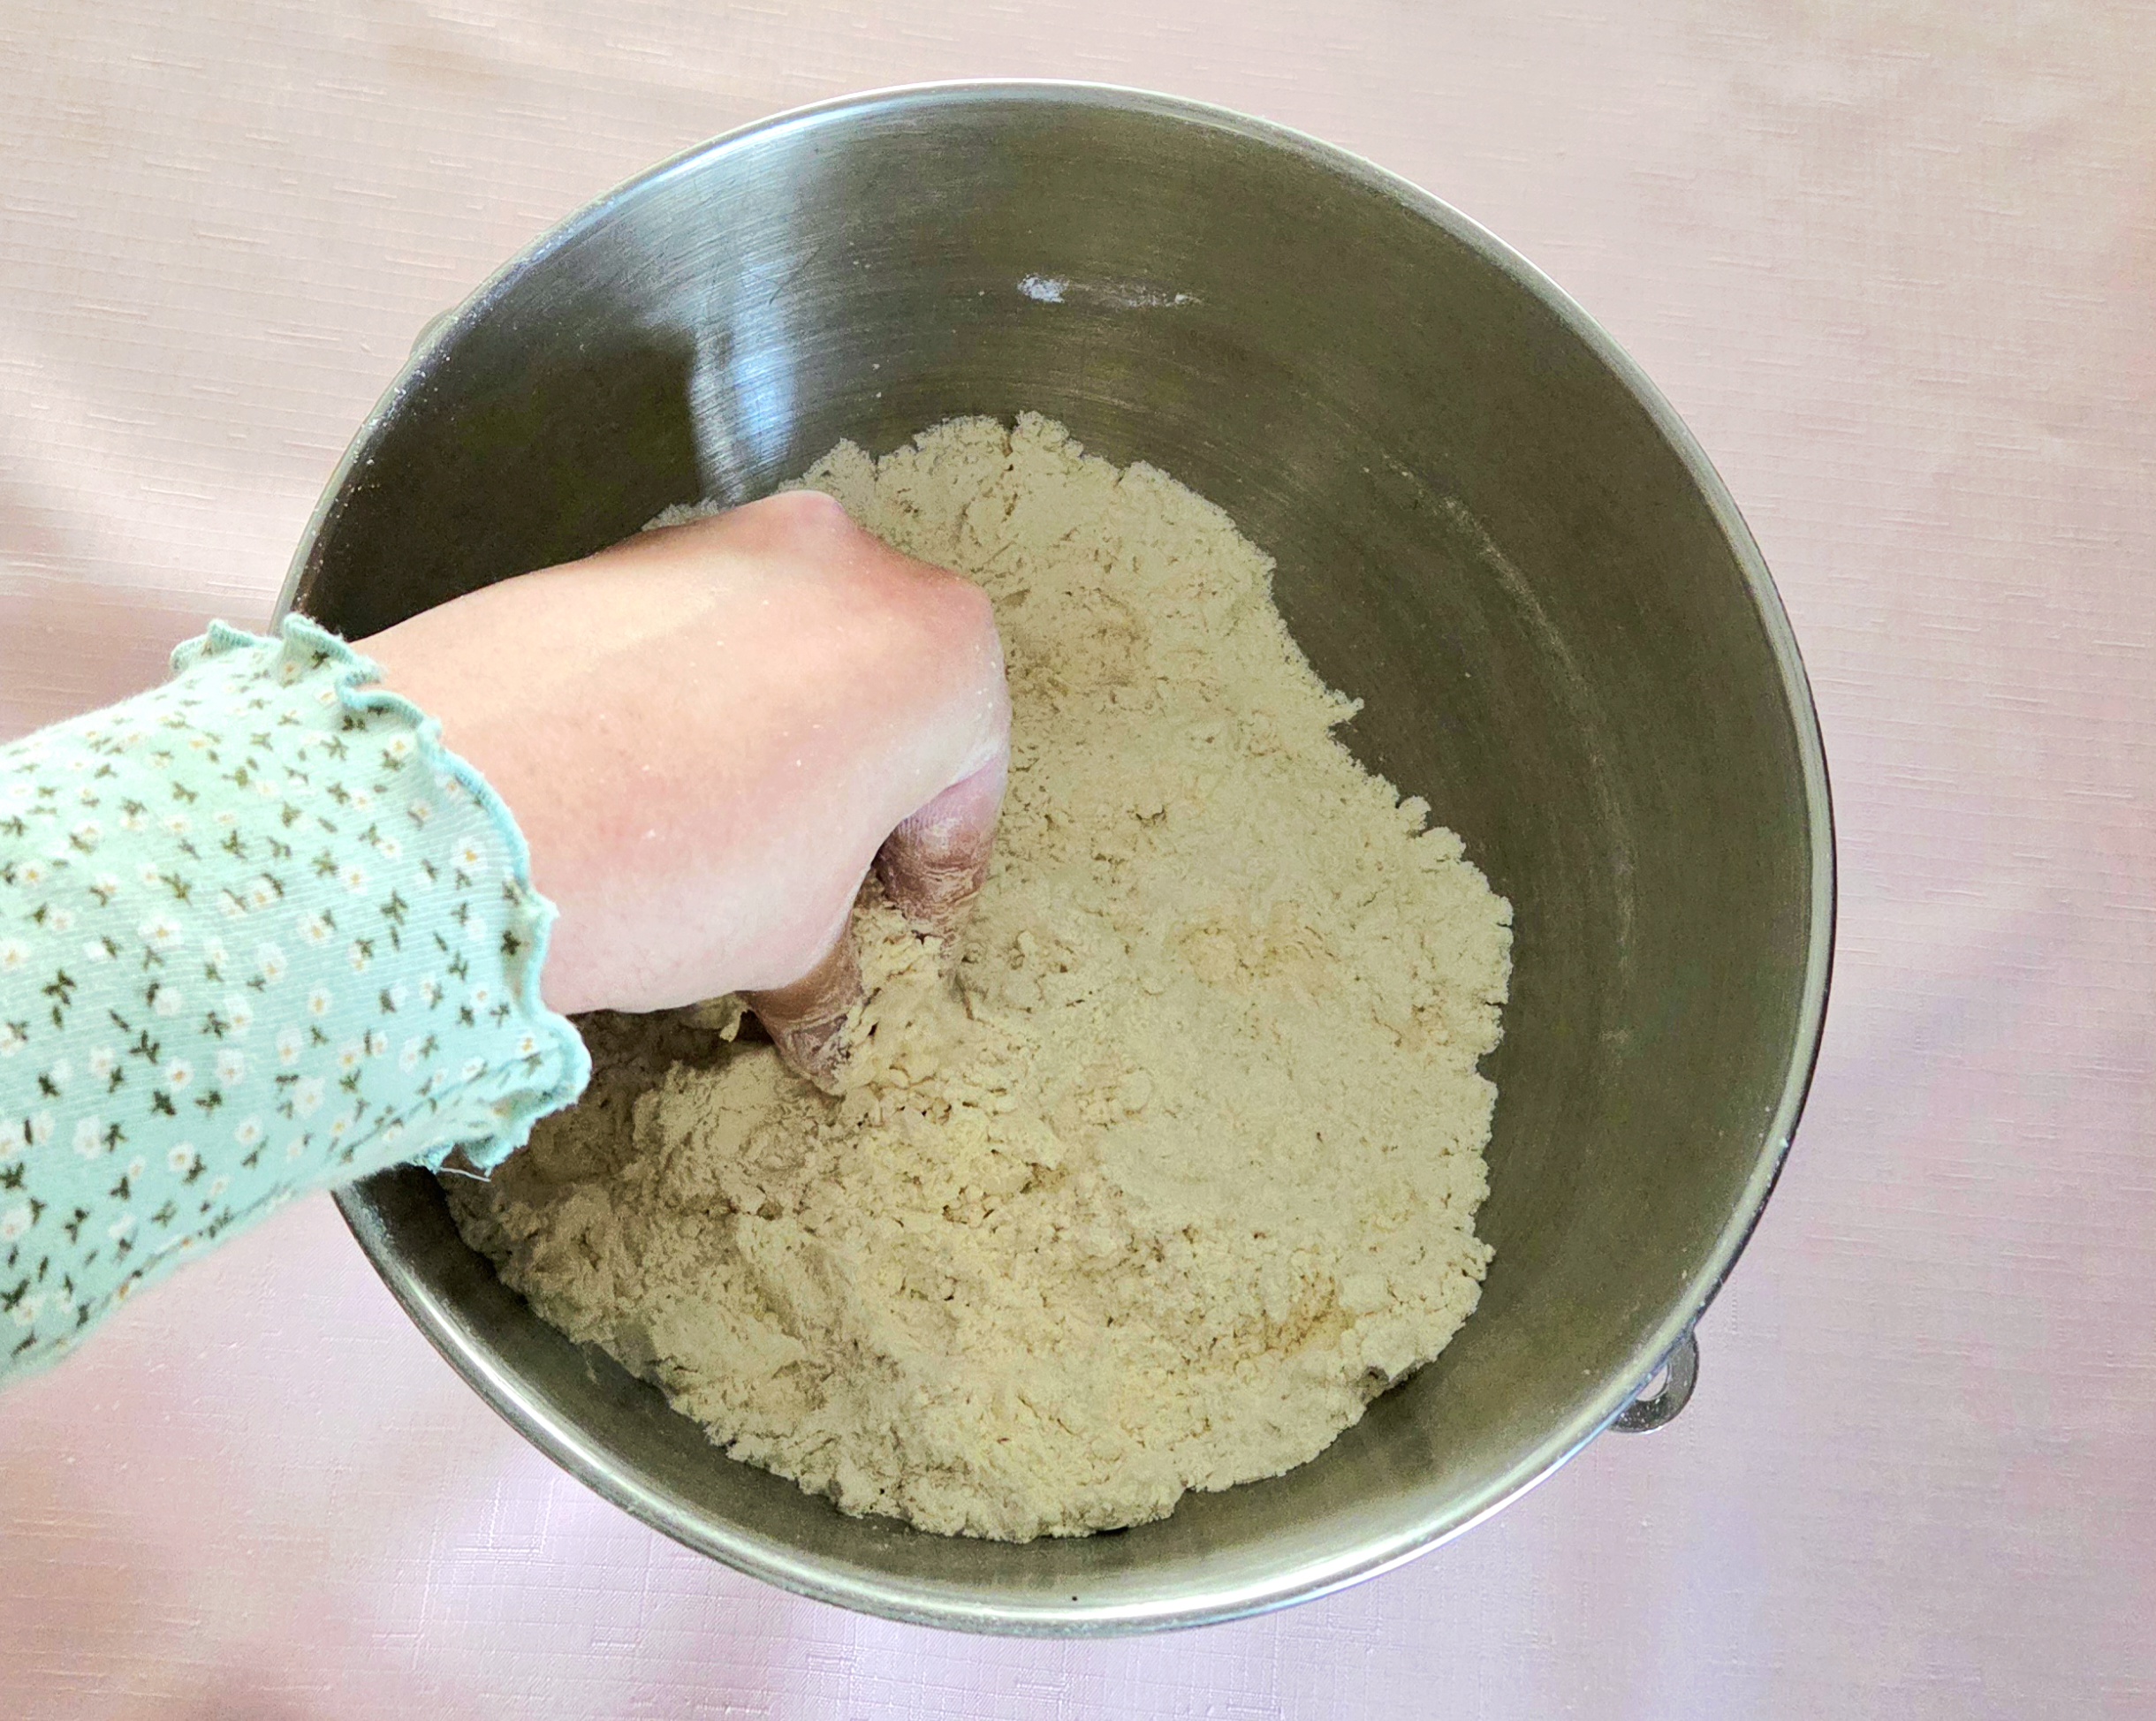
Pinch off pieces of the butter and drop them into the dry goods. Using the tips of your fingers, massage the butter into the flour until it’s been completely incorporated. The goal is to keep the butter as cool as you can, so do the best you can to stick to the tips of your fingers as you work the two together. The flour mixture should have a sandy texture when you’ve finished. Set this aside.
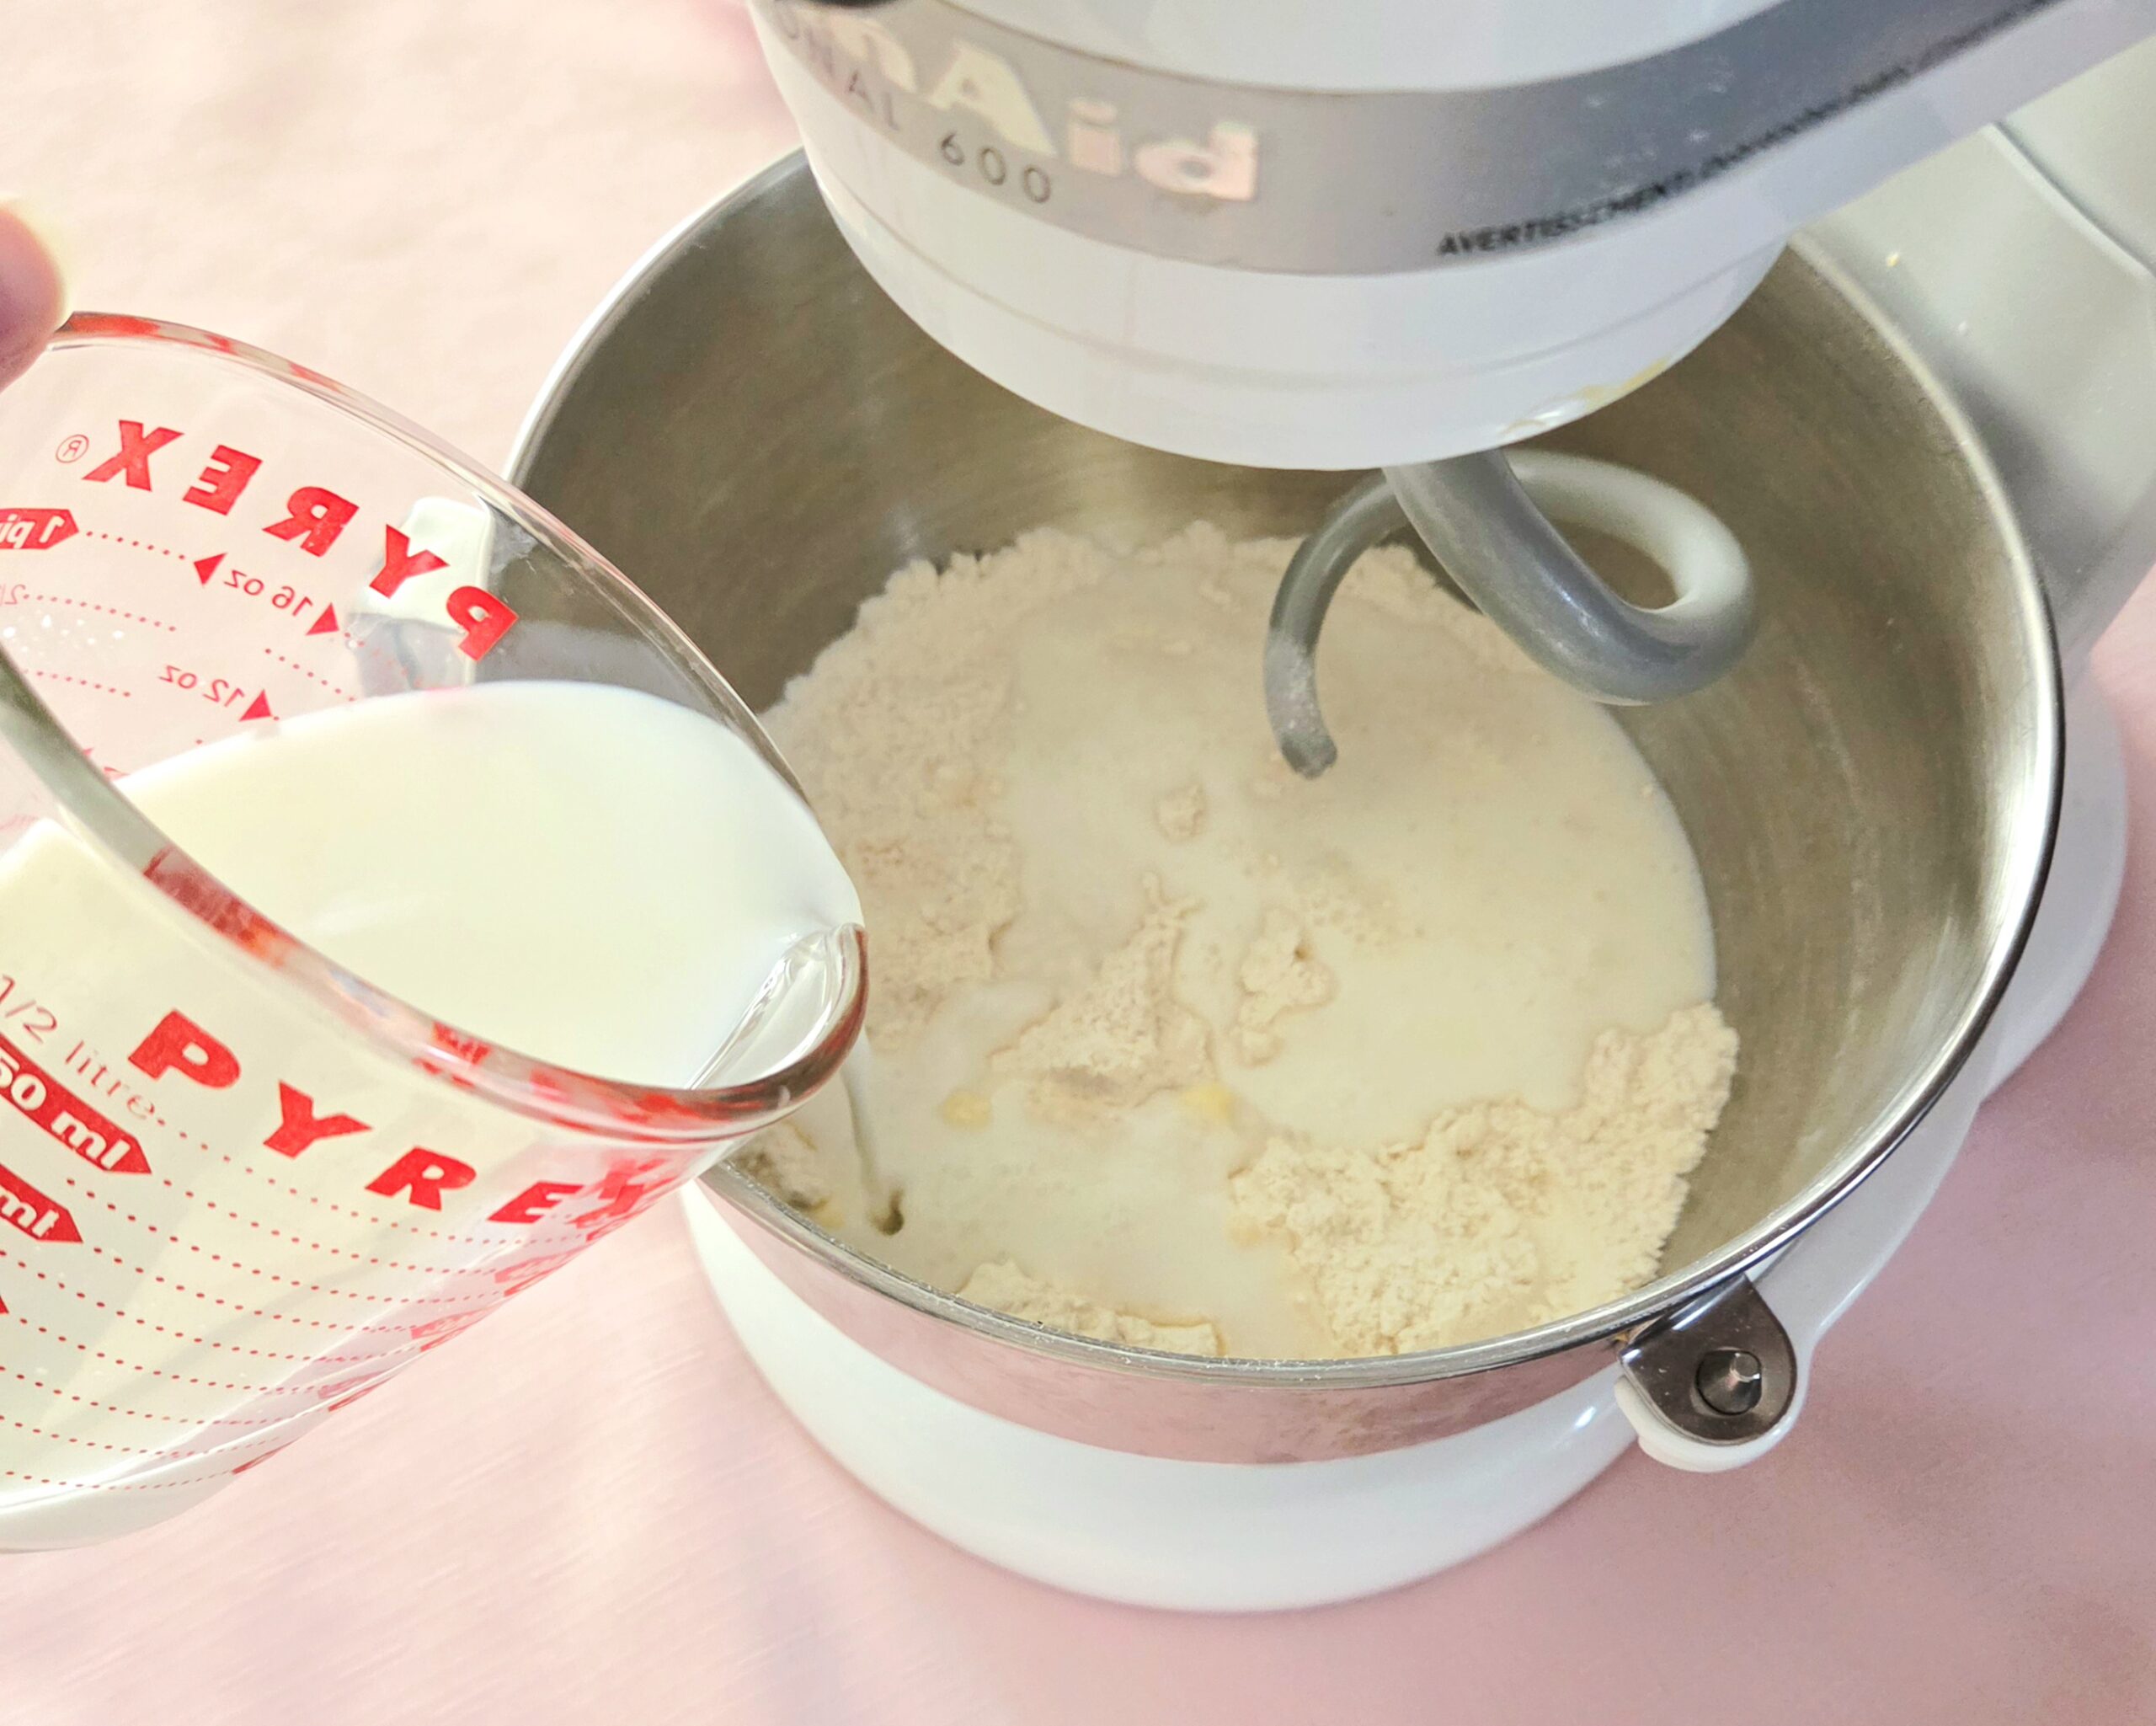
Warm the milk and water together until it’s just warm to the touch, or between 100-110 degrees F. This can be done either in the microwave or on the stovetop. Be sure to stir every so often, to evenly distribute the heat. Pour the liquids into the flour mixture and turn the mixer to level 2 for 5 minutes.
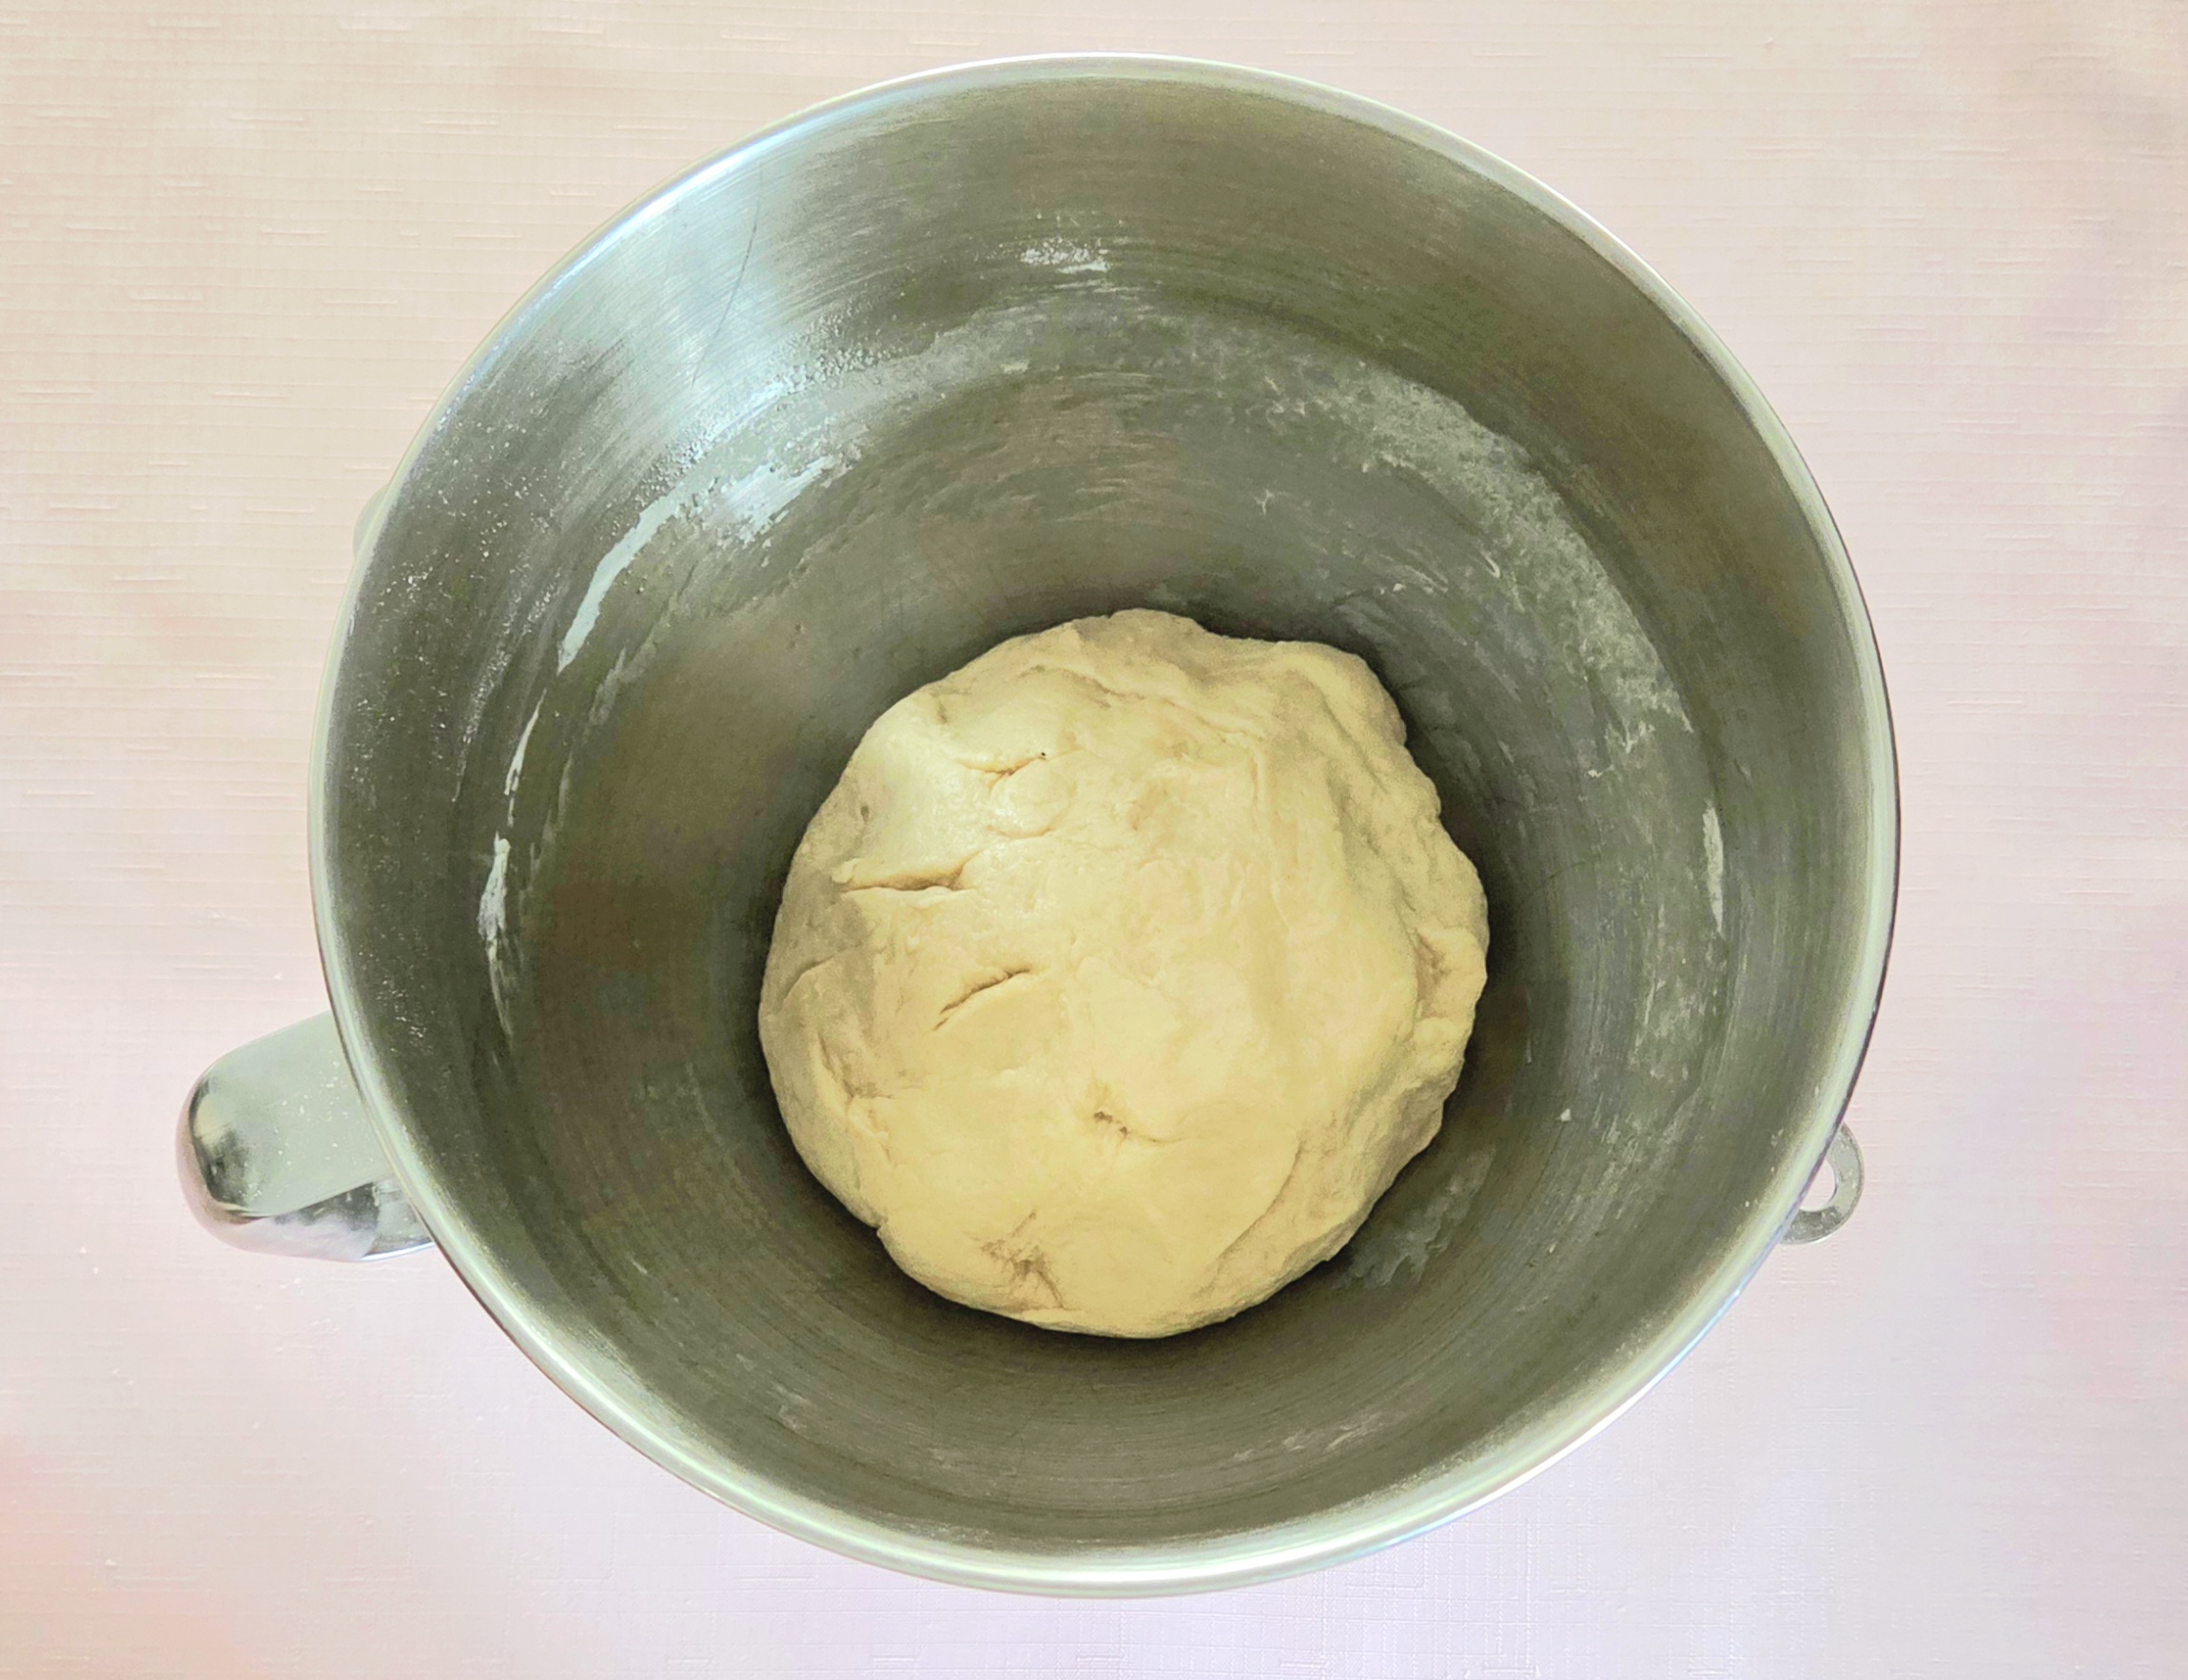
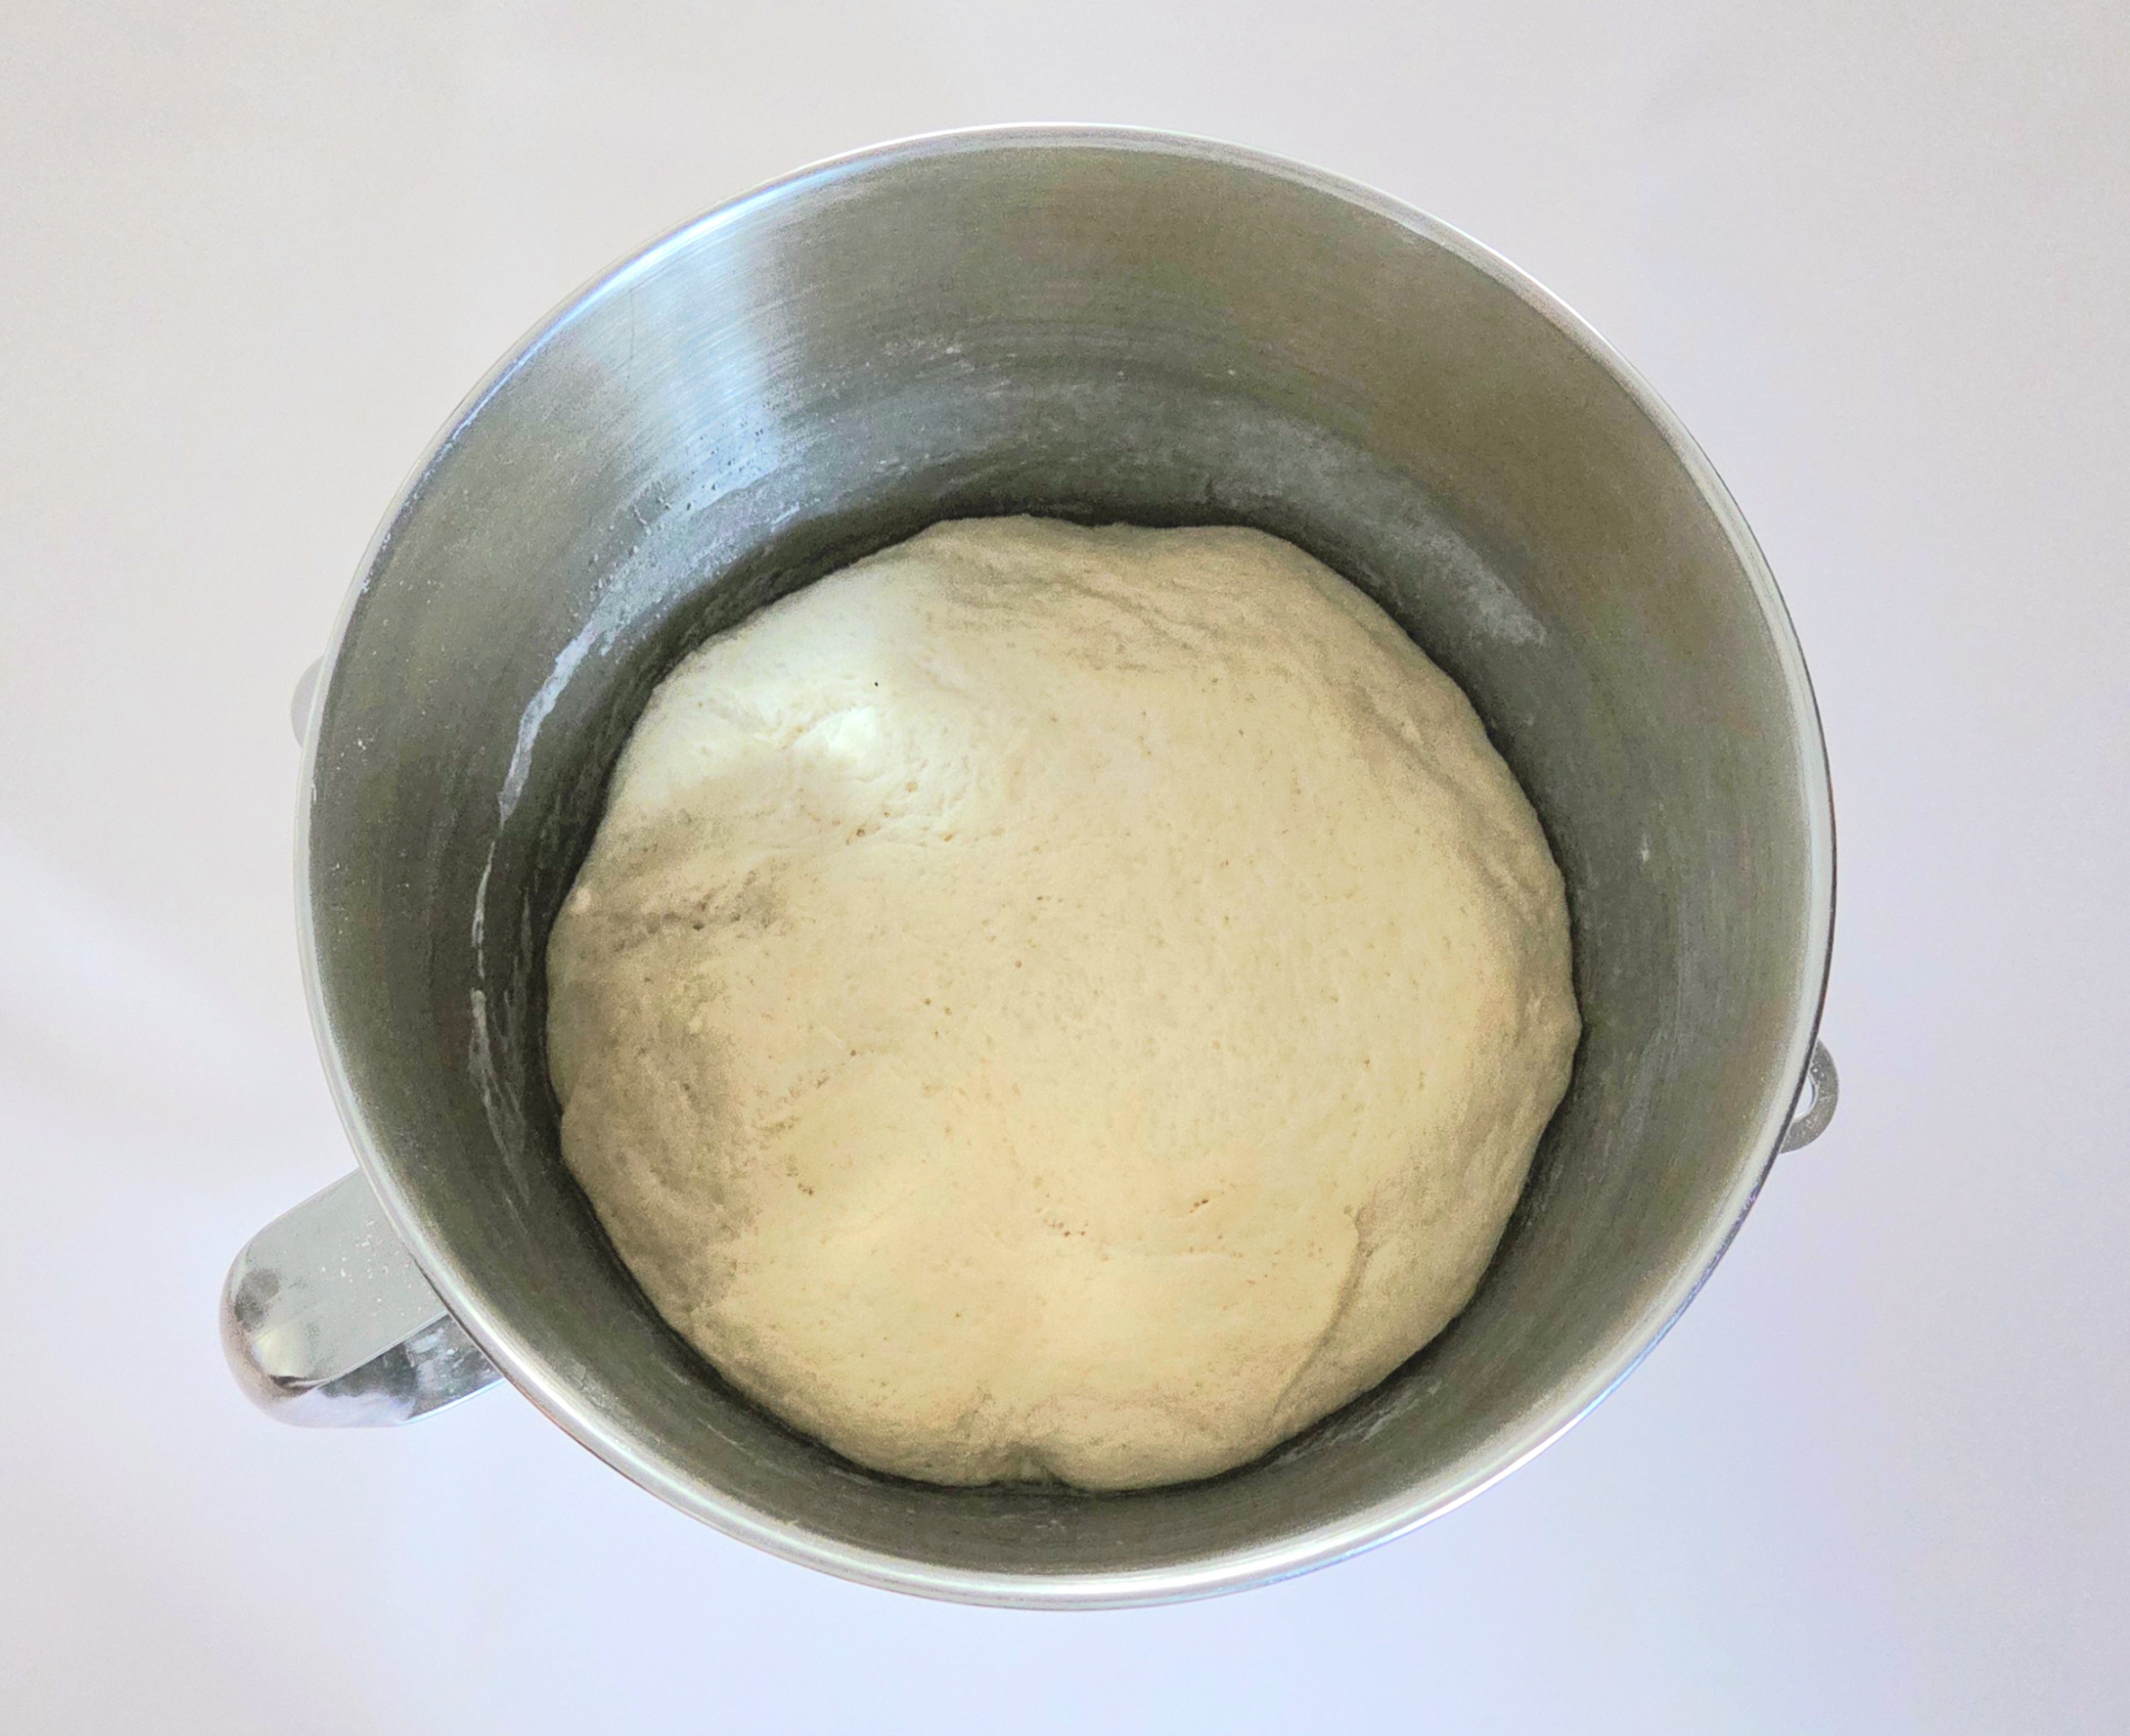
Temporarily place the completed dough onto a clean counter and lightly grease the inside of the mixer bowl with a neutral oil, such as vegetable or canola. Ball the dough and place it into the greased bowl, turning it several times to coat it lightly in oil. Cover the top of the bowl in plastic wrap and place it in a turned-off oven for 1-2 hours, or until doubled in size.
The Butter
While the dough proofs, prepare the butter slab, or beurrage. Take the remaining 21 Tablespoons of butter and wrap them in plastic, or place in a zip-top bag. Using a rolling pin, beat the butter the same way as you did the smaller amount. It will take some time and elbow grease, but just picture your infuriating boss or nosy sister. Whatever inspiration you need to really go at it.
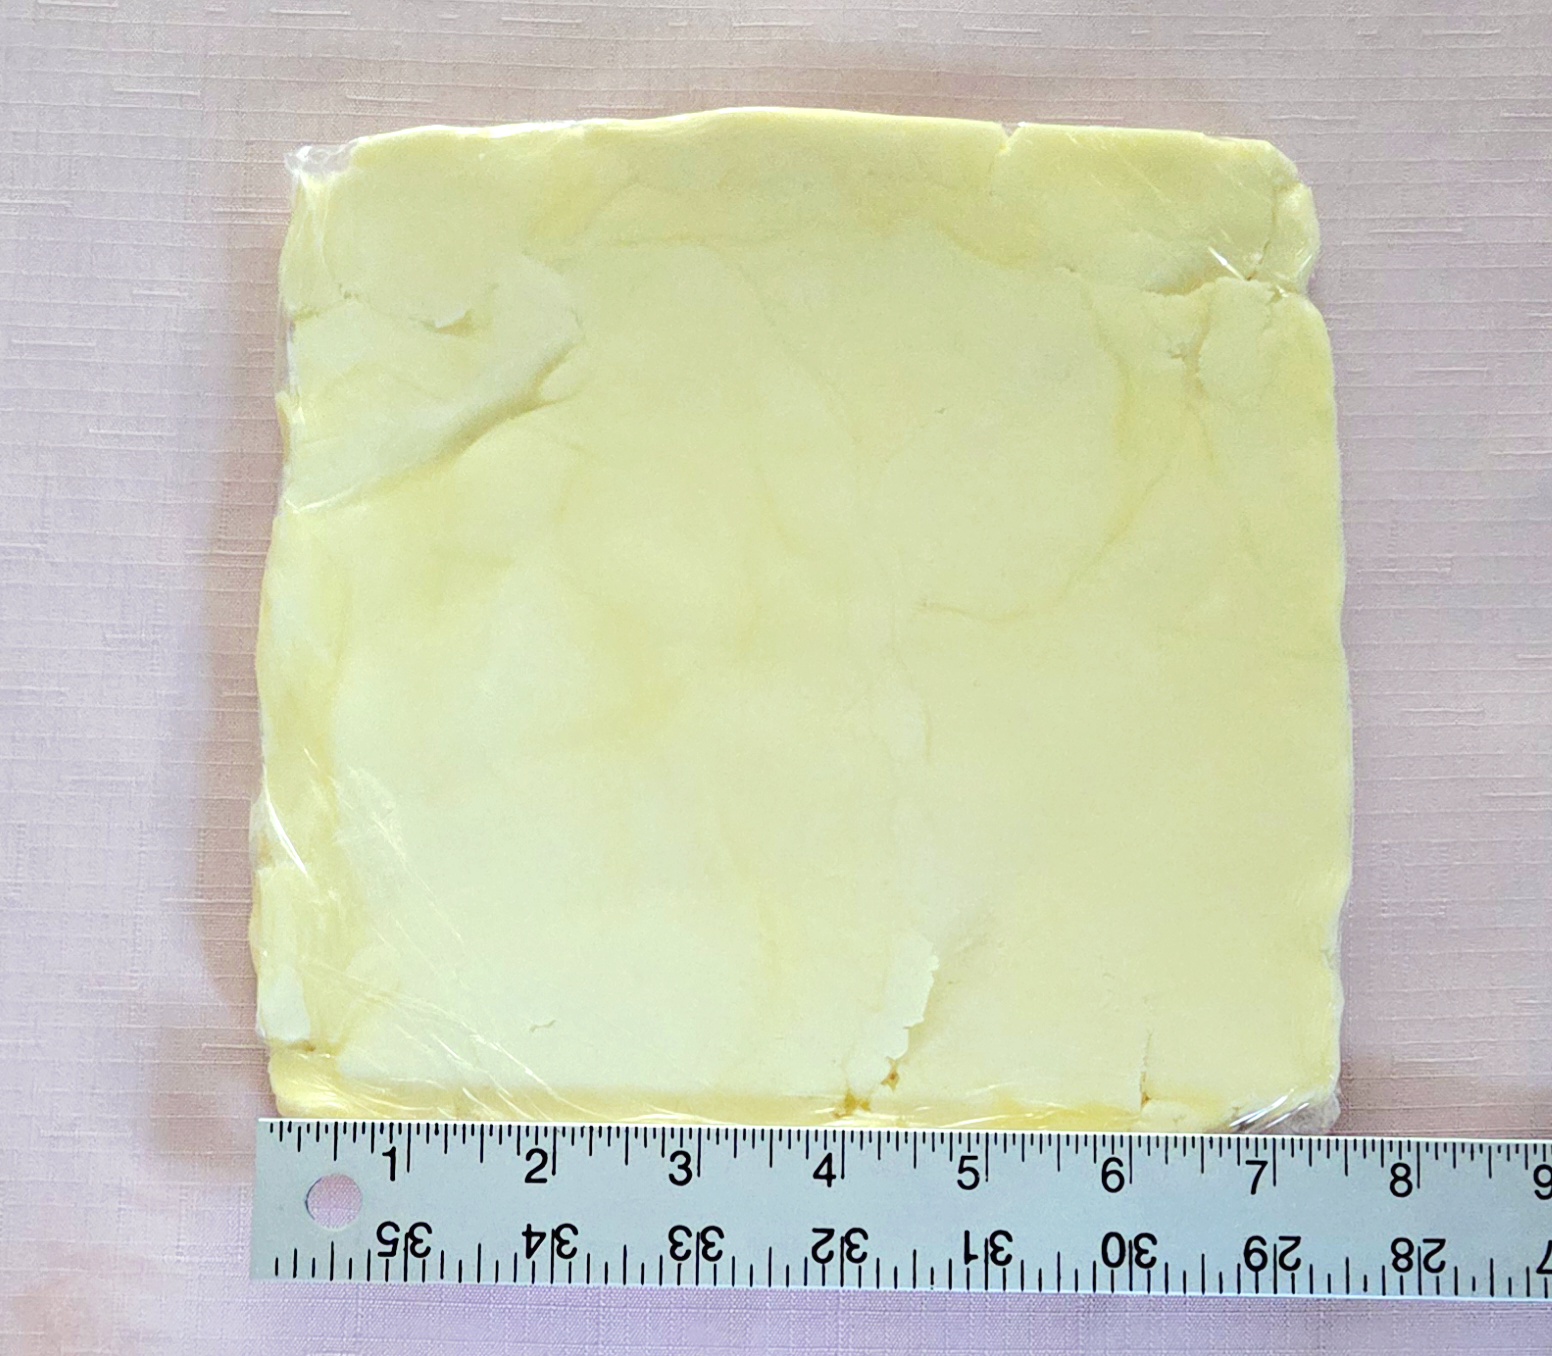
Once the butter is pliable, roll the butter out to an approximately 7 x 7 inch square and wrap it airtight in plastic wrap. Place the beurrage in the fridge until it’s needed.
Lamination
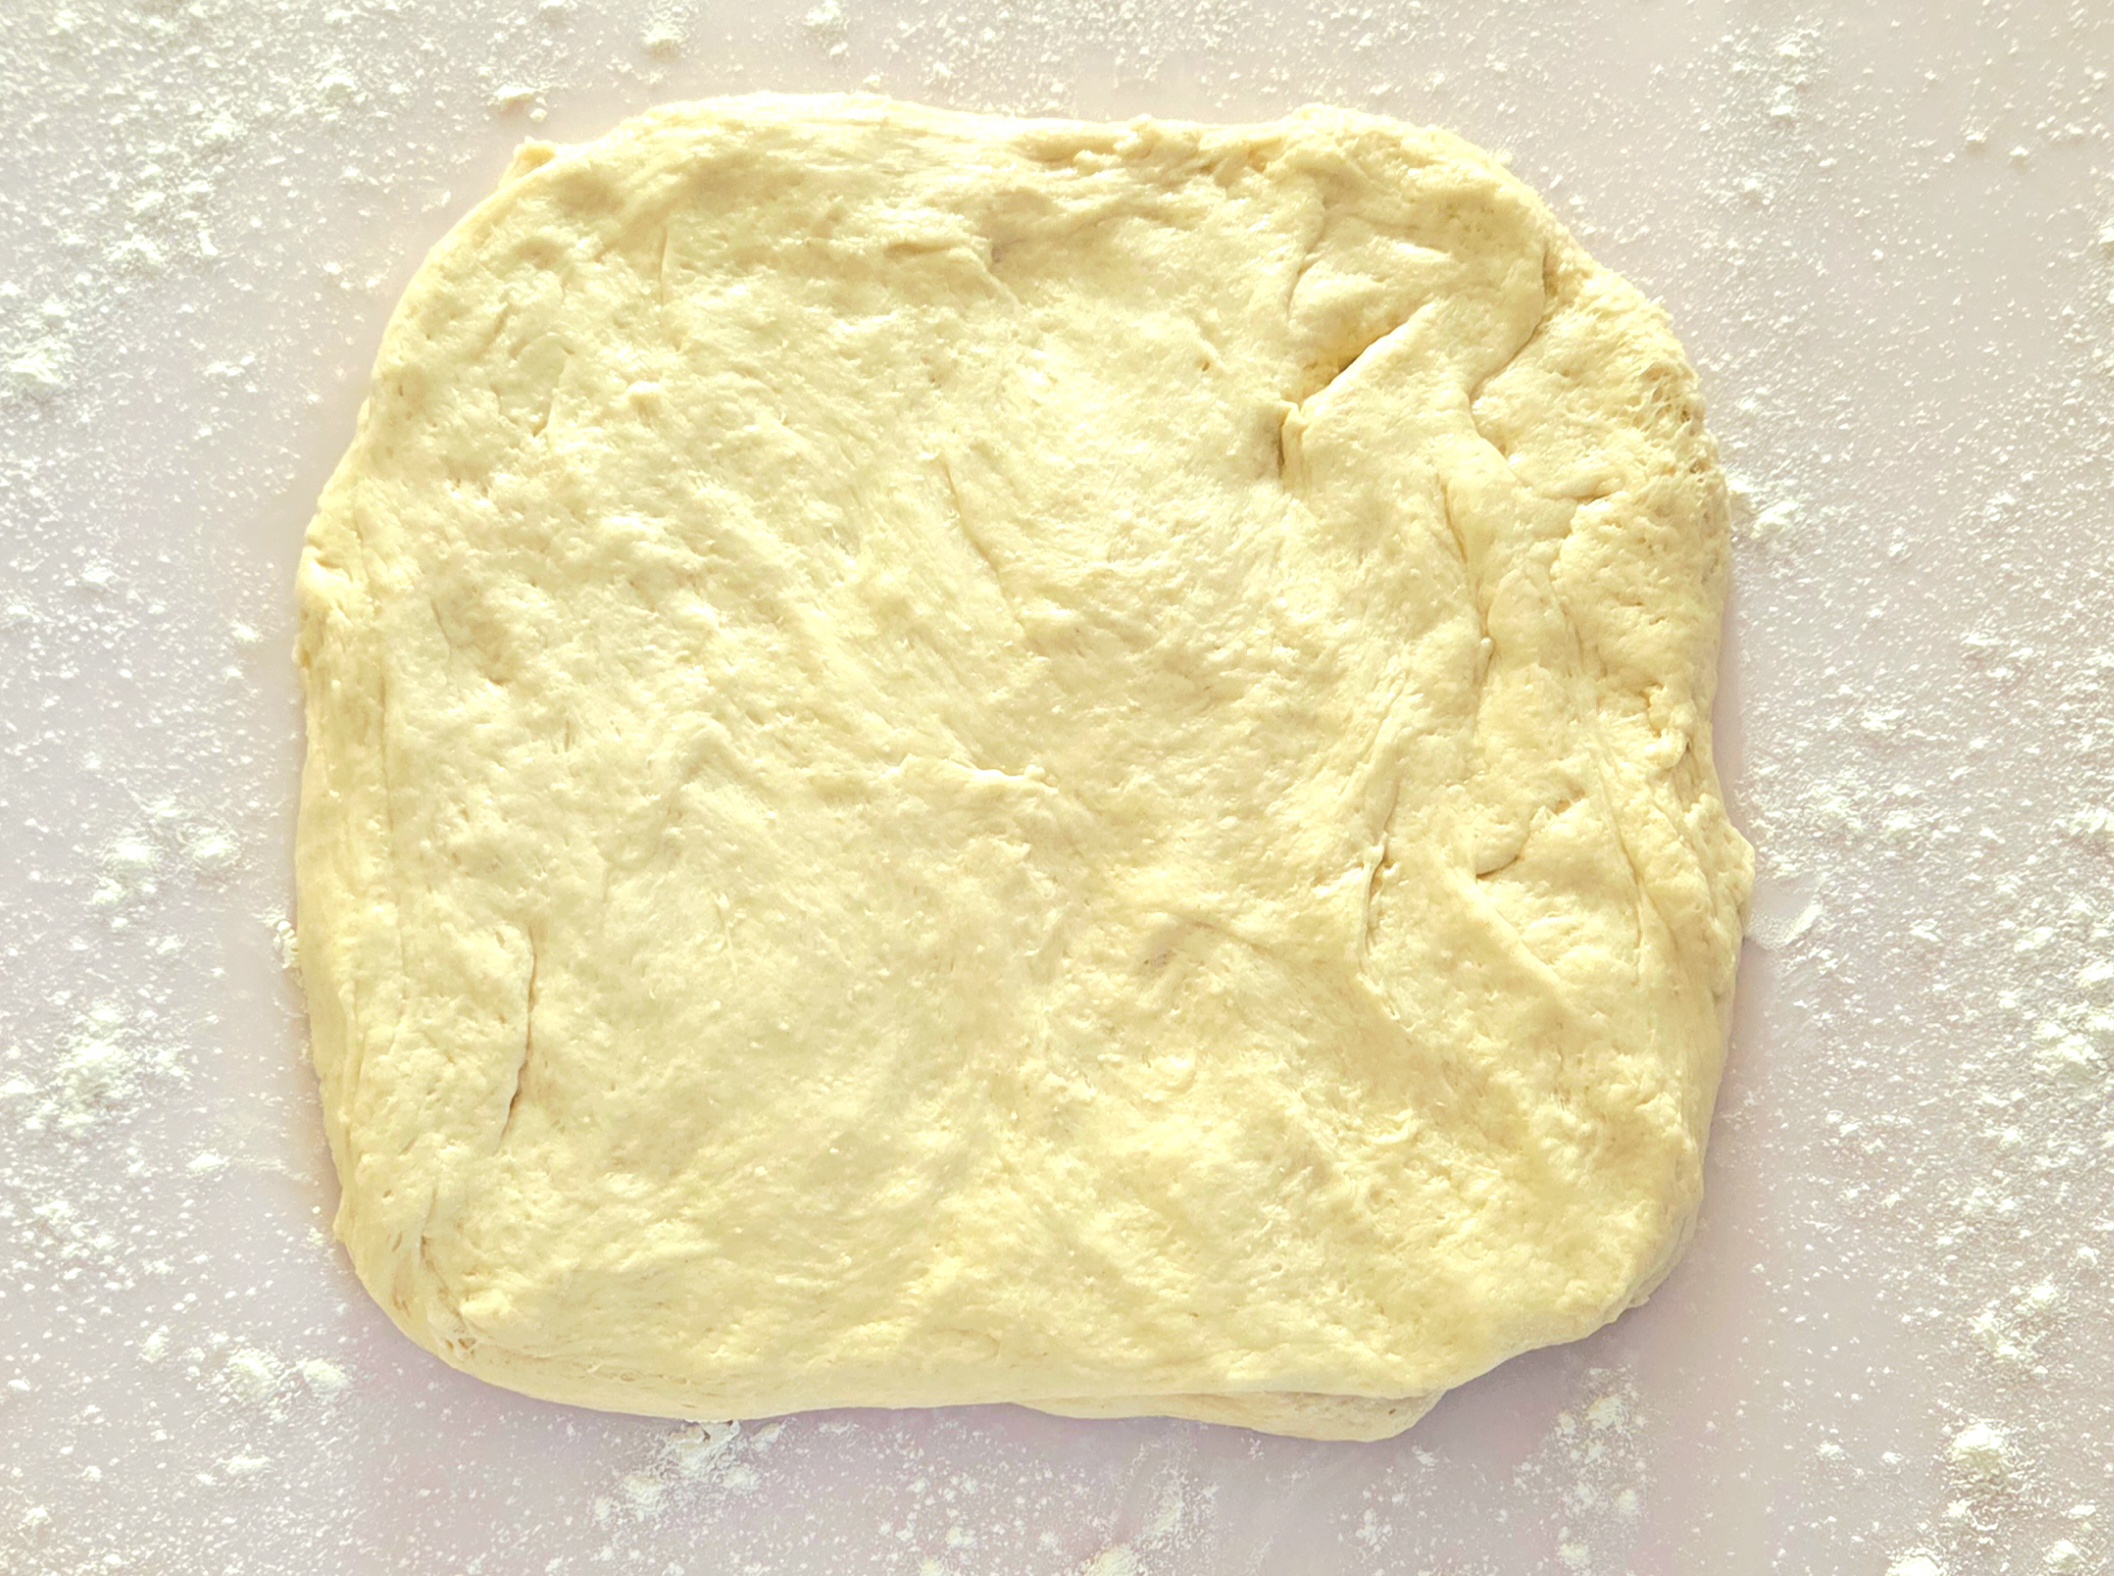
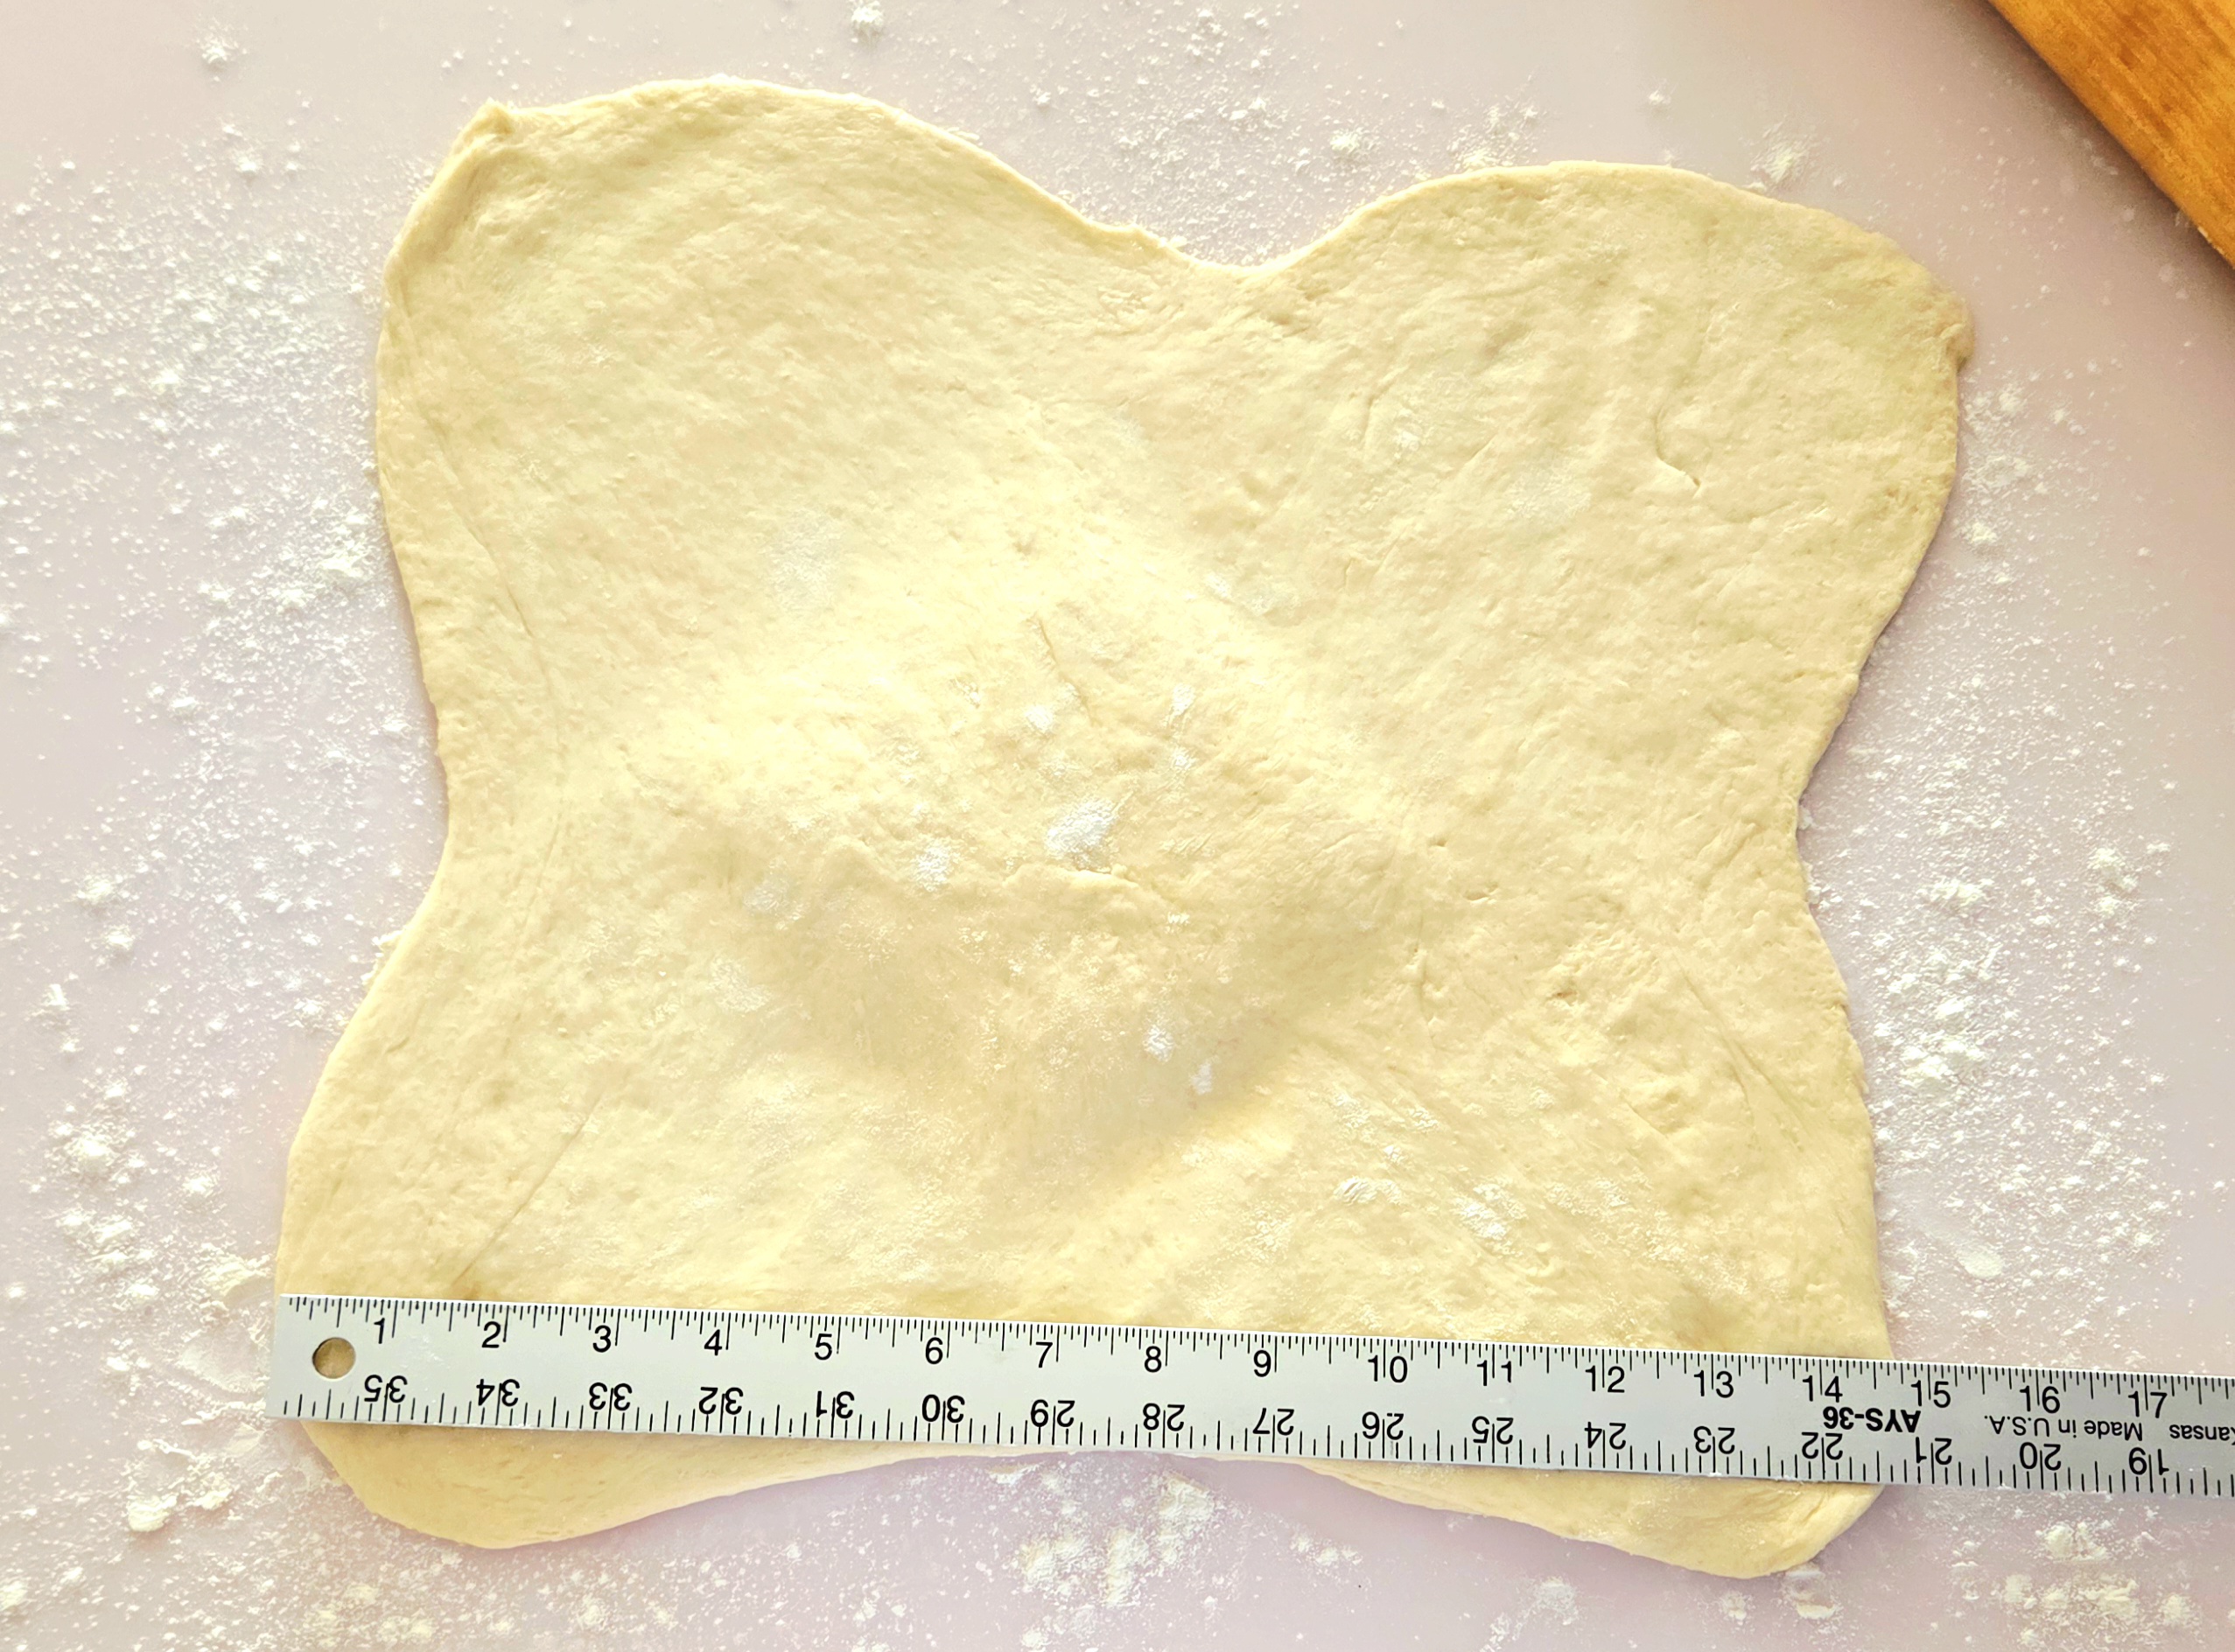
When the dough has finished proofing, dust a clean counter with flour. Place the dough on the flour dusted counter, and sprinkle a bit more flour on top of it. You want just enough flour for it not to stick. With your hands, gently pat the dough into a square.
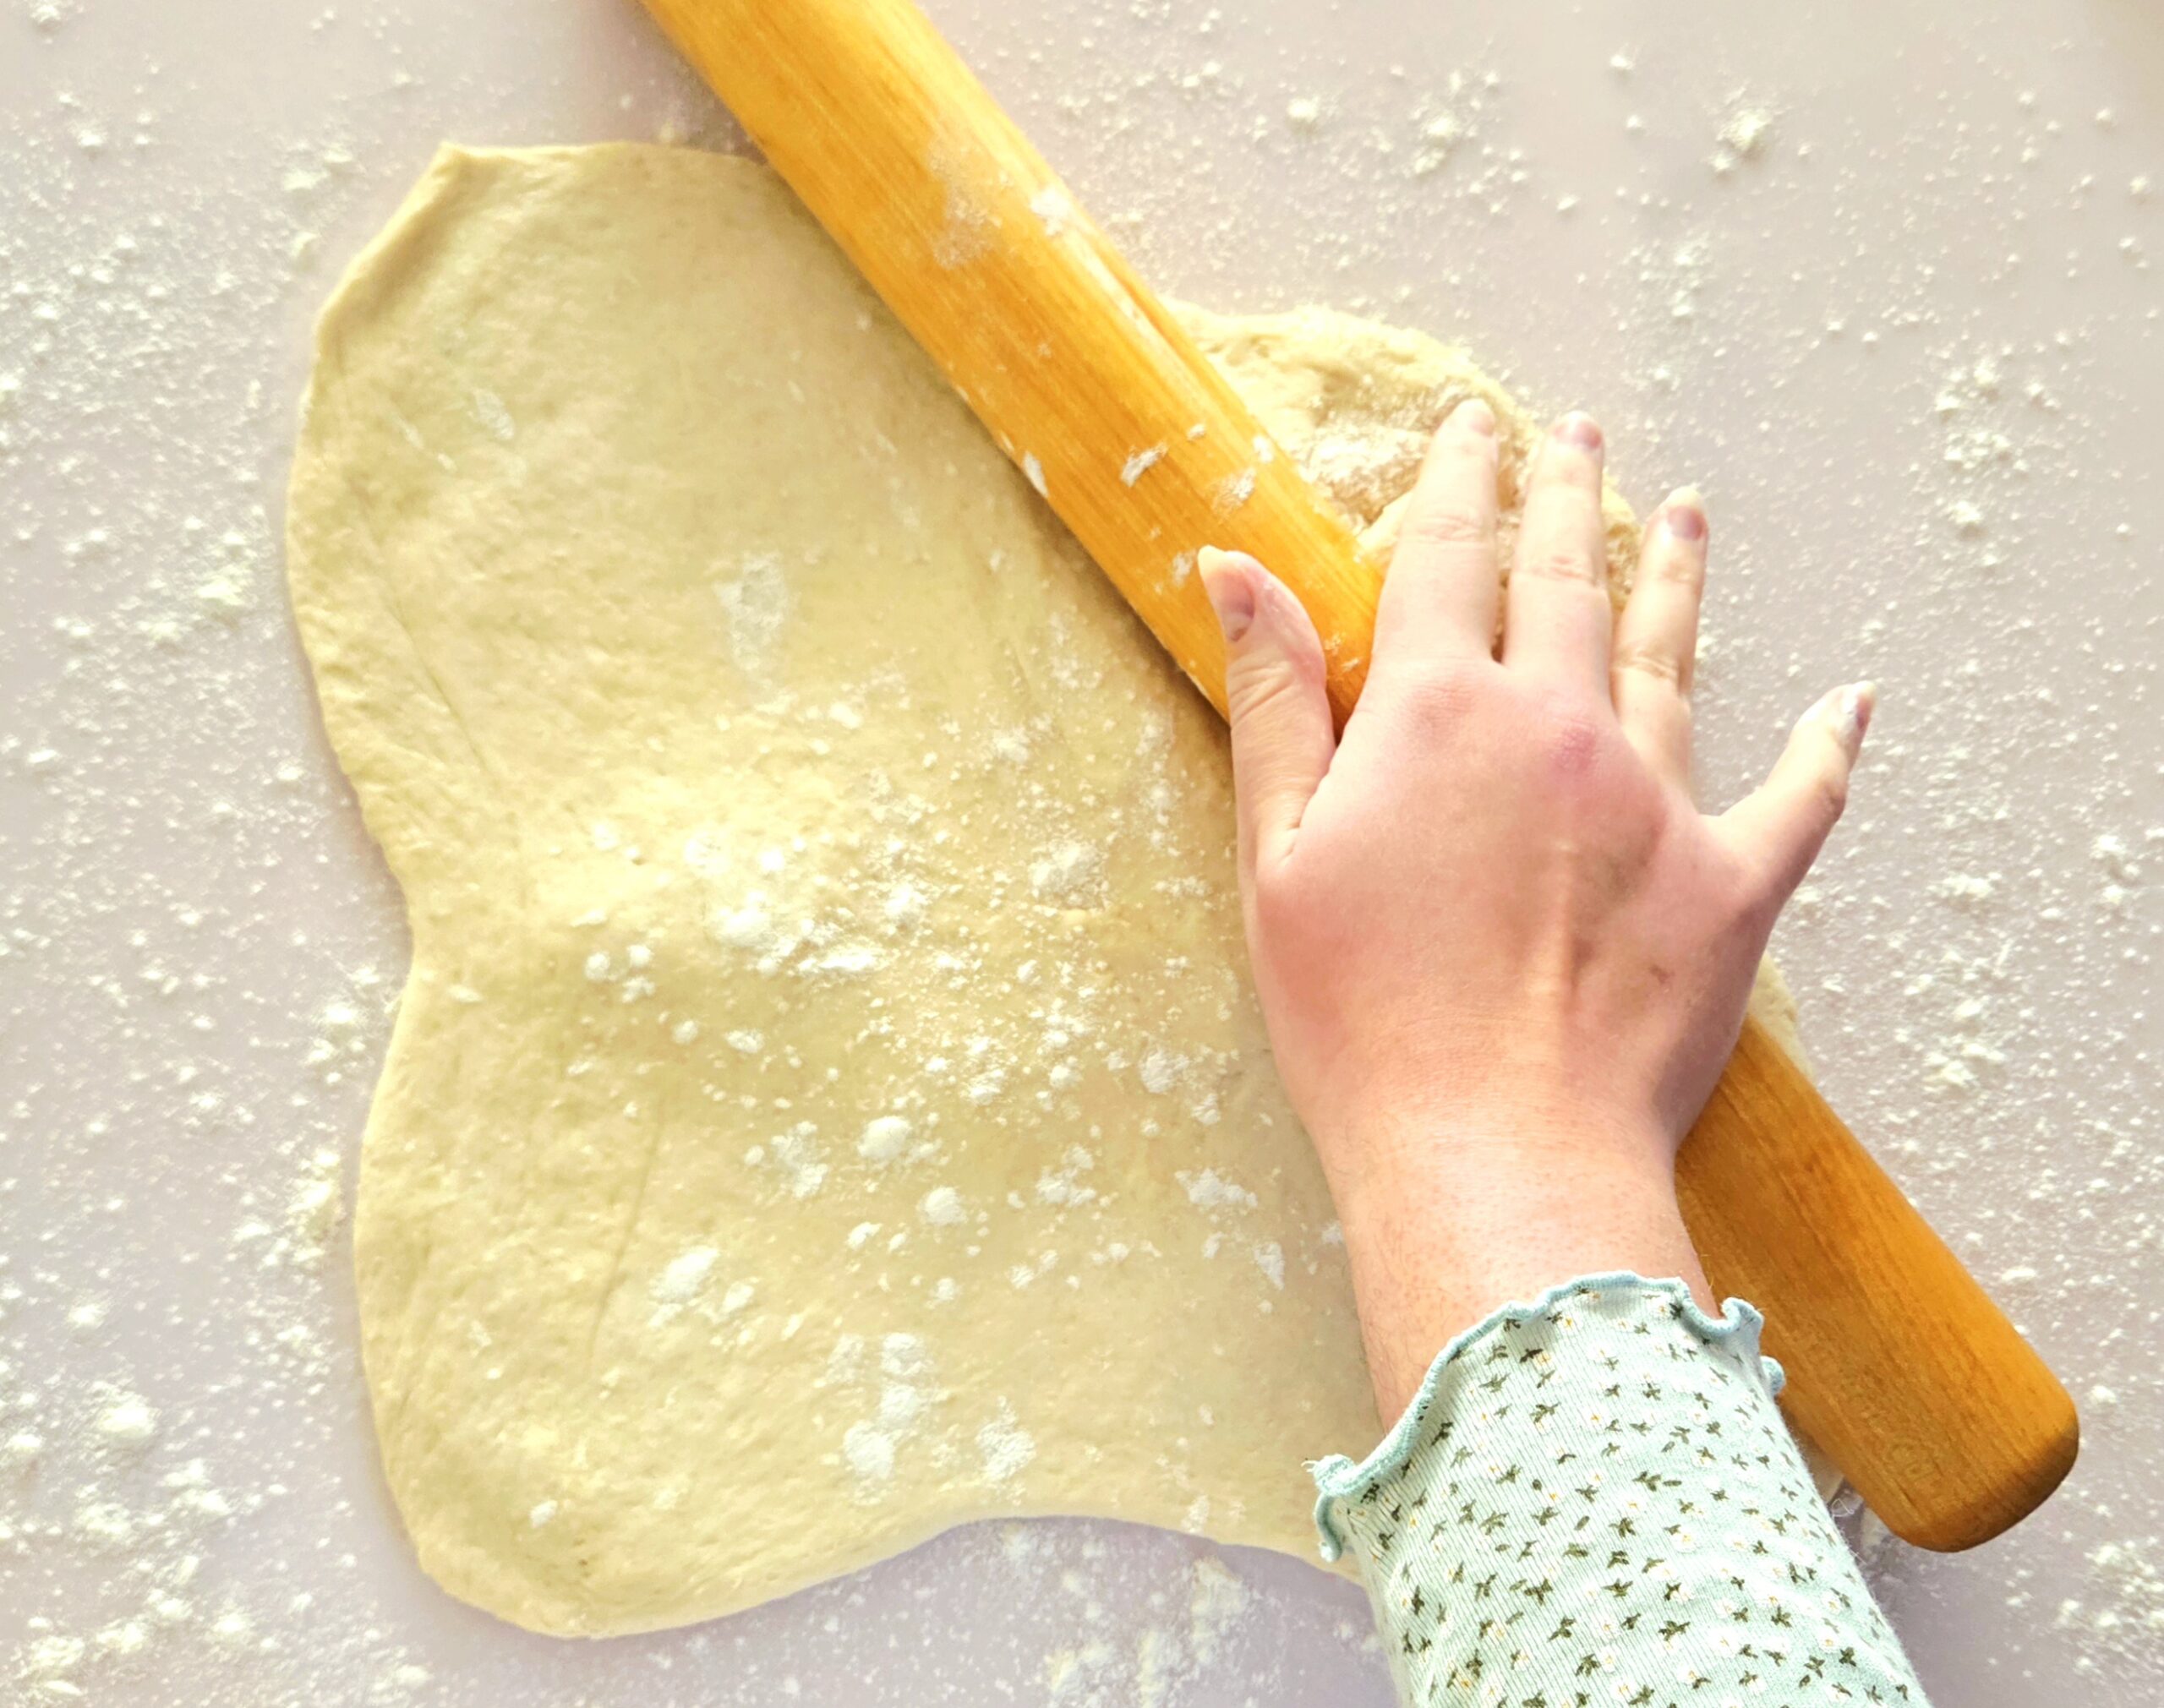
Take a rolling pin and roll out just the corners of the dough, so there’s a larger hump of dough in the center. This hump keeps the dough evenly distributed, since once the butter is encased, the dough on top tends to pile up. Thick dough on the bottom, thick dough on the top. The square should be about 15×15 inches, or large enough to completely encase the slab of butter.
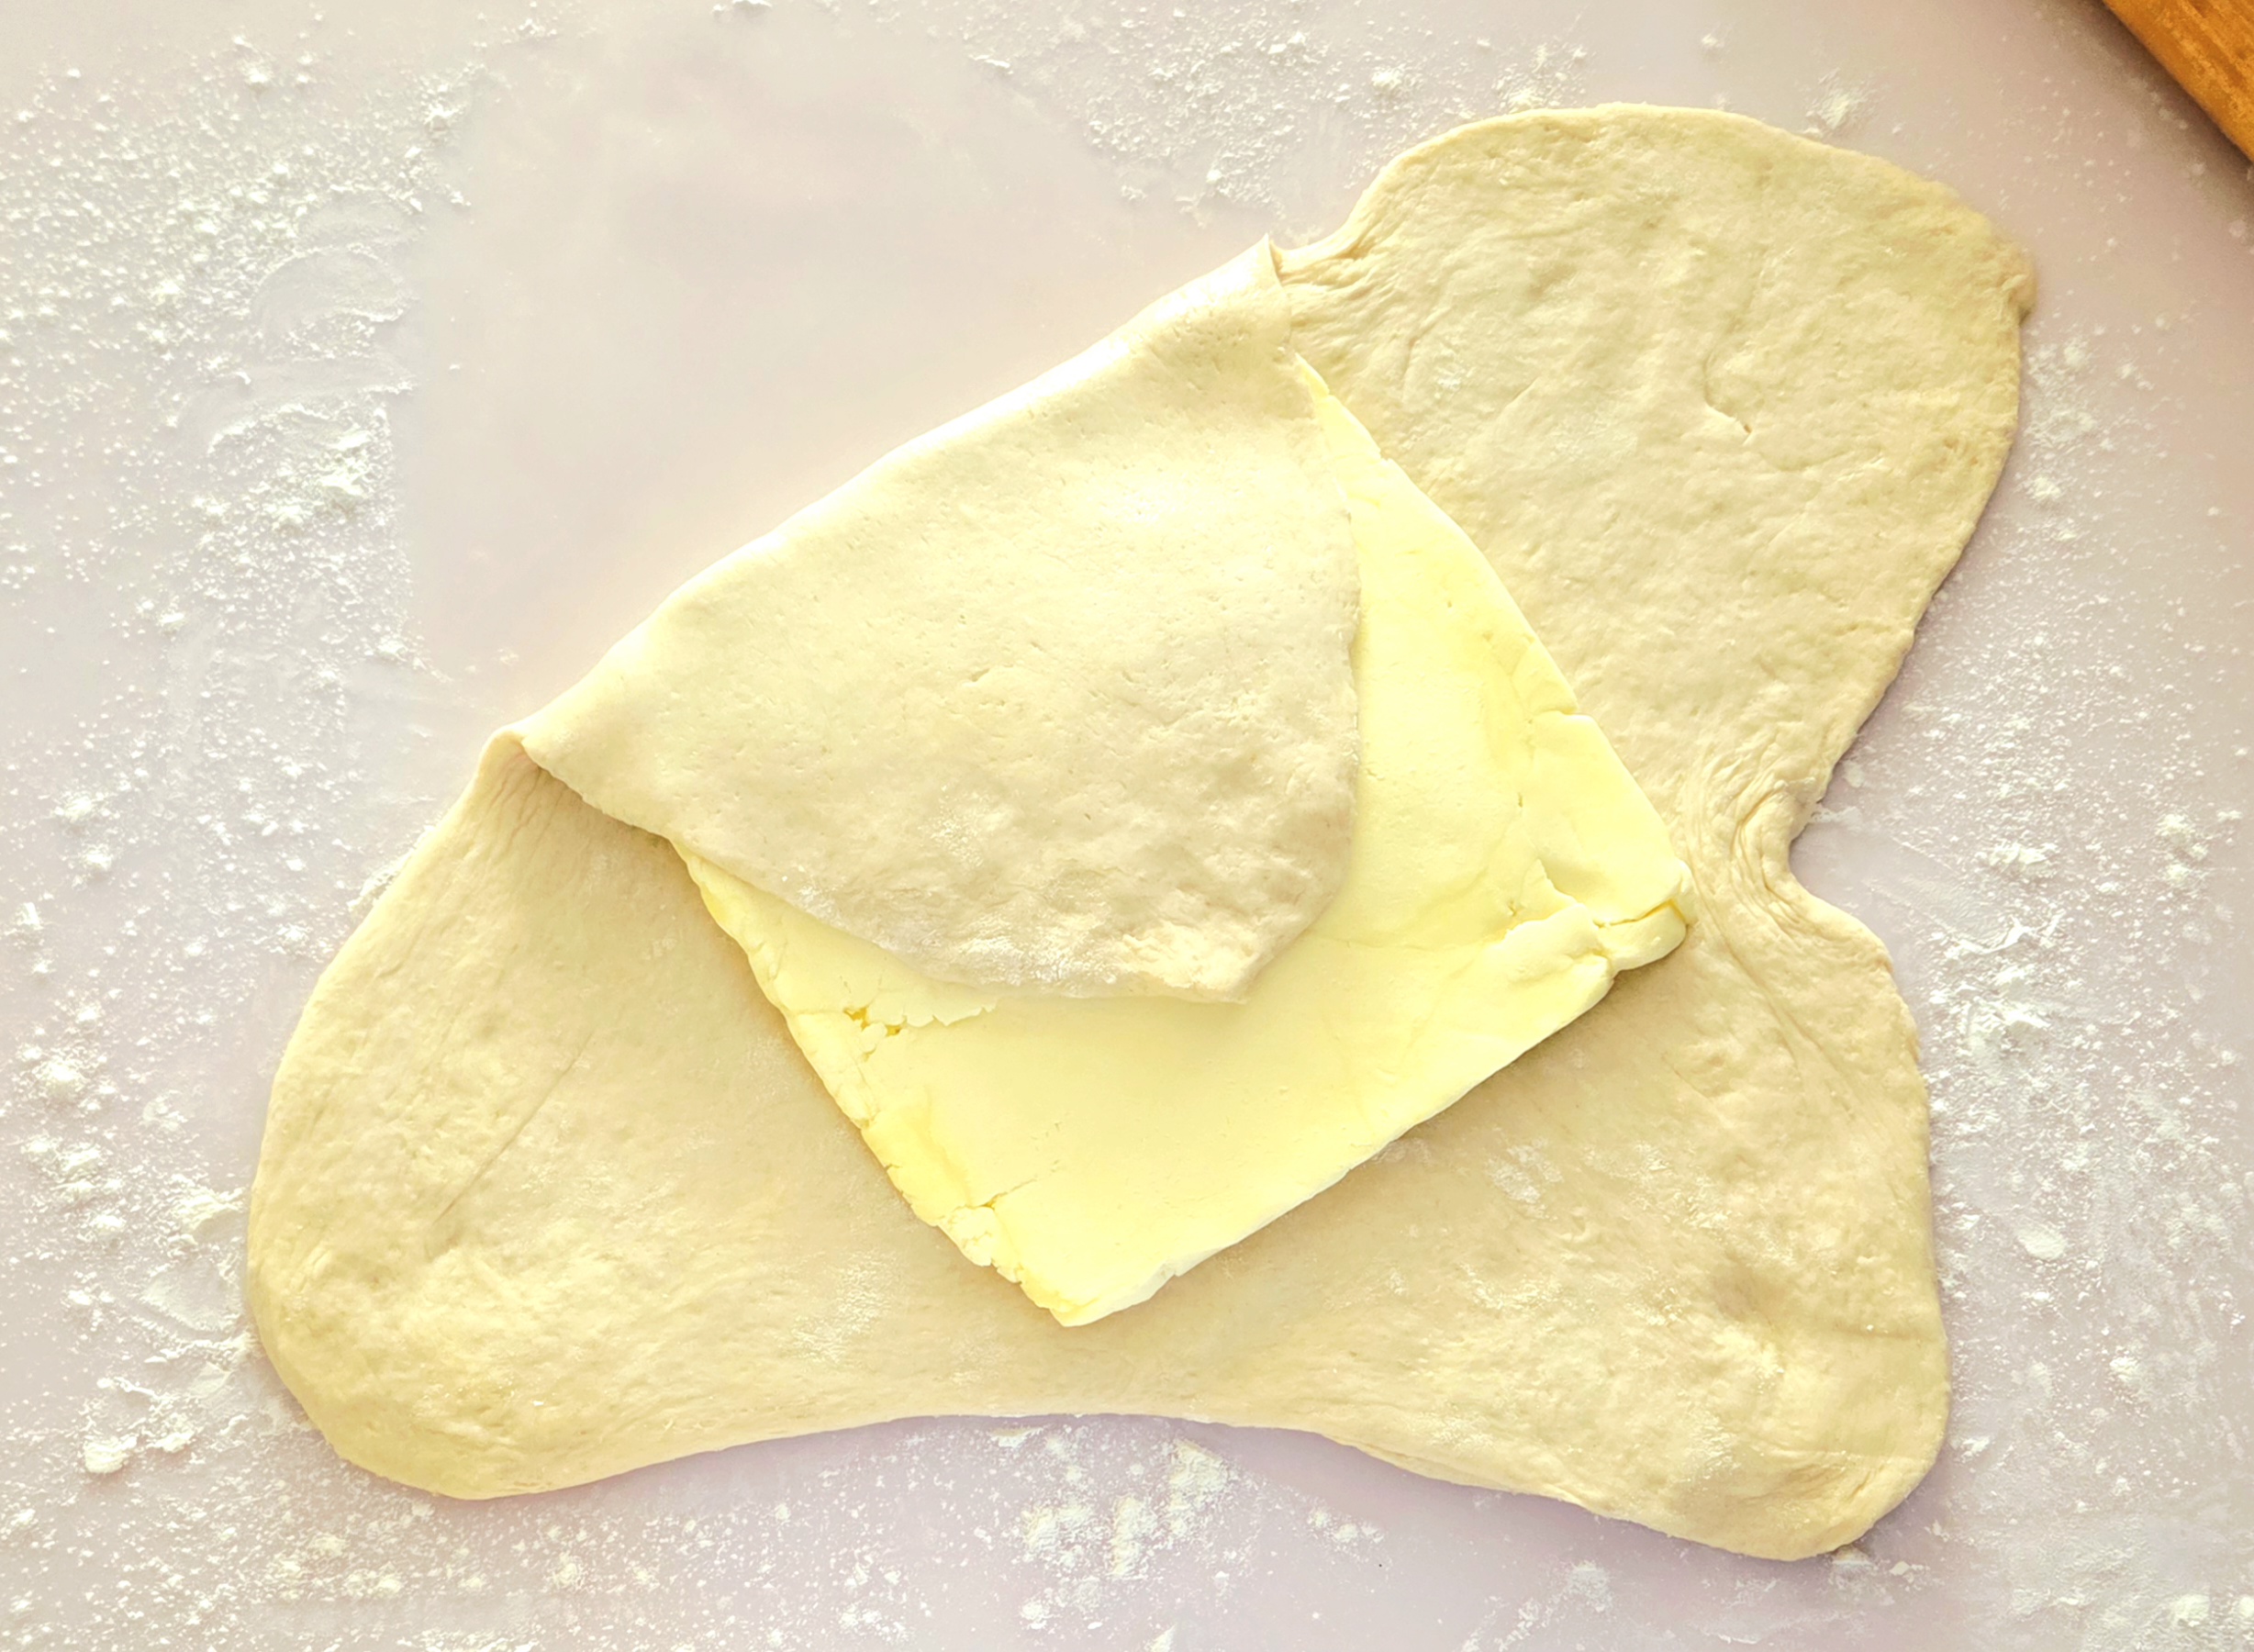
Unwrap the beurrage and place it diagonally in the center of the dough. Fold each corner of dough down and seal the edges together, to enclose the butter.
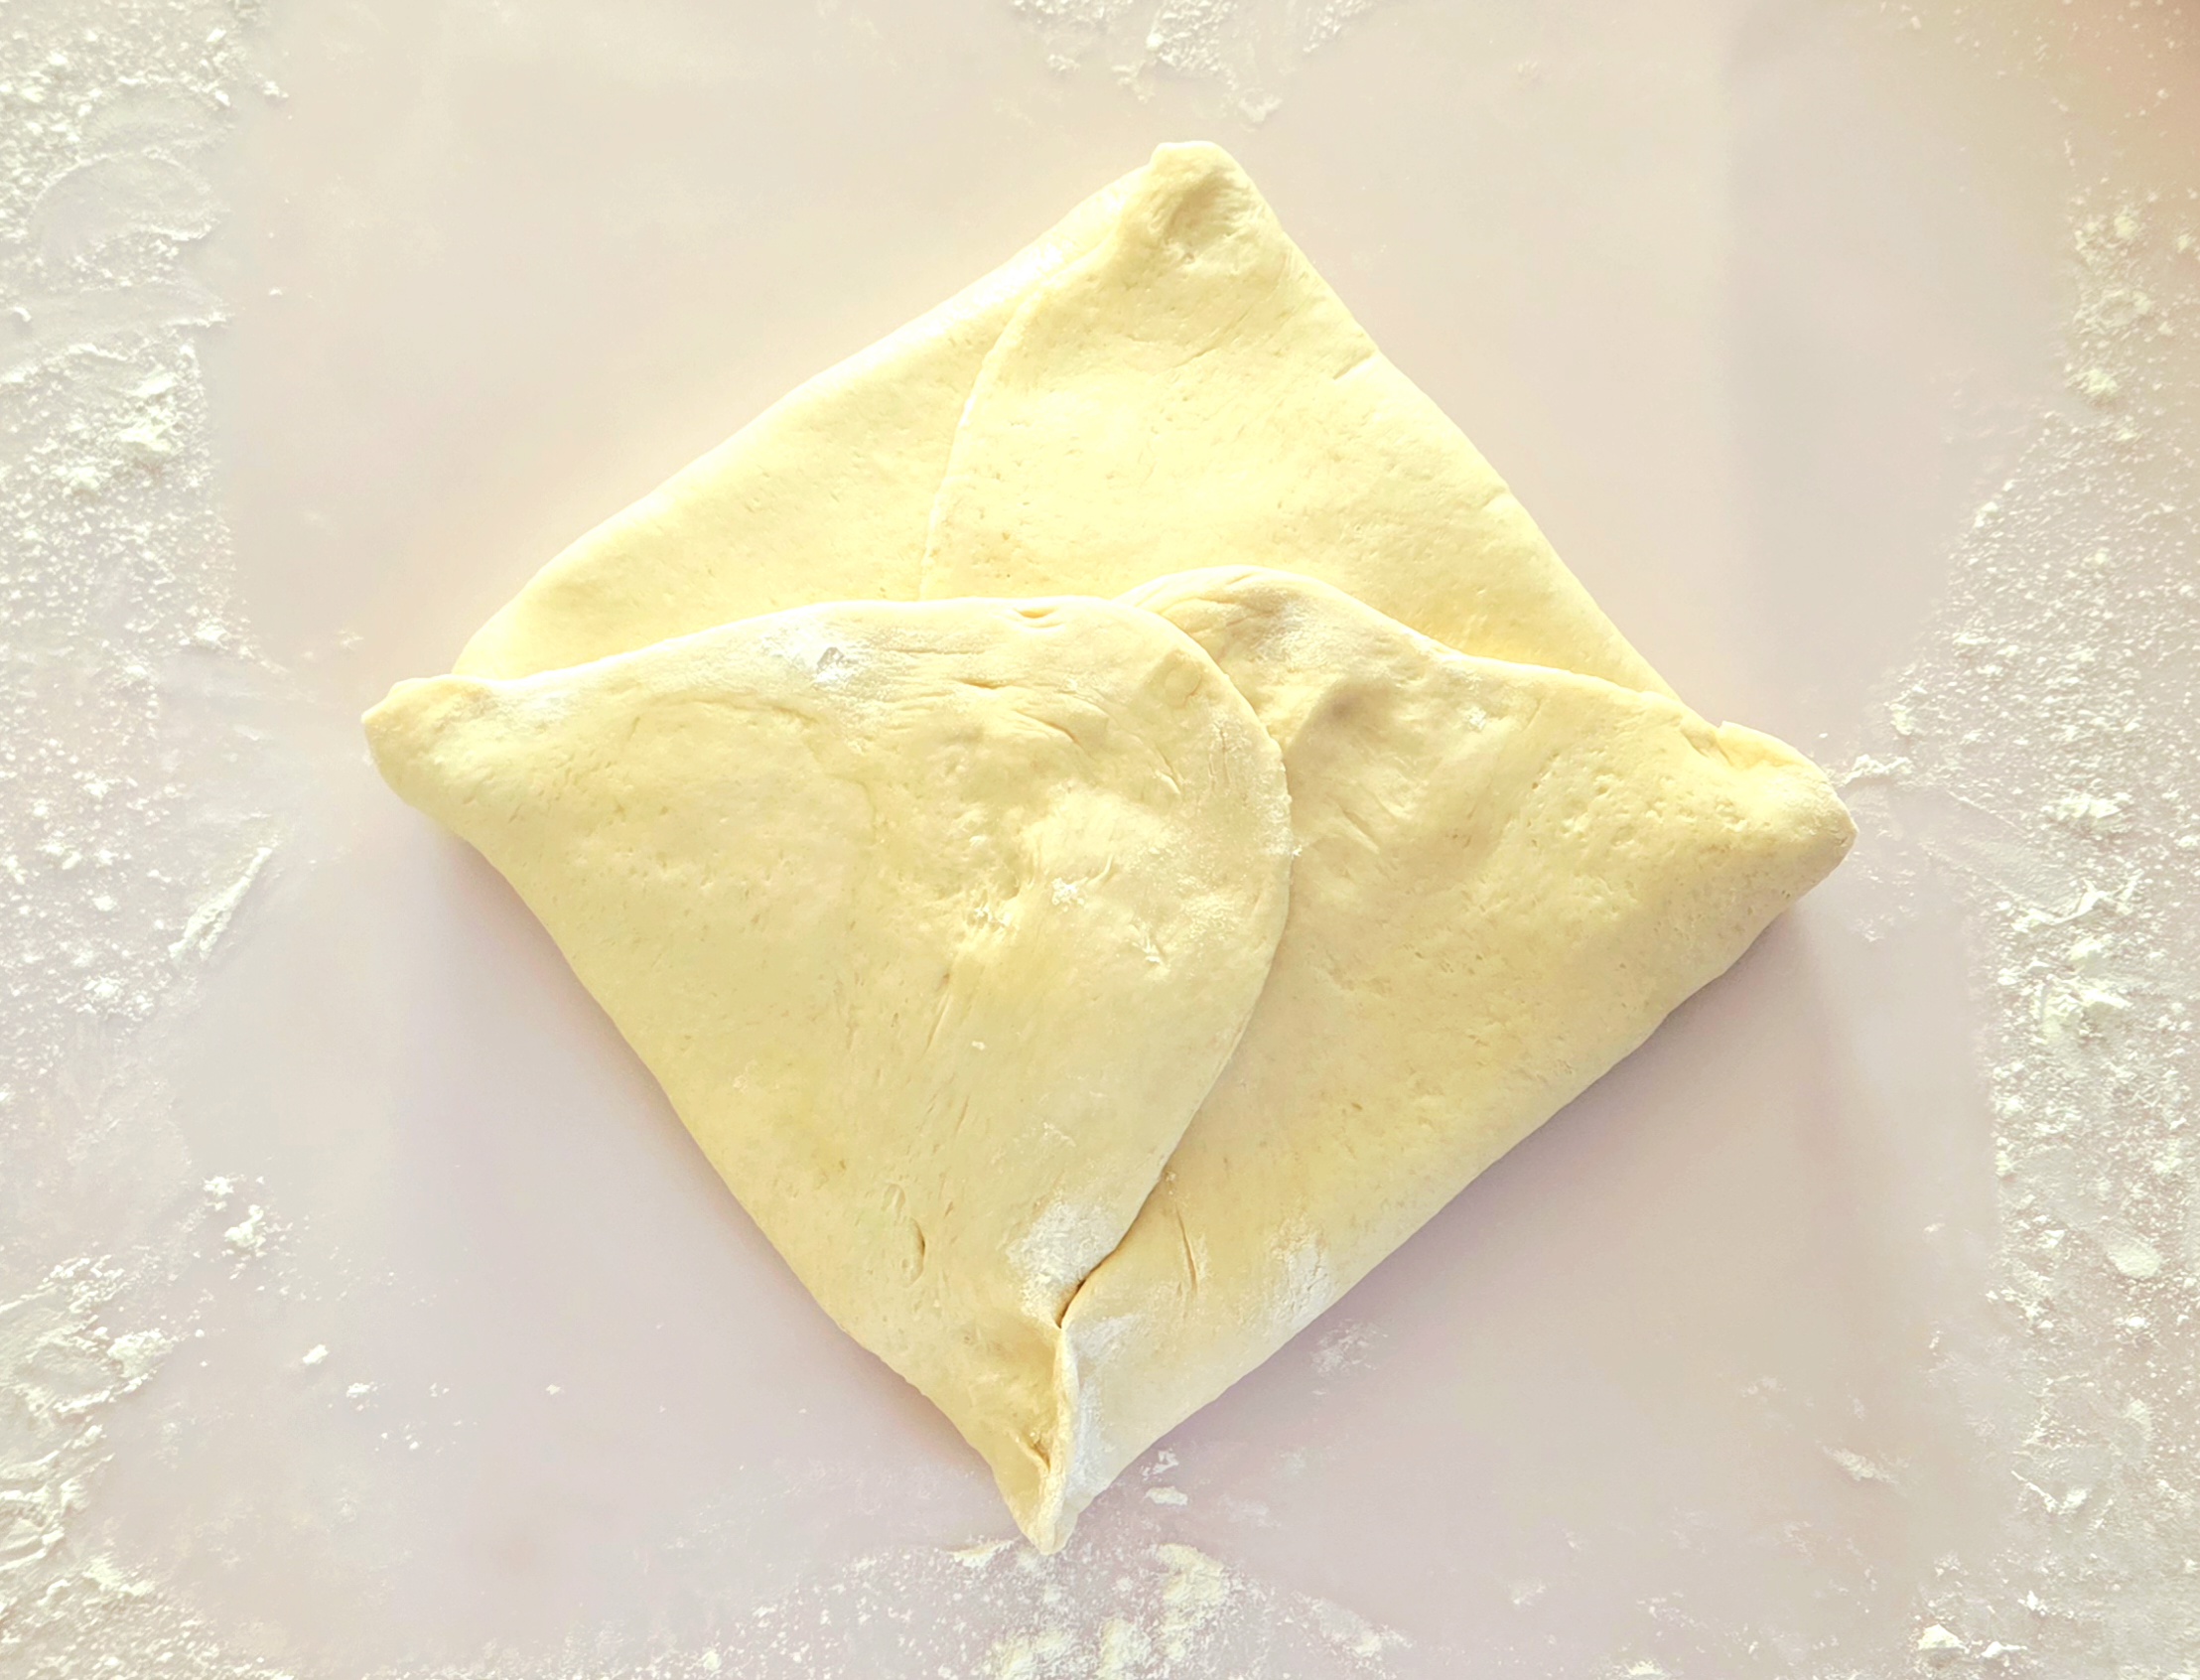
Flip the pâton (dough wrapped butter) over so it’s seam side down and roll it out to a 9 x 21 inch rectangle, around ⅜ of an inch thick.
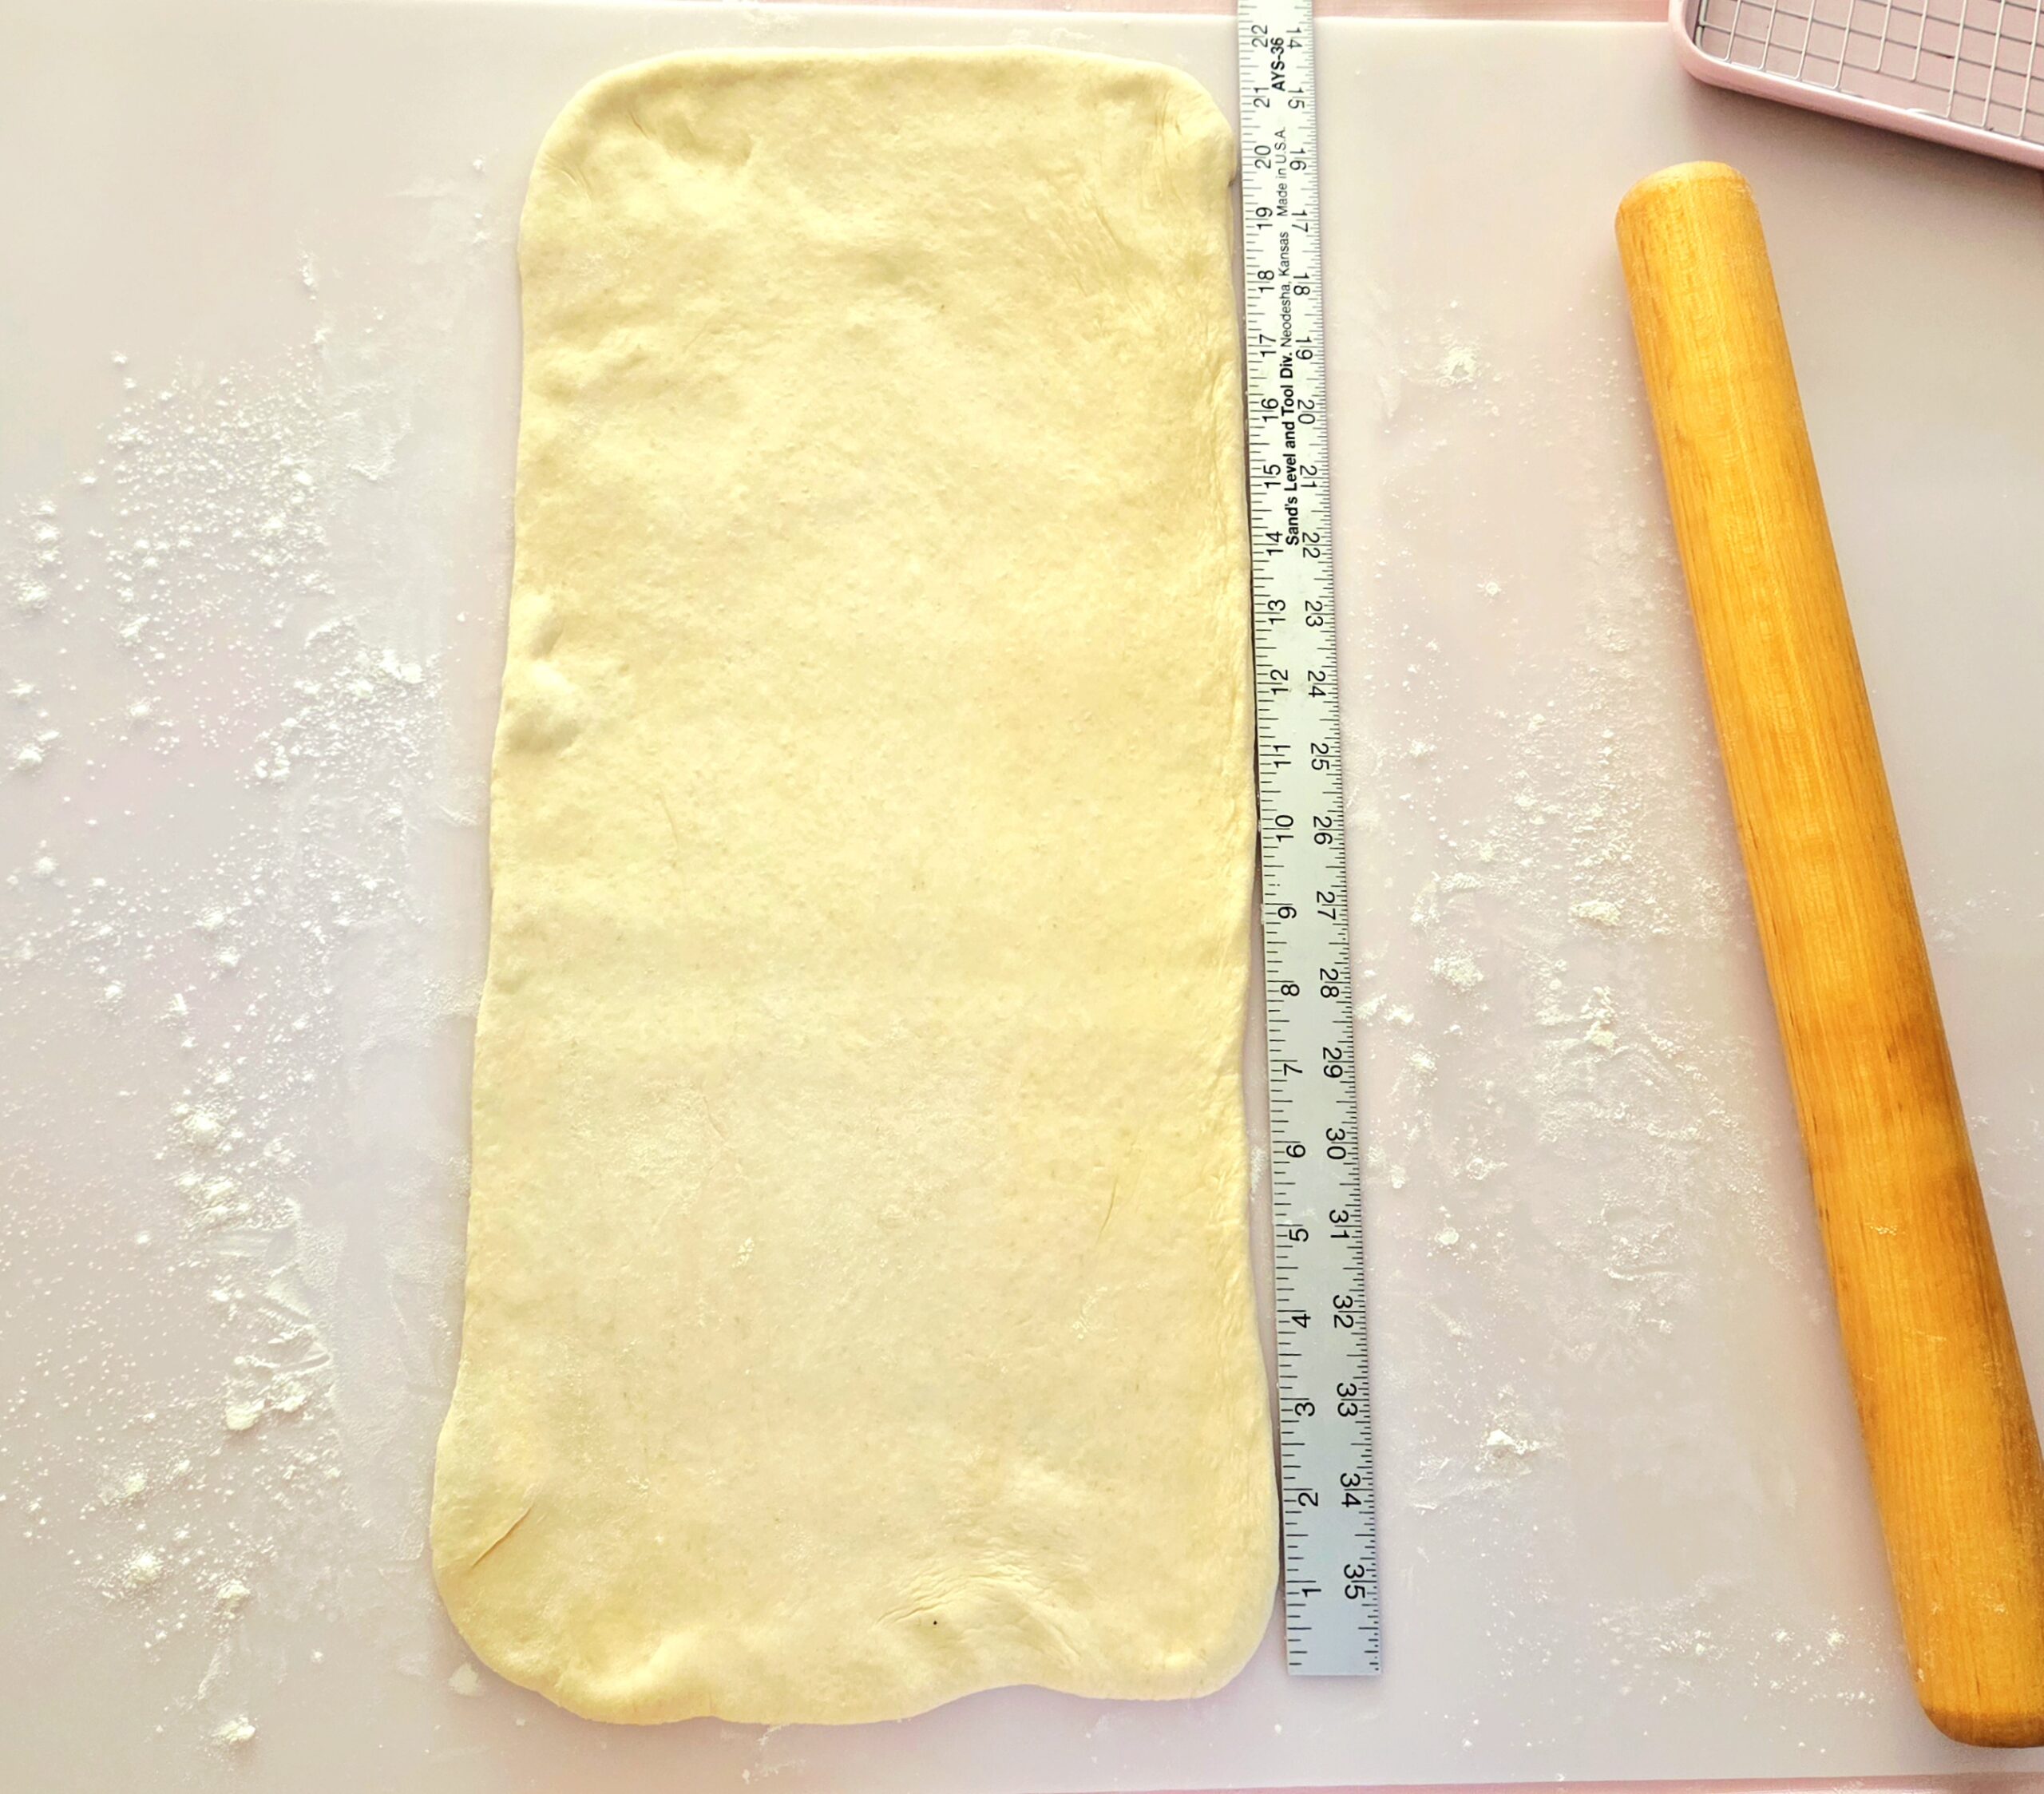

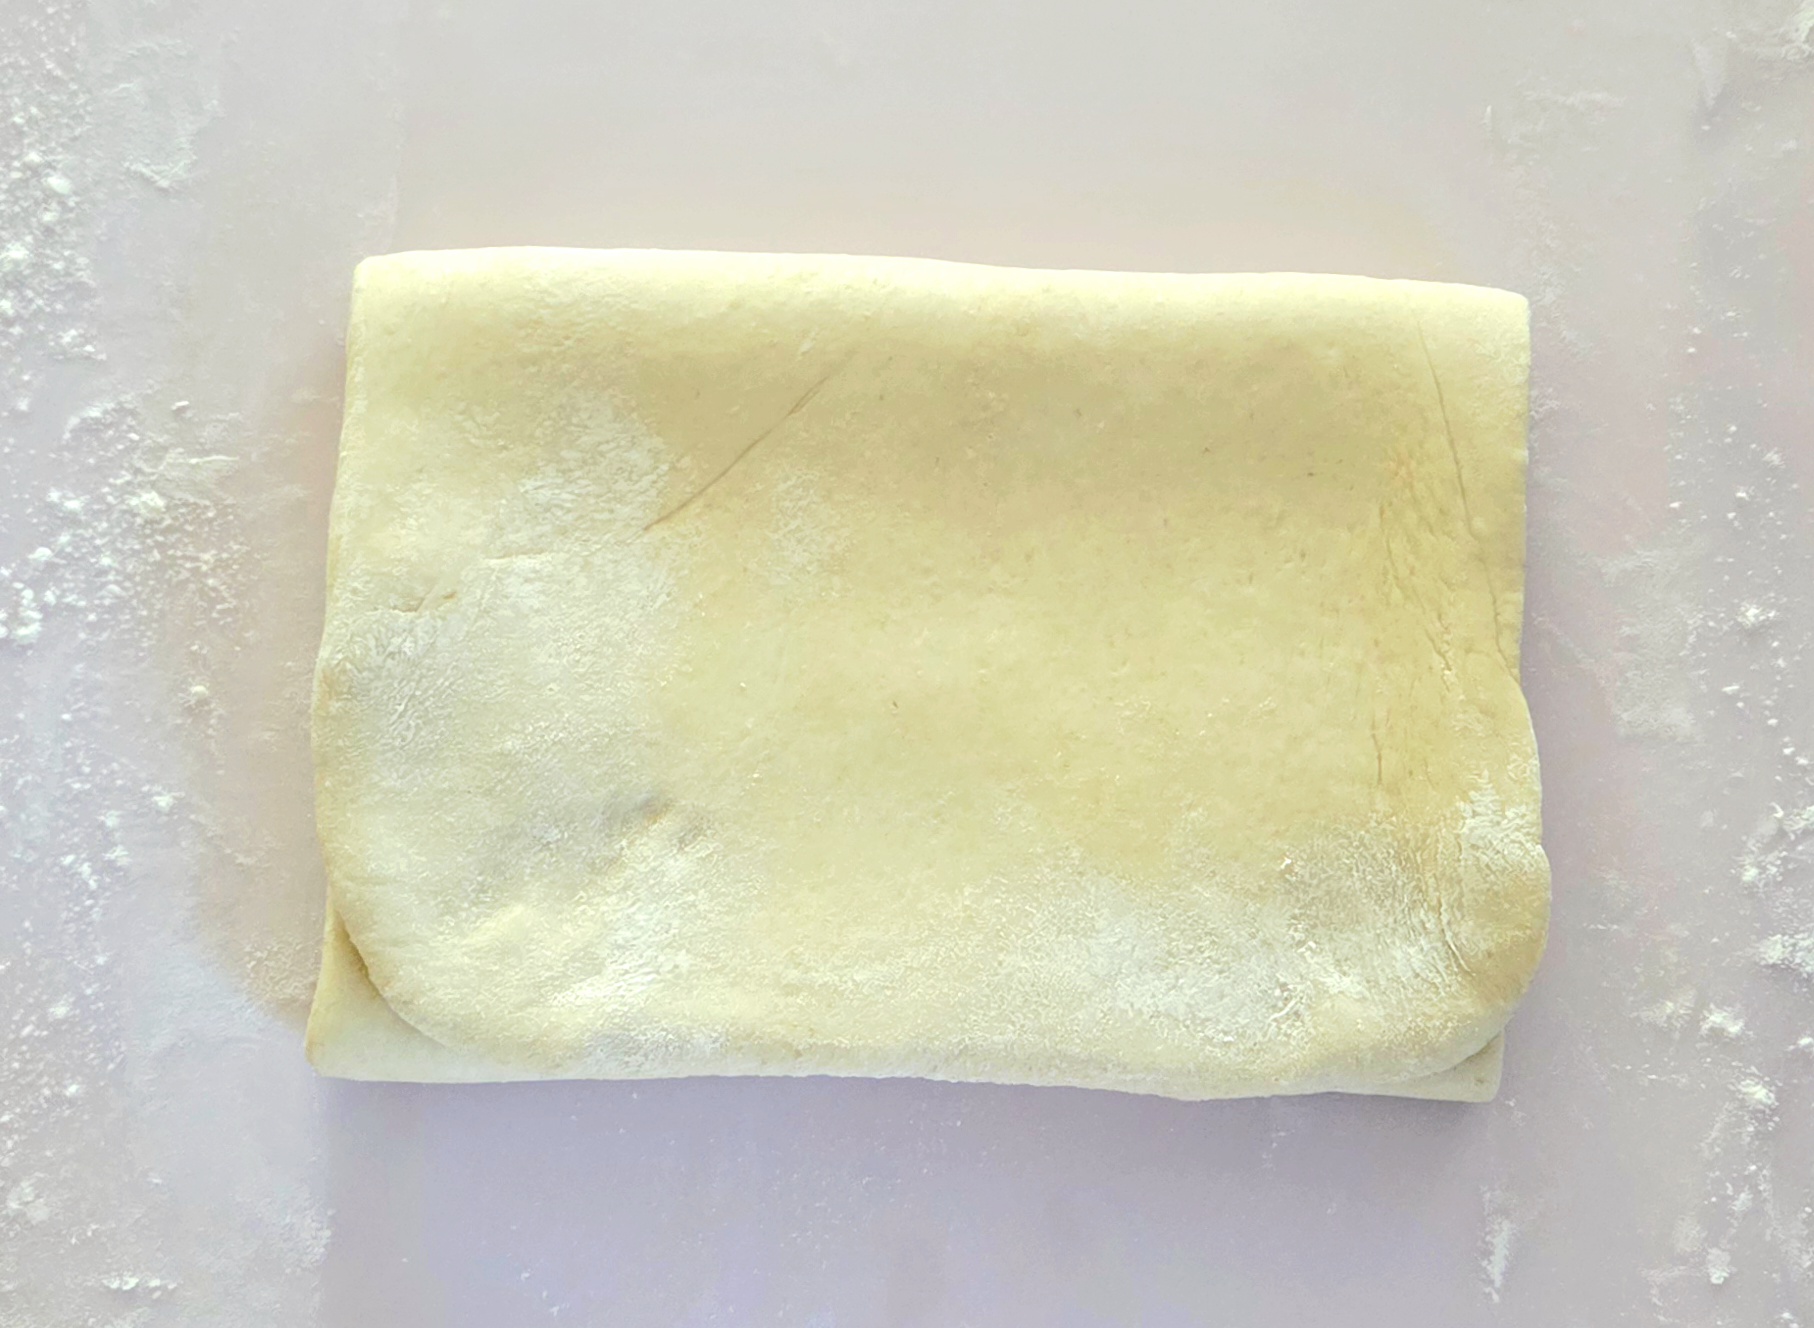
Fold the rectangle into thirds like a letter. Wrap it airtight in plastic and place it in the fridge to chill for 30 minutes.

After the dough has finished resting, dust the counter with a bit more flour and place it so the folded end is on the side.
Allow the dough to sit out for a few minutes. This time will allow the butter to warm a bit and become more pliable, so it won’t shatter as you do your folds. The more your butter shatters, the less even the distribution of butter will be throughout the croissants. Once it’s had the change to sit out, gently create two indents a few inches apart in the pâton using the rolling pin.
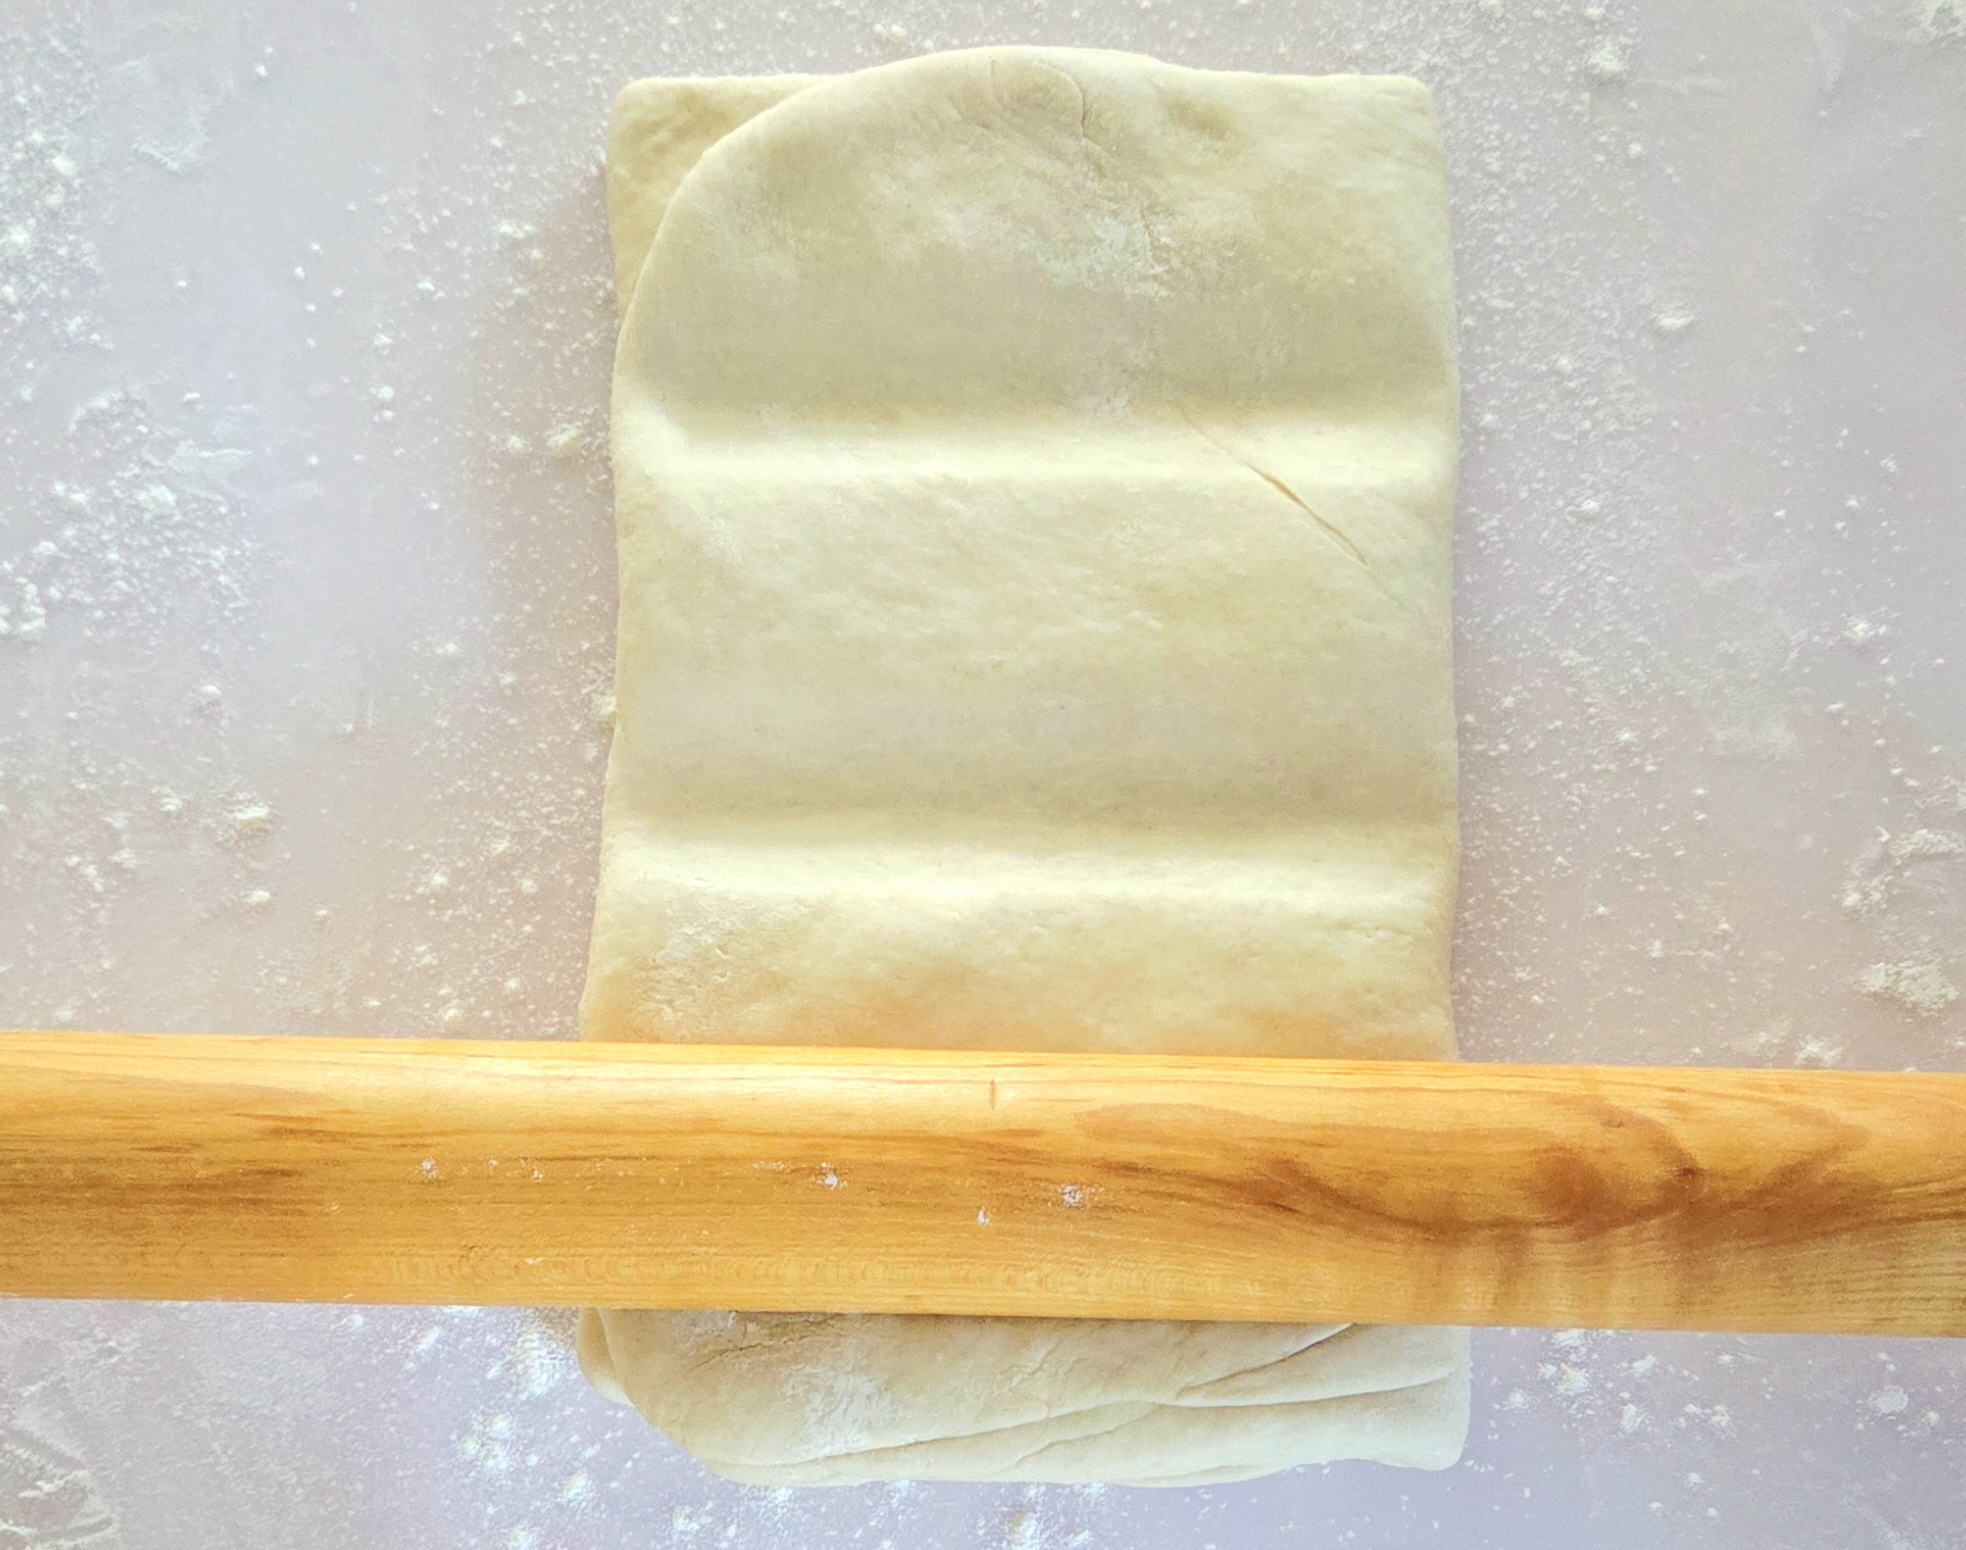
Doing this step just makes it easier to start rolling out a laminated dough of any kind, to help prevent shattering the butter. Roll the bulging dough in between the indents to flatten them, and roll out the pâton into a ⅜ inch thick rectangle again. Fold it into thirds again, wrap it airtight, and stick it back in the fridge for 30 minutes.
Repeat the roll and fold steps once more. After the final 30 minute rest, the dough is ready to use (though can be left in the fridge for up to a day ahead of time. It’s normal and expected for the dough to puff up, in this instance.) When you’re ready to shape the croissants, prepare a turned-off oven once again and line two baking sheets with parchment paper.
Prepare an egg wash. Technically this isn’t crucial for the development of the croissants so if you’re trying to prioritize your groceries in an intentional way, feel free to skip this step. Your croissants won’t be quite as beautifully golden brown without it, but it’s up to you if it’s worth losing that aspect. In a small bowl, whisk together an egg with a splash of water and a pinch of salt. Set the egg wash aside.

Shape the Croissants
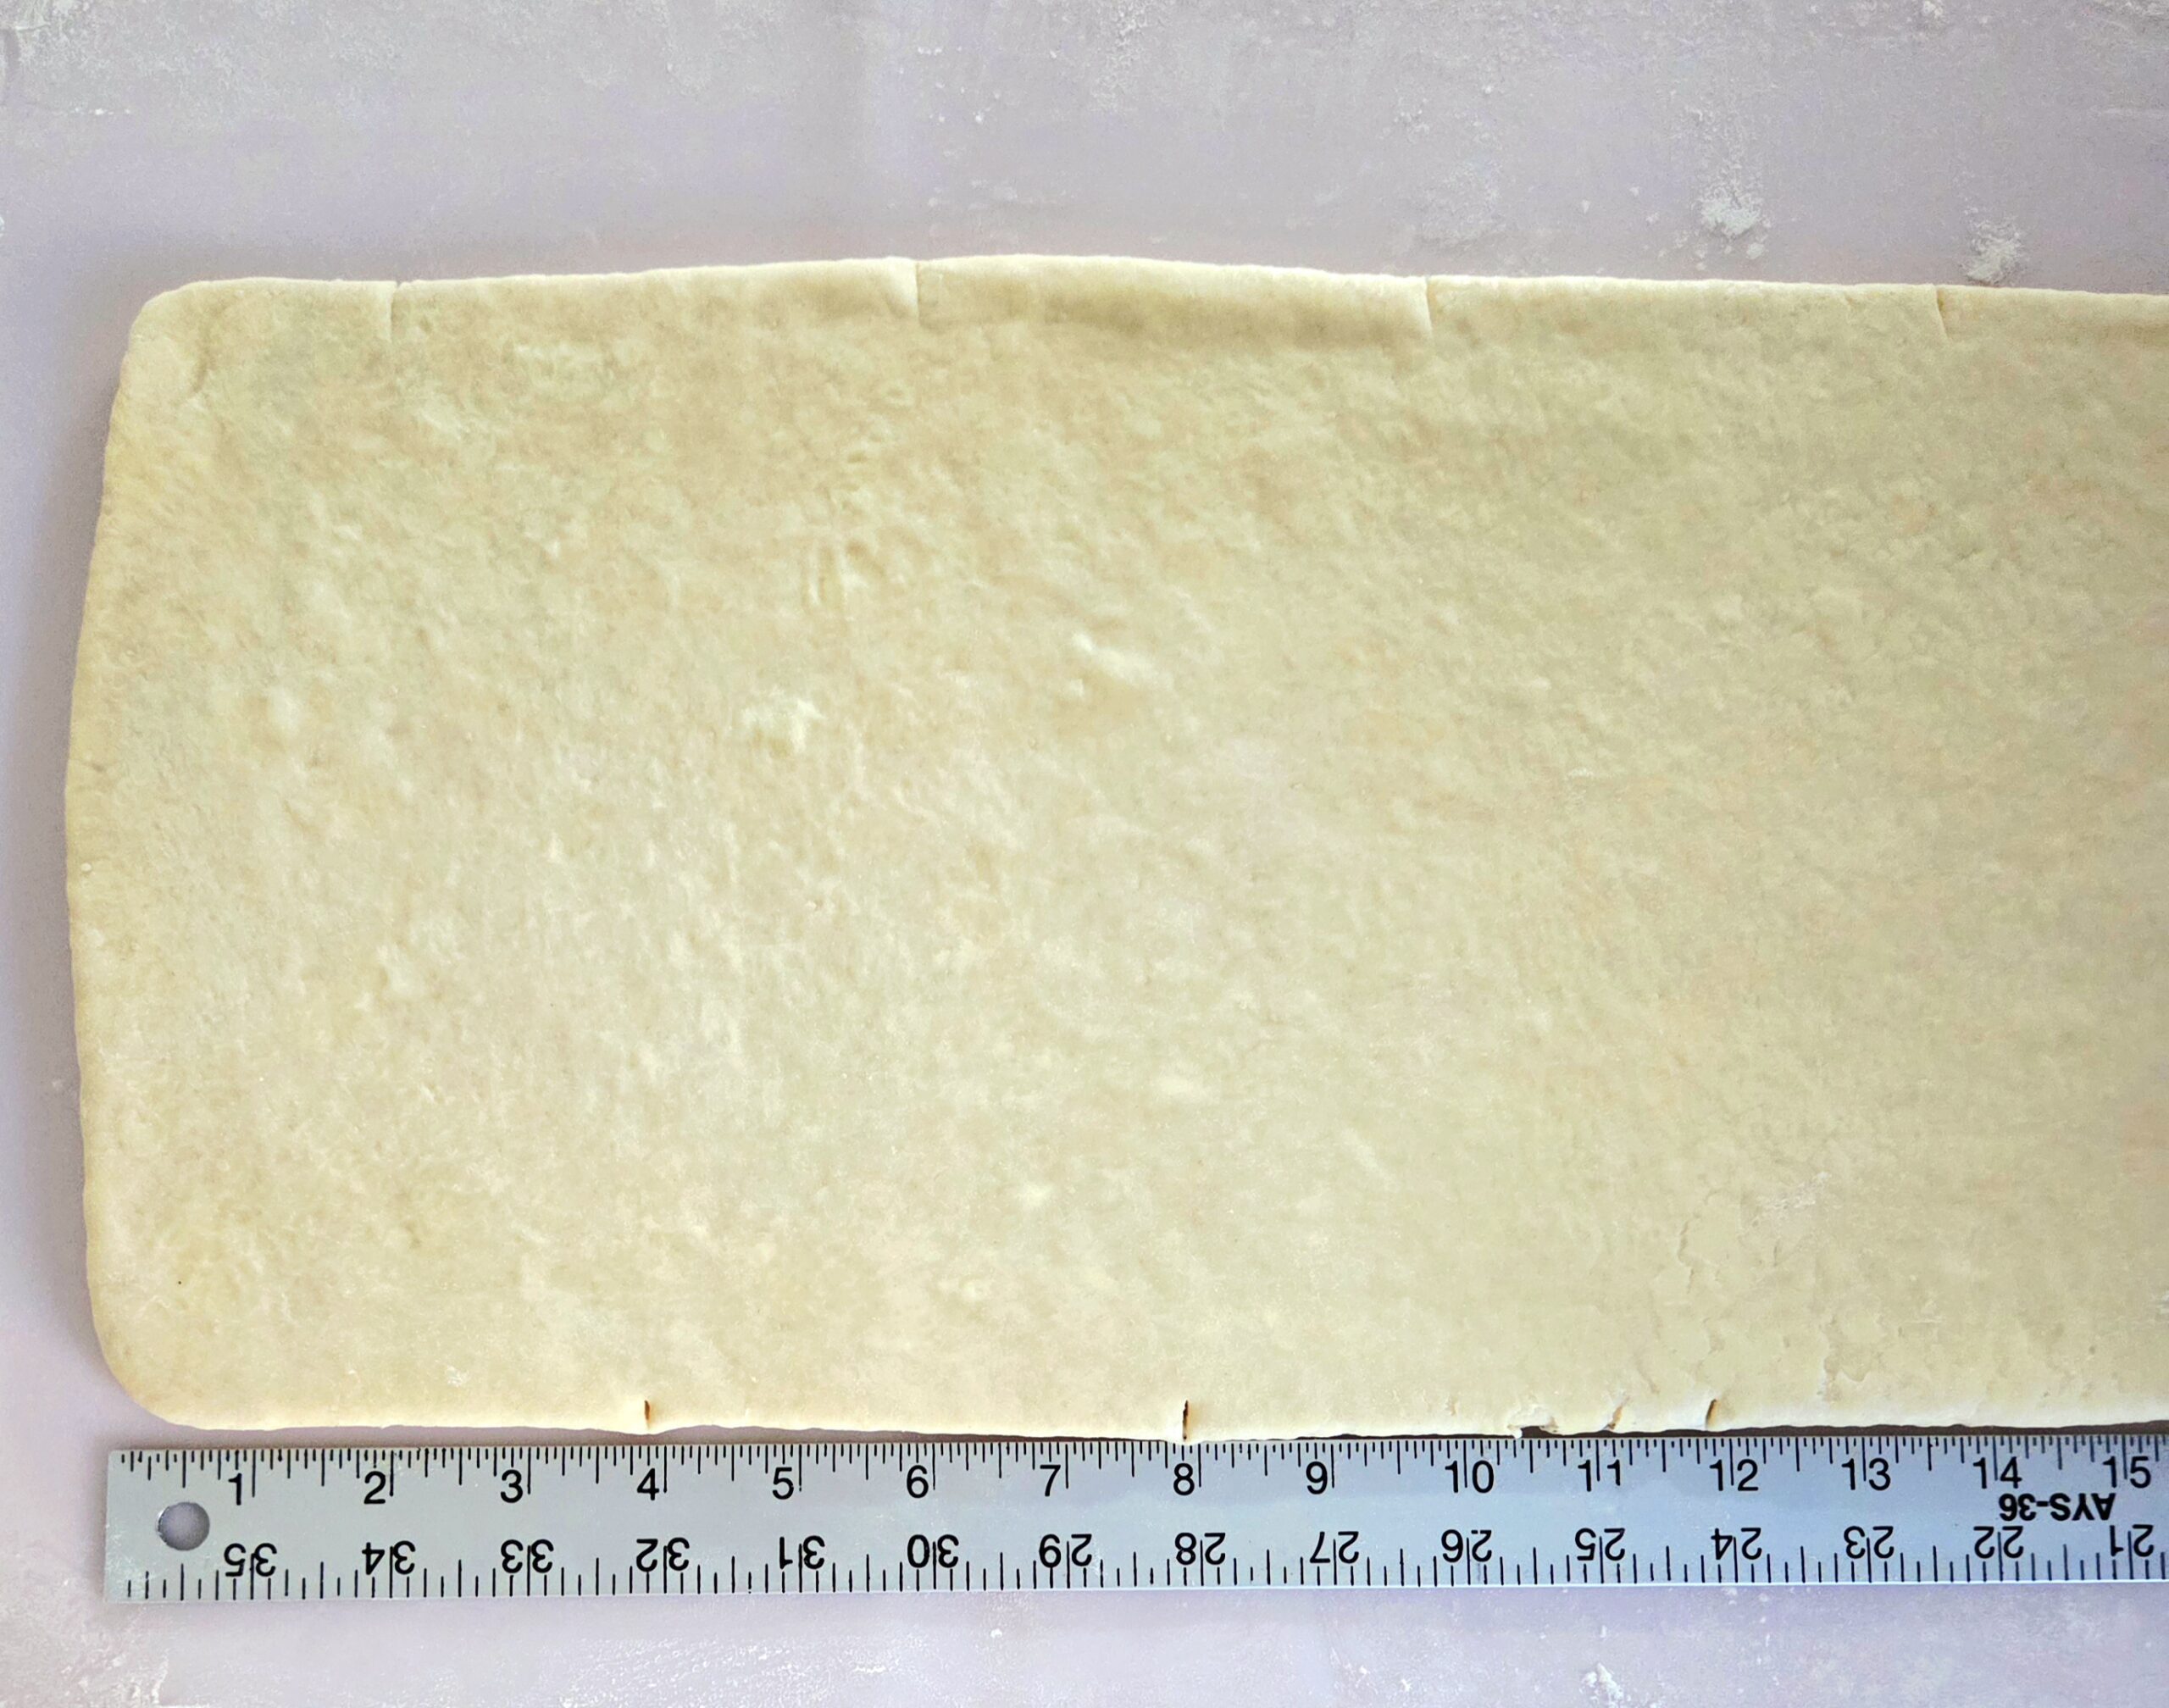
Set up the first stage of the turned off oven by turning it on now. Heat the oven to the lowest temperature it will go to. This way, it will be ready for the croissants to proof in after the croissants have been shaped. Place the dough onto a clean, flour-dusted counter. Roll the dough into a 9 x 26 inch rectangle. Yes, it’s a bit of an unusually sized rectangle, but it’s a very intentional design.
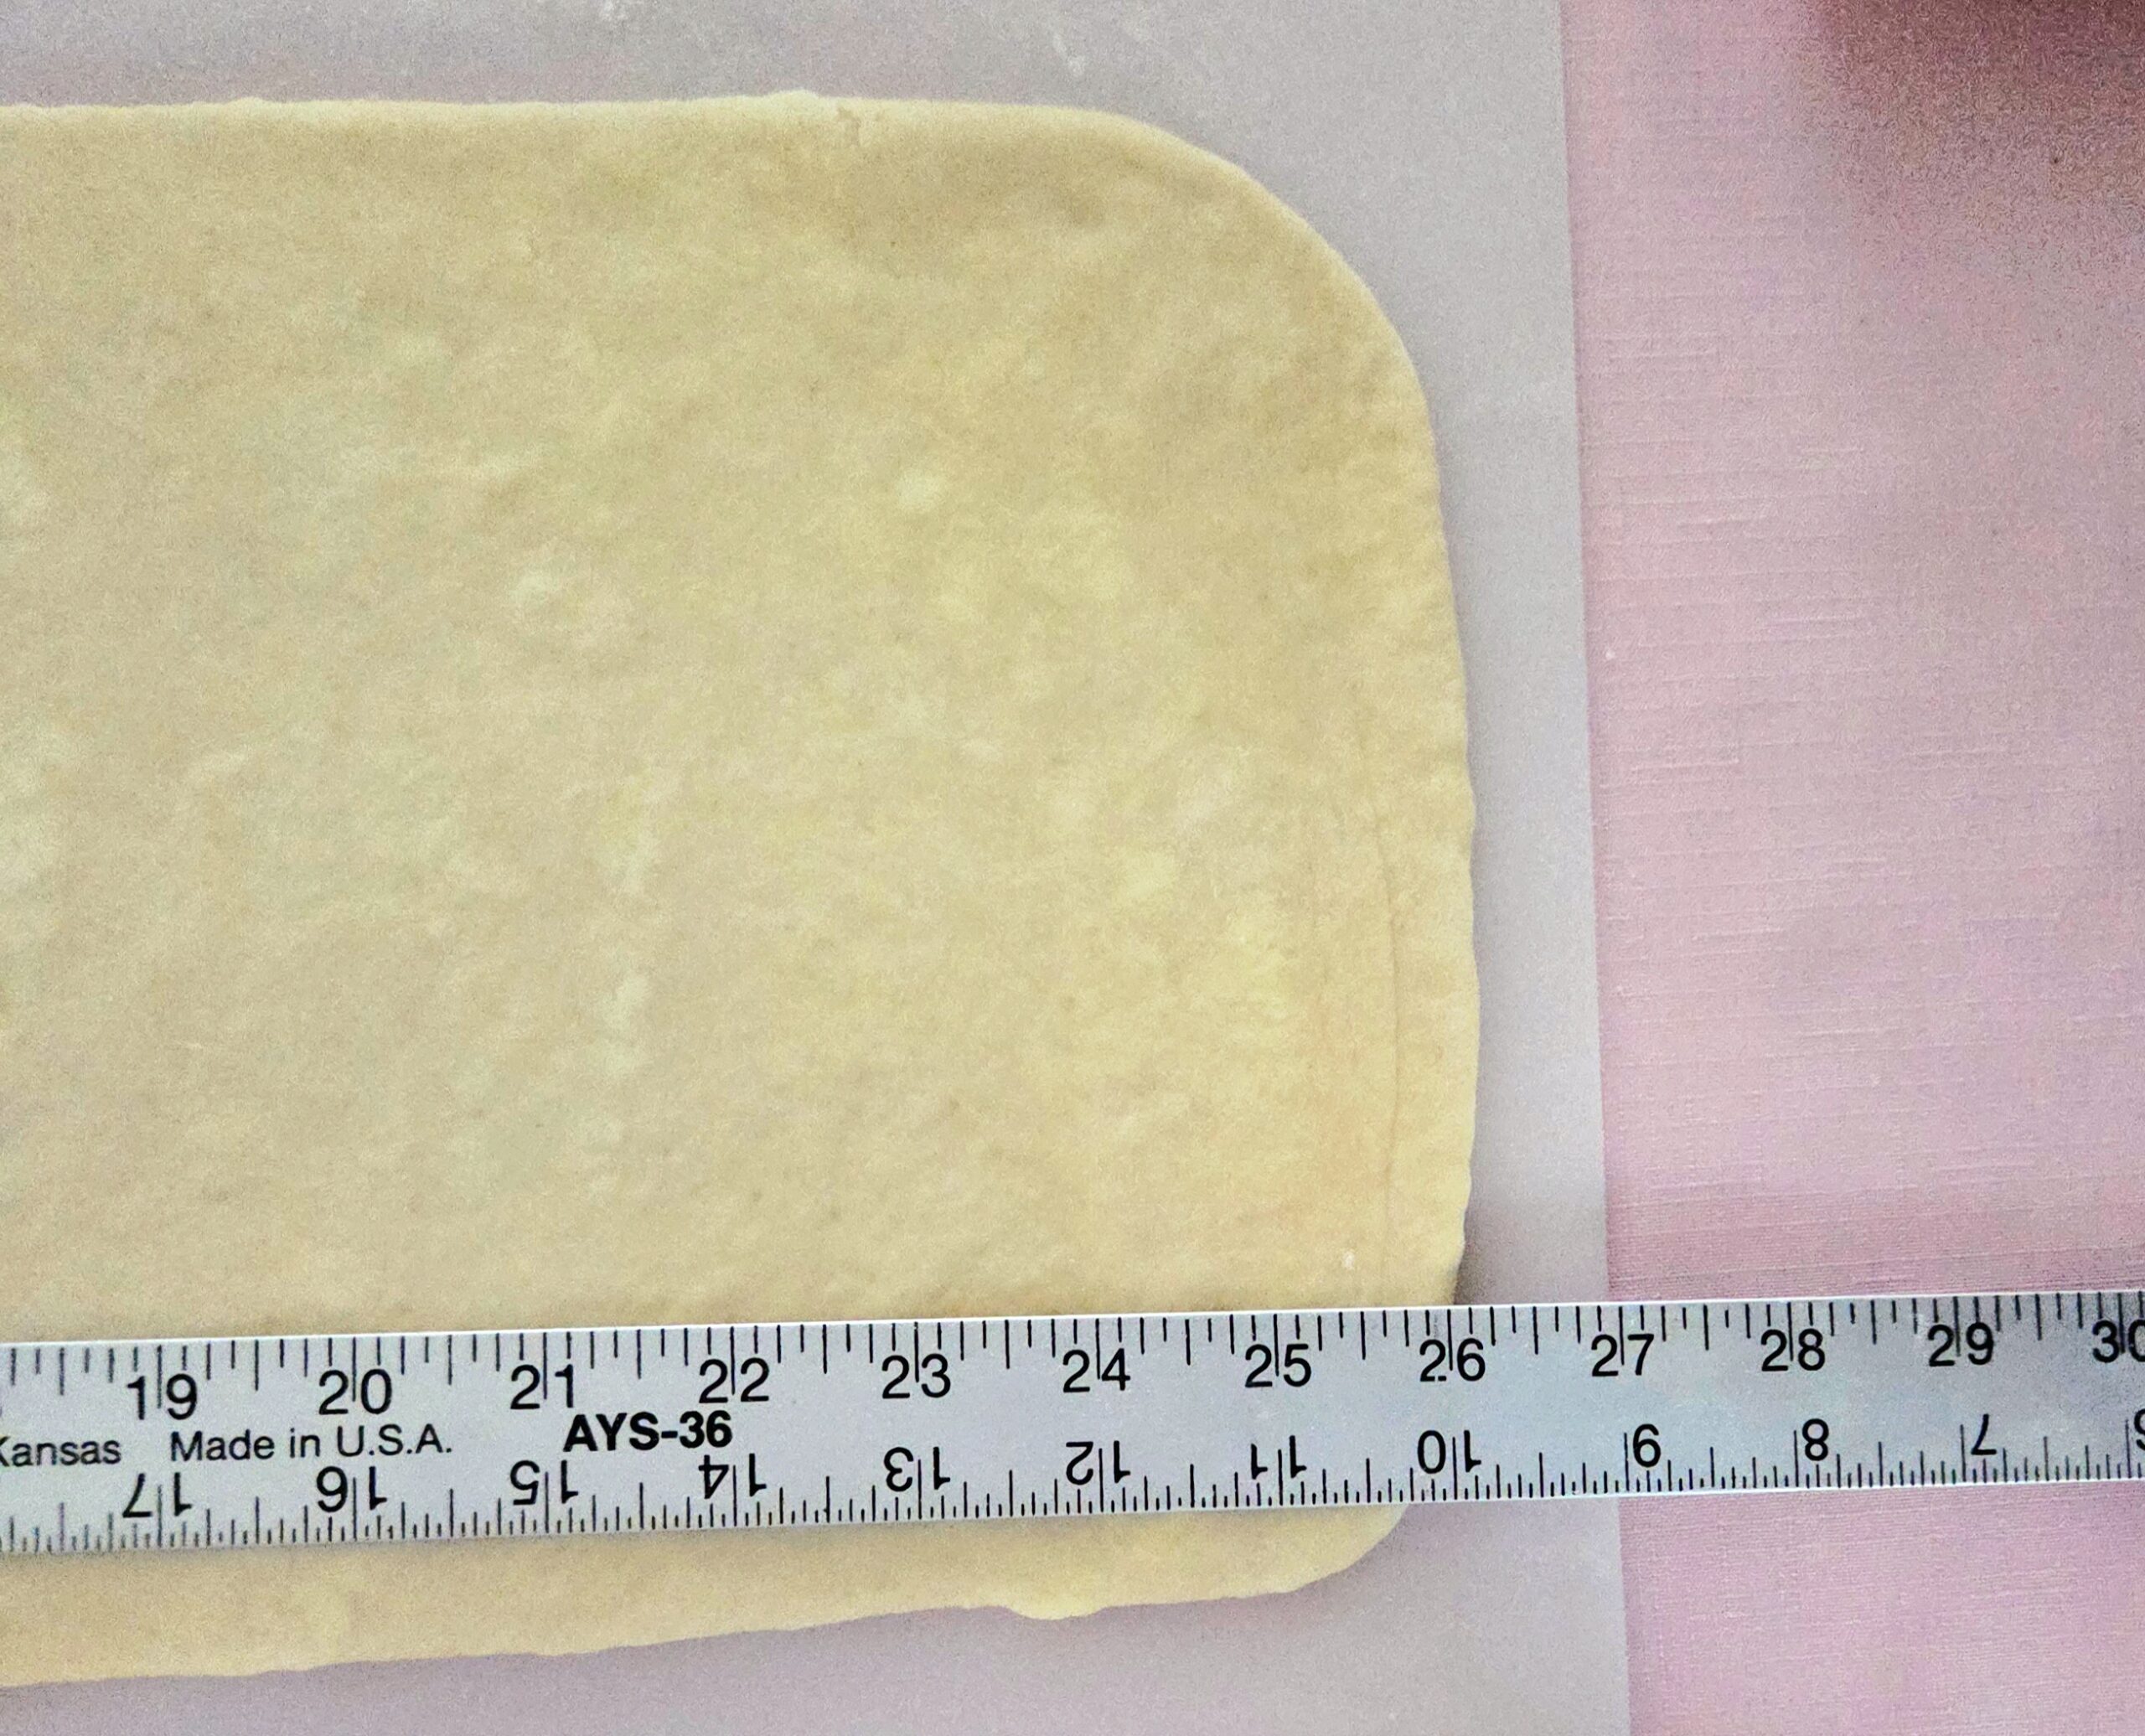
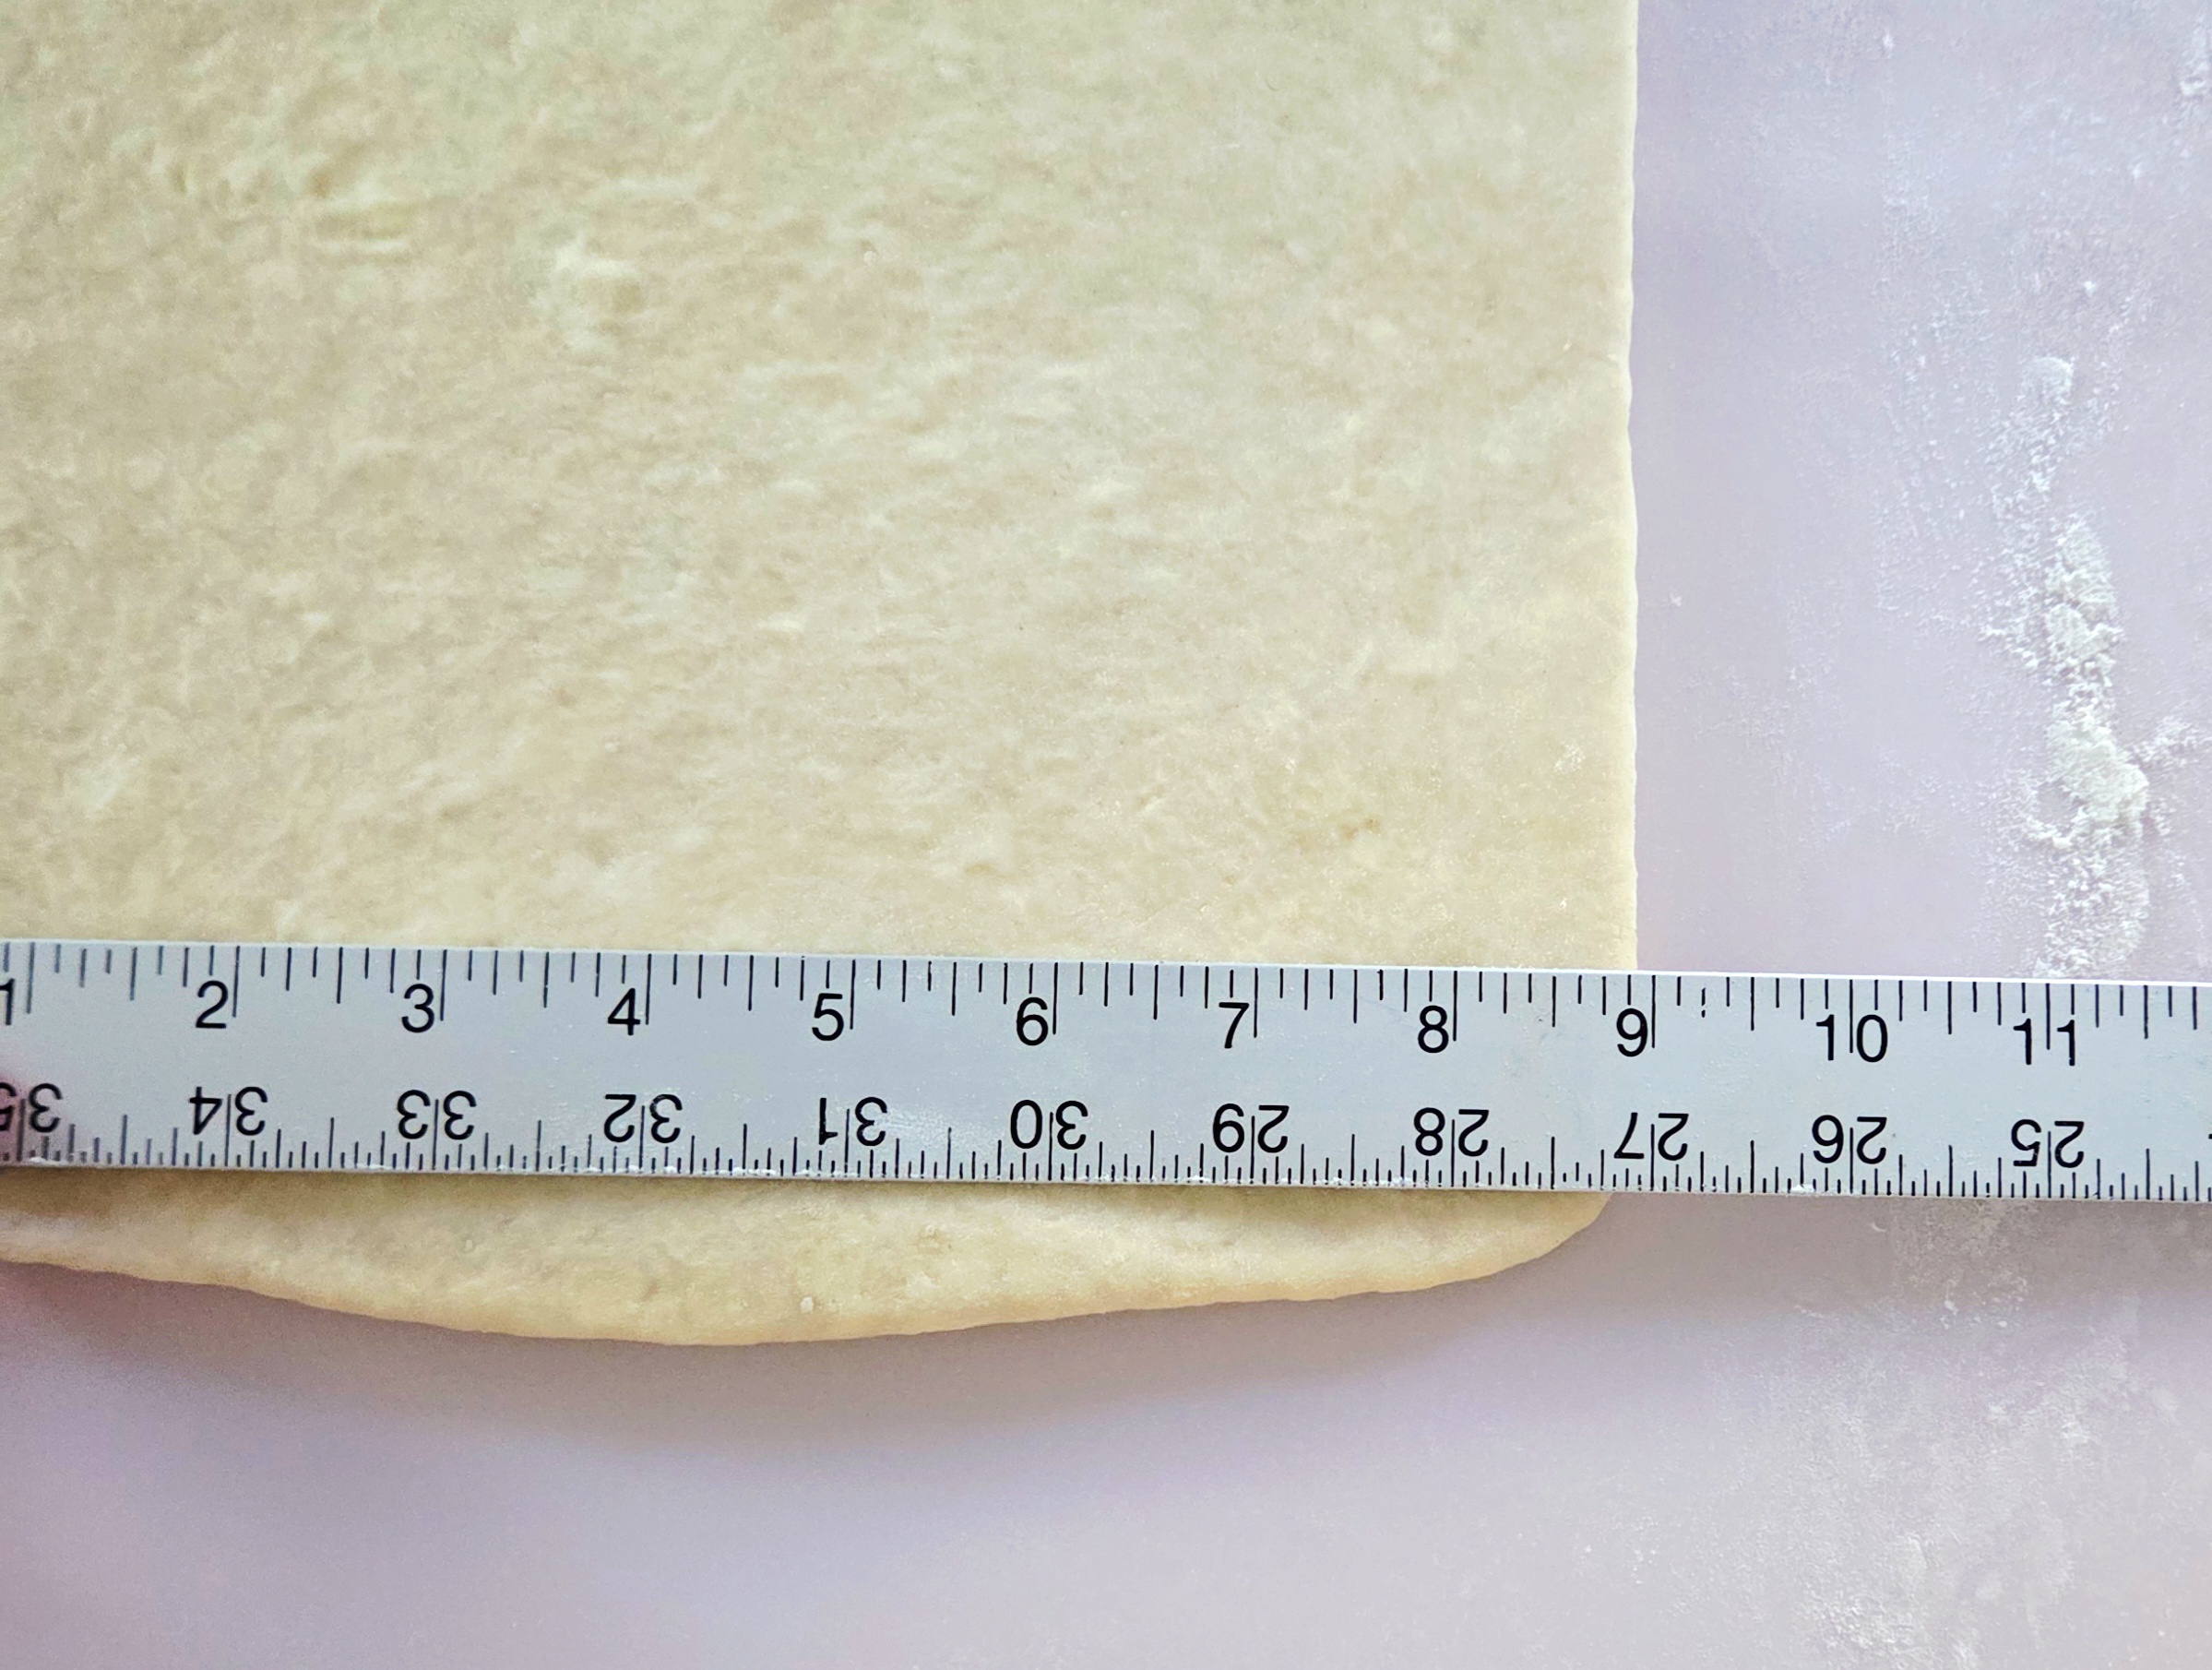
Using a ruler, mark off every 4 inches along the long edge of the dough using a paring knife. There should be 2 inches on one end of the rectangle. Place the ruler along the other long edge and begin marking off every 4 inches once again, starting at the opposite end from where you did the first time. The marks on one side should now be spaced in the center of where the marks on the other side are.
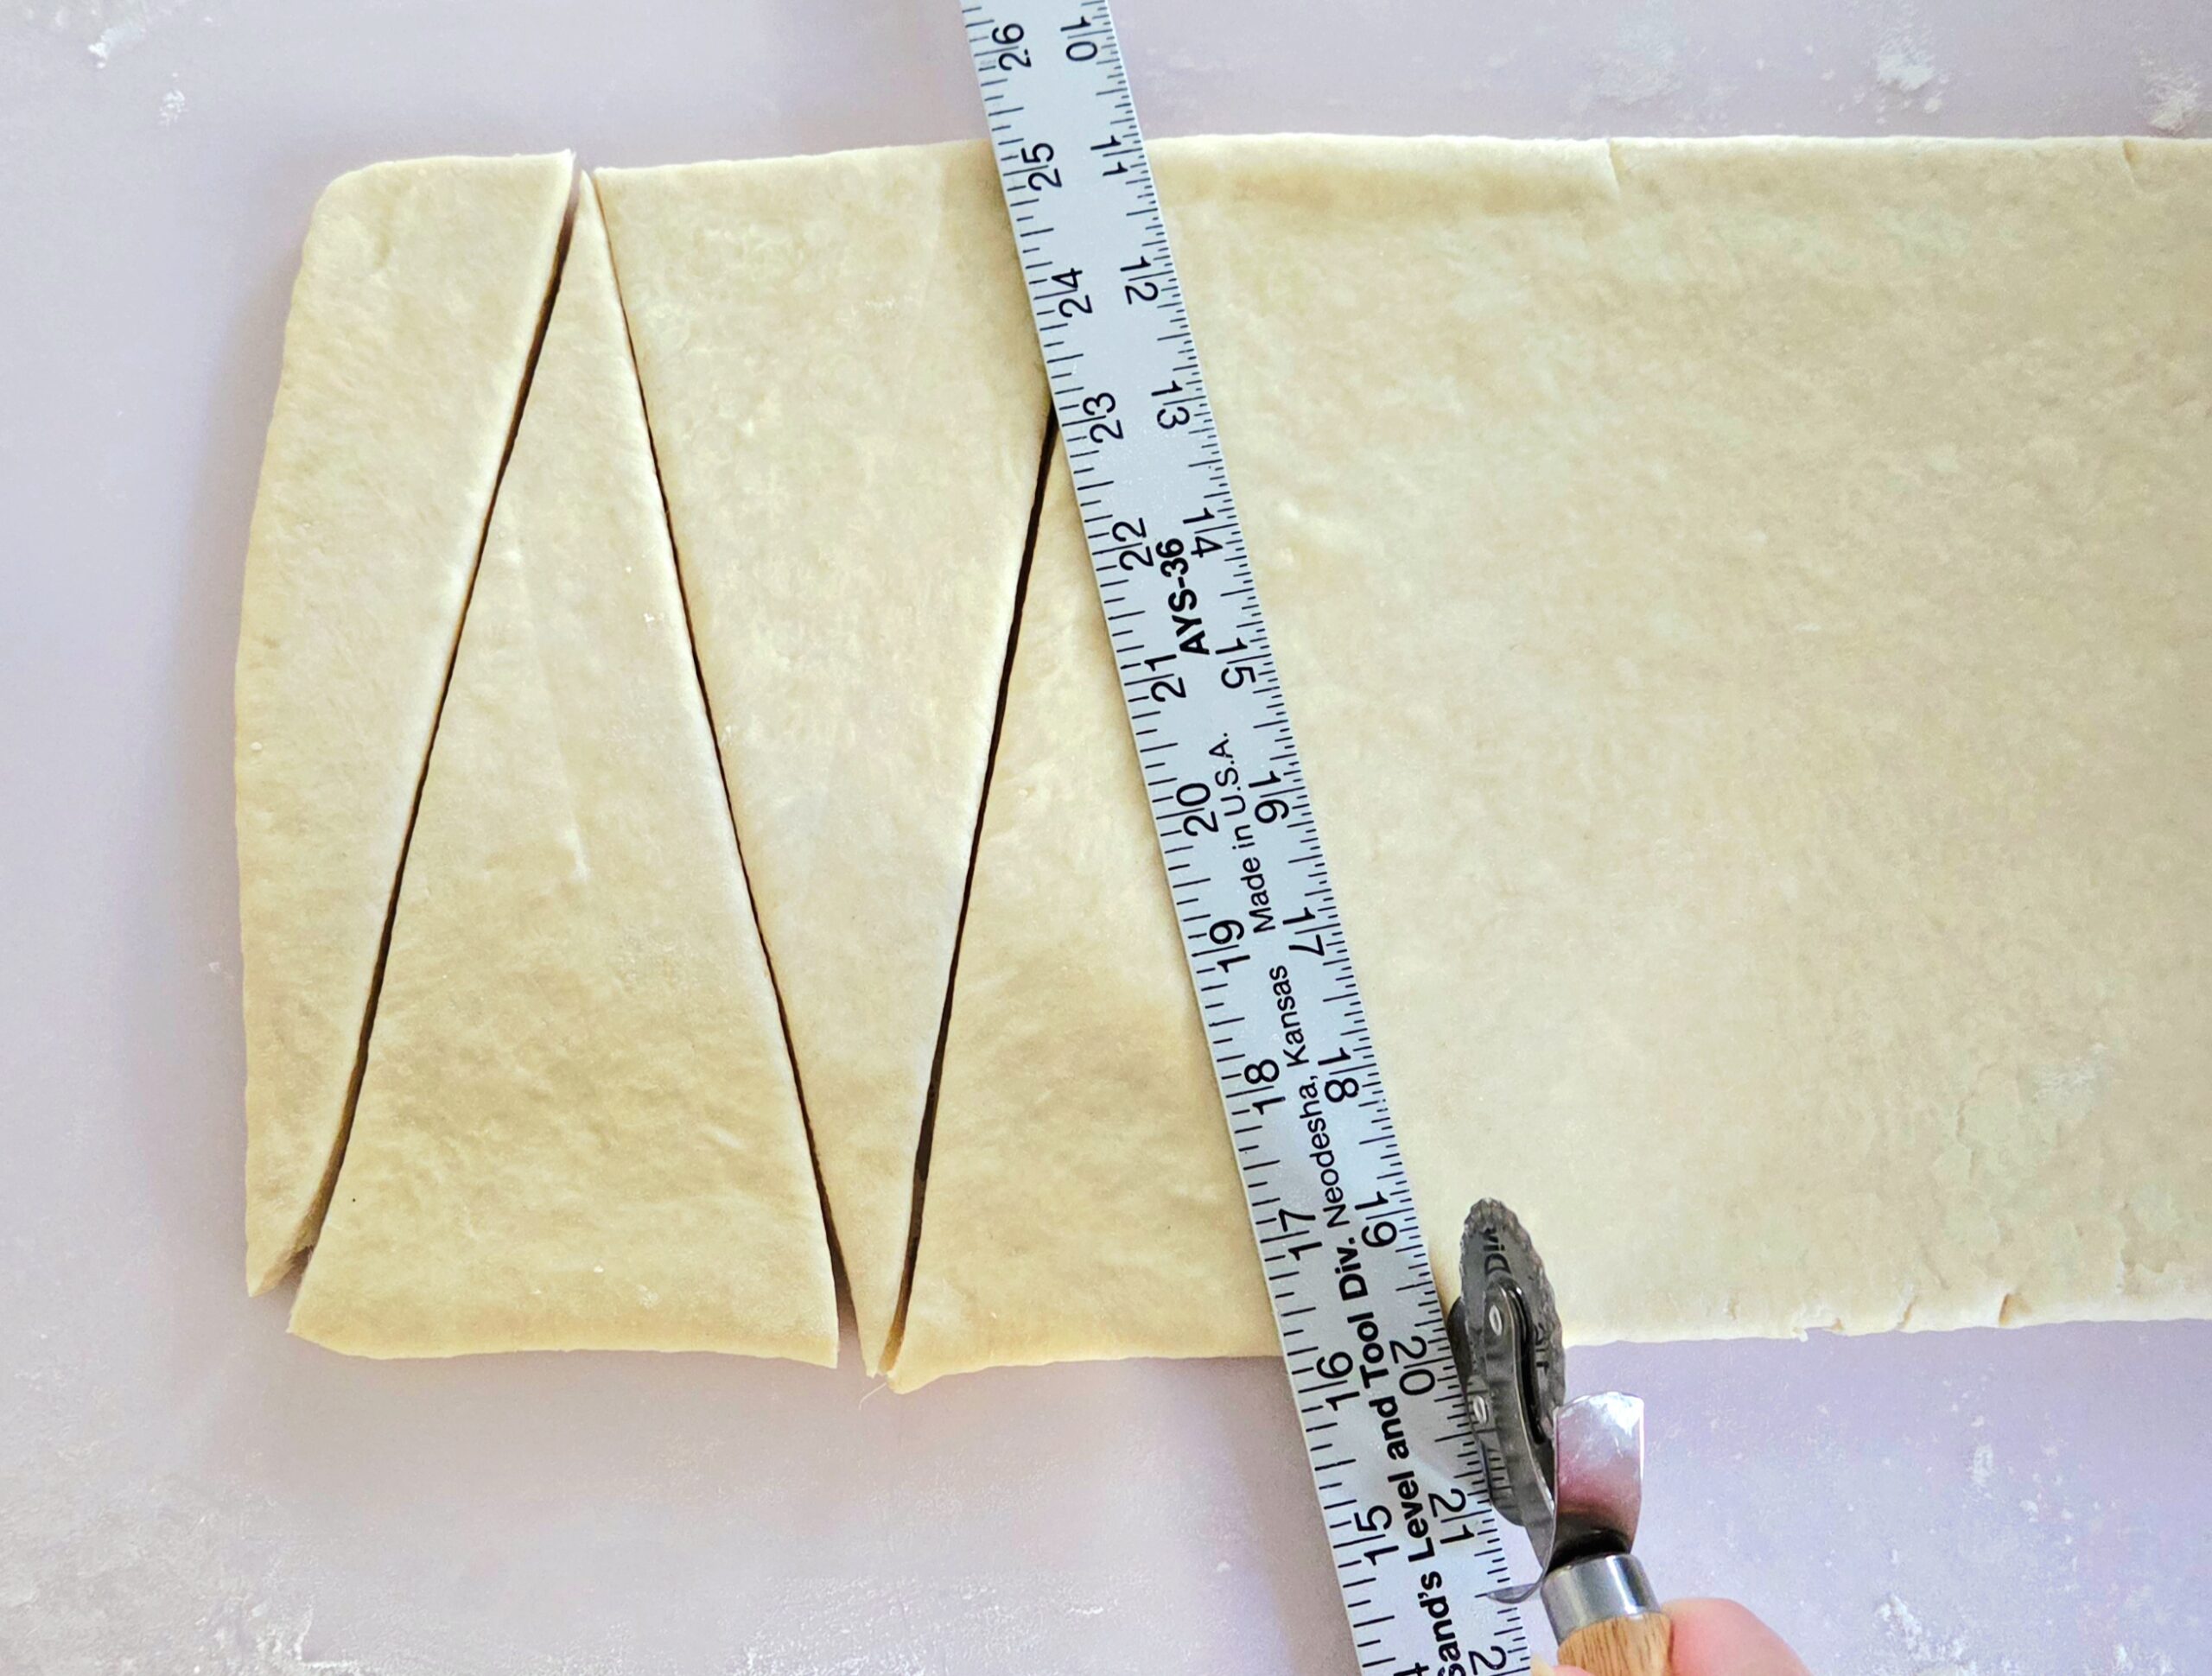
Place a ruler so the edge is diagonally aligned with a mark on each side. Using a paring knife or pizza wheel, cut a straight line using the ruler as a guide. Alternate the position of the ruler, so the mark in between the two marks on the opposite end becomes the point of a triangle. You should end up with 12 triangles.
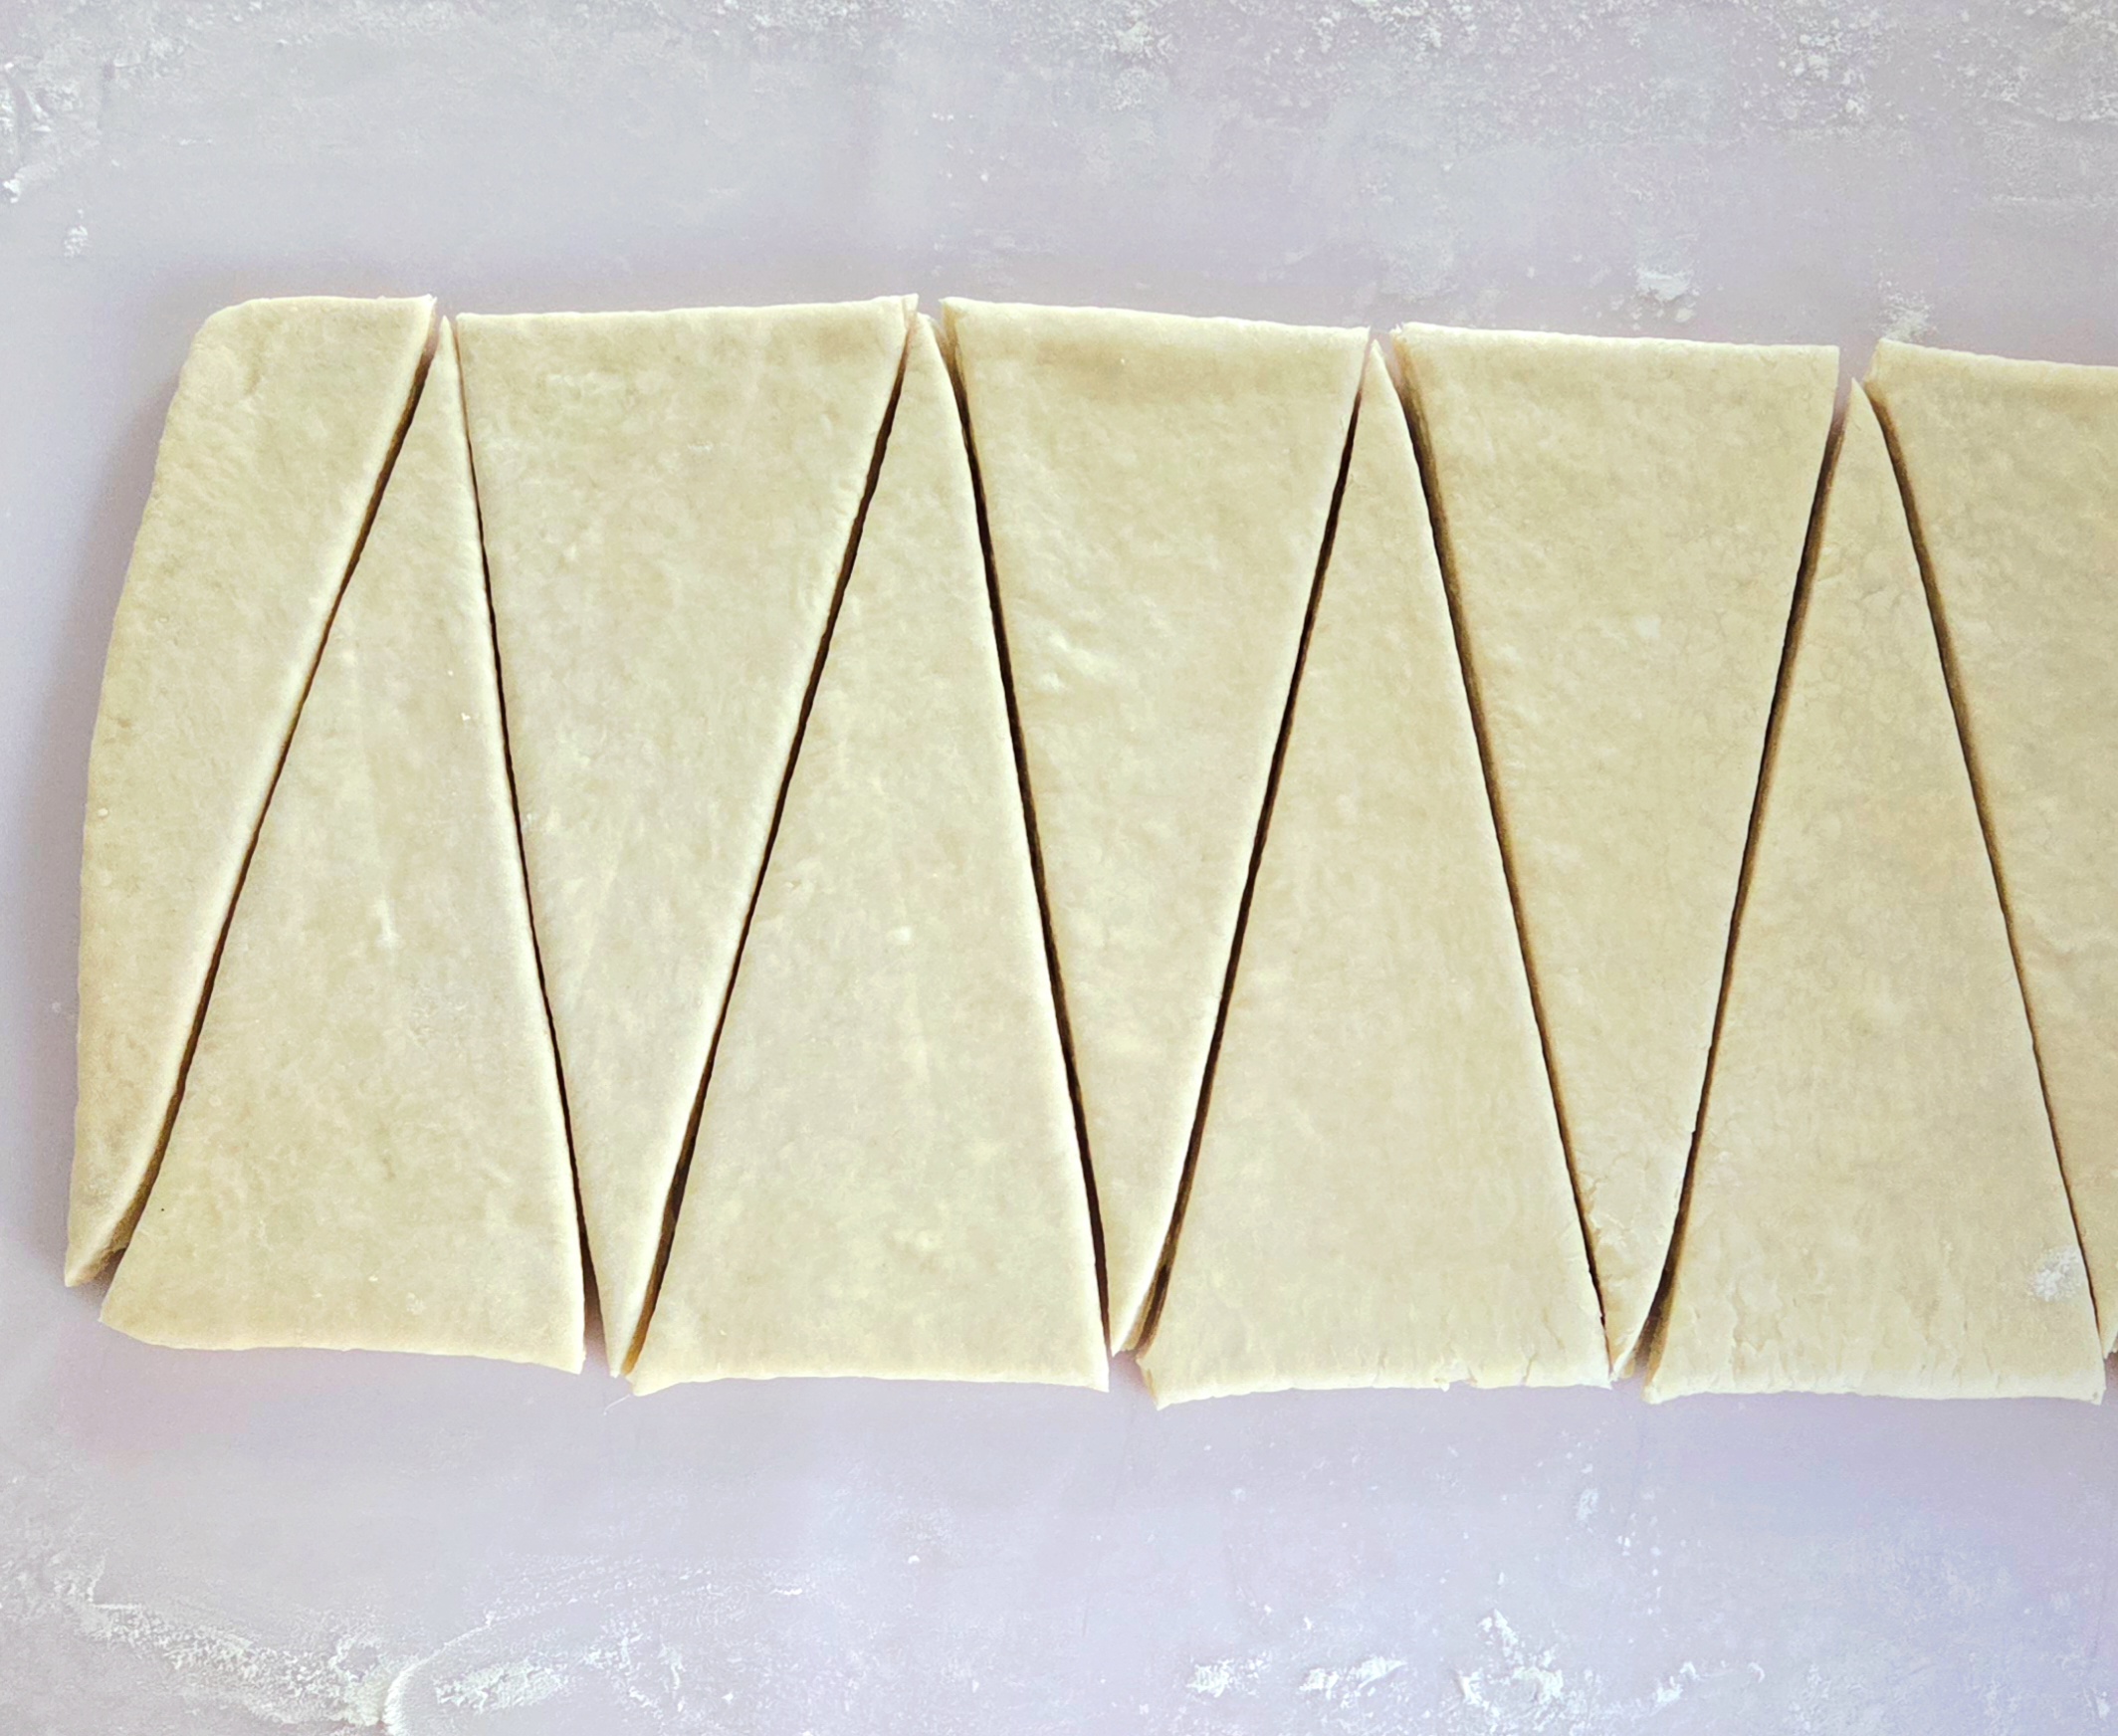
Cut the two half-triangles on either end into 6 relatively equal pieces. No wasted dough in this house!
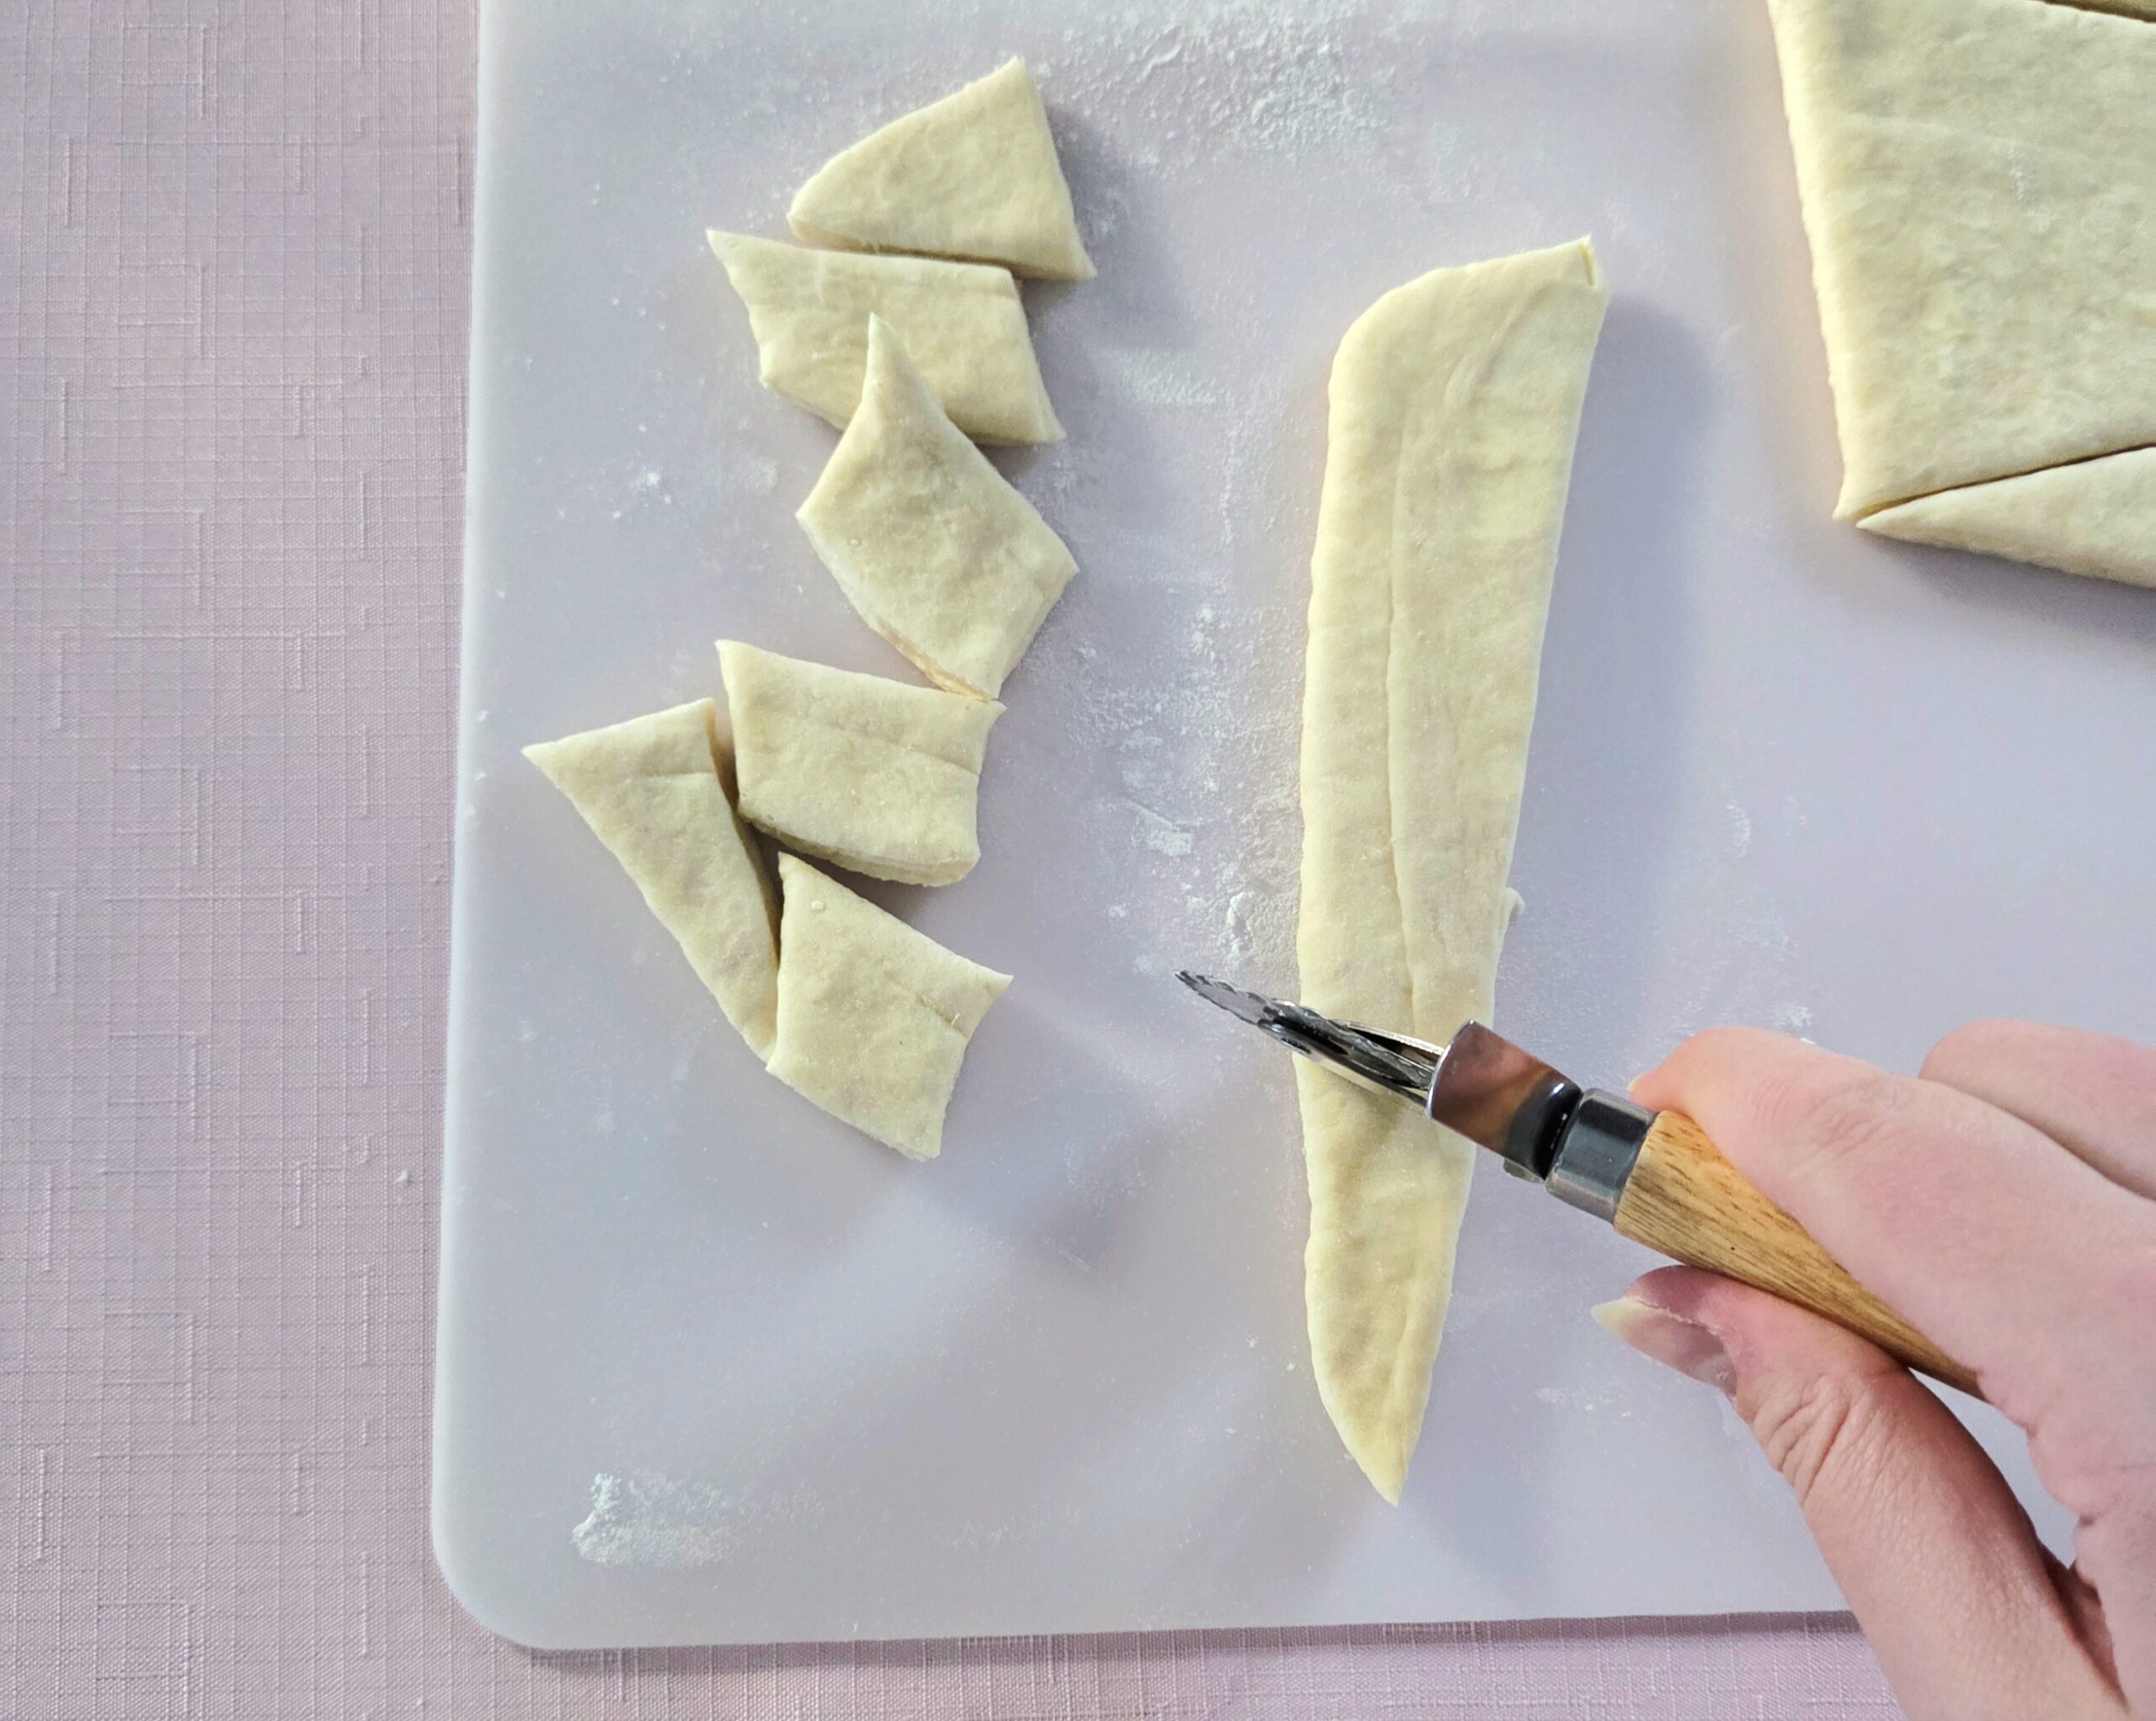
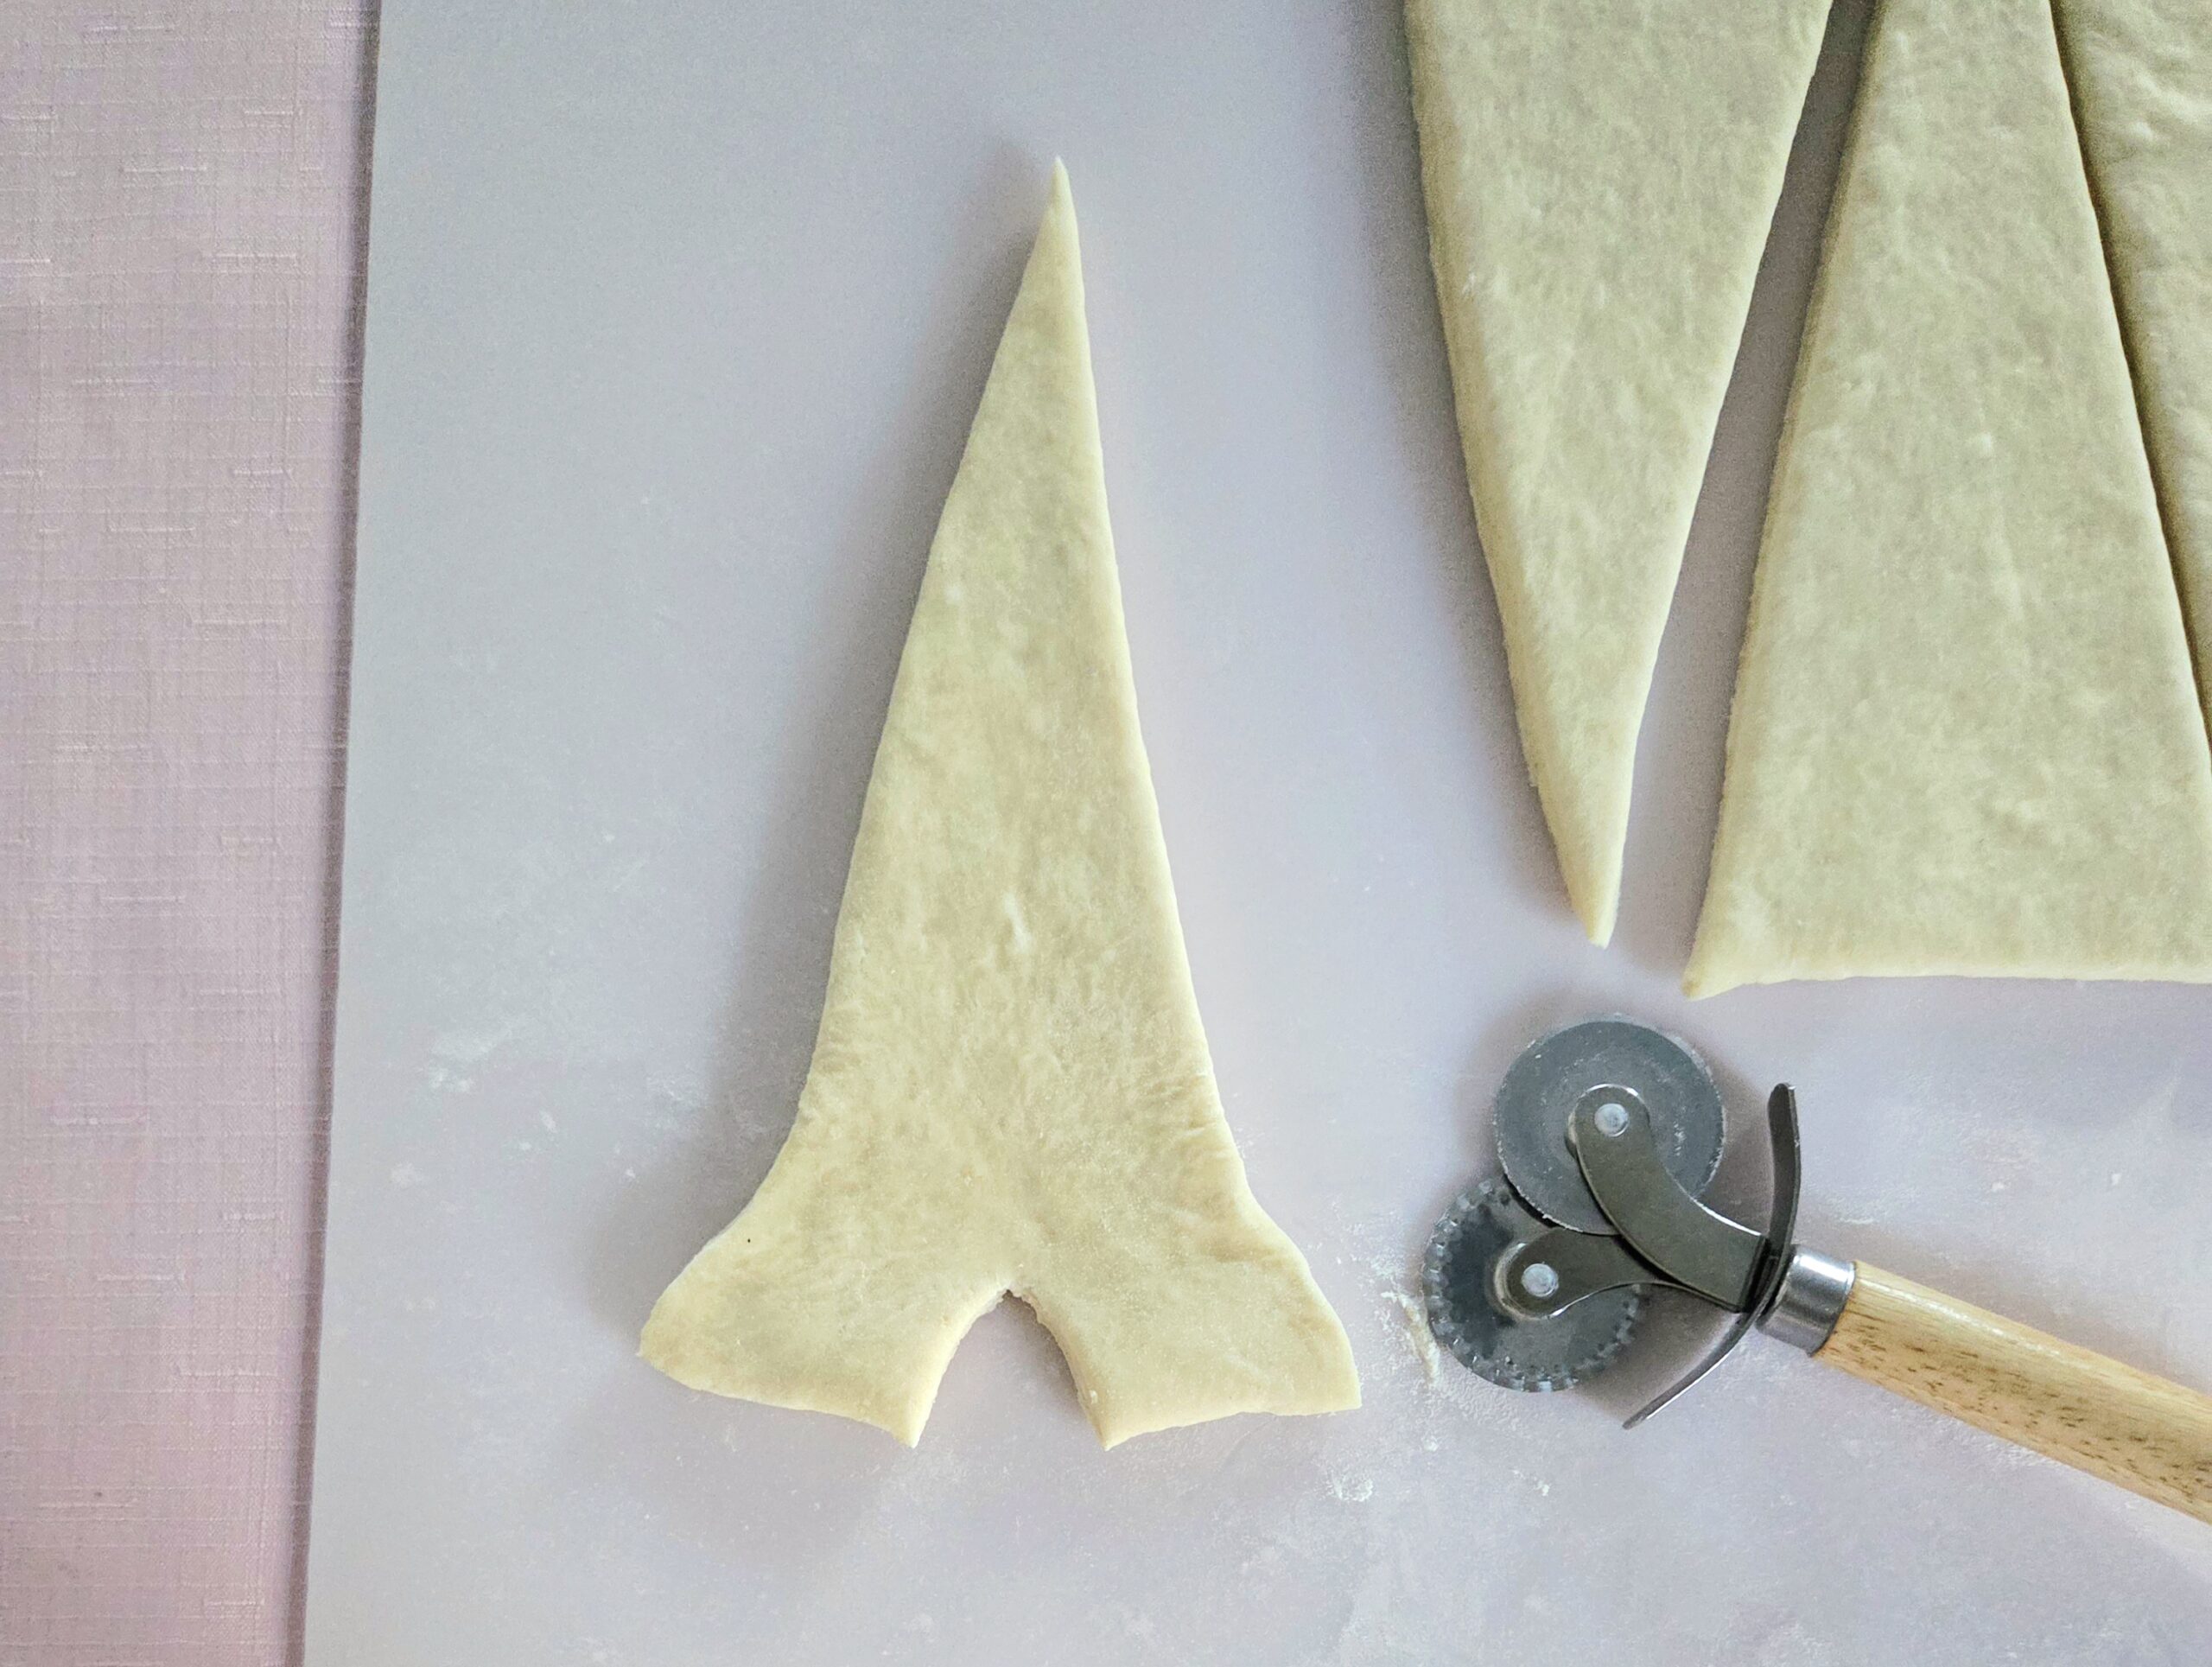
Take one triangle and make a 1-inch slit down the center of the short edge, and gently spread it open.
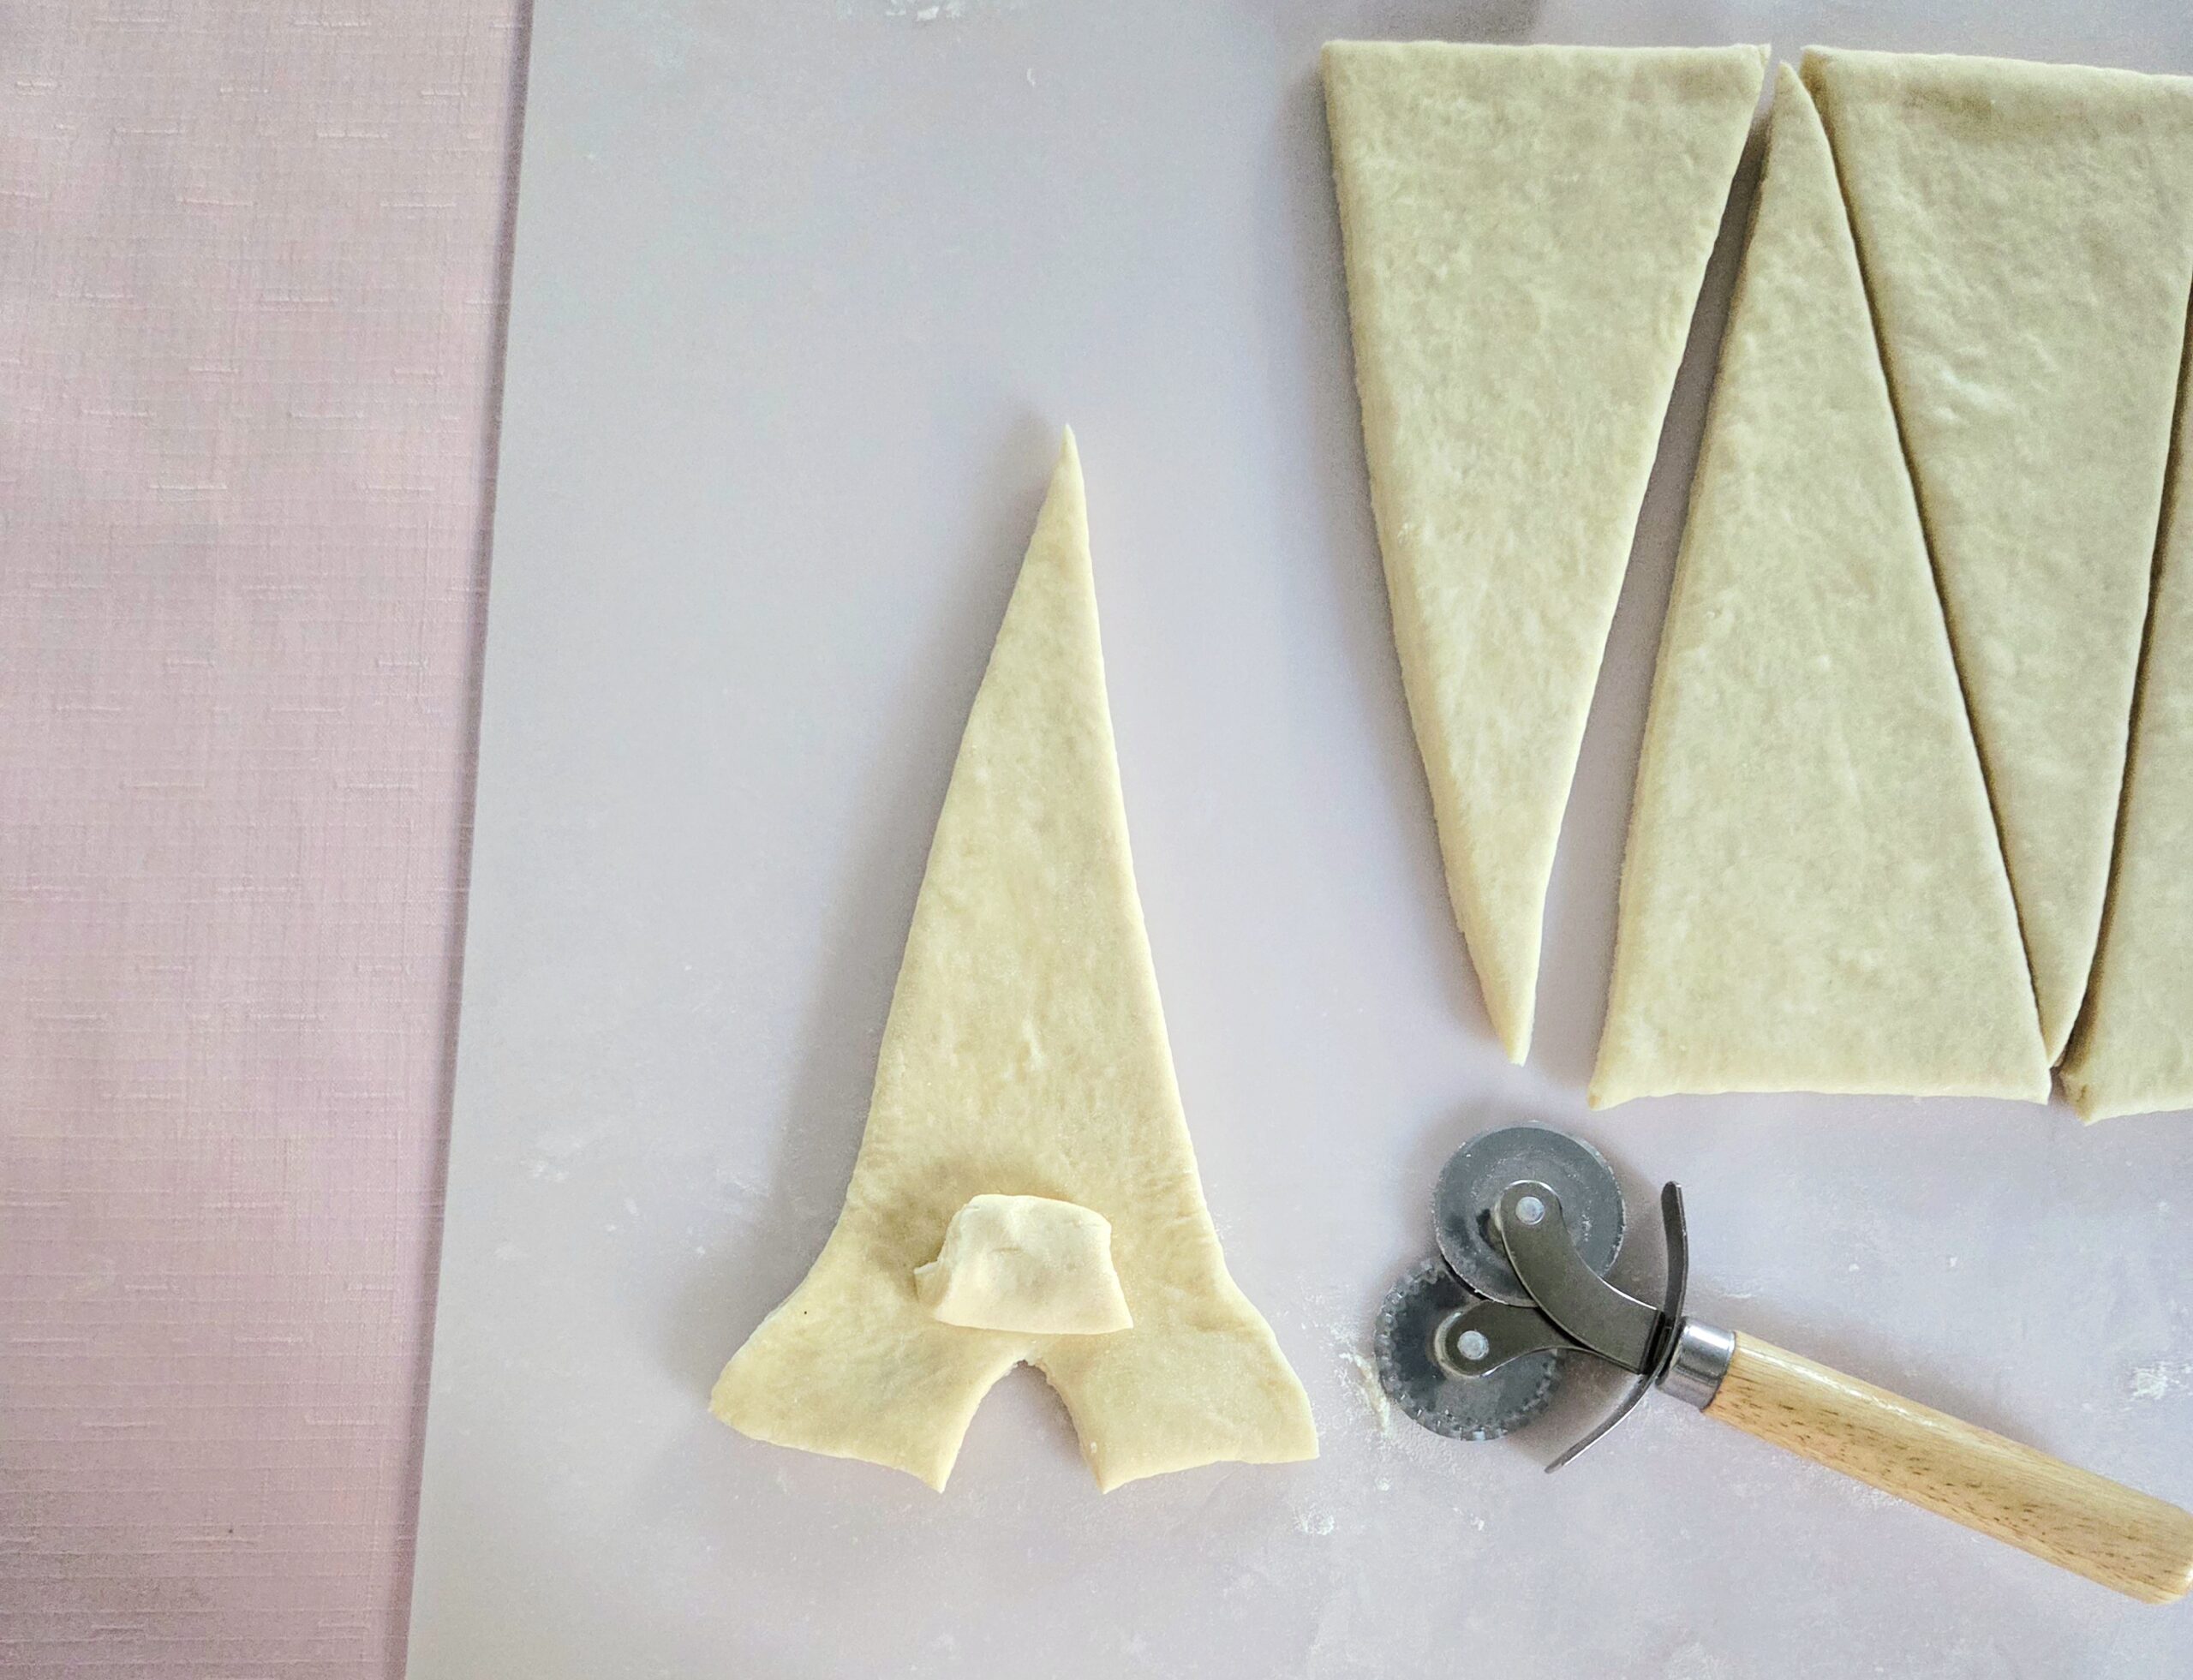
Place one of the cut pieces just above the slit you made and cover it with the two points at the slit, gently pressing down to seal it.
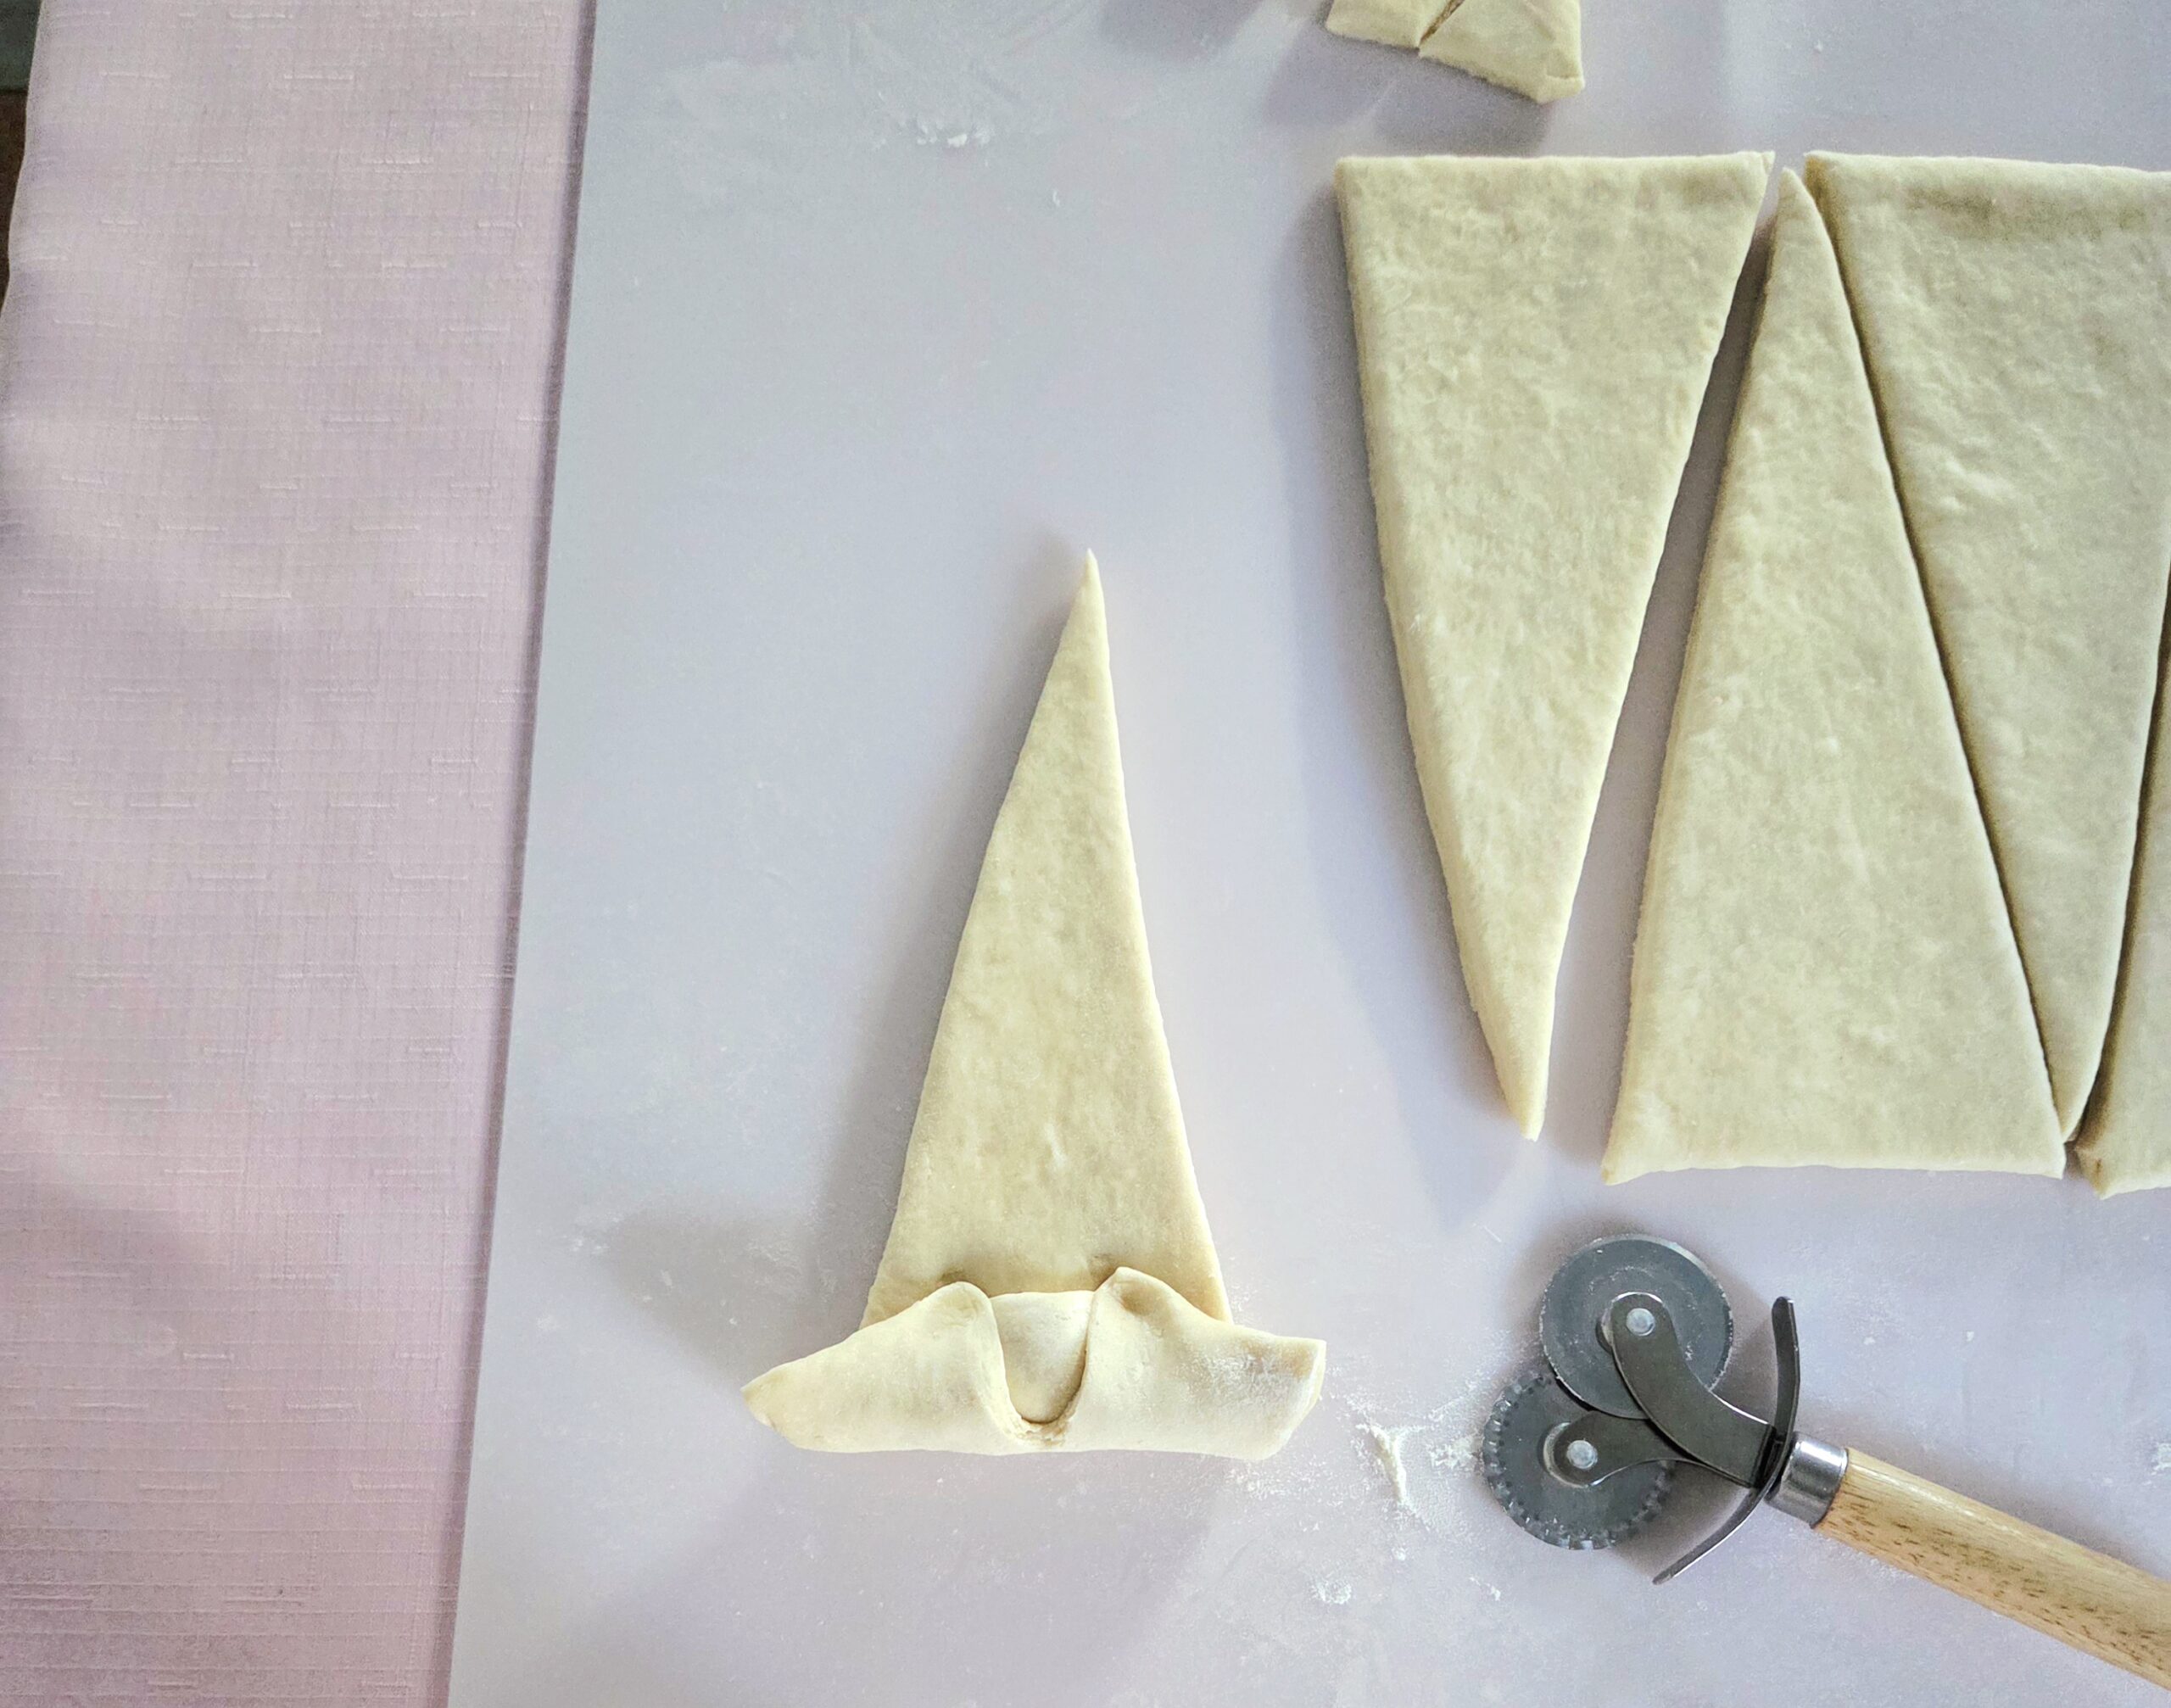
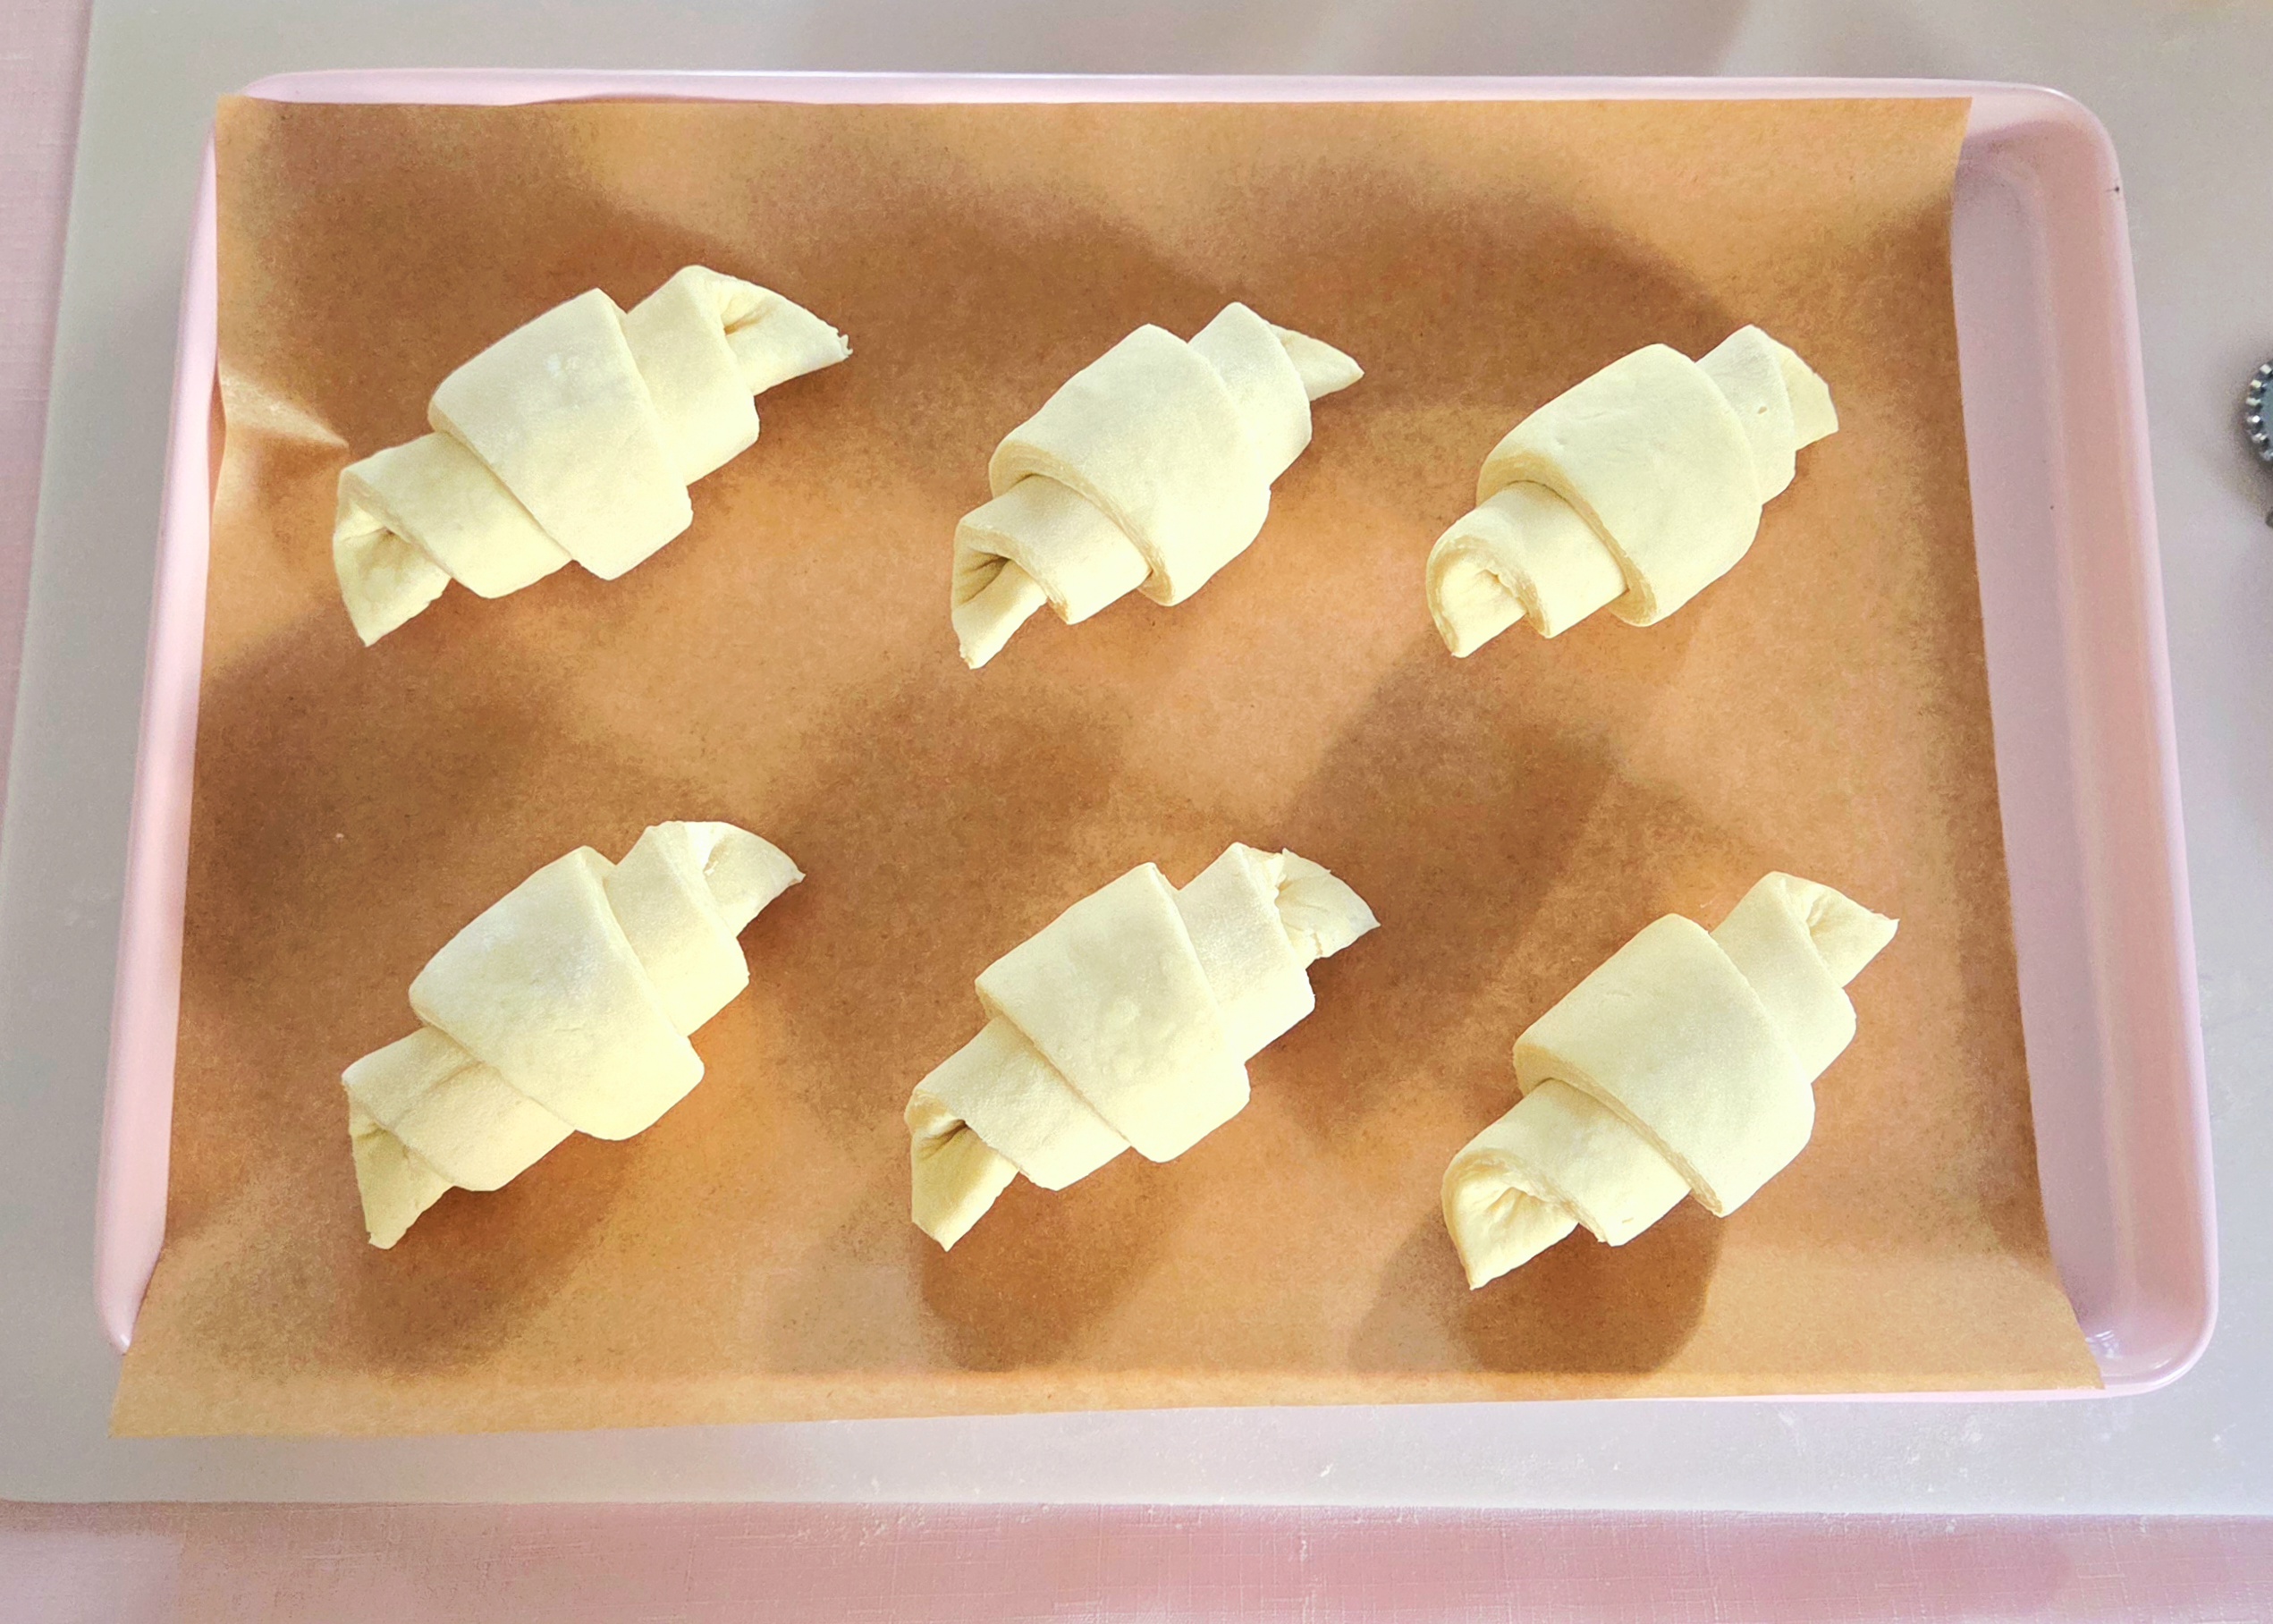
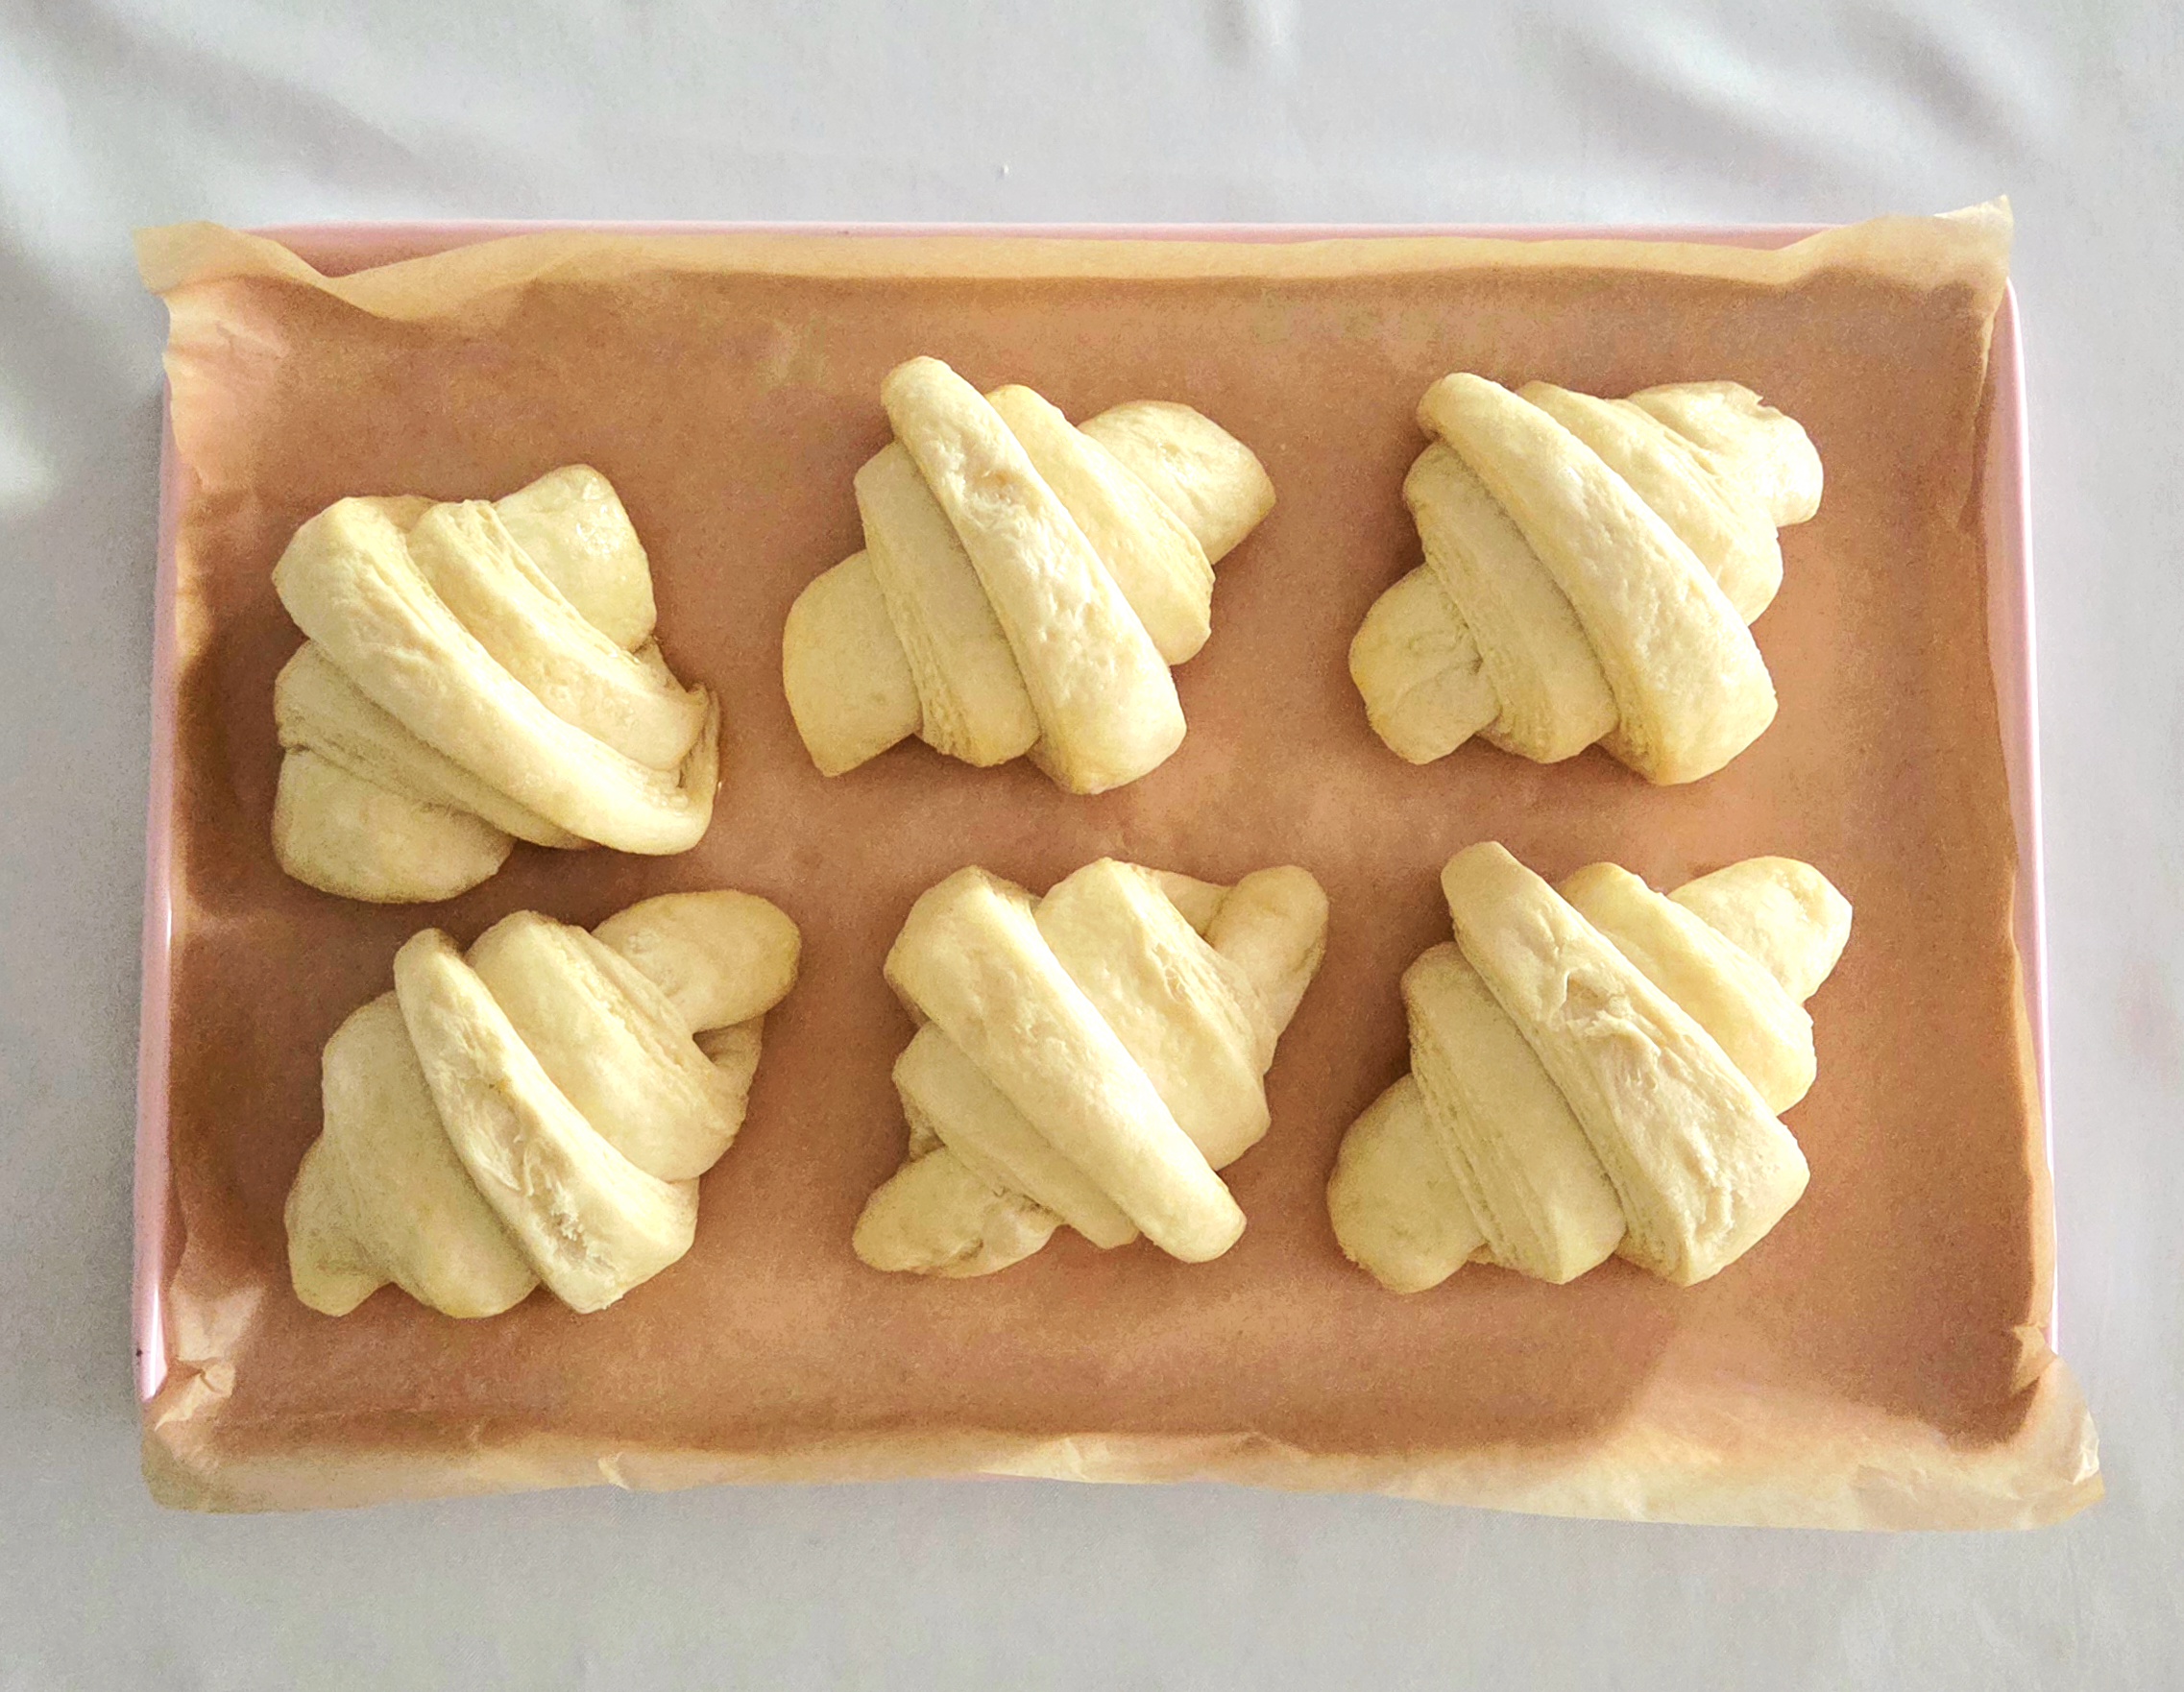
Starting at that edge, roll up the triangle, making sure the pointed end is tucked underneath the body of the croissant. Place it on one of the lined baking sheets, shaping into a crescent if desired.

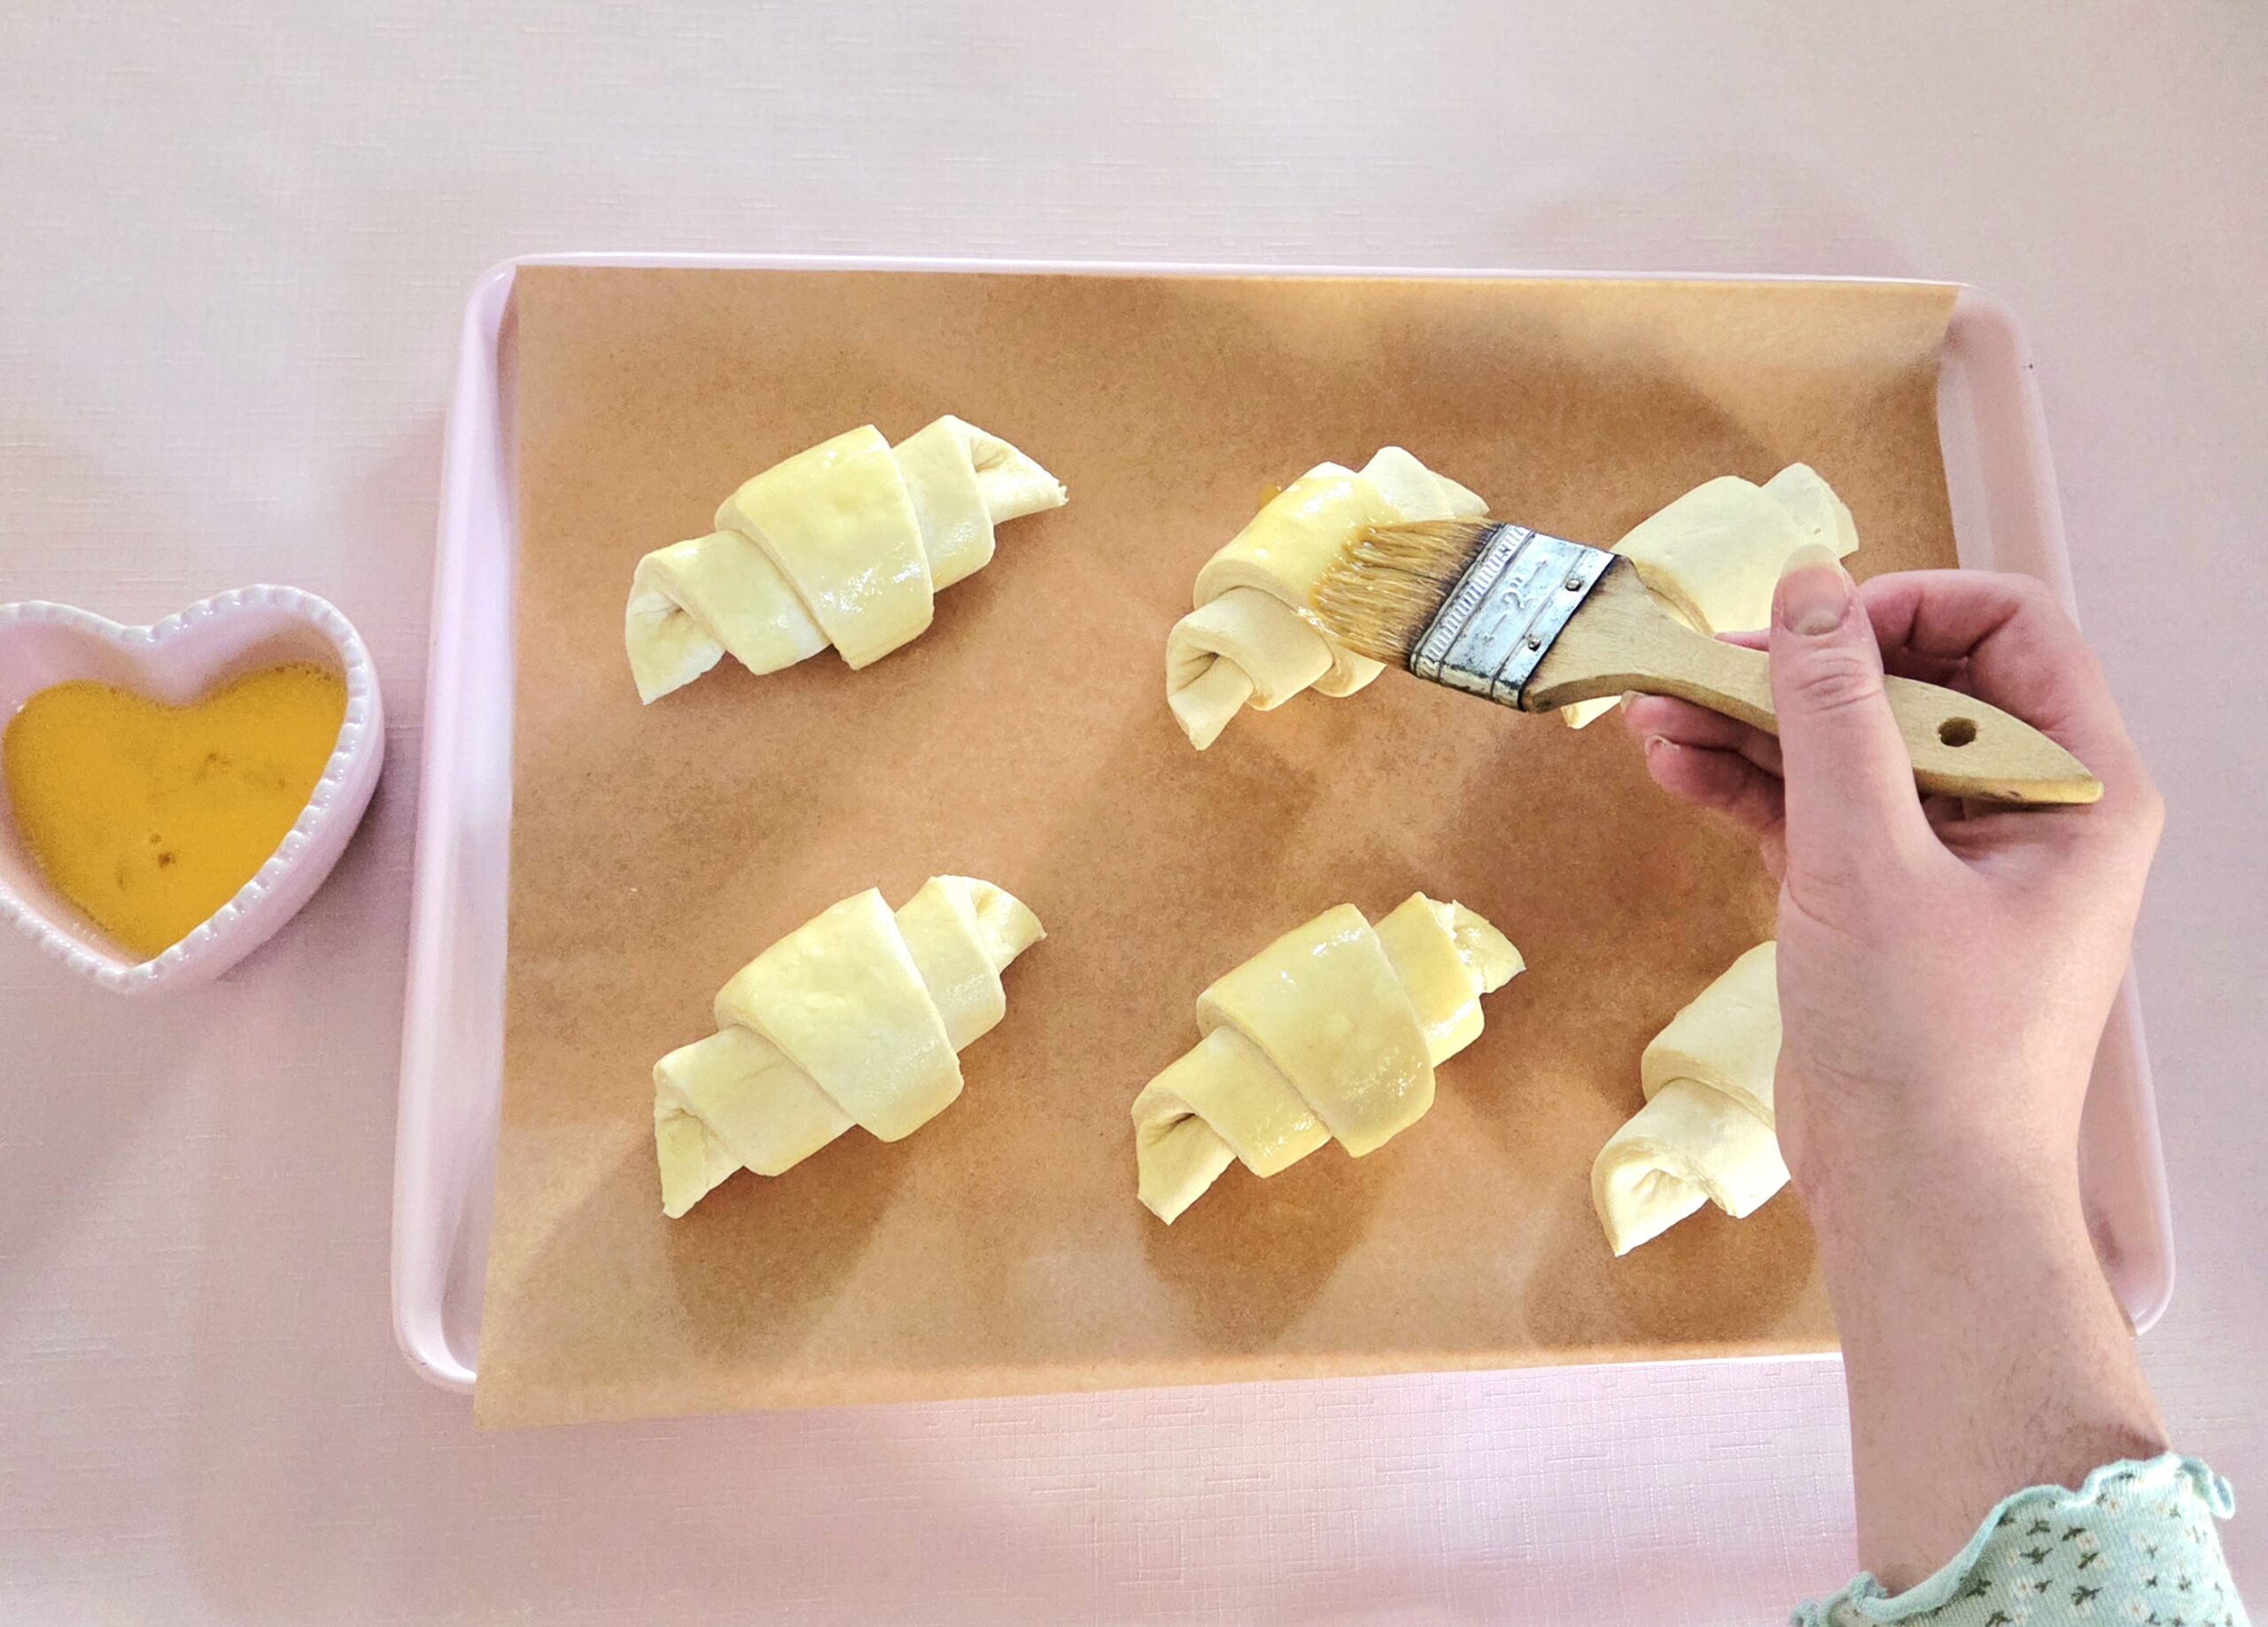
Repeat the previous steps for shaping the remaining croissants, making sure to leave plenty of space in between them on the baking sheets. Between proofing and then baking, you can expect the croissants to grow quite a bit. Turn the oven off, and brush the croissants delicately with the egg wash, using a pastry brush or your finger. Loosely cover the croissants with plastic wrap and place them in the turned-off oven for 1 hour, or until they’ve doubled in size.
Remove the croissants from the oven and heat it to 400F. While it’s heating, remove the plastic and brush the croissants once more with another delicate layer of egg wash. This will just reinforce how beautiful they’ll look in the end.
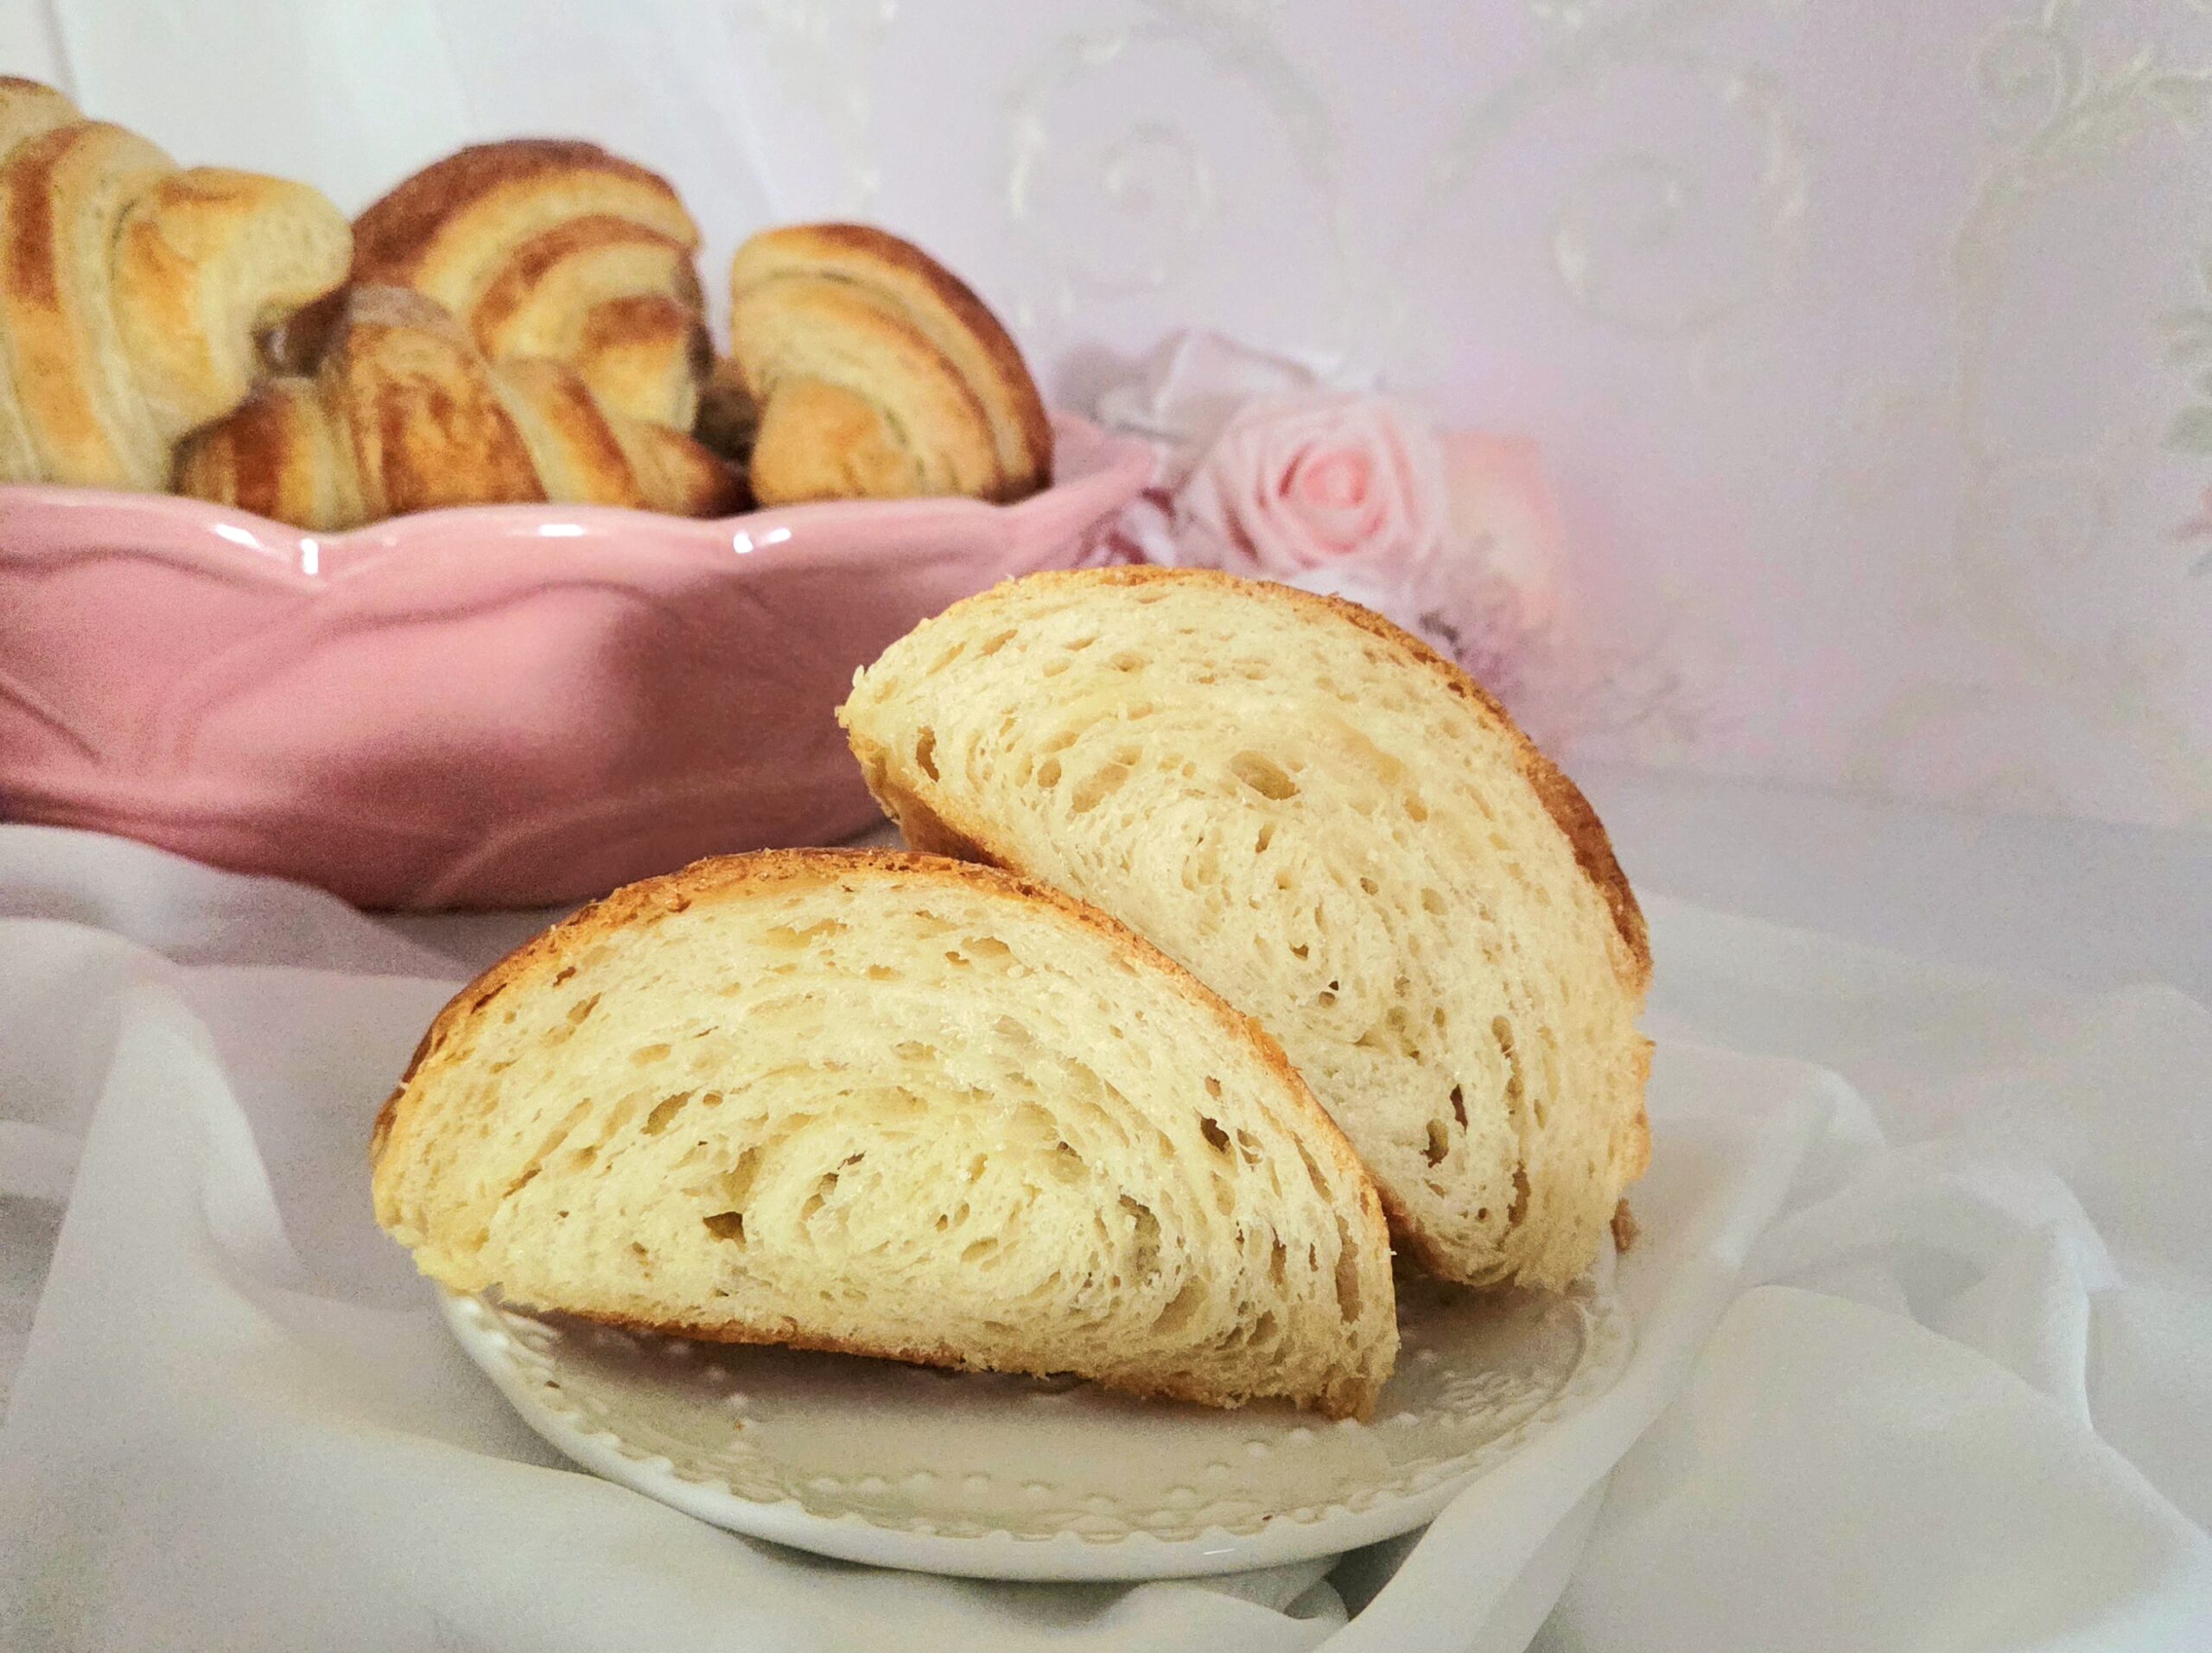
Place one pan on the center rack of the oven, and the second on the bottom rack. Bake the croissants for 10 minutes, flip the pans around. Swap which pan was in which slot during this point, for the most even results. Turn the oven down to 375F and bake for another 6-8 minutes, or until the croissants are a delightful golden brown. This way, the pastries can finish baking, but won’t get too dark in the process.

Transfer the croissants over to a cooling rack and allow them to come down to room temperature. Store any leftover in an airtight container or gallon sized zip-top bag for up to 1 day, and enjoy!


Croissants
Bake Time: 400F for 10 minutes then 375F for 6-8 minutes
Servings: 12 Croissants
Total Time: 6 hours 30 minutes
Prep Time: 1 hour 30 Minutes
Ingredients
- 4 cups bread flour
- ¼ cup granulated sugar
- 1 Tablespoon instant dry yeast
- 2 teaspoons salt
- 3 Tablespoons unsalted butter
- ¾ cup whole milk
- ⅔ cup water
- 21 Tablespoons unsalted butter
- 1 large egg
- Pinch of salt
Directions
Basic Dough (Détrempe)
- Begin by bringing together the base dough, or détrempe. In the bowl of a stand mixer fitted with a dough hook, whisk together the bread flour, sugar, yeast, and salt. Set this aside.
- Take the 3 Tablespoons of butter and gently wrap it entirely in plastic. Take a rolling pin and beat the butter, so it becomes pliable while staying cool. Fold the butter over itself a few times in between pounding it, so the whole thing softens.
- Pinch off pieces of the butter and drop them into the dry goods. Using the tips of your fingers, massage the butter into the flour until it’s been completely incorporated and the flour mixture has a sandy texture. Set this aside.
- Warm the milk and water together until it’s just warm to the touch, or between 100-110 degrees F. Pour the liquids into the flour mixture and turn the mixer to level 2 for 5 minutes.
- Temporarily place the completed dough onto a clean counter and lightly grease the inside of the mixer bowl with a neutral oil. Ball the dough and place it into the greased bowl, turning it several times to coat it lightly in oil. Cover the top of the bowl in plastic wrap and place it in a turned-off oven (see the FAQs and Science section) for 1-2 hours, or until doubled in size.
- While the dough proofs, prepare the butter slab, or beurrage. Take the remaining 21 Tablespoons of butter and wrap them in plastic, or place in a zip-top bag. Using a rolling pin, beat the butter the same way as you did the smaller amount. This may take a few minutes. Once the butter is pliable, roll the butter out to an approximately 7 x 7 inch square and wrap it airtight in plastic wrap. Place the beurrage in the fridge until it’s needed.
Lamination
- When the dough has finished proofing, dust a clean counter with flour. Place the dough on the flour dusted counter, and sprinkle a bit more flour on top of it. With your hands, gently pat the dough into a square. Take a rolling pin and roll out just the corners of the dough, so there’s a larger hump of dough in the center (see pictures above for reference). The square should be about 15 x 15 inches, or large enough to completely encase the slab of butter.
- Unwrap the beurrage and place it diagonally in the center of the dough, as shown above. Fold each corner of dough down and seal the edges together, to enclose the butter. Flip the pâton (dough wrapped butter) over so it’s seam side down and roll it out to a 9 x 21 inch rectangle, around ⅜ of an inch thick. Fold the rectangle into thirds like a letter, as shown above. Wrap it airtight in plastic and place it in the fridge to chill for 30 minutes.
- After the dough has finished resting, dust the counter with a bit more flour and place it so the folded end is on the side, as shown above. Allow the dough to sit out for a few minutes, then gently create two indents a few inches apart in the pâton using the rolling pin. Roll the bulging dough in between the indents to flatten them, and roll out the pâton into a ⅜ inch thick rectangle again. Fold it into thirds again, wrap it airtight, and stick it back in the fridge for 30 minutes.
- Repeat step 9 once more. After the final 30 minute rest, the dough is ready to use (though can be left in the fridge for up to a day ahead of time). When you’re ready to shape the croissants, prepare a turned-off oven once again and line two baking sheets with parchment paper.
- Prepare an egg wash. In a small bowl, whisk together an egg with a splash of water and a pinch of salt. Set the egg wash aside.
Shaping
- Turn the oven on to the lowest temperature it will go to. Place the dough onto a clean, flour-dusted counter. Roll the dough into a 9 x 26 inch rectangle. Using a ruler, mark off every 4 inches along the long edge of the dough using a paring knife. One end of the rectangle should only measure 2 inches from the last mark.
- Place the ruler along the other long edge and begin marking off every 4 inches once again, starting at the opposite end from where you did the first time. The marks on one side should now be spaced in the center of where the marks on the other side are.
- Place a ruler as shown above, so the edge is diagonally aligned with a mark on each side. Using a paring knife or pizza wheel, cut a straight line using the ruler as a guide. Alternate the position of the ruler, so the mark in between the two marks on the opposite end becomes the point of a triangle. You should end up with 12 triangles. Use the pictures above as a guide.
- Cut the two half-triangles on either end into 6 relatively equal pieces. Take one triangle and make a 1-inch slit down the center of the short edge, and gently spread it open. Place one of the cut pieces just above the slit you made and cover it with the two points at the slit, gently pressing down to seal it.
- Starting at that edge, roll up the triangle, making sure the pointed end is tucked underneath the body of the croissant. Place it on one of the lined baking sheets, shaping into a crescent if desired. Repeat steps 14-15 for the remaining croissants, making sure to leave plenty of space in between them on the baking sheets.
Proof and Bake
- Turn the oven off, and brush the croissants delicately with the egg wash, using a pastry brush or your finger. Loosely cover the croissants with plastic wrap and place them in the turned-off oven for 1 hour, or until they’ve doubled in size.
- Remove the croissants from the oven and heat it to 400F. While it’s heating, remove the plastic and brush the croissants once more with another delicate layer of egg wash. Place one pan on the center rack of the oven, and the second on the bottom rack. Bake the croissants for 10 minutes, then flip the pan. Reduce the oven temperature to 375F and bake for another 6-8 minutes, or until the croissants are a beautiful golden brown.
- Transfer the croissants over to a cooling rack and allow them to come down to room temperature. Store any leftover in an airtight container or gallon sized zip-top bag for up to 1 day, and enjoy!
Tips
- Remove the beurrage (butter slab) from the fridge about 15-30 minutes before the détrempe (base dough) has finished proofing, depending on how warm your kitchen is. This way, it will be easier to roll them out when lamination begins.
- The dough can be prepared ahead of time to then bake fresh! It can be brought to the point where the lamination process is complete, so the recipe is followed through step 10 but the dough is then kept in the fridge overnight. Continue the recipe as written the next day.
- Alternatively, follow the recipe to step 5 of the Shaping Section, where the croissants have been shaped but haven’t gone through the final proofing. Cover them with plastic wrap so they’re airtight and place them in the fridge overnight. Complete the recipe as written the next morning.
- Fully baked croissants can be frozen! Once the fully baked croissants have cooled entirely, place them in a freezer safe bag. Freeze them for up to 3 months, thawing them gently on the counter overnight or carefully in the microwave.


0 Comments