
The 90’s really were a wild ride for any and all snacks, candy, cereal, and frozen foods. Being born in 1993, I’ve had my fair share of store bought Pop Tarts over the years. As nostalgic as it all feels on an emotional level, I just can’t stomach most of it anymore (thanks, 30). So rather than live a life either without any of my favorite childhood treats or feeling like literal garbage after eating them, I just decided to recreate them myself!
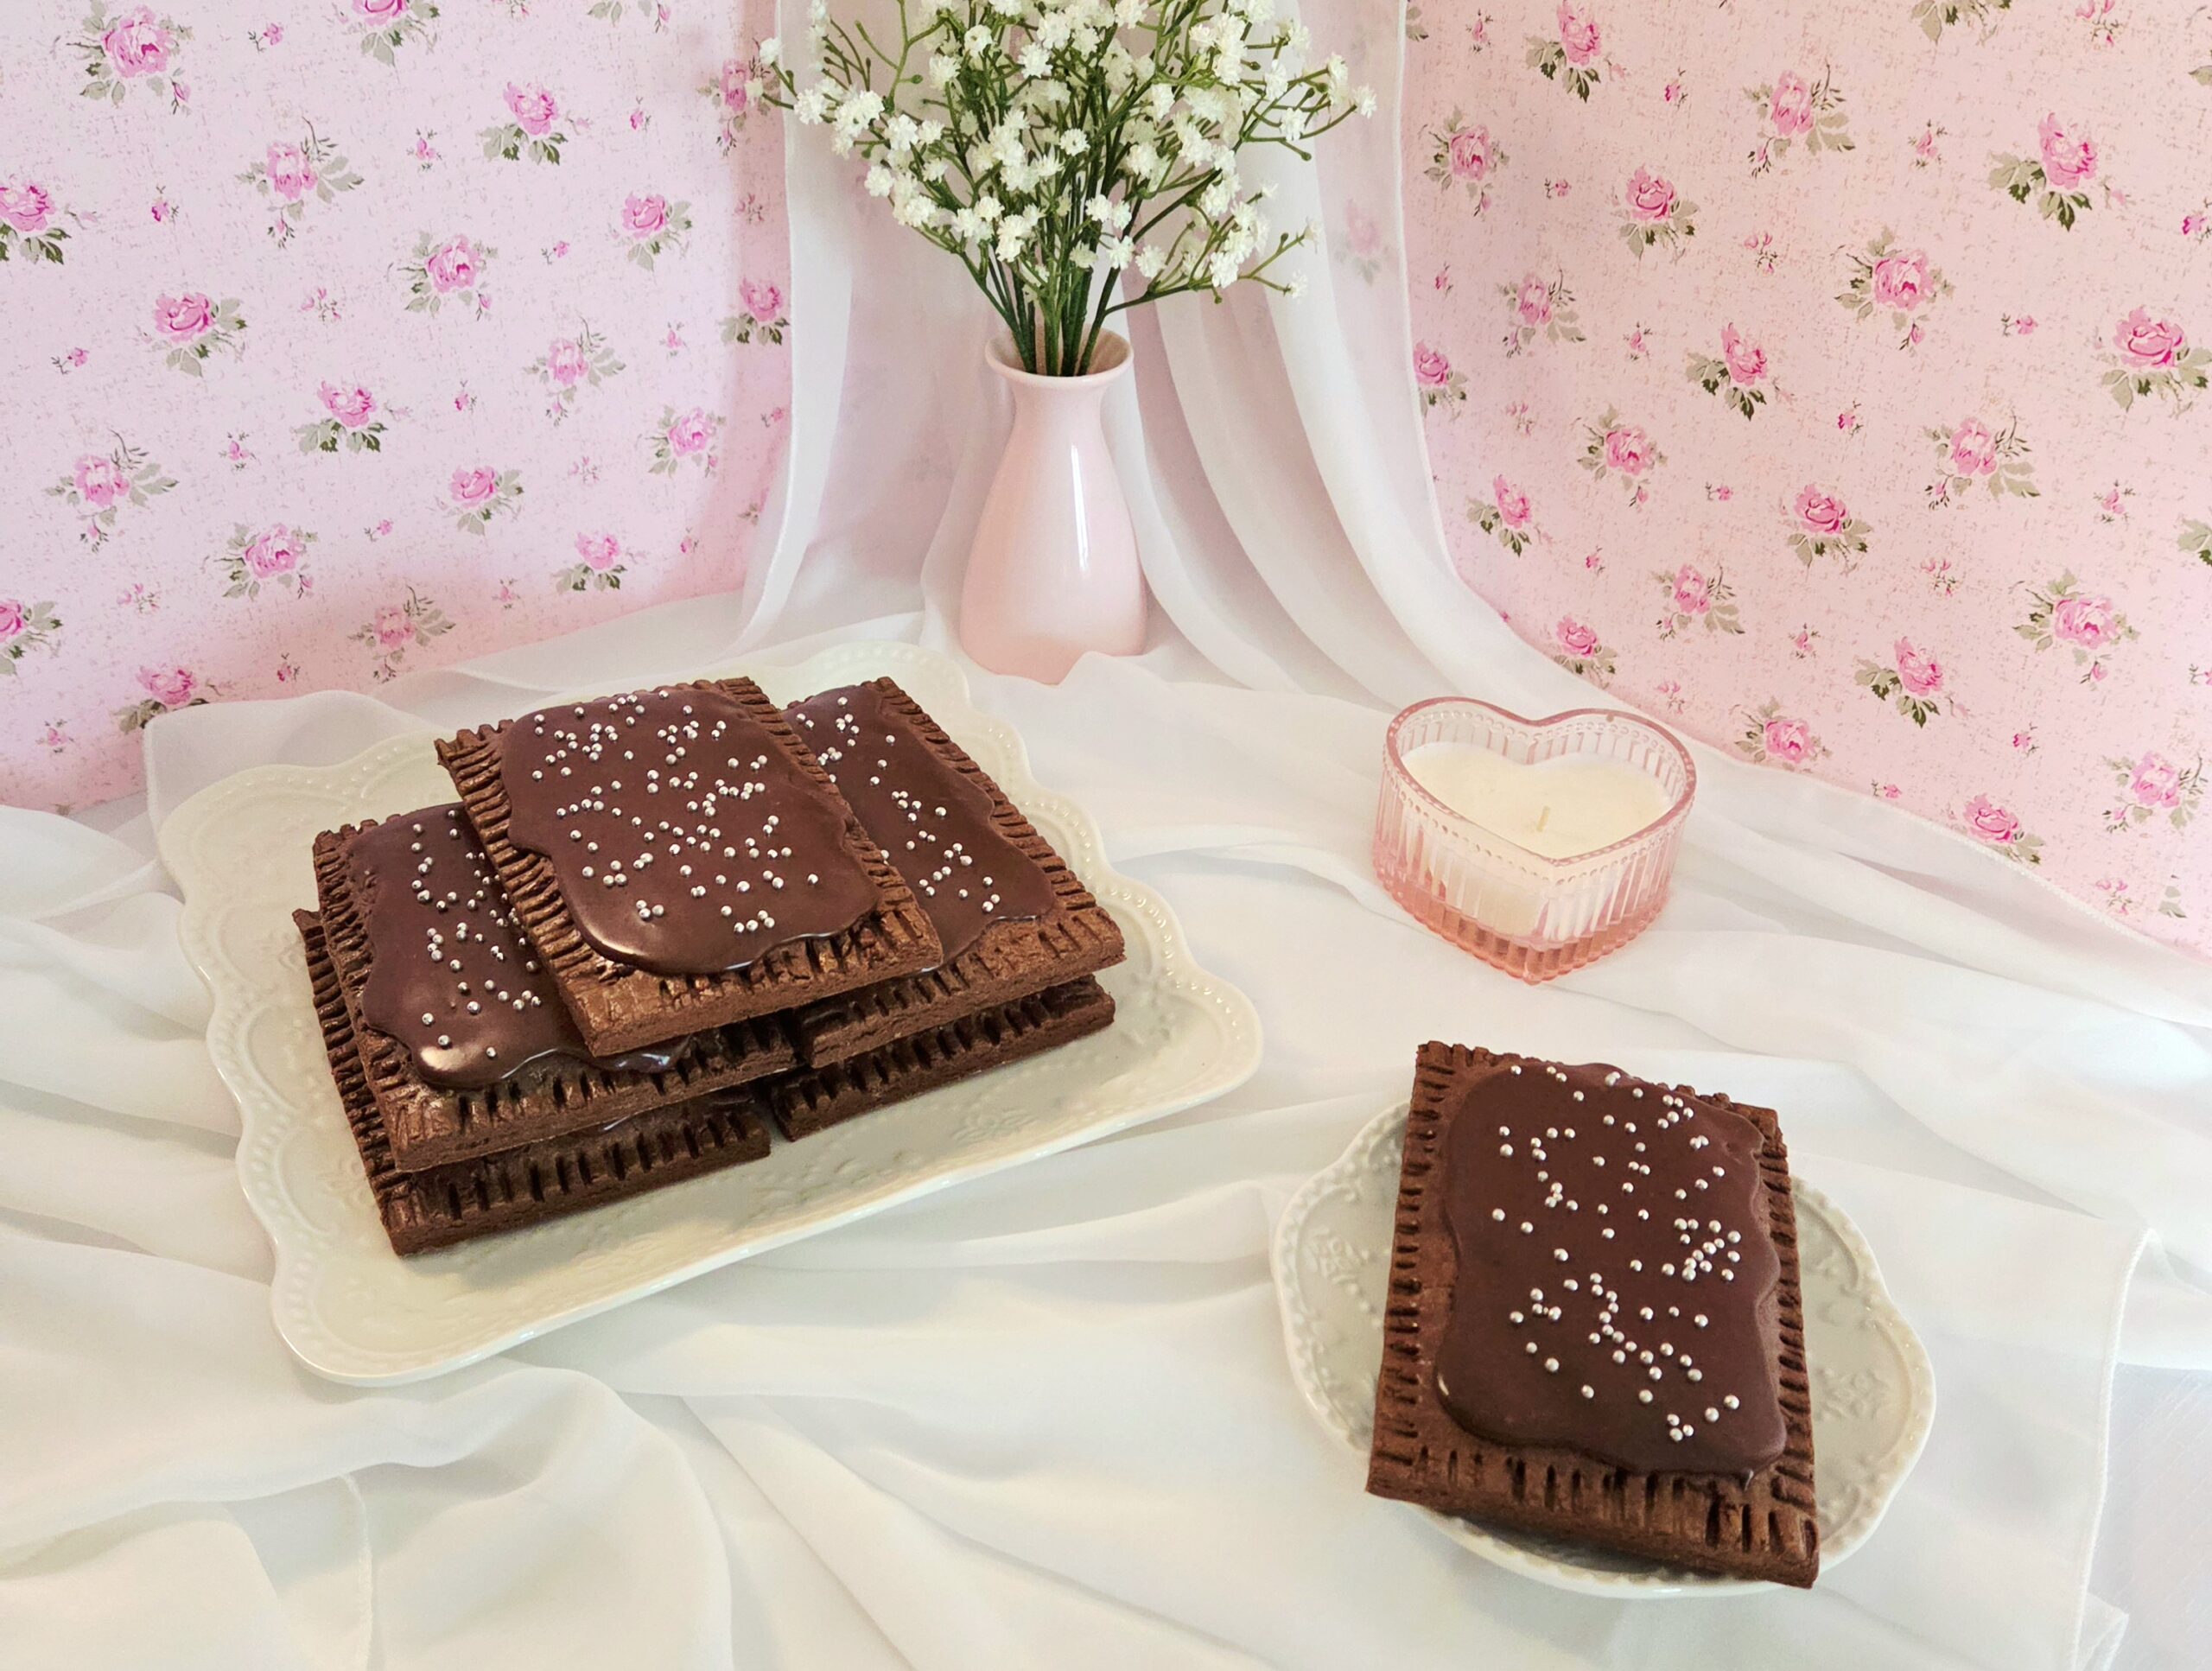
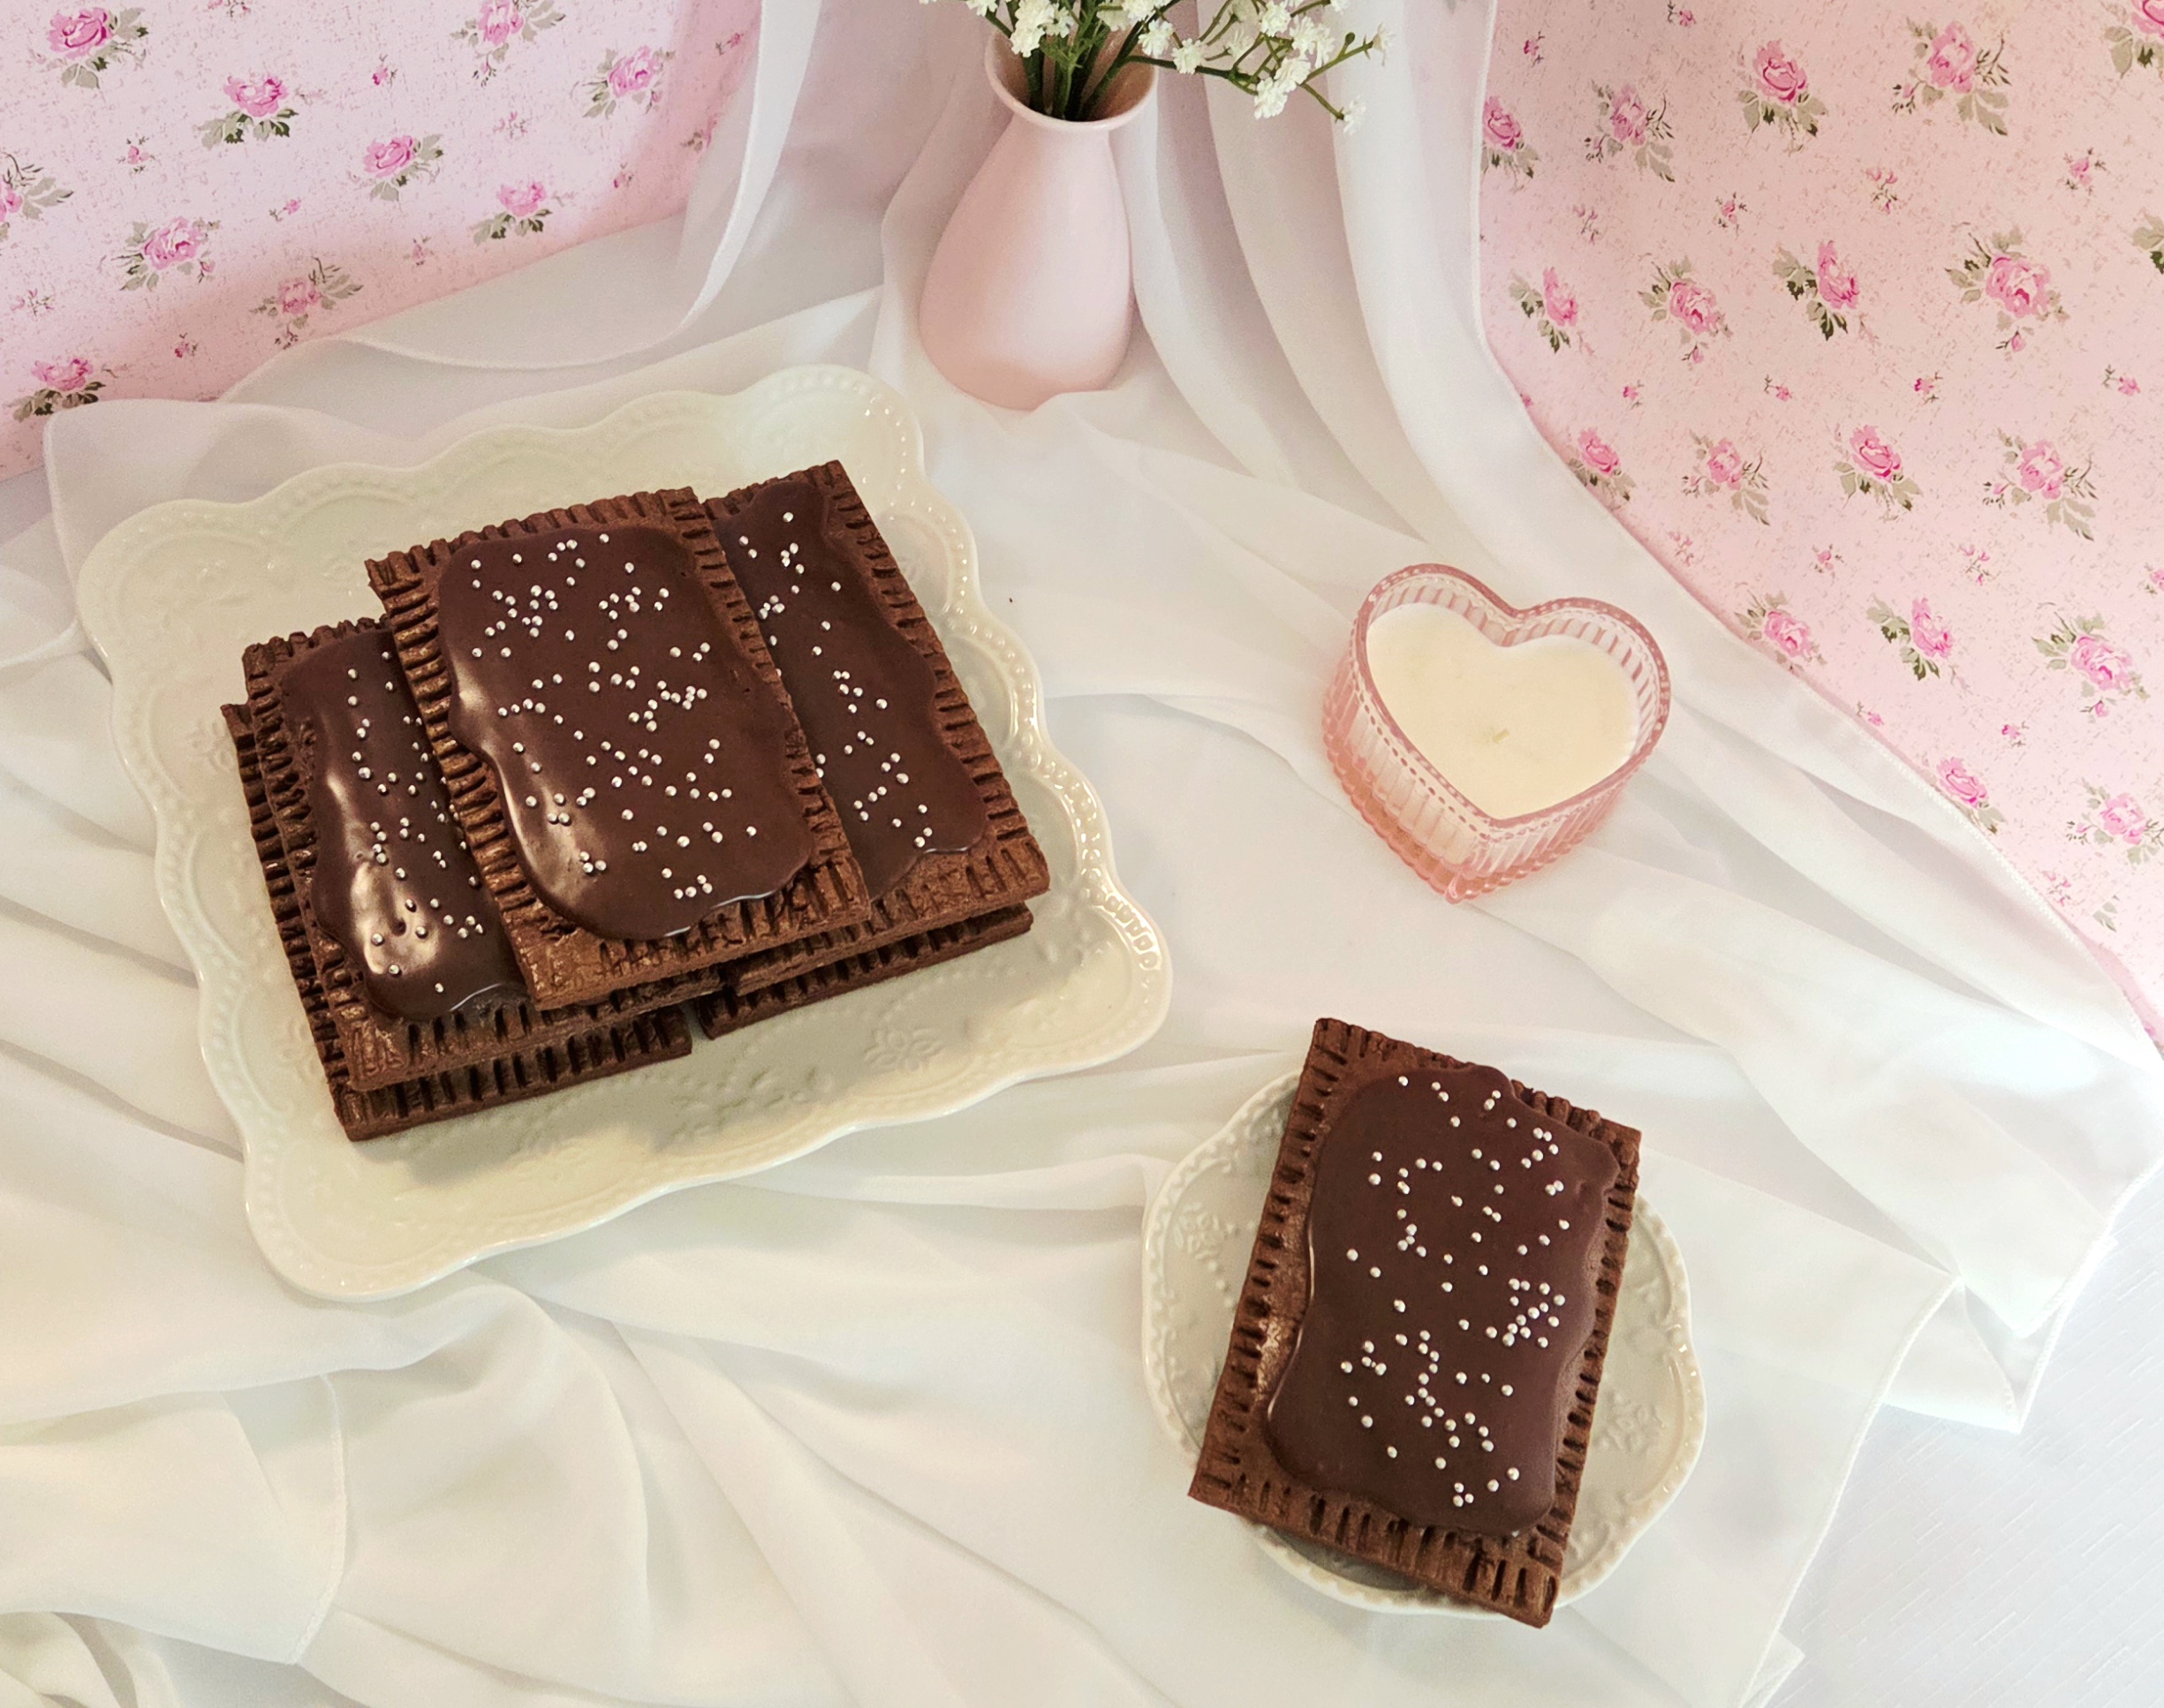
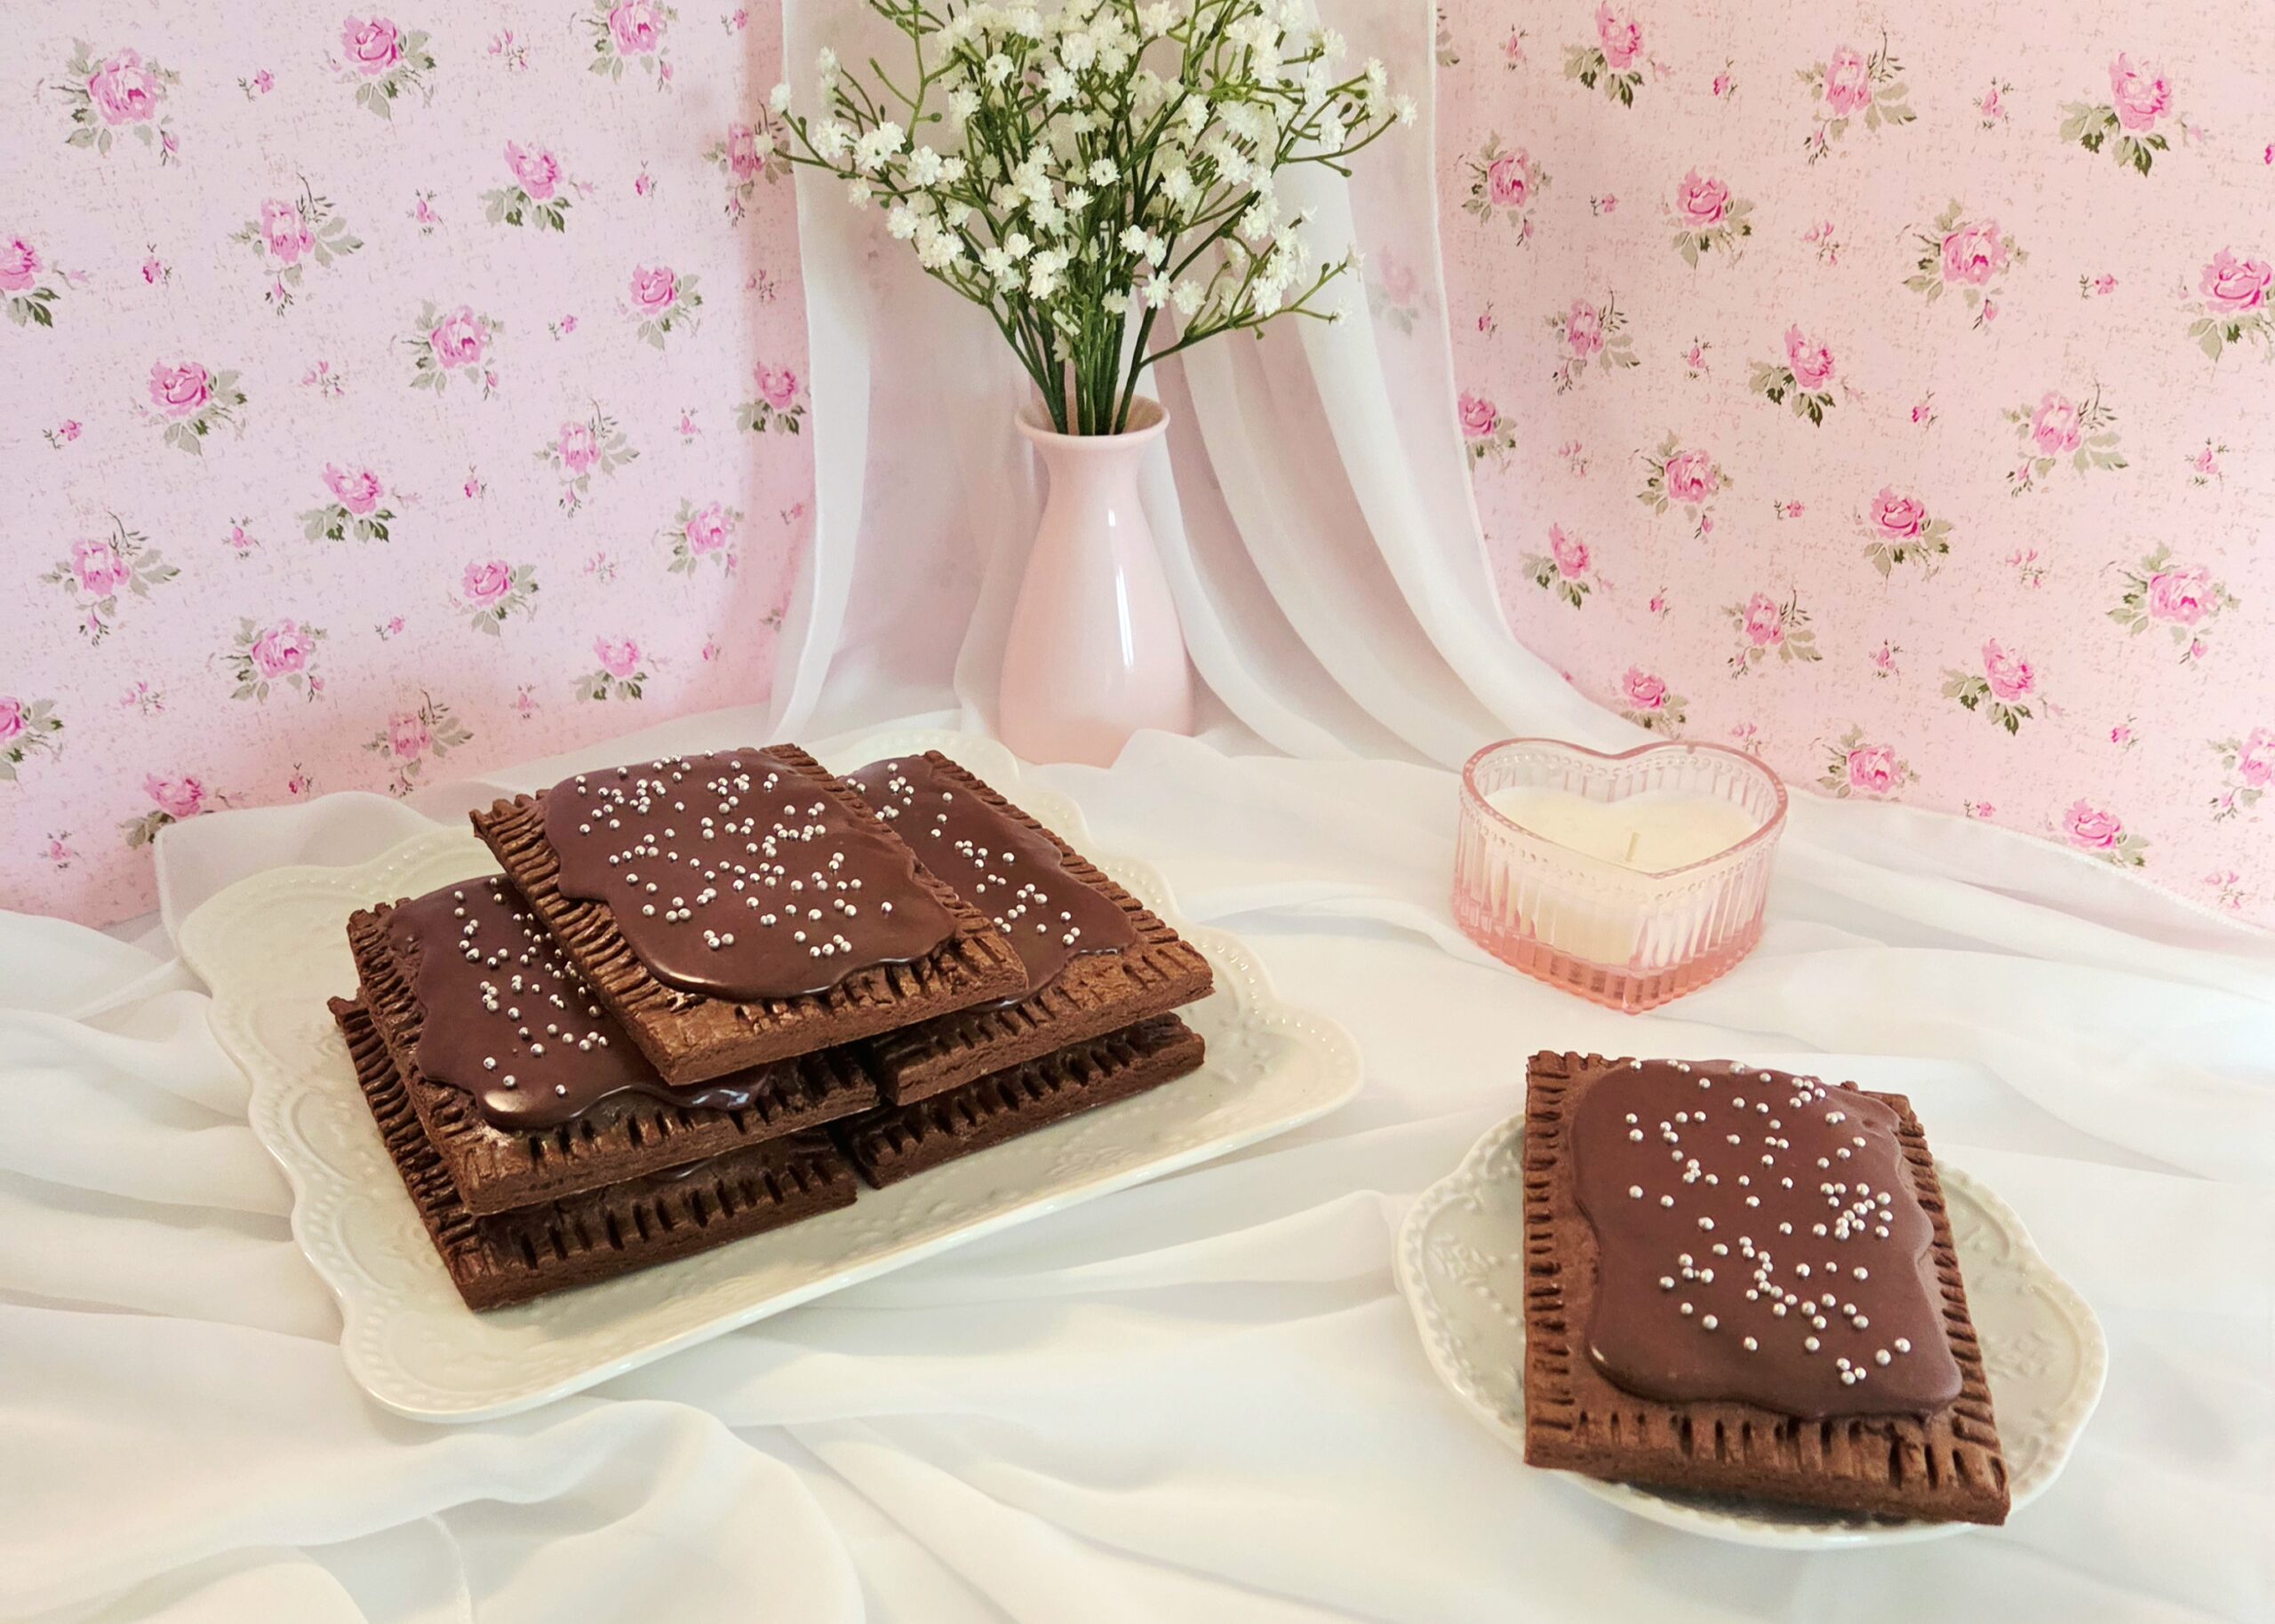
I started this project off with my favorite of all Top Tart flavors, chocolate fudge. Are they a little one dimensional? Yes, it’s chocolate dough with chocolate fudge filling and chocolate icing, of course it’s a bit one note (I was a picky eater, sue me). But is it also delicious, with more depth of flavor than just sweet on sweet? Yes, I made sure of it. I want to taste the chocolate, not the supportive sugar.
Every time I see someone make a copycat Pop Tart recipe, they always get the dough wrong. Most commonly I’ve seen puff pastry used, which really results in a copycat Toaster Strudel. Still a delicious breakfast pastry, but definitely not a Pop Tart. I’ve also seen pie crust, which again, while delicious, just makes a hand pie. There’s no flakiness or layers in the crust of an actual Pop Tart. I completely understand the urge to use a pre-made store-bought dough, since making your own can feel intimidating, but I promise, it’s worth the effort in this case.
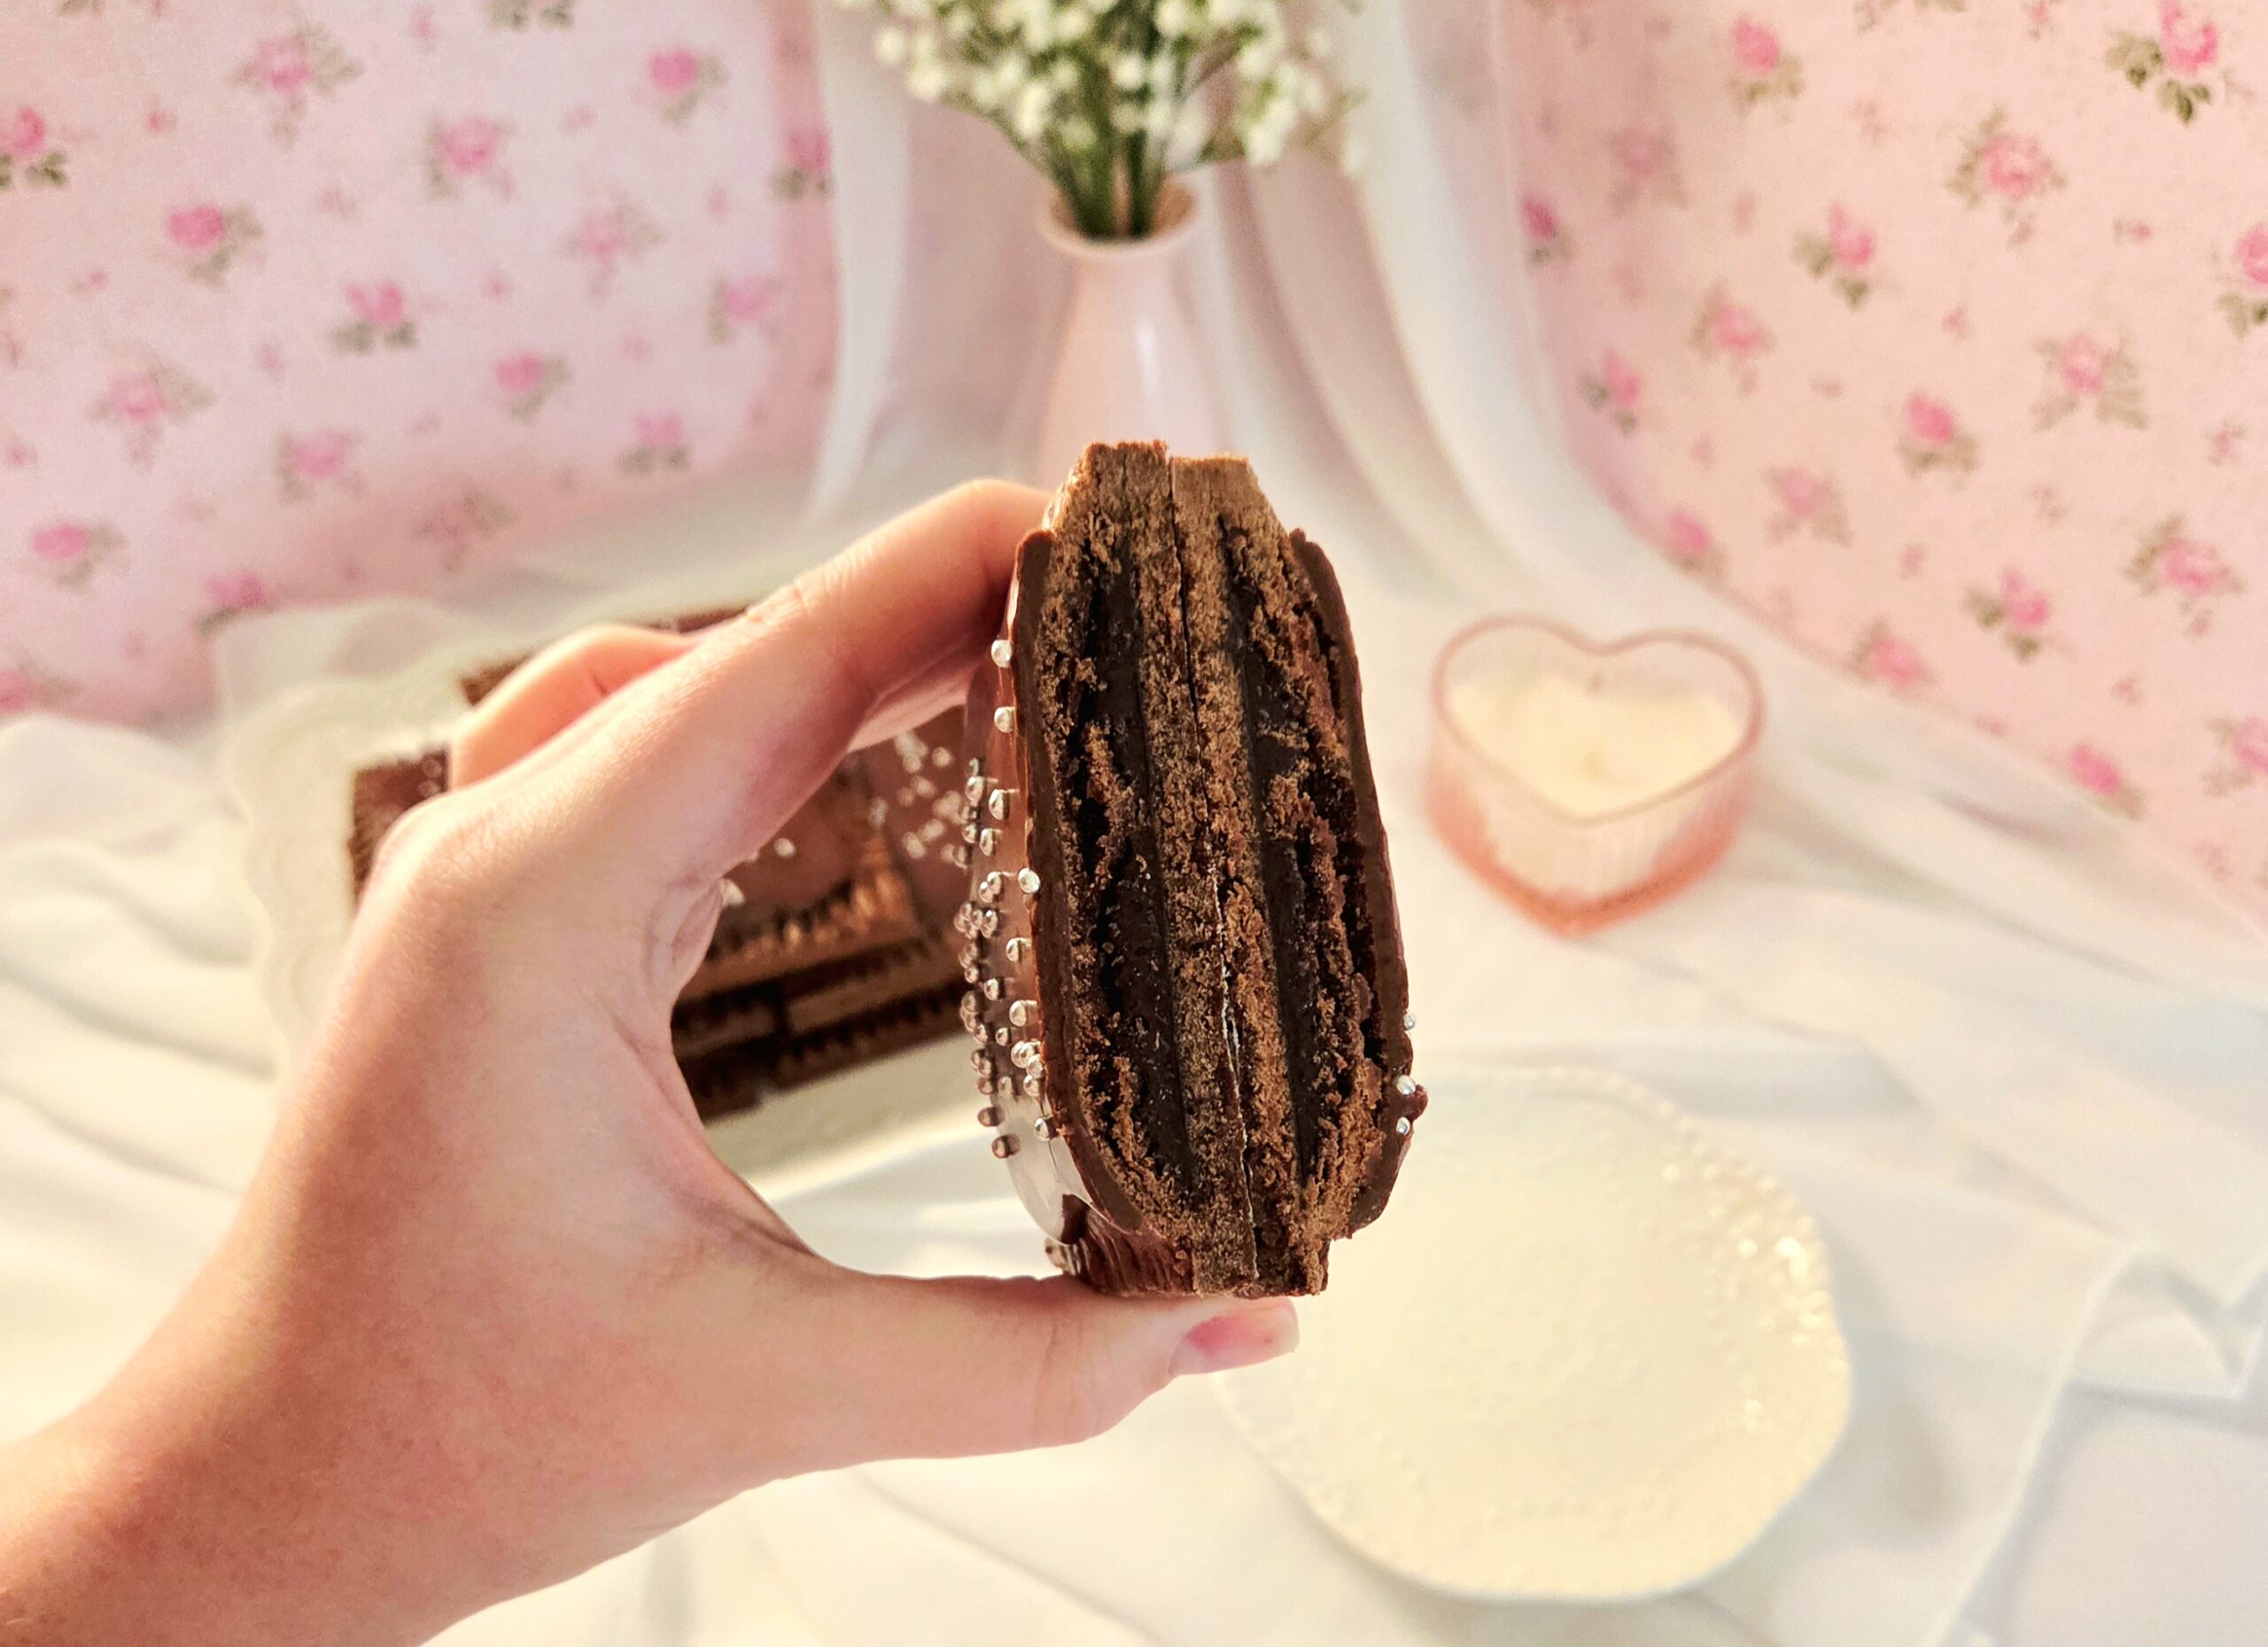
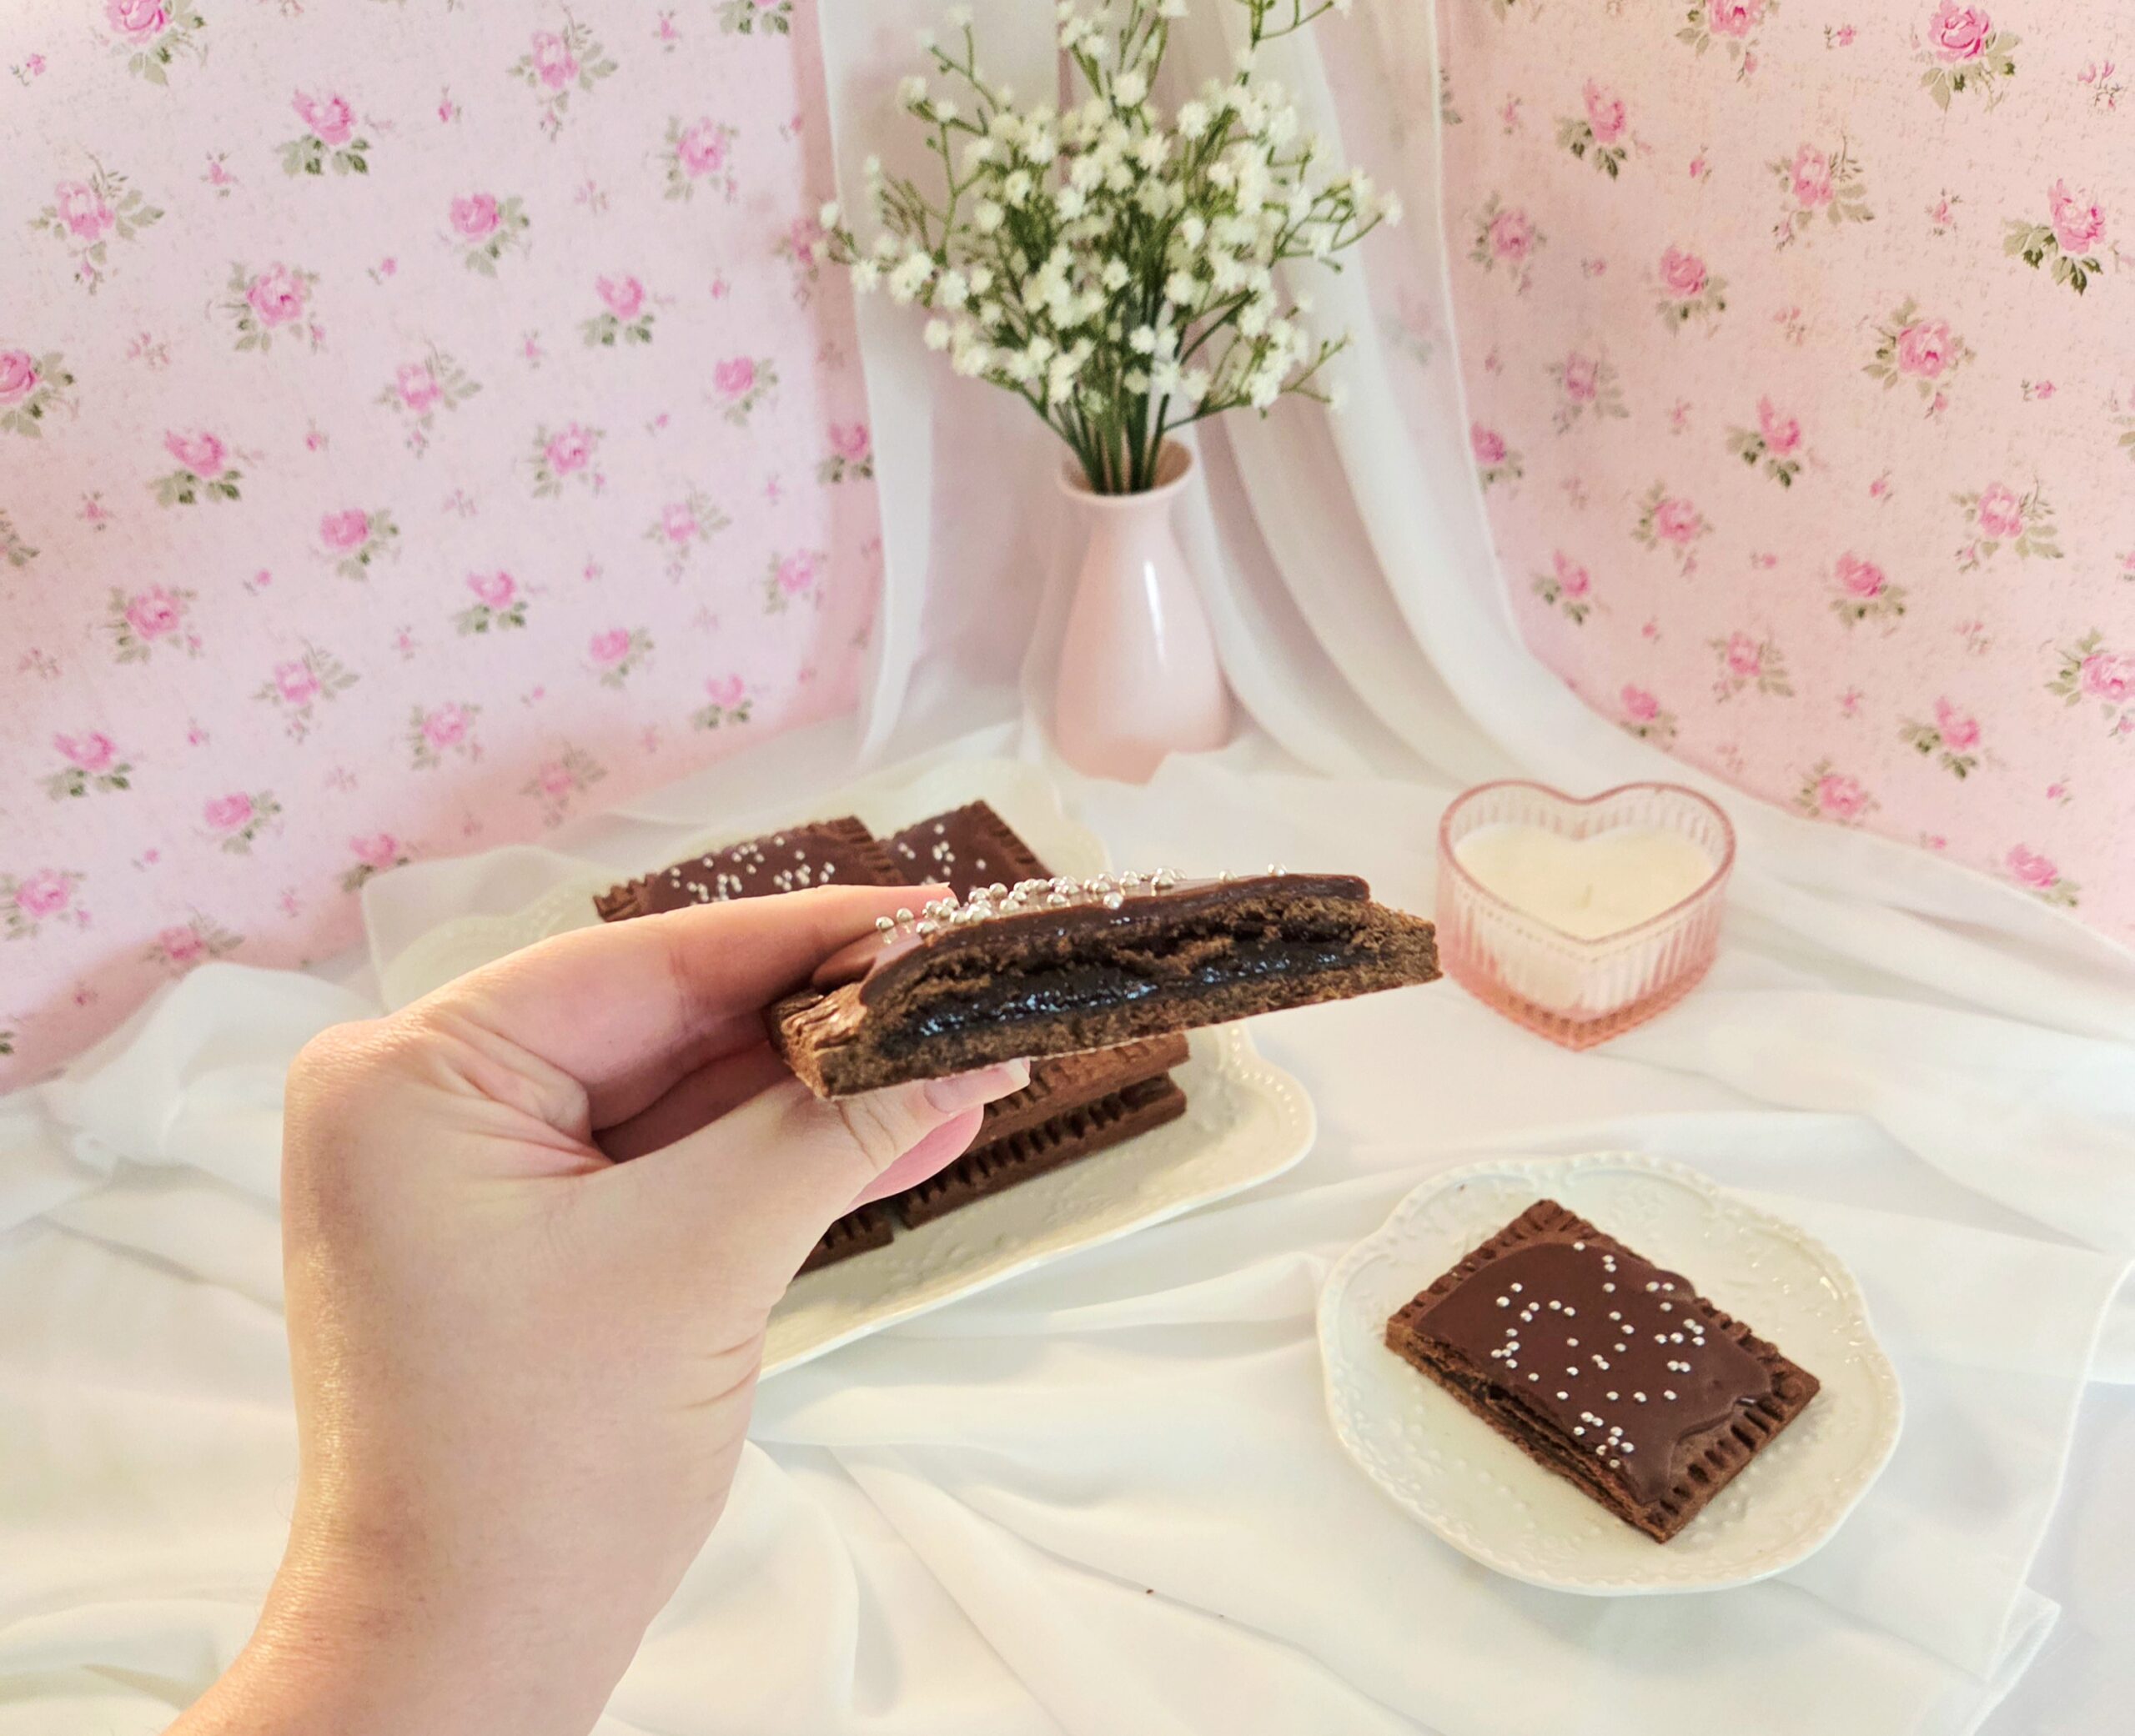
This copycat recipe uses a chocolate tart dough. It’s soft yet strong enough to hold its shape, a little bit crumbly, and comes together just as easily as cookie dough. The filling is gooey, fudgey, and chocolatey, the perfect mouthfeel and just the right texture to stay inside the dough as it bakes. The frosting is a basic powdered sugar based glaze, so an easy ending to a tasty labor of love. And of course, some sprinkles to garnish for that classic whimsical Pop Tart look.
FAQs and Science
What’s the difference between pie crust and tart dough?
To put it simply, pie crust is flaky while tart dough is more akin to the texture of a cookie. The particular dough in this recipe is a pate sucree, a very common dough used in French pastry arts.
Can I substitute cake flour with all purpose flour?
No, in this case, the dough really needs the delicate nature of cake flour for the texture to be correct. Cake flour has the lowest protein percentage out of the different kinds of flour, which means the least amount of gluten forms when working with it. Less gluten means a more tender crust.
Will it make a difference if I use dutch processed cocoa powder or natural cocoa powder?
If you’ve got it, use the dutch processed, but don’t sweat it if you only have access to natural processed cocoa powder. It will still come out delicious.
Does it really matter that my eggs are room temperature?
Yes, it makes for a better emulsification. But don’t fret, there’s no need to remove them from the fridge 4 hours ahead of time (this recipe takes long enough as it is). At the beginning of the recipe, place the eggs in a bowl and cover them with the hottest water that will come out of your tap. By the time you’re ready to add them, they’ll be at room temperature.
Can the melted dark chocolate in the filling come from chips, or does it have to be from a chopped up bar?
I prefer the chopped bar, but if you’ve got dark chocolate chips already, by all means have at it. You won’t ruin it, they just don’t melt as well.
How dark should that chocolate be?
I recommend anywhere from 70-78%
Can I use milk chocolate instead?
I wouldn’t, the bitterness of the dark chocolate adds a little more dimension to the end product.
Why corn syrup?
Corn syrup is what gives the filling its gooey texture, and keeps it thick enough not to erupt out of the dough during the baking process.
Why put salt in the glaze?
Salt both brings out the flavor of the cocoa powder, and cuts the cloying sweetness of the powdered sugar. Just like you need salt in standard cooking, you absolutely need salt in baking if you hope for things to taste good. Don’t be afraid of salt.
Can I toast these Pop Tarts like the store bought ones?
Yes, but use either a toaster oven on medium-low or an air fryer on 325, not a slotted toaster. Things will get messy in a very frustrating way with the slotted toaster.
What You’ll Need
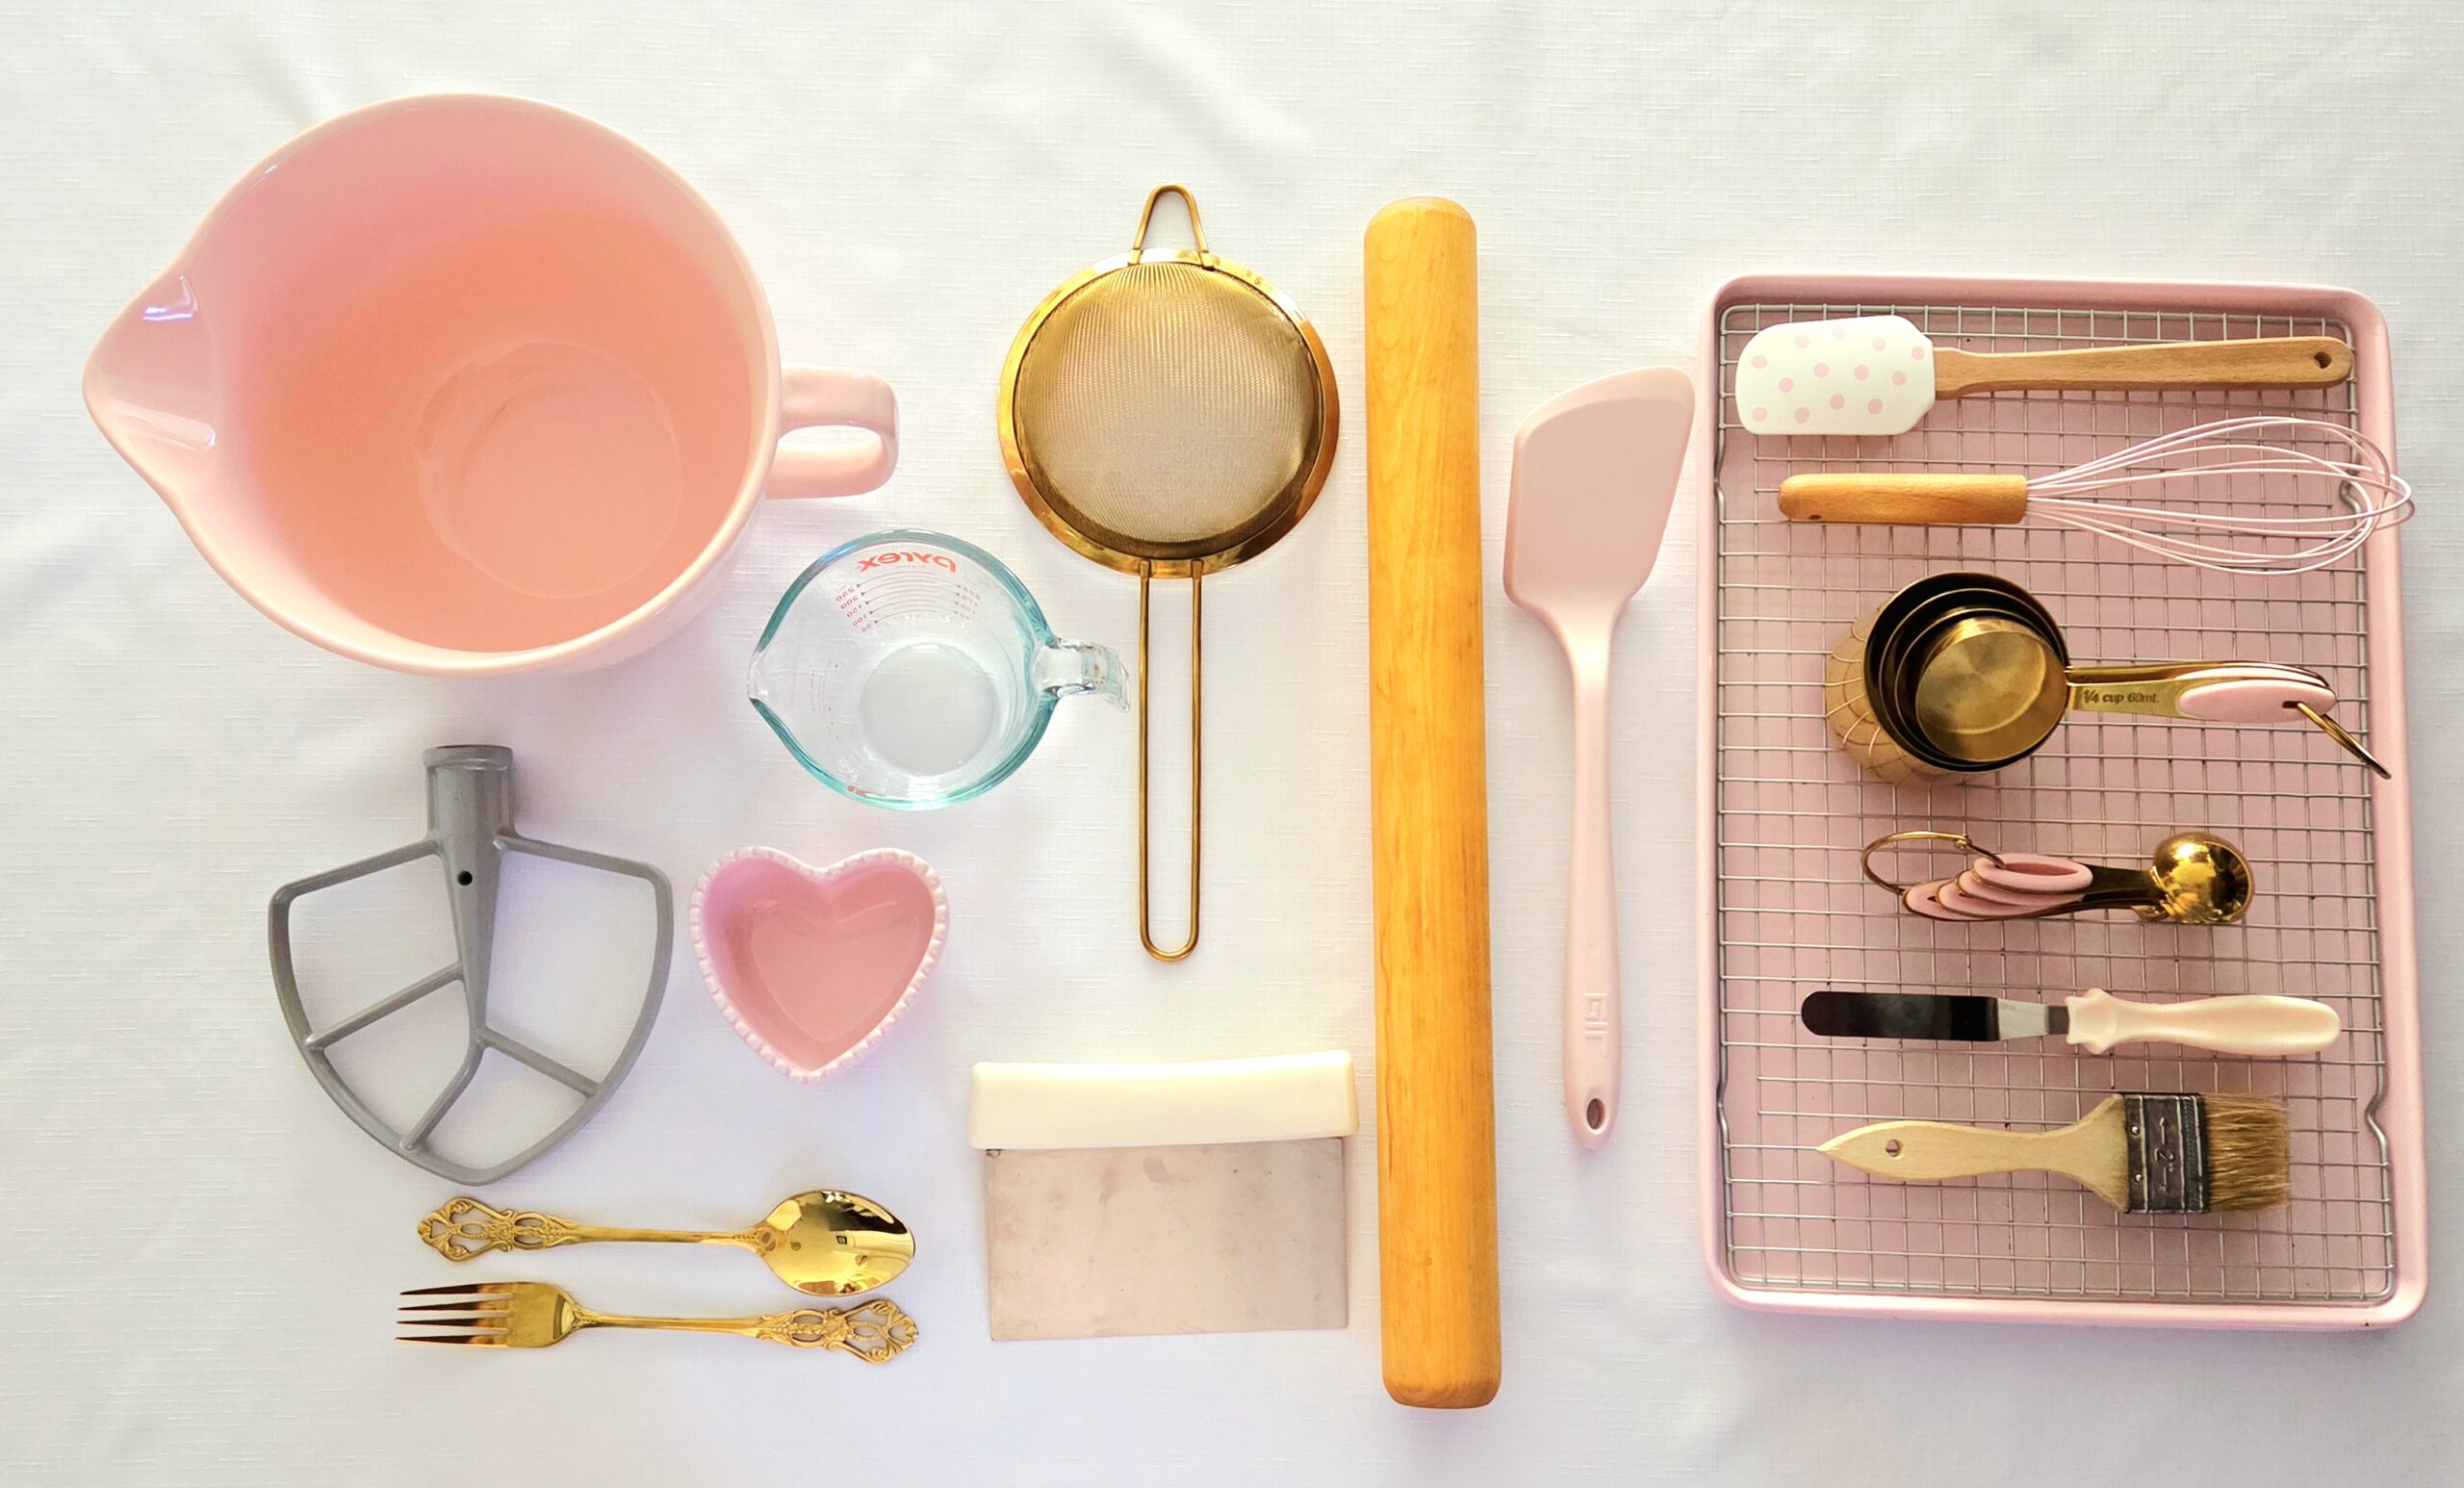
- 2 baking sheets
- Parchment paper or 2 silicone baking mats
- Plastic wrap
- Stand mixer with paddle attachment or hand mixer
- 1 medium microwave-safe mixing bowl
- 1 small bowl
- Whisk
- Rubber spatula
- Offset spatula
- Dry measuring cups
- Liquid measuring cup
- Measuring spoons
- Fork
- Spoon
- Rolling Pin
- Pastry brush
- Bench scraper or chefs knife
- Sifter or sieve
- Spatula
- Cooling rack
The Process
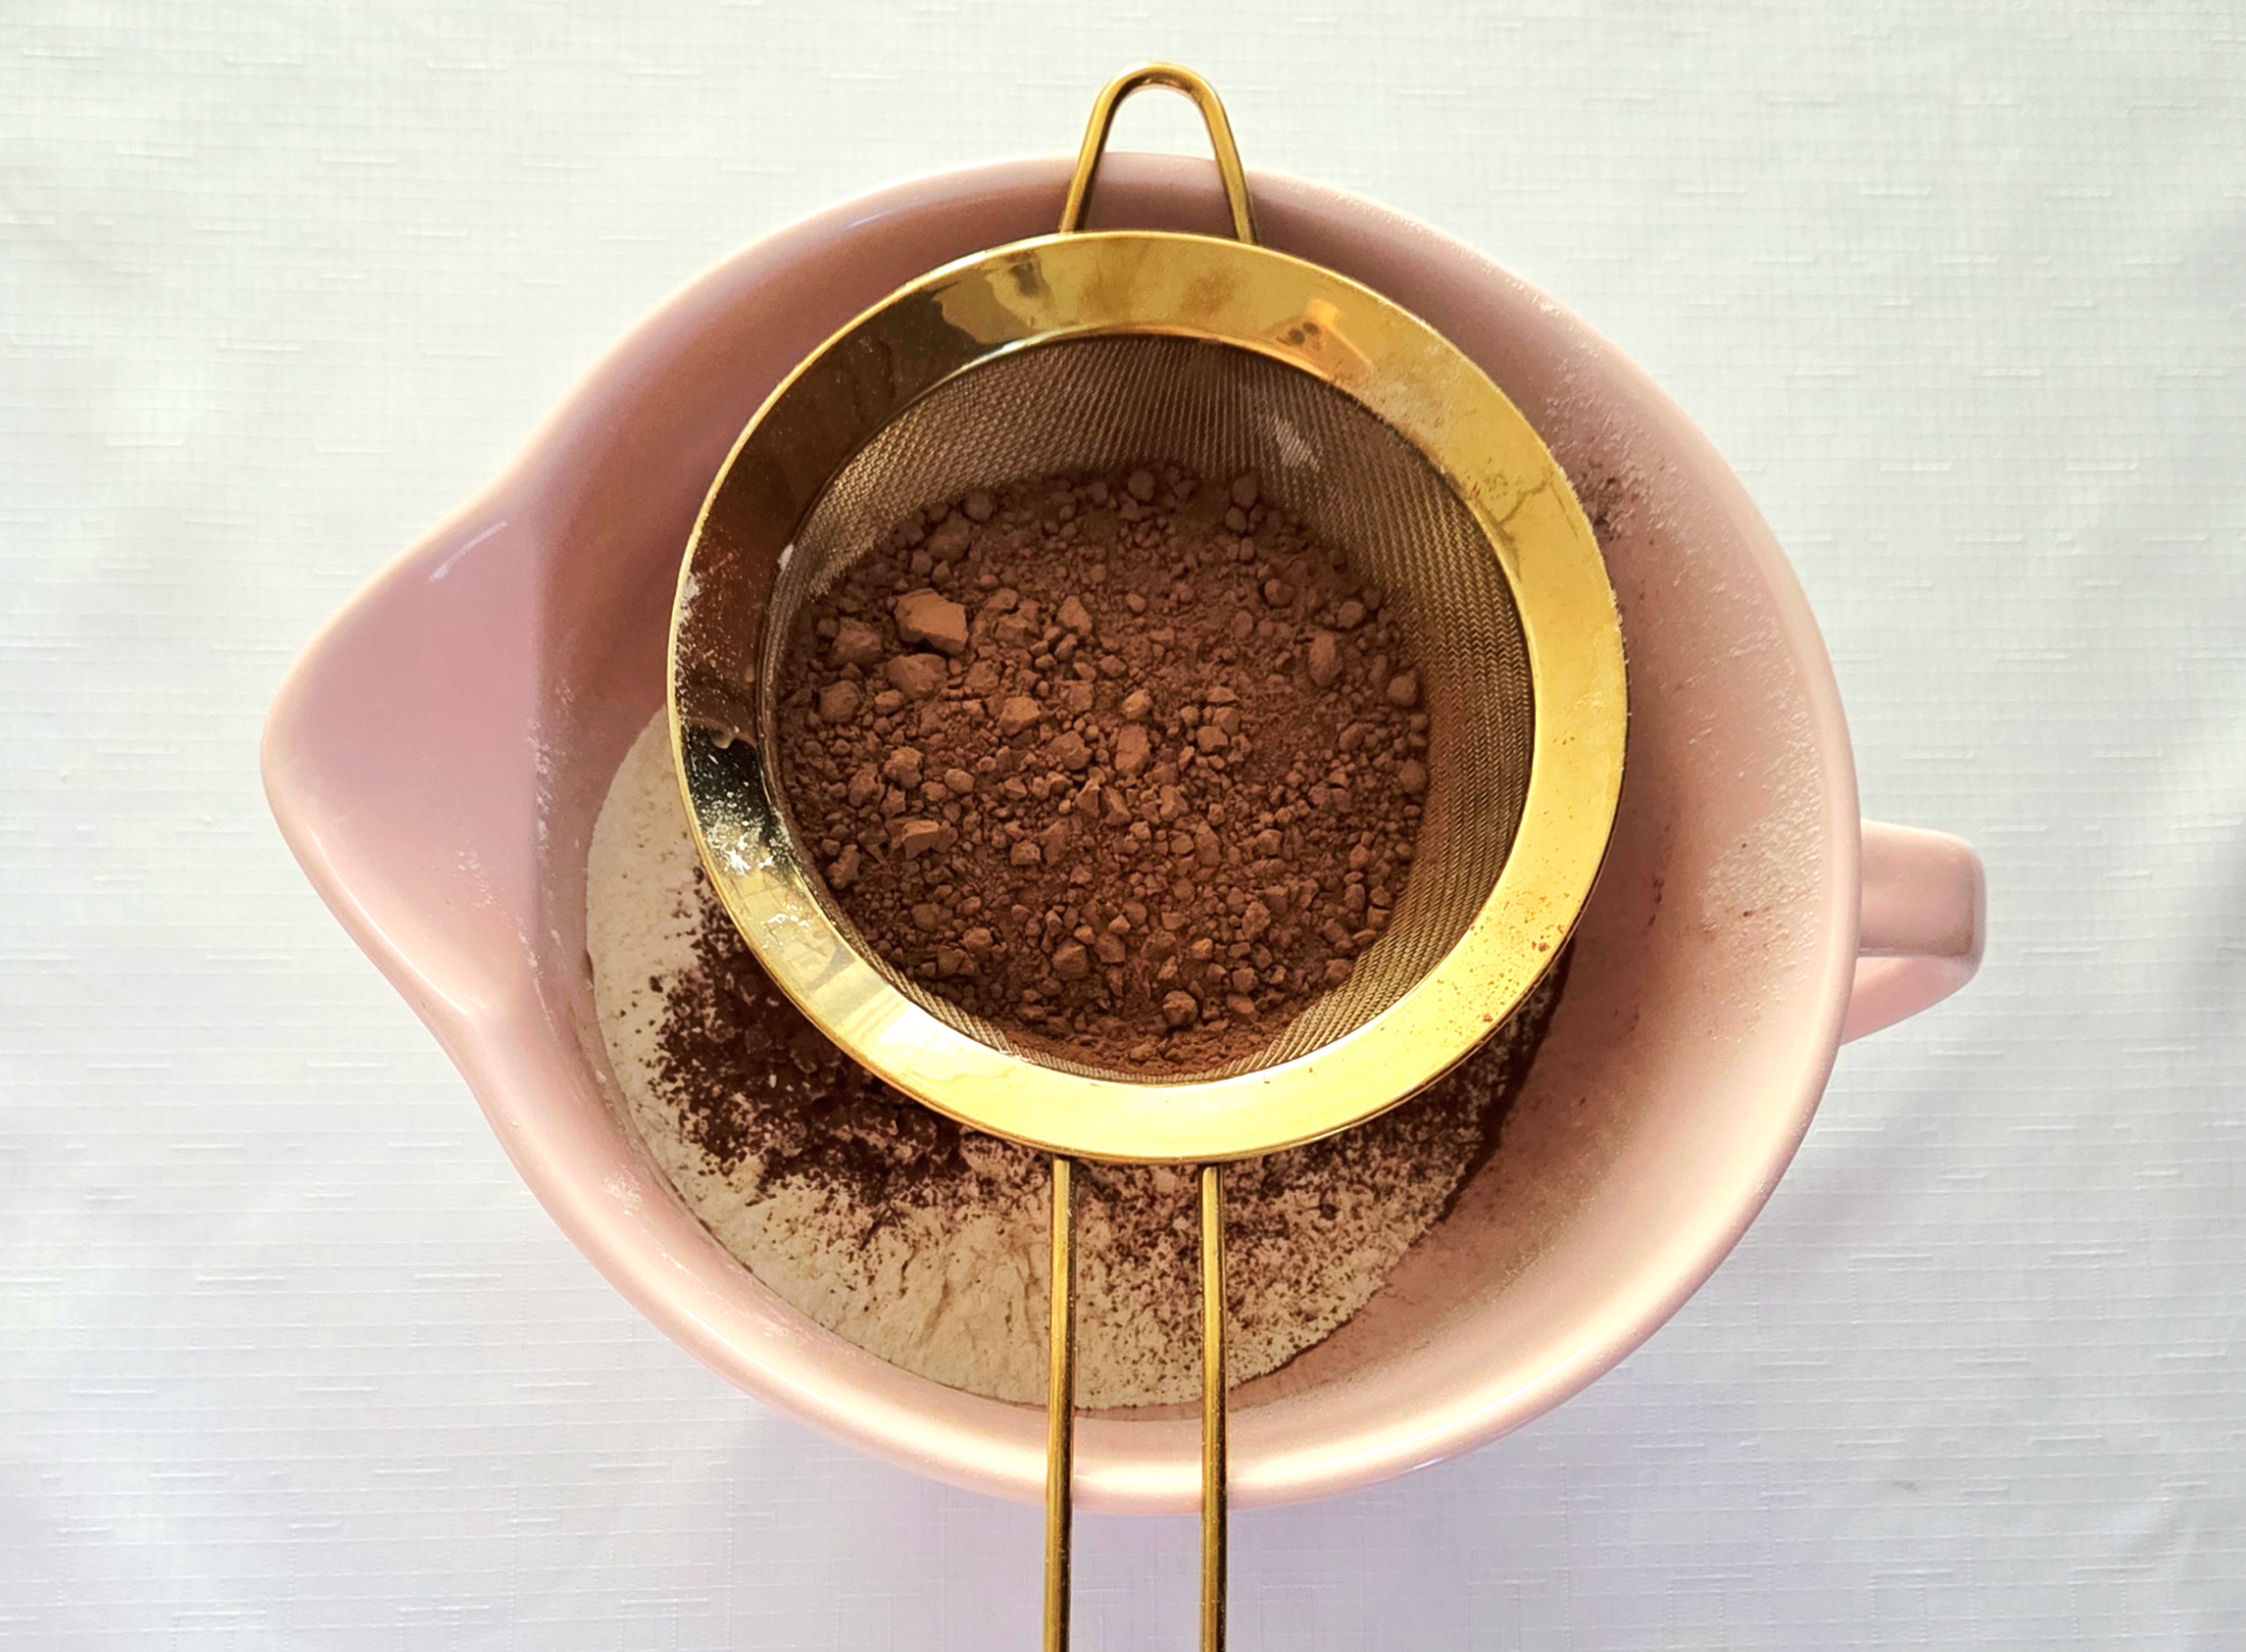
This is a long one, so buckle up! But trust that it’s worth the effort. Start by making the dough, it needs to chill for a while before getting rolled out. In a medium mixing bowl, sift the cake flour and cocoa powder, and whisk them together along with the salt. Set this bowl aside.
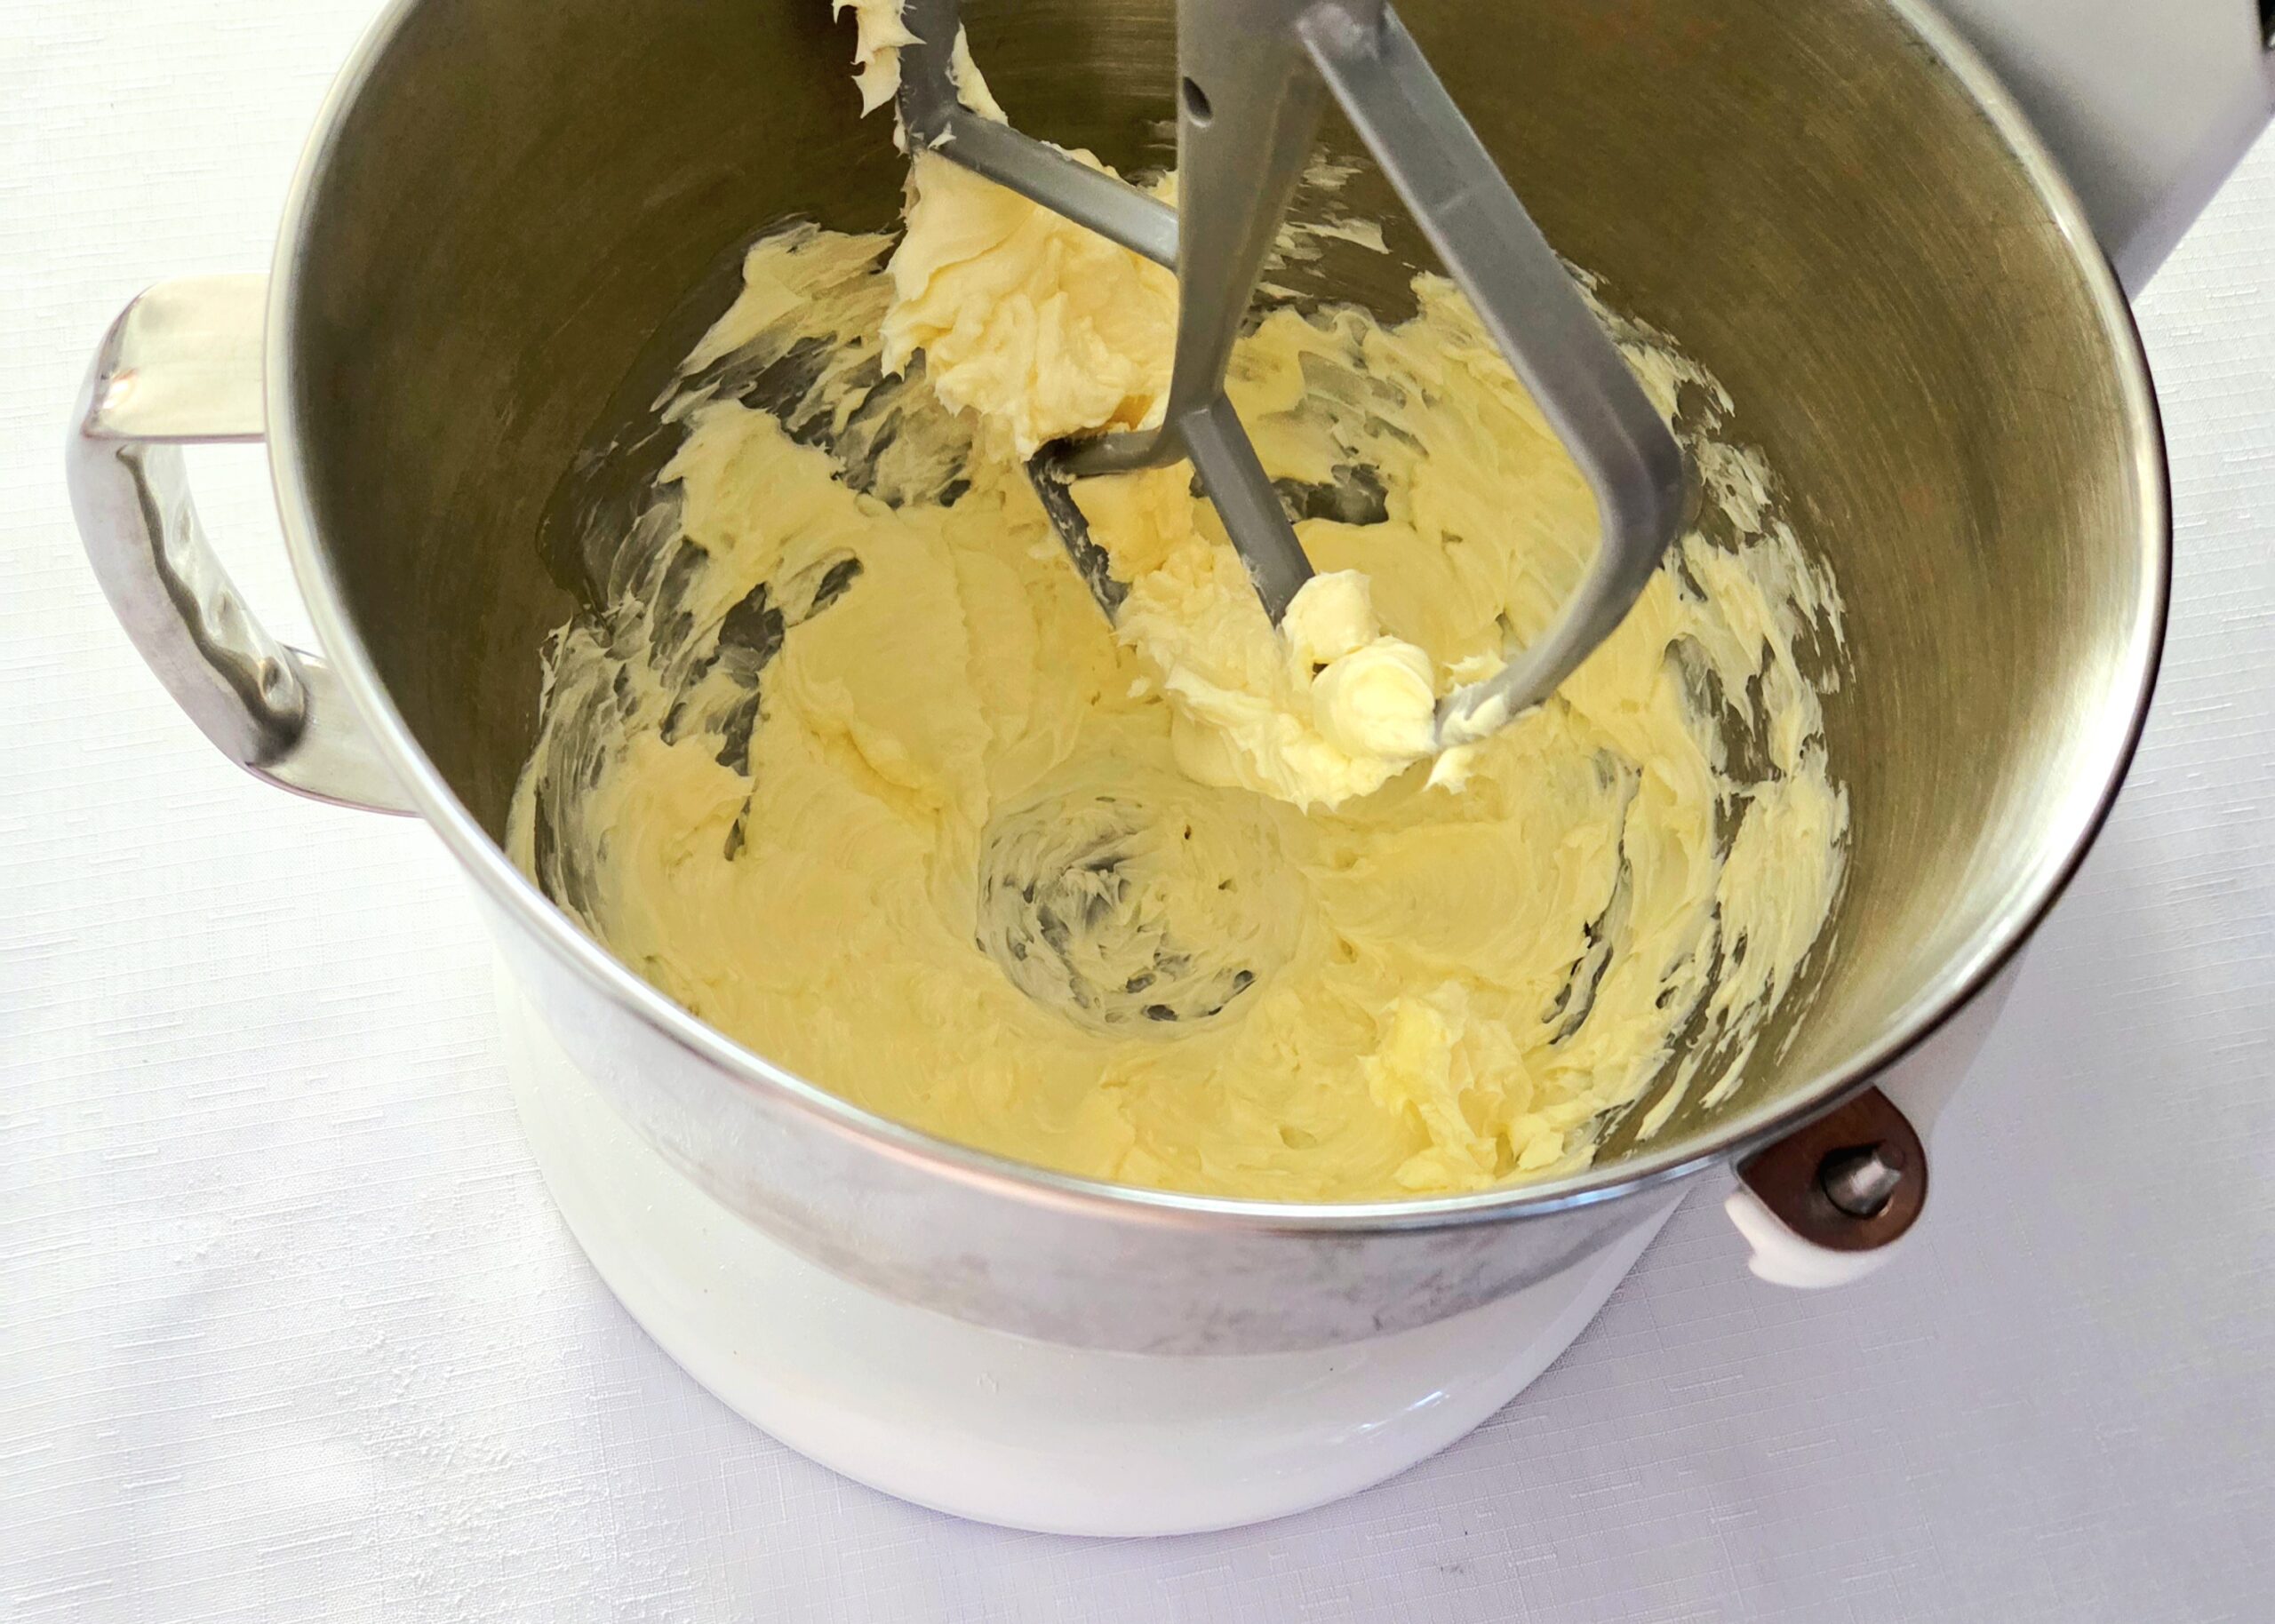
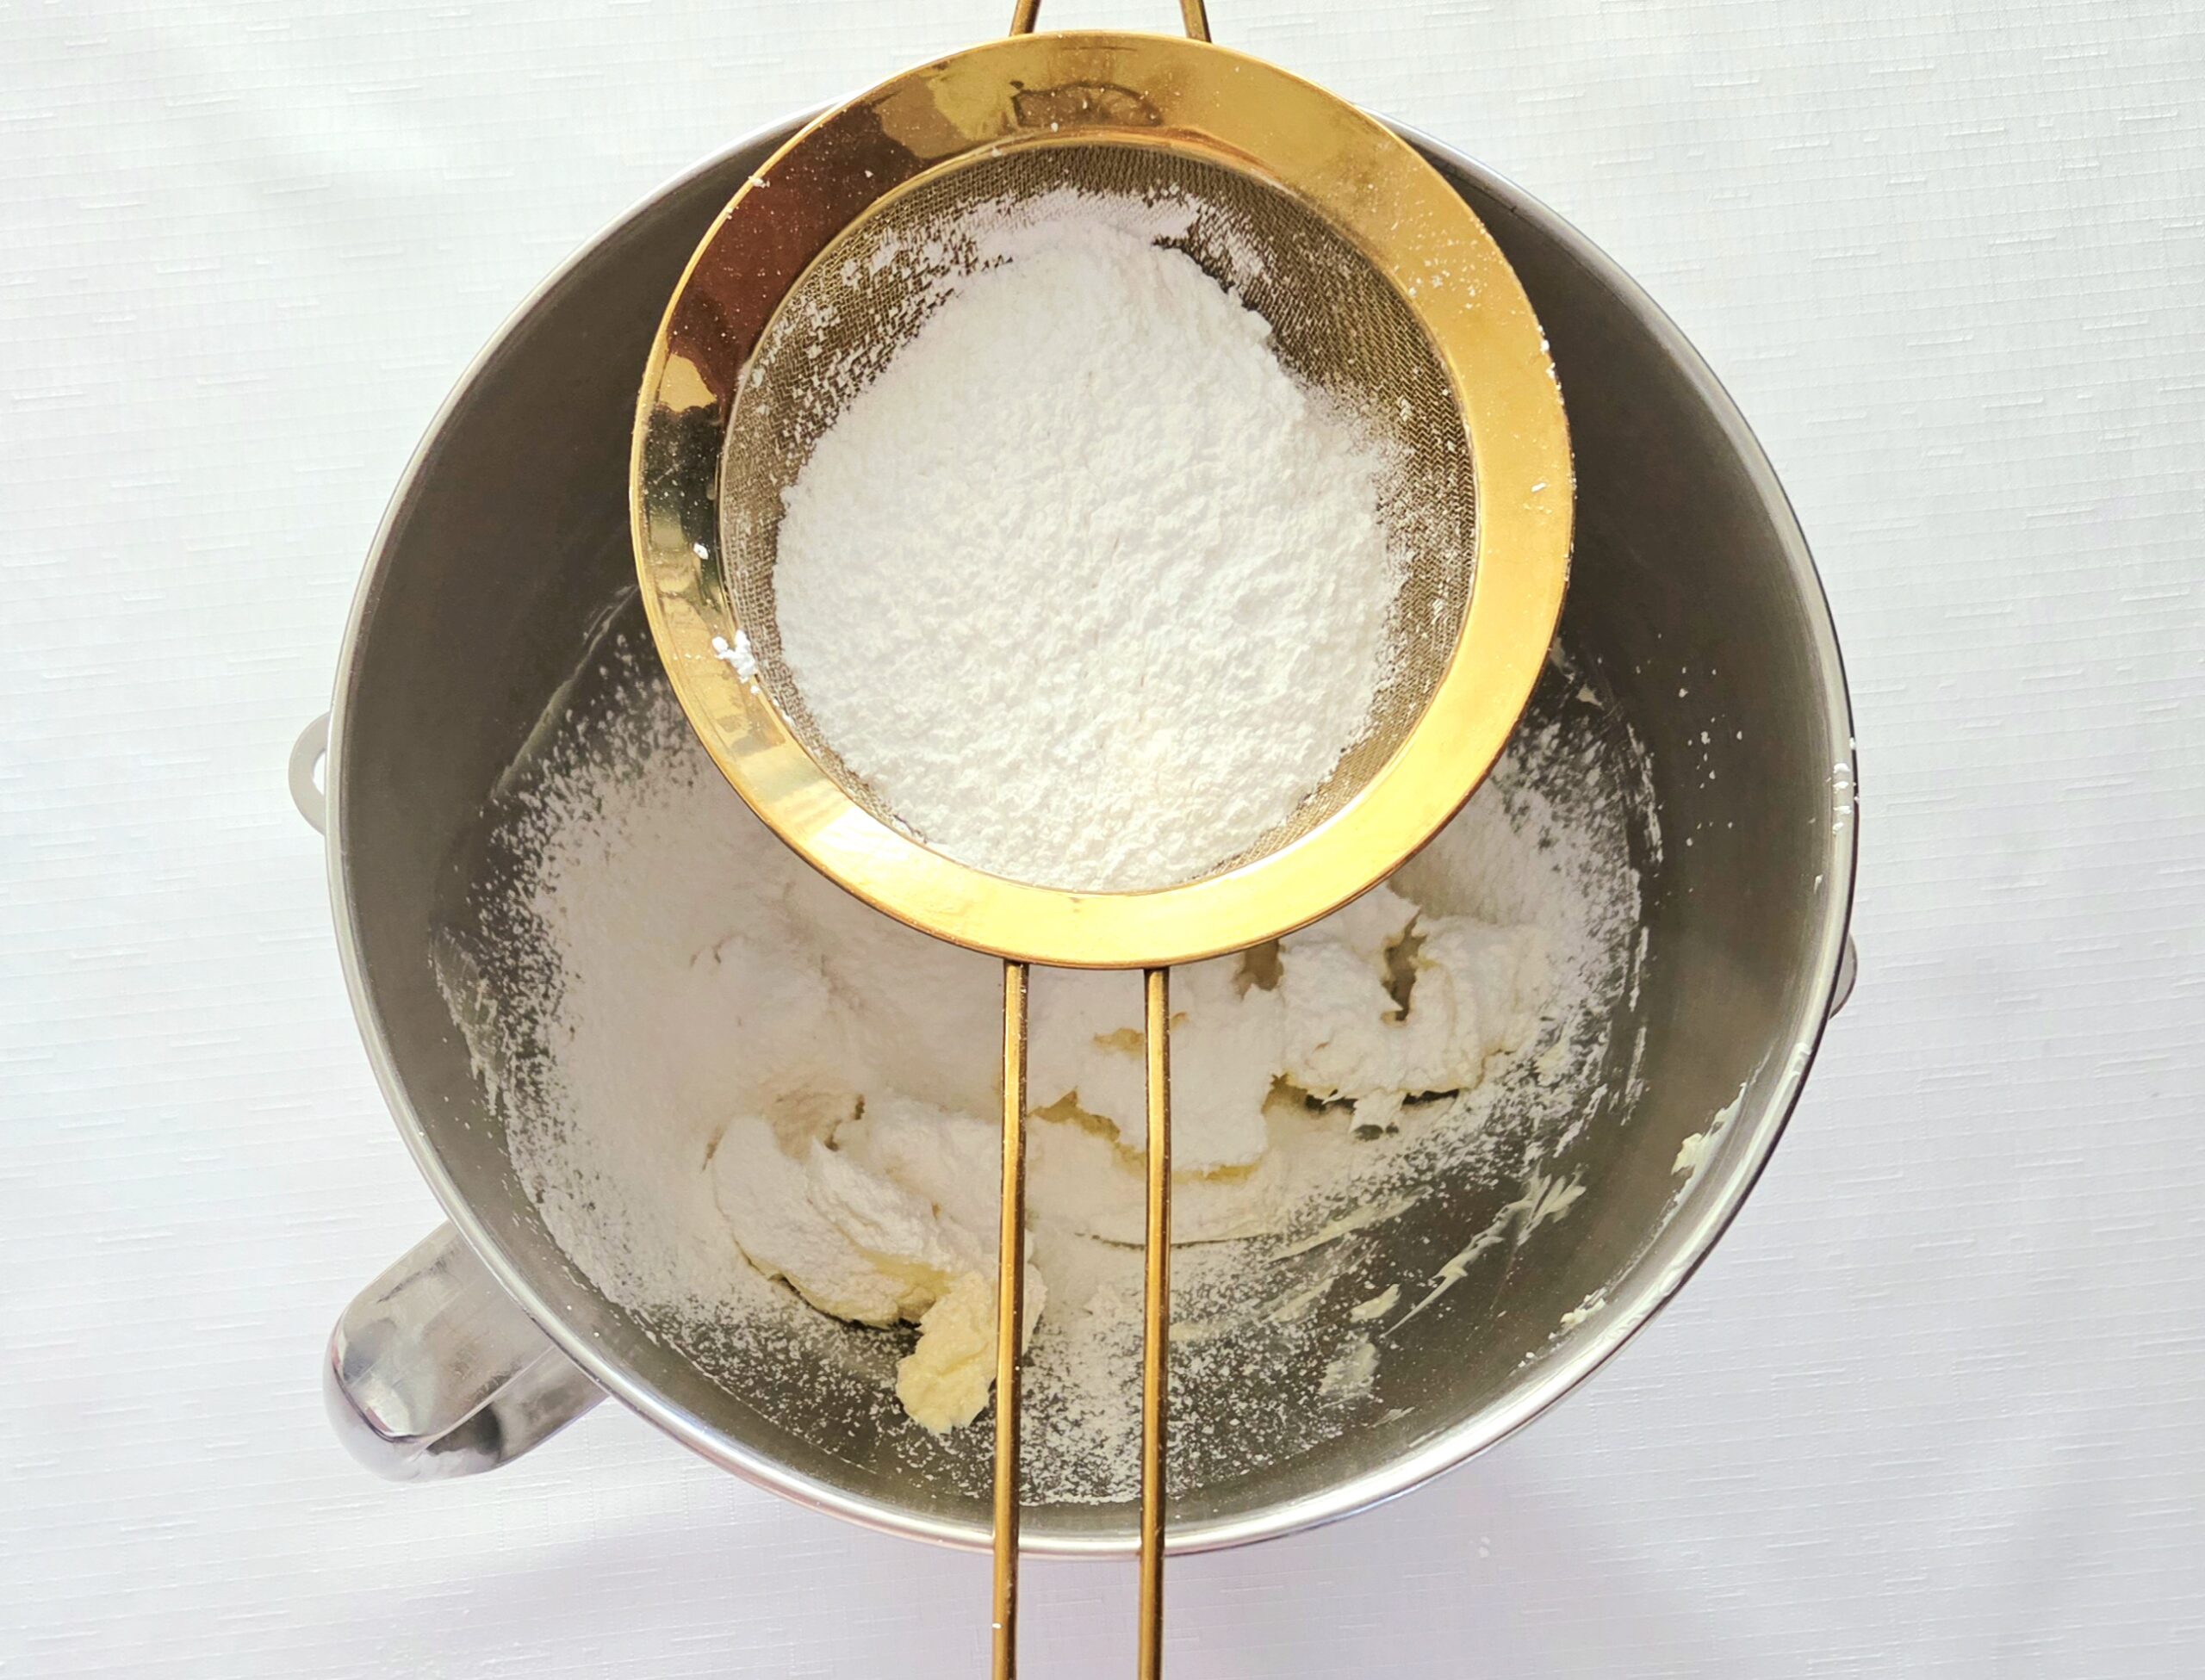
In the bowl of a stand mixer using the paddle attachment, beat the softened butter on level 3 for a minute. Sift the powdered sugar directly over it, then cream them together. The sifting is important, or you’ll end up with lumps of powdered sugar stuck in the dough. Start the mixer off slow, on level 1, so powdered sugar won’t go flying all over your kitchen. Increase the mixer to level 3 or 4 to finish creaming, 3-4 minutes. It should be light and creamy in the end.
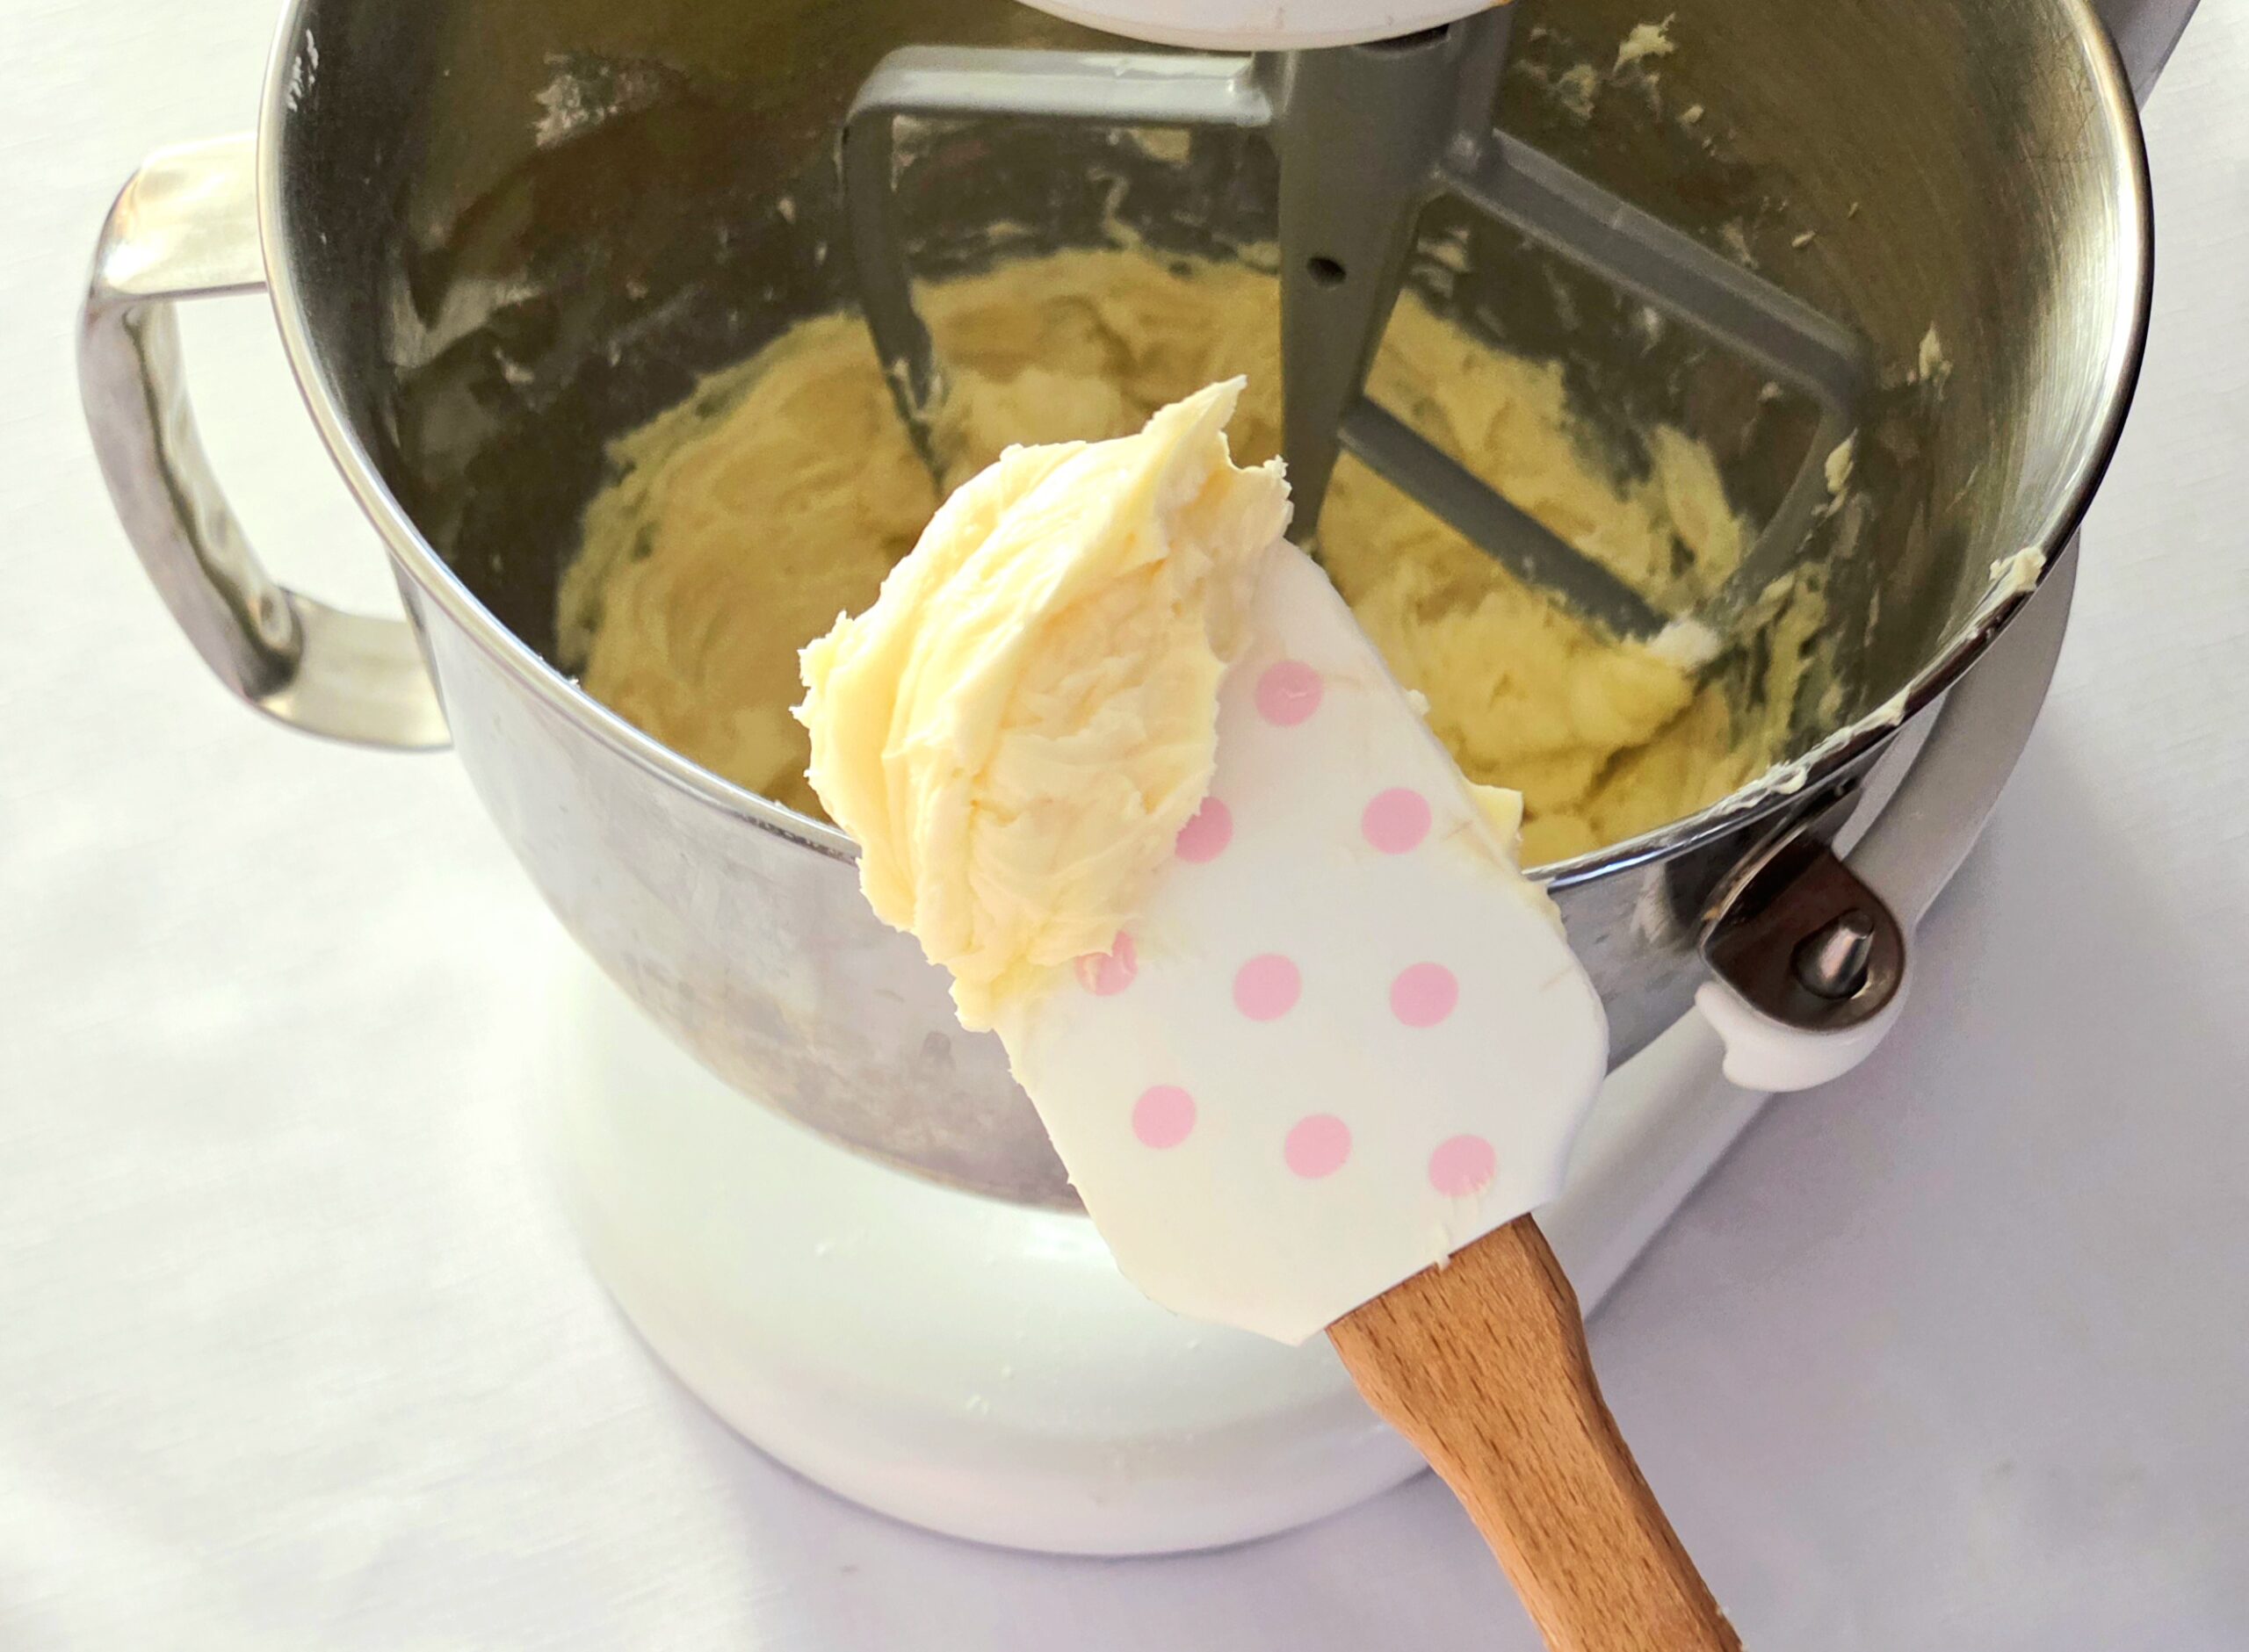
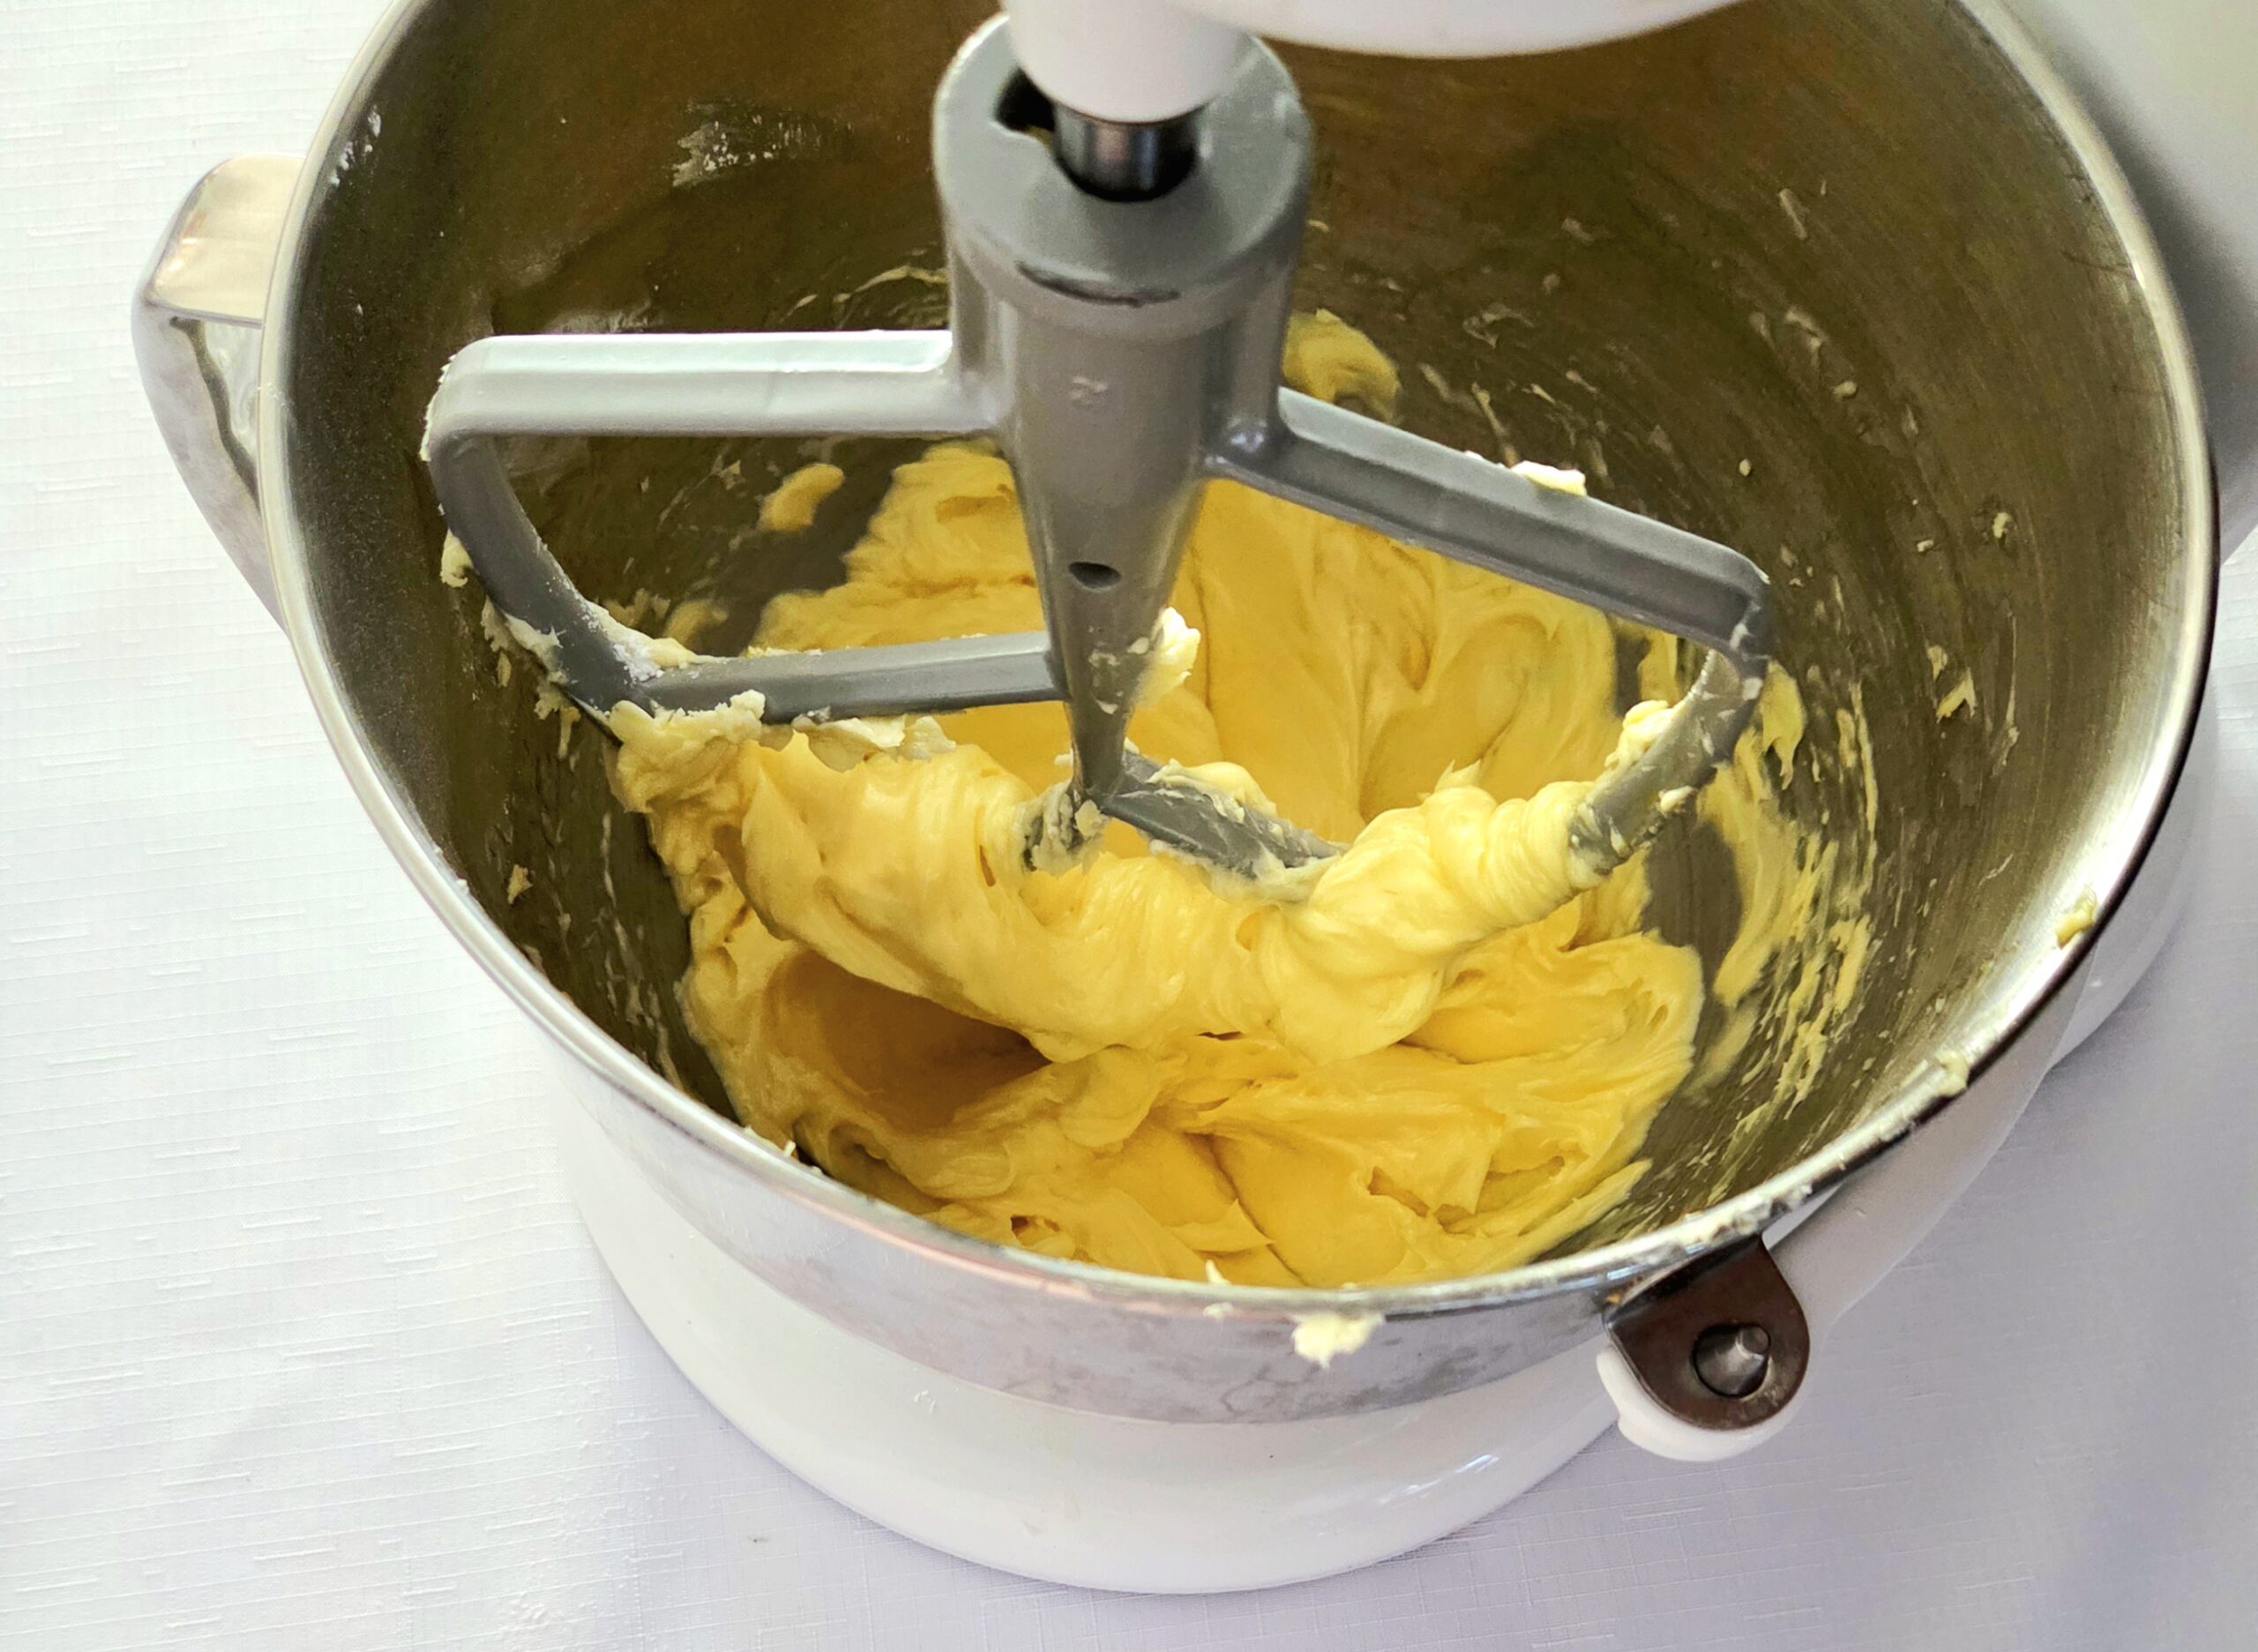
Scrape the sides of the bowl using a rubber spatula and, one at a time, add in the eggs. Make sure the previous egg has been absorbed into the butter mixture before tossing in the next, to give everything a fair shot at coming together. Scrape down the sides of the bowl in between each new egg, or as needed.
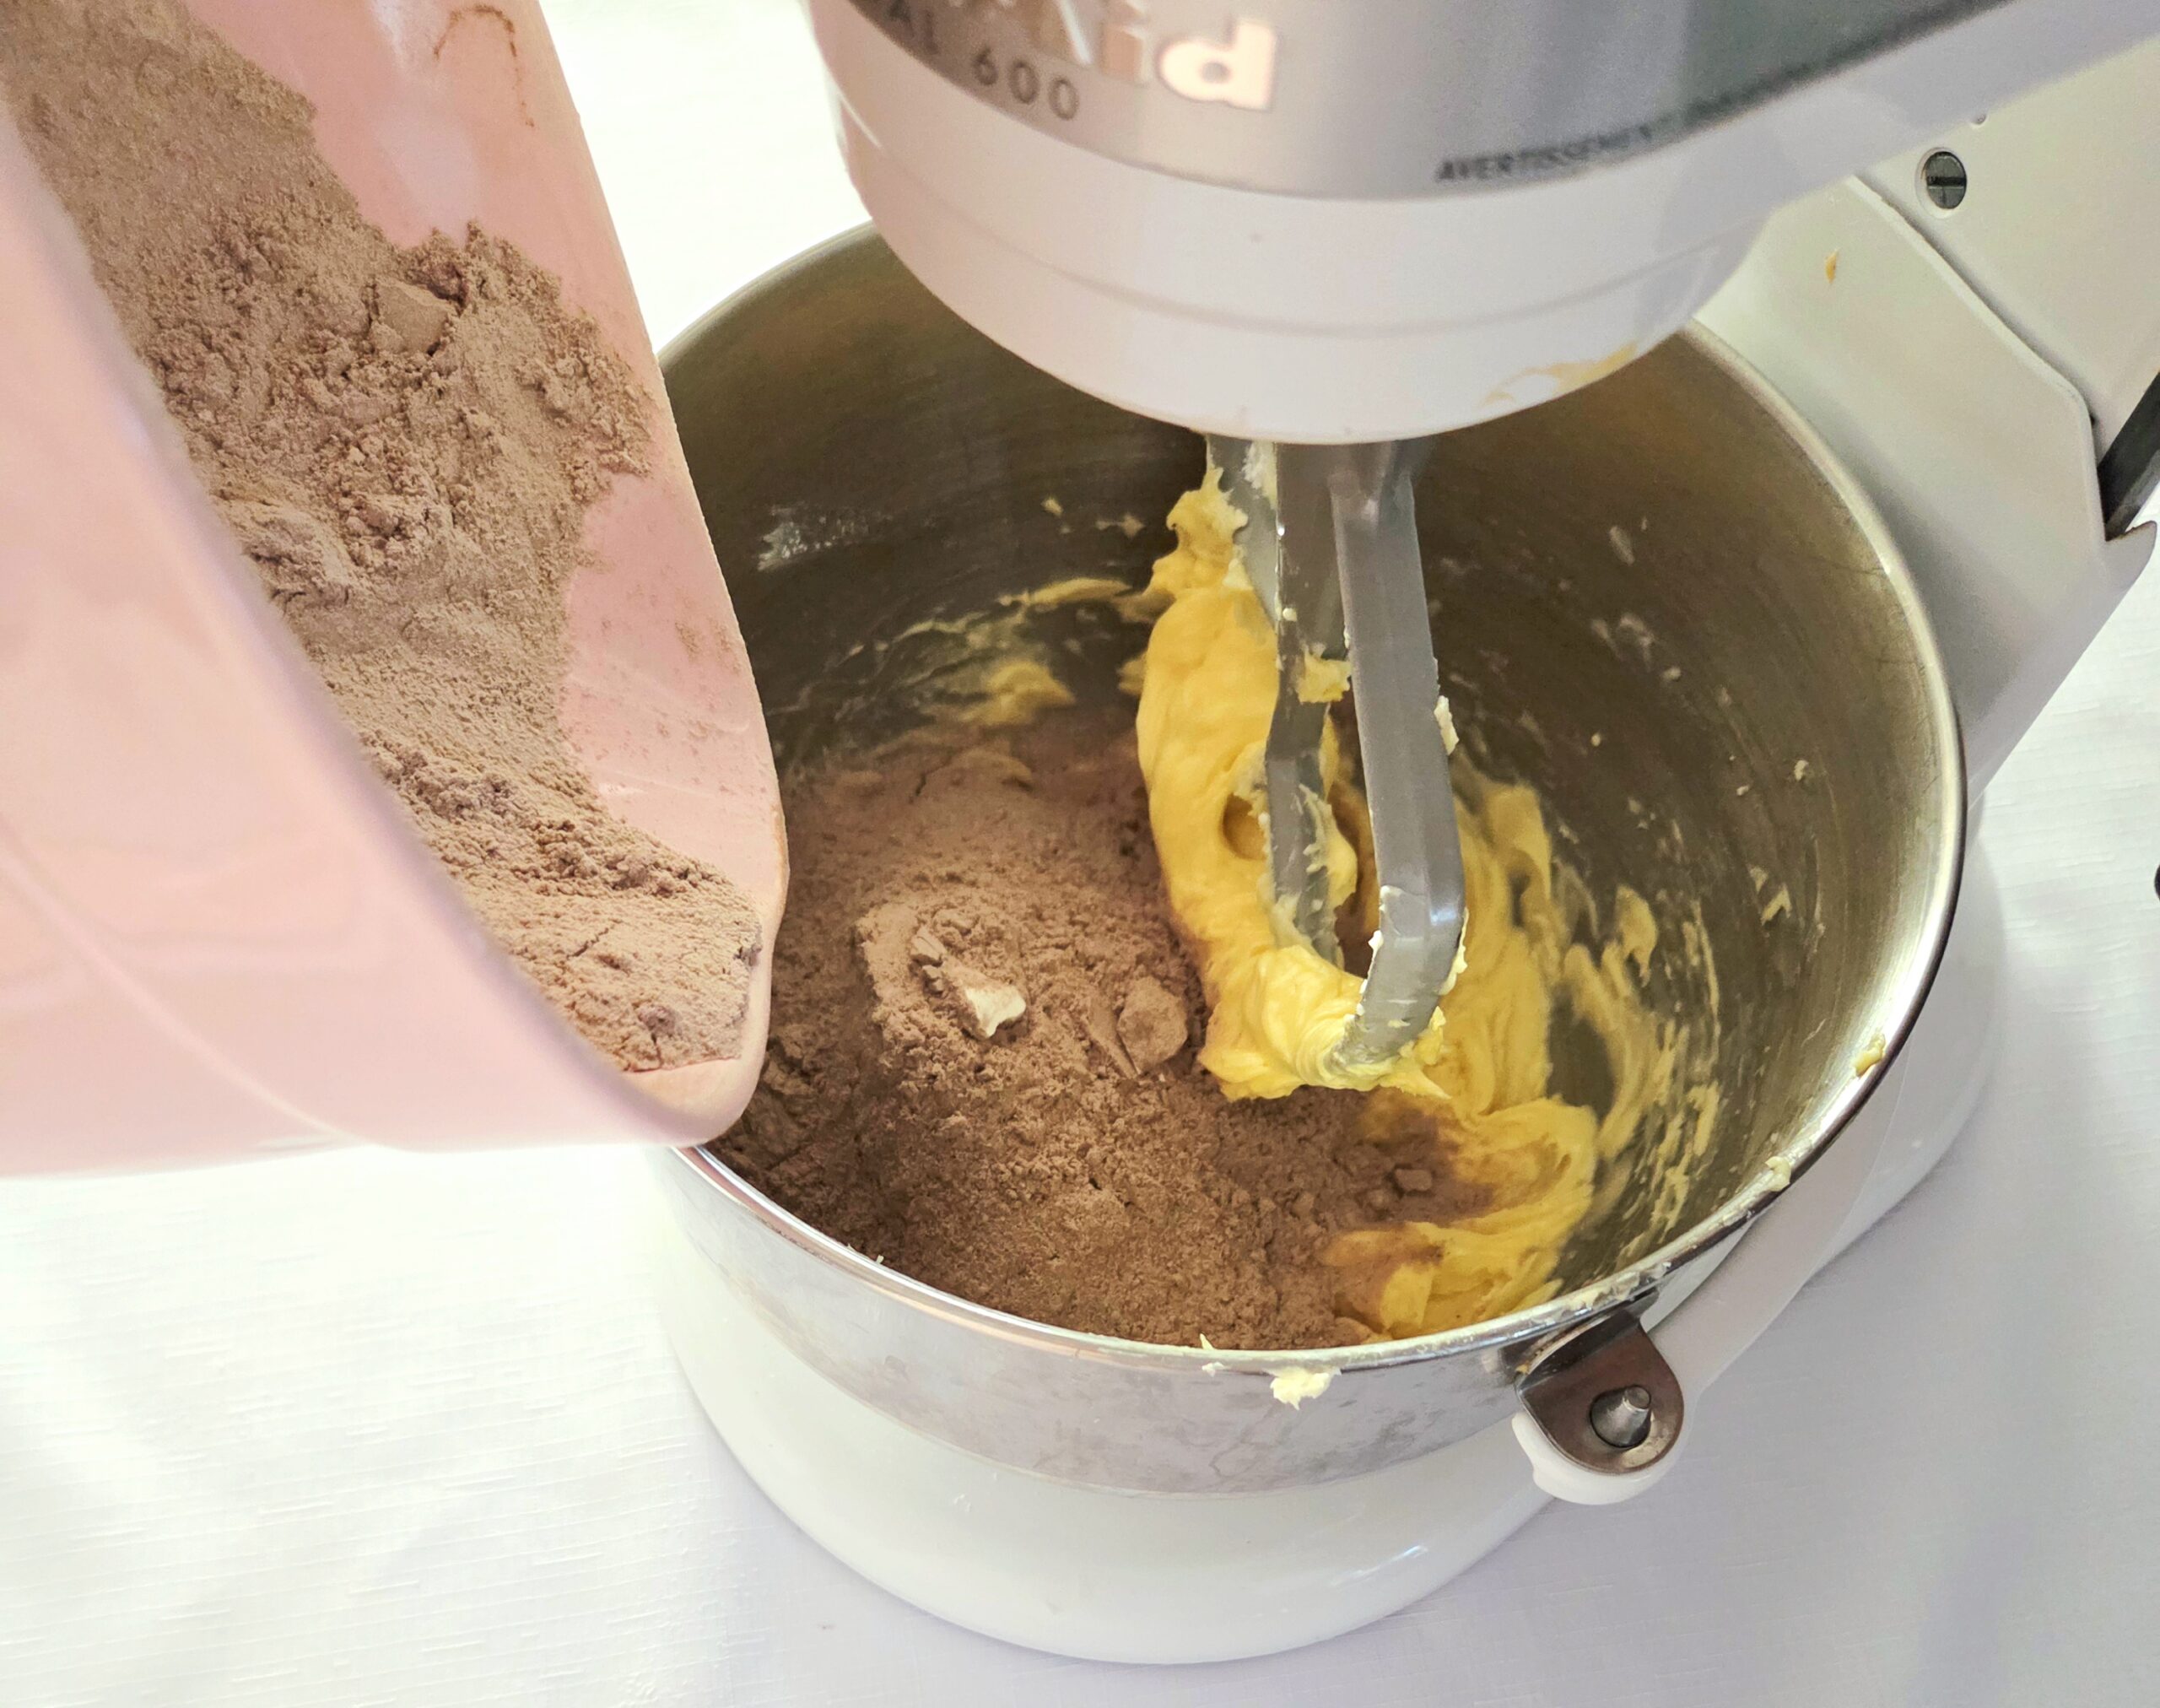
All at once, add the dry goods to the butter mixture. Still using the paddle attachment, mix the cocoa-flour mix into the butter on level one. As soon as all of the dry goods have disappeared without a trace, leaving you with one homogeneous dough, turn the mixer off.

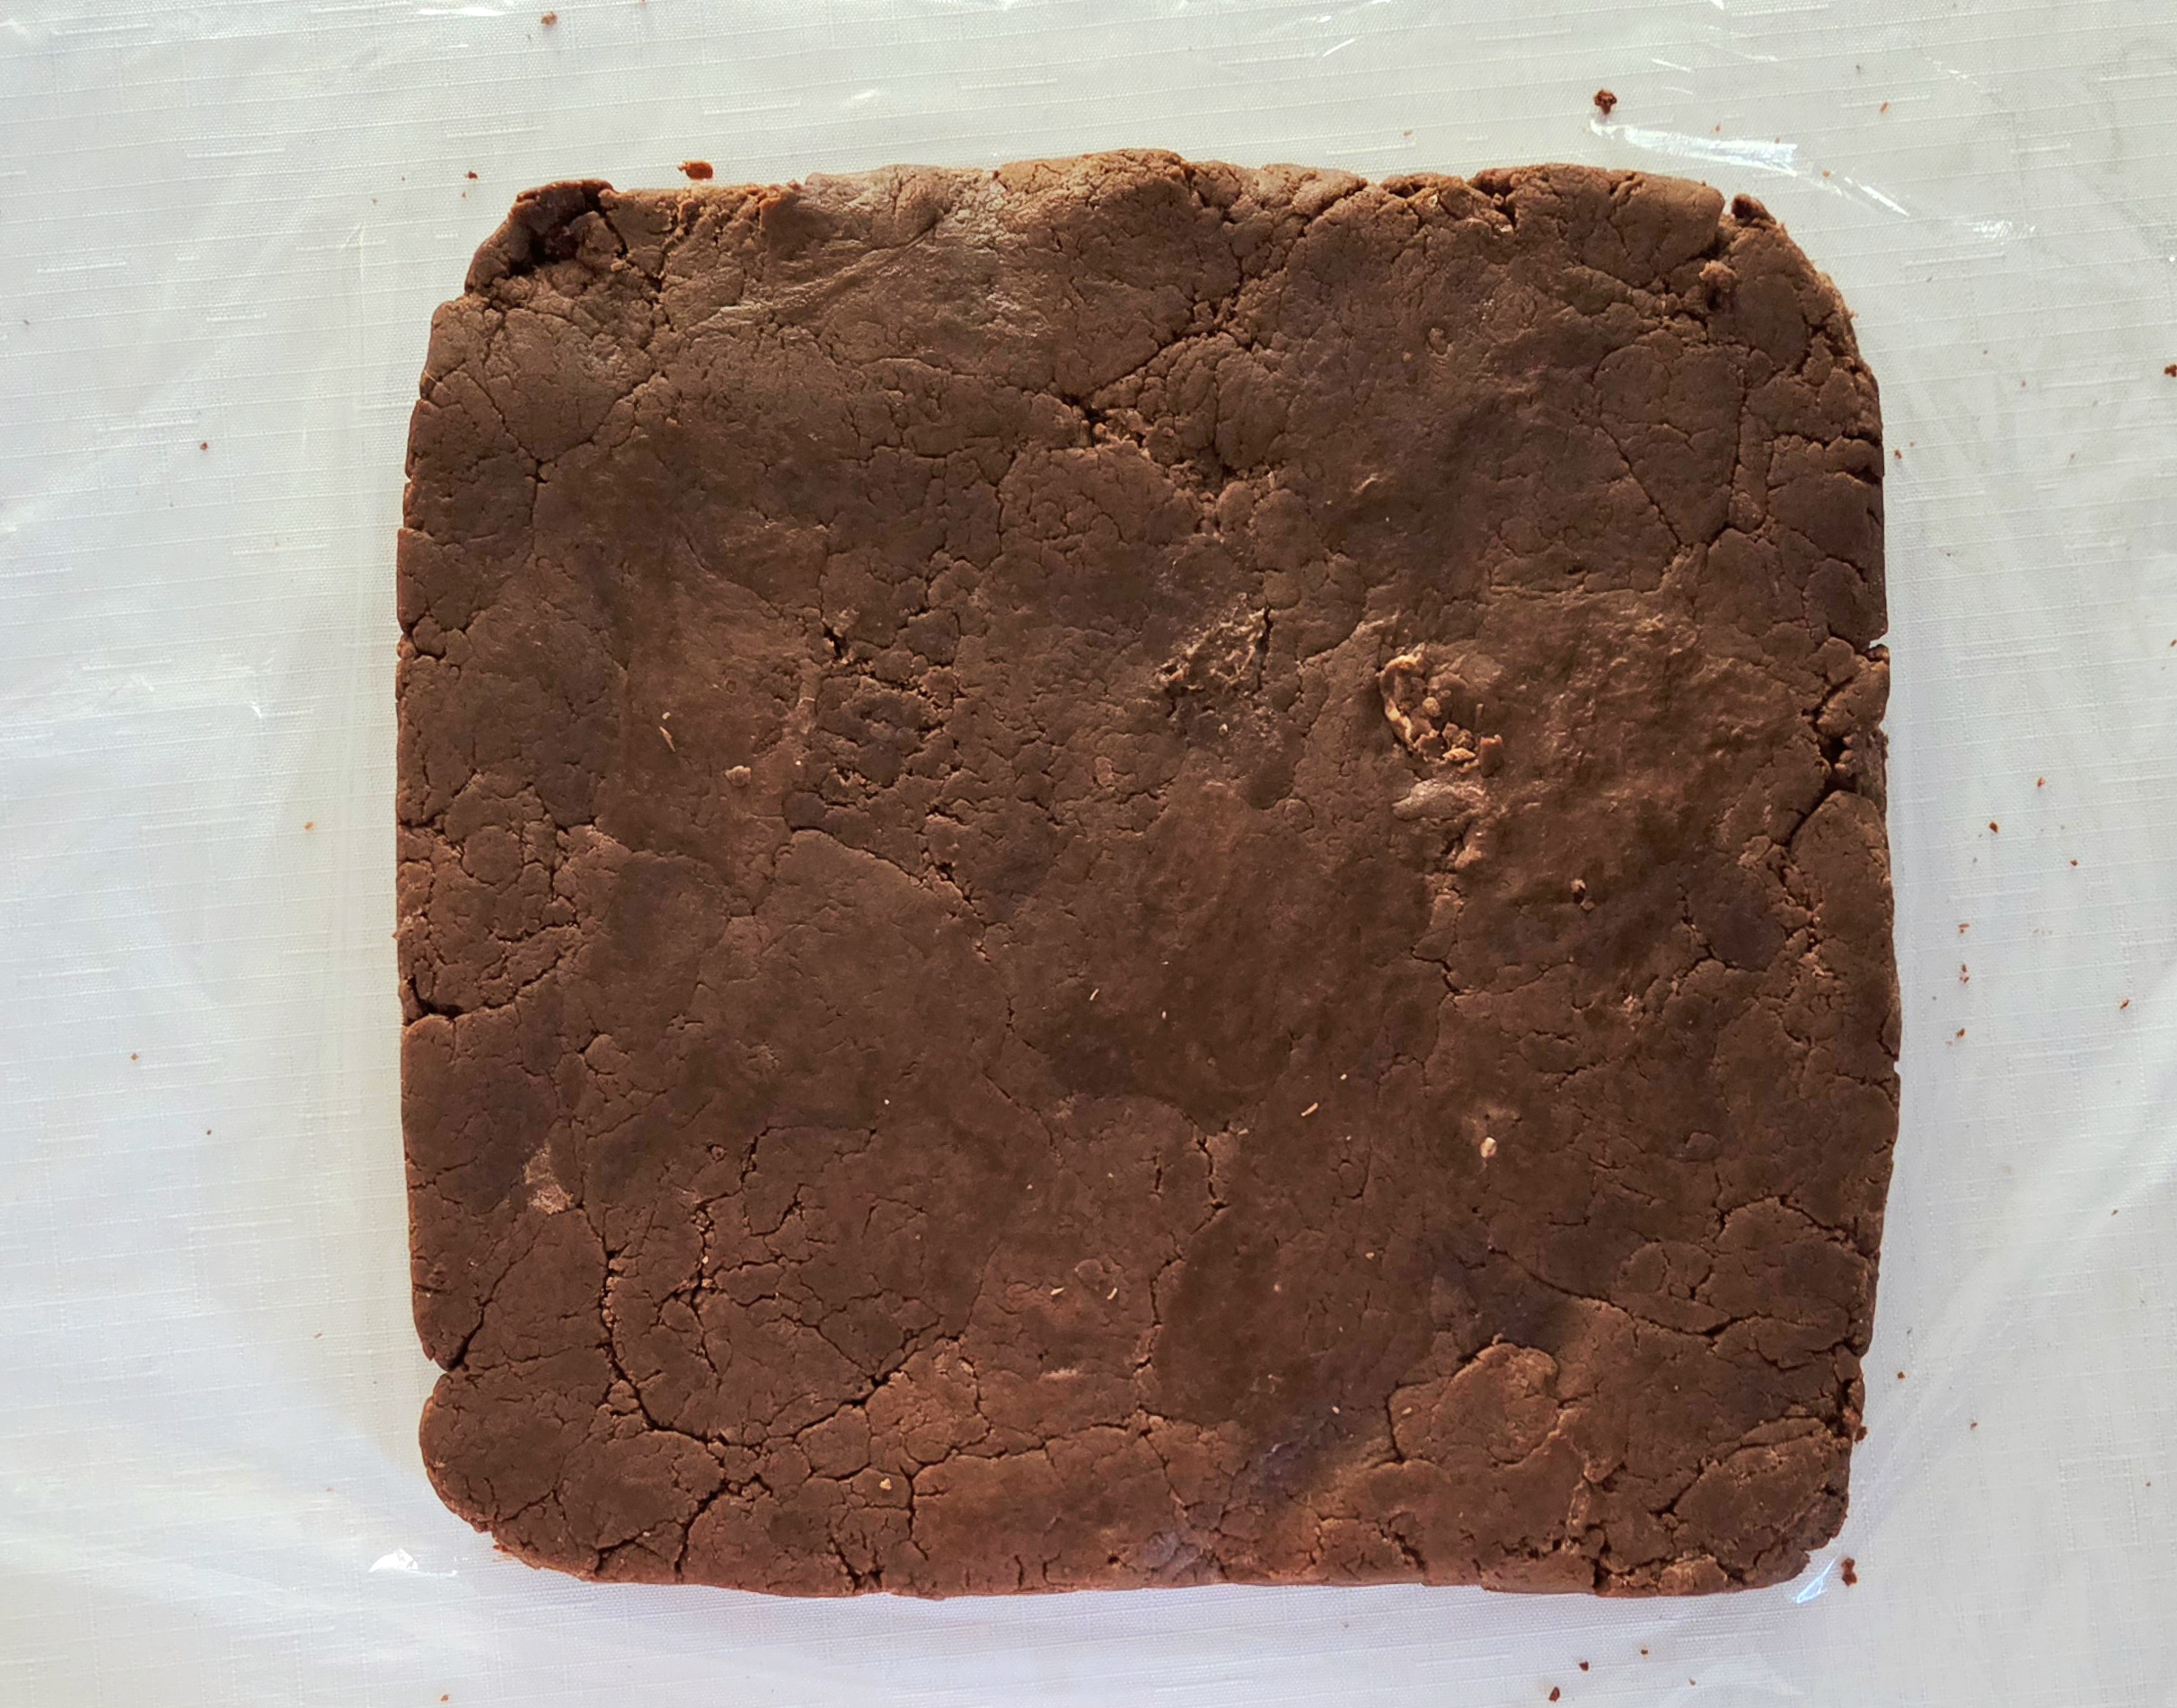
Lay out a large sheet of plastic wrap and dump the dough into the middle of it. Gently press the dough into a large square, around 1-inch in thickness. Tightly wrap it in the plastic wrap so it’s airtight. Place the dough on a flat surface in the fridge, and allow the dough to chill for a minimum of 1 hour. This can be done up to 2 days in advance, just note that the longer it chills, the firmer the dough will get. It may need to sit out for 15-20 minutes if it’s been in for longer than a few hours, to make it easier to roll out.
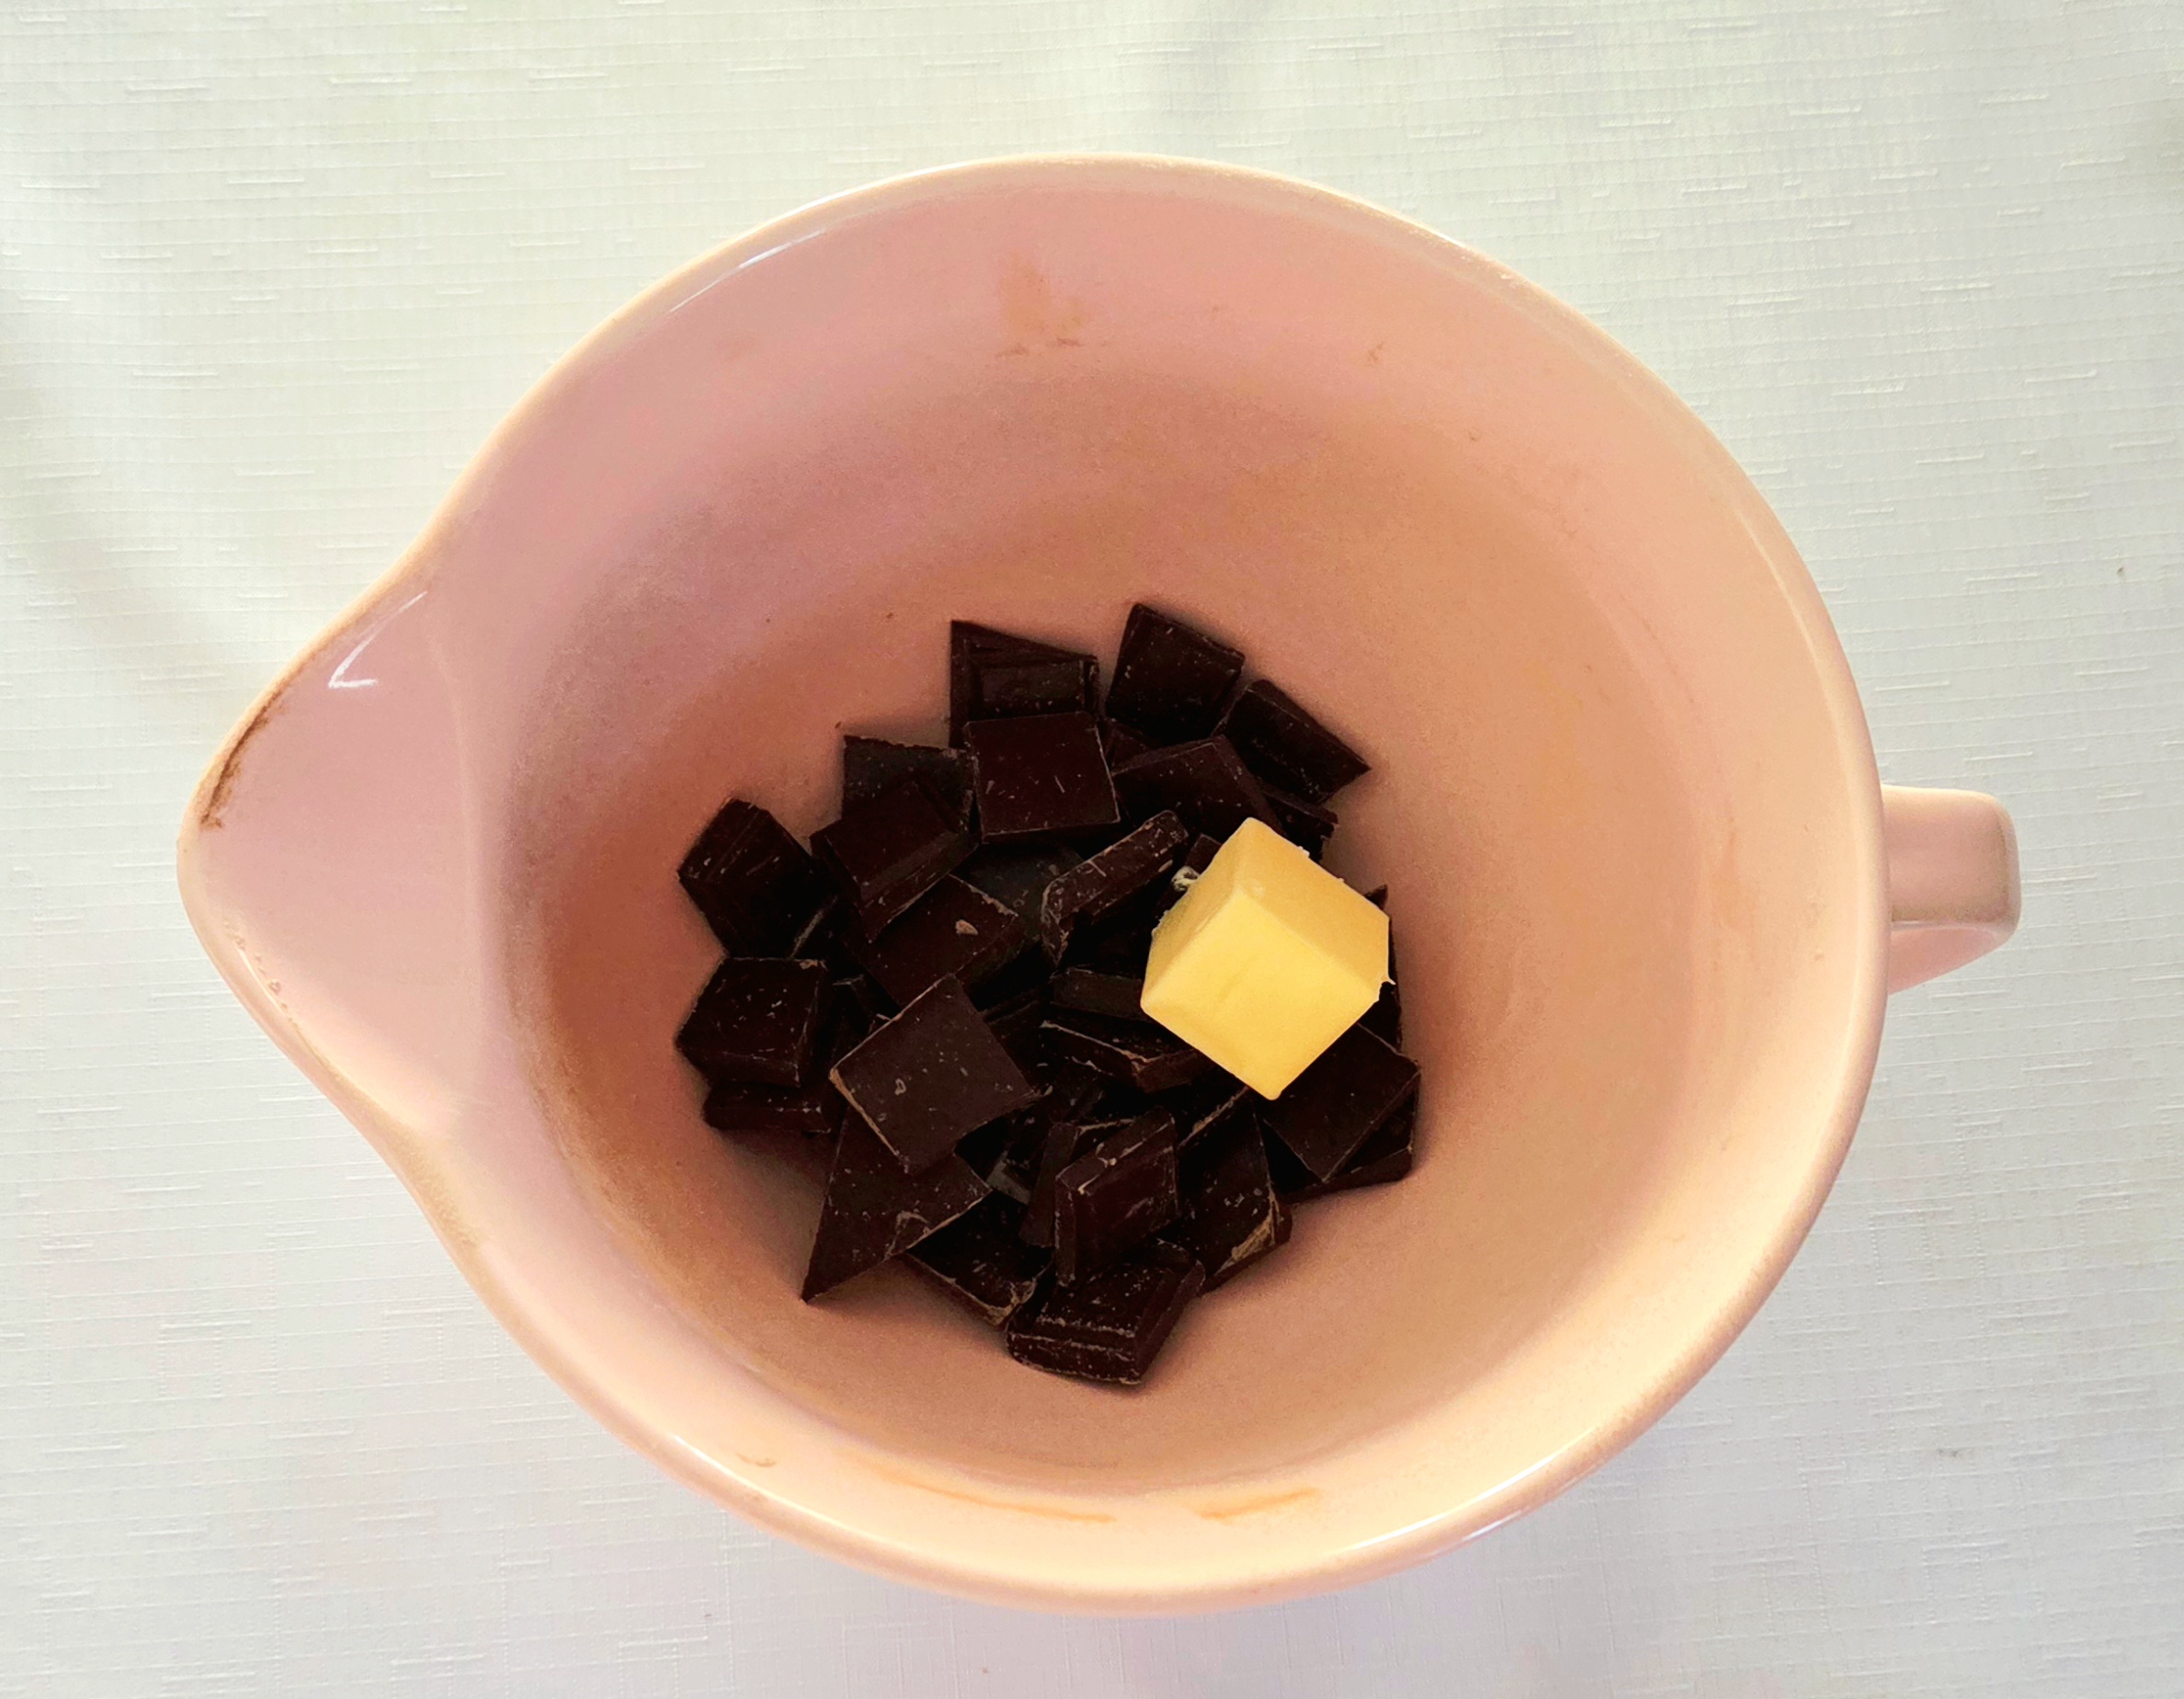
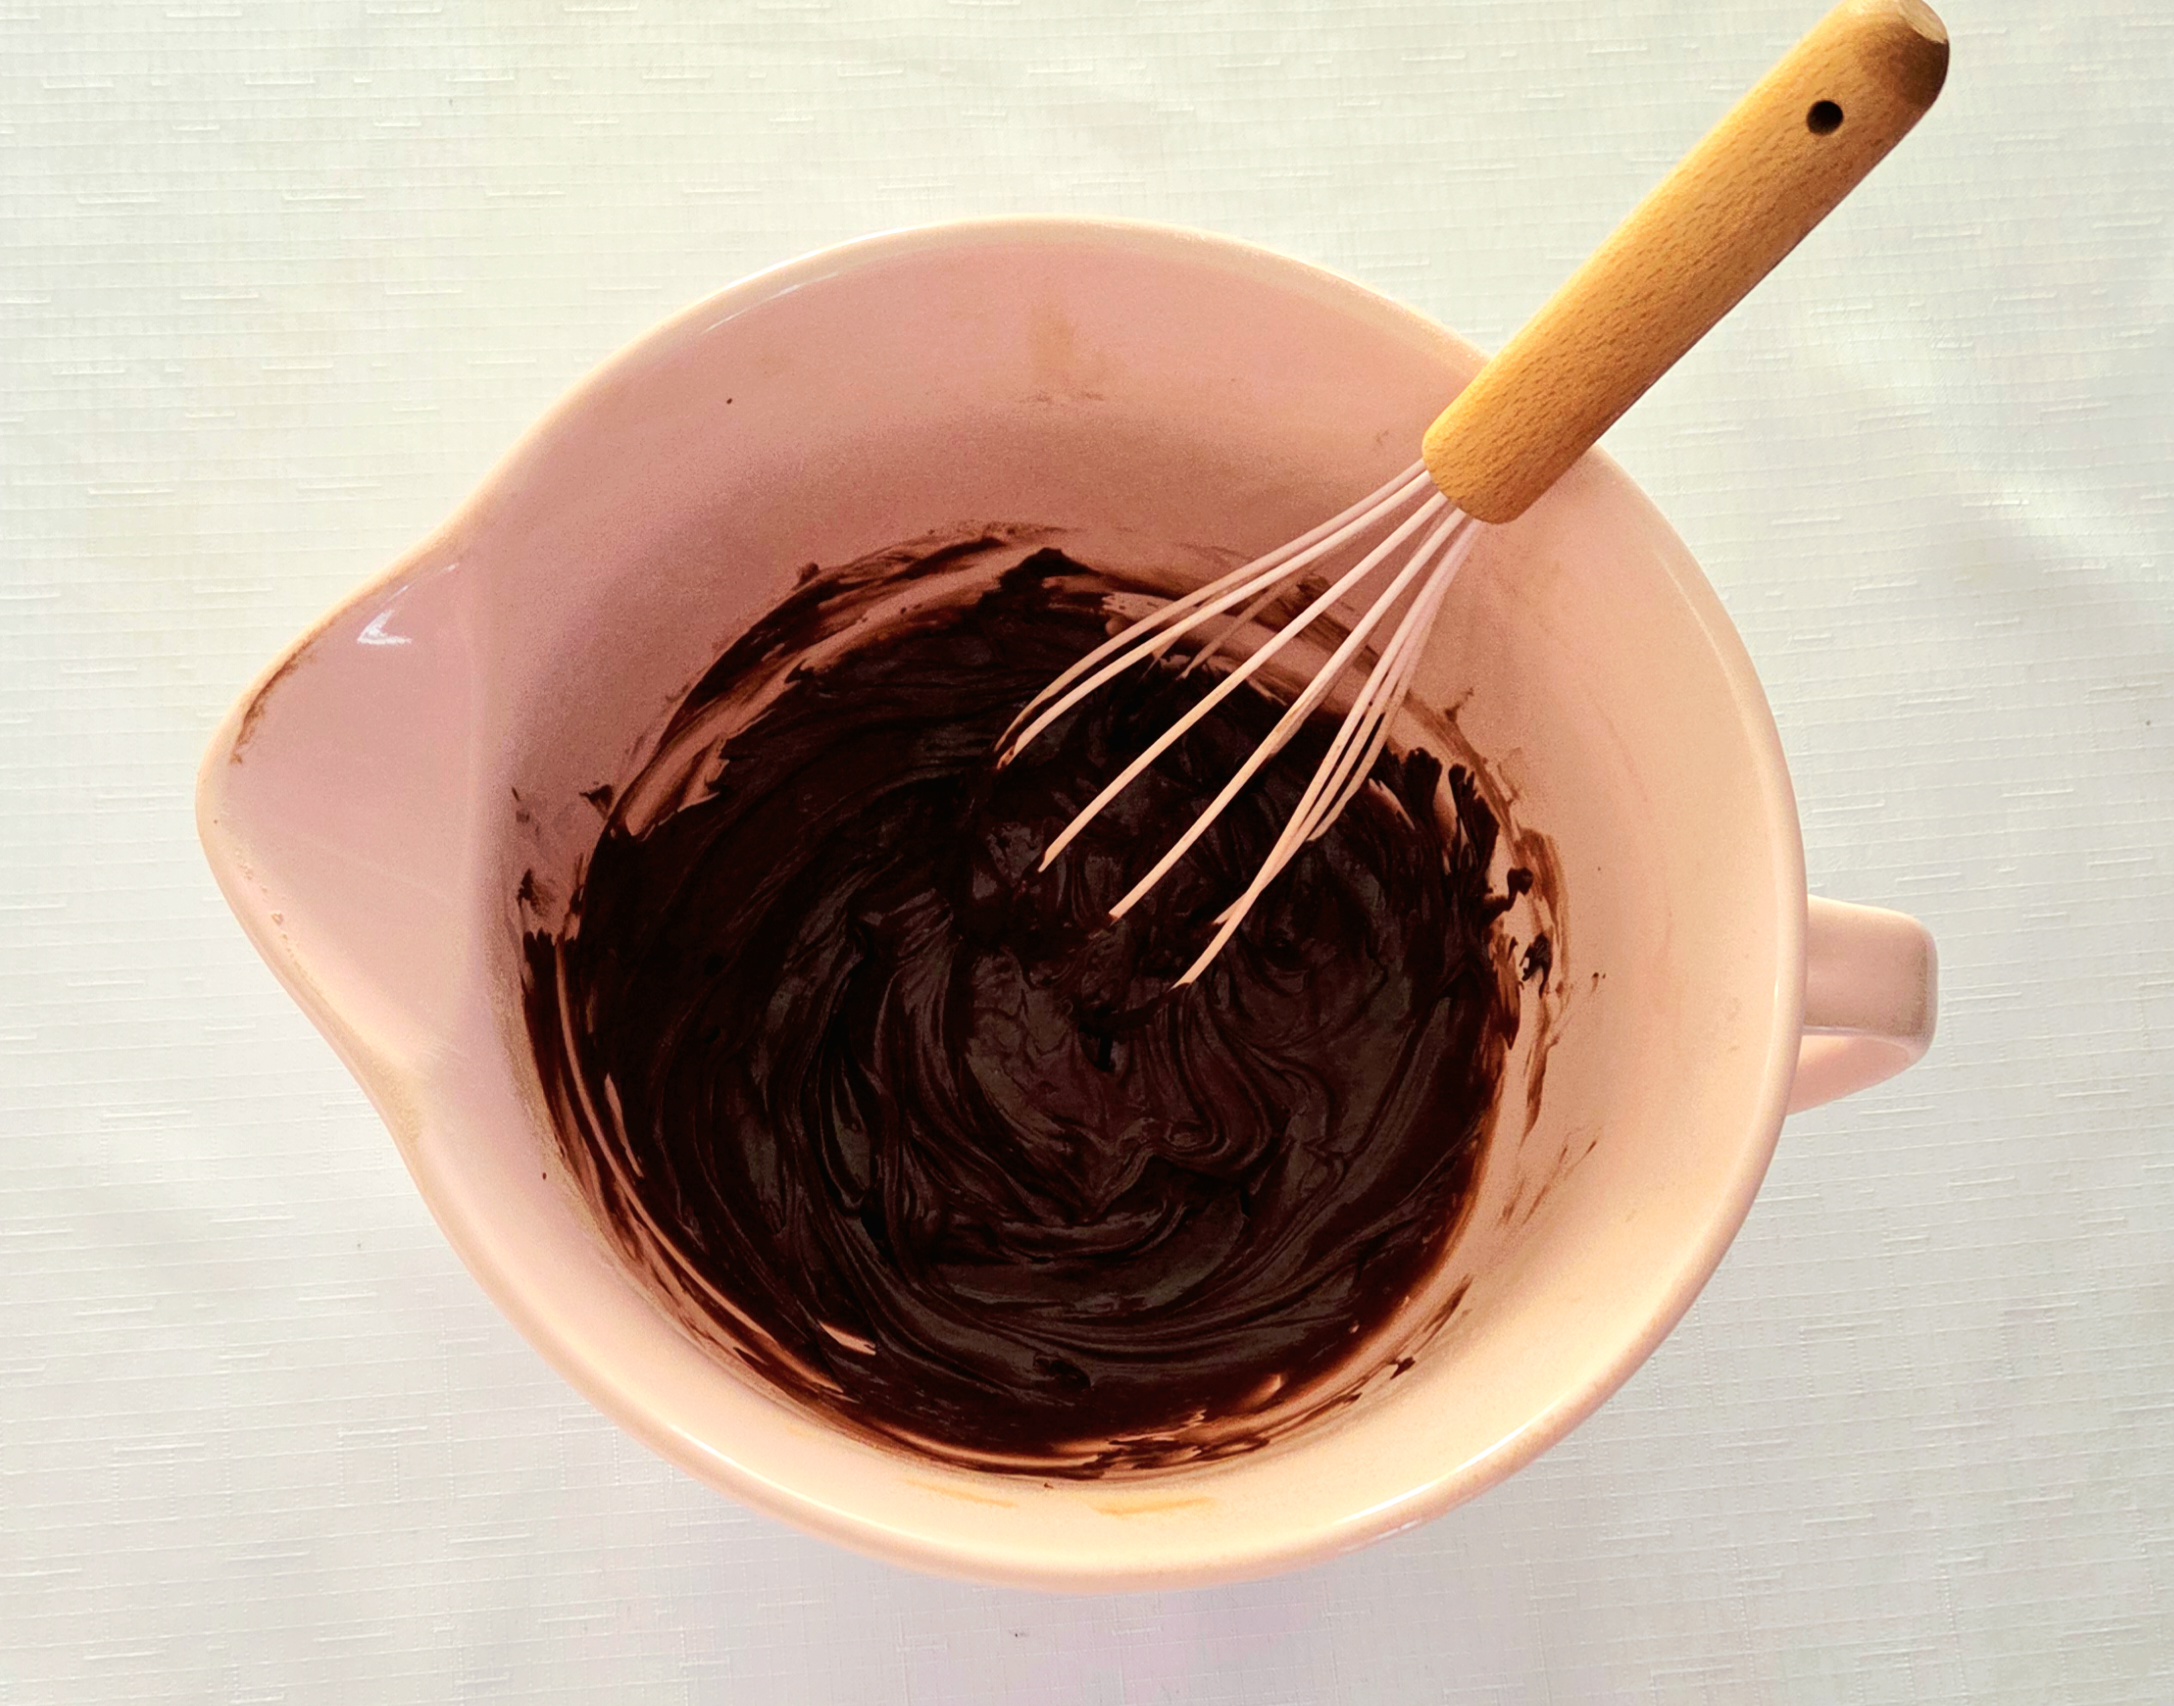
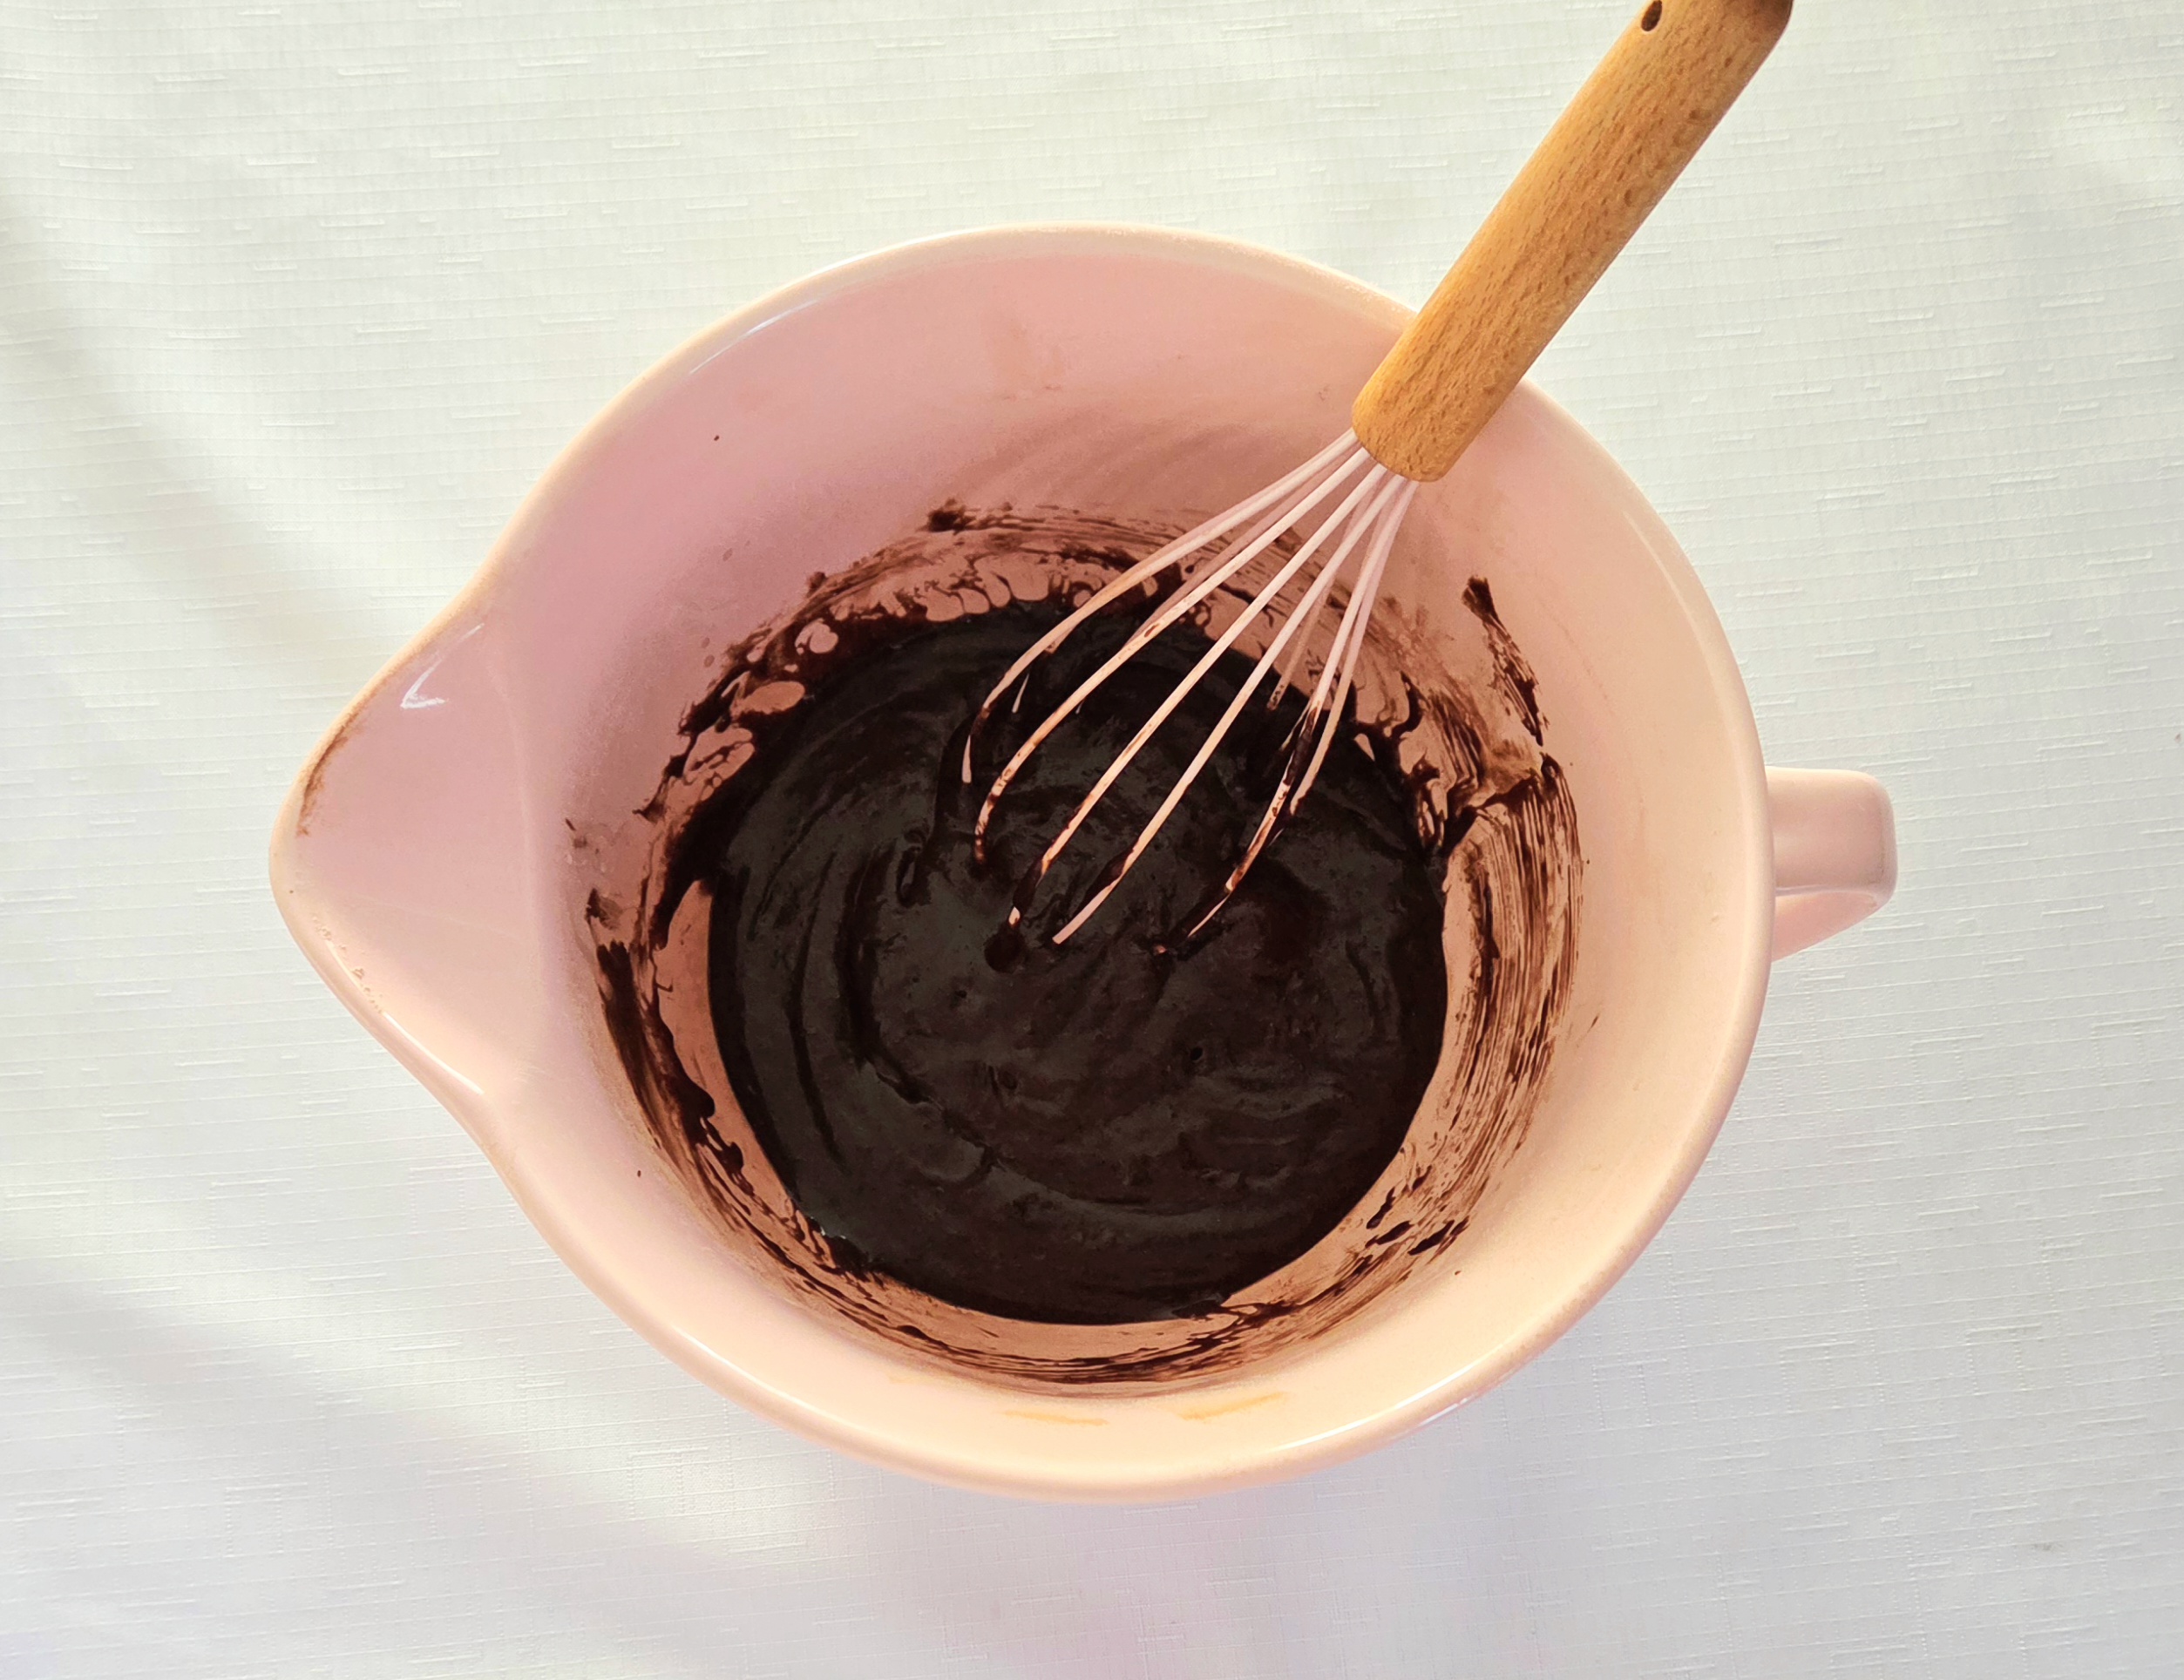
While the dough is chilling, prepare the filling. In a medium microwave-safe mixing bowl, melt together the butter and dark chocolate in 30 second increments, whisking in between each.
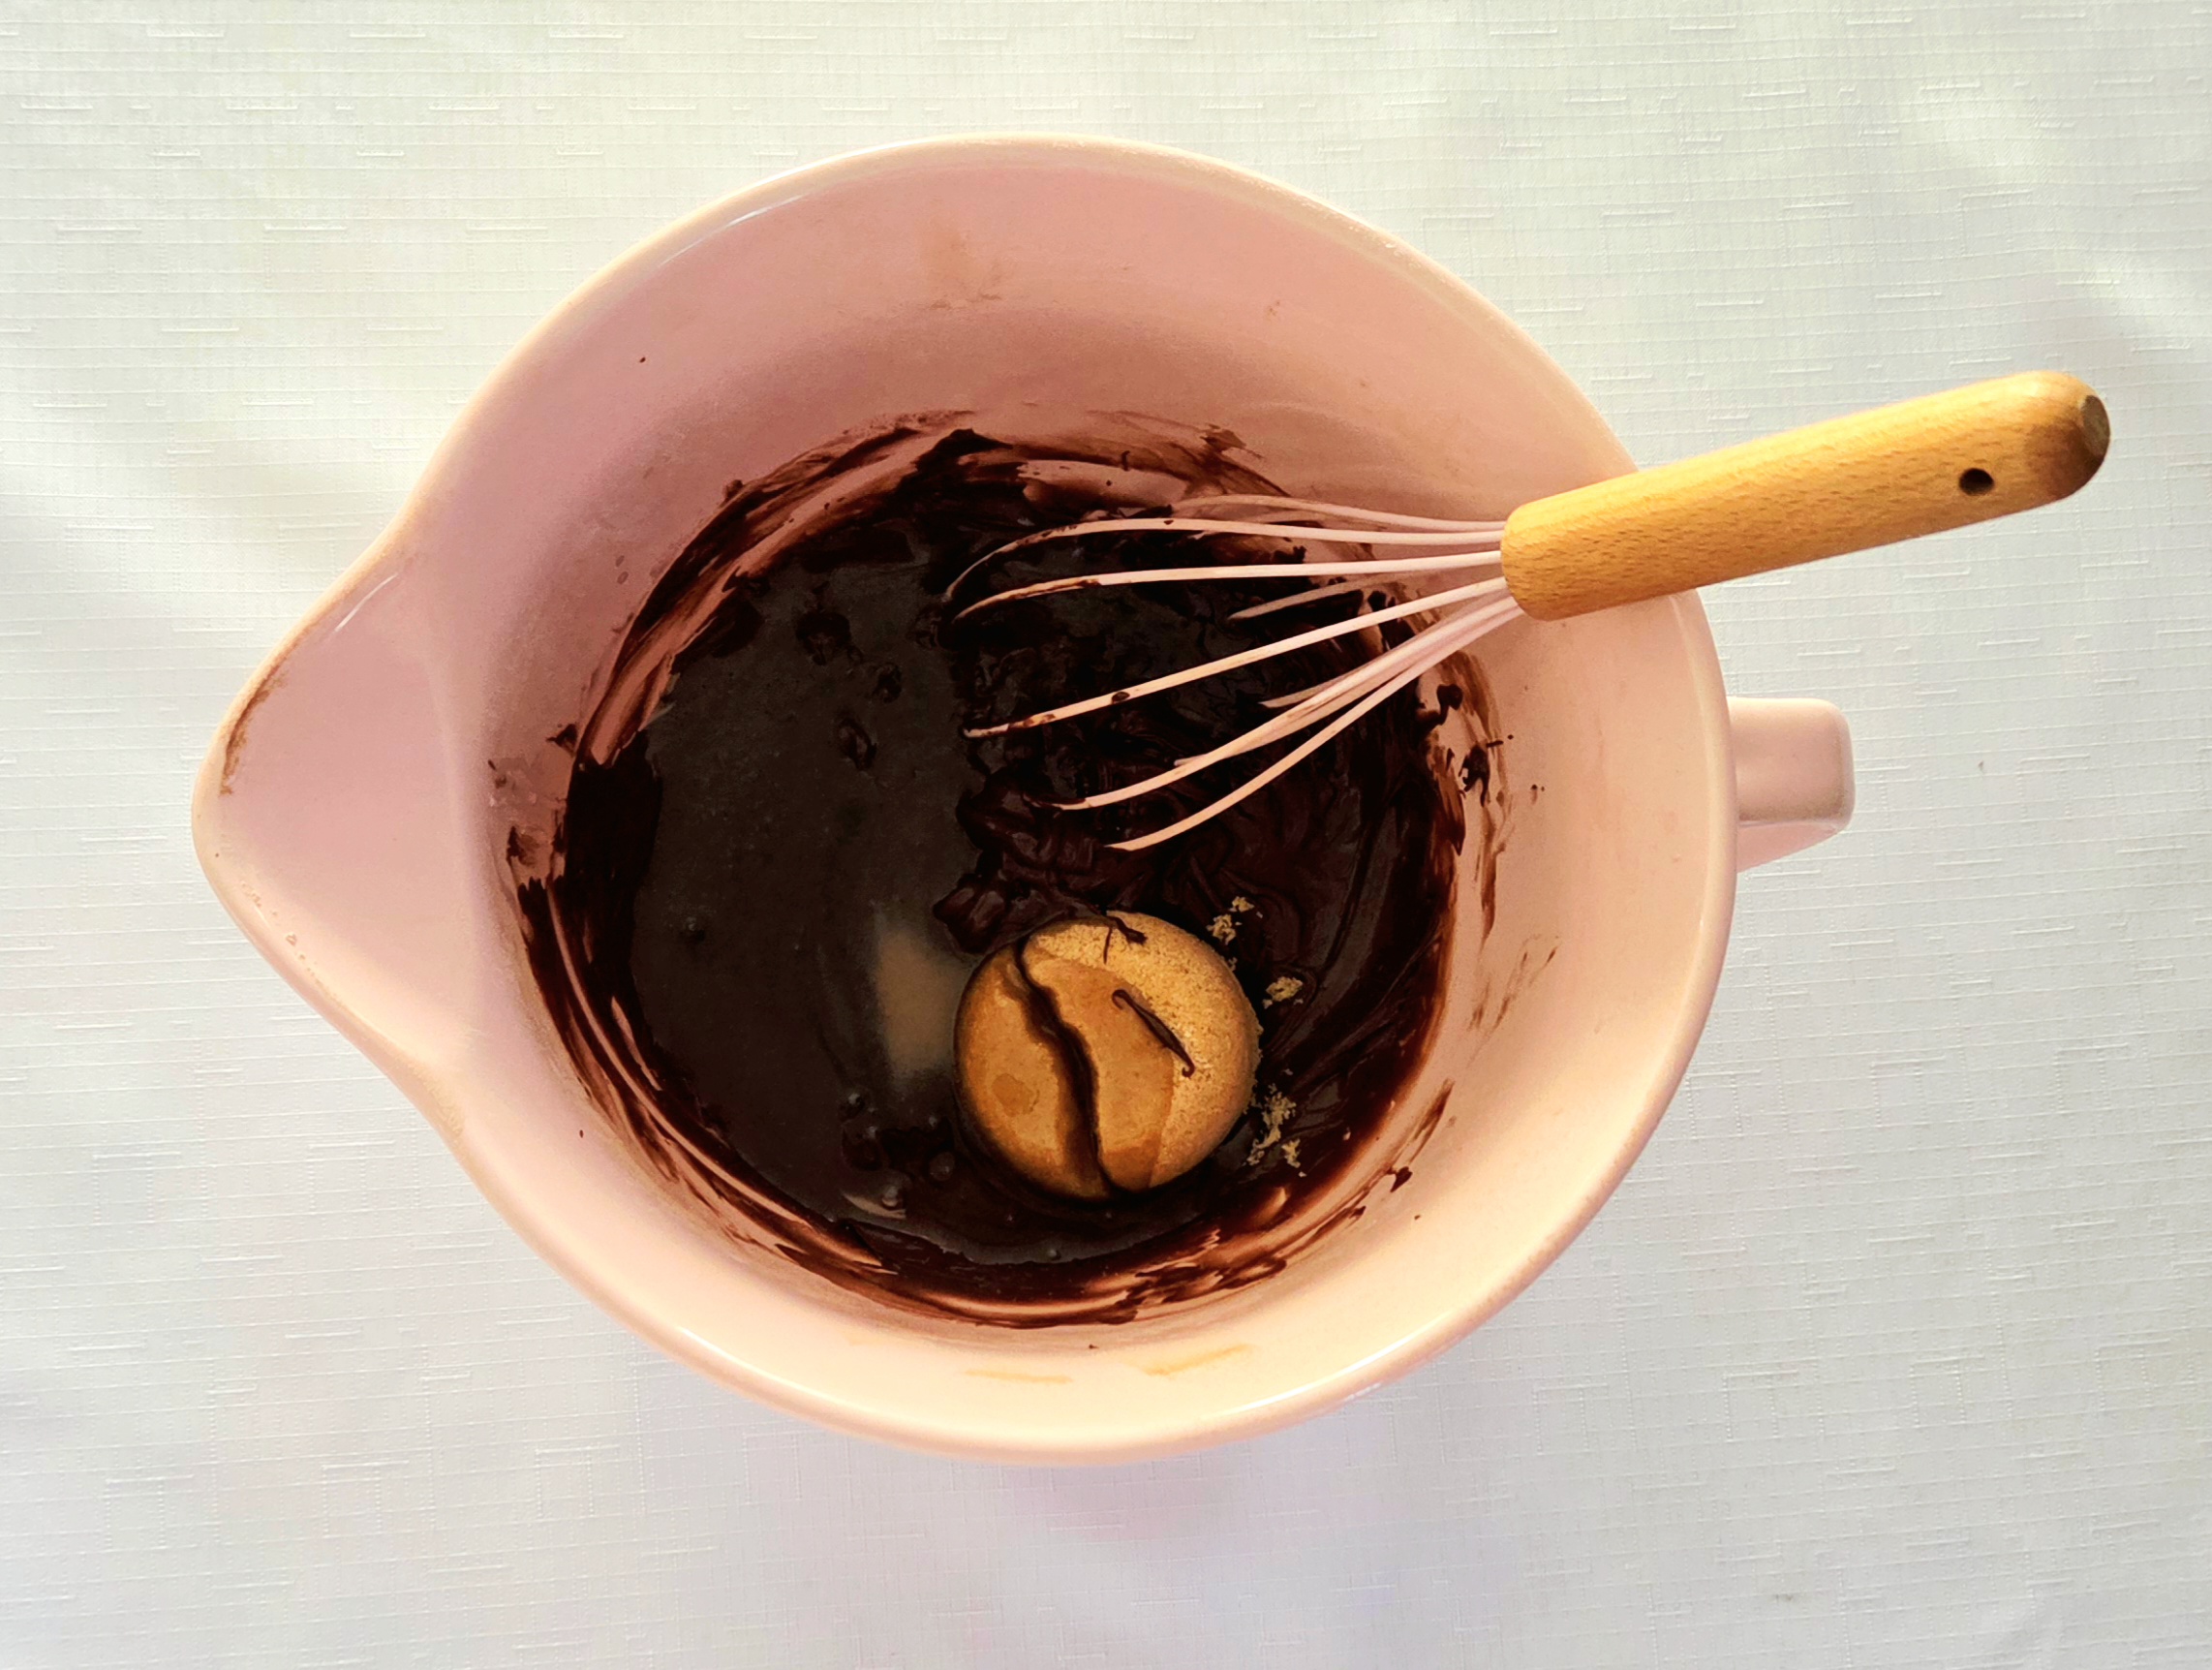
Pour in the corn syrup (measured in liquid measuring cup), brown sugar, vanilla, and salt, and whisk to combine. It will be thick, but it should still be a spreadable consistency. Cover the bowl with plastic and set it aside at room temperature, until it’s needed.
When you’re ready to assemble, preheat the oven to 350, on the convection setting if possible, and prepare the pans. Line two baking sheets with parchment paper or silicone baking mats, and set them aside. Remove the dough from the fridge and allow it to sit at room temperature for a few minutes, so it will be easier to roll out. Using a knife or bench scraper, cut the slab of dough in half, giving you two equal rectangles.
Lightly dust a clean counter with flour, and grab one of the halves of dough. Wrap the other half back up in the plastic wrap until you’re ready to use it. If the kitchen is particularly warm, place the second half back into the fridge, but otherwise it can just hang out on the counter.
Sprinkle flour on both sides of the dough before placing it on the flour coated surface and roll it out until the dough is around 1/8 of an inch thick, approximately a 12×12 square.
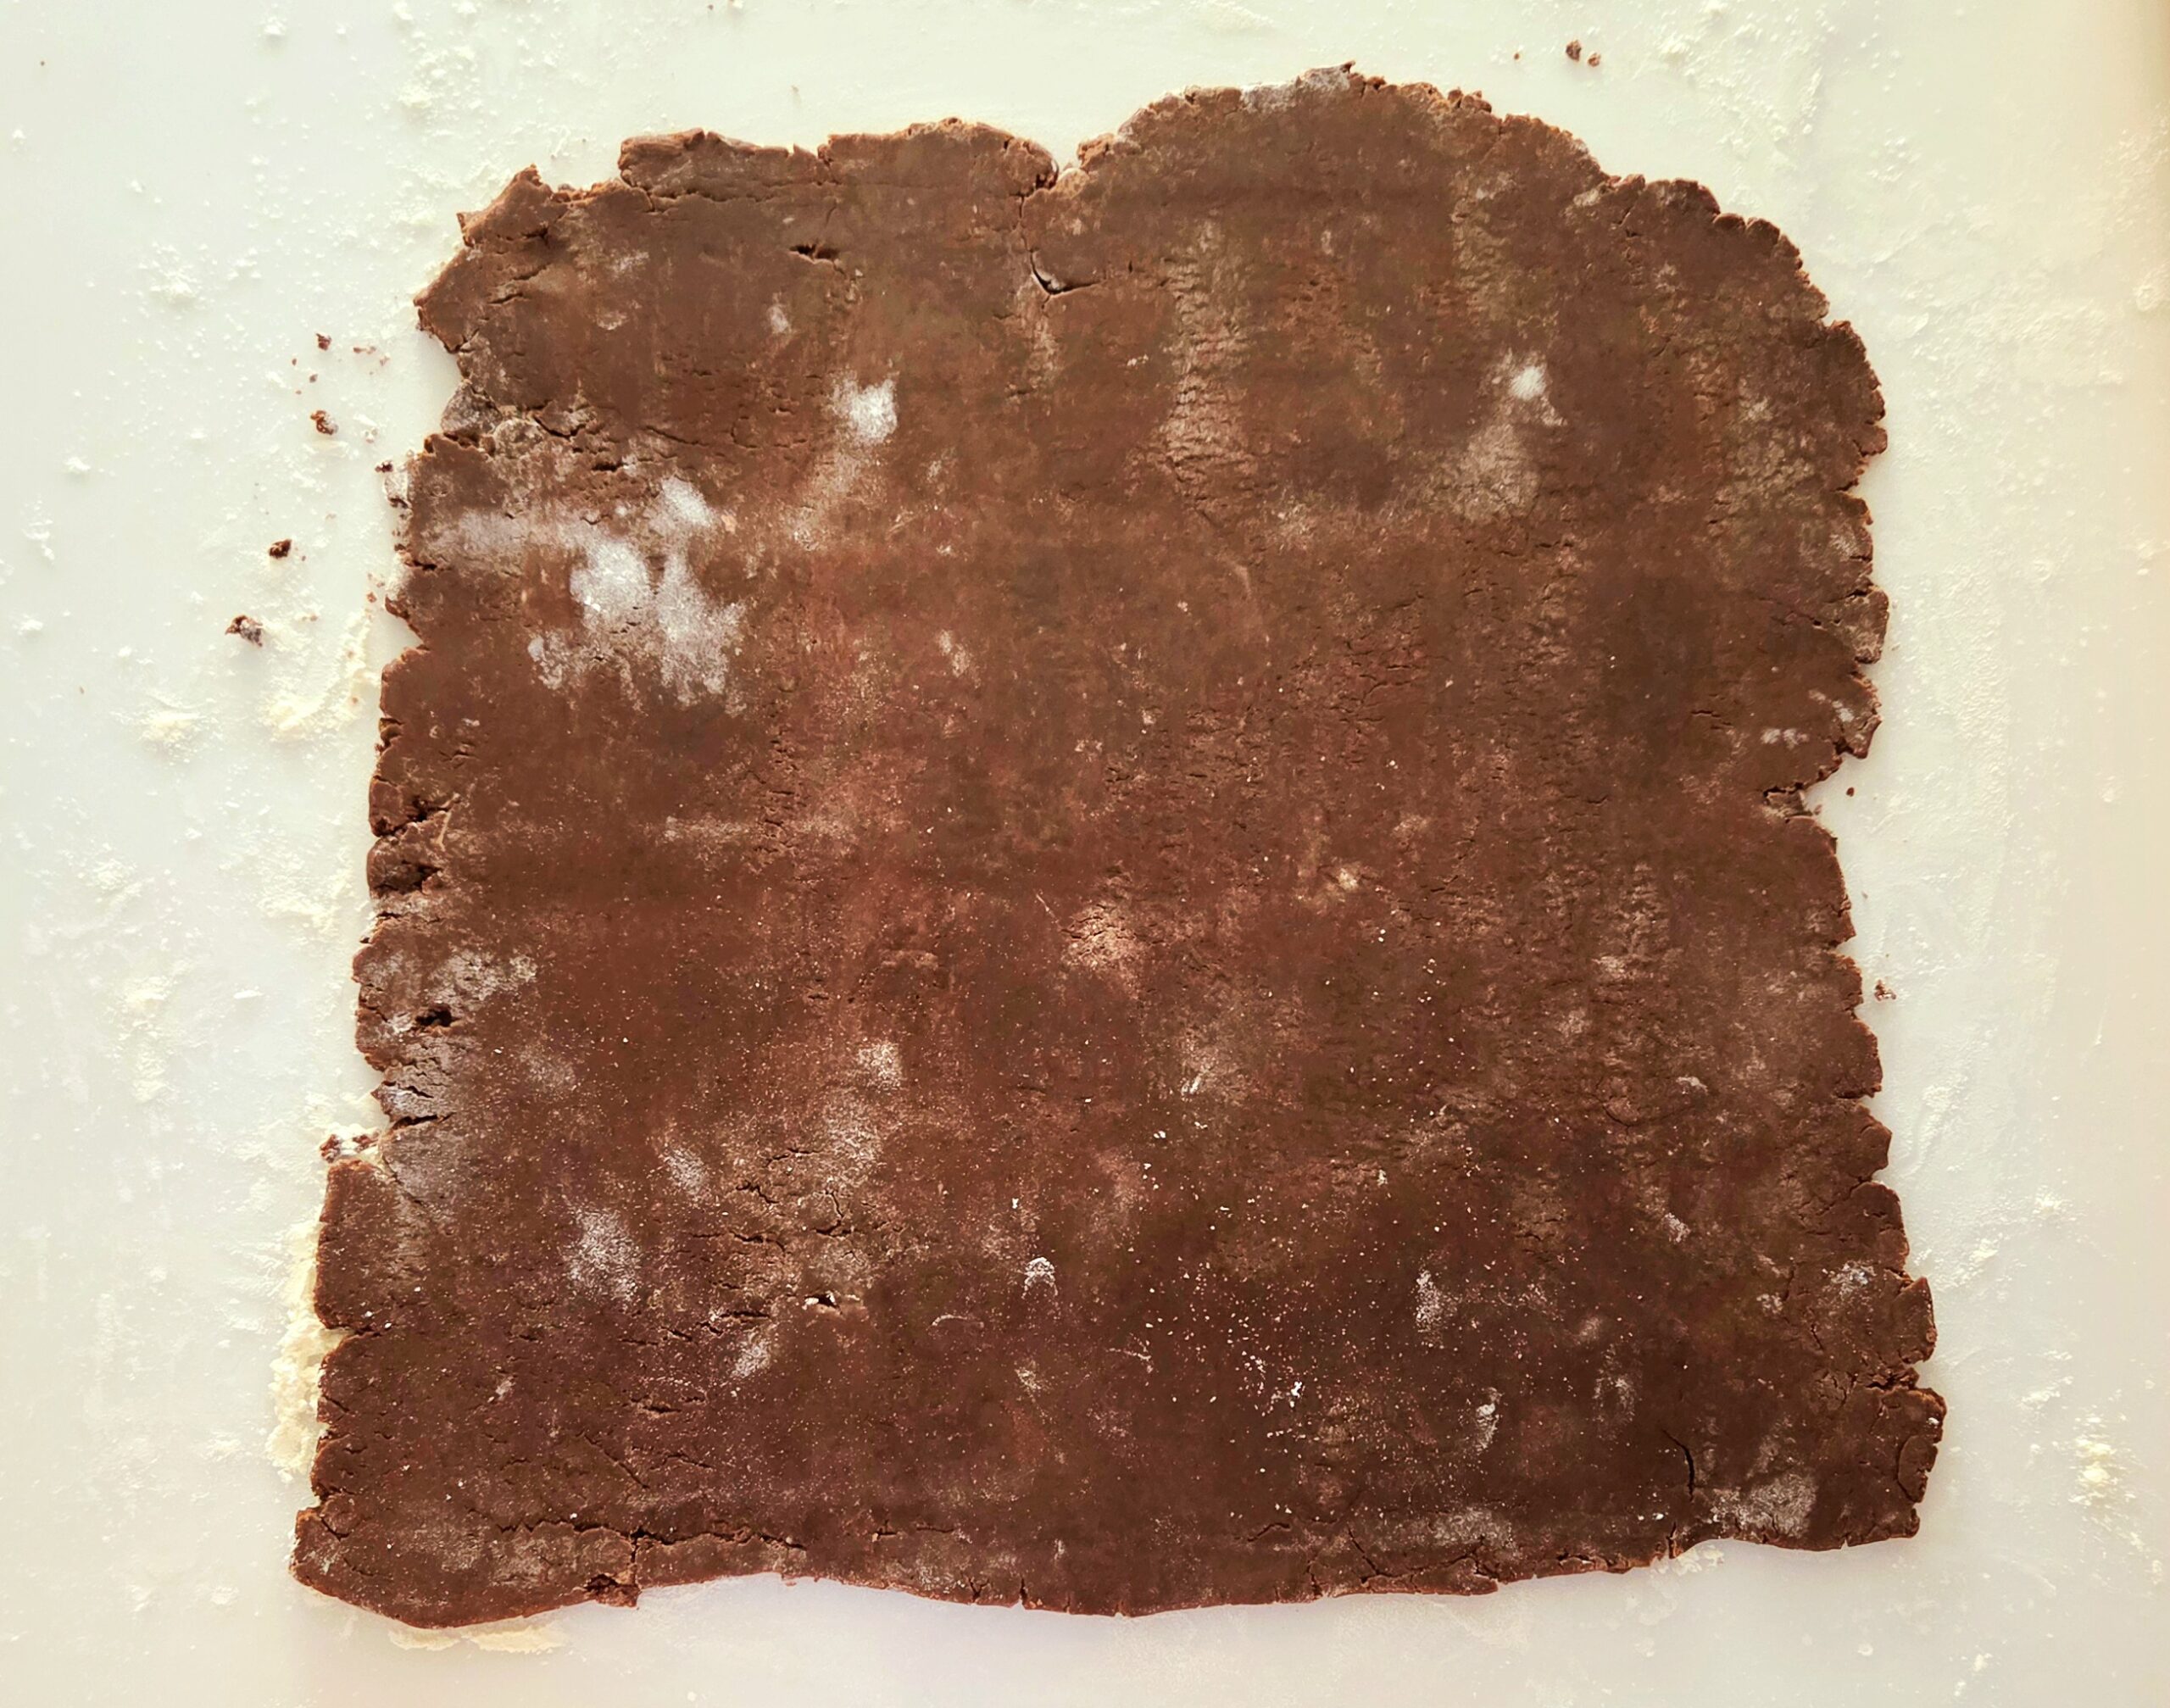
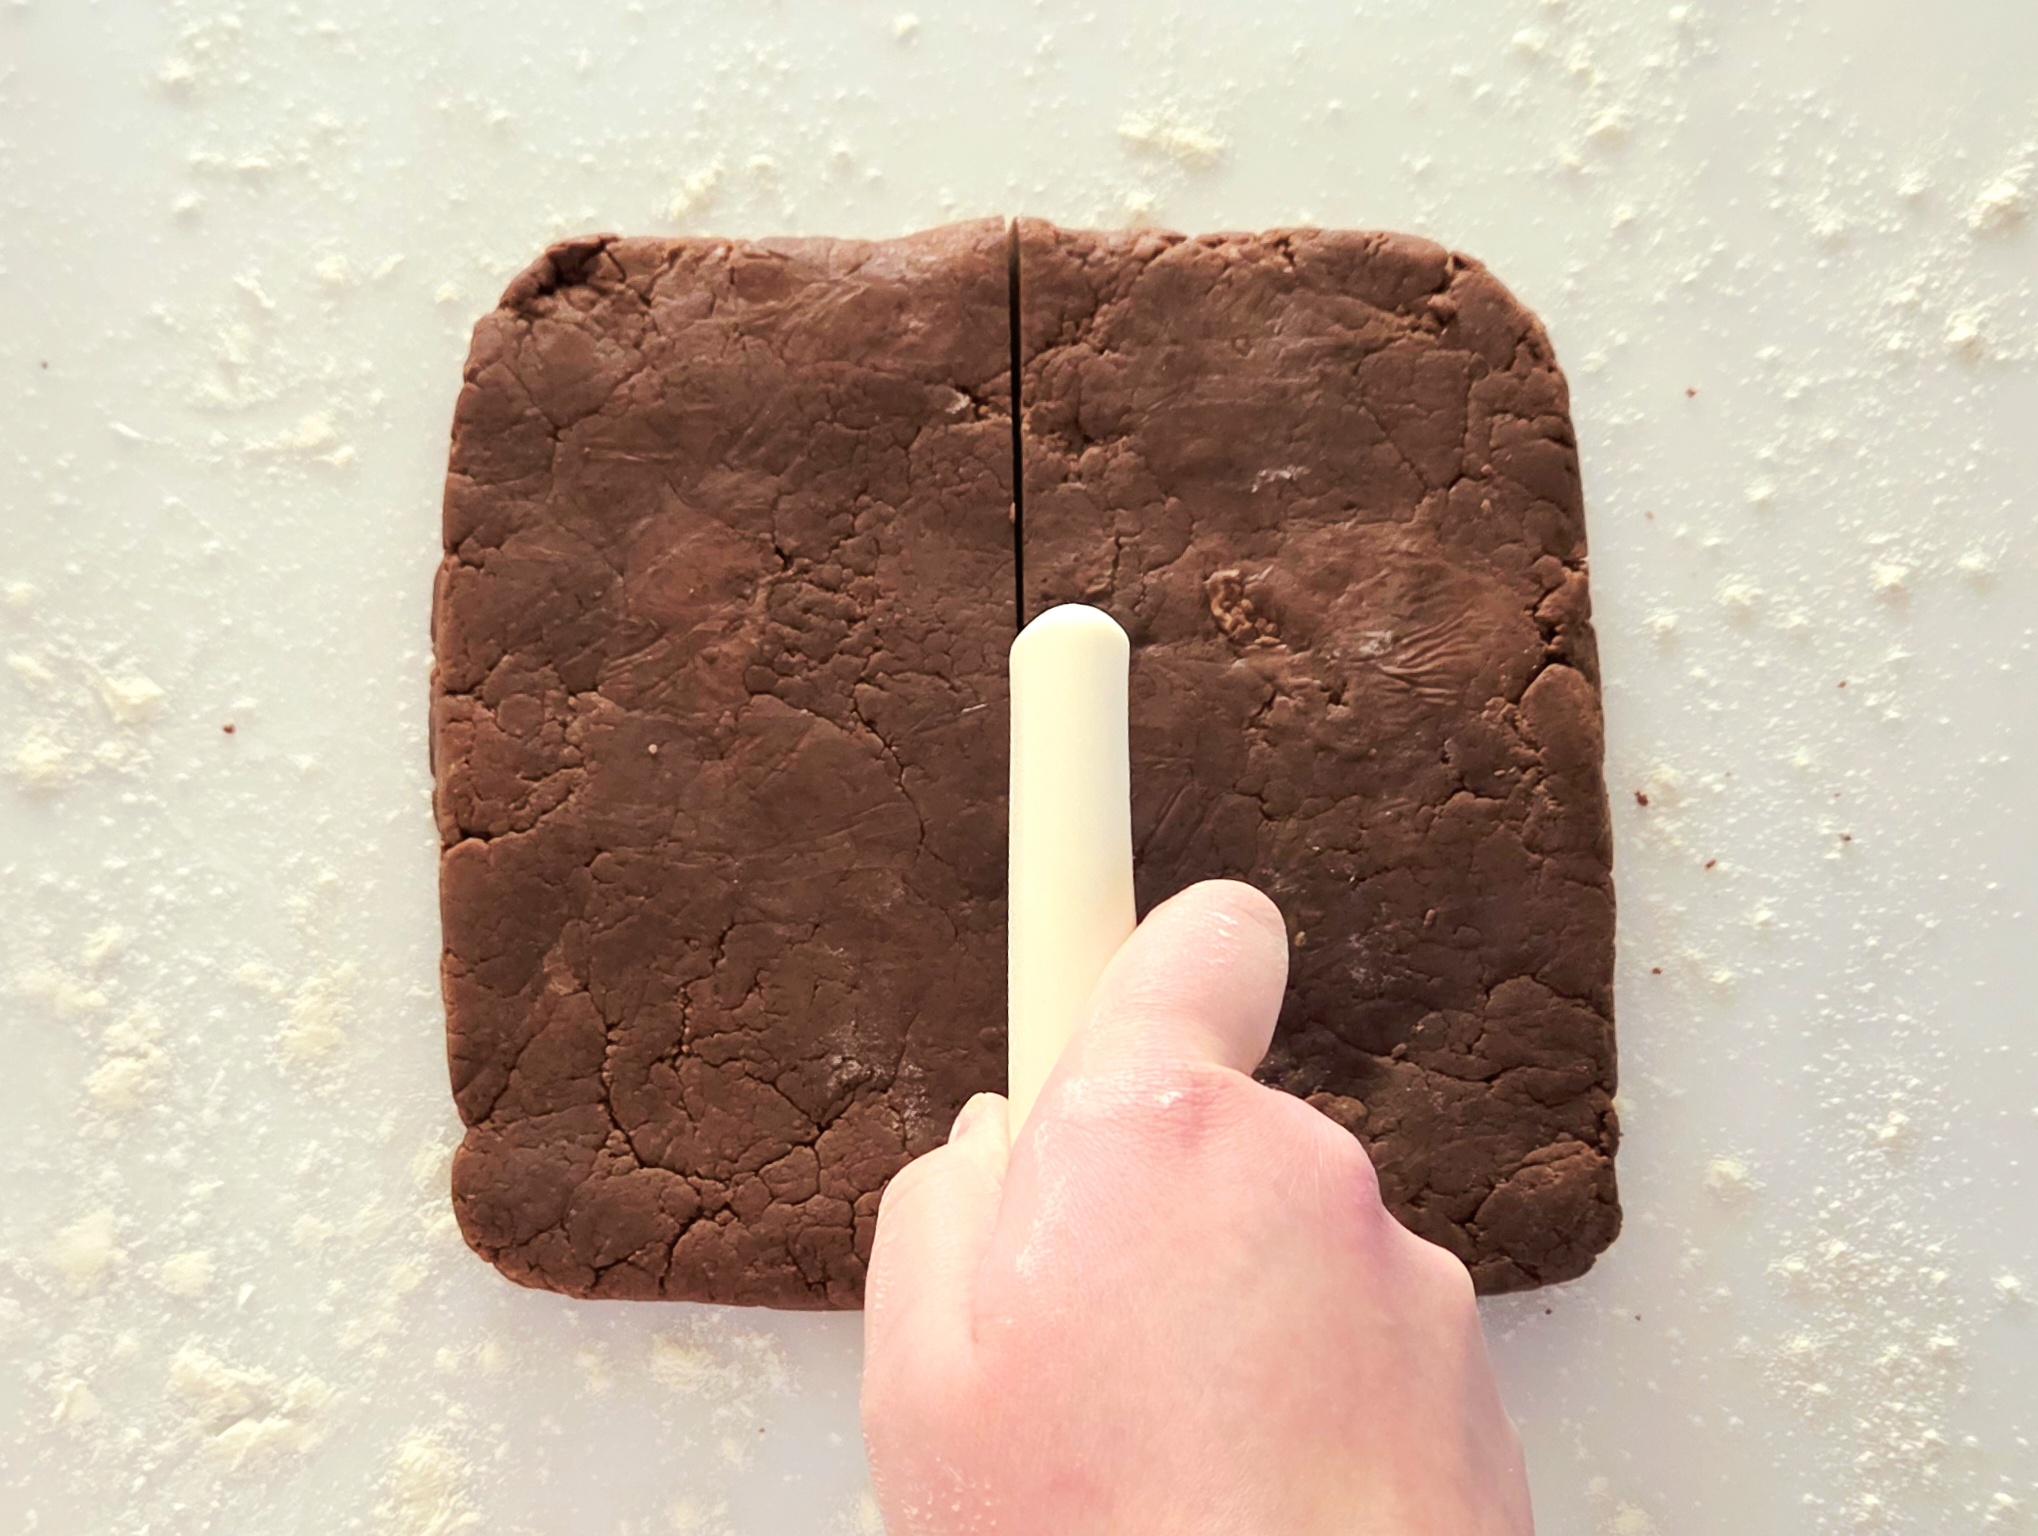
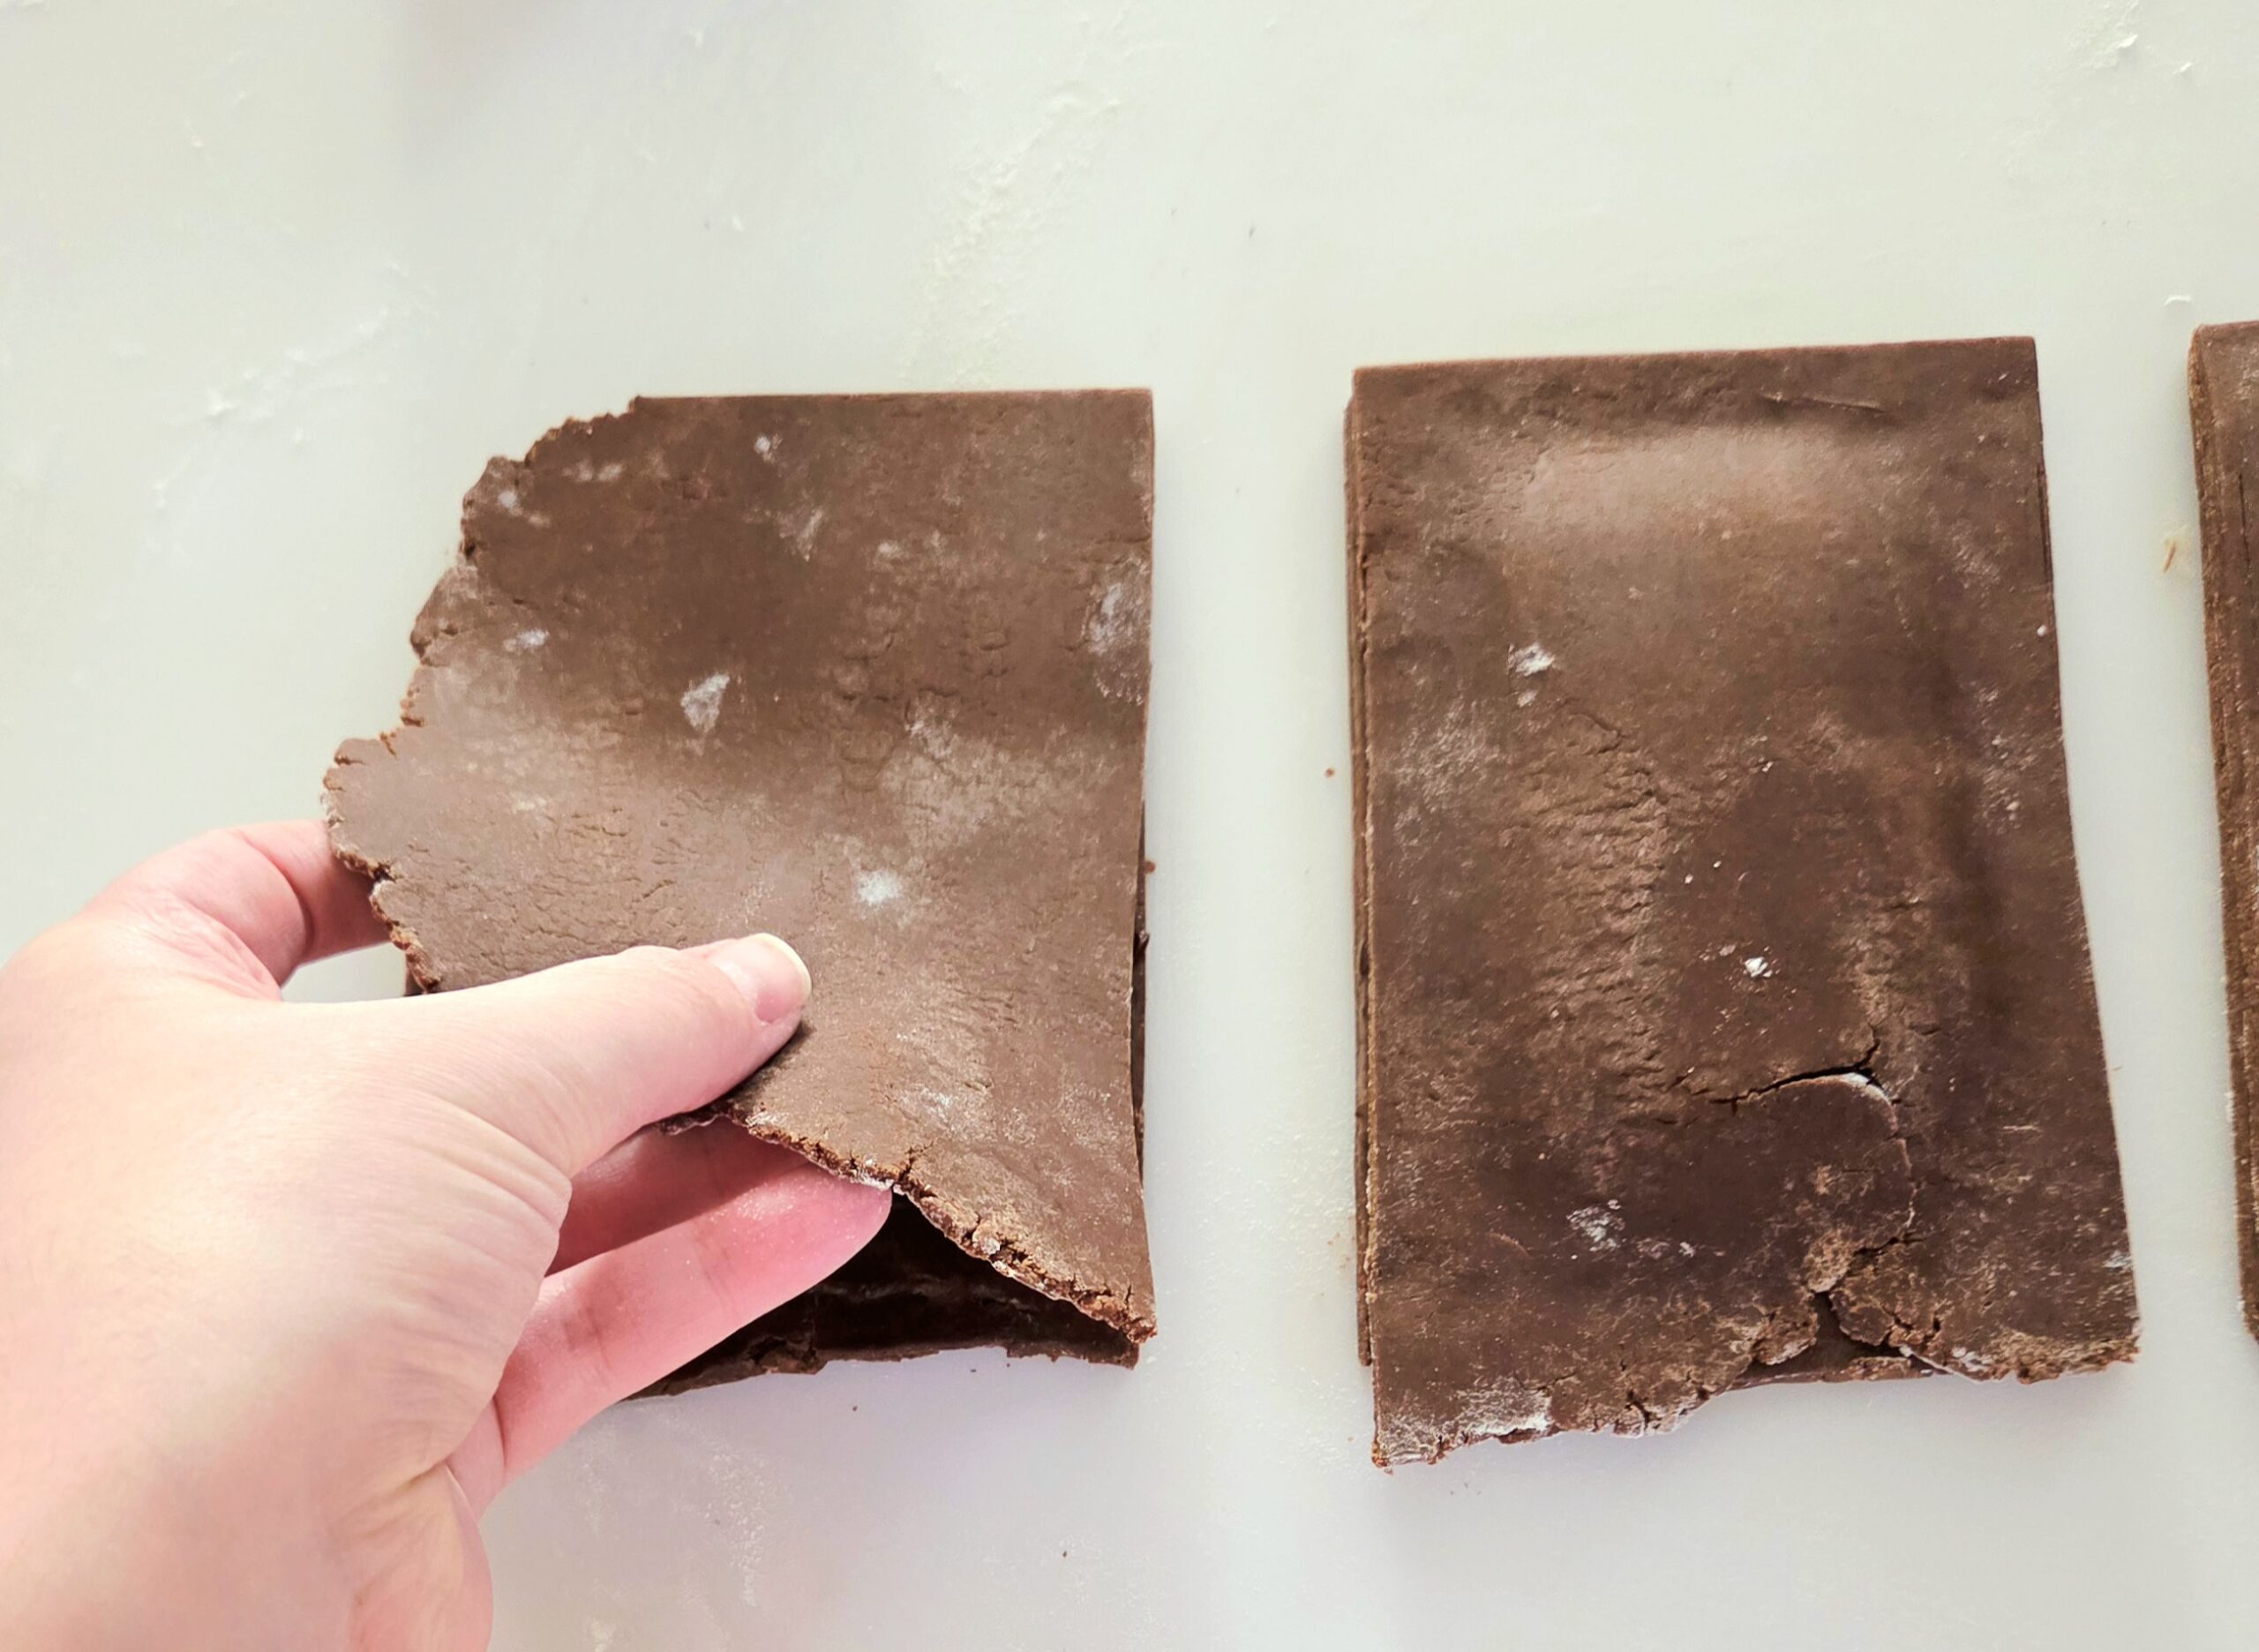
Using the knife or bench scraper, cut the square into 3 equal strips in one direction, then in half in the other, giving you 6, relatively evenly sized, total rectangles. Don’t worry about them being beautiful at this point, that will come after they’ve been filled and the edges have been trimmed.
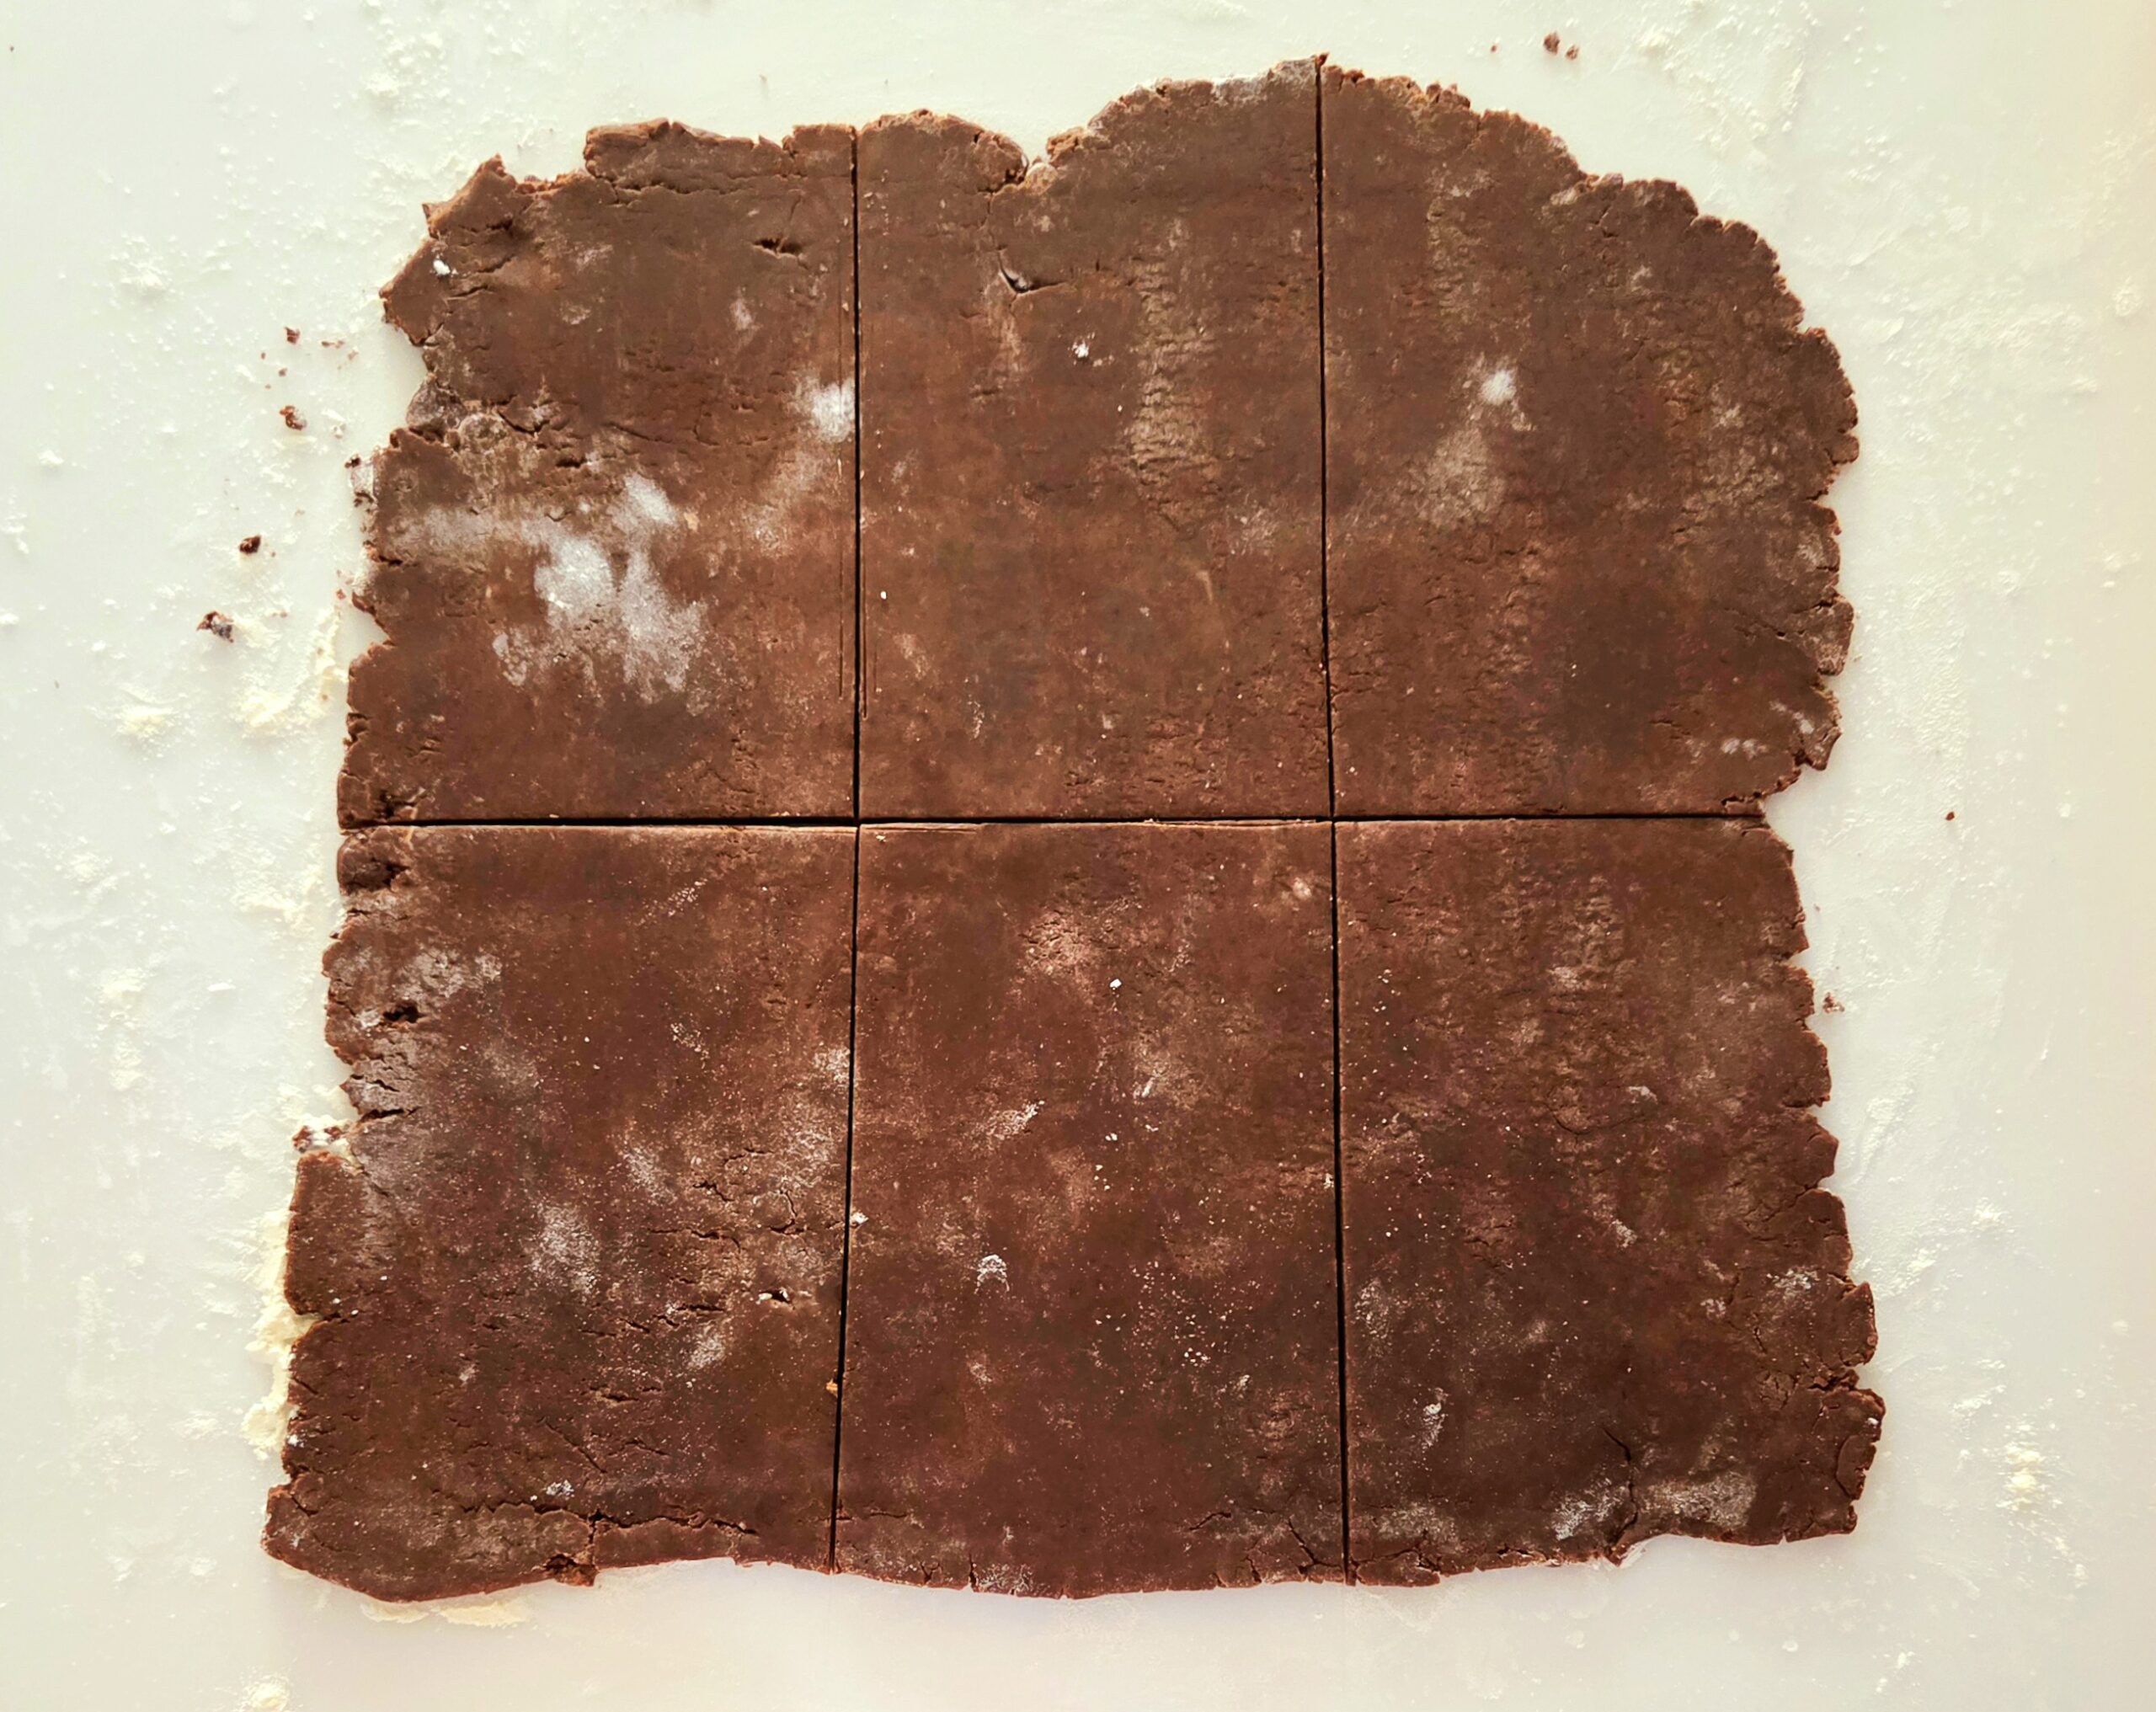
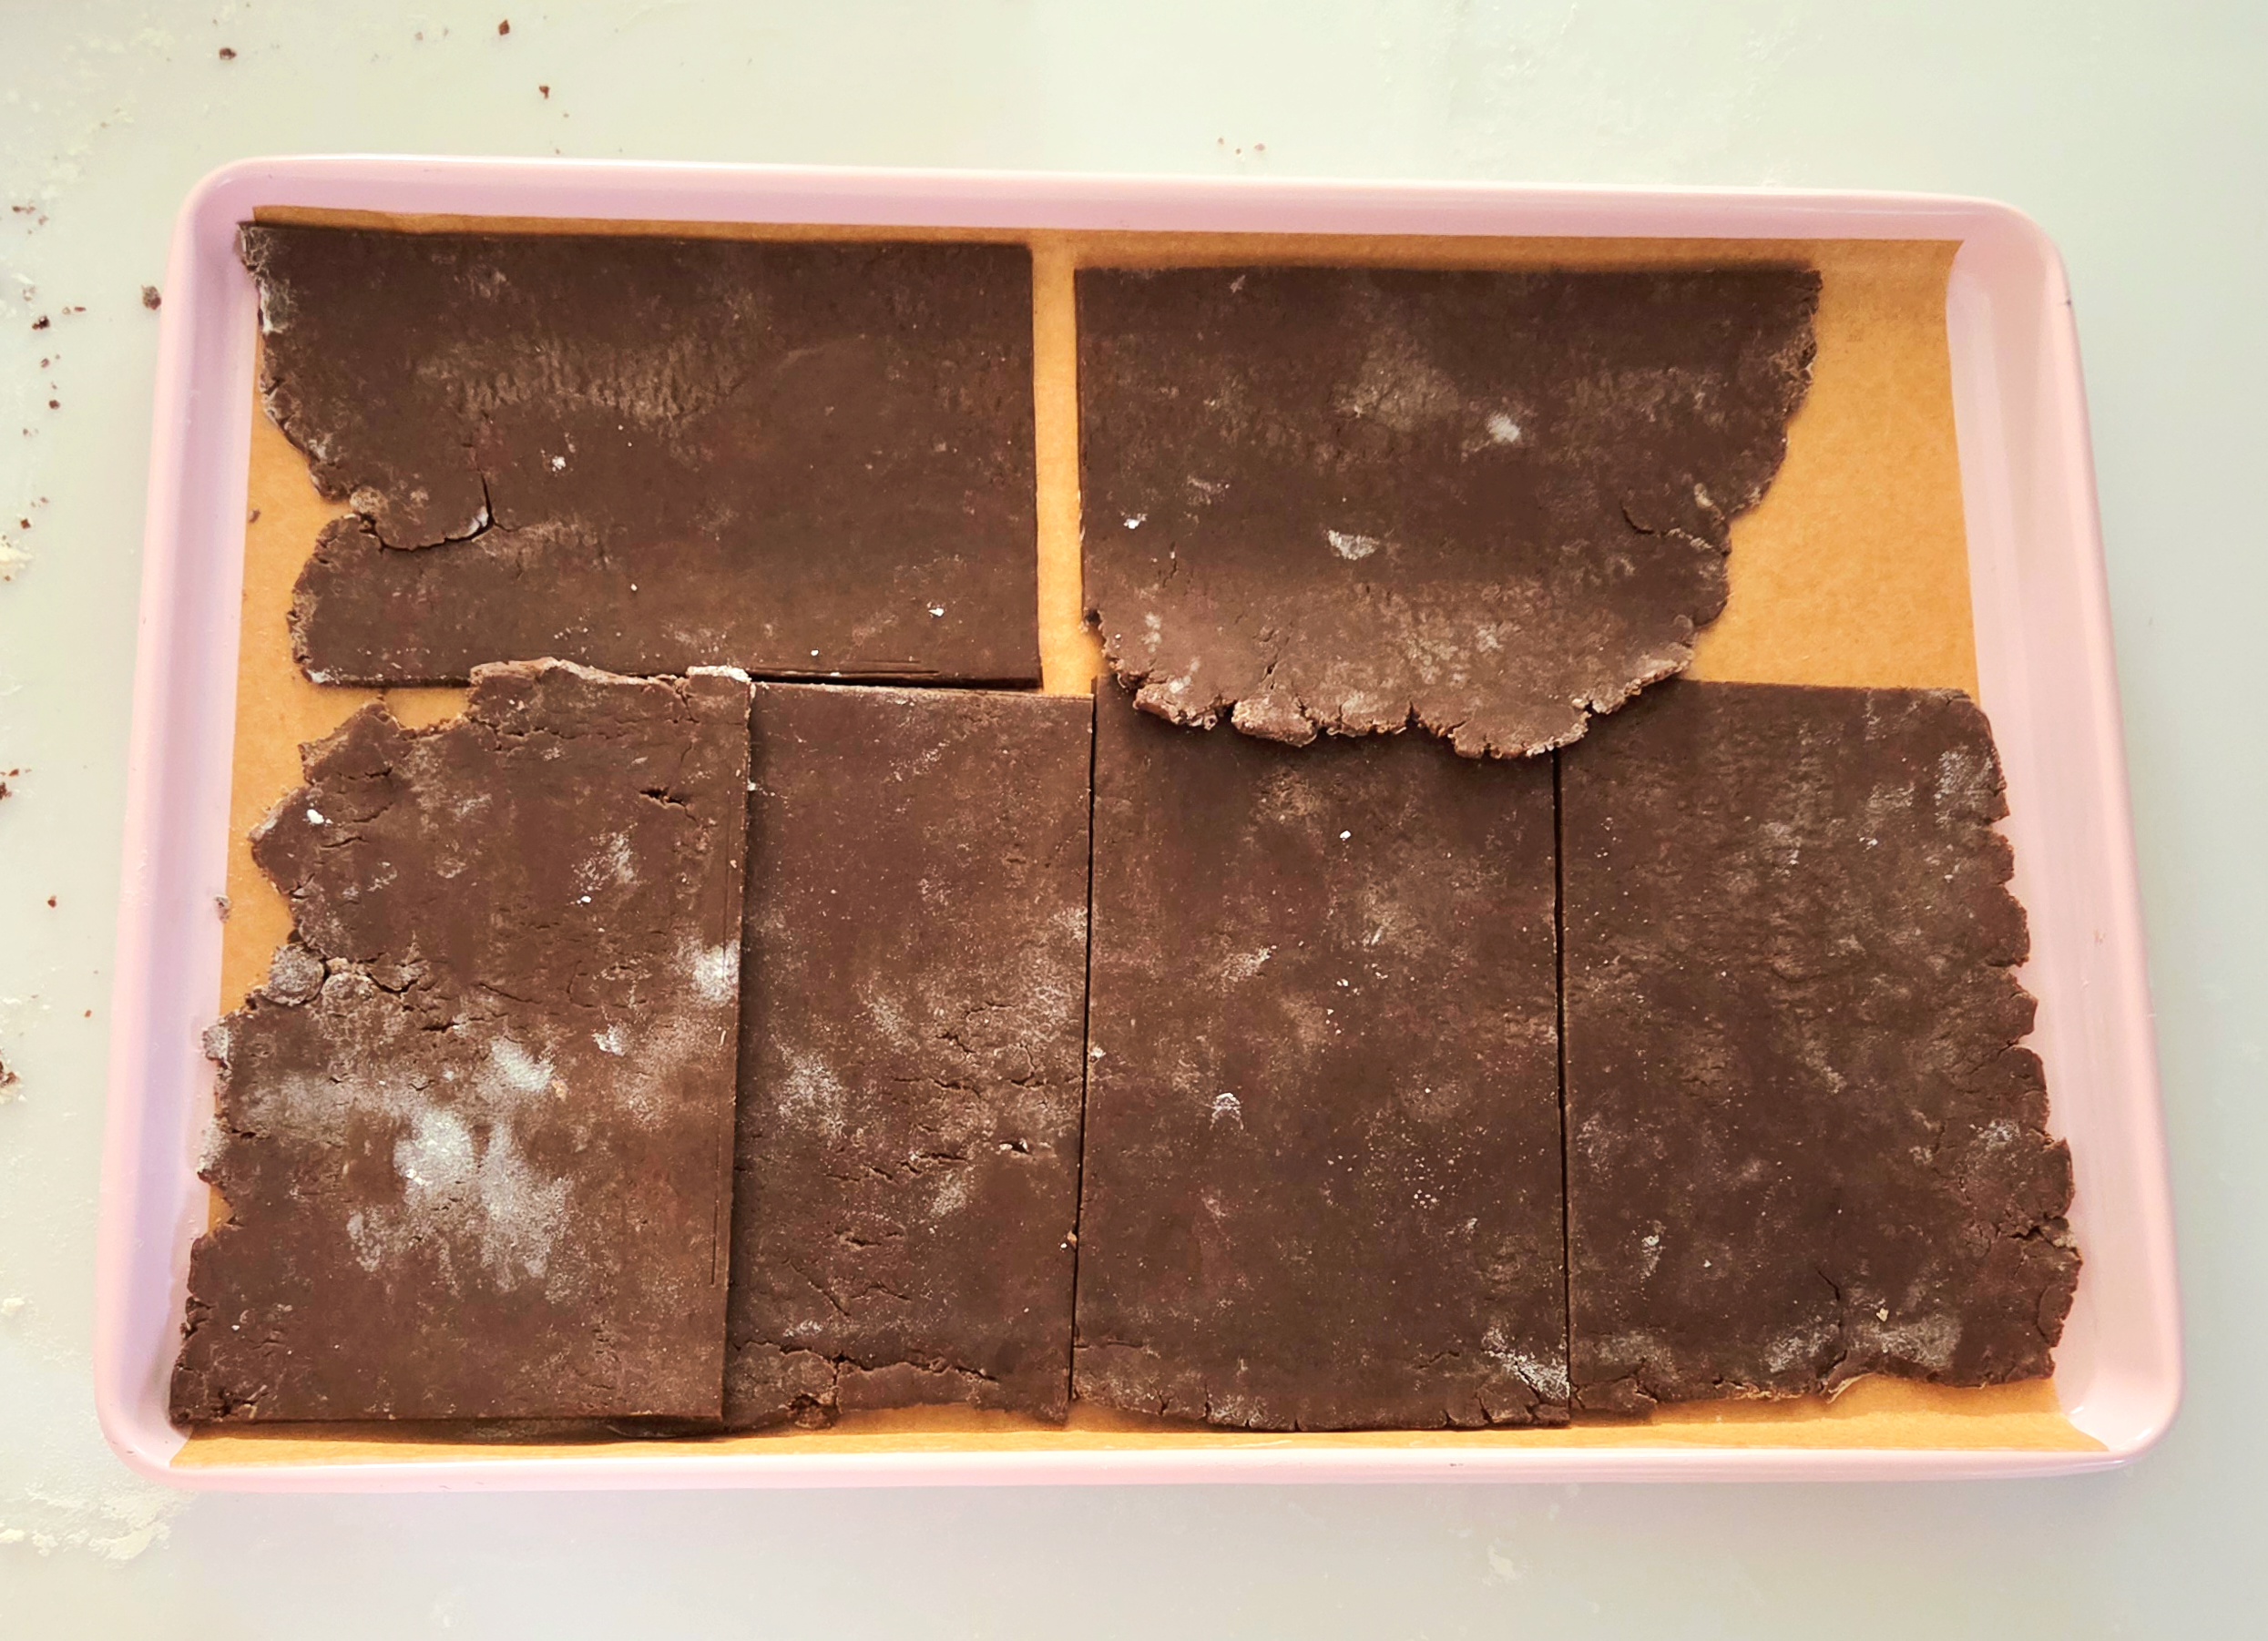
Be sure to cut straight down and lift in between cuts, rather than dragging your tool or you could tear the dough. Place the 6 rectangles on one of the lined baking sheets, cover them in plastic, and place them in the fridge for 15-30 minutes. While they chill, repeat the process with the second half of the dough, using the other lined sheet pan for the second set of rectangles.
Prepare the egg wash. In a small bowl, whisk together the egg and pinch of salt until the egg is as smooth as you can get it. Set this aside.

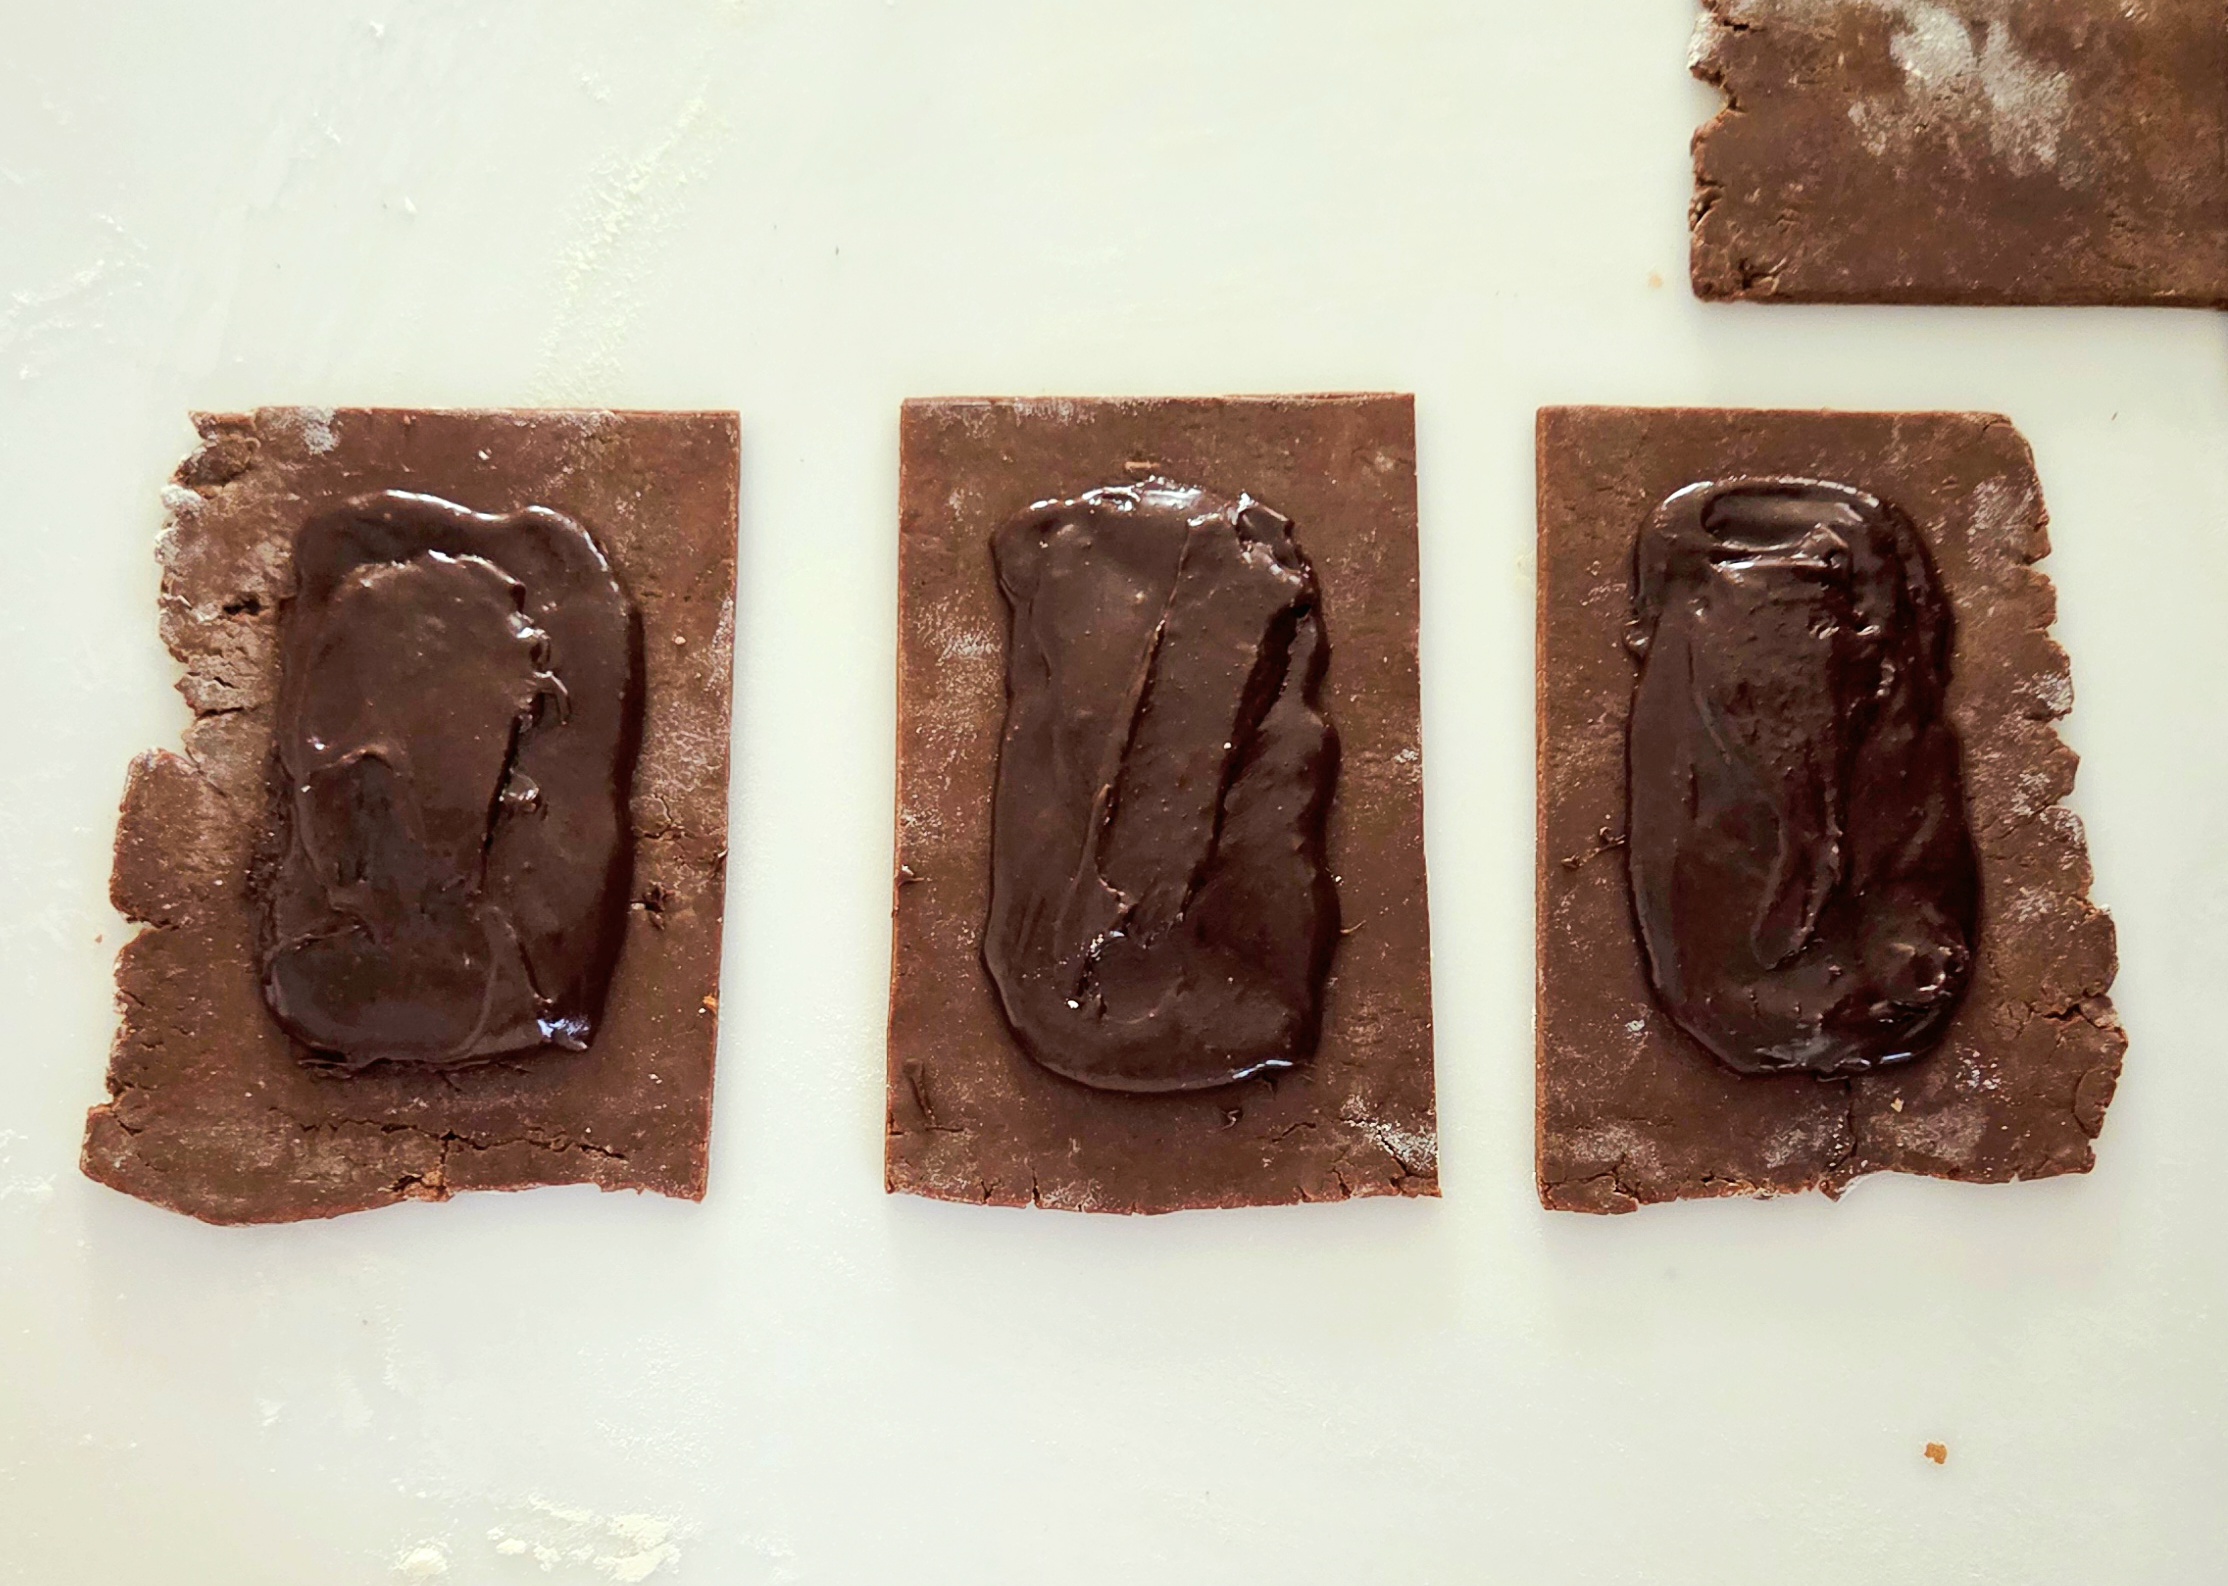
While the second set of rectangles chill in the fridge, take out the first set to start filling them. Match up 3 pairs of rectangles to whichever fit together the best. Take the filling, and divide it in half. Spread about 1/3 of one half of the filling and spread it onto one of the bottom rectangles of dough, leaving about a 1/2-3/4 inch boarder along the sides. Repeat with the other two bottom pieces.
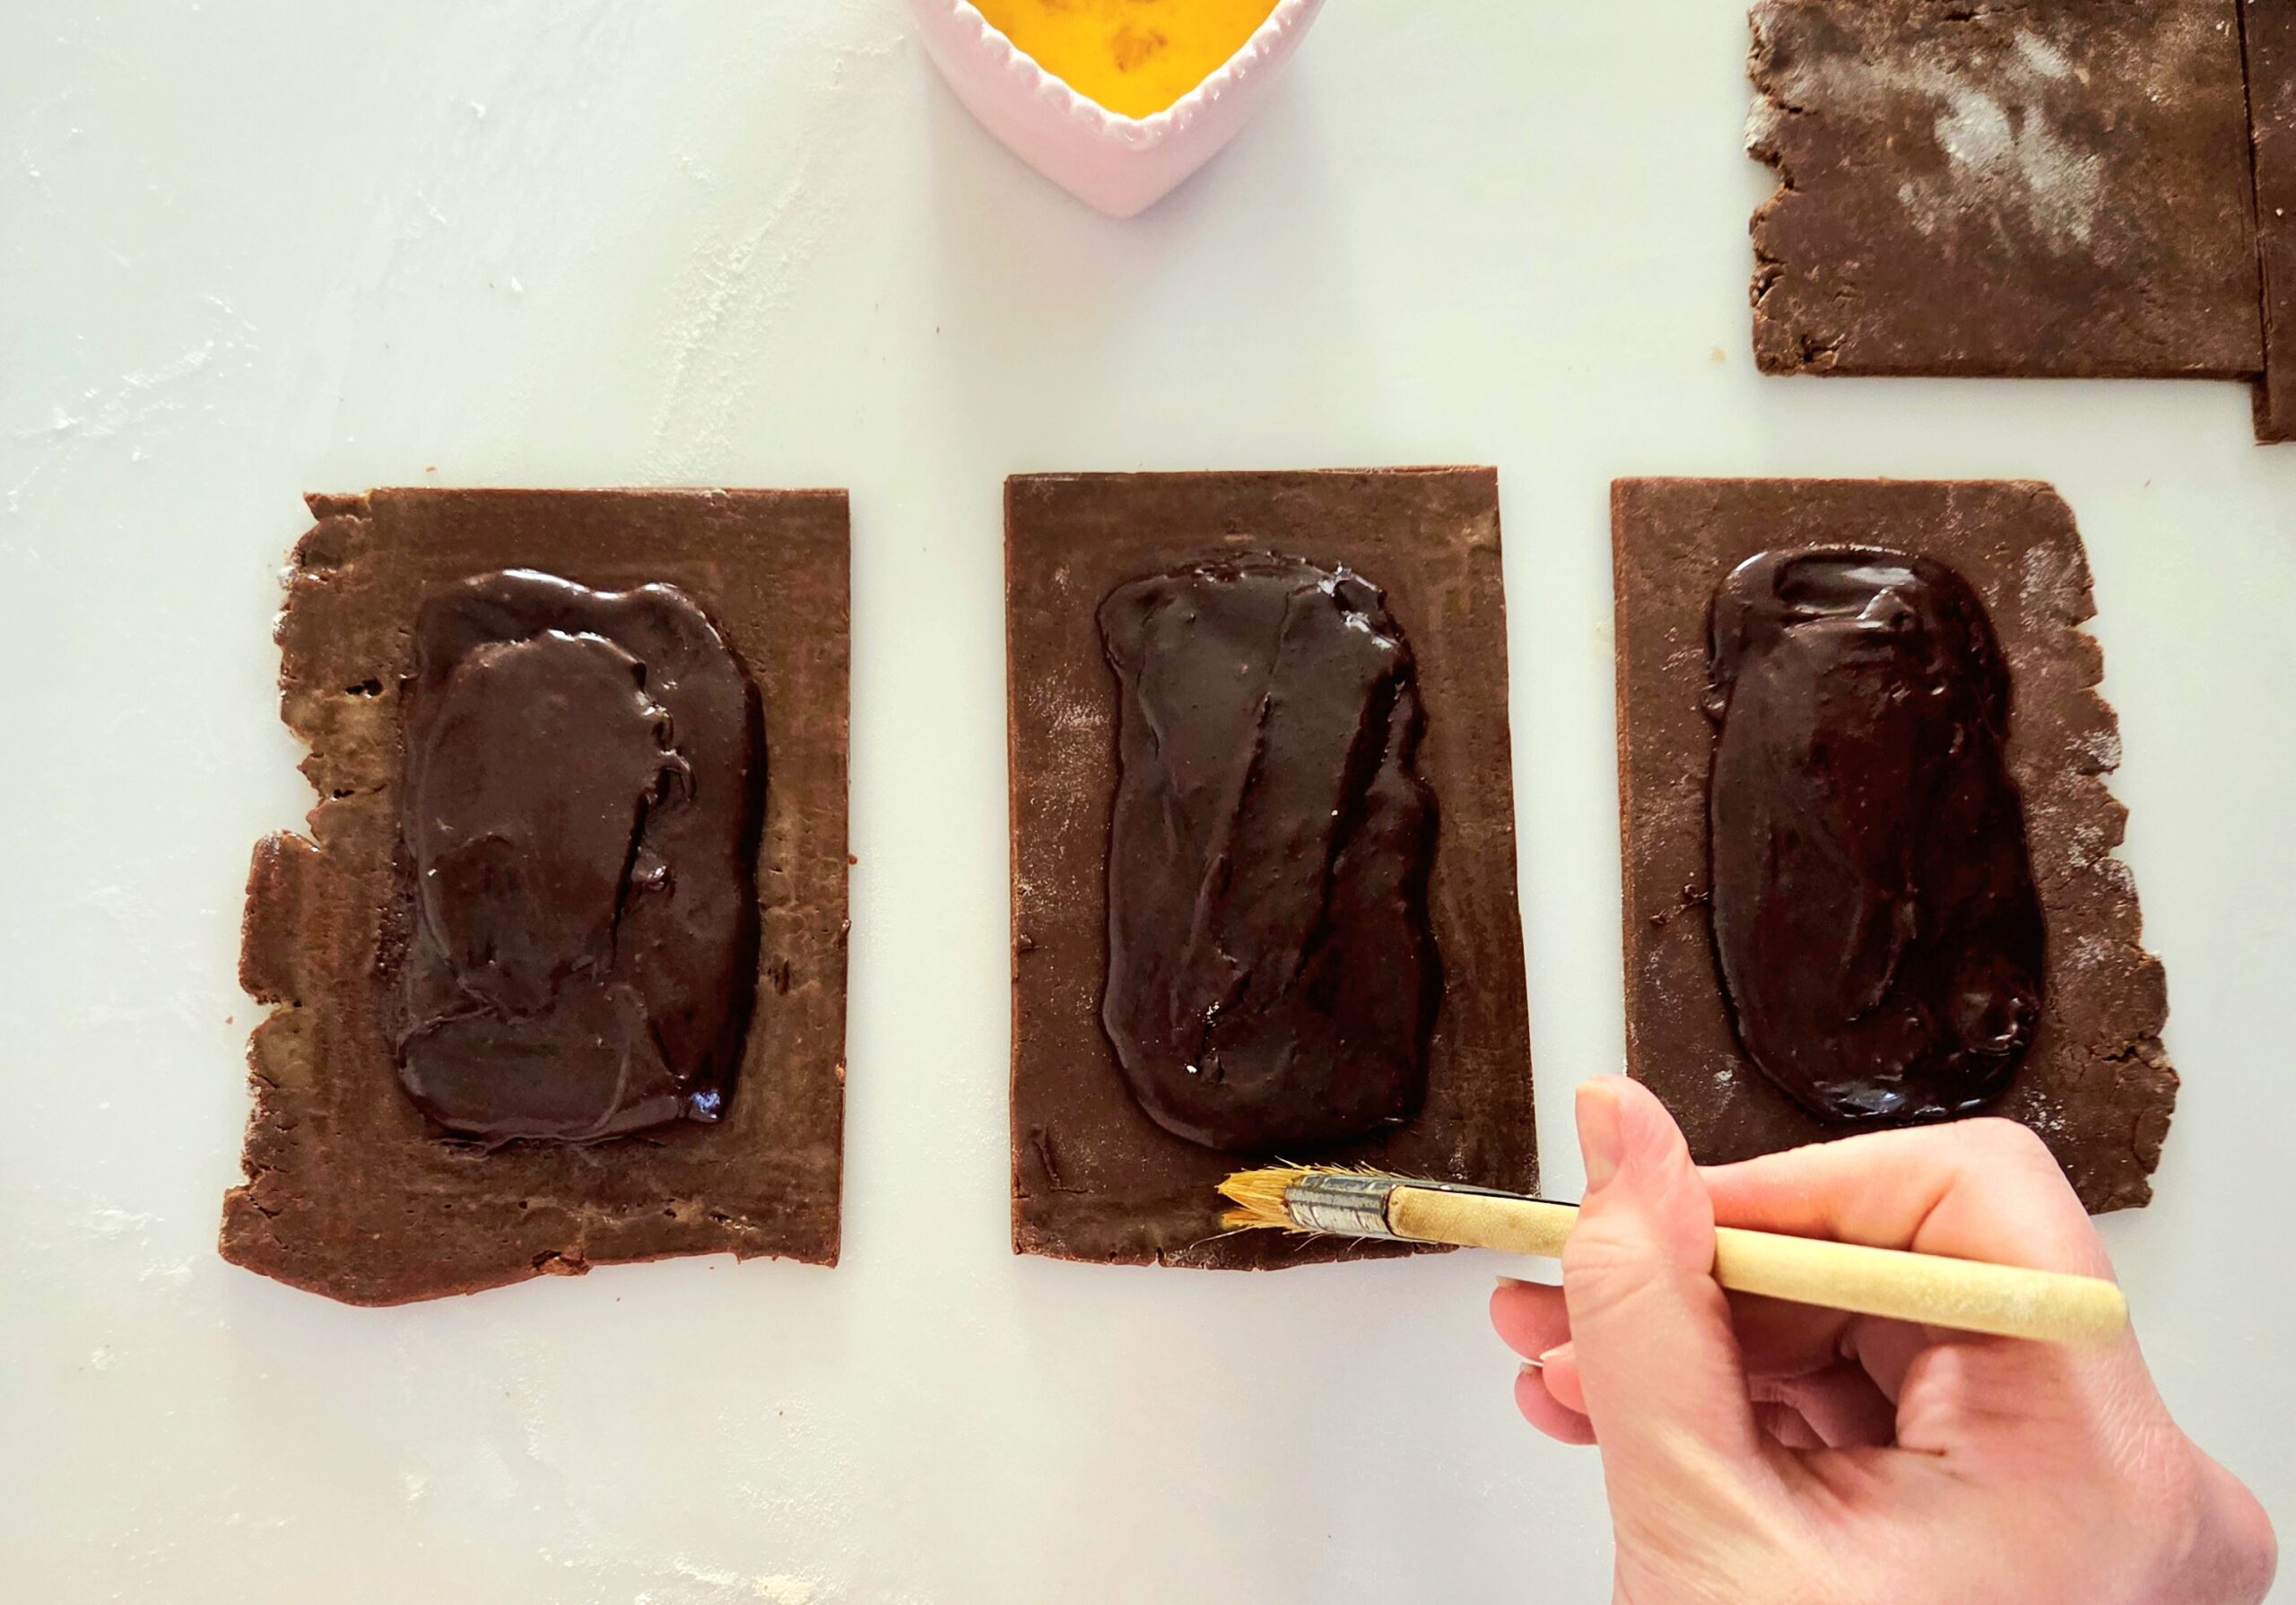
Grab your egg wash and a pastry brush (or your finger, if you don’t have one) and dip it into the egg wash. Brush along the boarders of all 3 rectangles, right up to the filling. The egg wash here acts like a glue, bonding the bottom and the top sheets of dough together and keeping the filling sealed inside.
Take one of the rectangles and place it over its filled pair, pressing along the boarder to help seal the filling inside. Repeat with the next two top sheets.
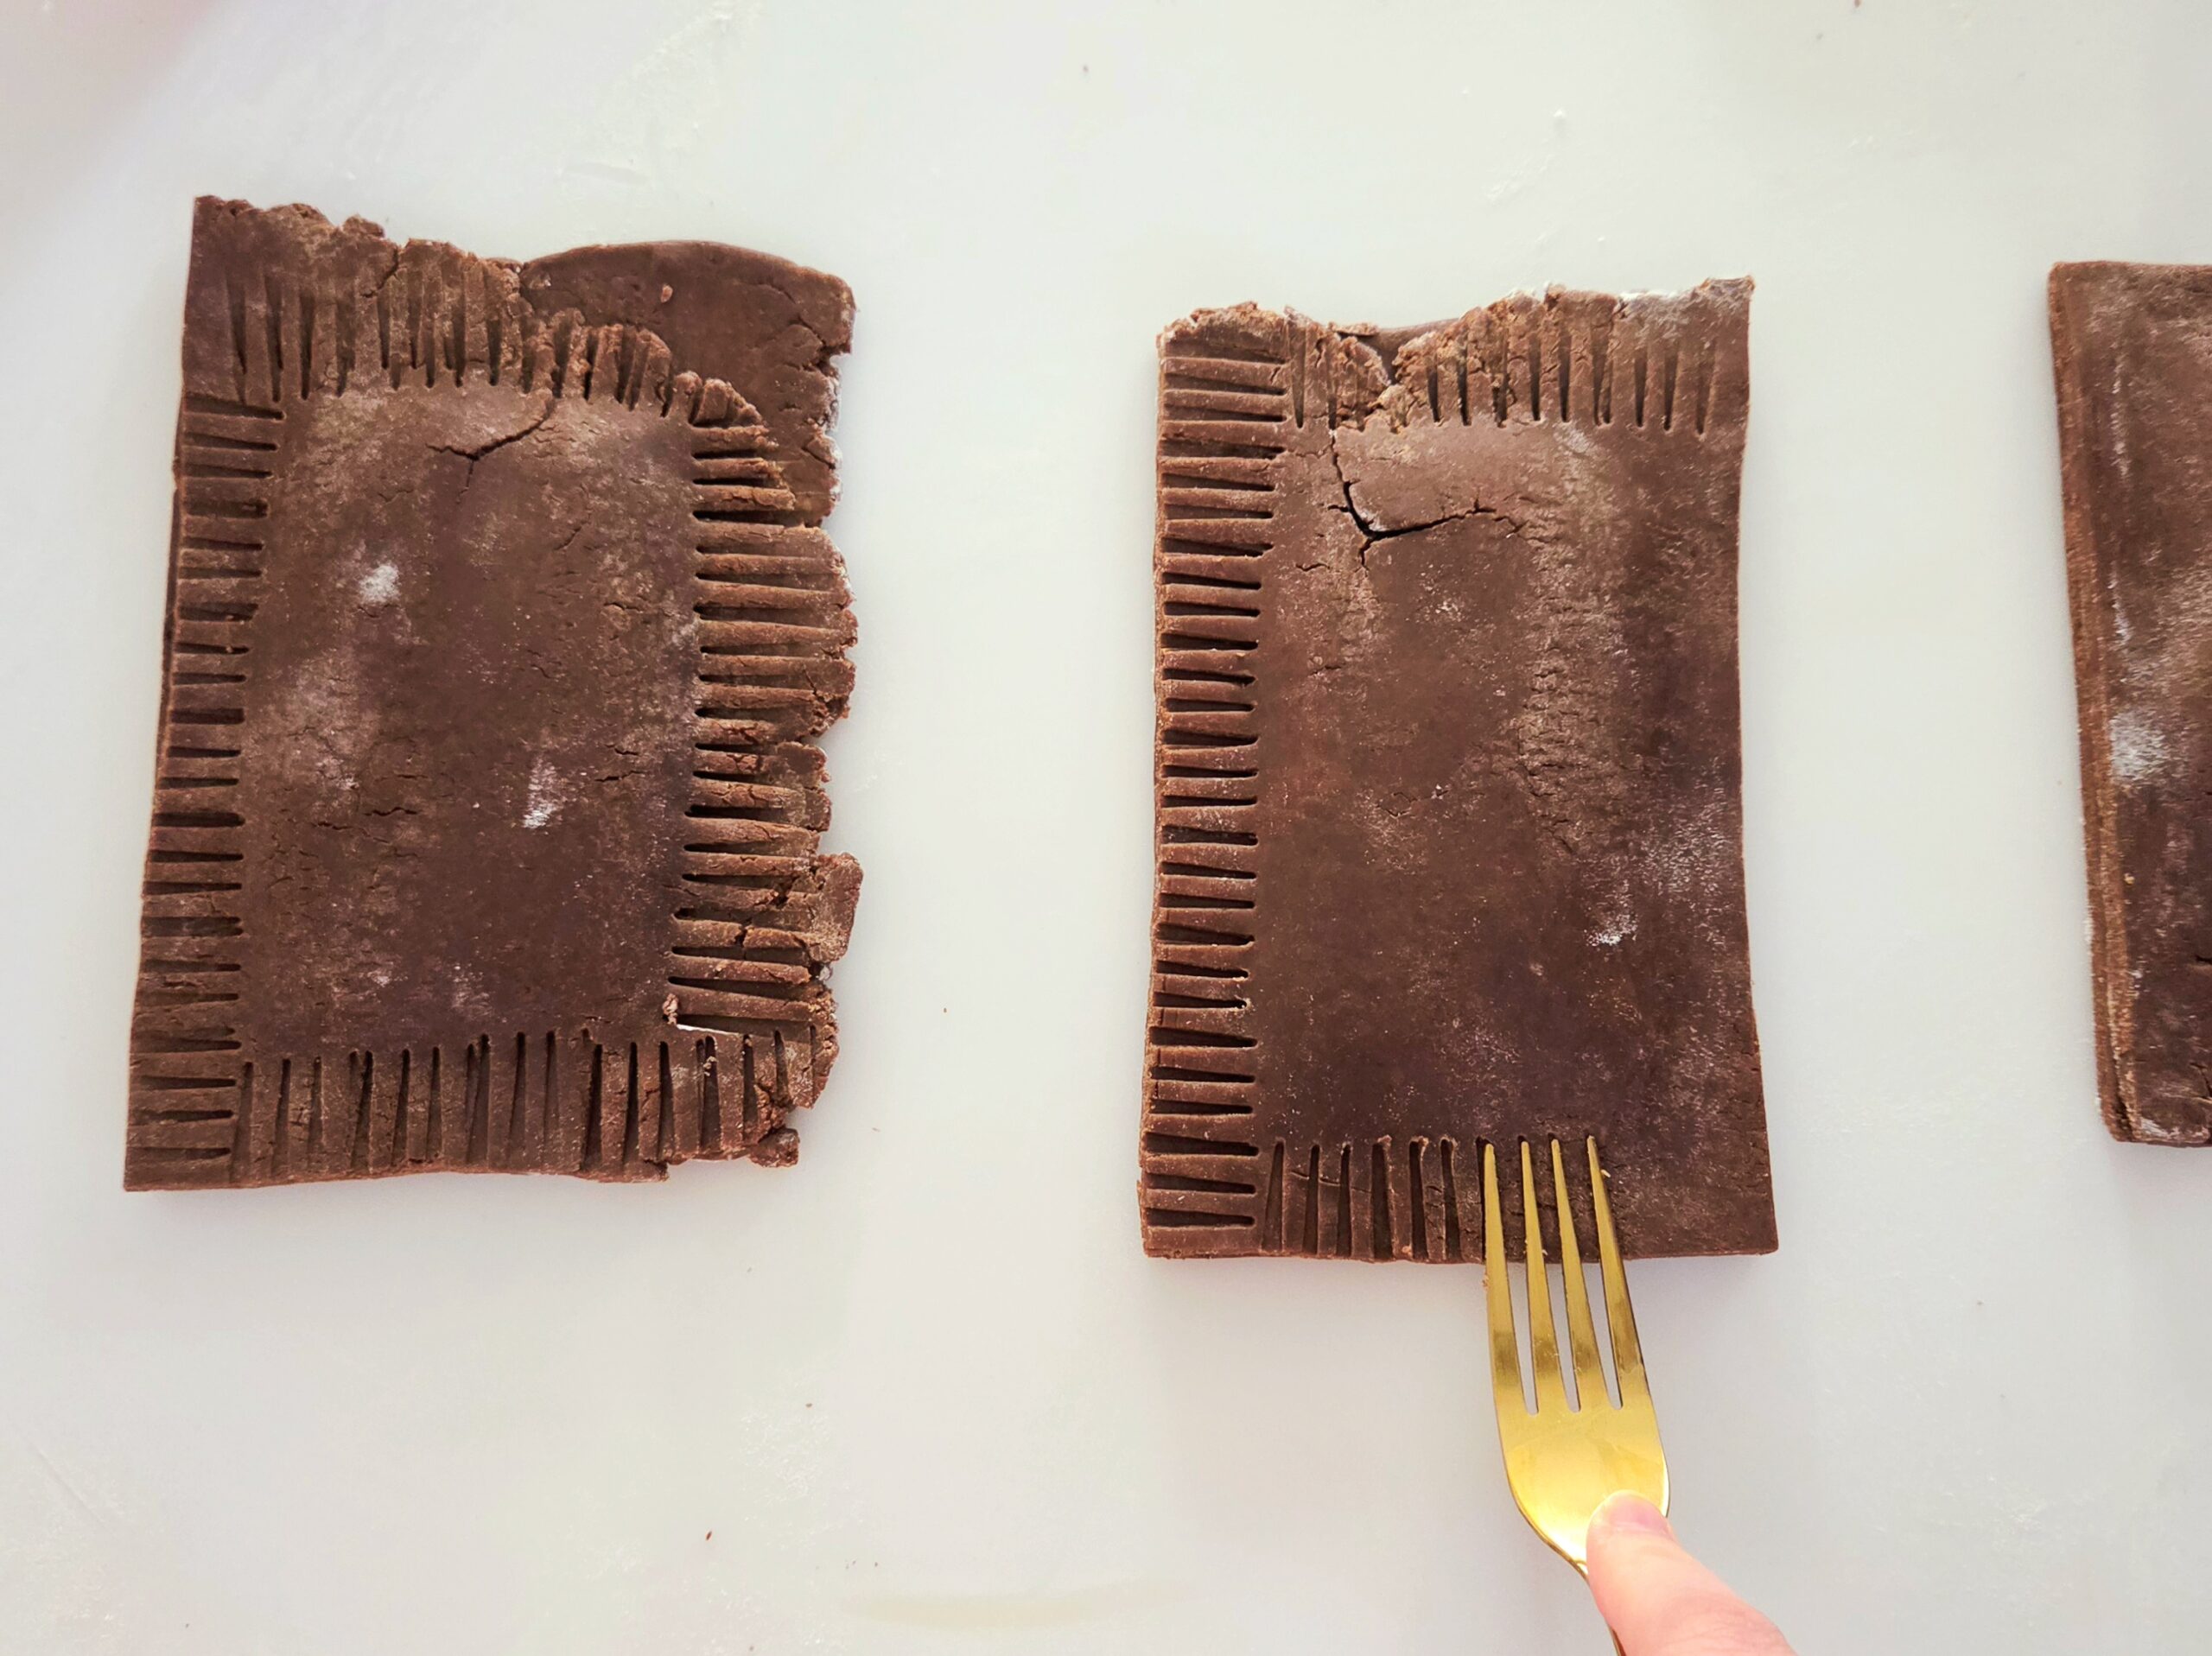
Take the fork and crimp along all 4 edges of each pop tart, as close to the filling as you can get it without tearing another hole. To keep things even, line the end tine up with the last marking from the previous indentation. That way, there will be equal spacing around the entire edge. Cover the assembled pop tarts with plastic and chill them in the fridge for another 30 minutes. Repeat the assembly process with the second set of rectangles.
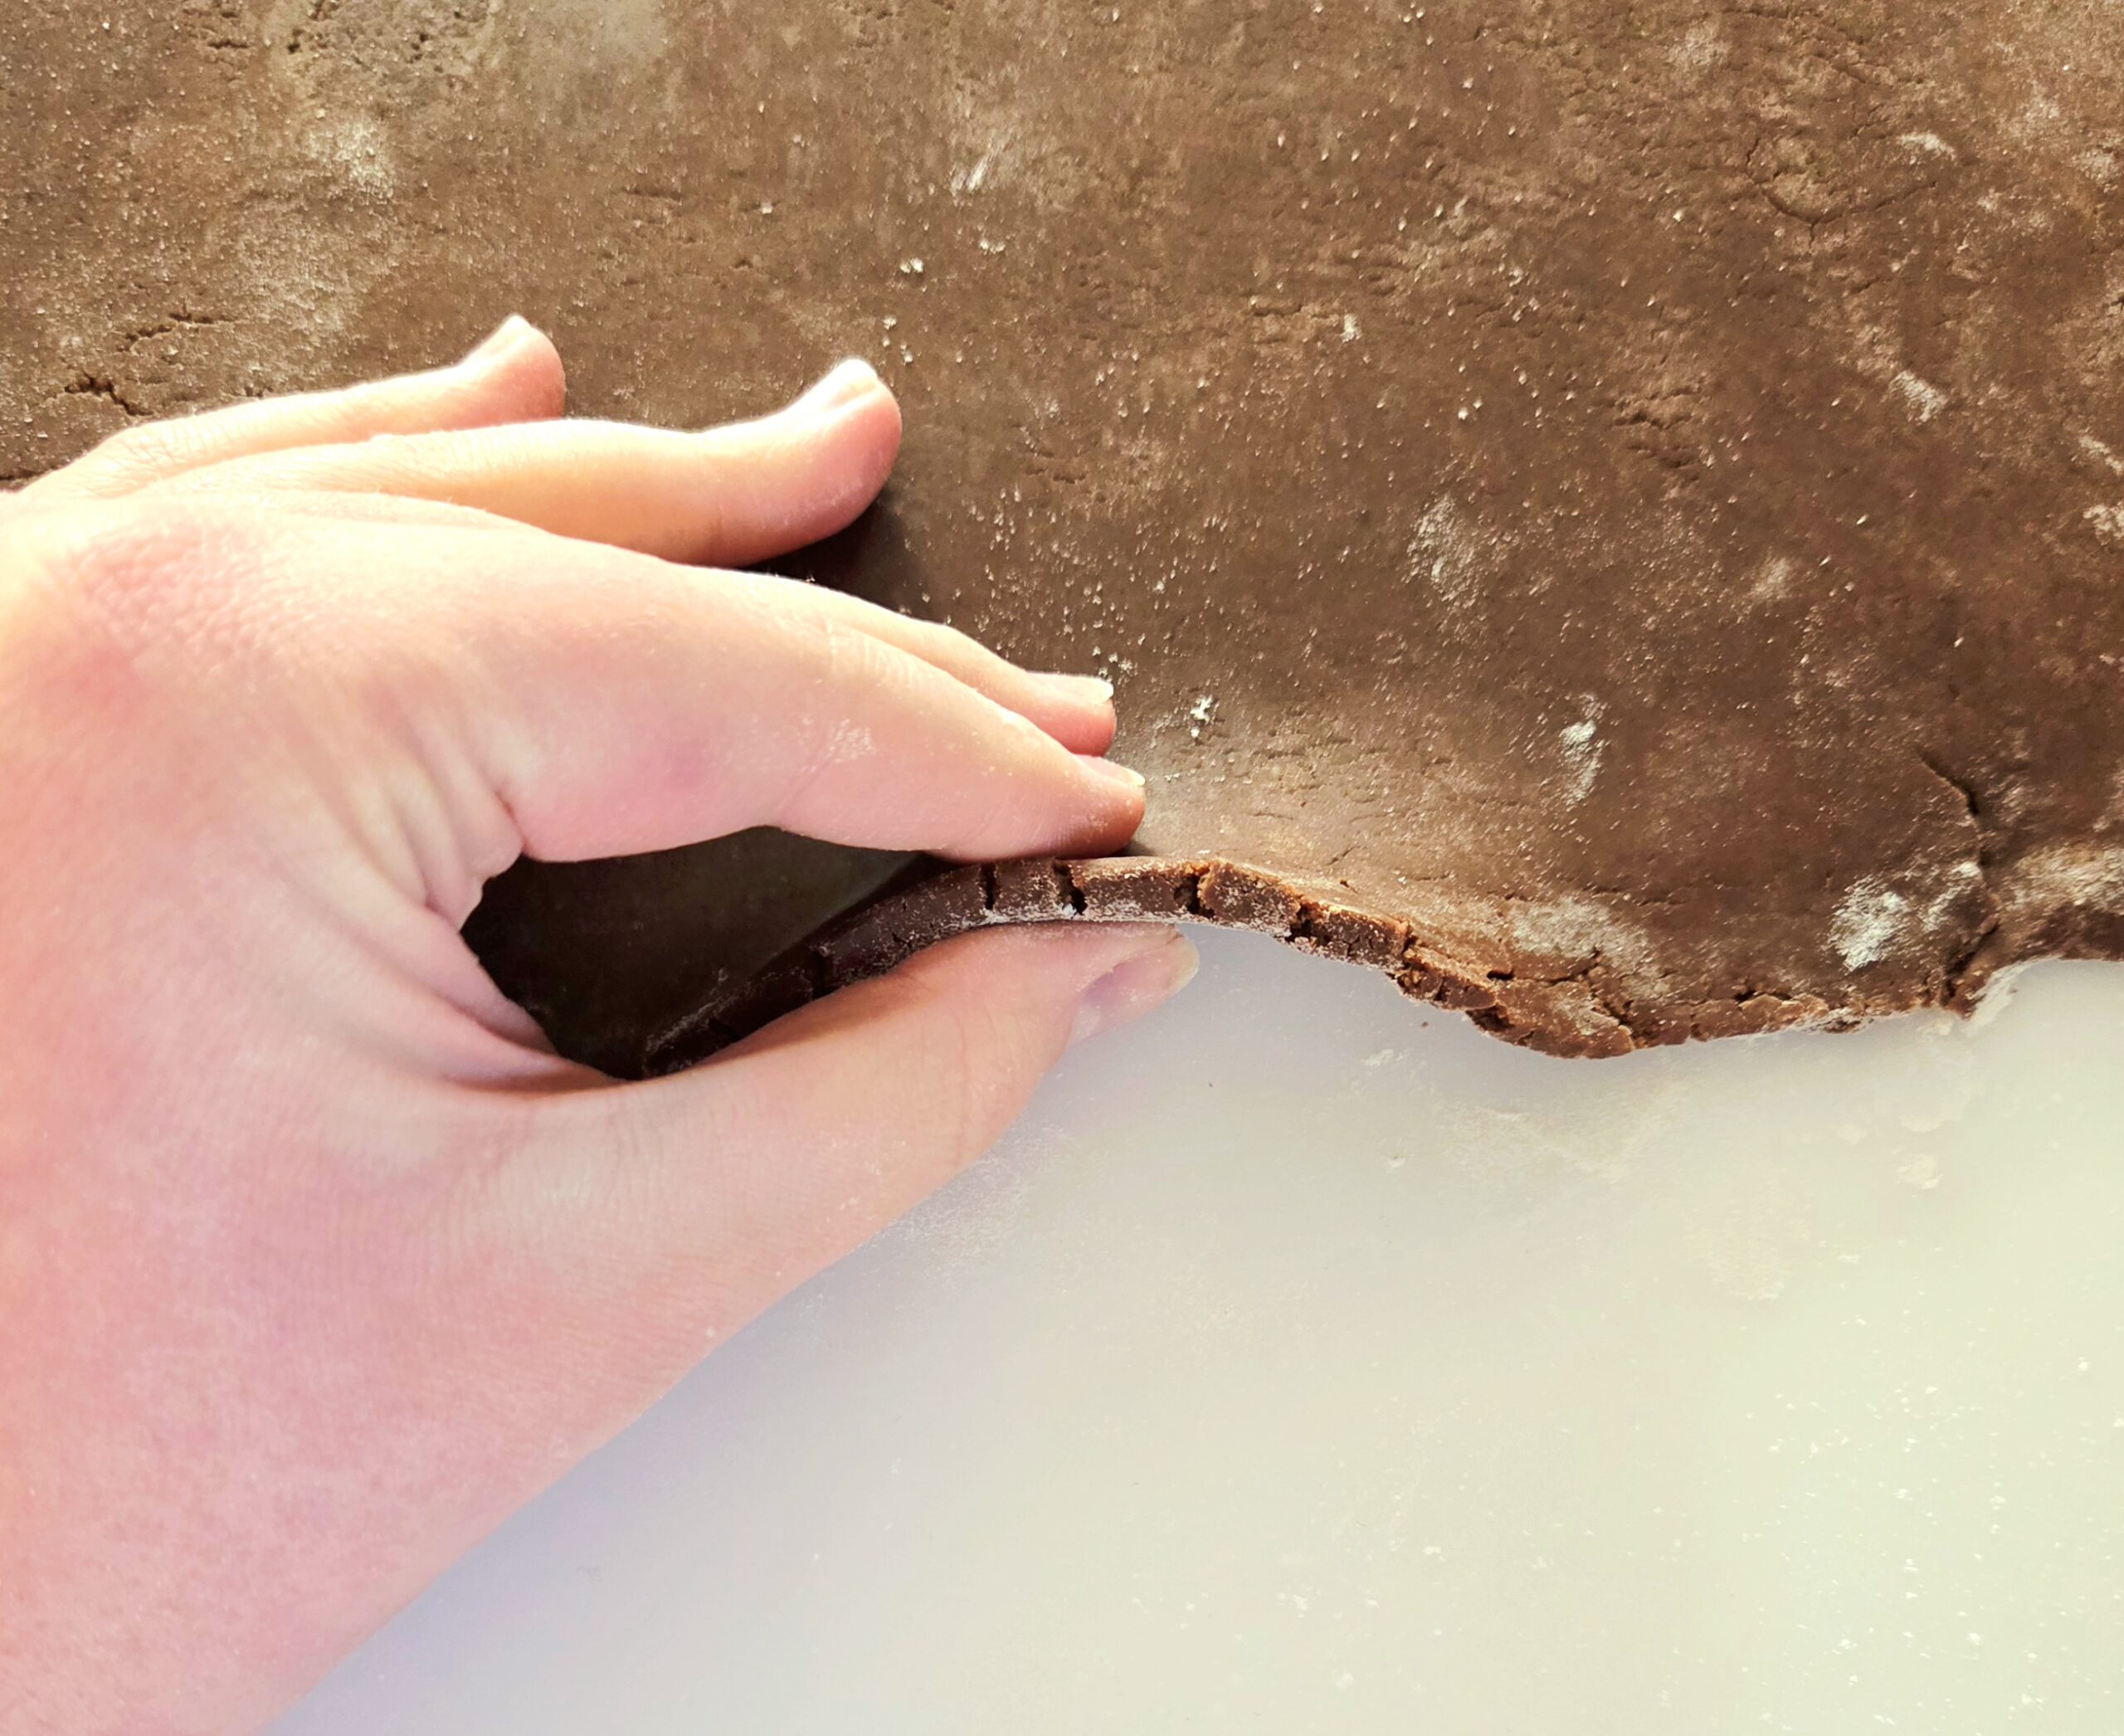
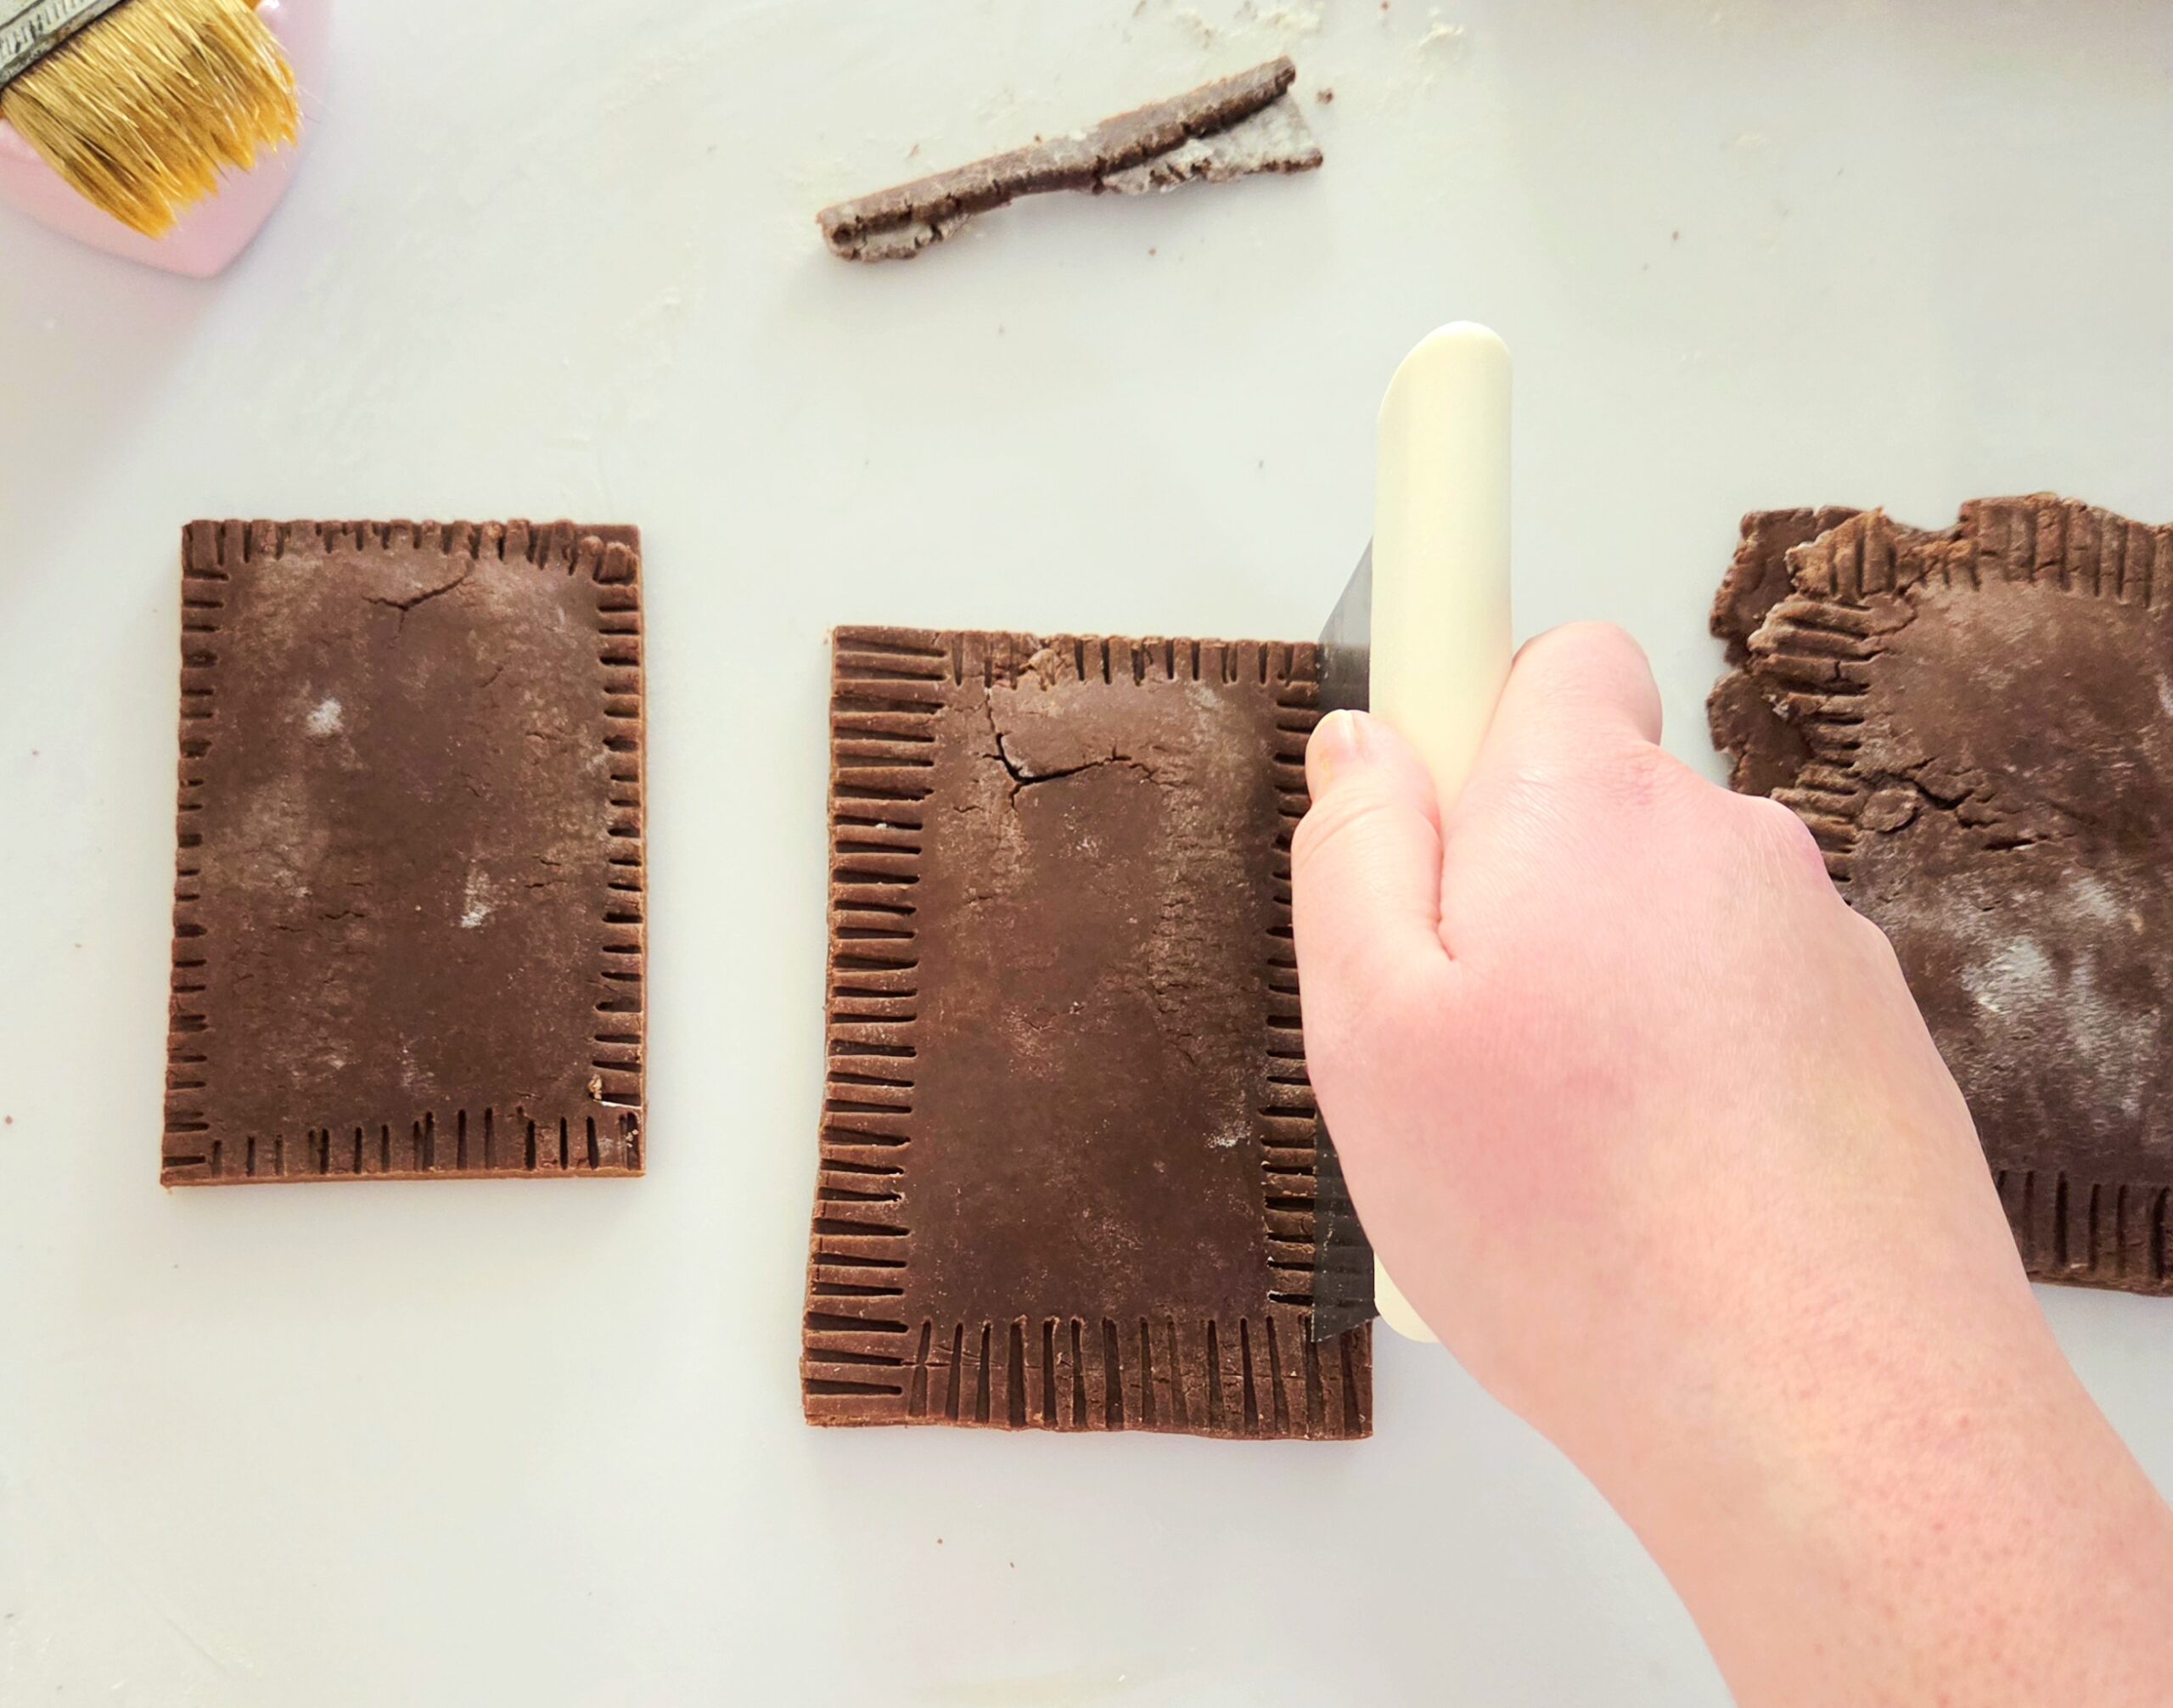
Remove the first prepared pan of pop tarts from the fridge and, before placing them in the oven, trim the sides. Using the bench scraper or knife, press firmly down on each side so there’s about 1/4 inch boarder remaining. Take care not to drag your tool, or the dough can tear. Just keep lifting and pressing straight down.
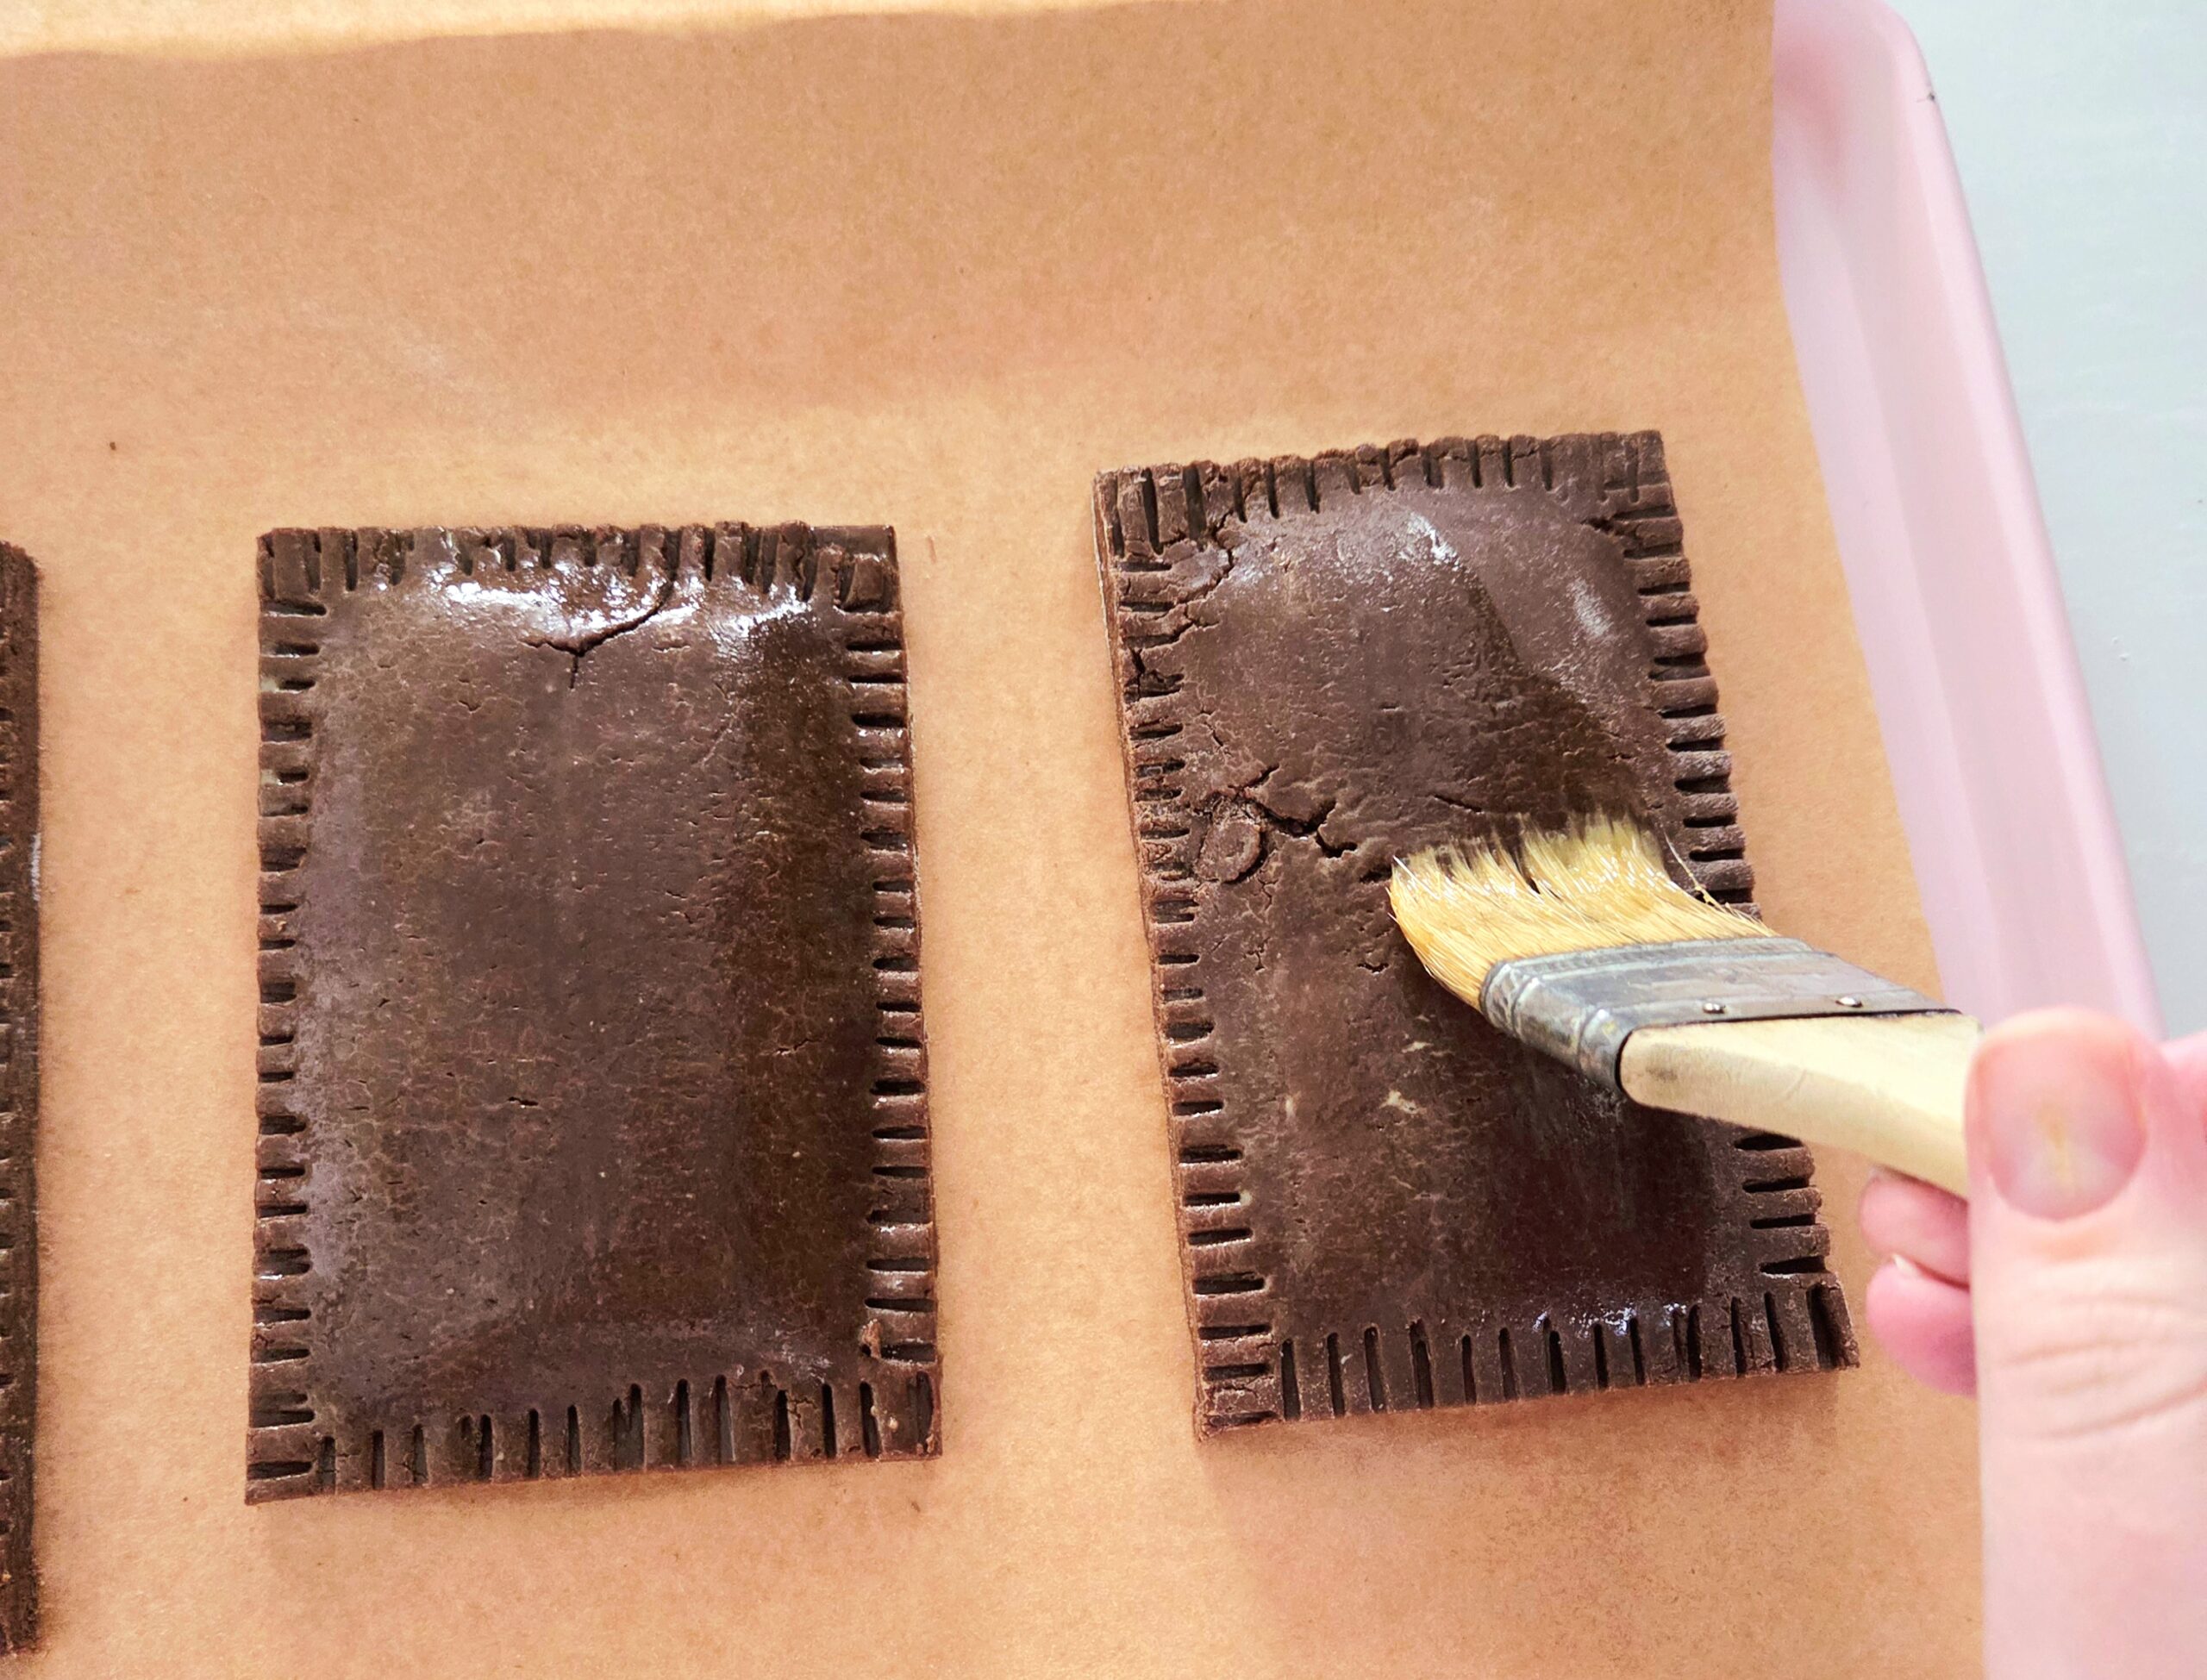
Arrange the 3 pop tarts so they’re evenly spaced on the pan, though they wont expand much in the oven. Brush the tops of each pop tart with the egg wash. You’ve already got the egg wash made and the brush dirtied, do not skip this step.
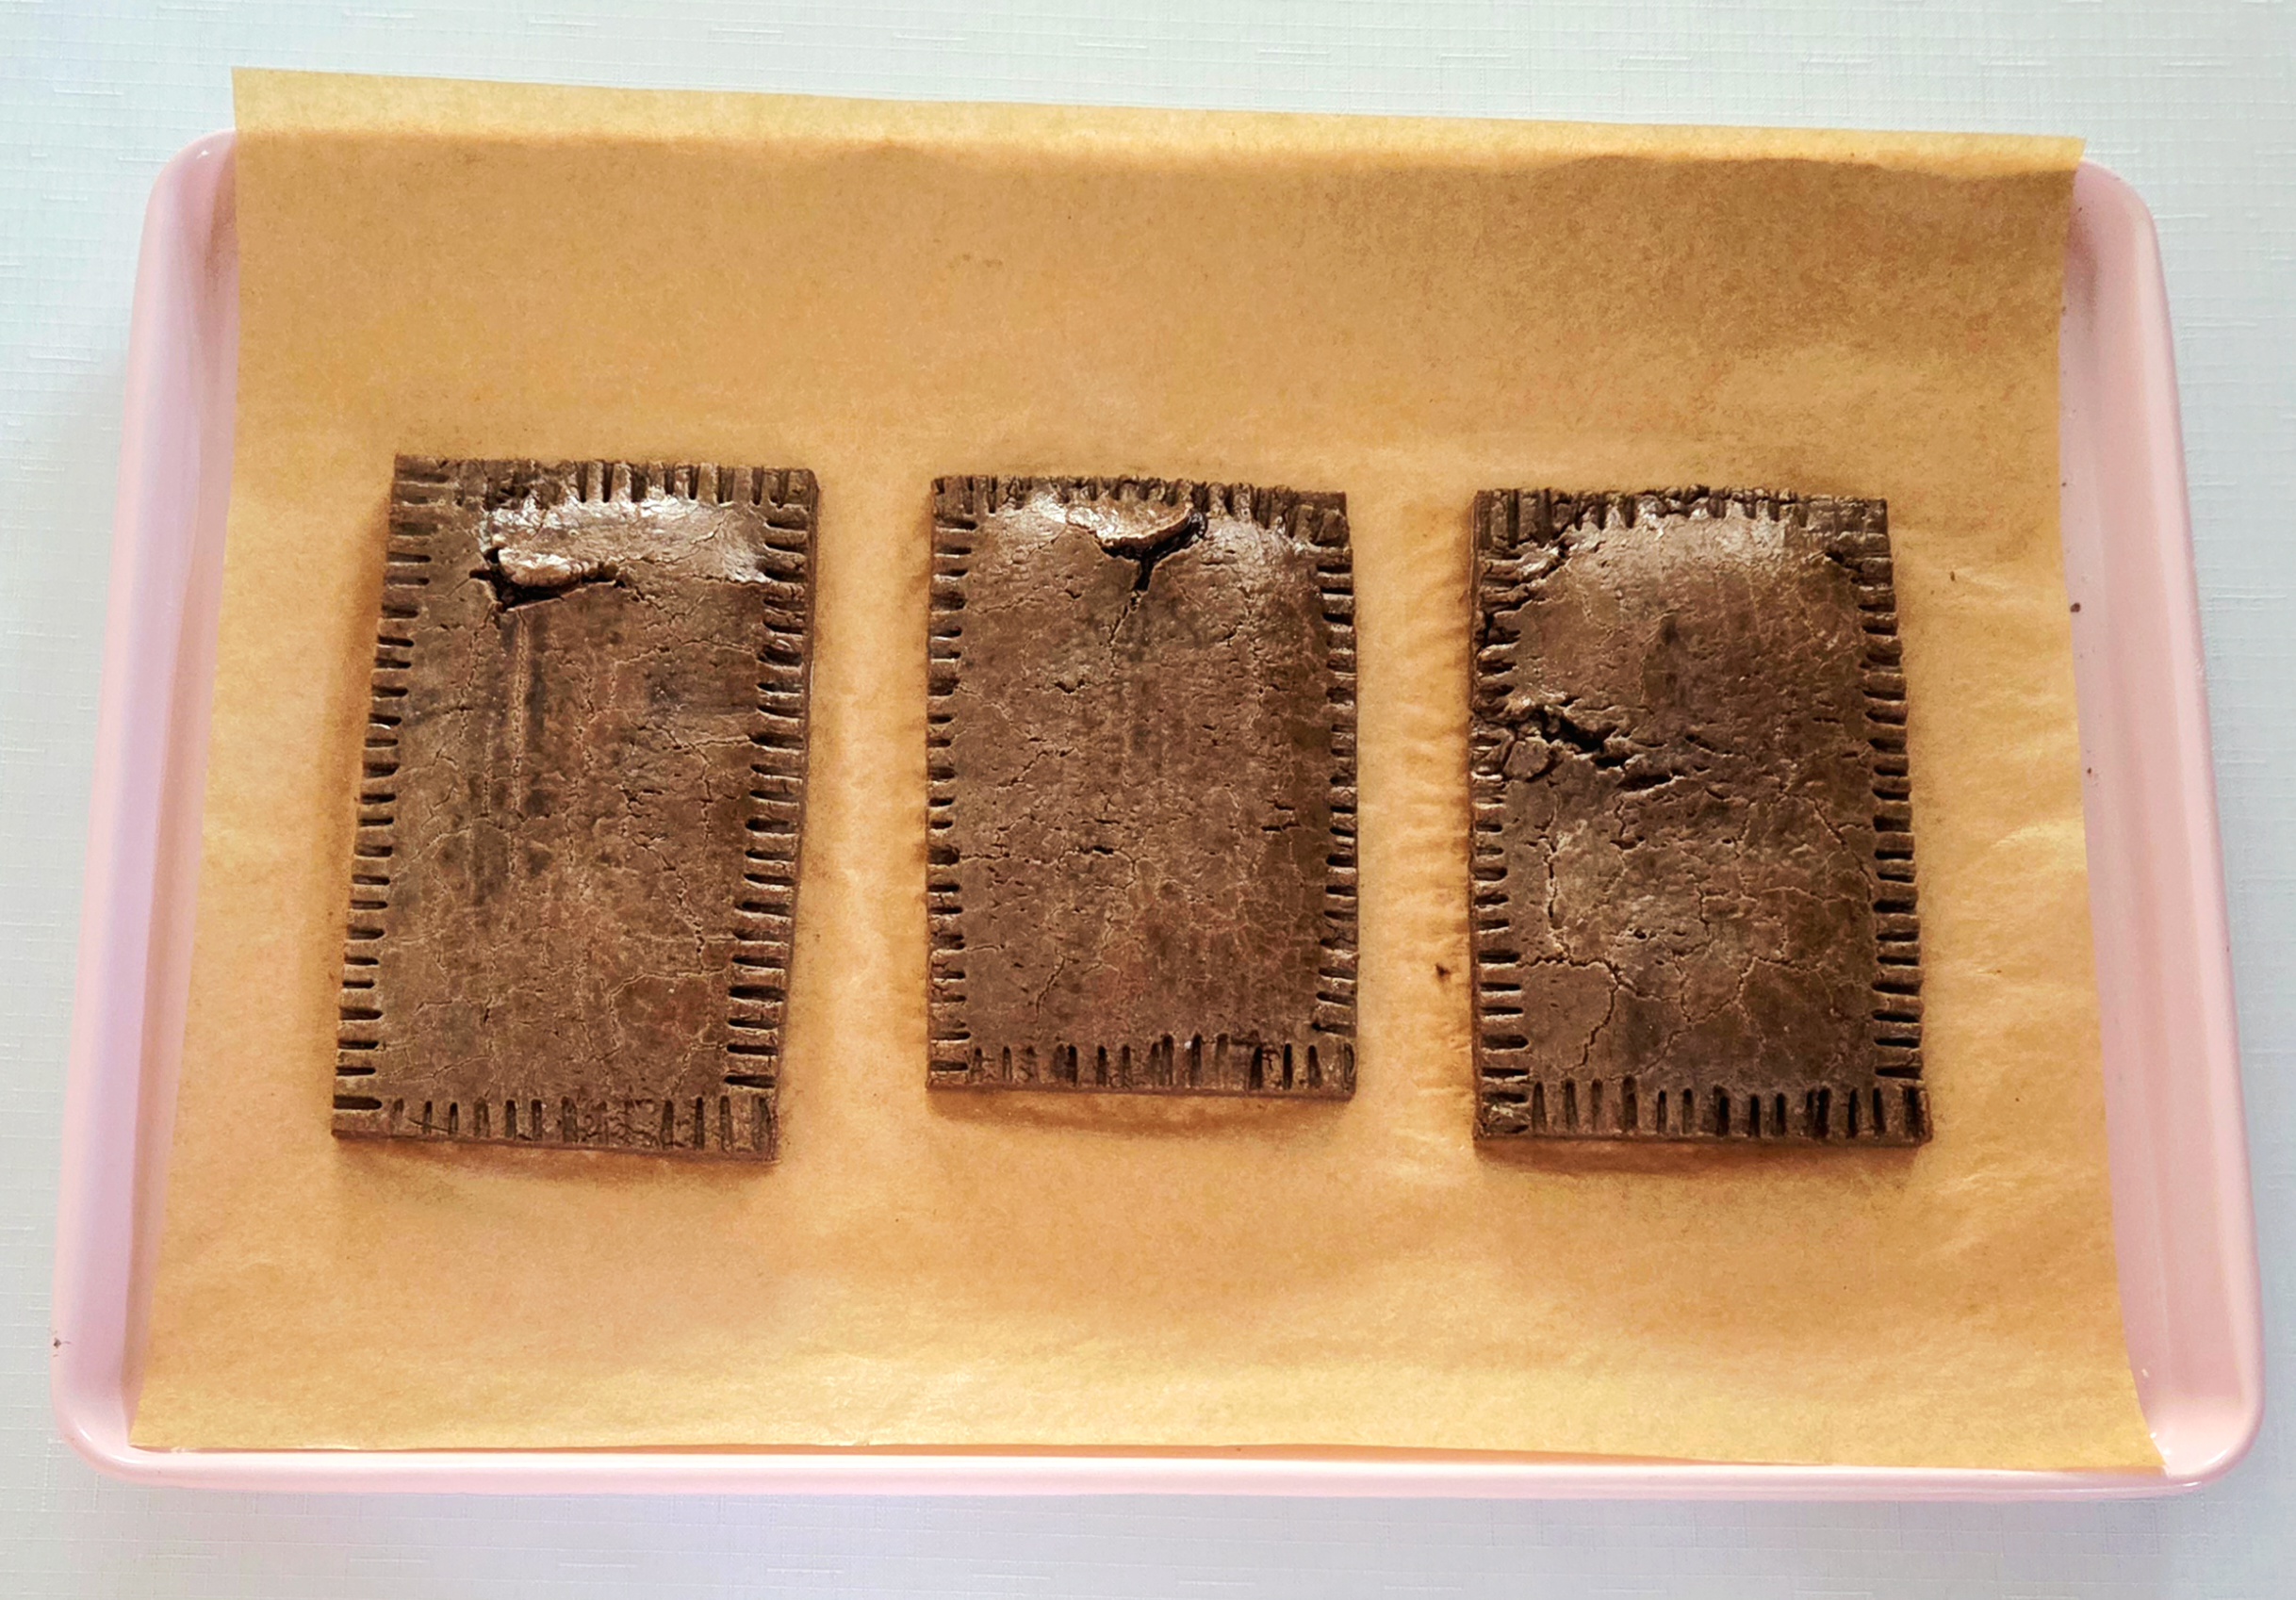
Place them in the oven for 15 minutes, flipping halfway through. Allow them to cool on the baking sheet for 5 minutes once removed from the oven, then transfer them over to a cooling rack. They need to be mostly cooled before adding the glaze, just be patient. Repeat the trim, egg wash, and bake process with the second pan of pop tarts.

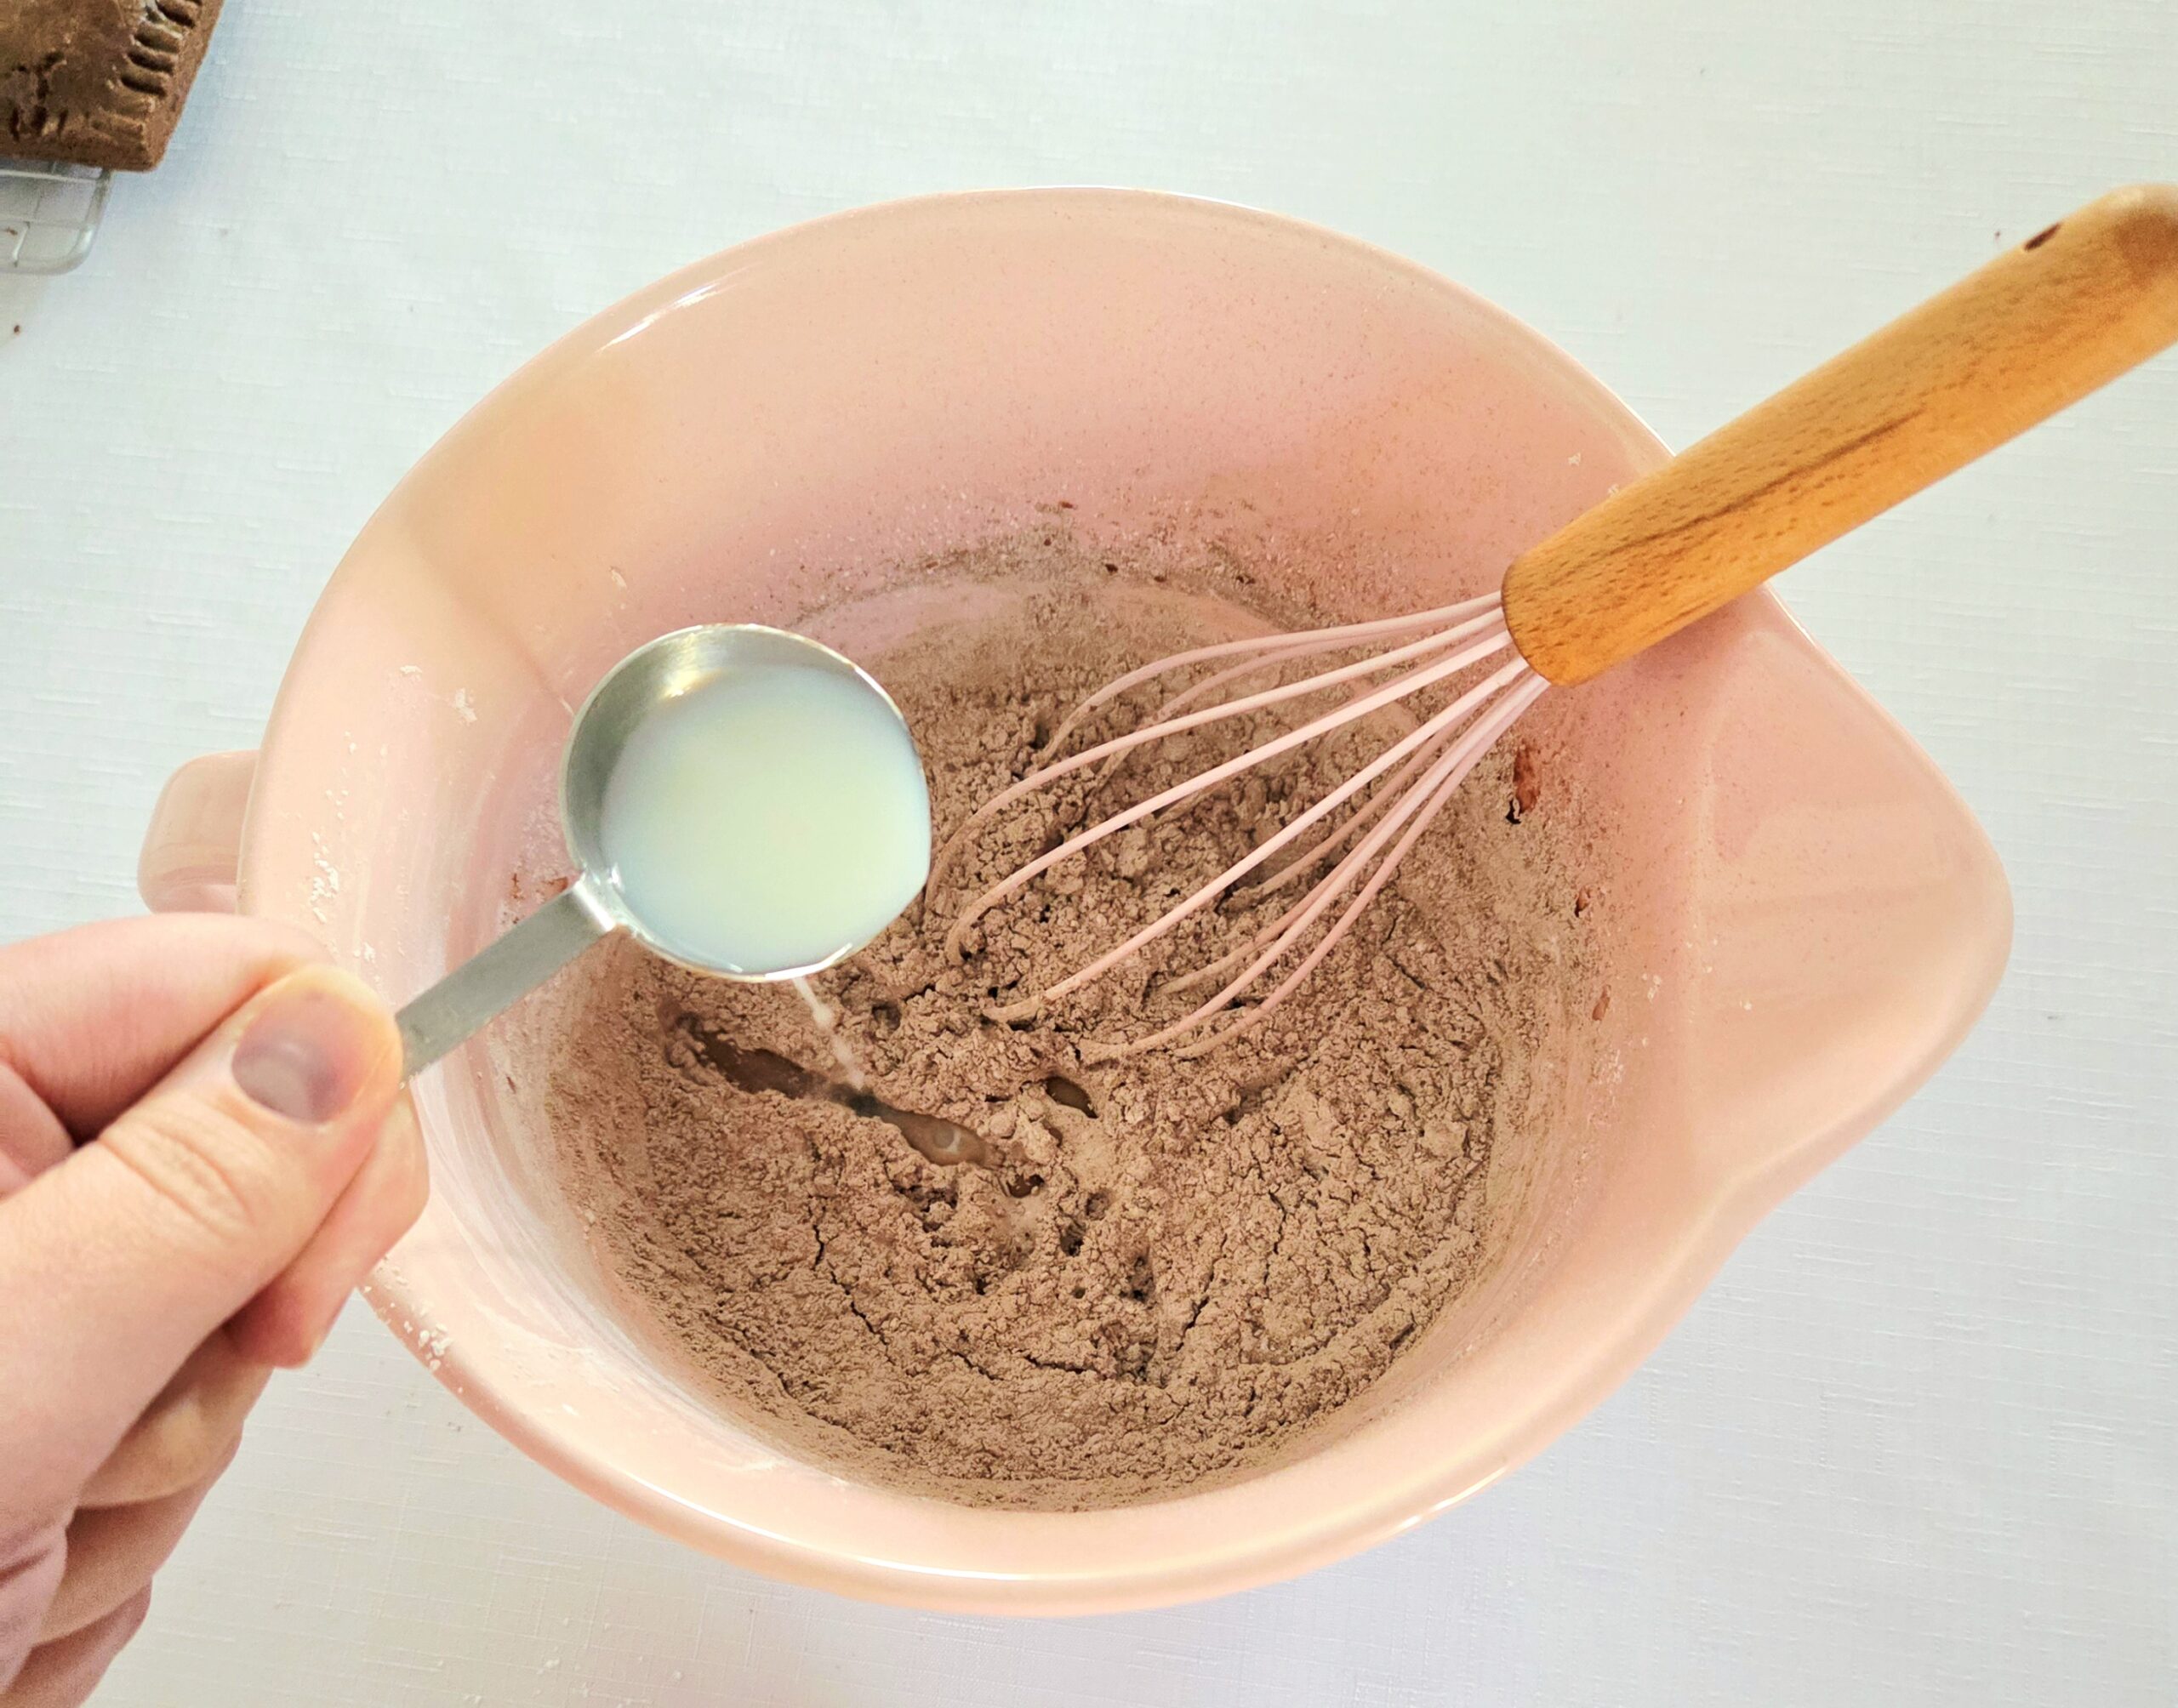
When the pop tarts have cooled to room temperature, make the glaze. In a medium mixing bowl, sift together the powdered sugar and cocoa powder. Add in the salt, vanilla, and milk, and whisk the glaze together until it’s smooth. It should be fairly thick, but if it’s so thick you can’t really whisk it, add 1 teaspoon of milk at a time until it’s more manageable.

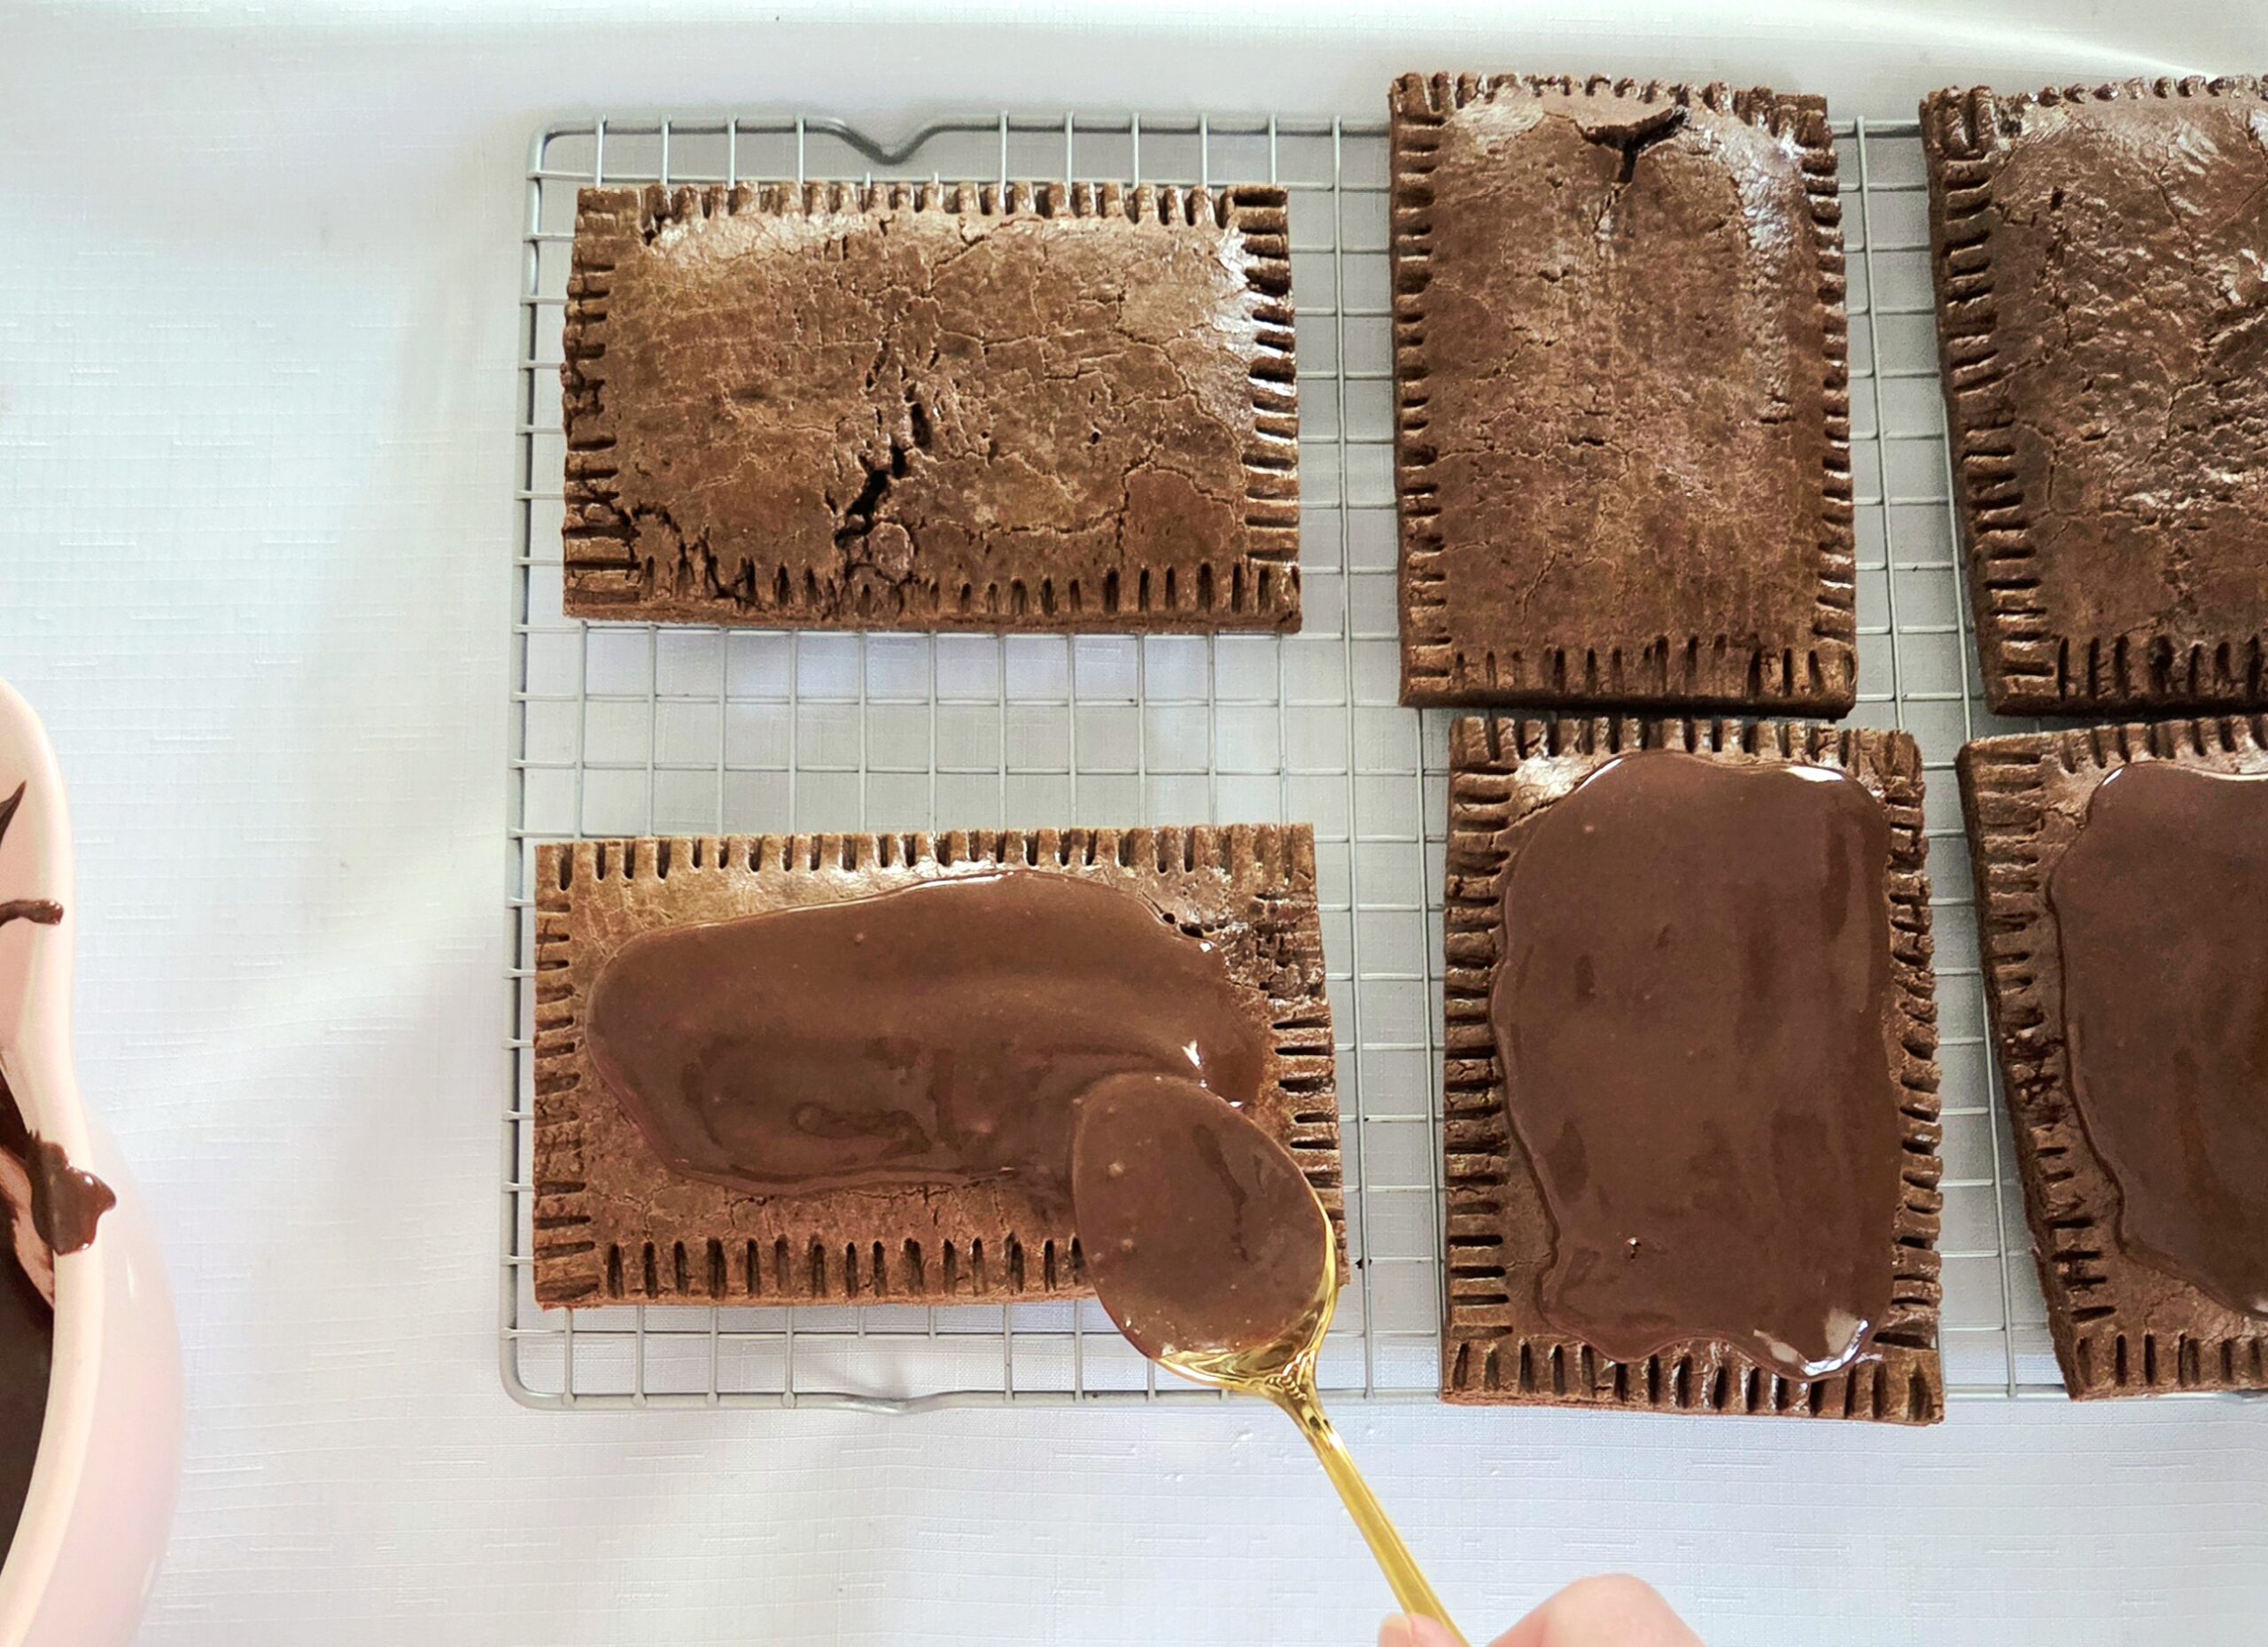
Using a spoon, spread around 2-3 tablespoons of glaze on each pop tart, leaving a slight boarder. If you’re feeling whimsical and you’d like a garnish of sprinkles, add them immediately or they wont stick.
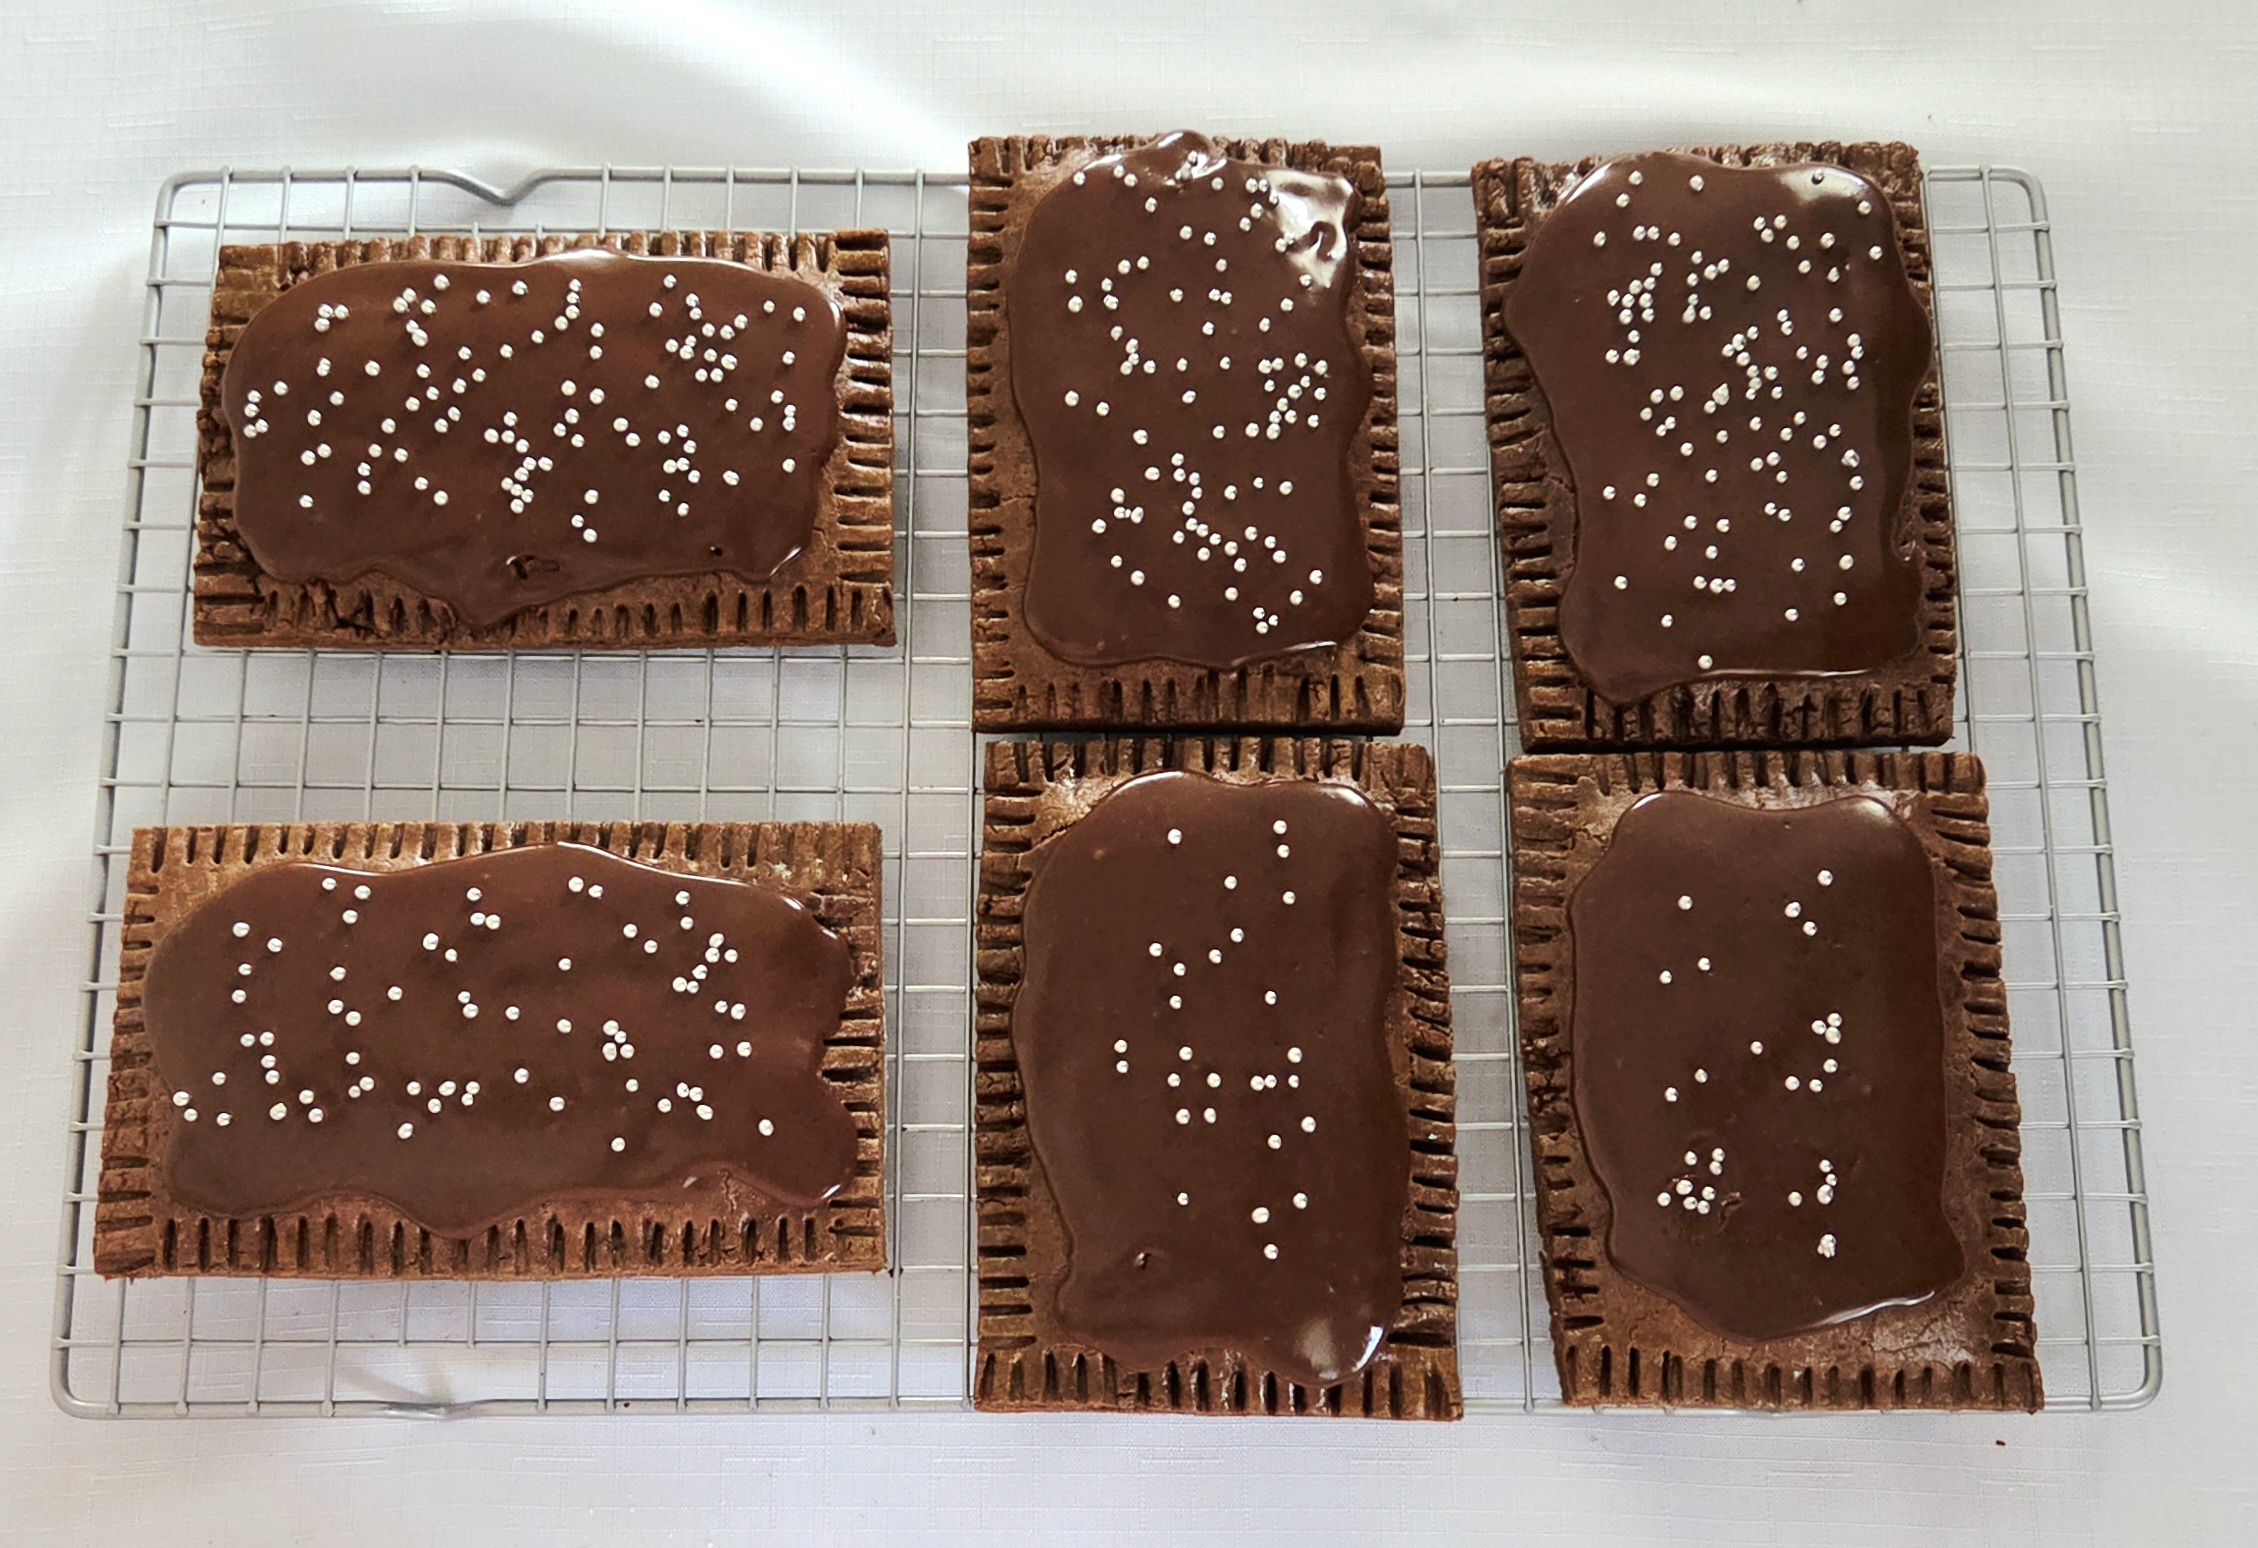
Allow the glaze to set completely on top of the pop tarts before eating. Keep them stored in an airtight container or gallon sized zip top bag for up to 3 days, and enjoy!
Chocolate Fudge Pop Tarts Dupe
Bake Time: 350F for 15 minutes
Servings: 6 pastries
Total Time: 3 hours
Prep Time: 60 Minutes
Ingredients
Dough:
- 3 3/4 cups cake flour
- 2/3 cup cocoa powder
- 1 teaspoon salt
- 18 Tablespoons unsalted butter, softened
- 1 cup powdered sugar, sifted
- 3 large eggs, room temperature
Filling:
- 1 cup (8 oz) dark chocolate
- 2 Tablespoons unsalted butter
- 1/2 cup light corn syrup
- 1/4 cup light brown sugar
- 1 teaspoon vanilla extract
- 1/2 teaspoon salt
Chocolate Glaze:
- 1 cup powdered sugar, sifted
- 2 Tablespoons cocoa powder, sifted
- 1/4 teaspoon salt
- 2 Tablespoons whole milk
- 1/2 teaspoon vanilla extract
- Sprinkles, optional
Egg Wash:
- 1 large egg
- Pinch salt
Instructions:
Dough
- Begin by throwing together the dough. In a medium mixing bowl, sift the cake flour and cocoa powder, and whisk them together along with the salt. Set this bowl aside.
- In the bowl of a stand mixer using the paddle attachment, cream together the softened butter and sifted powdered sugar. Start slow, on level 1, until the sugar has been absorbed by the butter. Increase to level 3 or 4 to finish creaming for 3-4 minutes, until it’s airy and creamy.
- Scrape the sides of the bowl using a rubber spatula and add in the eggs, one at a time. Make sure the previous egg has been fully absorbed before cracking in the next. Scrape down the sides of the bowl in between each new egg, or as needed.
- All at once, add the dry goods to the butter mixture. Mix the cocoa-flour mix into the butter on level one. As soon as all of the dry goods have been absorbed and you have one homogeneous dough, turn the mixer off.
- Lay out a large sheet of plastic wrap and dump the dough into the middle of it. Gently press the dough into a large square, around 1-inch in thickness. and tightly wrap it in the plastic wrap so it’s air-tight. Place the dough on a flat surface in the fridge, and allow the dough to chill for a minimum of 1 hour or for up to 2 days.
Filling
- While the dough is chilling, prepare the filling. In a medium microwave-safe mixing bowl, melt together the butter and dark chocolate in 30 second increments, whisking in between each.
- Pour in the corn syrup (measured in liquid measuring cup), brown sugar, vanilla, and salt, and whisk to combine. It will be thick, but it should still be a spreadable consistency. Cover the bowl with plastic and set it aside at room temperature, until it’s needed.
Assembly
- Preheat the oven to 350F, on the convection setting if possible. Line two baking sheets with parchment paper or silicone baking mats, and set them aside. Remove the dough from the fridge and allow it to sit at room temperature for a few minutes, so it will be easier to roll out.
- Using a knife or bench scraper, cut the slab of dough in half, giving you two equal rectangles. Lightly dust a clean counter with flour, and grab one of the halves of dough, taking care to wrap the other half back up in the plastic wrap until you’re ready to use it.
- Lightly sprinkle flour on both sides of the dough before placing it on the flour coated surface and roll it out until the dough is approximately 1/8 of an inch thick, around a 12×12 square. Using the knife or bench scraper, cut the square into 3 equal strips in one direction, then in half in the other, giving you 6 relatively evenly sized rectangles. Reference pictures displayed above.
- Place the 6 rectangles on one of the lined baking sheets, cover them in plastic, and place them in the fridge for 15-30 minutes. While they chill, repeat the process with the second half of the dough, using the other lined sheet pan for the second set.
- Prepare the egg wash. In a small bowl, whisk together the egg and pinch of salt until the egg is as smooth as you can get it. Set this aside.
- While the second set of rectangles chill in the fridge, take out the first set to start filling them. Match up 3 pairs that fit together the best.
- Take the filling, and divide it in half. Take 1/3 of one side and spread it over one of the rectangles, leaving about 1/2-3/4 inch boarder along the sides. Repeat with the next two sheets of dough.
- Grab your egg wash and a pastry brush (or your finger, if you don’t have one) and dip it into the egg wash. Brush along the boarders of all 3 rectangles, right up to the filling. Take the top half of the pairs and place them over the filled bottom, pressing along the boarder to help seal the filling inside. Repeat with the next two rectangles of dough.
- Take the fork and crimp along all 4 edges of each pop tart, as close to the filling as you can get it without tearing another hole. Cover the assembled pop tarts with plastic and chill them in the fridge for another 30 minutes. While the first pan of pop tarts chills, repeat steps 6-9 with the second pan of rectangles.
- Remove the first prepared pan of pop tarts from the fridge and, before placing them in the oven, trim the sides. Using the bench scraper or knife, press firmly down on each side so there’s about 1/4 inch border remaining. Arrange the 3 pop tarts so they’re evenly spaced on the pan, though they won’t expand much.
- Brush the tops of each pop tart with the egg wash and place them in the oven for 15 minutes, flipping halfway through. Allow them to cool on the baking sheet for 5 minutes once removed from the oven, then transfer them over to a cooling rack with a spatula. They need to be cooled before adding the glaze. Repeat with the second pan of pop tarts.
Glaze:
- In a medium mixing bowl, sift together the powdered sugar and cocoa powder. Add in the salt, vanilla, and milk, and whisk the glaze together until it’s smooth.
- Using a spoon, spread around 2-3 tablespoons of glaze on each pop tart. If you’d like sprinkles, add them immediately or they wont stick.
- Allow the glaze to set completely on top of the pop tarts before eating. Keep them stored in an airtight container or gallon sized zip top bag for up to 3 days, and enjoy!
Tips
- The dough can be made ahead of time and stored in the fridge for up to 2 days, or frozen for up to 3 months.
- The filling can be made ahead of time and stored in the fridge for up to 2 days. It will need to be heated slightly, to bring it back to a spreadable consistency. Start with 10 seconds in the microwave and work your way up slowly, stirring in between, so it doesn’t become molten.
- Fully assembled, unbaked pop tarts can be frozen for up to 3 months. Get them to the point of the edges being trimmed, then freeze them flat on a sheet pan. Once they’re solid, transfer them over to a freezer safe bag or container. Try to place them in a safe corner of the freezer, so they don’t get banged up.
- To bake frozen Pop Tarts, preheat the oven to 325F. Space out up to 3 still frozen Pop Tarts on a parchment or silicone baking mat lined baking sheet, and bake them for 20 minutes, flipping halfway through. Once baked, proceed with the recipe as written.


0 Comments