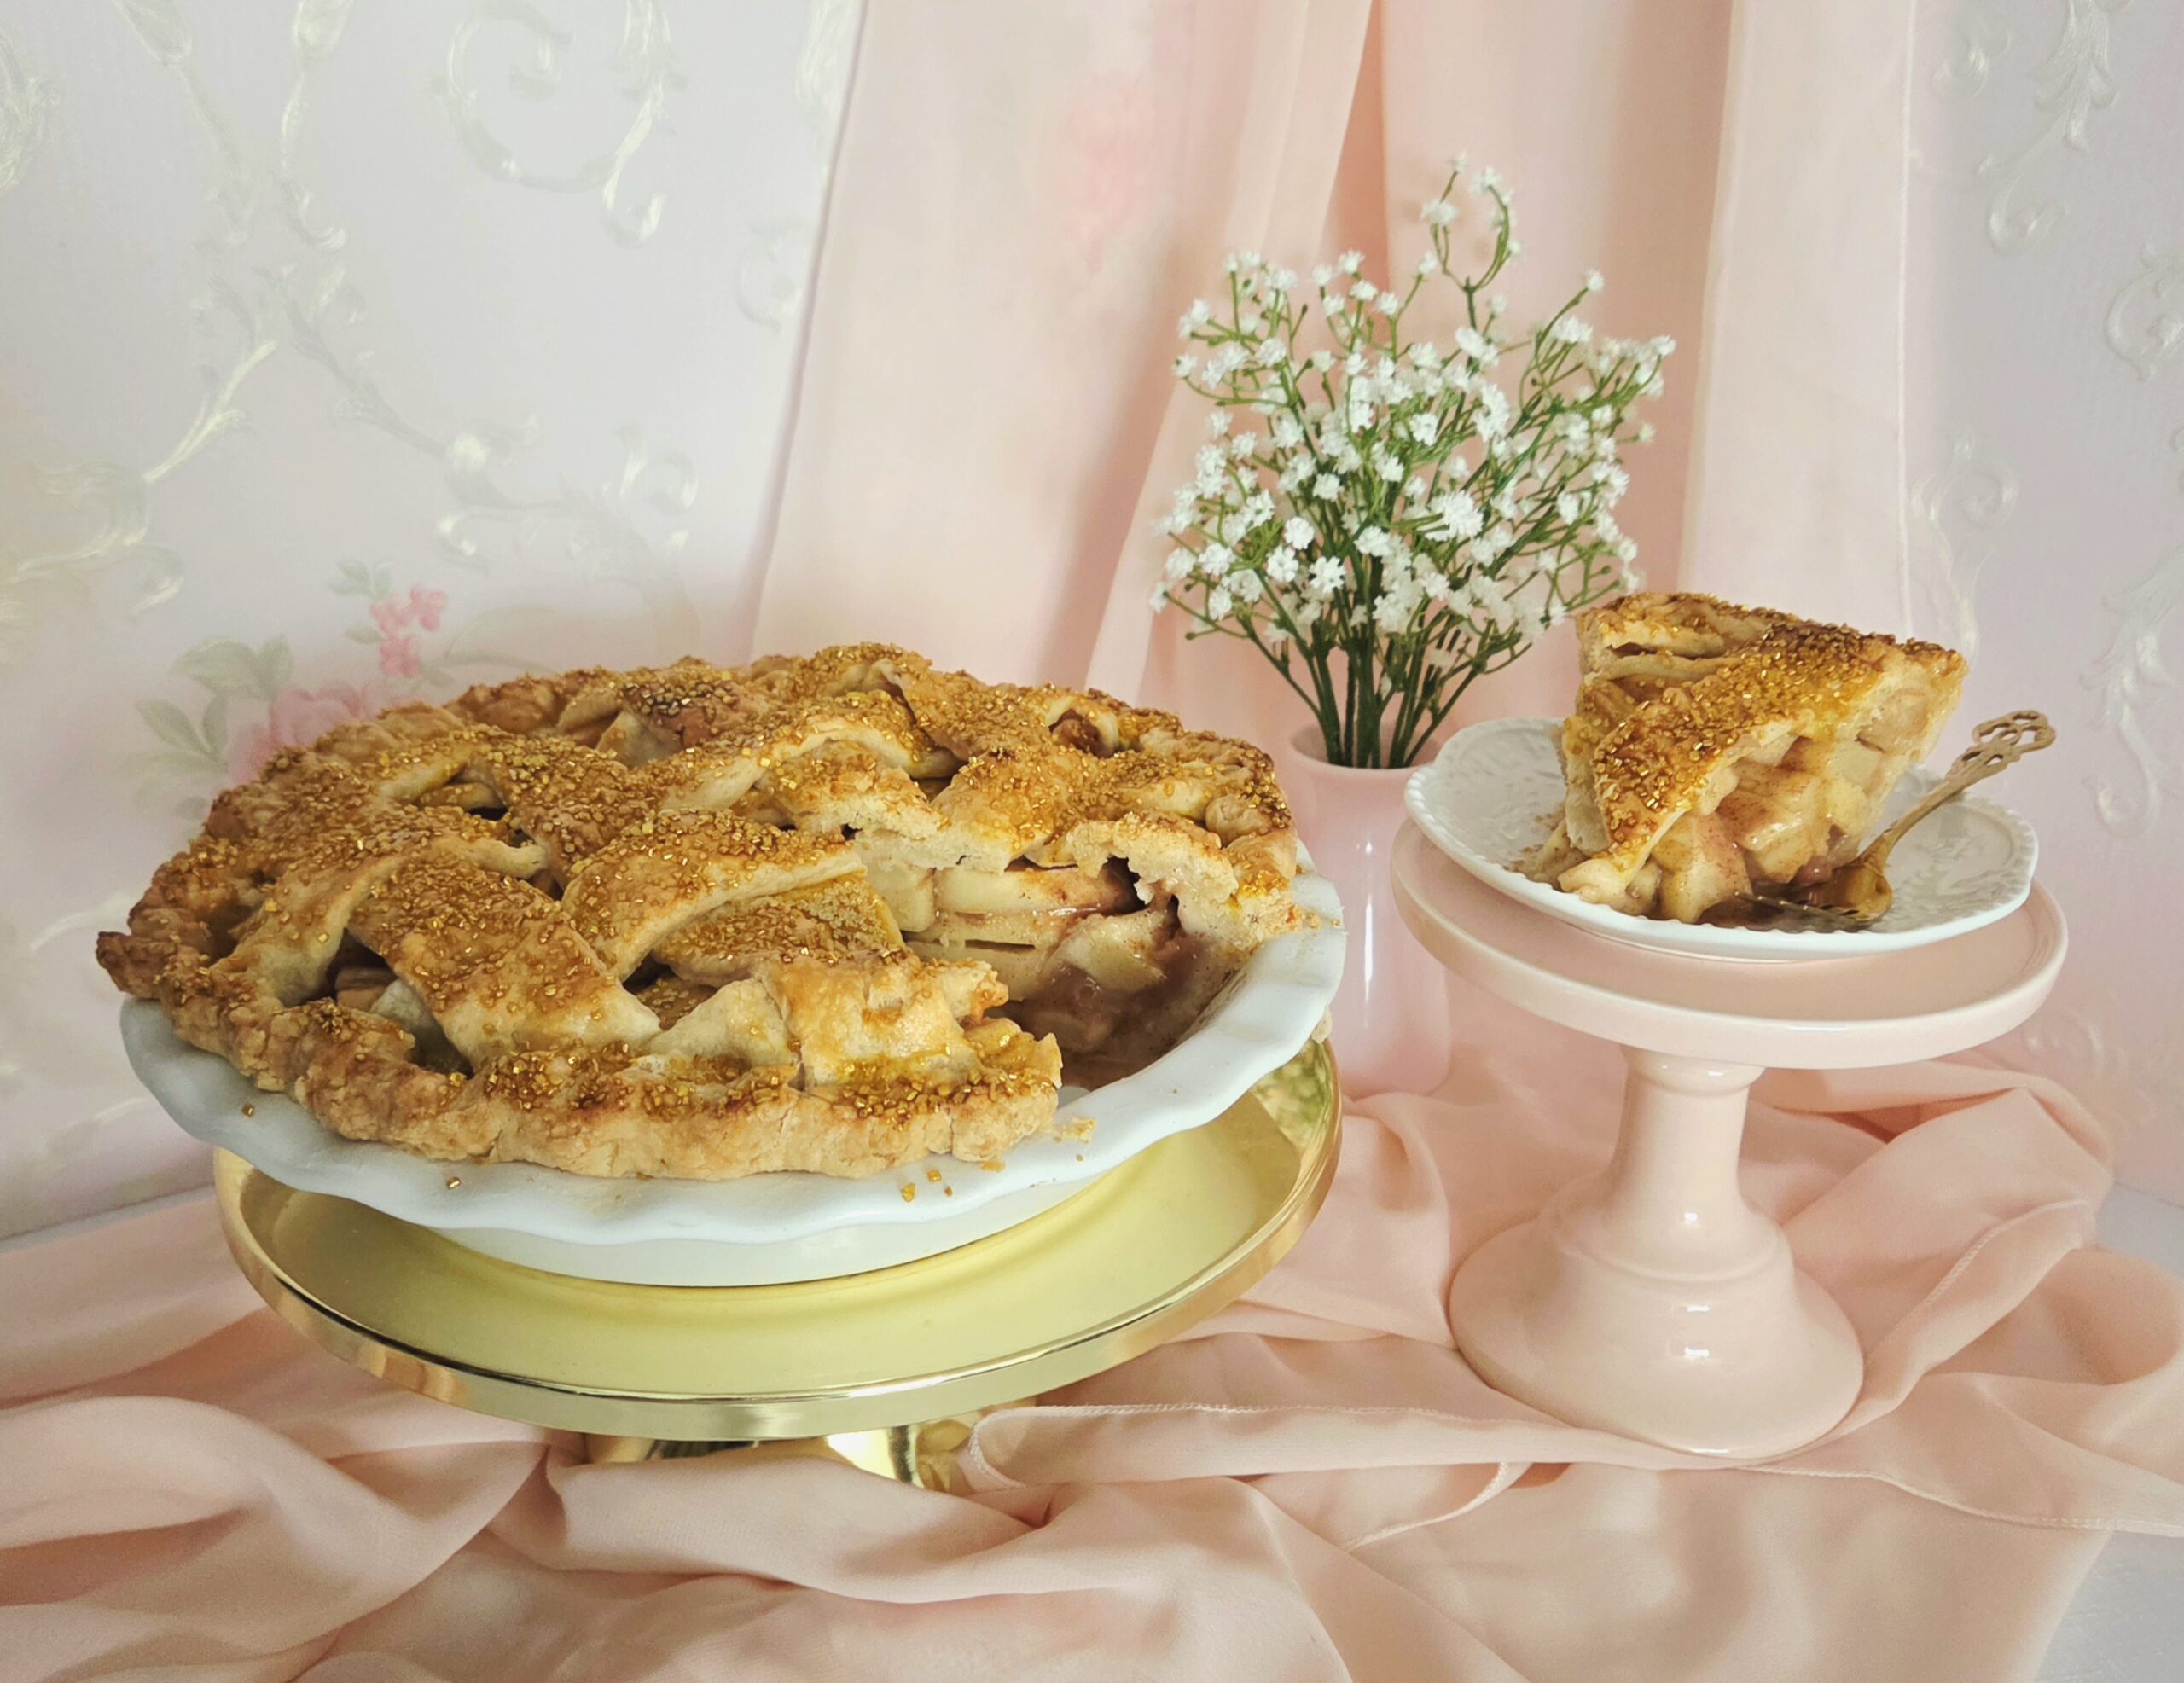

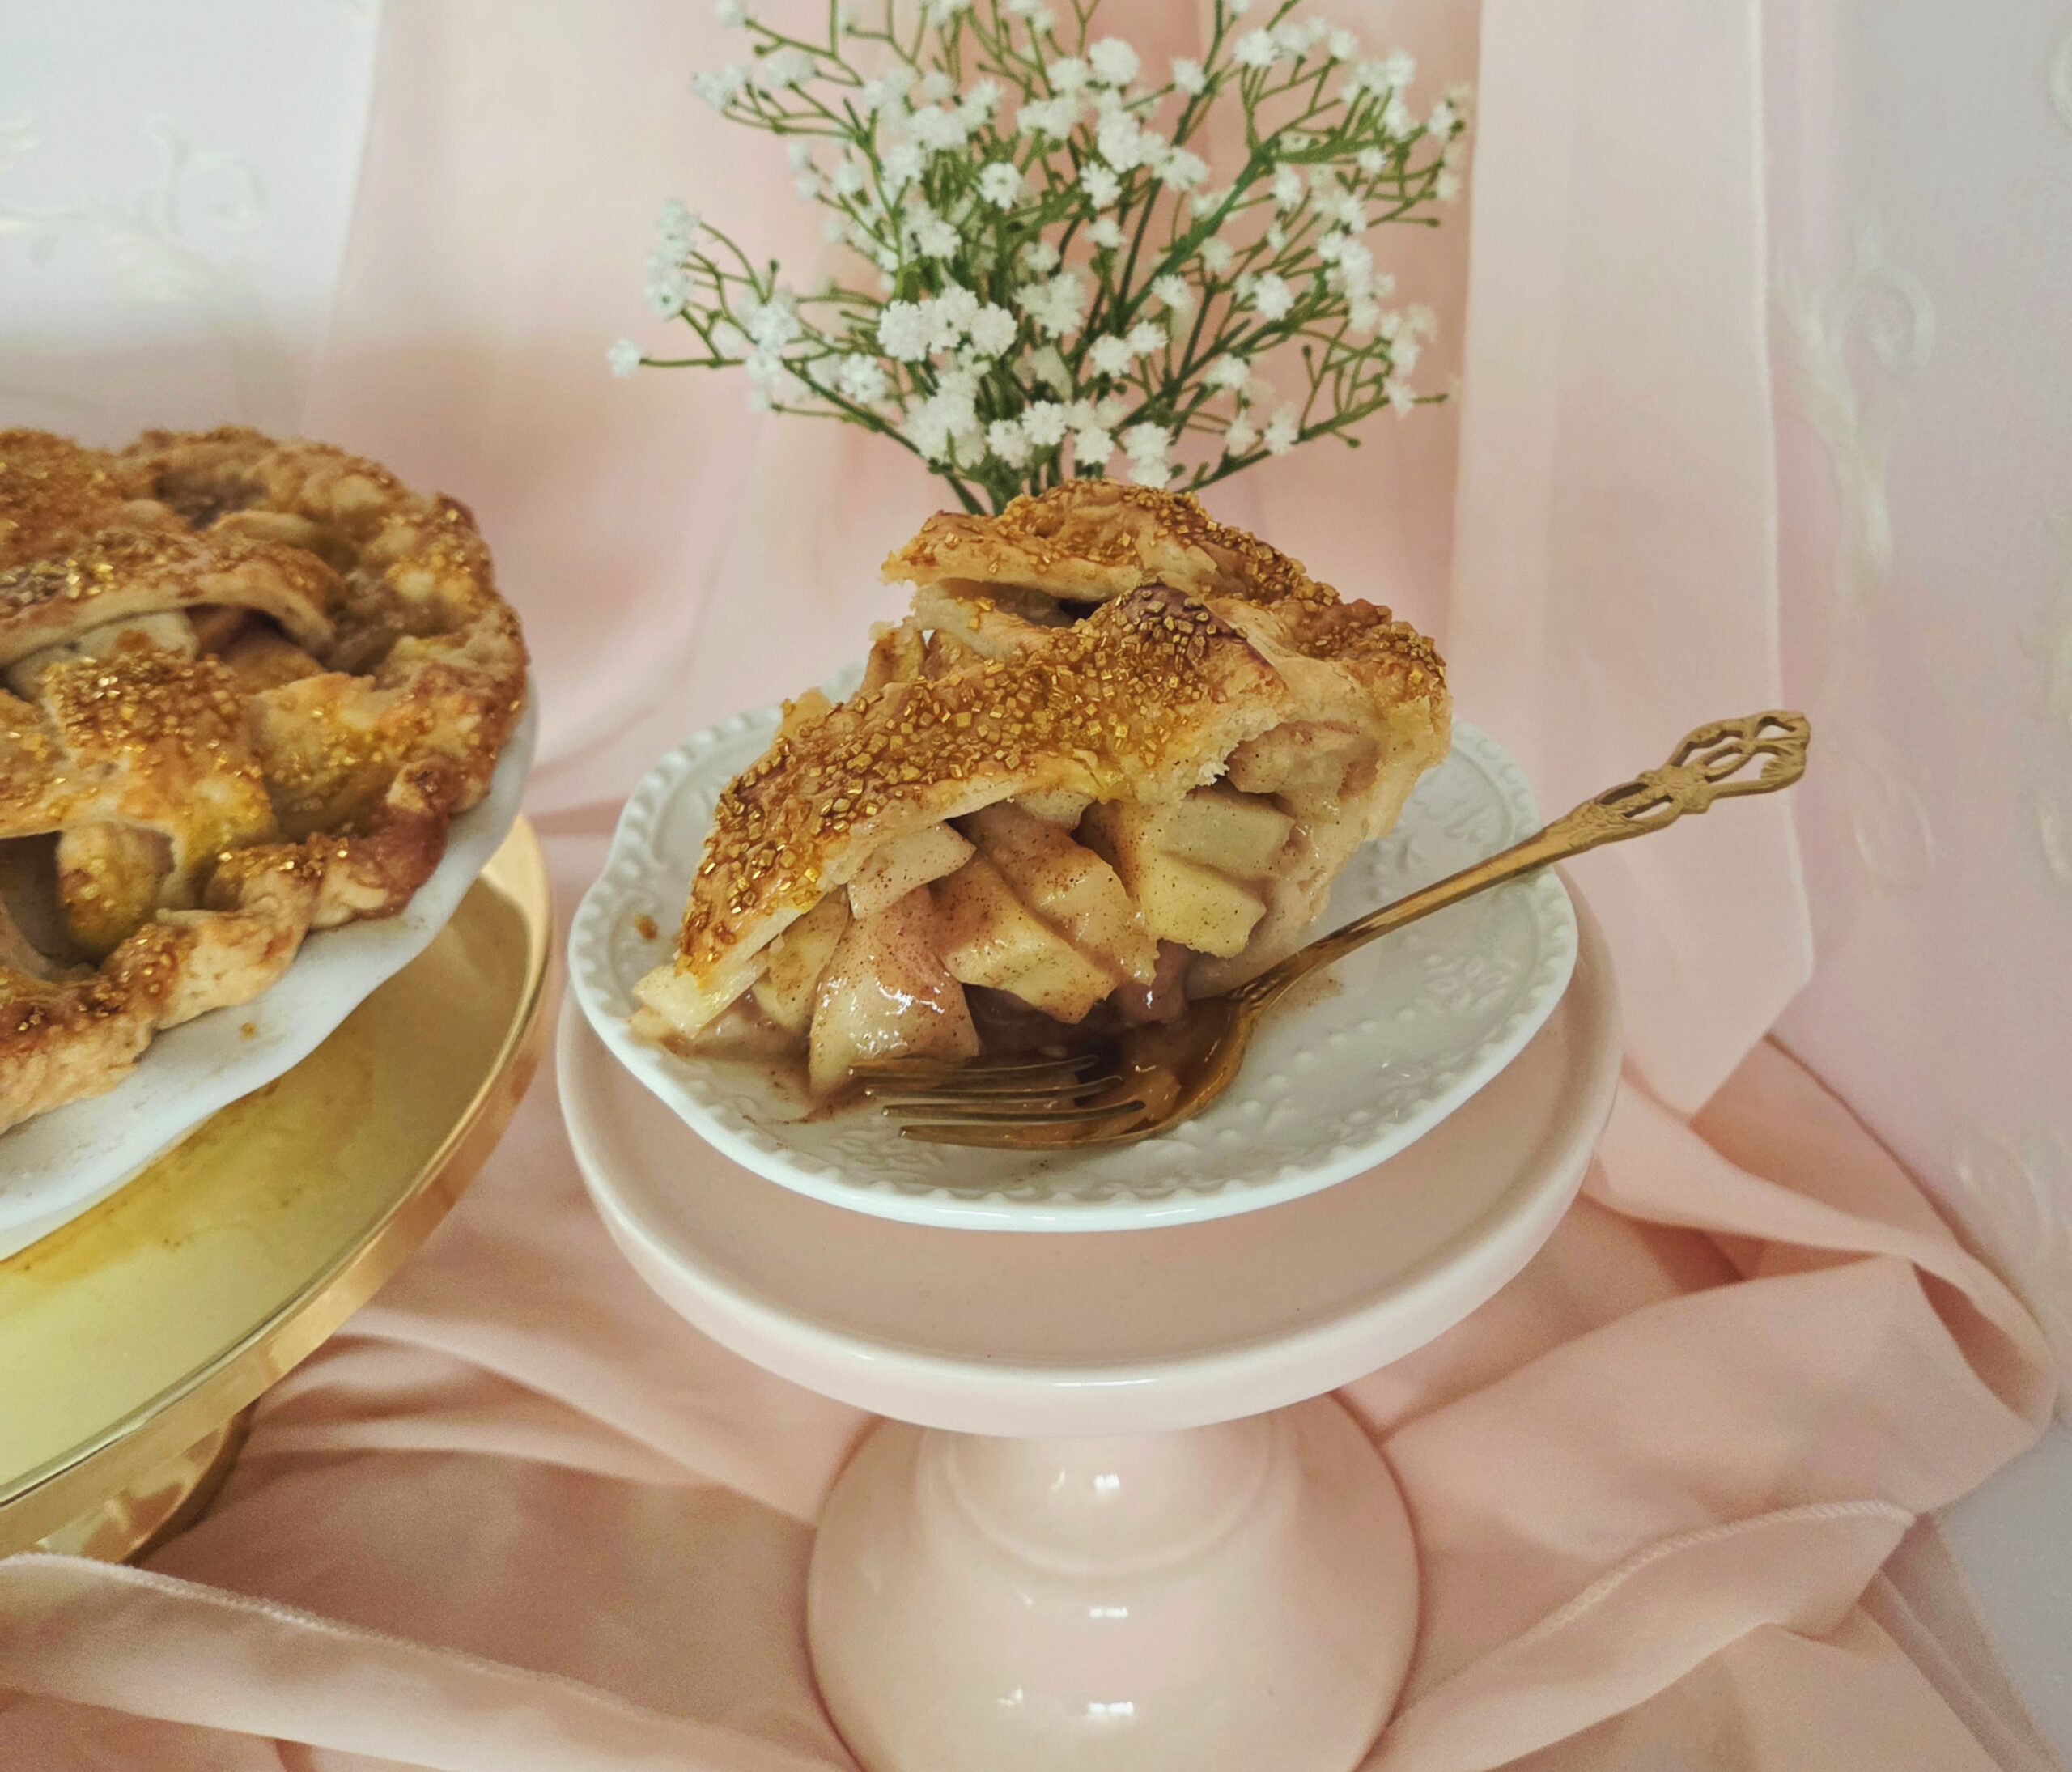
When Autumn hits, aka the best season finally begins, I am an apple girl all the way. Apple cider, apple crisp, apple turnovers, apple dumplings, cider donuts, caramel apples, and of course, the king of all apple desserts, a classic apple pie. Call me basic all you want, but even with all the creativity and skillset to craft any number of unique and delicious creations at my fingertips, I still gravitate towards a good, warm slice of apple pie with a scoop of vanilla ice cream throughout the season.
Because of this warm spiced love, it was important to me to come up with a delicious and easy apple pie to throw together. The filling in this pie is flavorful, and the crust is crisp and sturdy enough to hold everything together. No soggy bottoms in this kitchen. I also wanted to make a pie that’s easily picture perfect with little effort. There’s nothing more frustrating when you’re putting in all the hard work to make a pie from scratch, decorating the top crust for that extra special touch, and then you’re left with 2 inches of air between the filling and the crust that ruins it. With my direction, that gap won’t be a problem!
Serve your pie warm with a scoop of vanilla or caramel ice cream, a dollop of whipped cream, or if you’re feeling adventurous and want to try a New England delicacy, melt a thin slice of sharp cheddar on top. The cheddar may not be my thing, but it’s been a popular choice here for years so it’s worth a try if you’re up for it.
FAQs and Science
Do I have to peel the apples? I very strongly recommend peeling your apples first. Baked apple peels are a fairly unappealing texture, so it’s worth the extra 5 minutes of effort.
Does it make a difference what kind of apples I use? It should be a good kind for baking with (in other words, it holds some structural integrity and won’t disintegrate into mush), so nothing like a macintosh or red delicious. I prefer granny smith, since the tartness is a nice contrast to all of the sweetness, but you could also use something like honey crisp, pink lady, or braeburn.
Should I freshly grate the nutmeg? Freshly grated produces a much better flavor than pre-grated nutmeg, but it won’t destroy the dish if pre-grated is what you’ve got to work with.
Could I just use a premade apple pie spice blend instead of measuring all the individual spices? As a proponent of using what you’ve got when you can, if you’re more of a spice blend buyer than individual spices so you already have an apple pie spice blend in the house, by all means, go for it! Just make sure the amount you use is equal to the volume of the spices listed in the recipe added together, in this case about 4 teaspoons.
Why pre-cook the filling? Won’t it make the apples soggy by the time the pie has finished baking? A quick cook on the filling releases some of the water and activates the starches in the flour, both of which are key in preventing that gap between the filling and the top crust. The apples won’t cook for long enough here to turn into mush in the end, as long as you follow my instructions on preparing them.
Do I have to make a lattice top? That seems more difficult than I’m comfortable with. Absolutely not! If it sounds too intimidating to create your own lattice top, you can just roll out the dough to the same diameter of the circle and instead, cut 4 small slits near the center of the circle. This way, the pie still has a ventilation point for steam to escape from but it’s a much easier process to create.
Does it matter what material the pie dish I use is made from? The material your pan is made from actually does make a huge impact on how your pie comes out, as different materials conduct heat differently. A dark metal pie dish will conduct the most heat, while glass conducts the least. I prefer to go somewhere in the middle, with either a lighter metal or ceramic dish.
What You’ll Need

- Ceramic or light colored metal pie dish
- Nonstick baking spray
- 4-Quart saucepan
- Whisk
- Heat resistant rubber spatula
- Dry measuring cups
- Measuring spoons
- Citrus reamer or citrus squeezer
- Chef’s knife
- Cutting board
- Small bowl
- Medium mixing bowl
- Large mixing bowl
- Fork
- Rolling pin
- Baking sheet
- Pizza wheel or bench scraper
- Paring knife or kitchen scissors
- Pastry brush (optional)
- Aluminum foil
The Process
Before beginning anything else, make sure whatever pie crust you’re using is ready to go! I recommend using my Easy Pie Crust, but you’re welcome to use whichever recipe you’d prefer or even store bought.
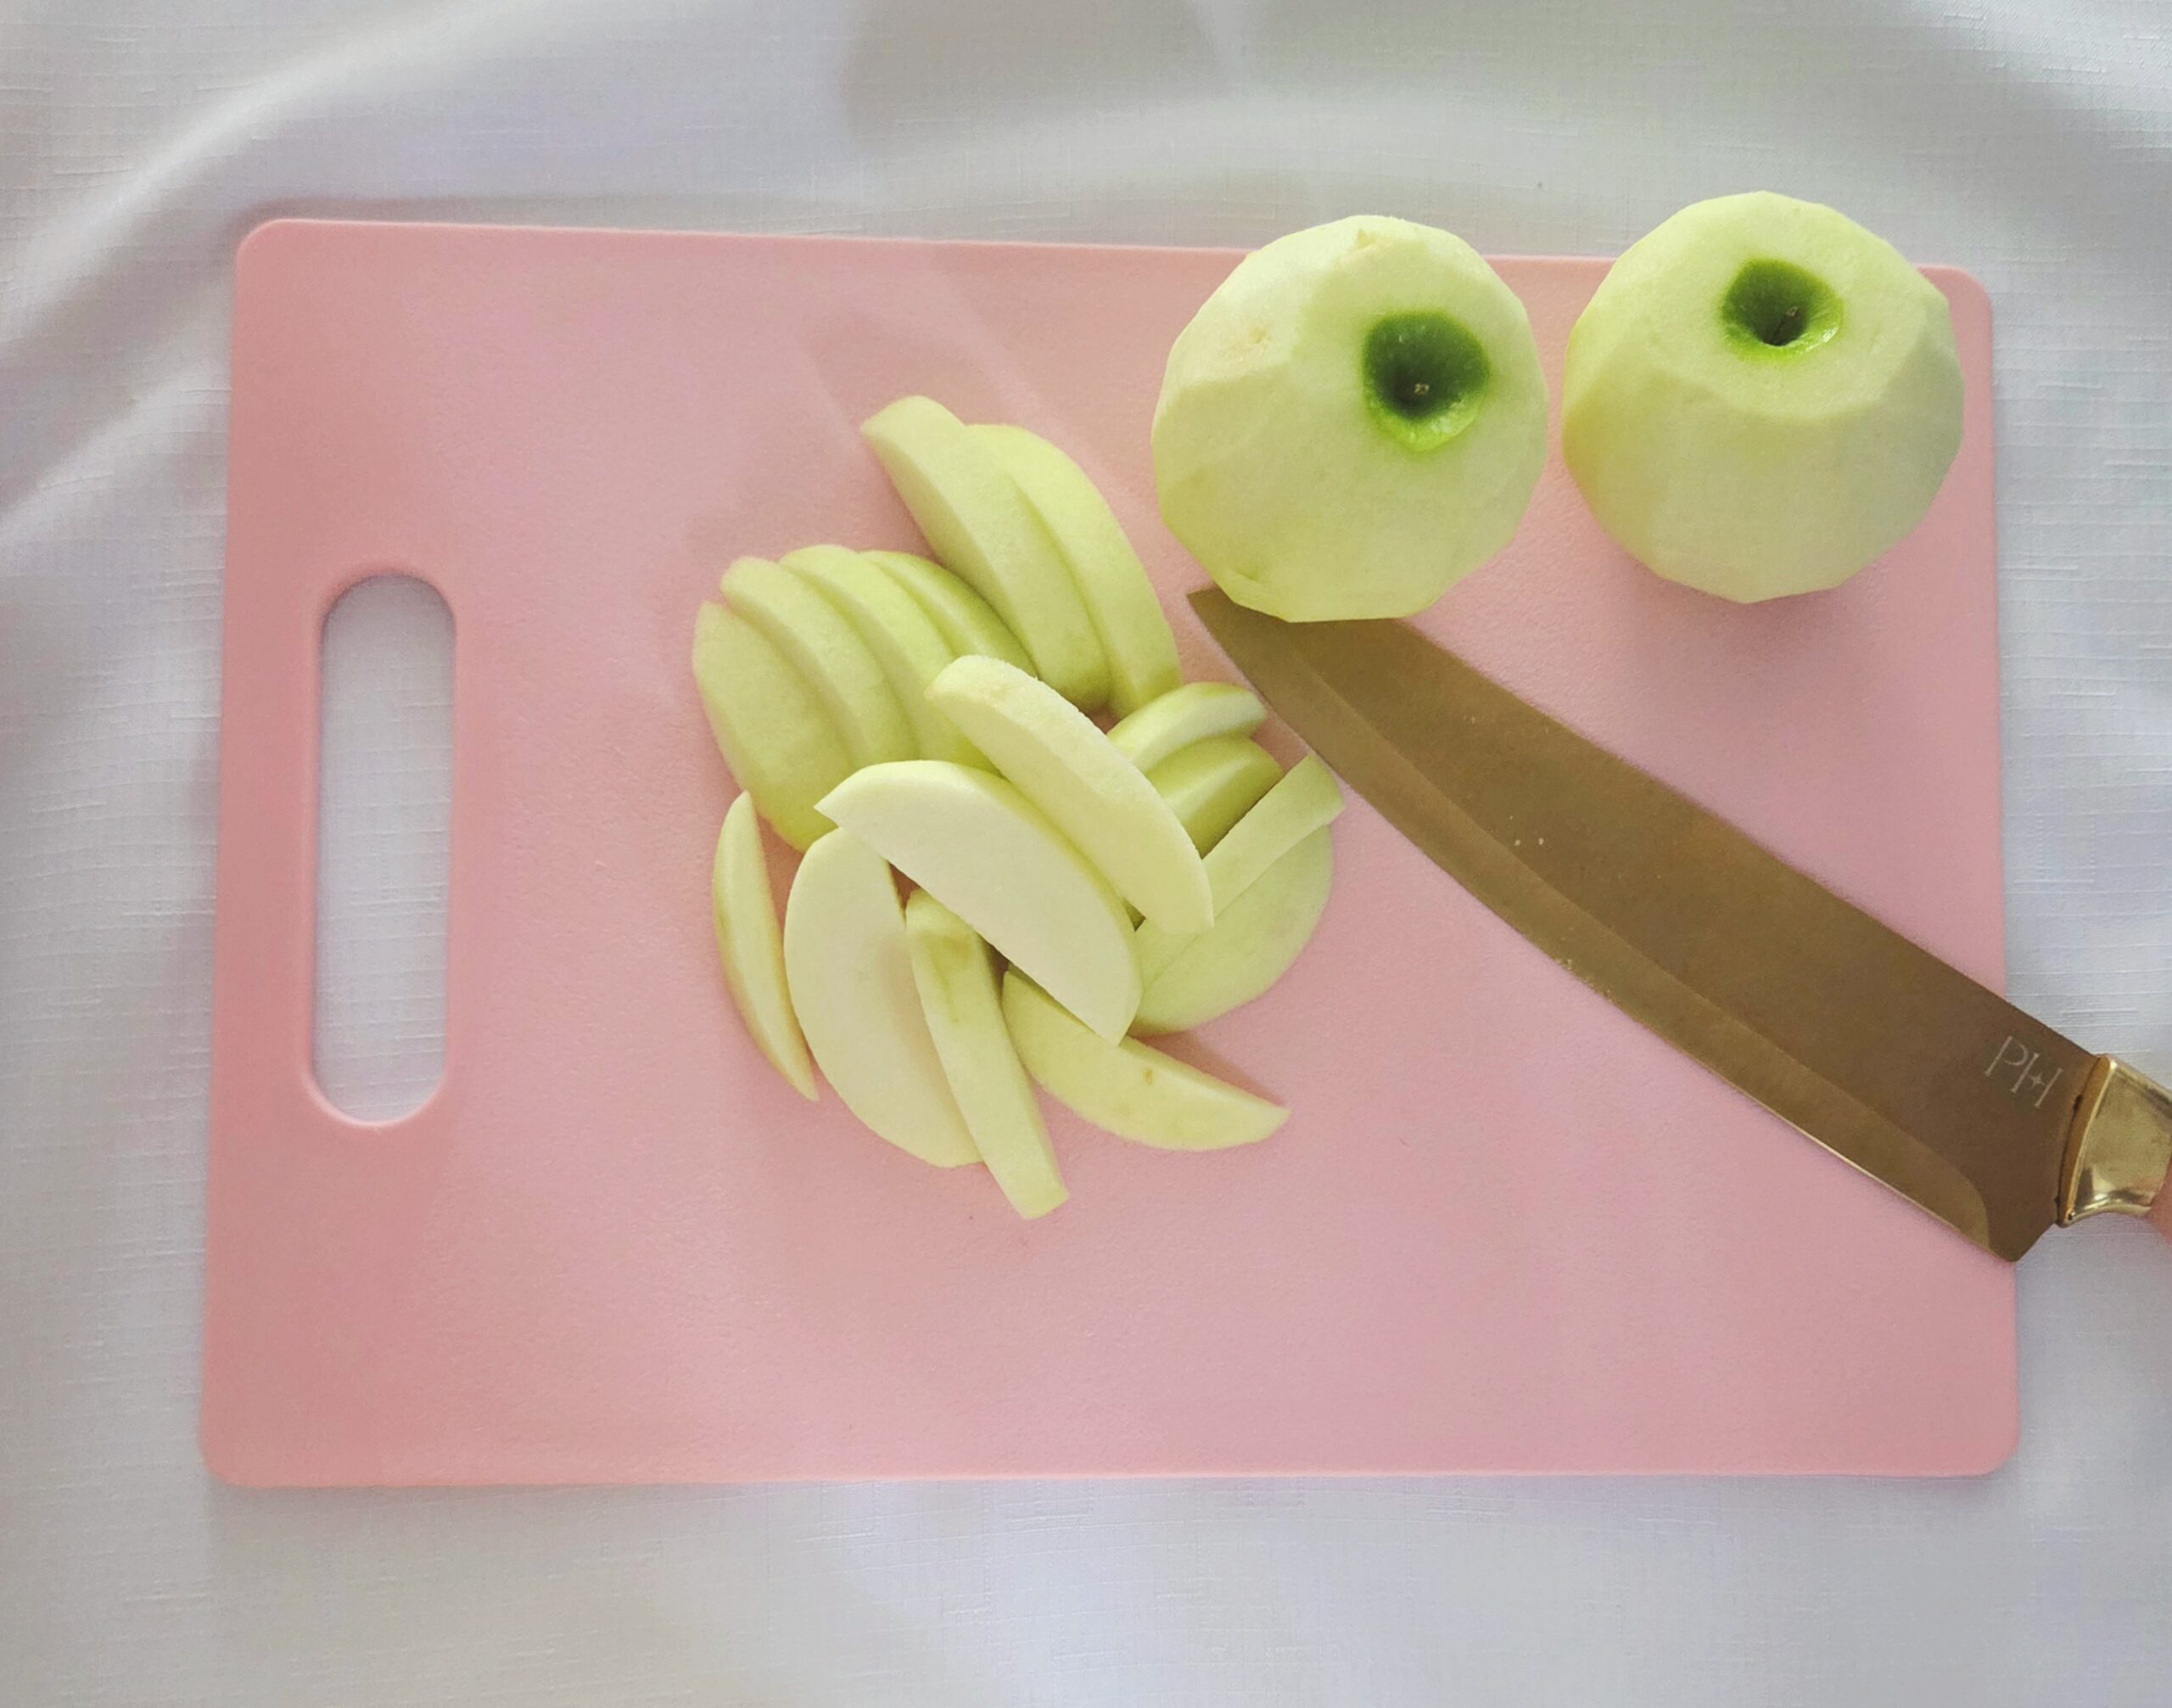
Now that that’s settled, time to prepare the apple filling. Peel the apples and cut them into ½ inch thick slices.
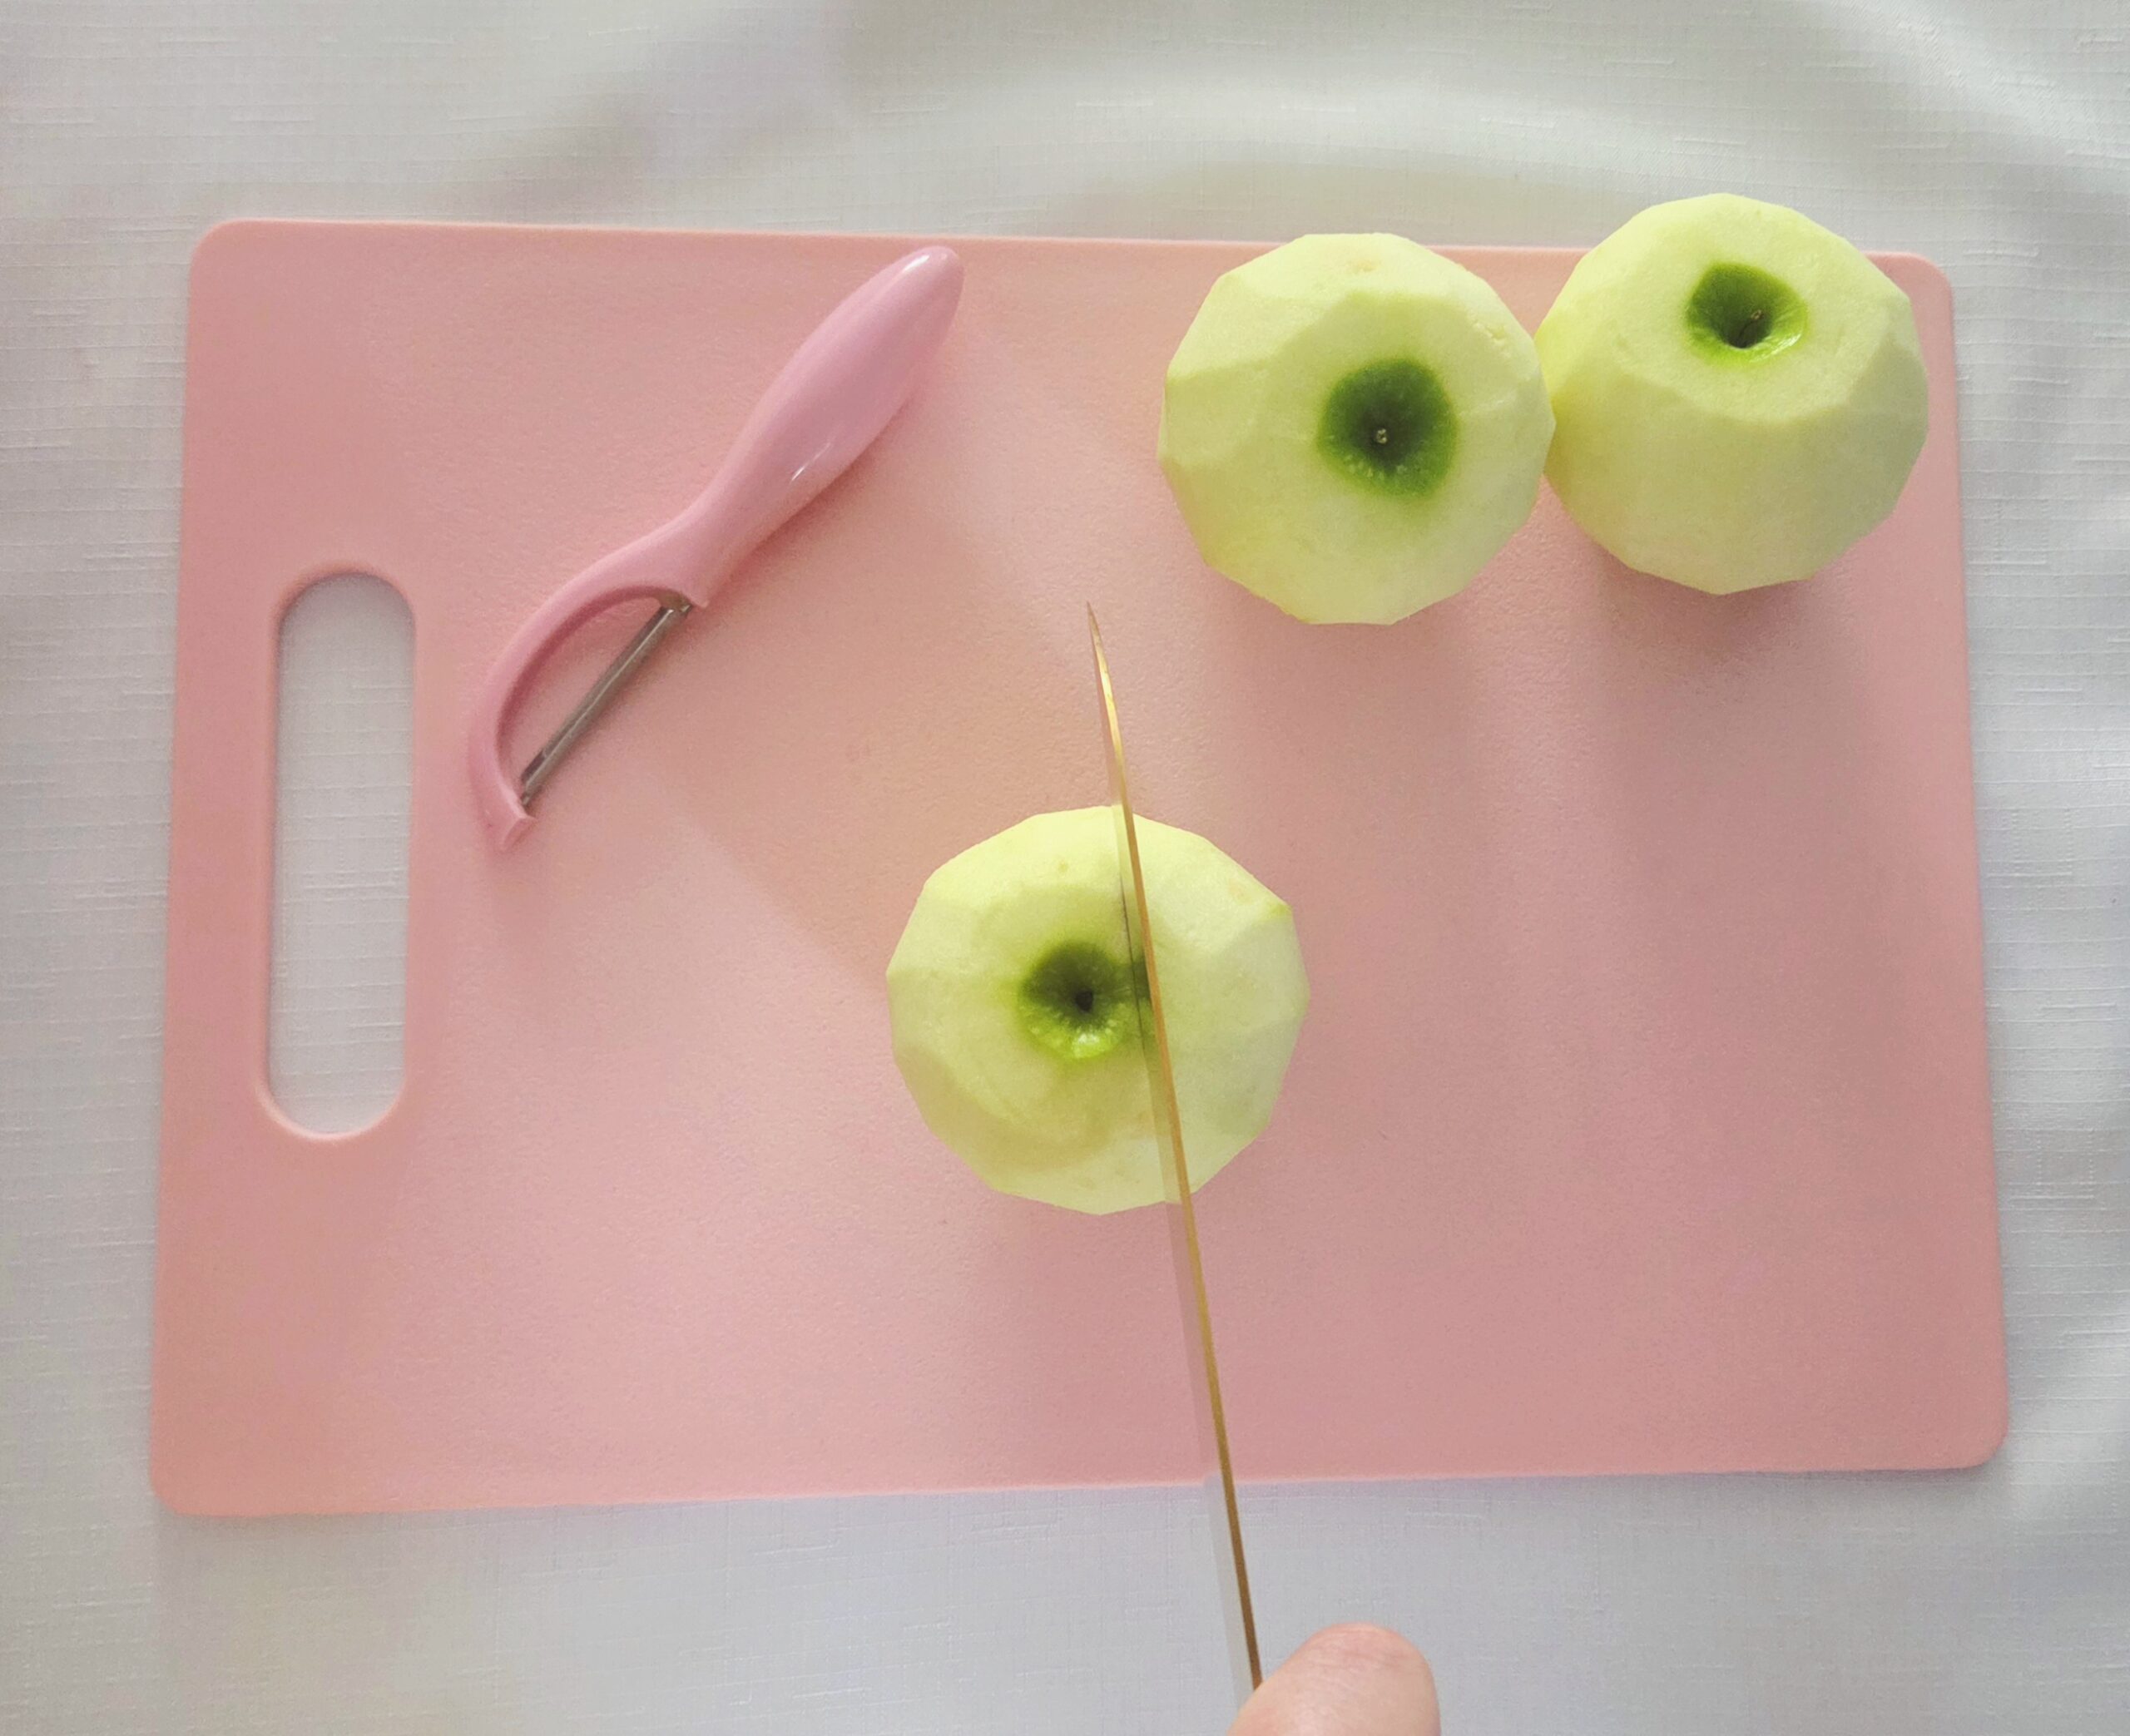
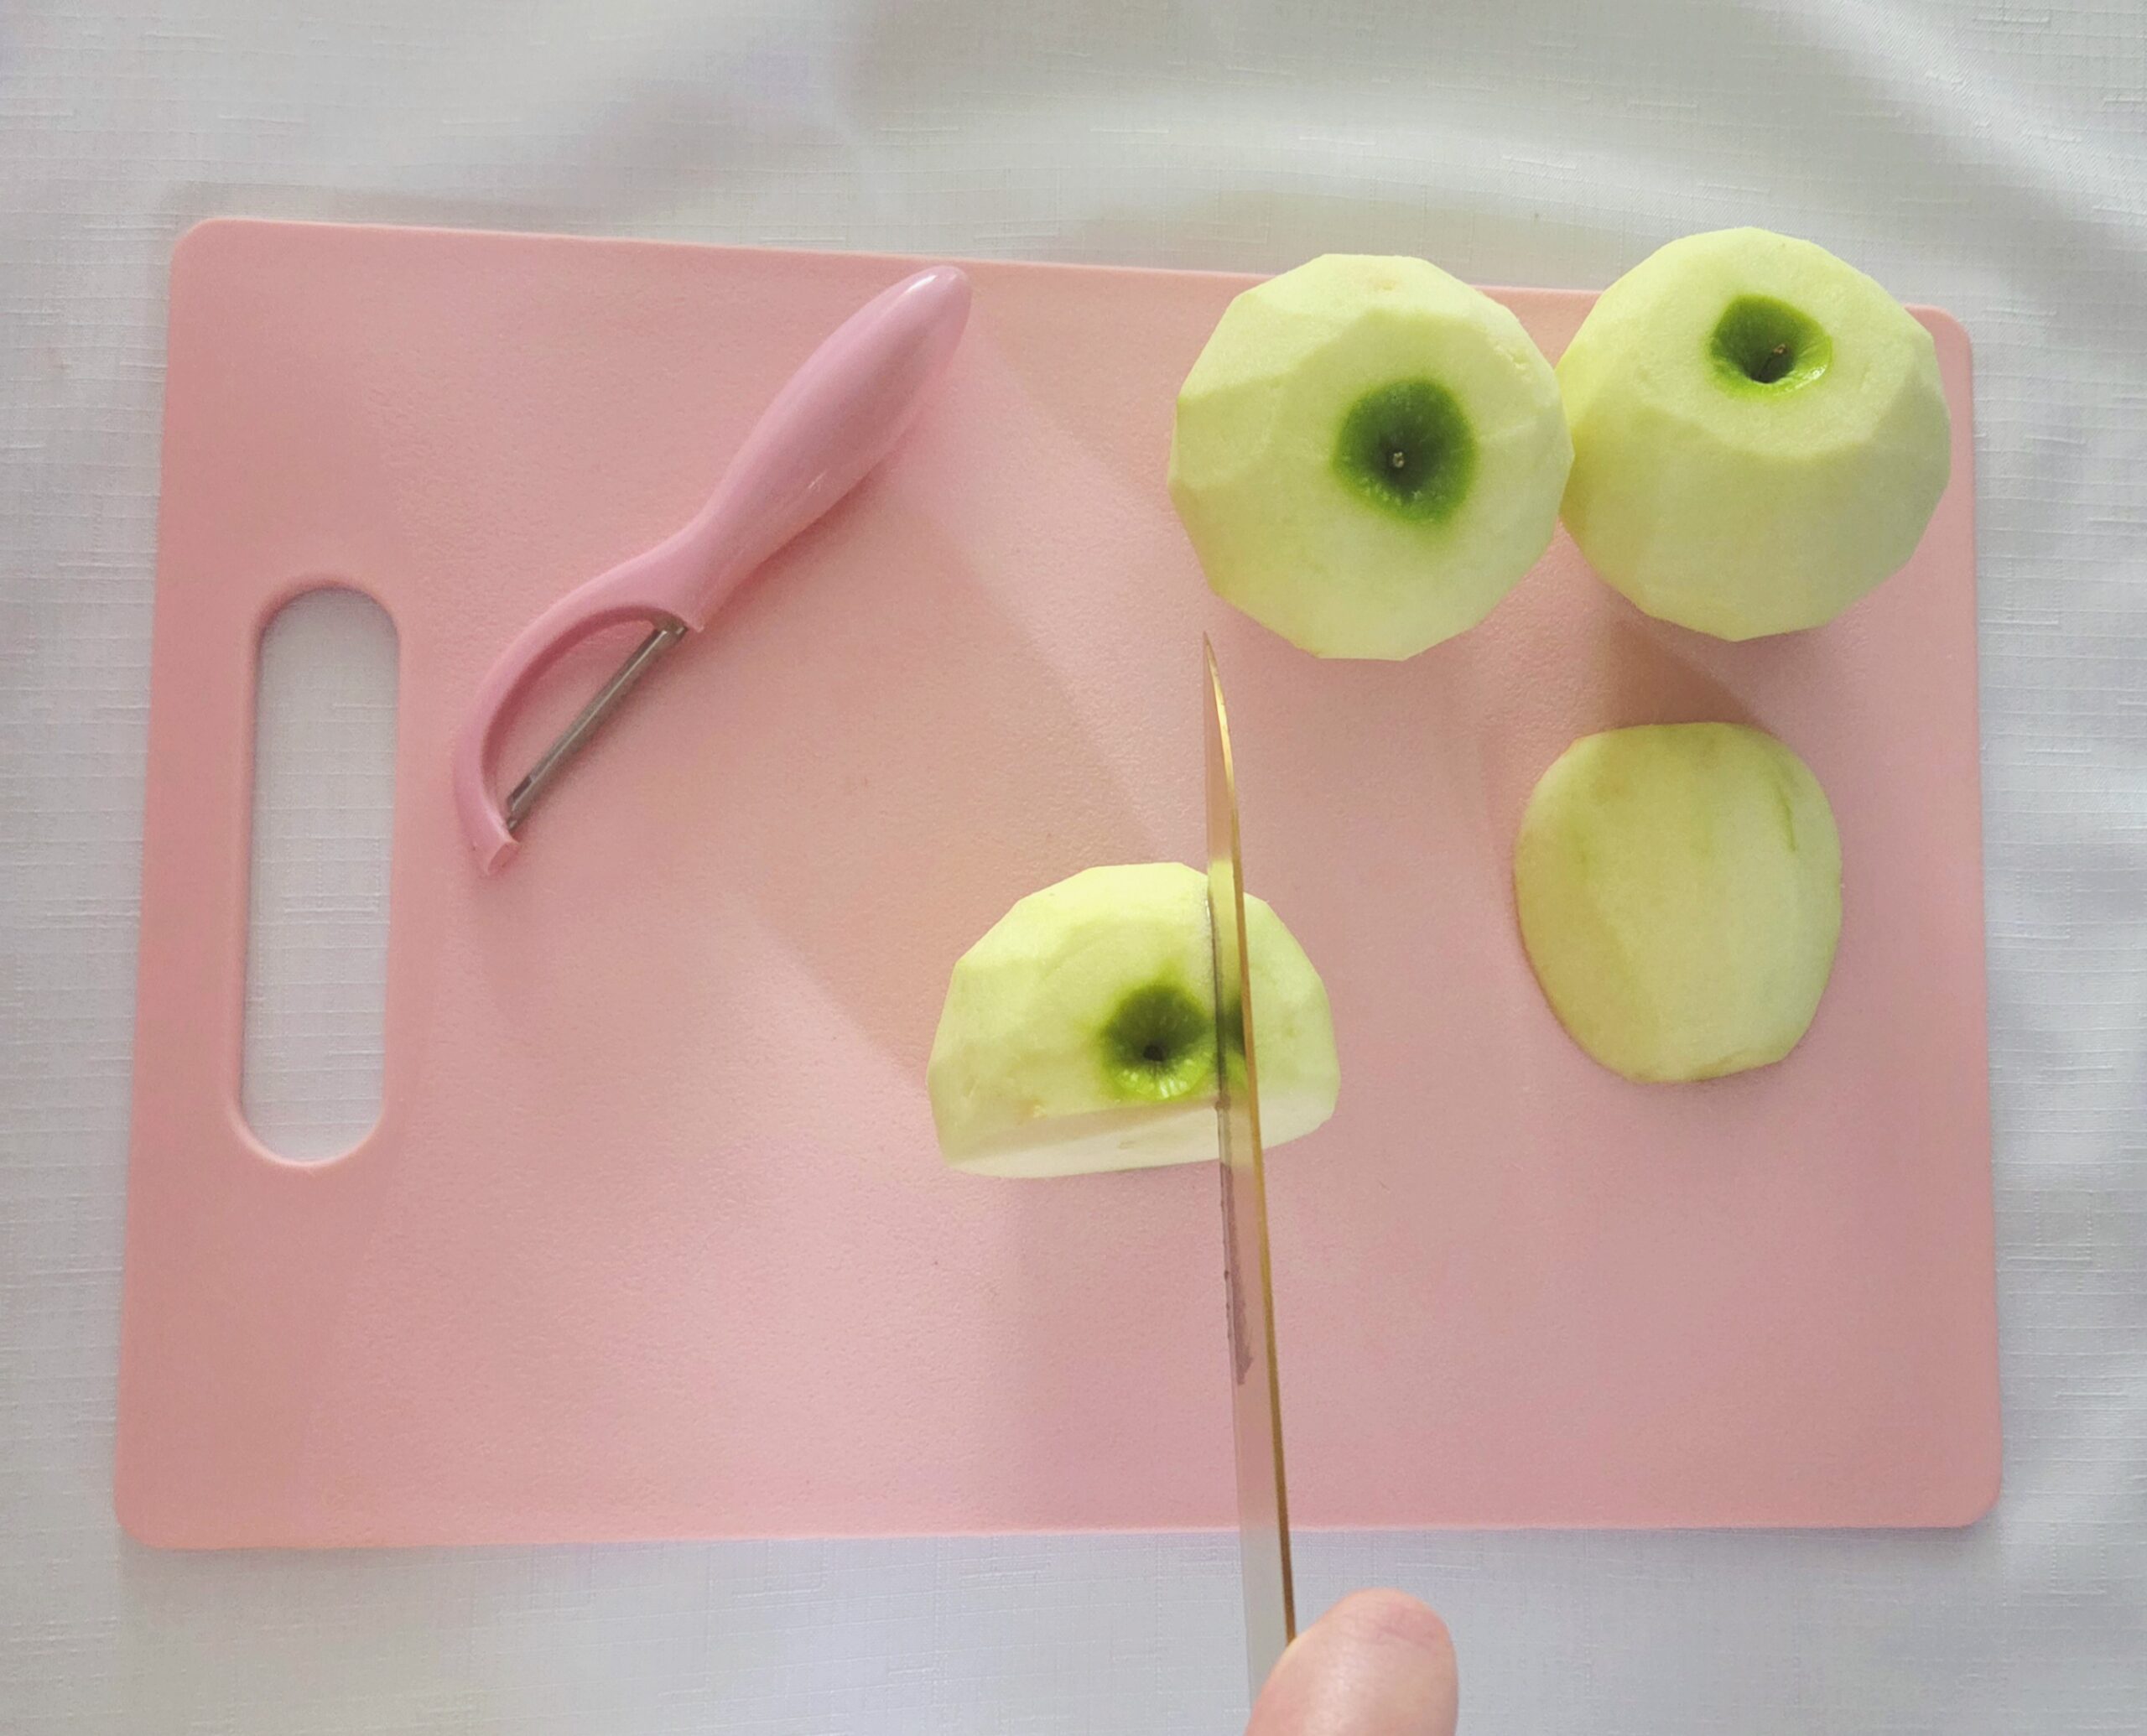
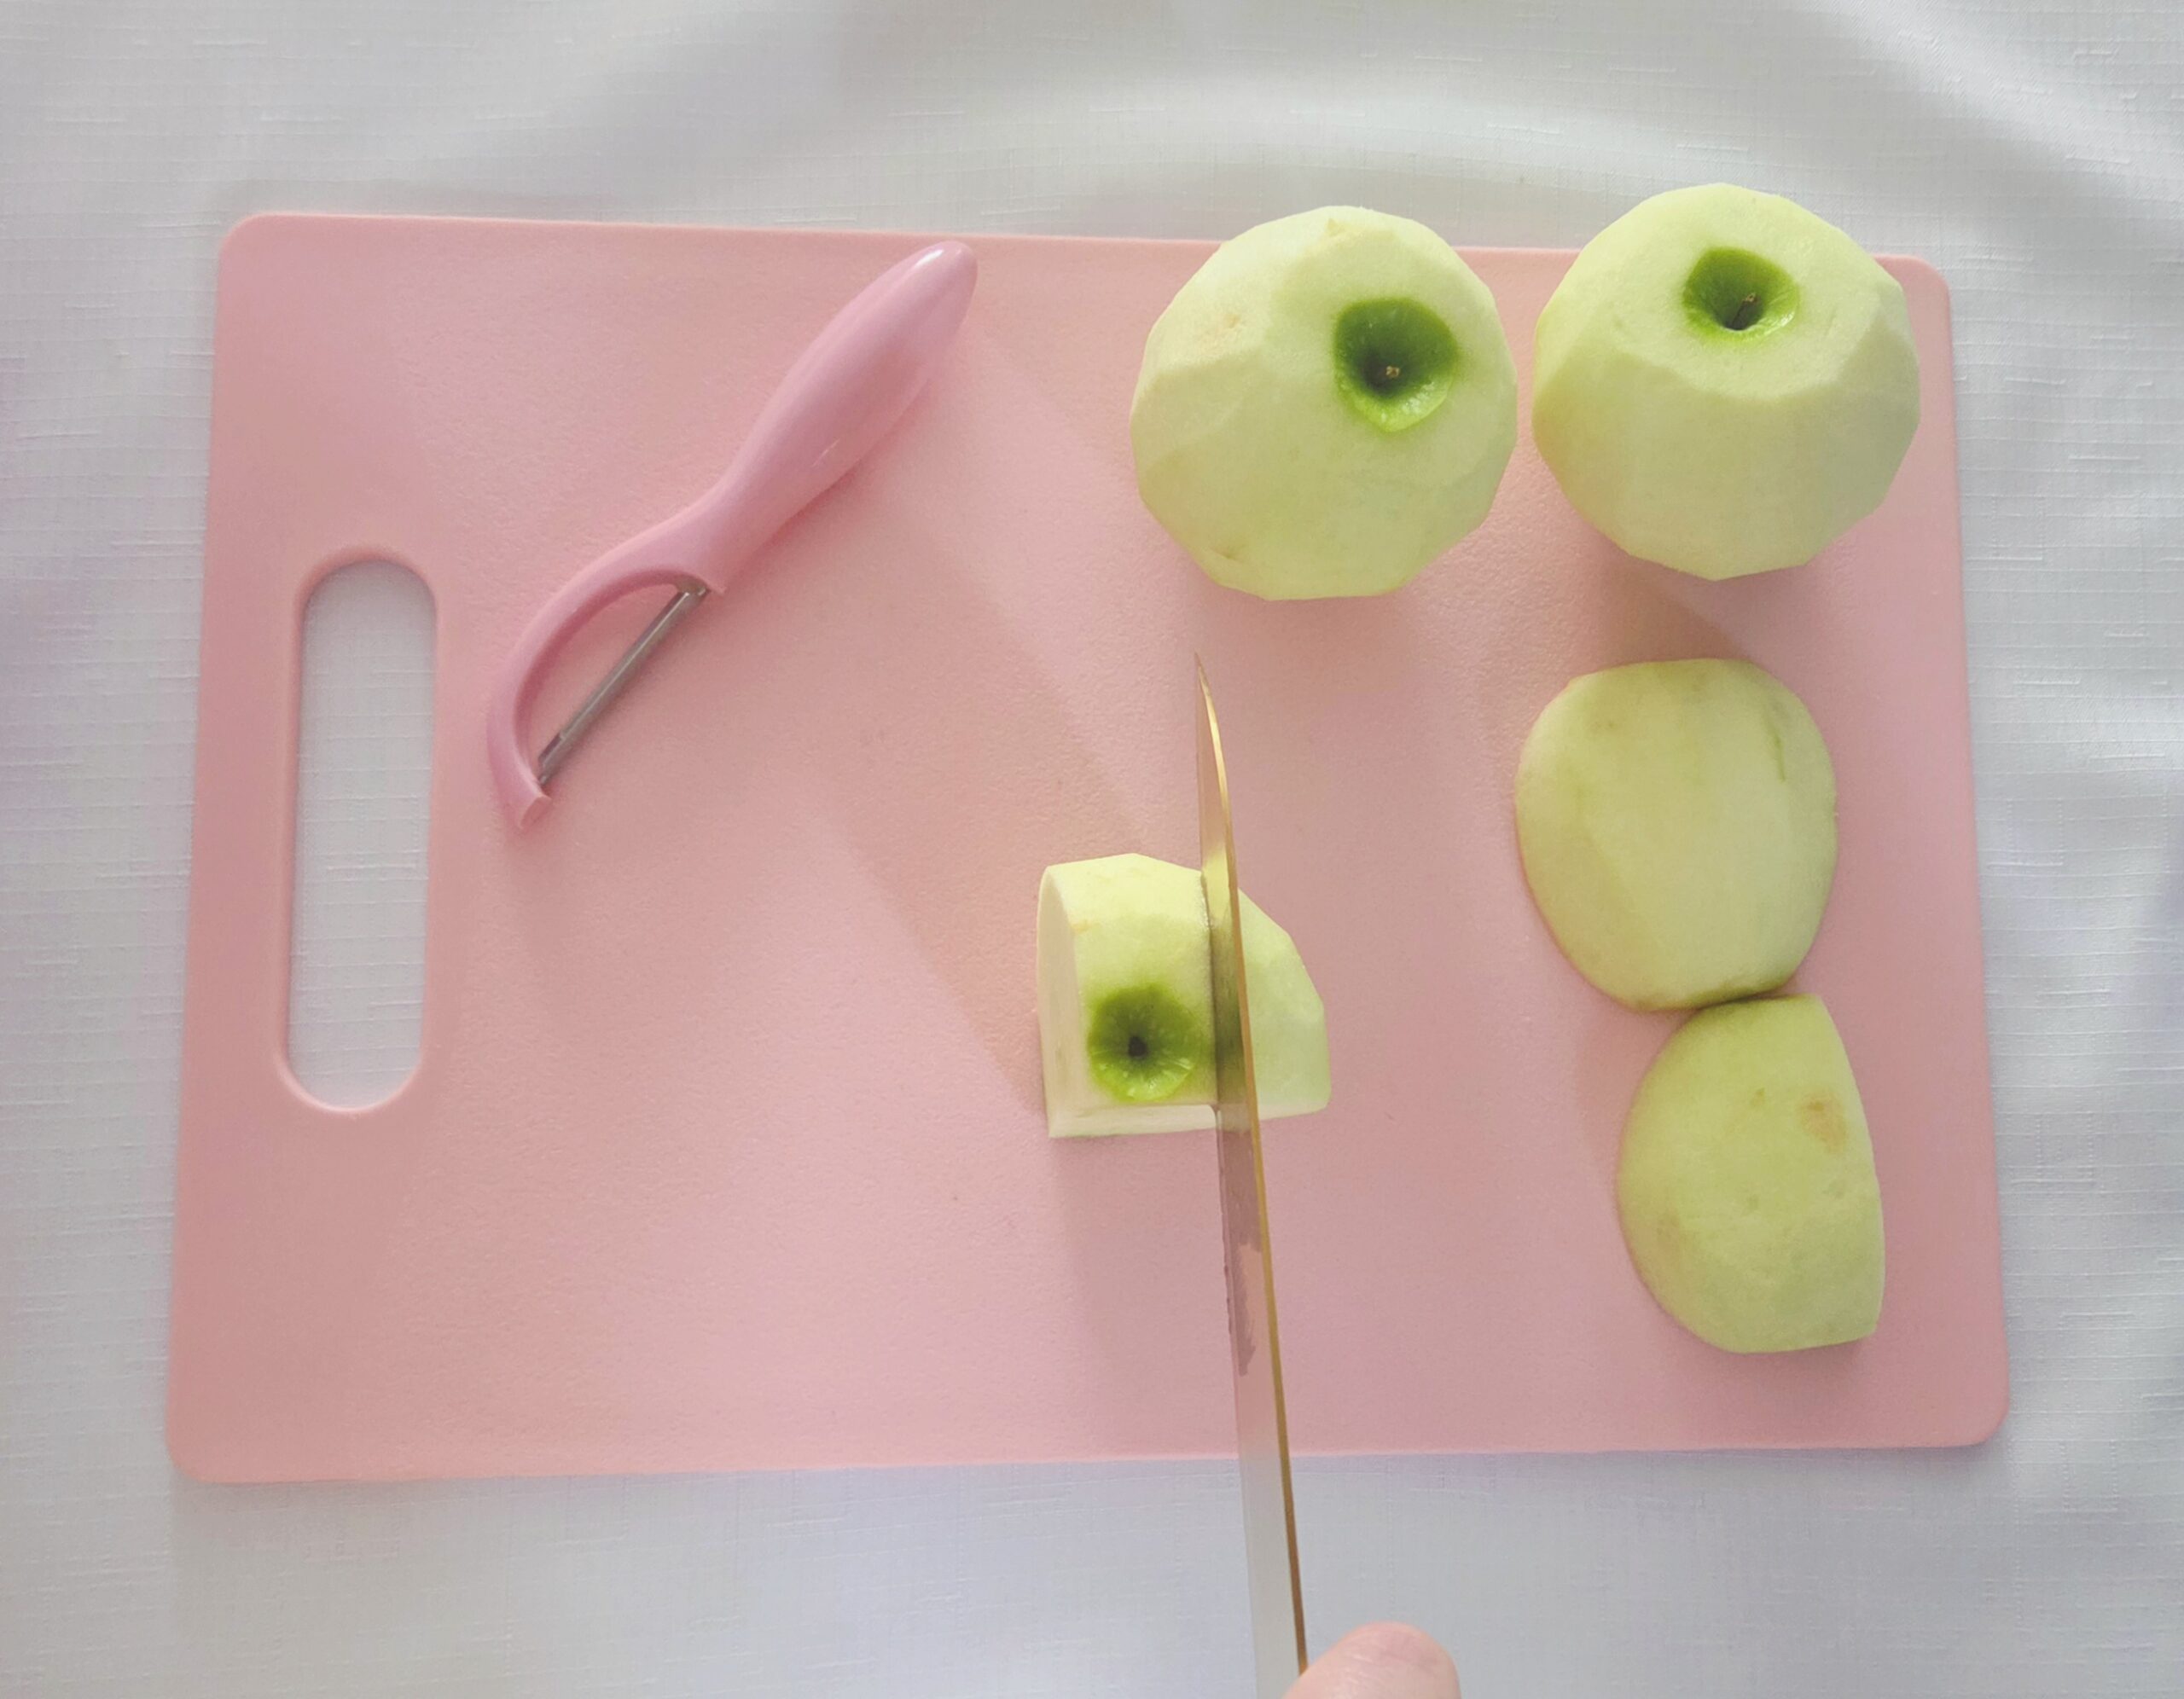

If they’re too thin, you’ll wind up with apple mush in the end so it’s better to have the slices on the thicker side. Place the slices into a large mixing bowl and set them aside.
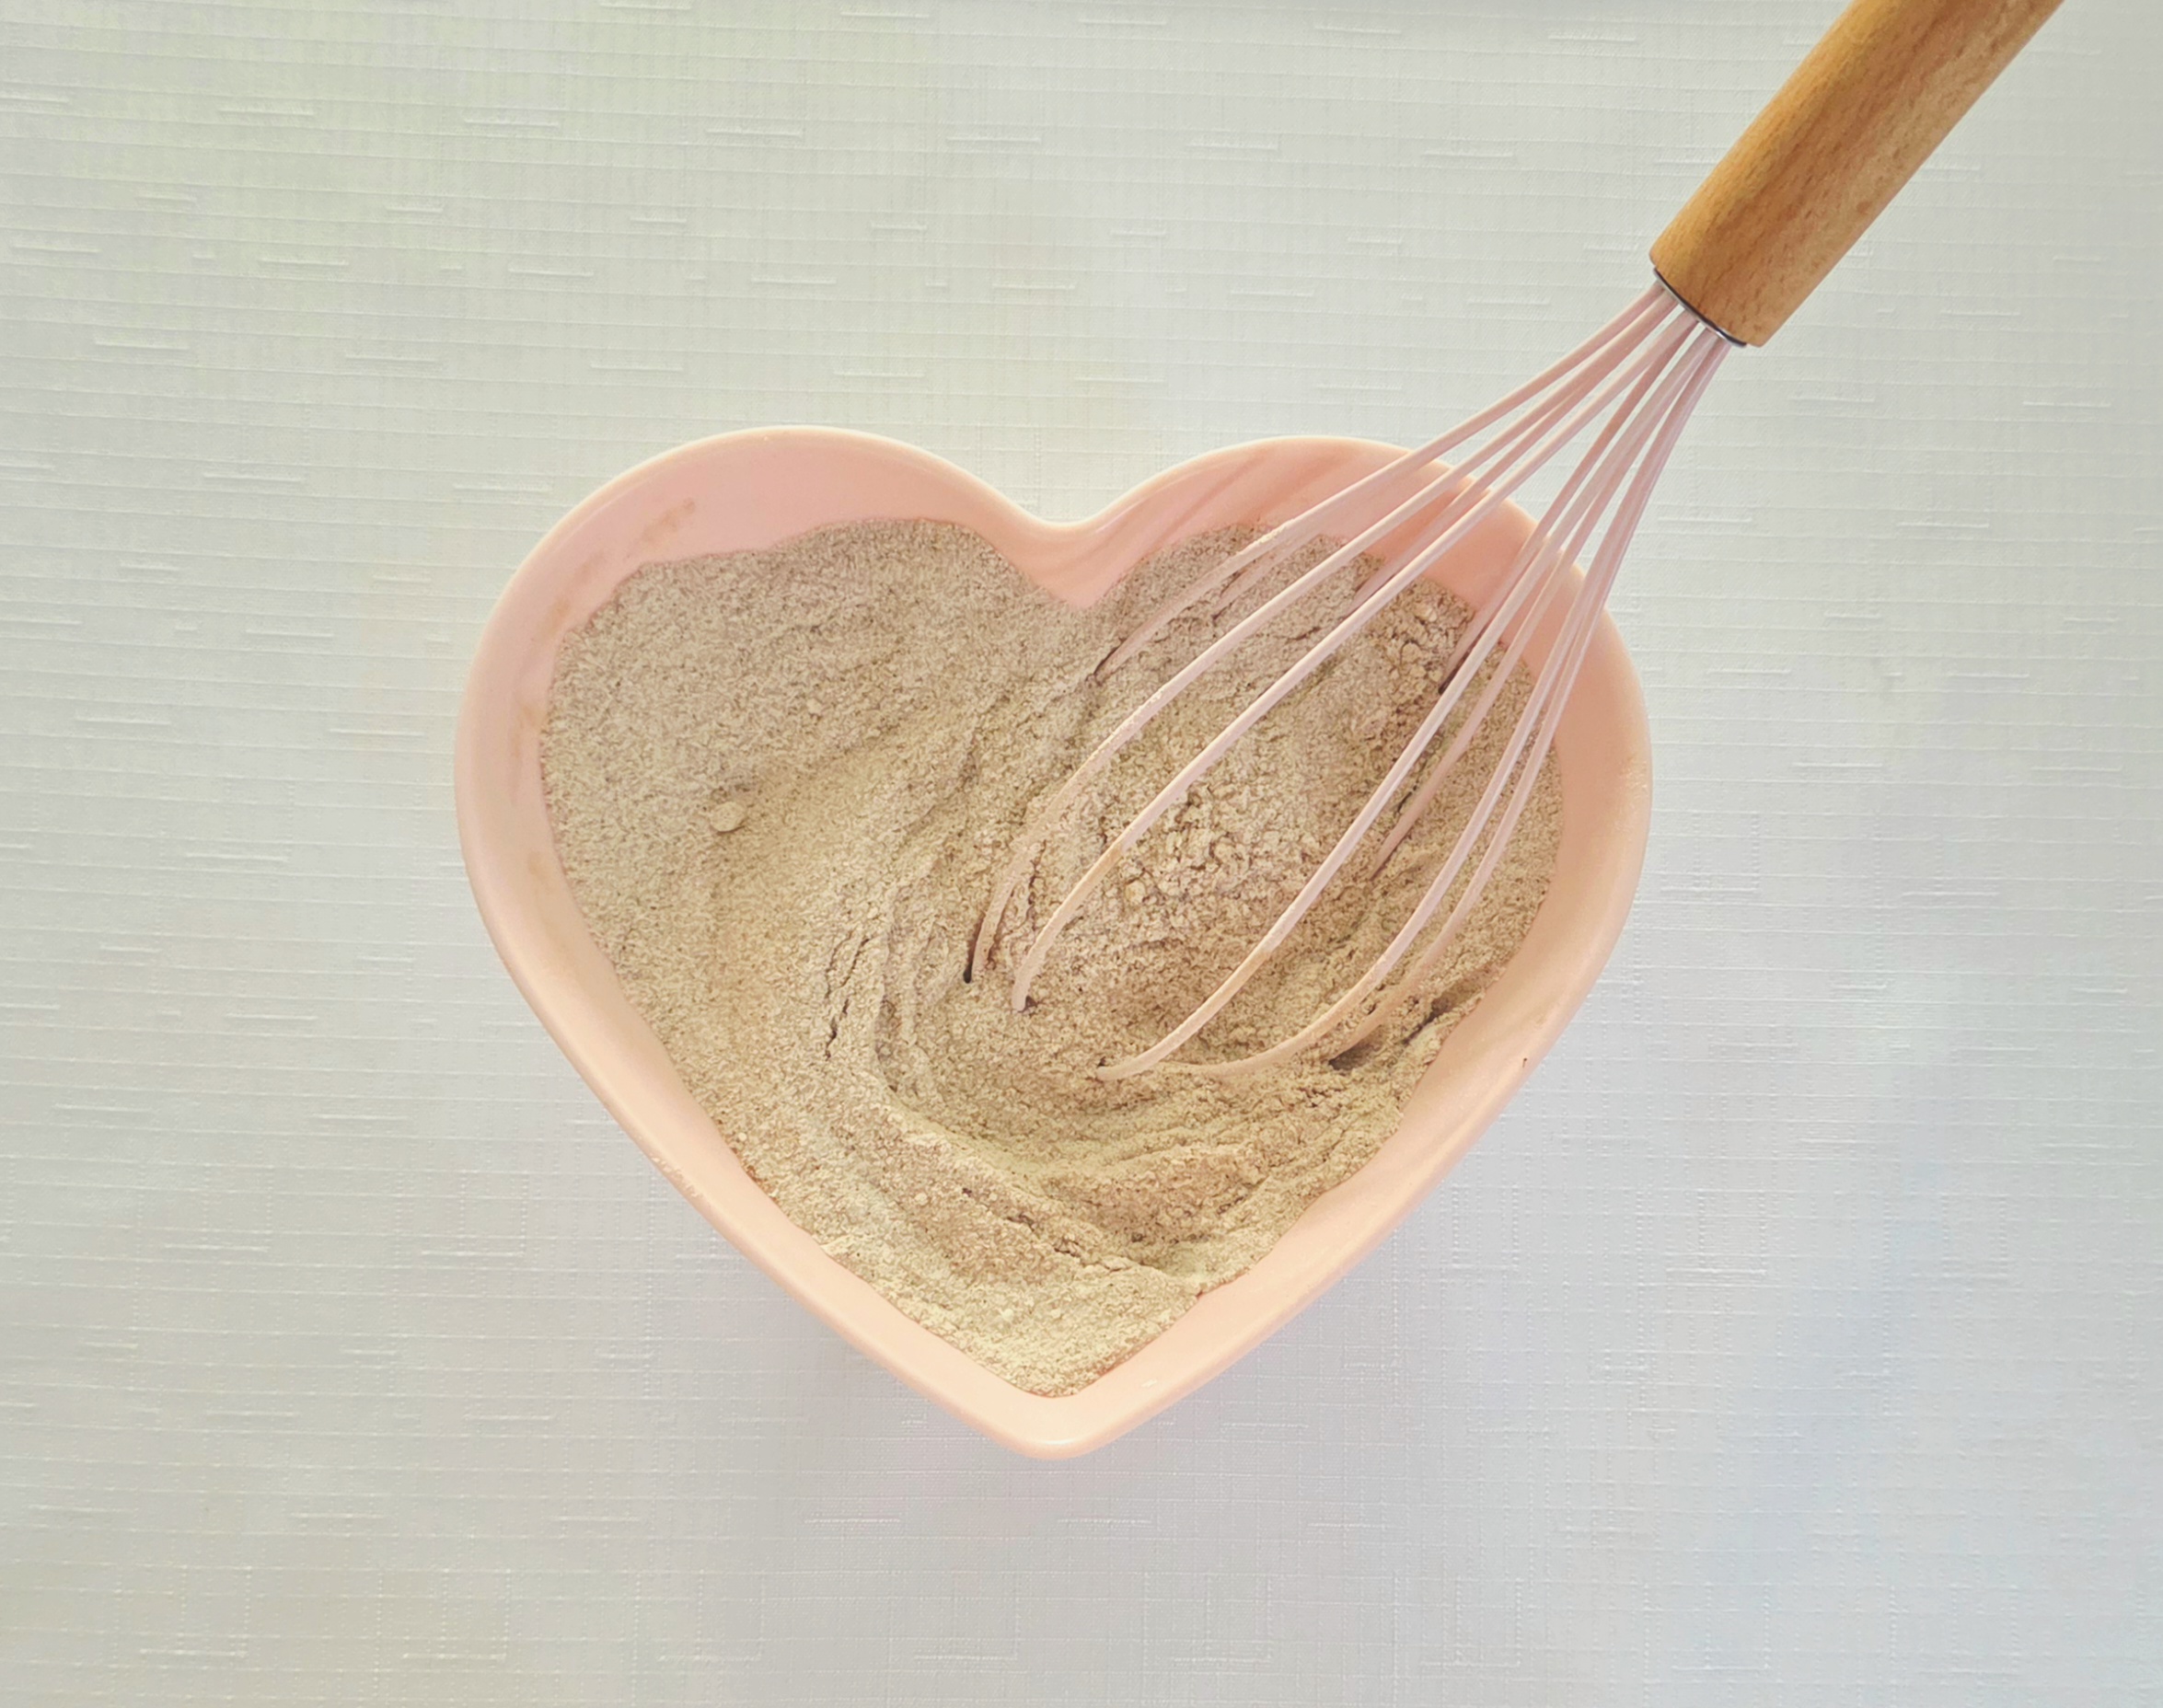
In a small bowl, whisk together the sugar, flour, cinnamon, allspice, nutmeg, clove, and salt. If you’d rather use a pre-made apple pie spice blend, feel free to do so, I just like having control of the different spice ratios. If you do make your own blend as I’ve suggested, it’s better to freshly grate your nutmeg if you can, as freshly grated has noticeably better flavor. Set the dry goods aside.
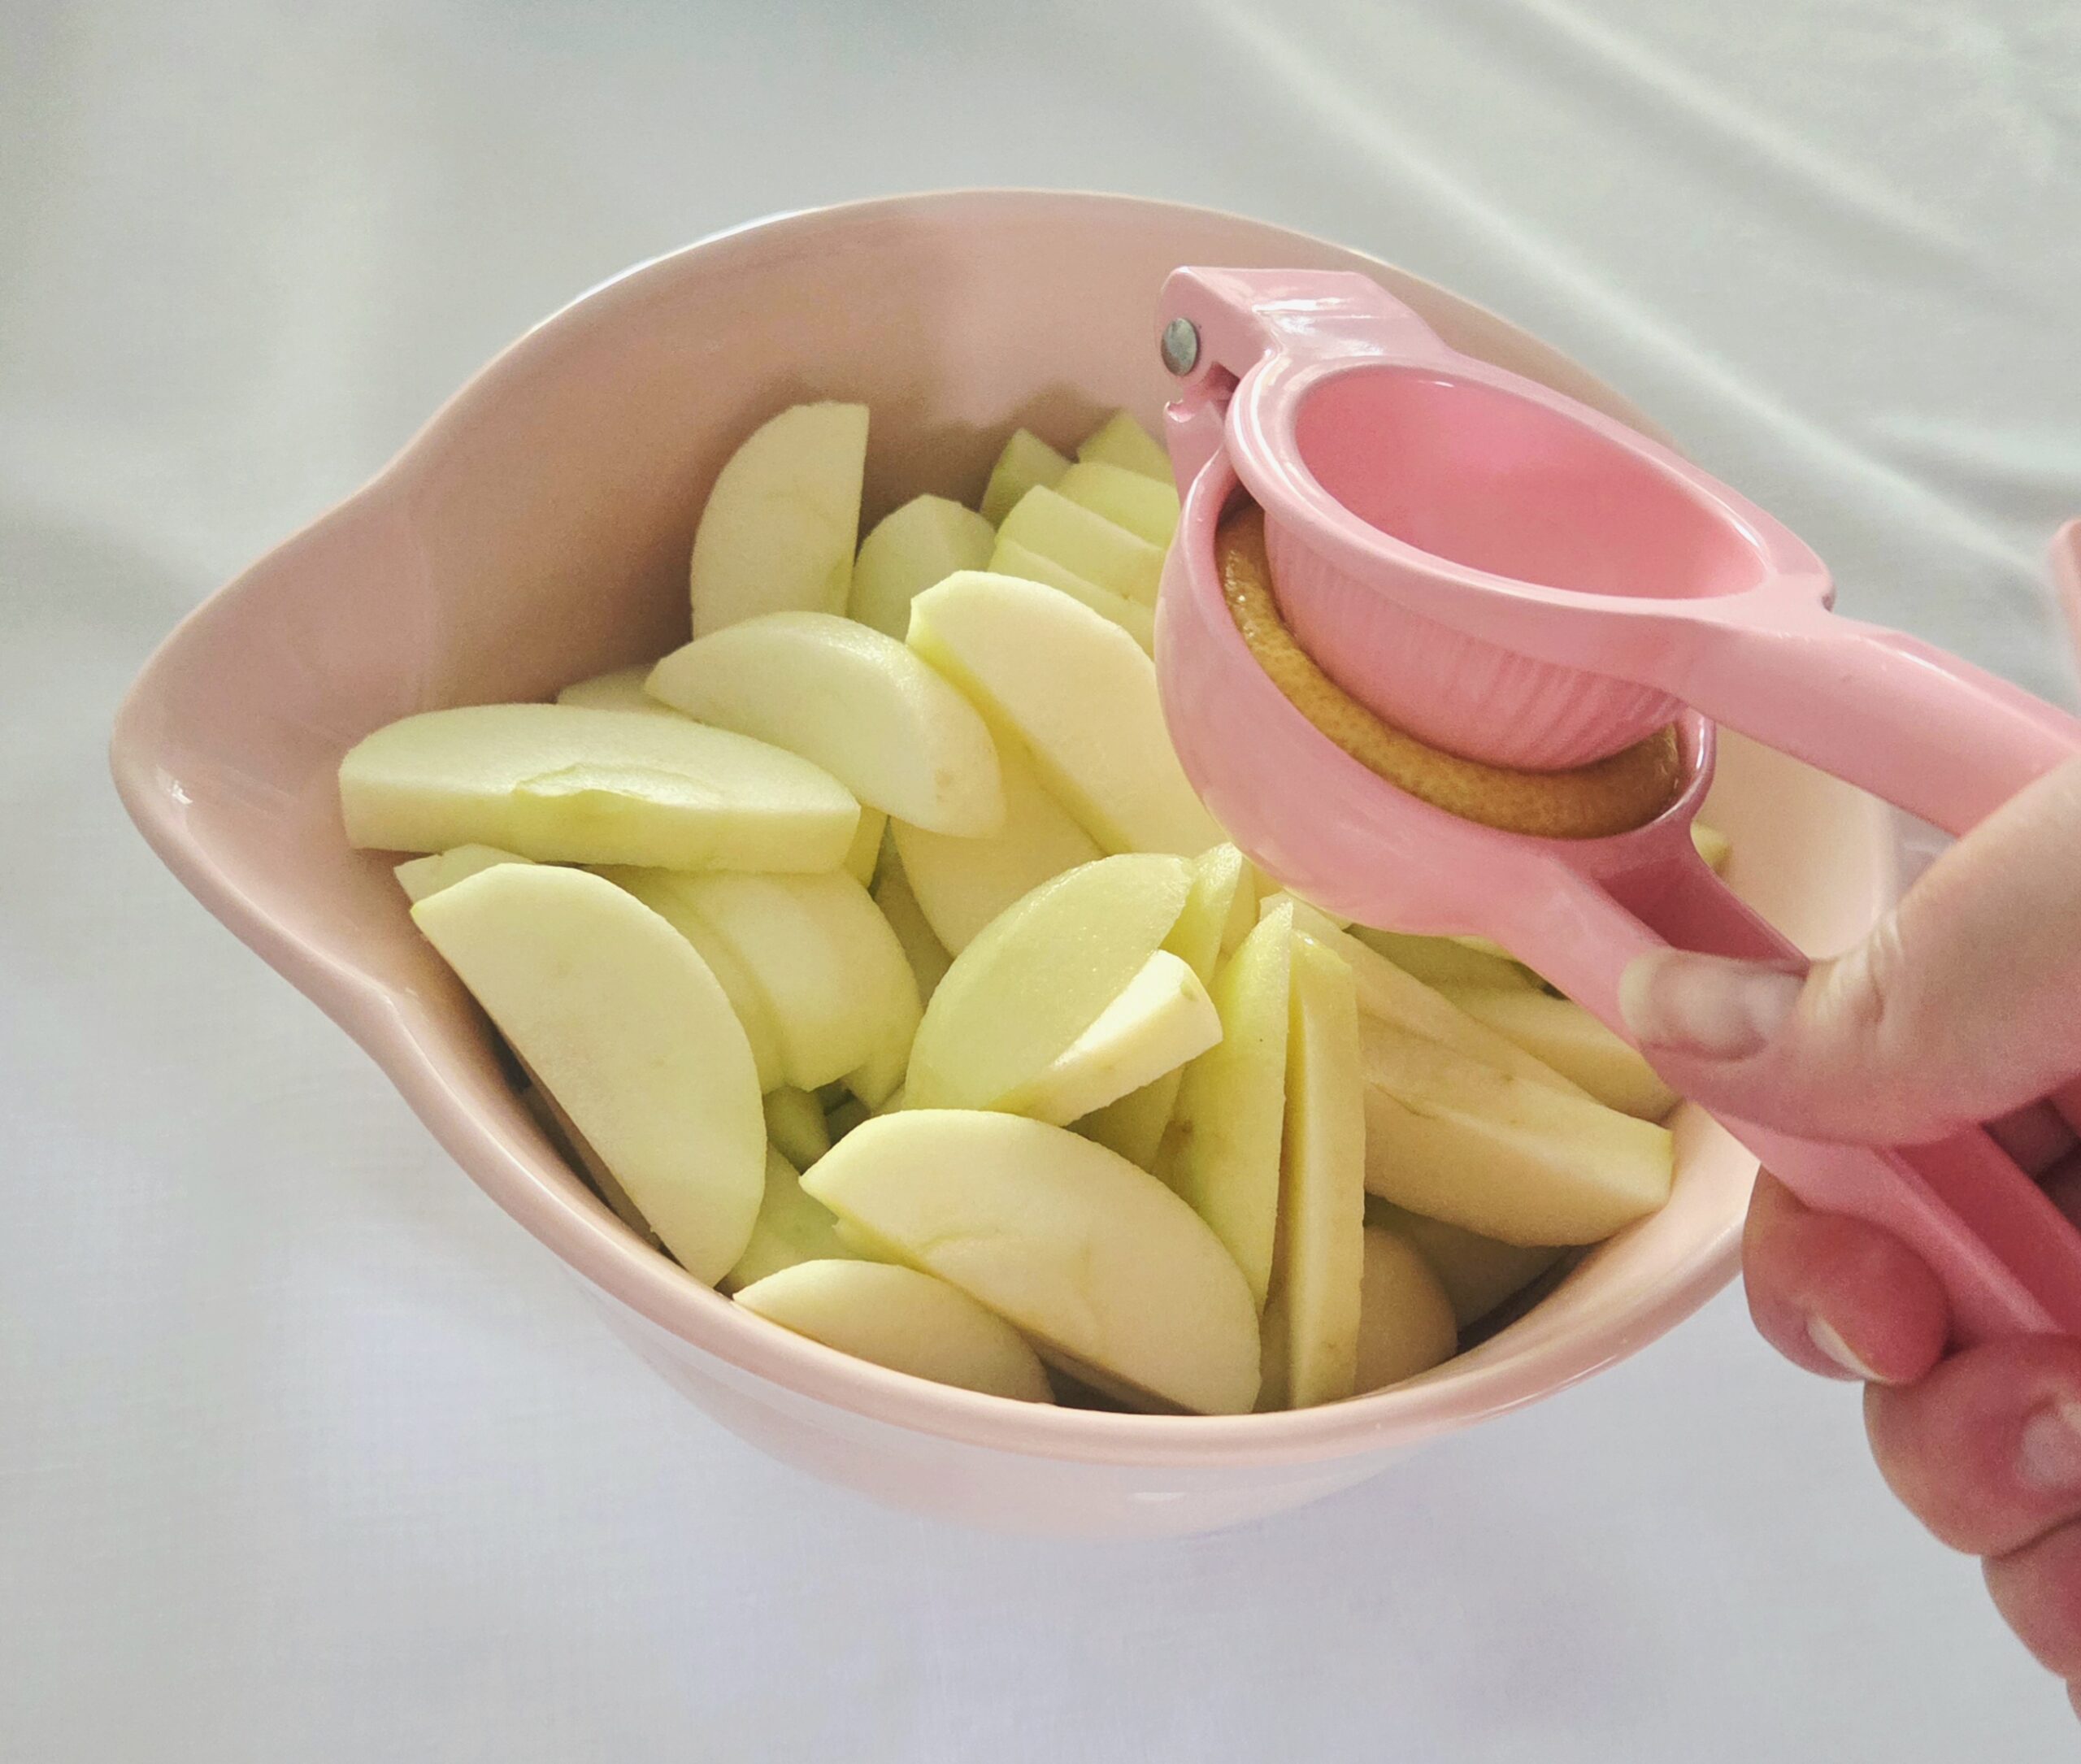
Grab the large bowl of apple slices and squeeze lemon juice over them. The lemon wont add any citrus flavor, it’s actually there to bring a sense of brightness to the filling!
Pour the spiced sugar mixture over the apples and stir to coat the fruit. Don’t worry if it’s difficult to reach all the way to the bottom of the bowl, the mixture will get evenly distributed during the next step, when you’re heating the filling.
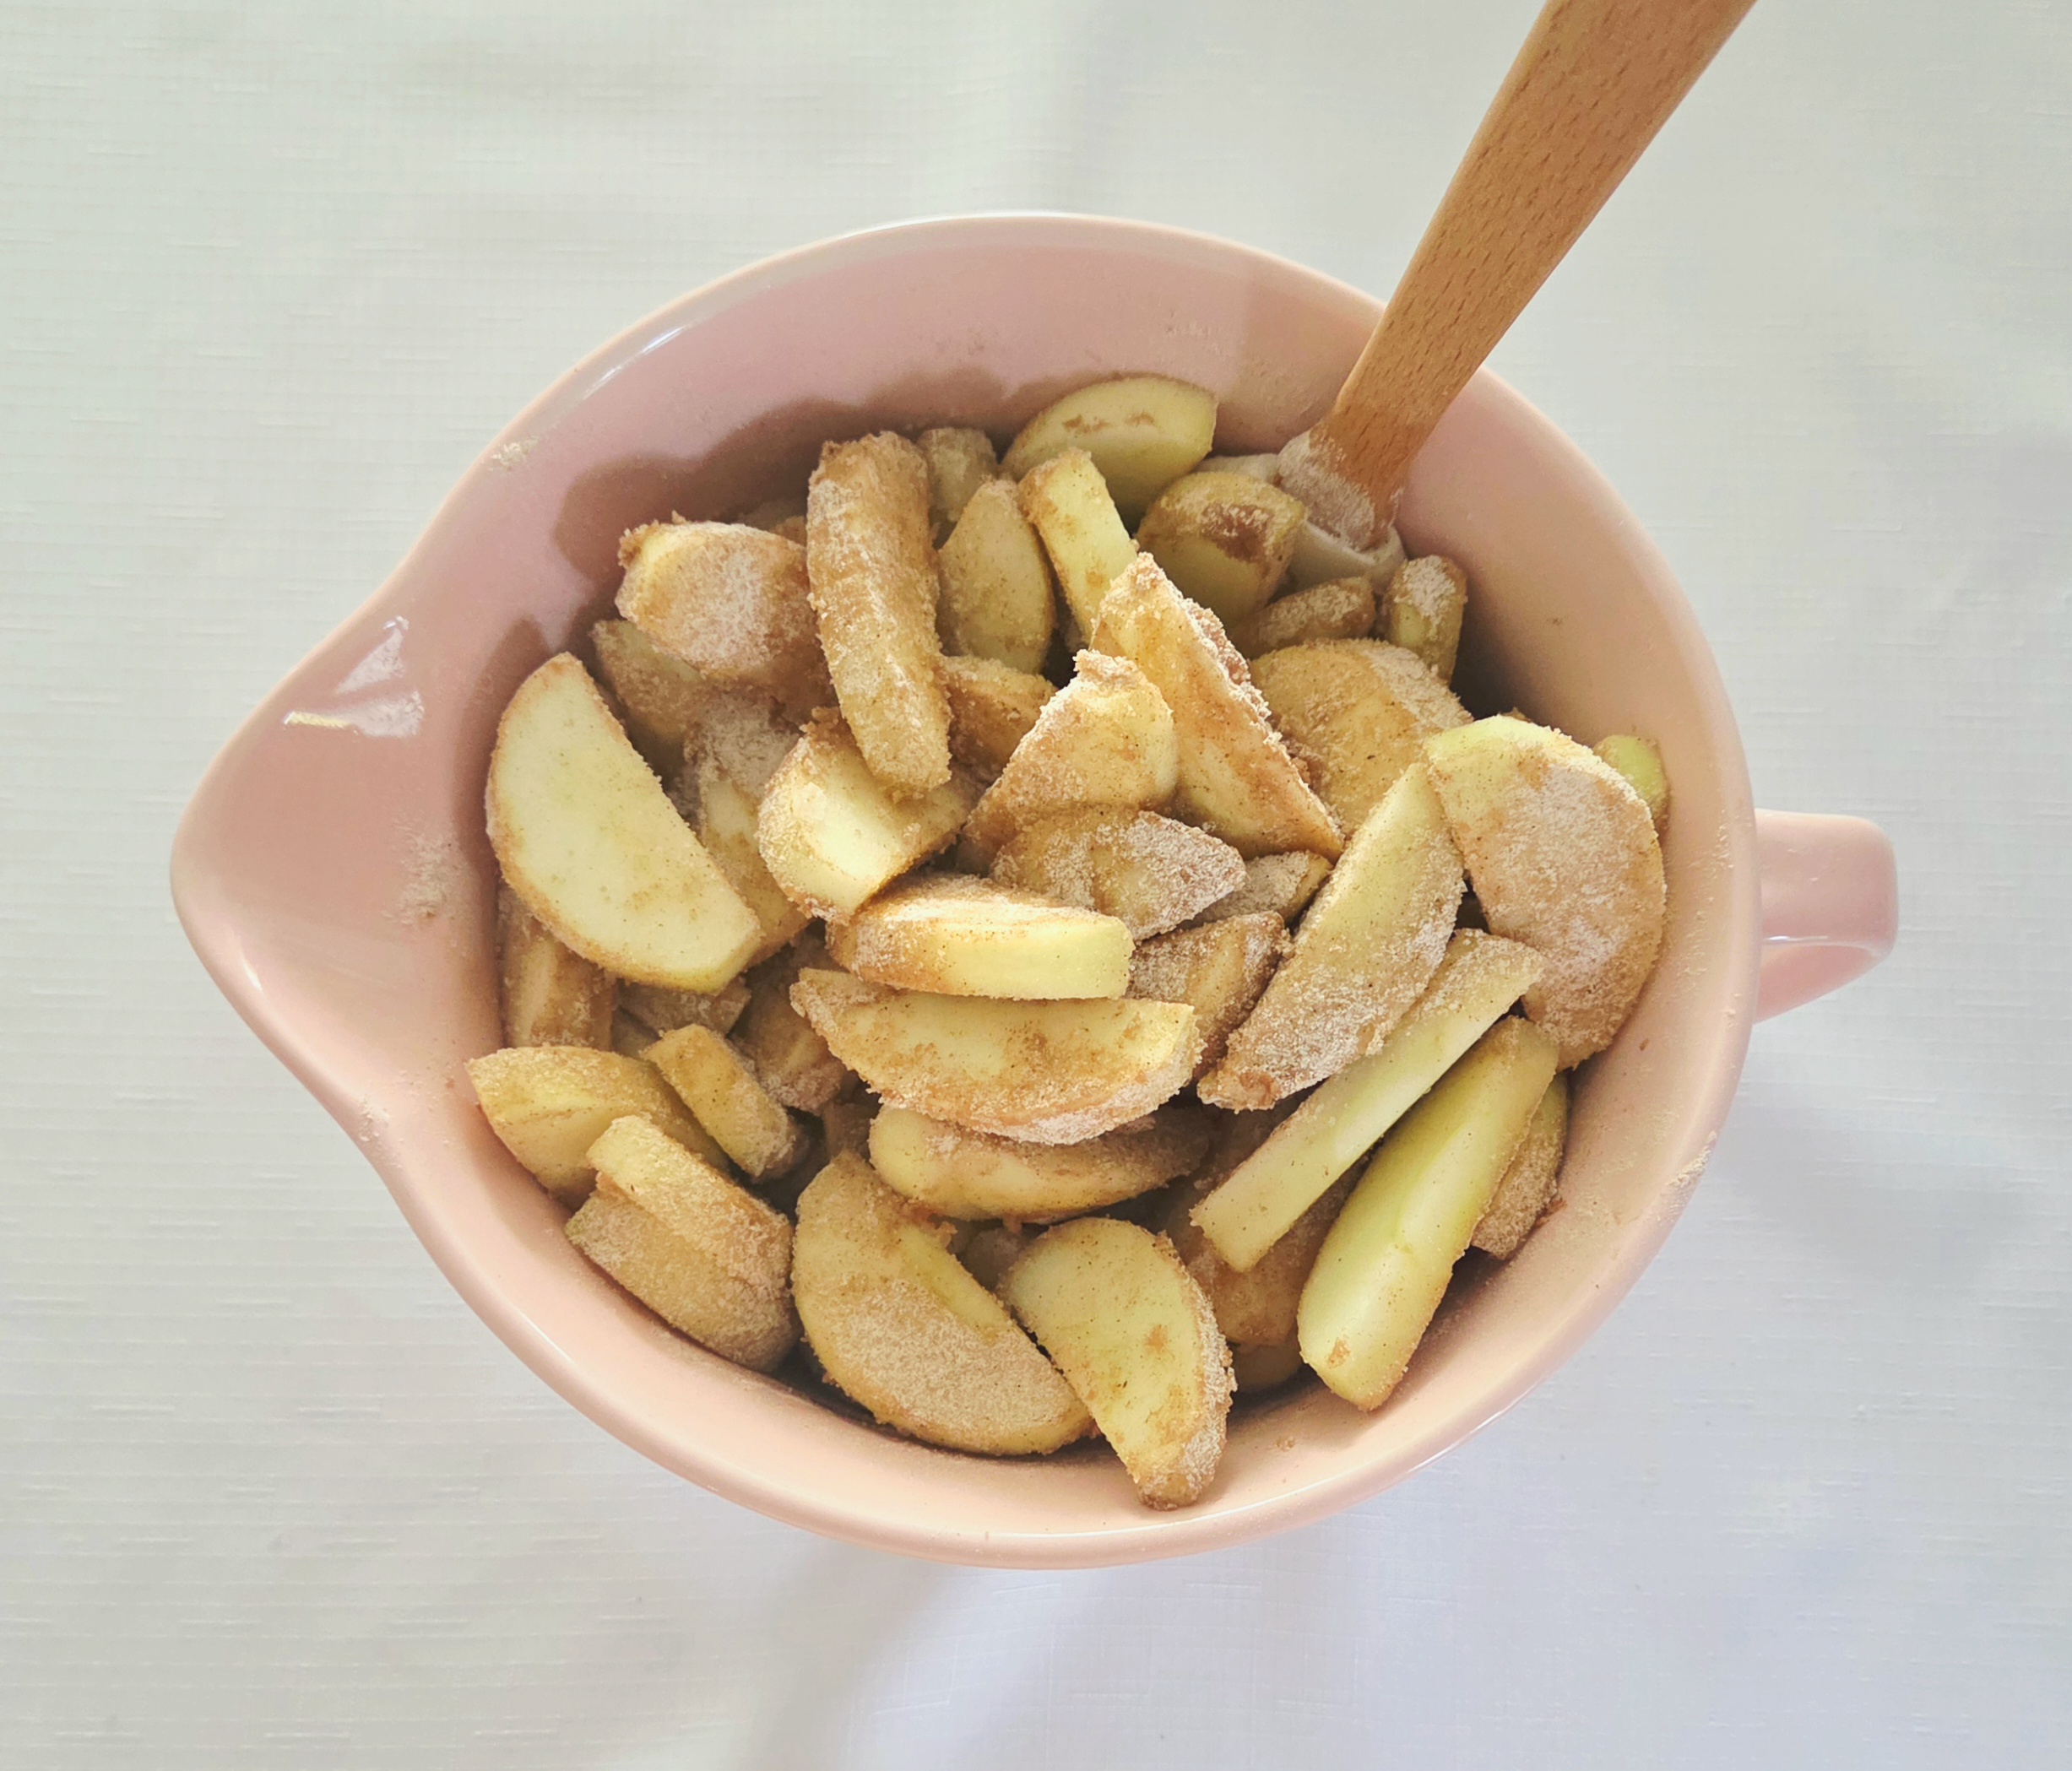
In a 4-quart saucepan, heat the butter. Once it’s melted, add the sliced apples. Take care to stir them occasionally, so the spiced sugar mixture evenly coats and nothing gets stuck to the bottom of the pan.
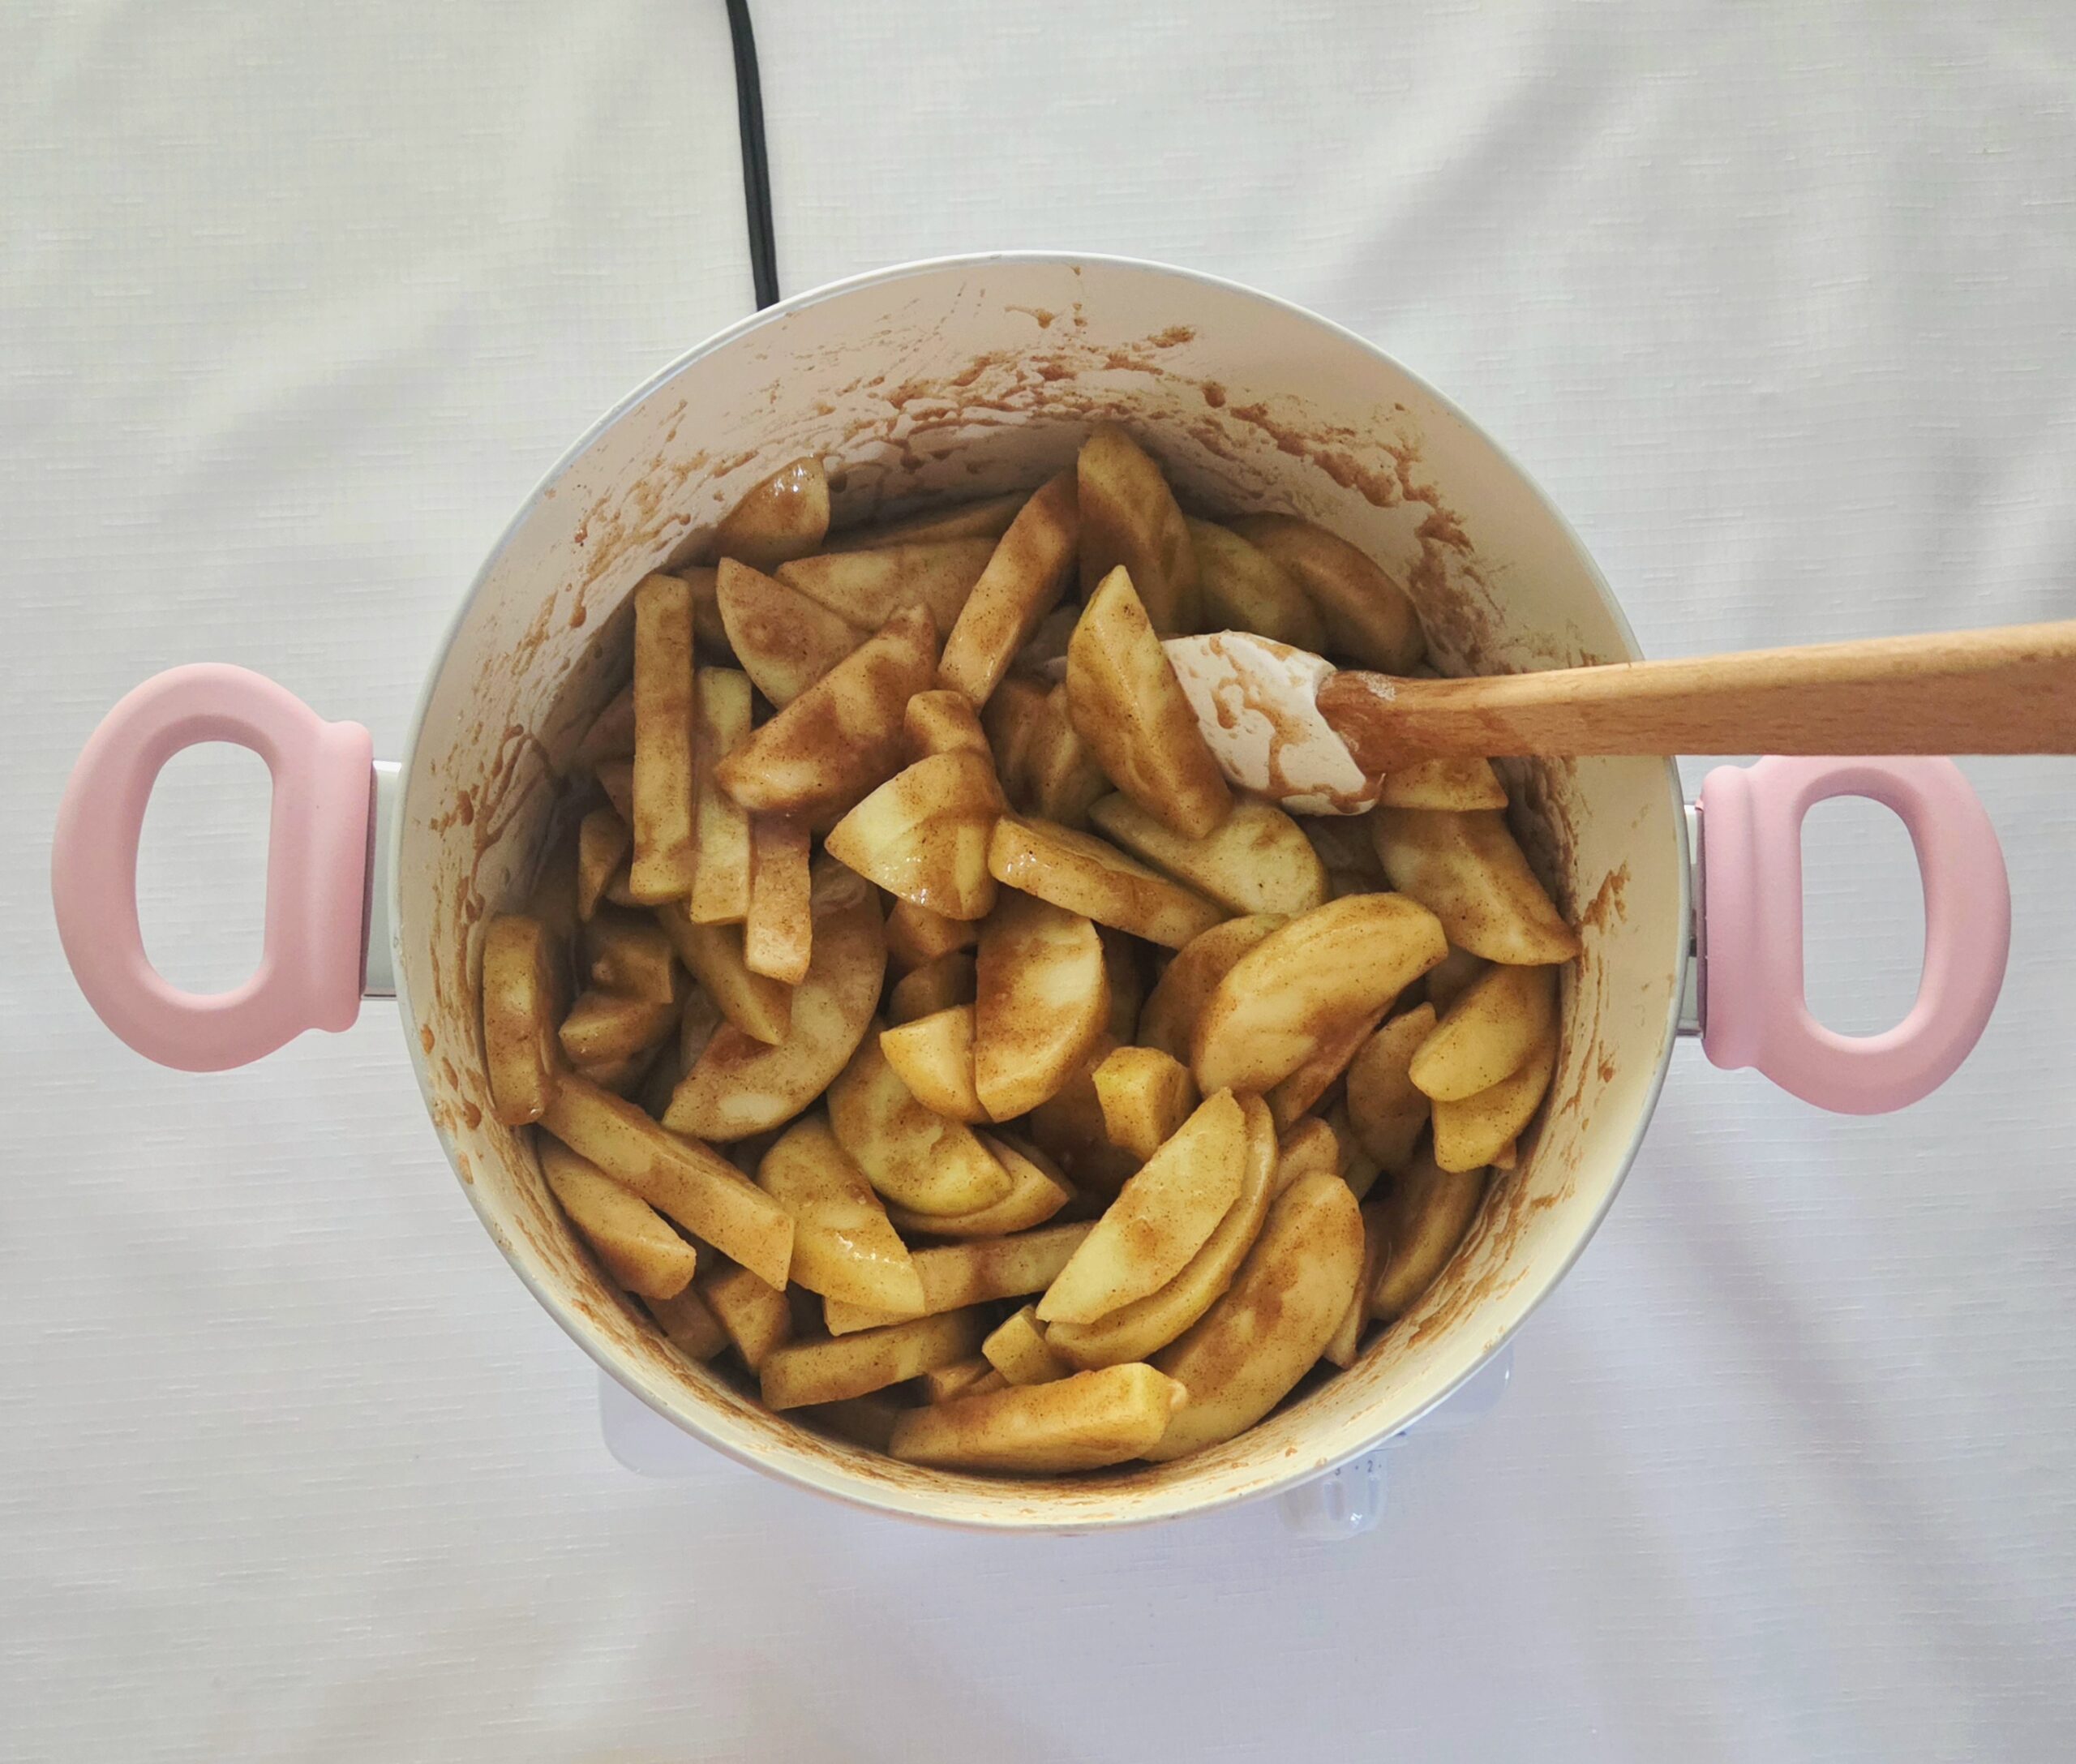
Allow the filling to cook, stirring occasionally, until some of the water has evaporated and the syrup has thickened. Do not skimp on the thickening, if you take the filling off the stove too early, it will make for a wet pie. No one wants a soggy mess of a pie. This should take approximately 5-10 minutes or so.
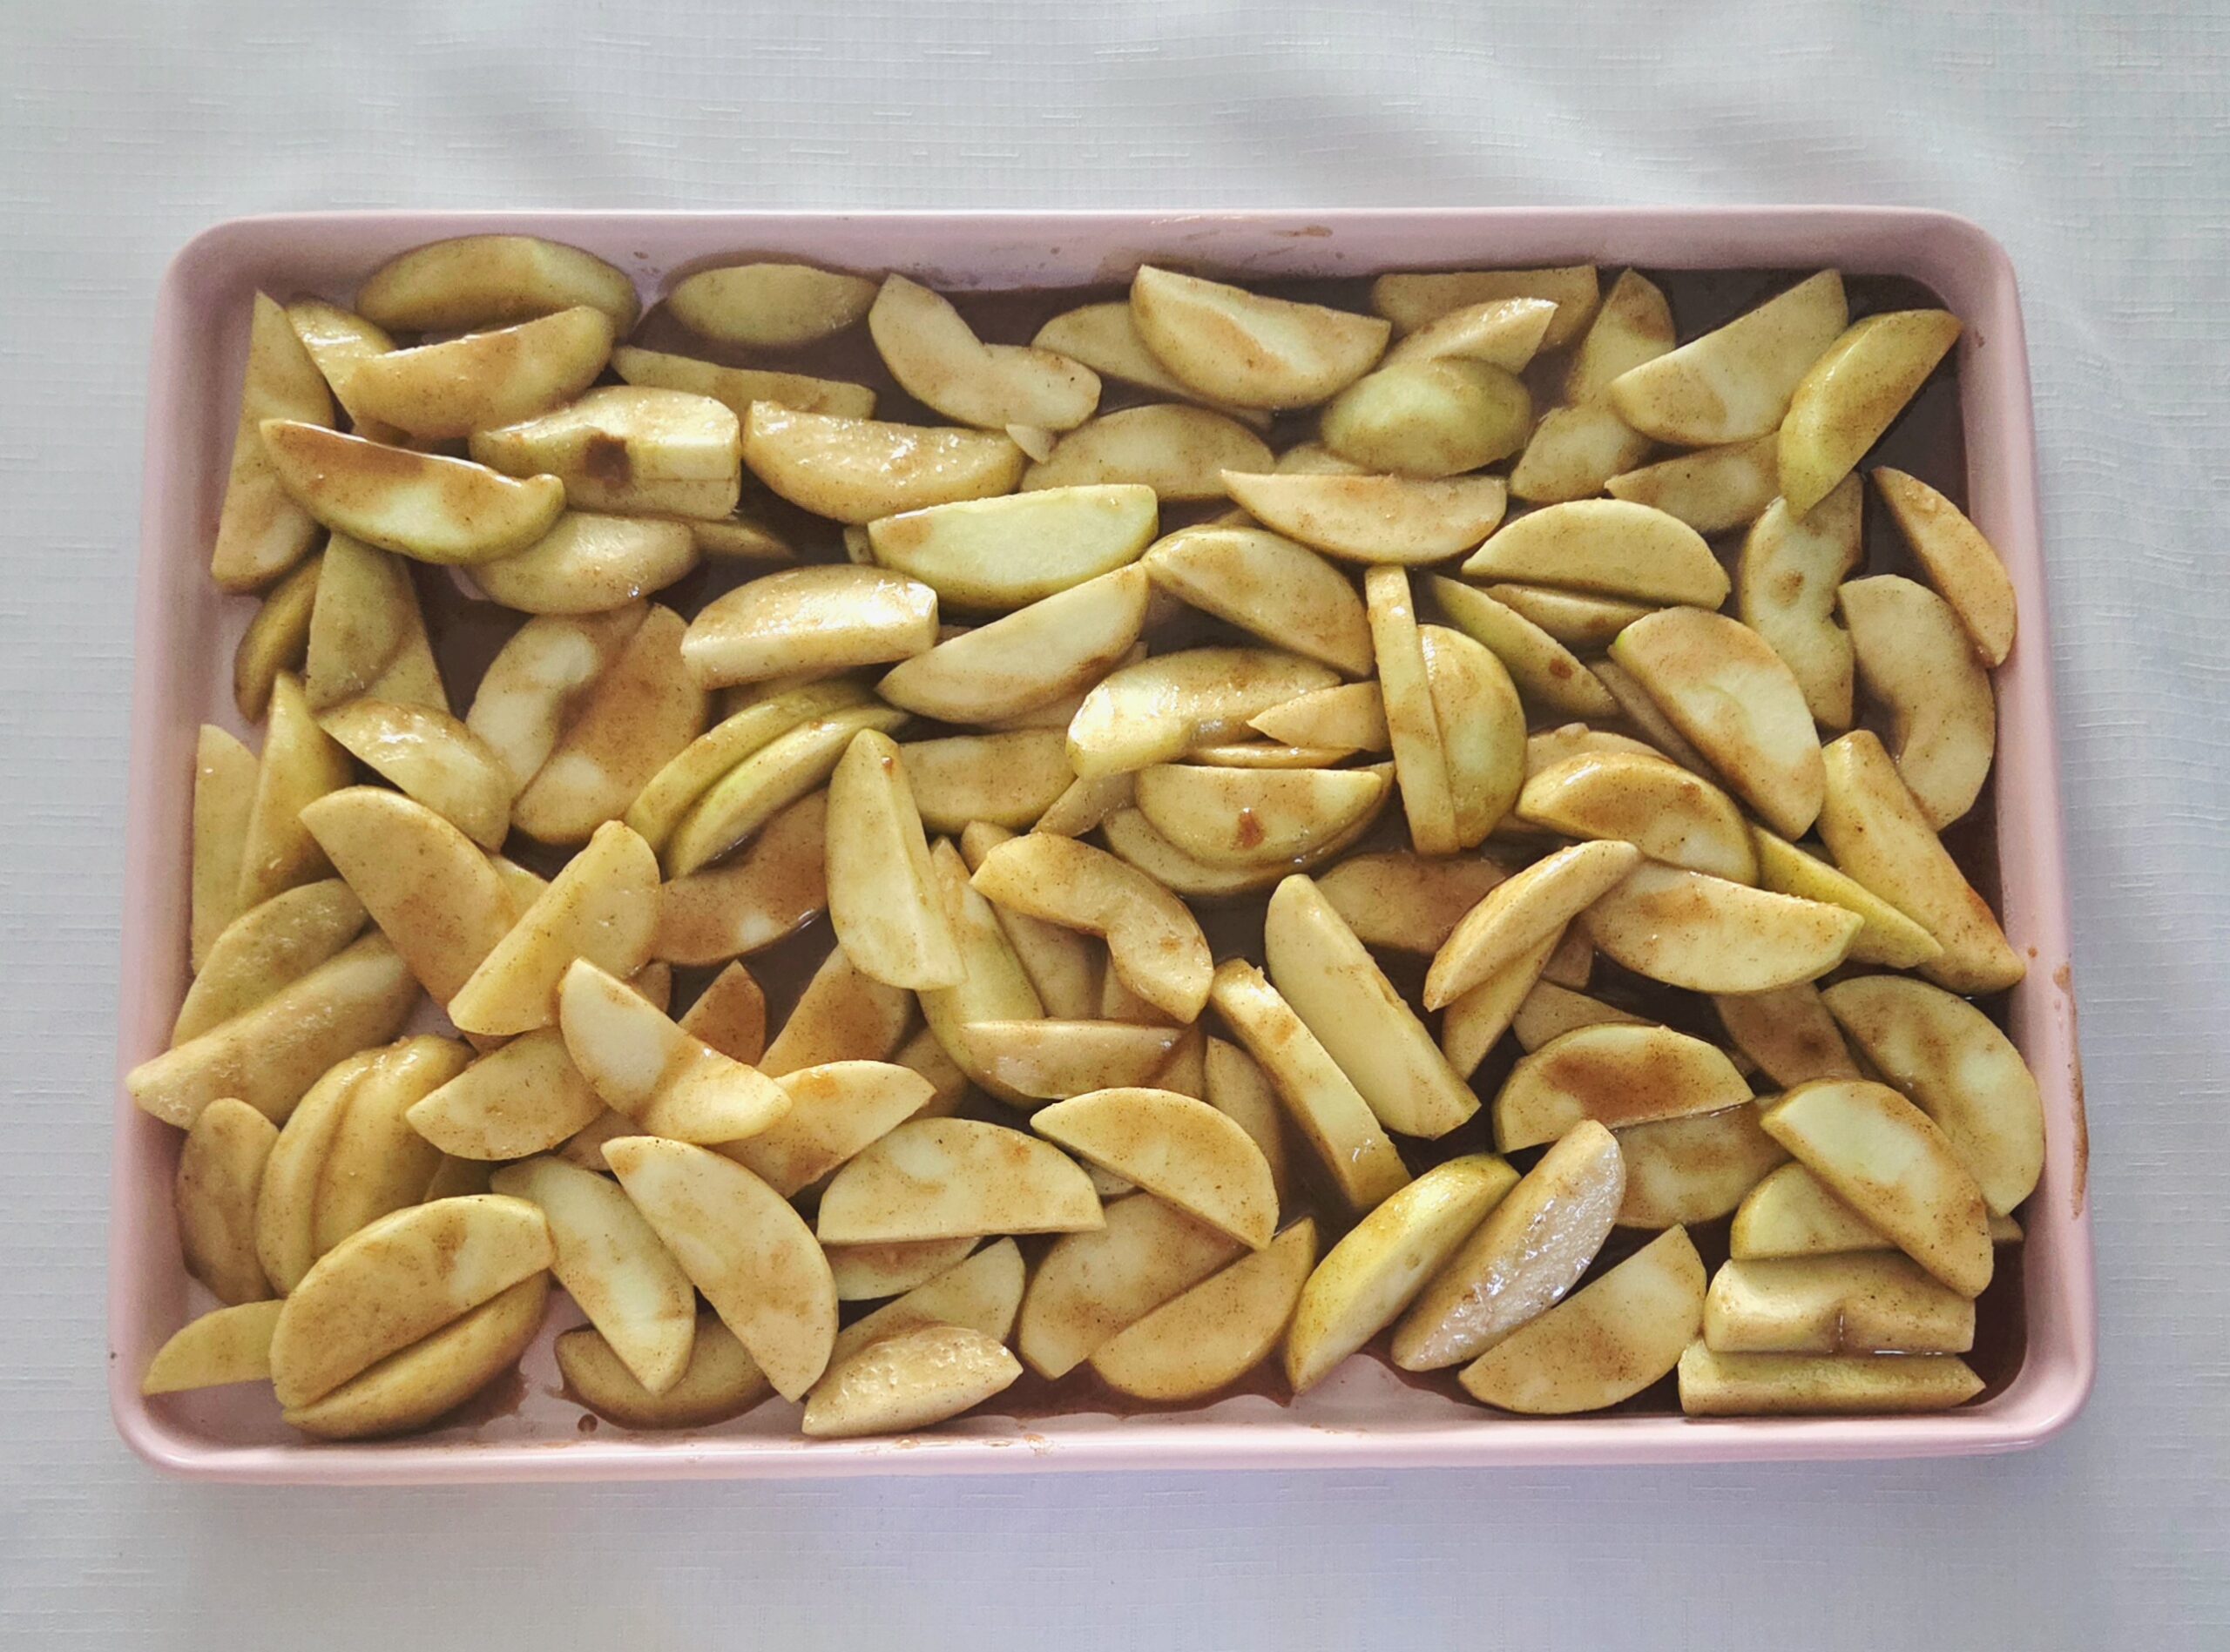
As the filling cooks, grab the baking sheet. Once the filling has finished thickening, immediately pour it out onto the sheet, spreading it out evenly. Allow it to sit, uncovered, to cool completely. The apples will cool down much, much faster on the pan than if they were left in the pot.
Time to assemble the pie and bake! Preheat the oven to 400F, on the convection setting if possible, and prepare your pie dish by coating it with a nonstick baking spray. Set the pan aside. Mix together the egg wash. In a small bowl, whisk together the egg, splash of water, and a pinch of salt. Set it aside.
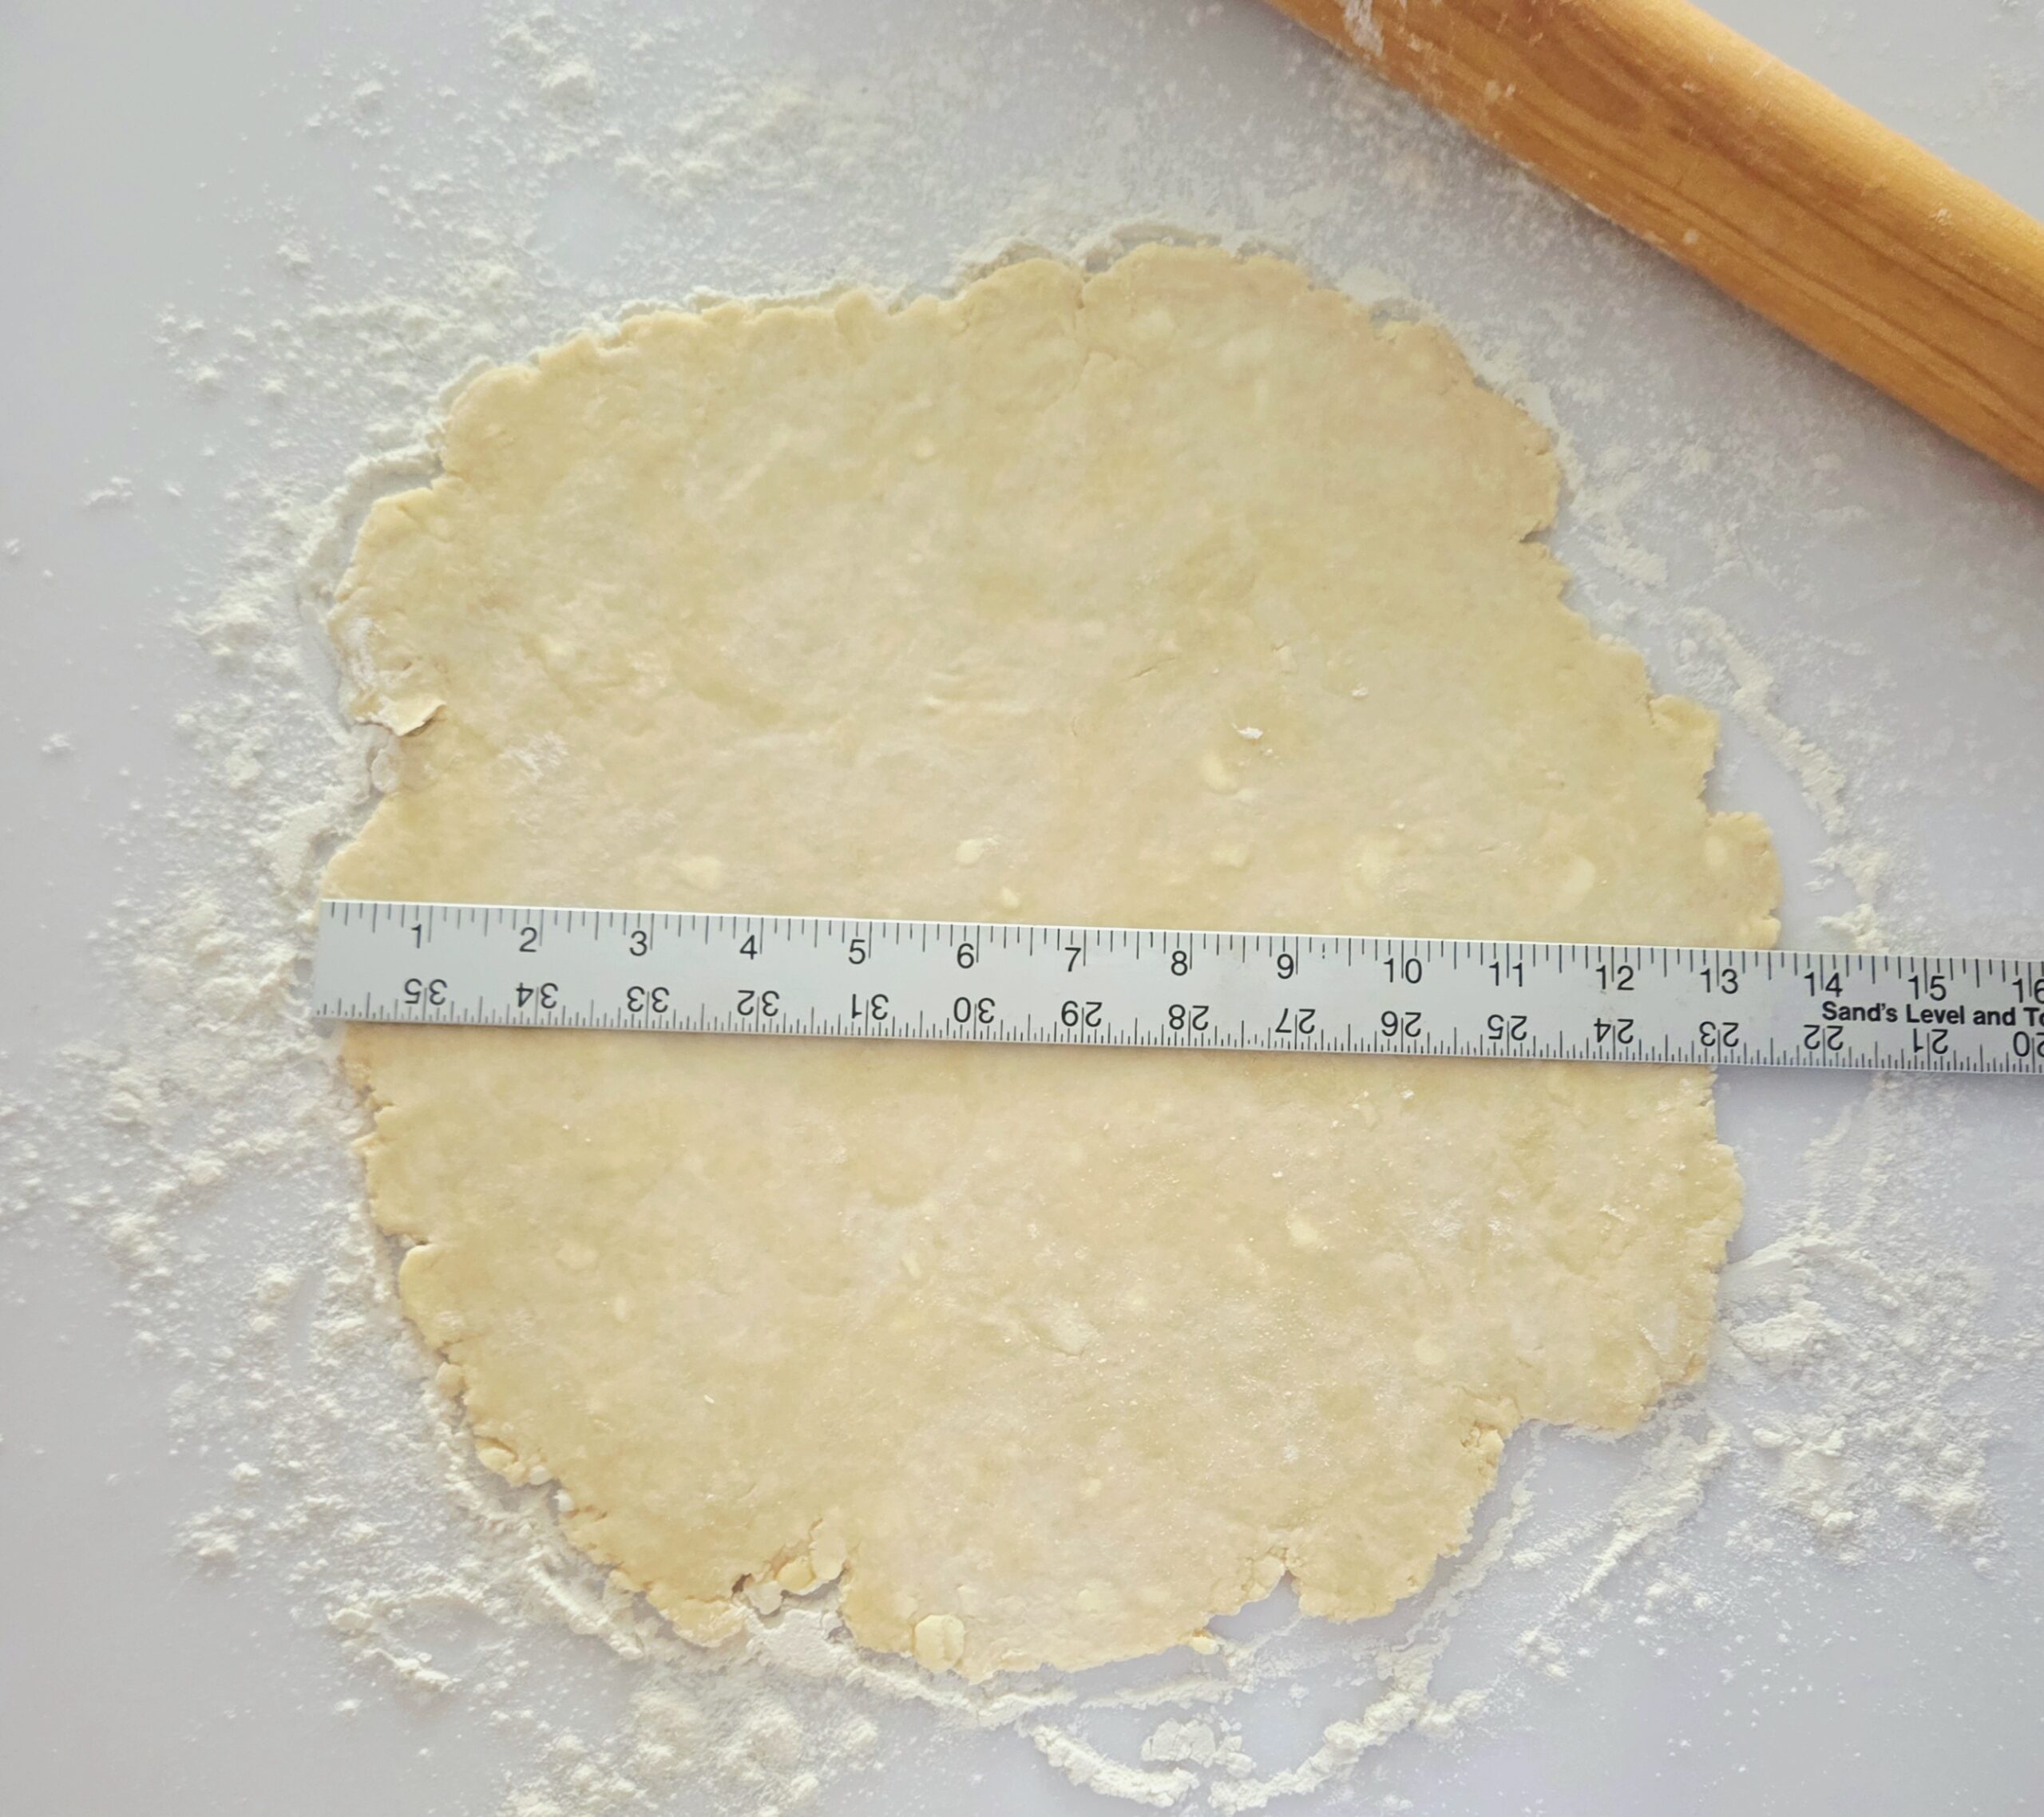
If you’ve made your own dough, take one of the portions out of the fridge. Lightly flour a clean counter, place the disc in the center, and lightly flour the top of the dough. Using a rolling pin, roll out the dough into a circle with a 13 inch diameter. If at any point the dough starts to stick to either the counter or the rolling pin, gently peel it away and add a little more flour. If it’s seriously stuck, use a bench scraper to assist you.
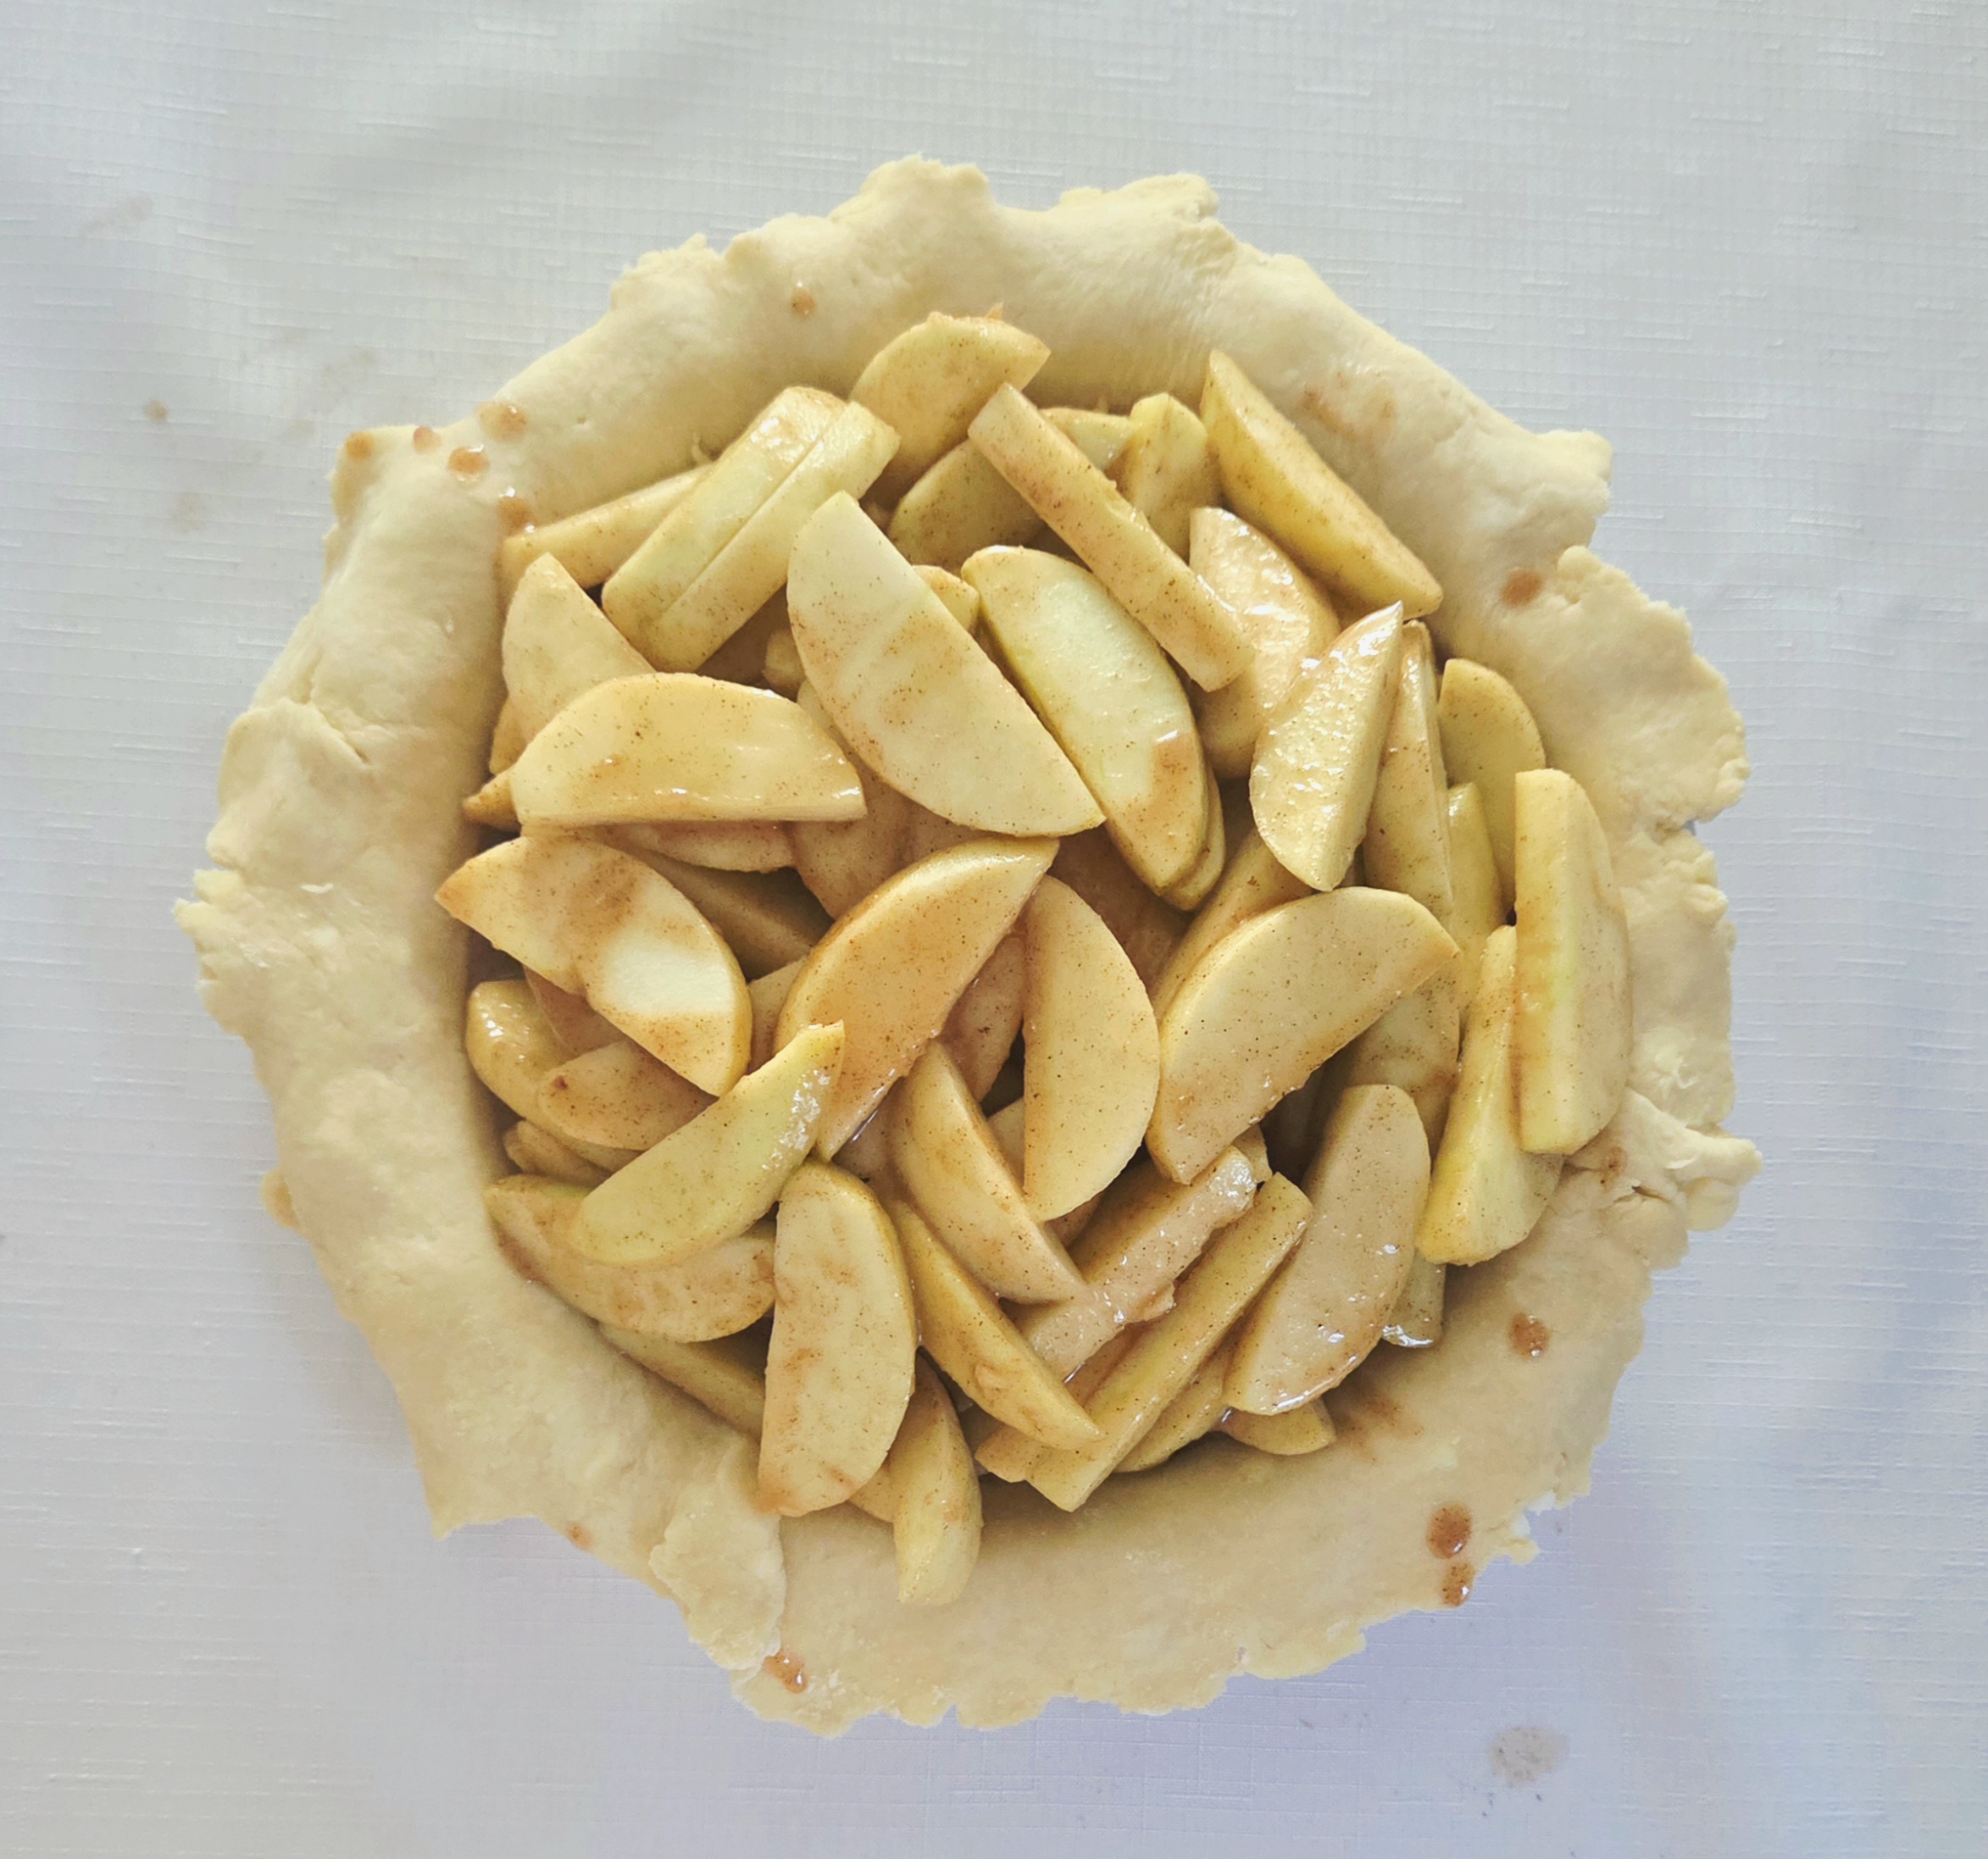
Fold the circle of dough in half, and transfer it over to the pie dish. Gently unfold it, and fit the dough snug into the pie dish, ensuring it’s touching the bottom, all sides, and where the bottom and sides meet. Allow any excess dough to hang over the sides of the dish.
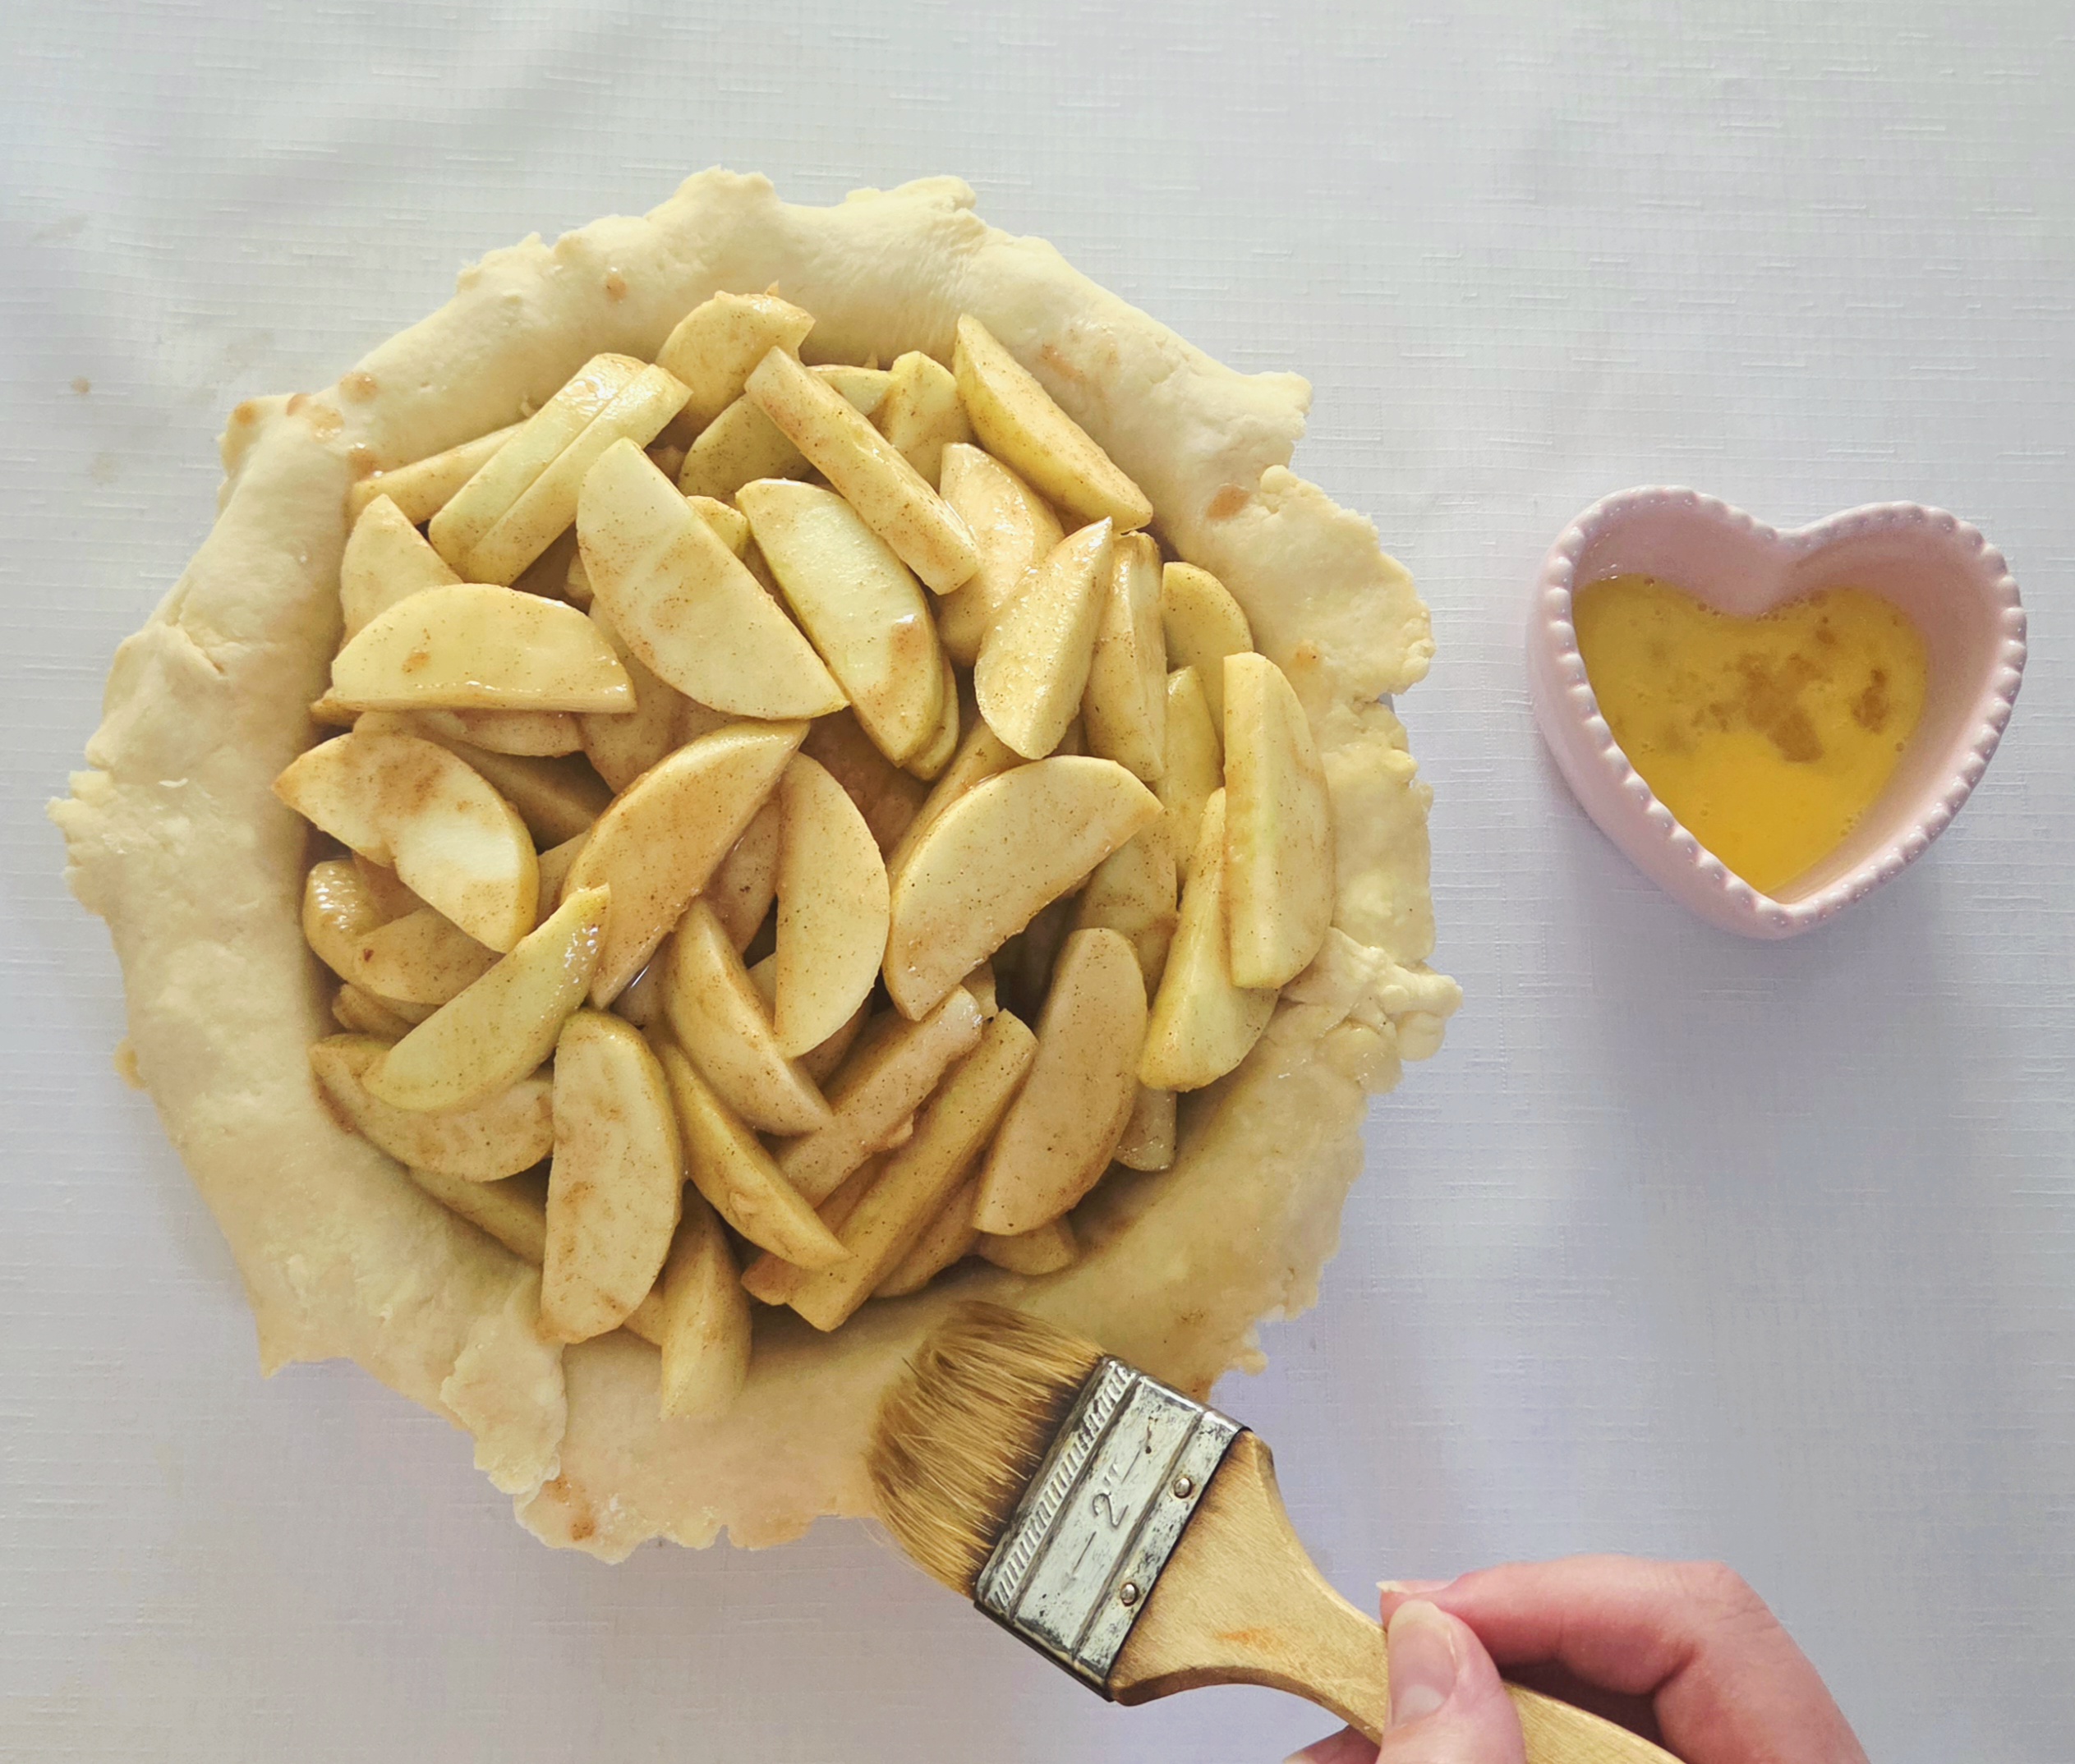
Pour the cooled off filling into the dough lined pie dish, and using a pastry brush or your finger, lightly brush the outer rim of dough with the egg wash. Place the pie dish in the fridge while you work on the top crust.
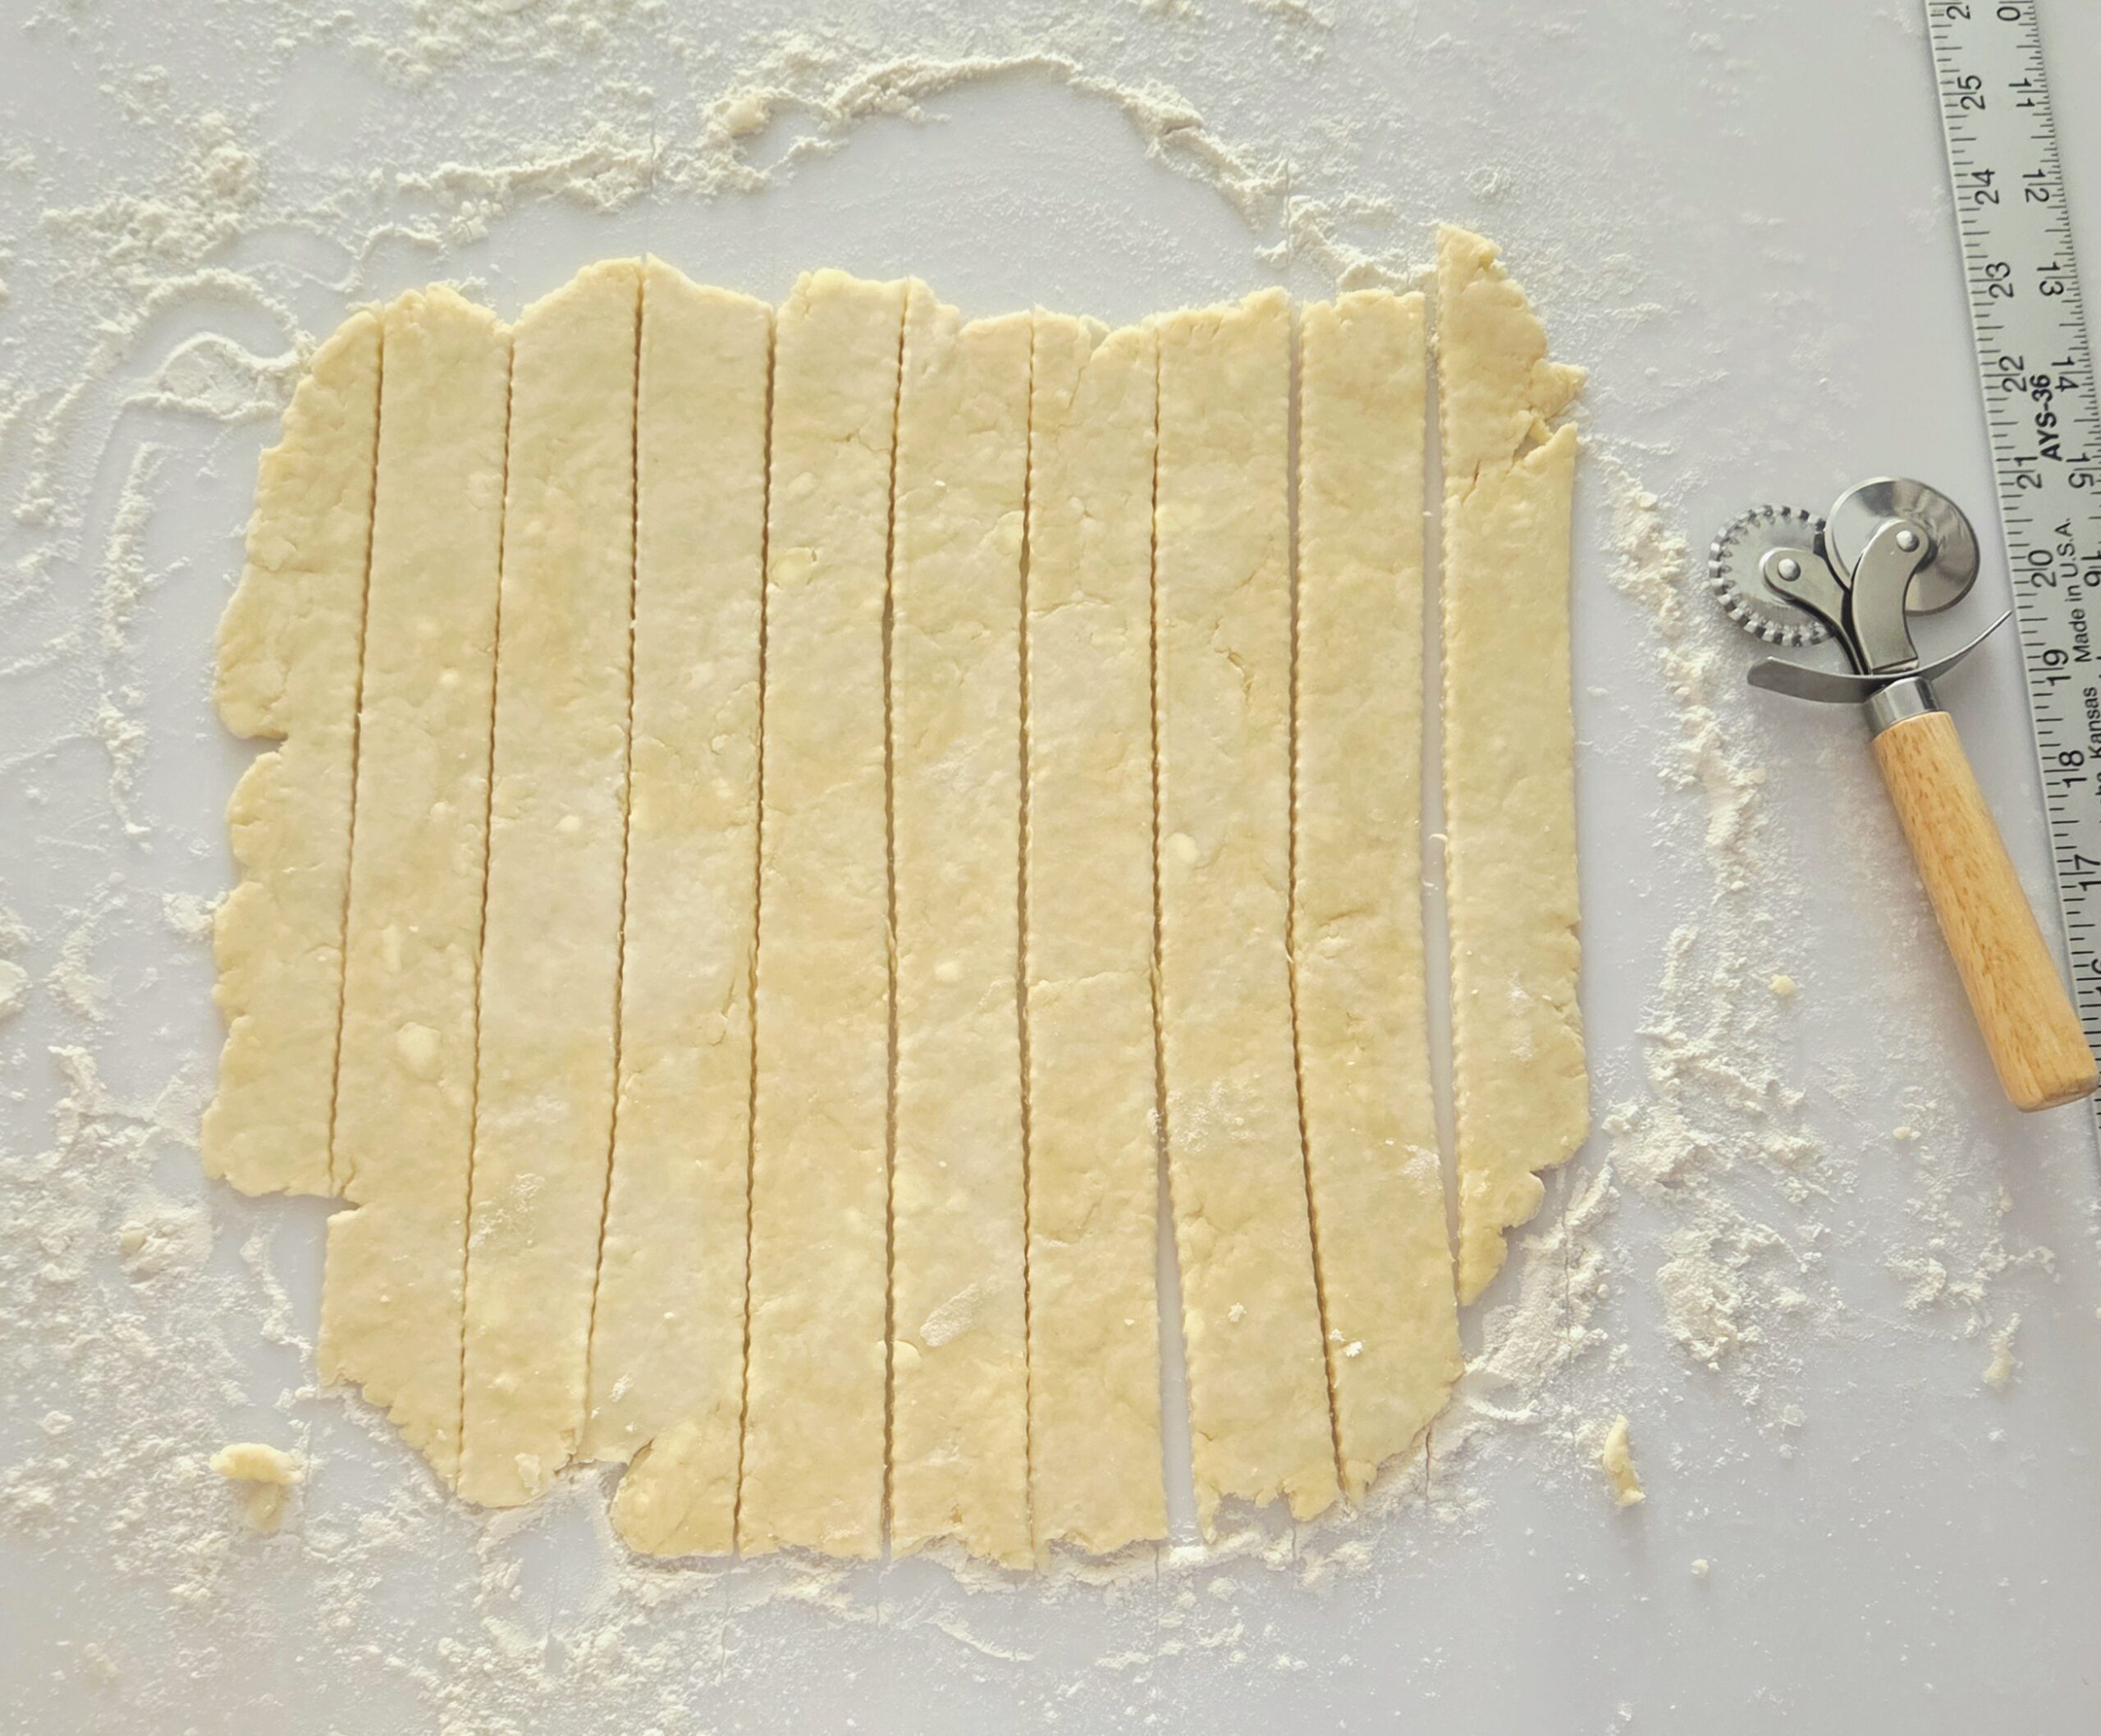
Lightly flour the counter once more, and place the smaller unwrapped disc of dough in the center. Lightly flour the disc and roll it out into a 10 x 10 inch square. Using a knife, bench scraper, or pizza wheel, cut the dough into 1 inch strips.
Take every other strip of pie dough and place them onto the filled pie, spaced ¼-½ inch apart.
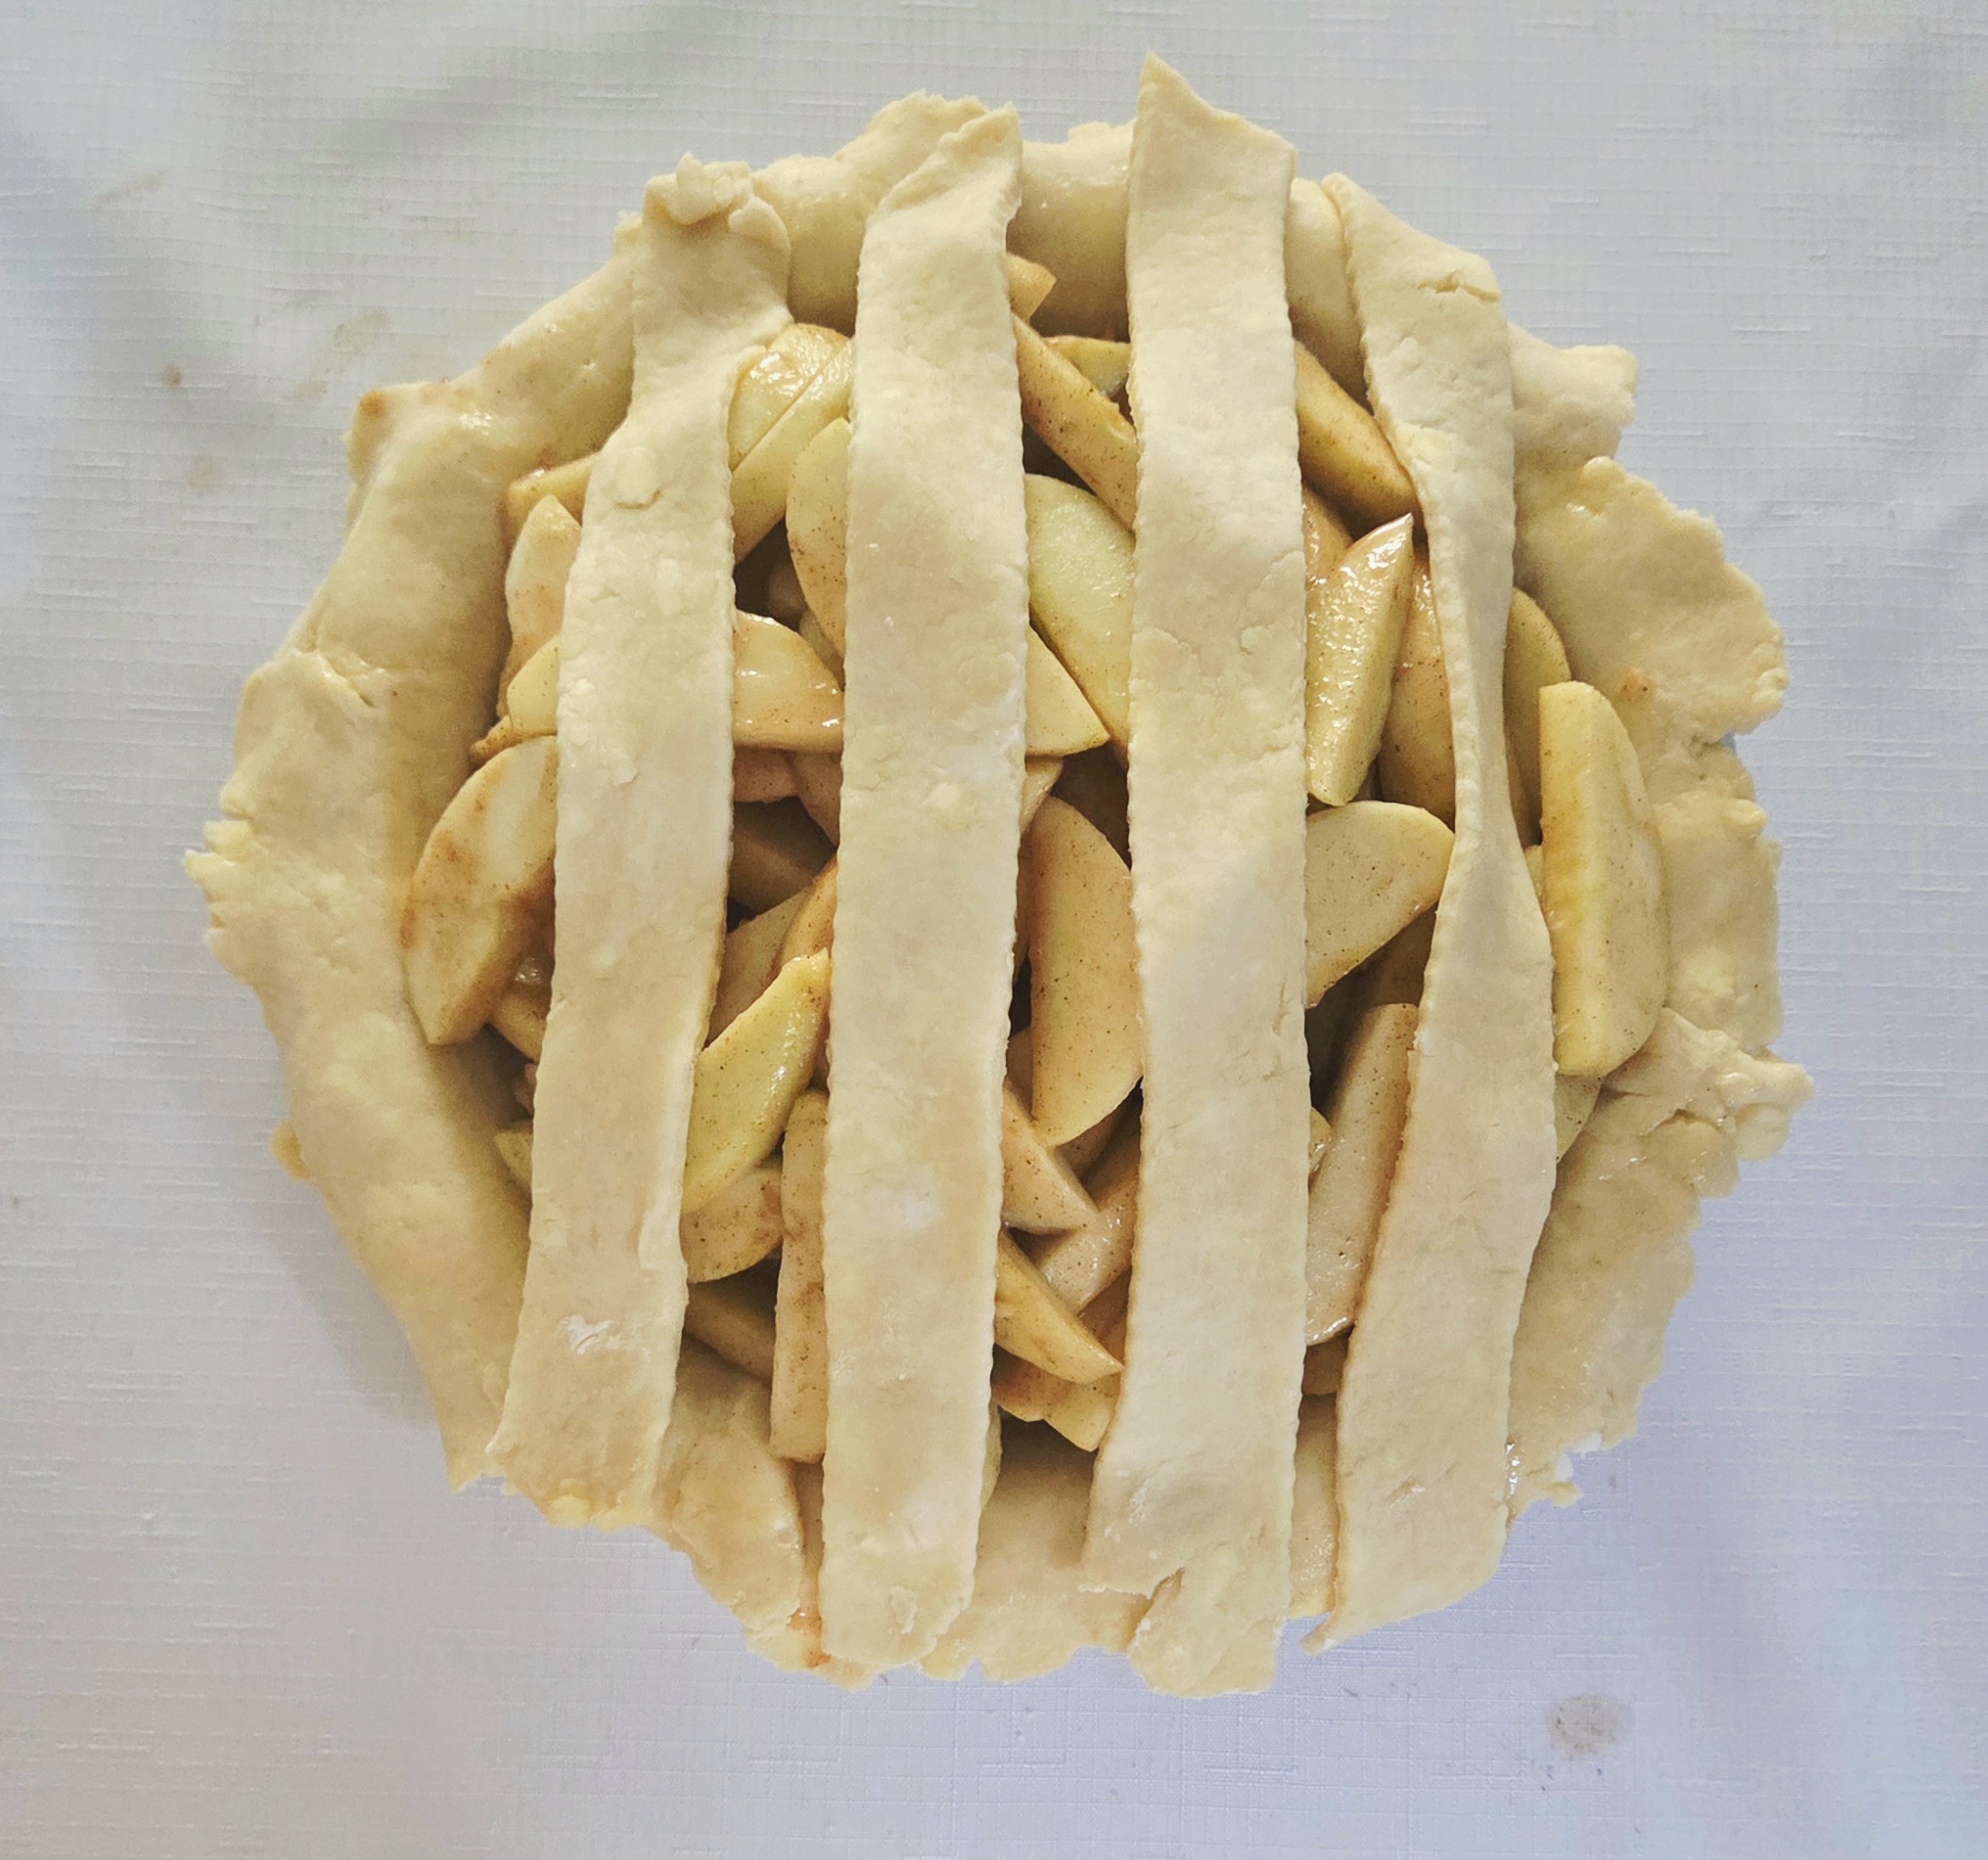
Fold back every other strip of dough, so they’re in half.

Grab one of the longer remaining strips and place it horizontally over the flat laid strips of dough.
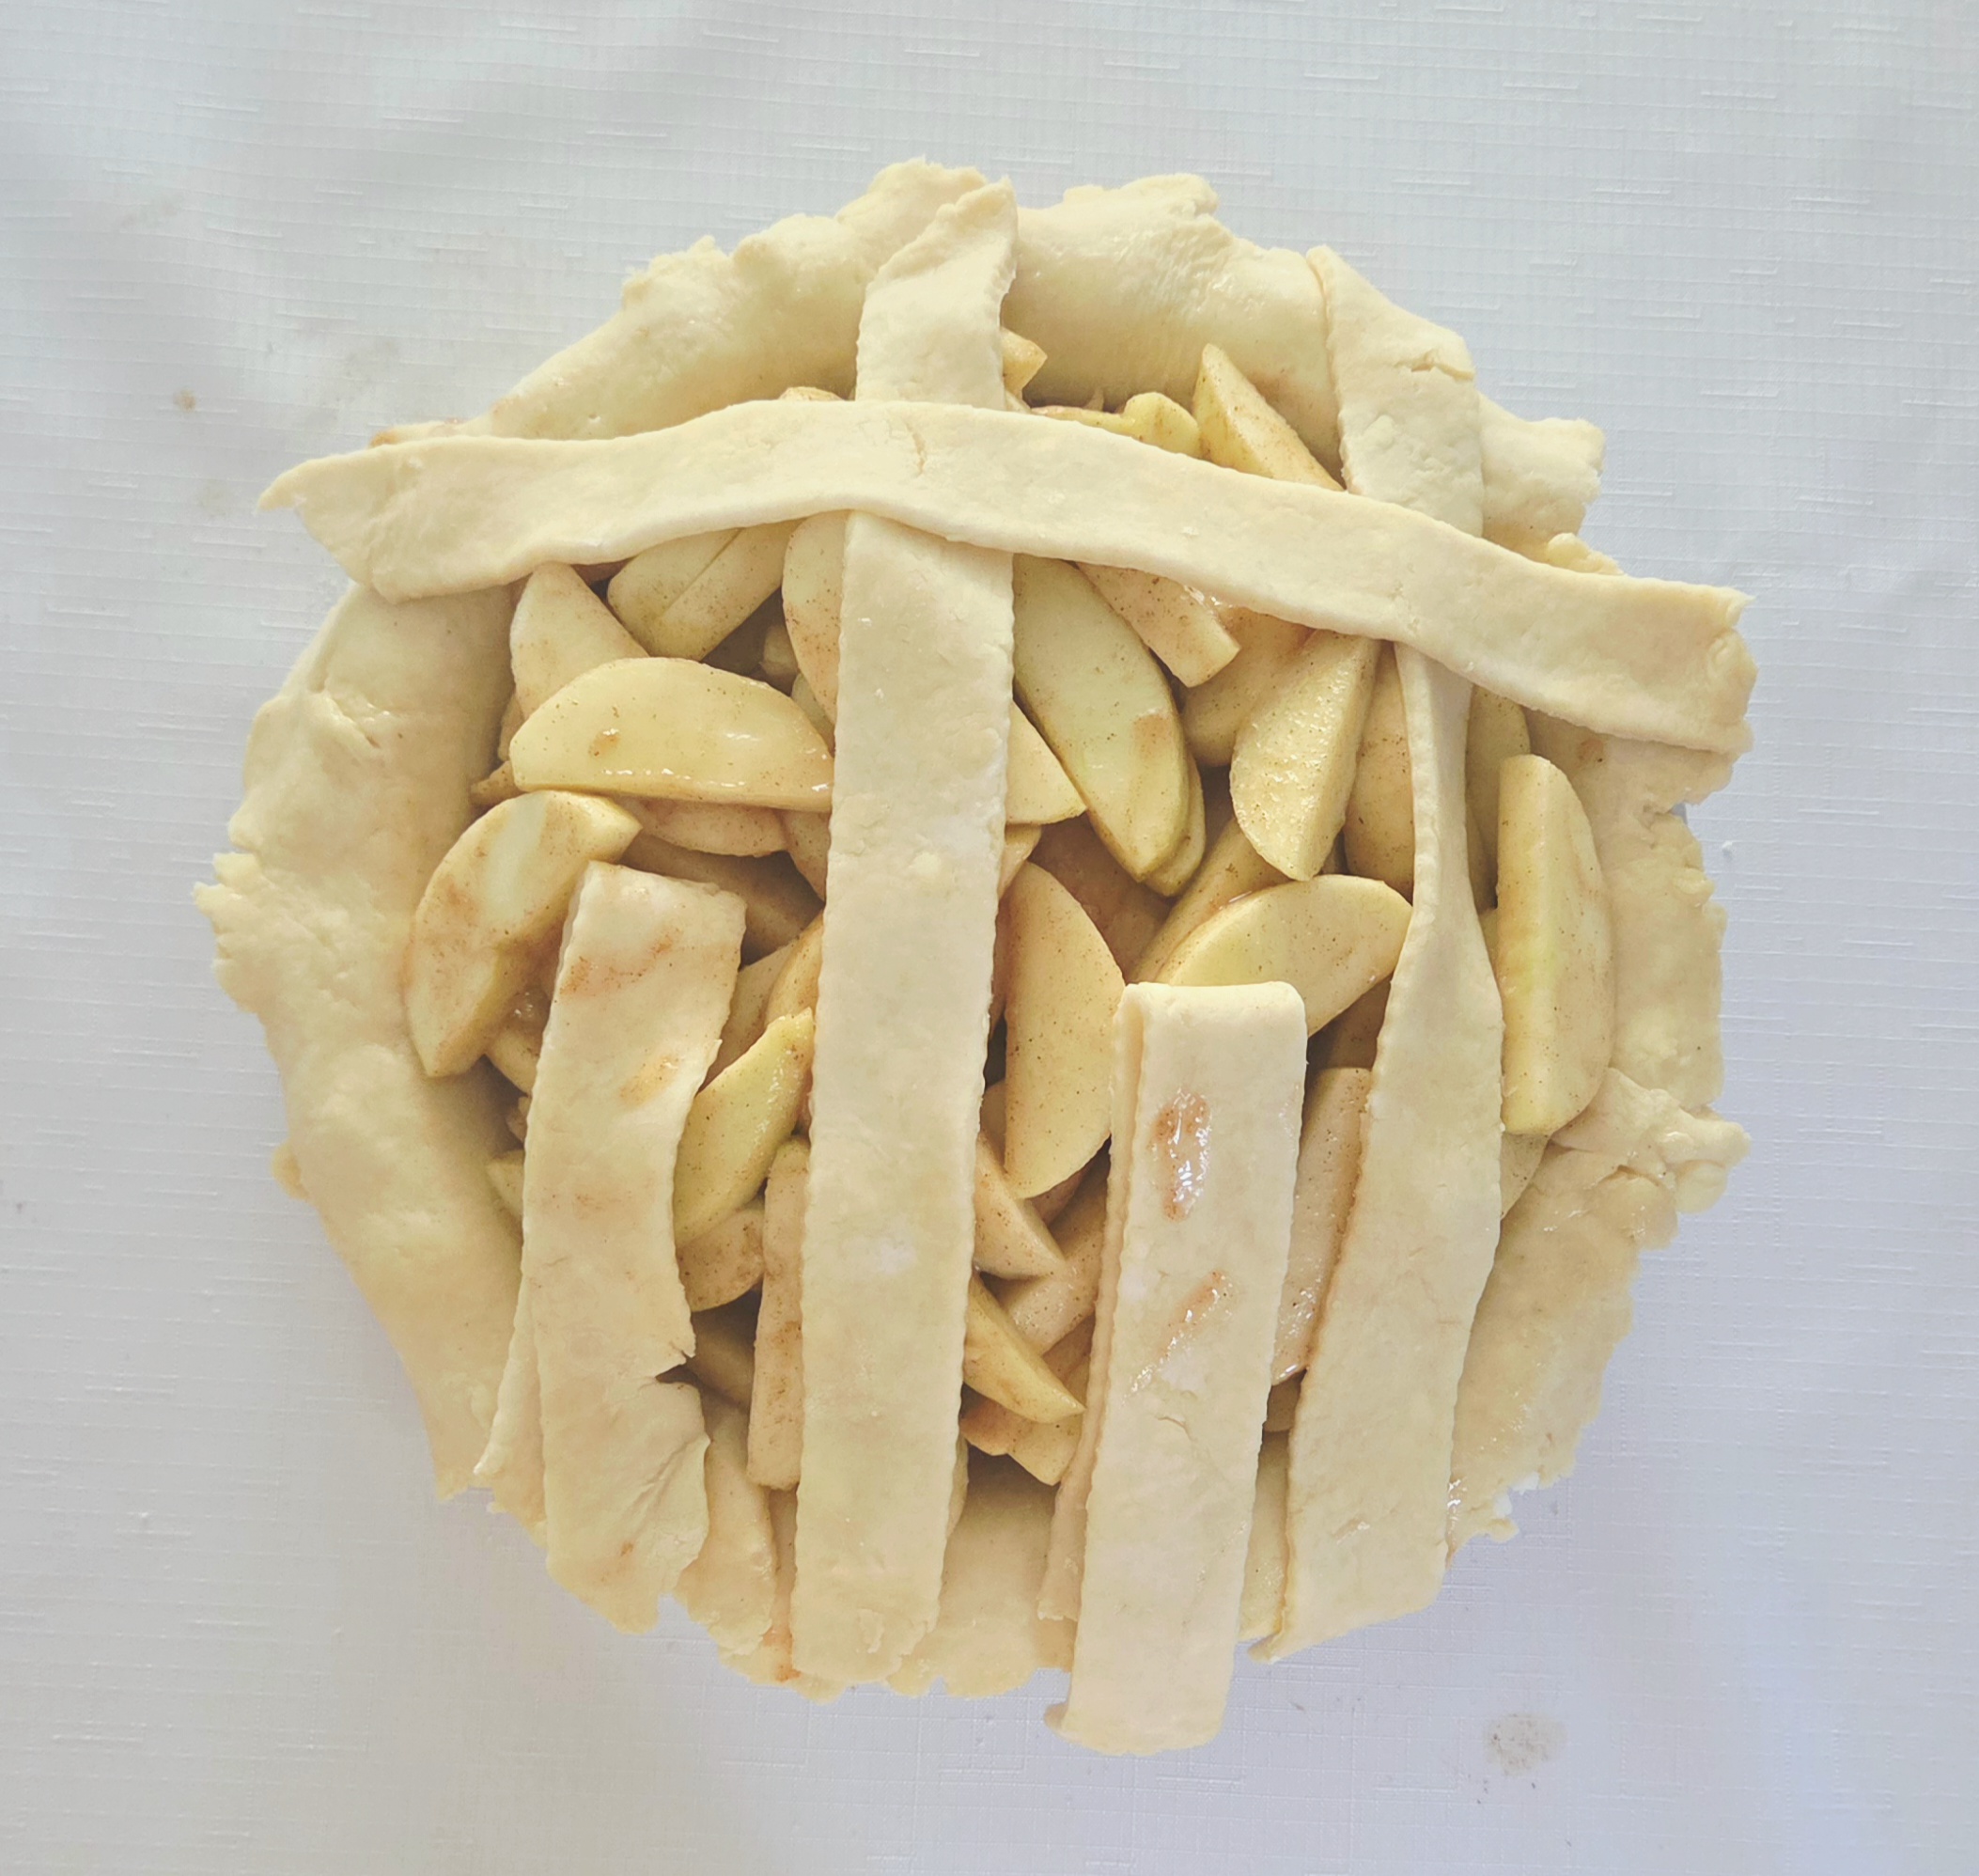
Fold the pulled back strips of dough back over the horizontal strip, then pull back all of the opposite strips that had remained flat before over the horizontal strip.
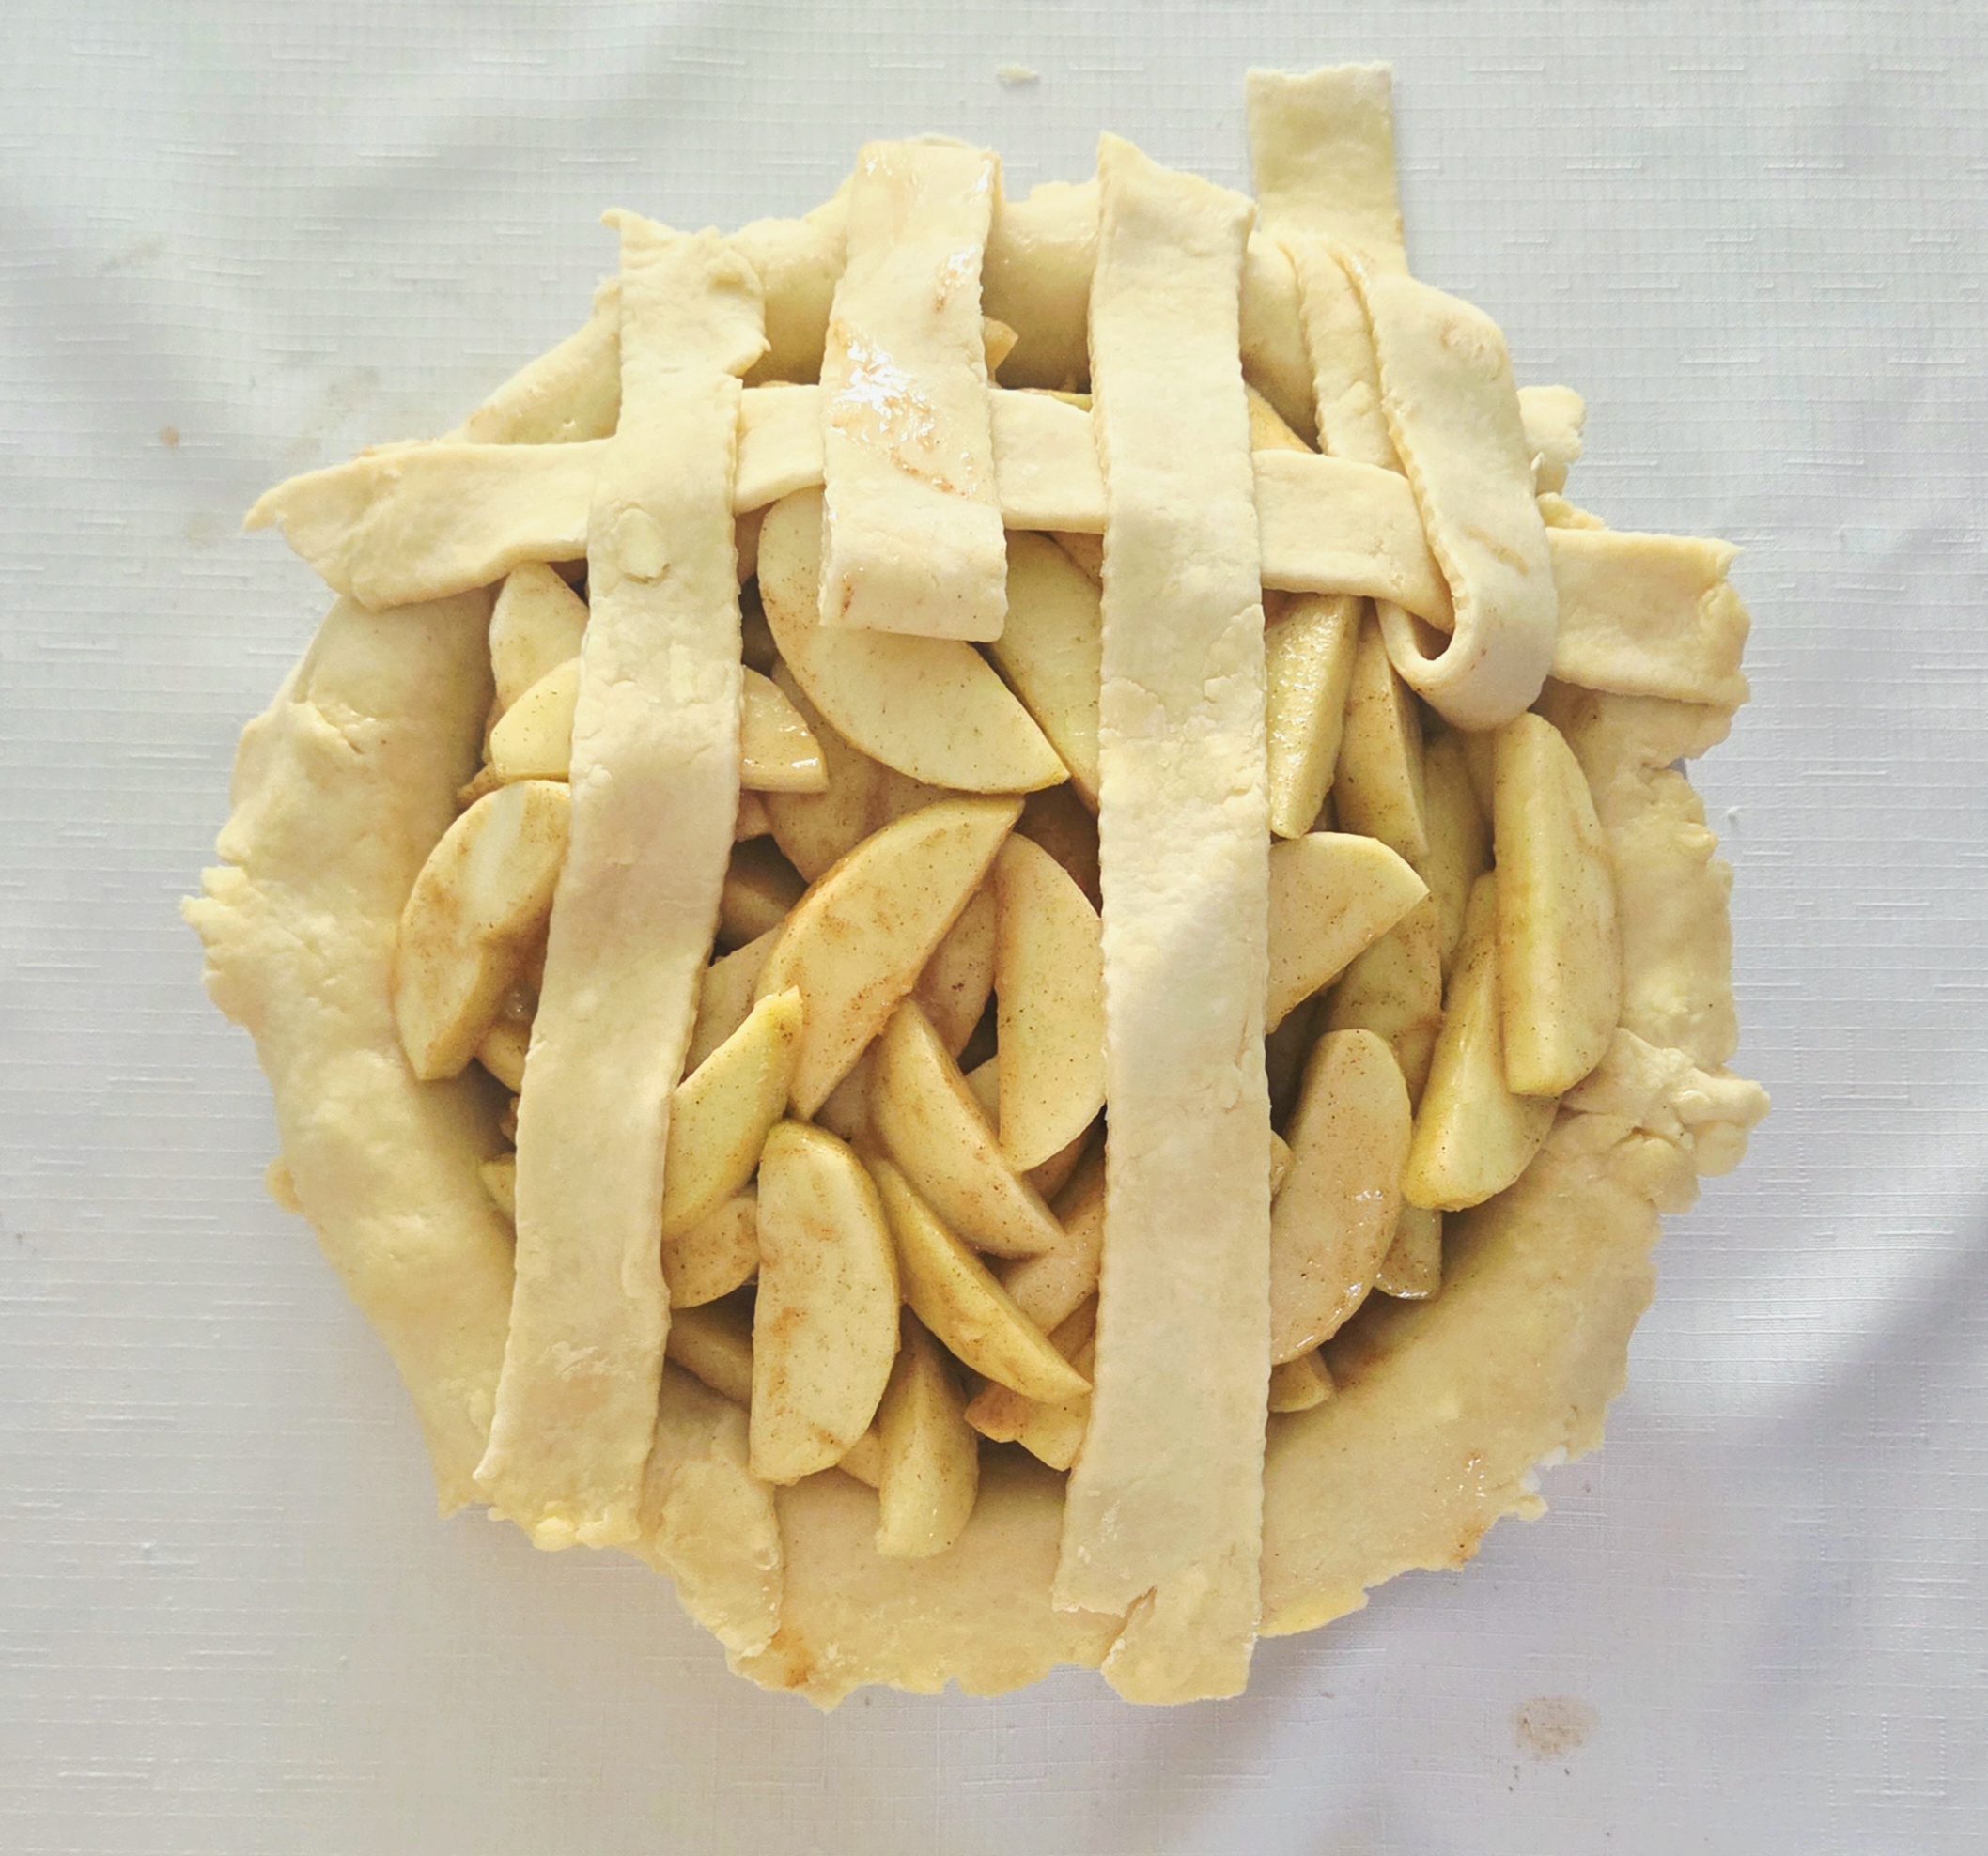
Lay a second horizontal strip down, then fold down all of the pulled back strips.
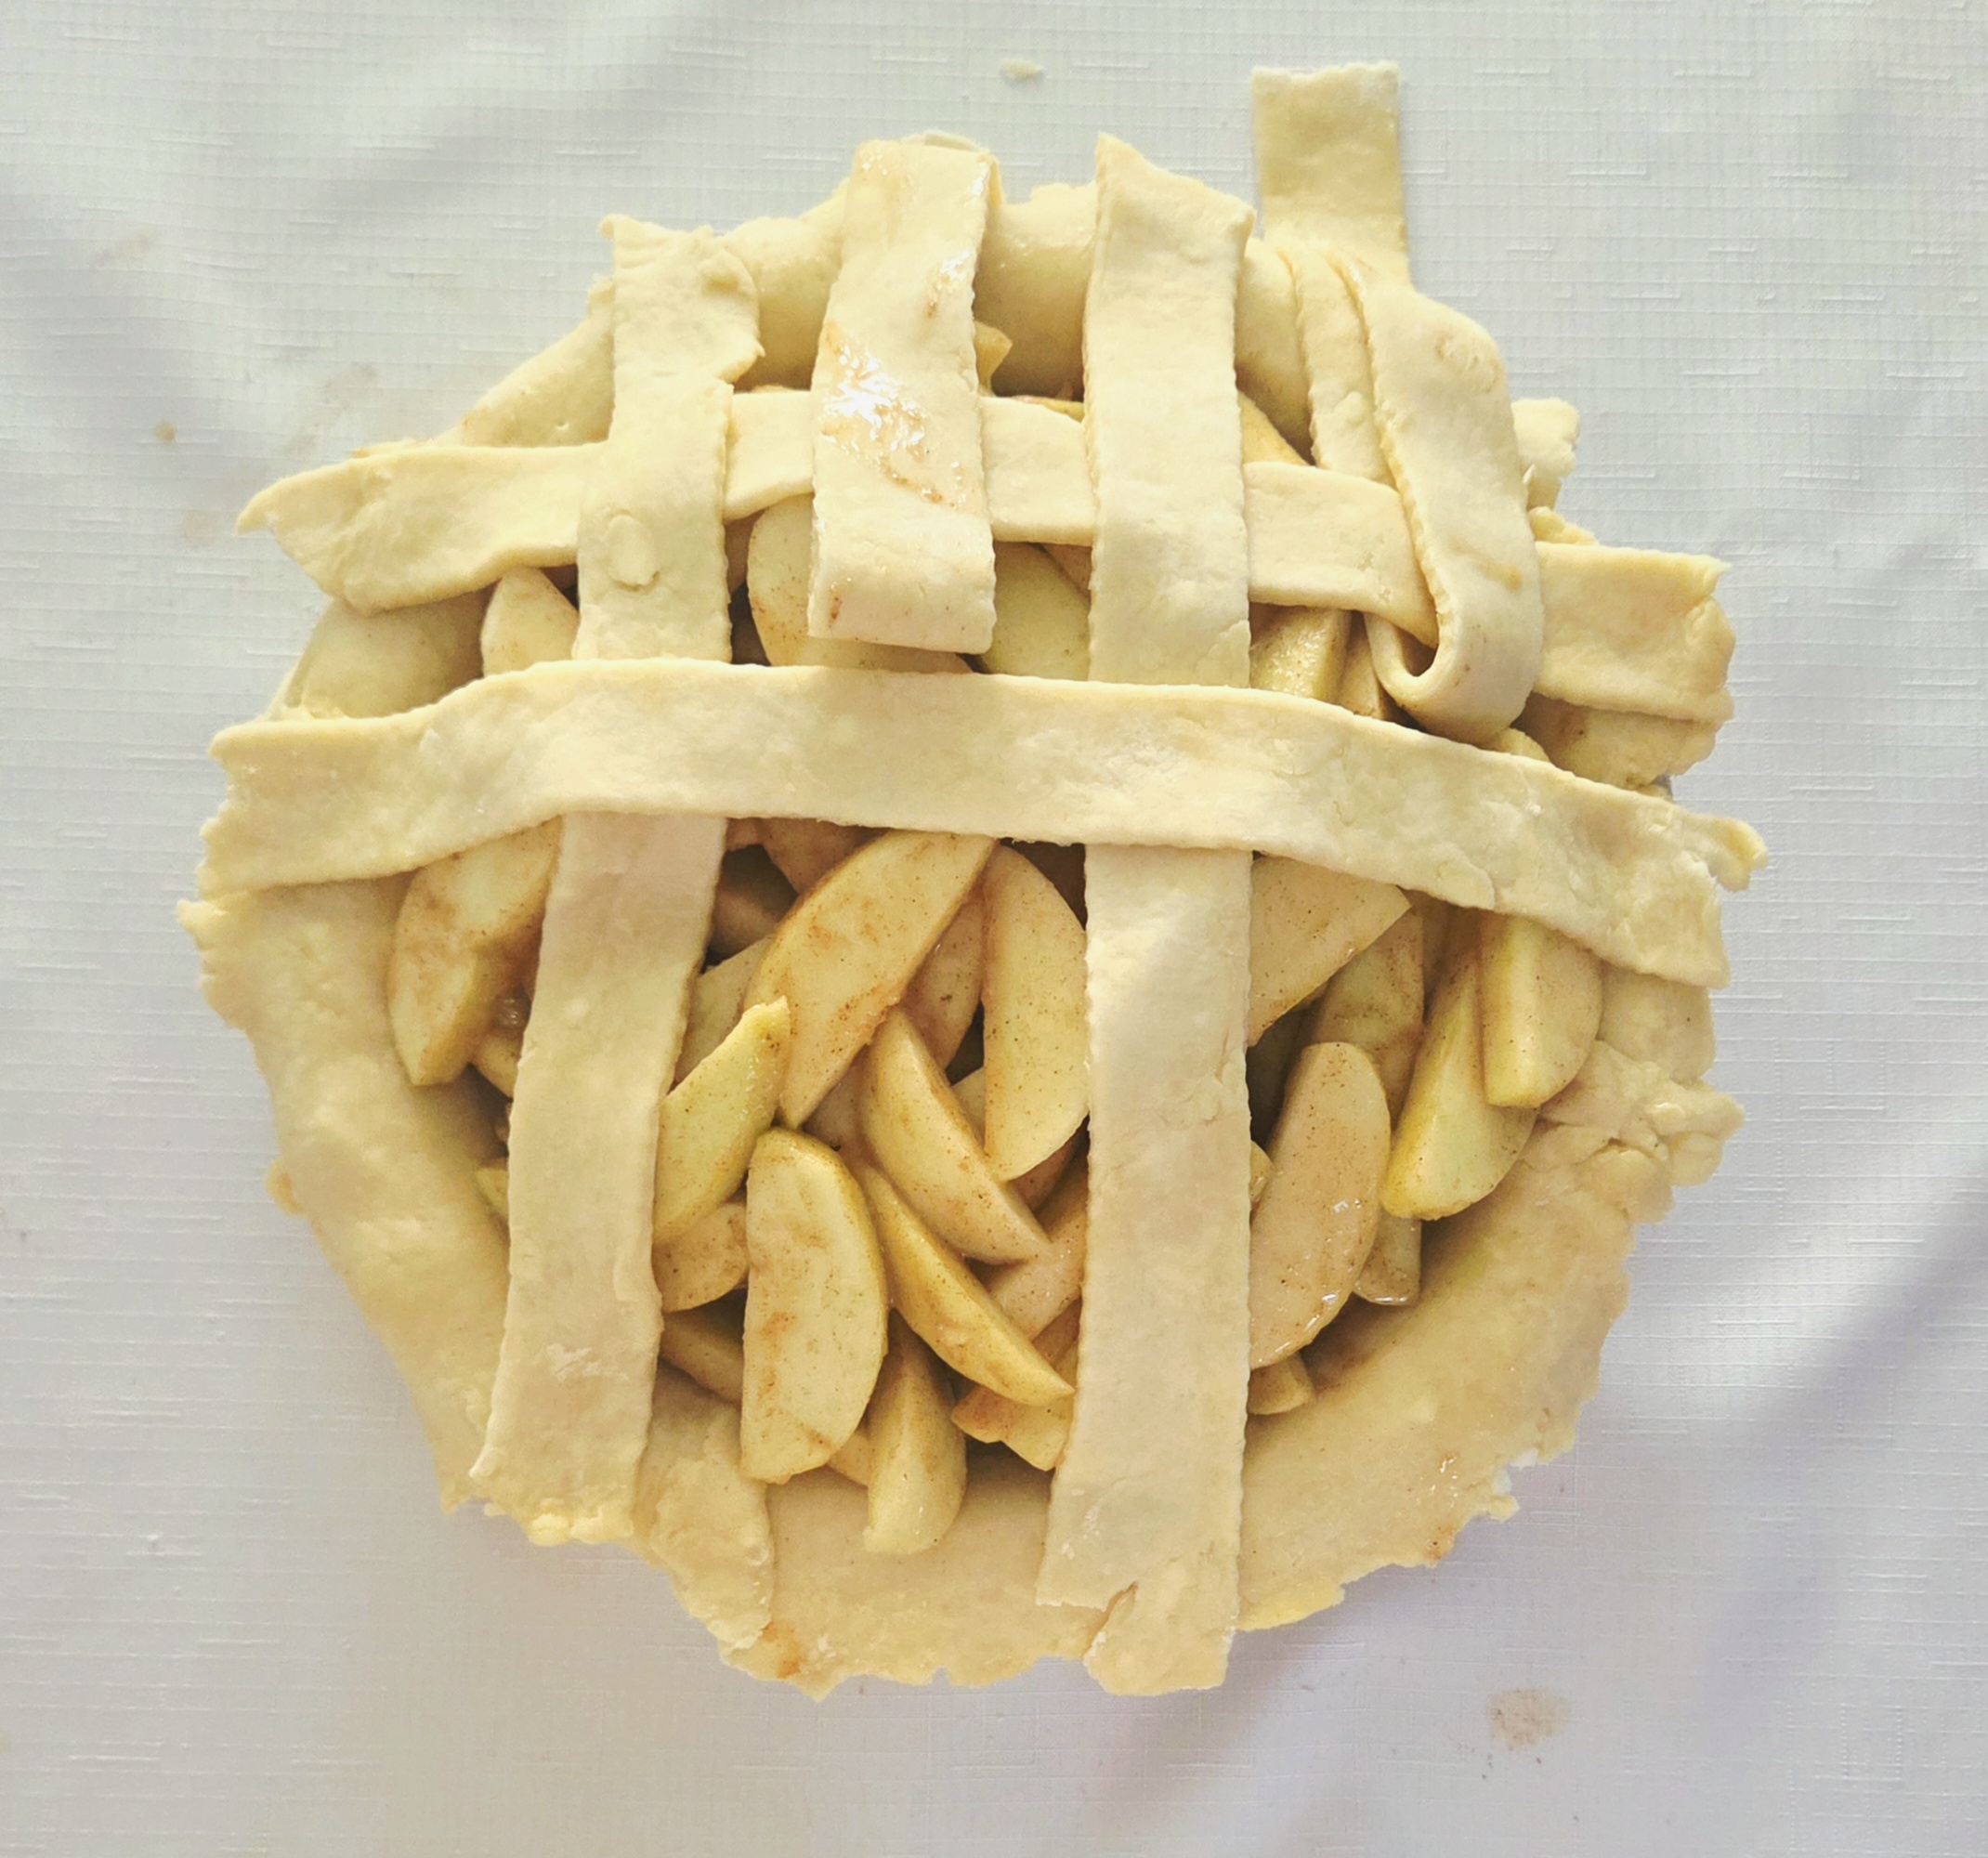
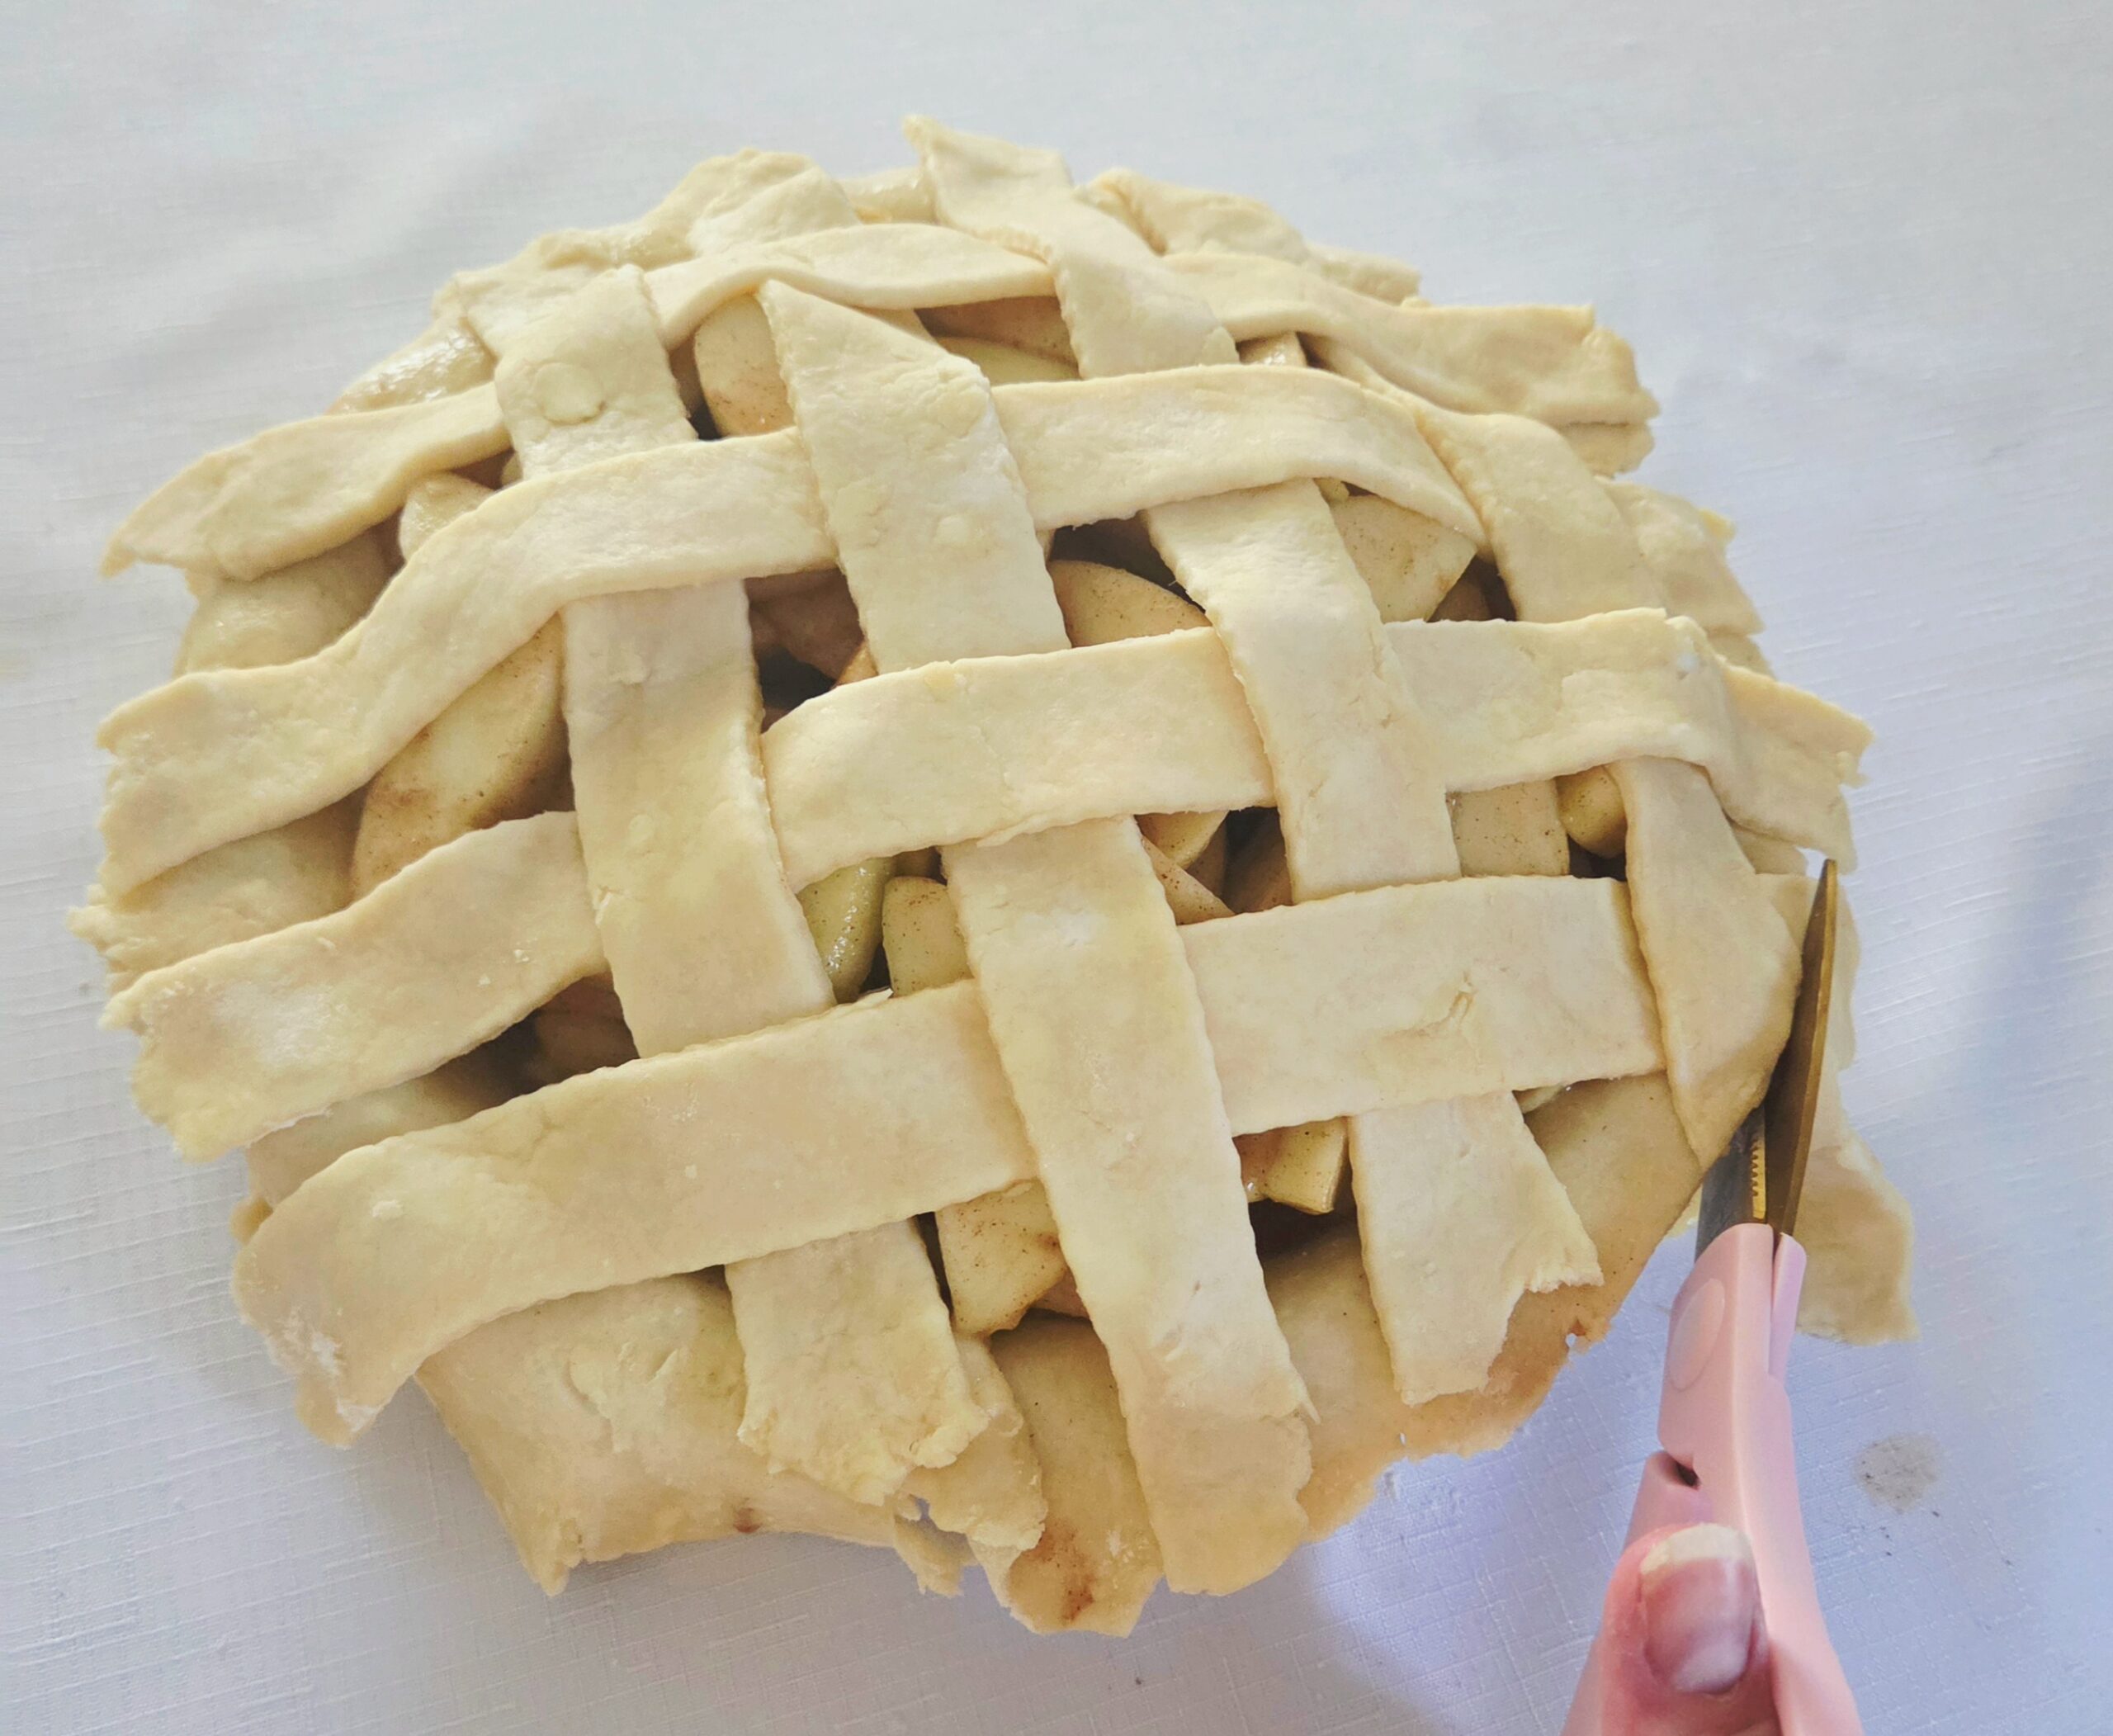
Continue this process until all of the strips of dough have been used, and you’re left with a beautiful lattice top.

Trim any dough hanging over the edge of the pan with a paring knife or kitchen scissors.
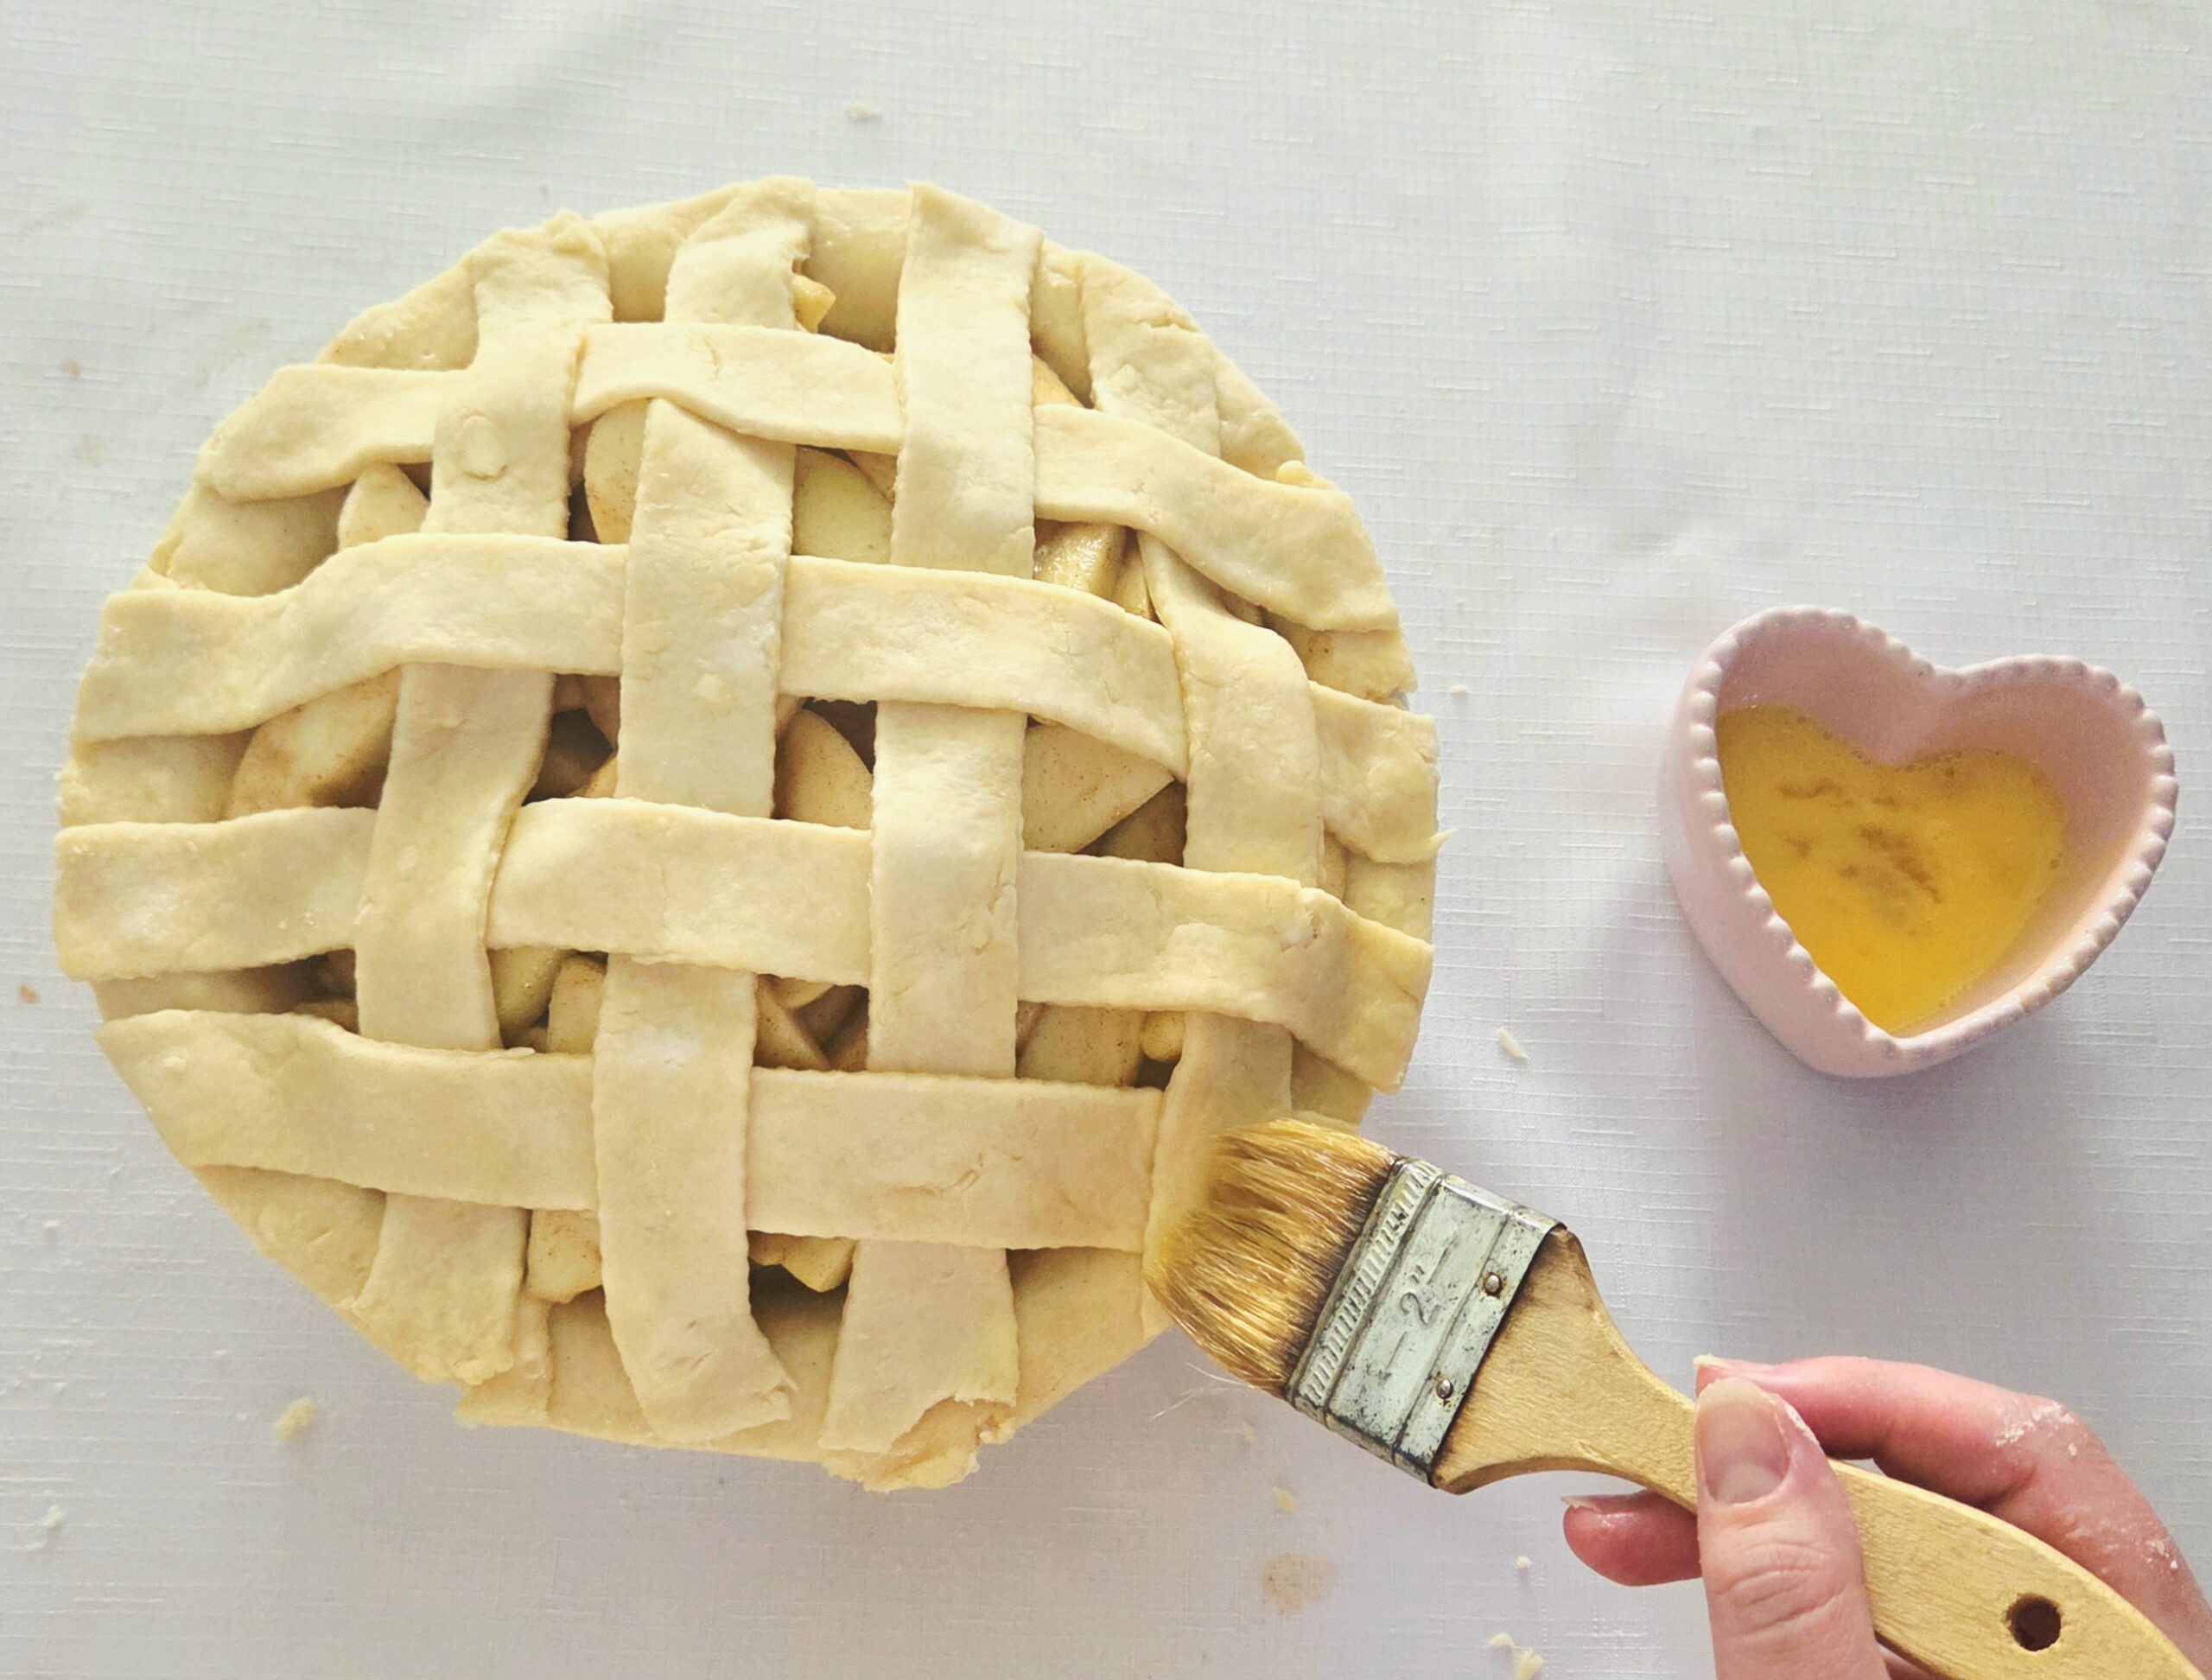
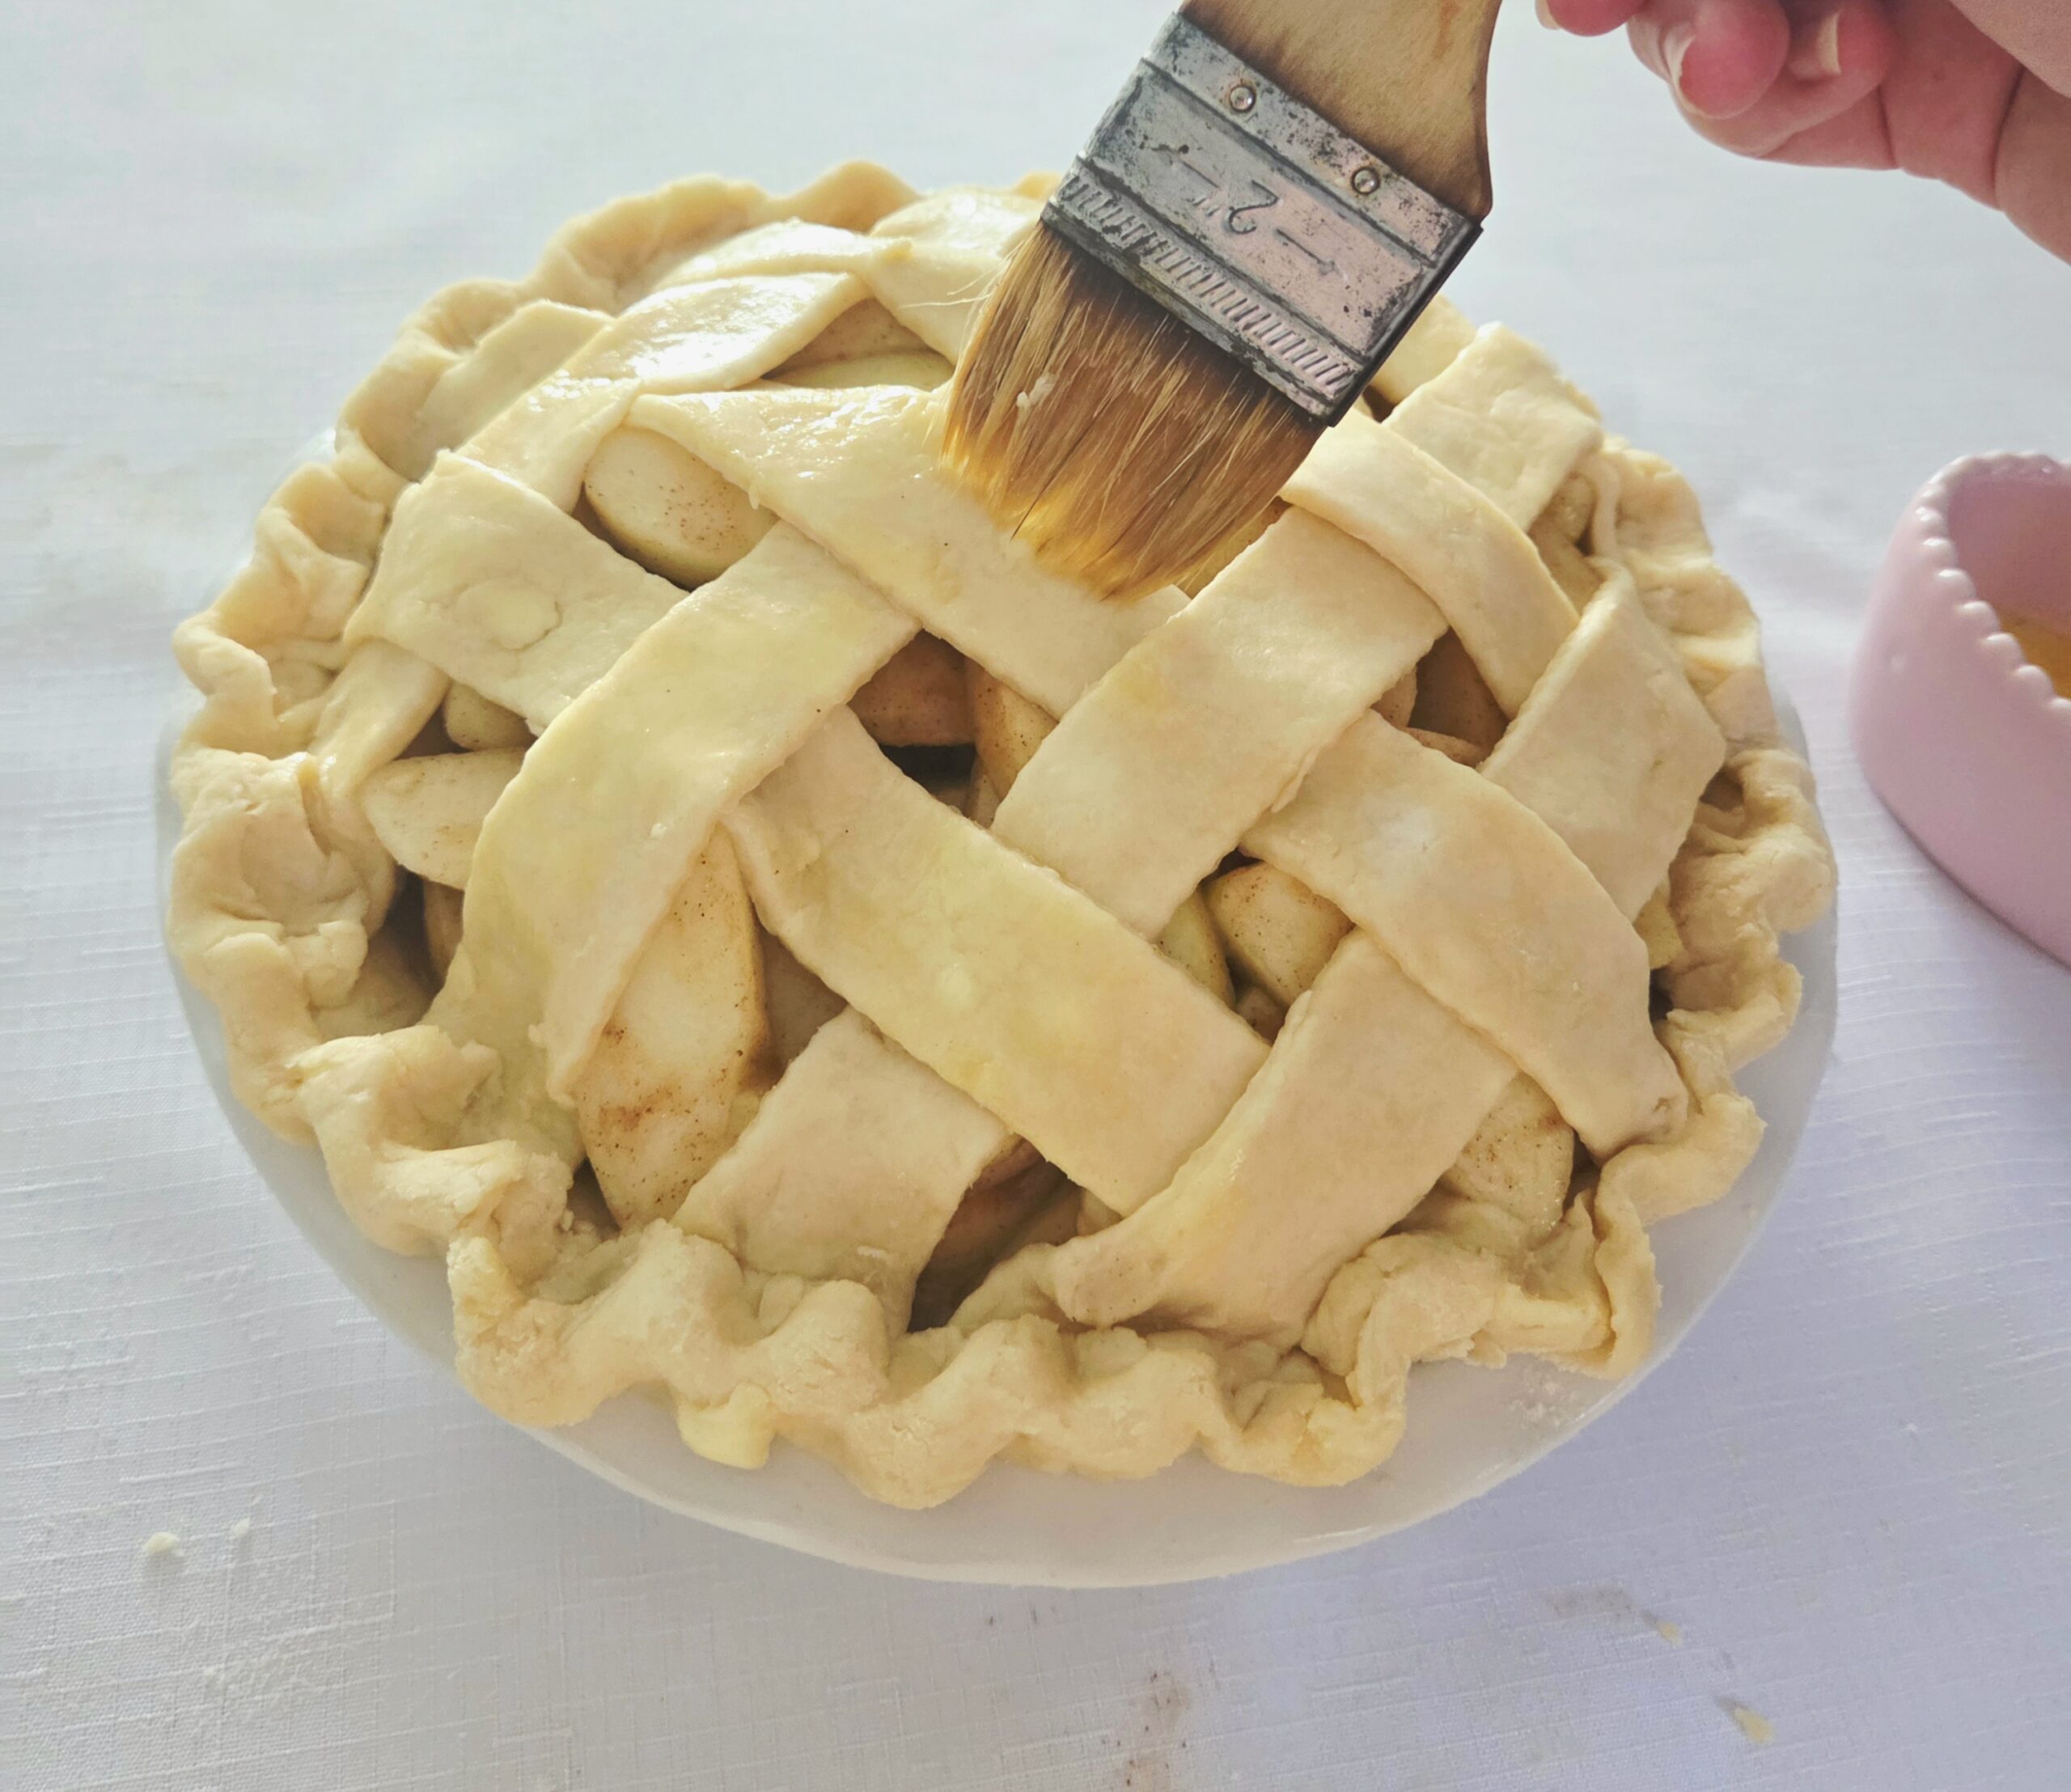
Gently brush the trimmed rim of dough with more egg wash. This way, when it’s folded over and crimped, it will actually stick together.
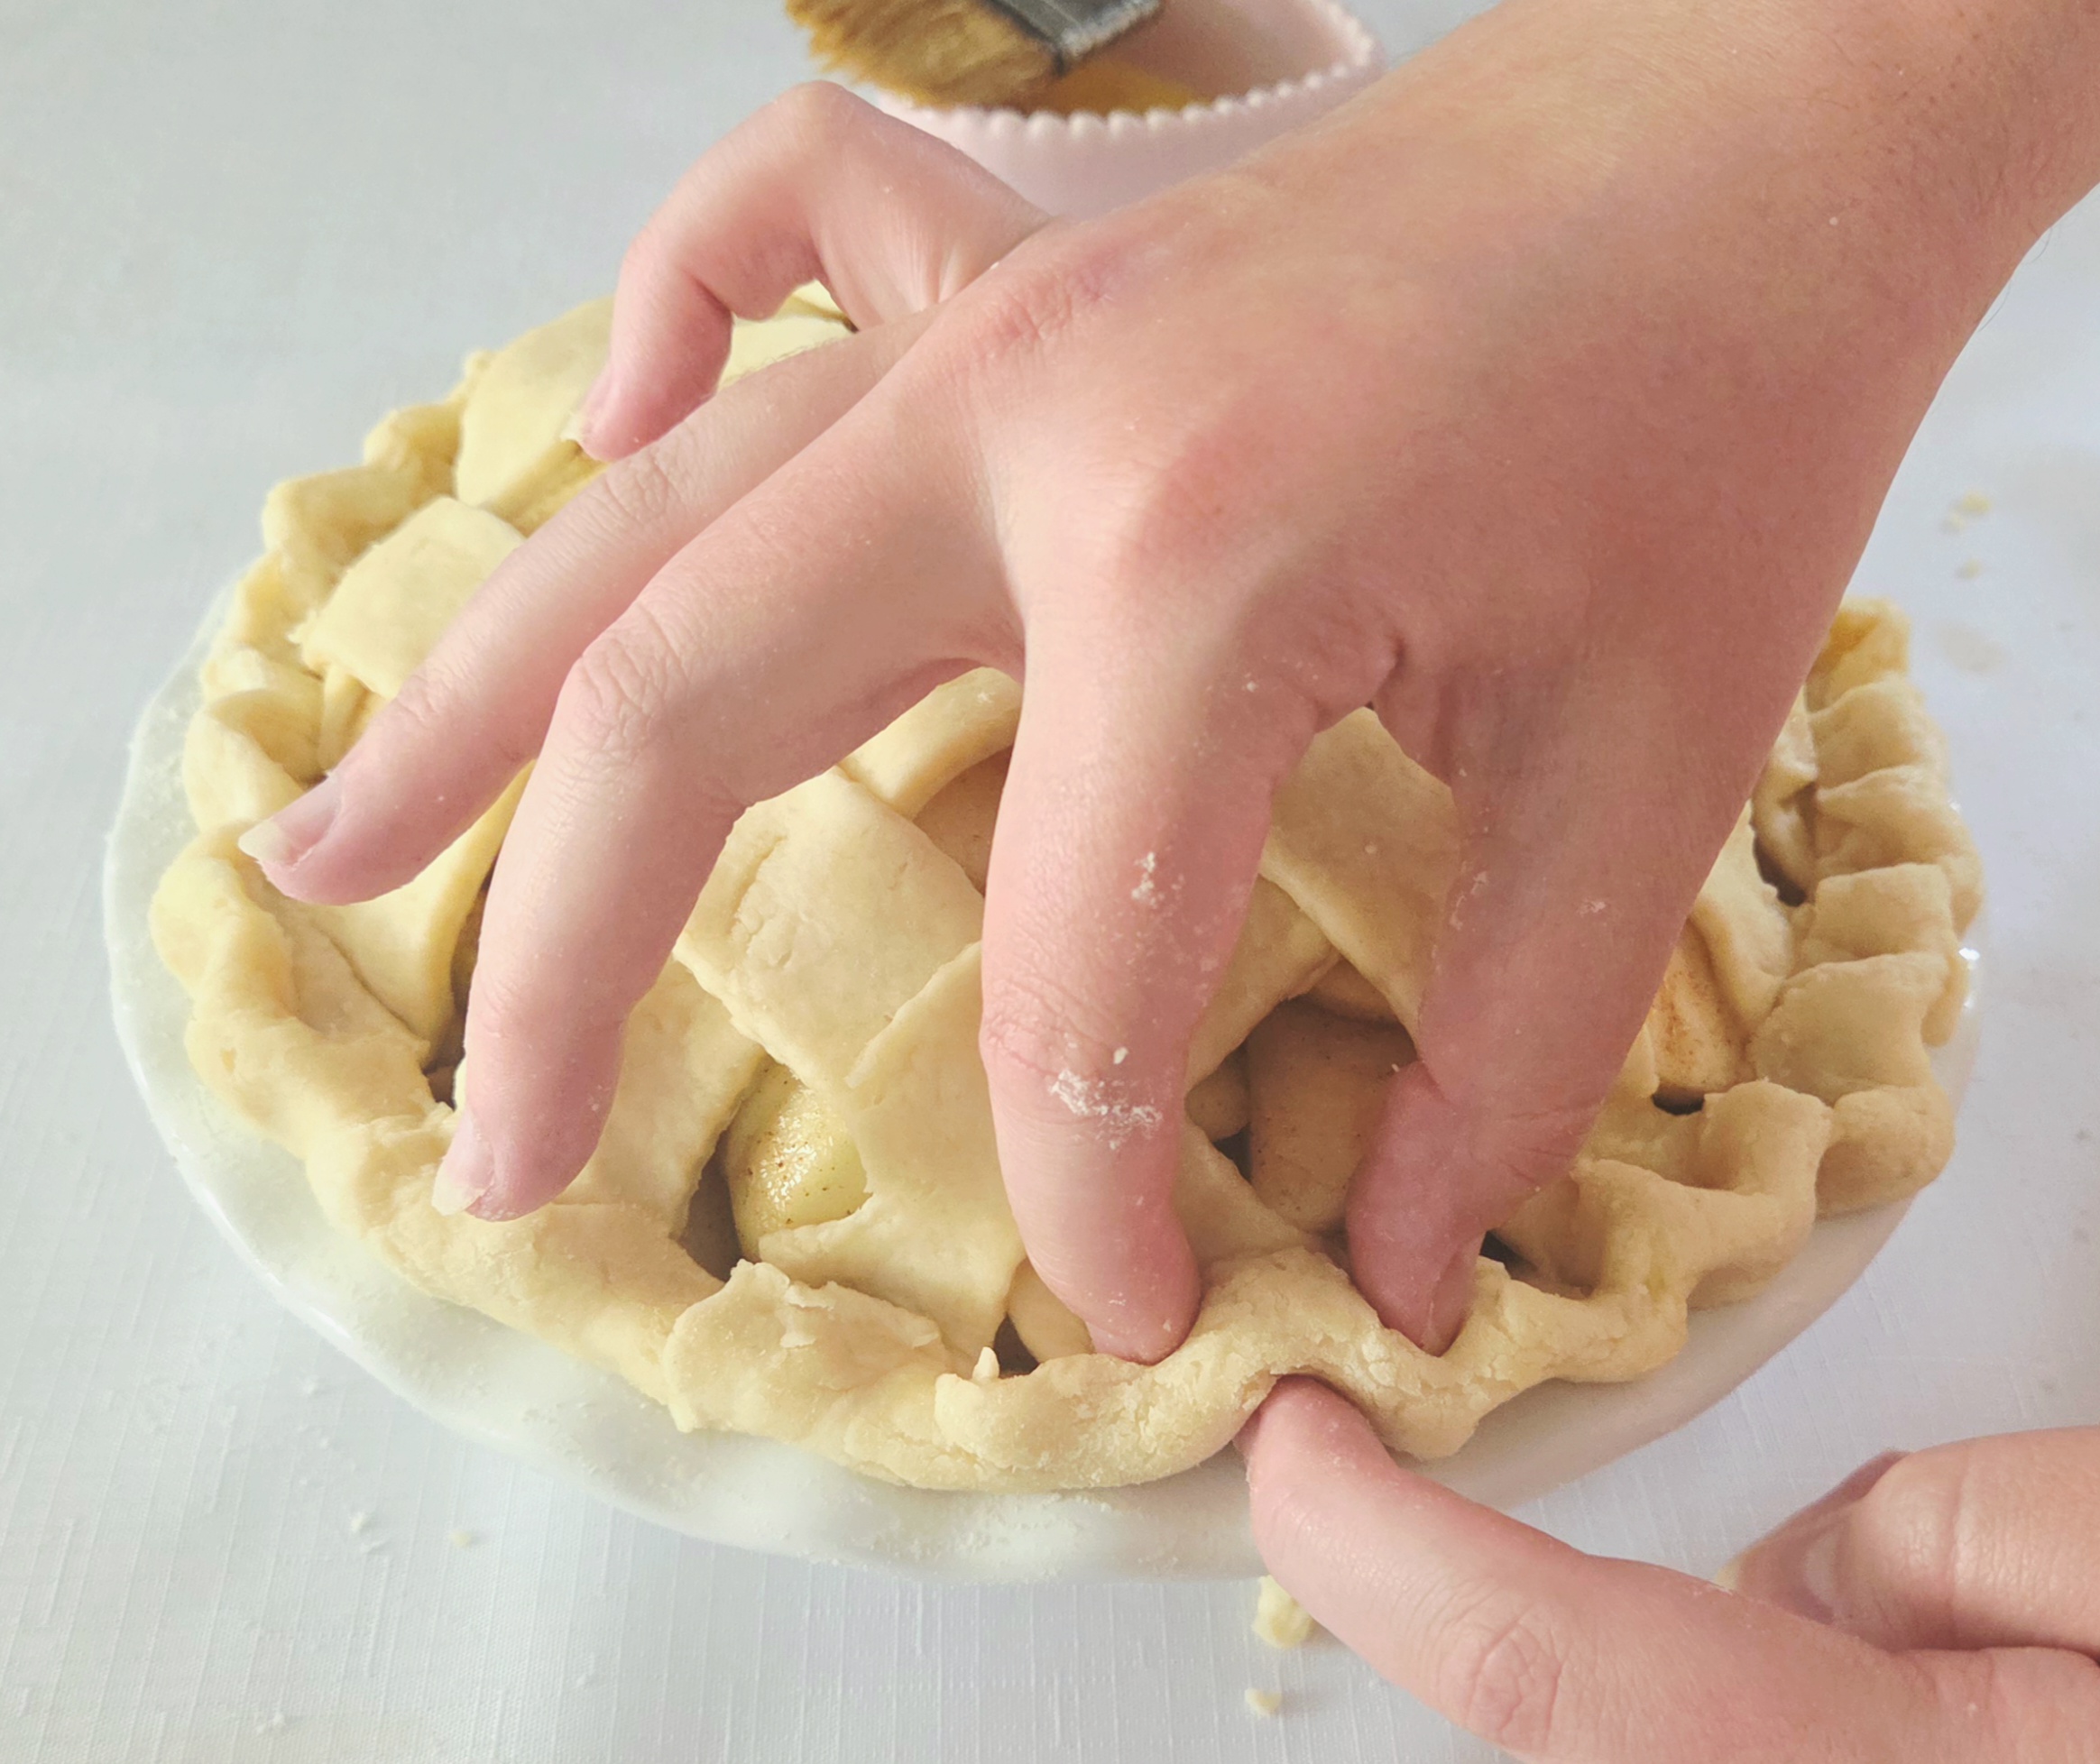
Carefully fold the outer rim of dough onto itself, by about 1/4-1/2 inch. For an easy crimp, take a fork and gently press the tines into the rim of dough you just folded over. To ensure that it’s even, start the next crimp by placing the tine on the end into the previously made impression on the end. Continue all the way around the rim of dough.
For a slightly fancier crimp, take your pointer finger and thumb on one hand and hold them about an inch apart. Gently press them against the sides of the rim of dough and use the pointer finger on the opposite hand to make a moderately deep impression in the space between your two fingers. Start the next finger crimp by placing your pointer finger against the previously made indent, and repeat the same actions as before.
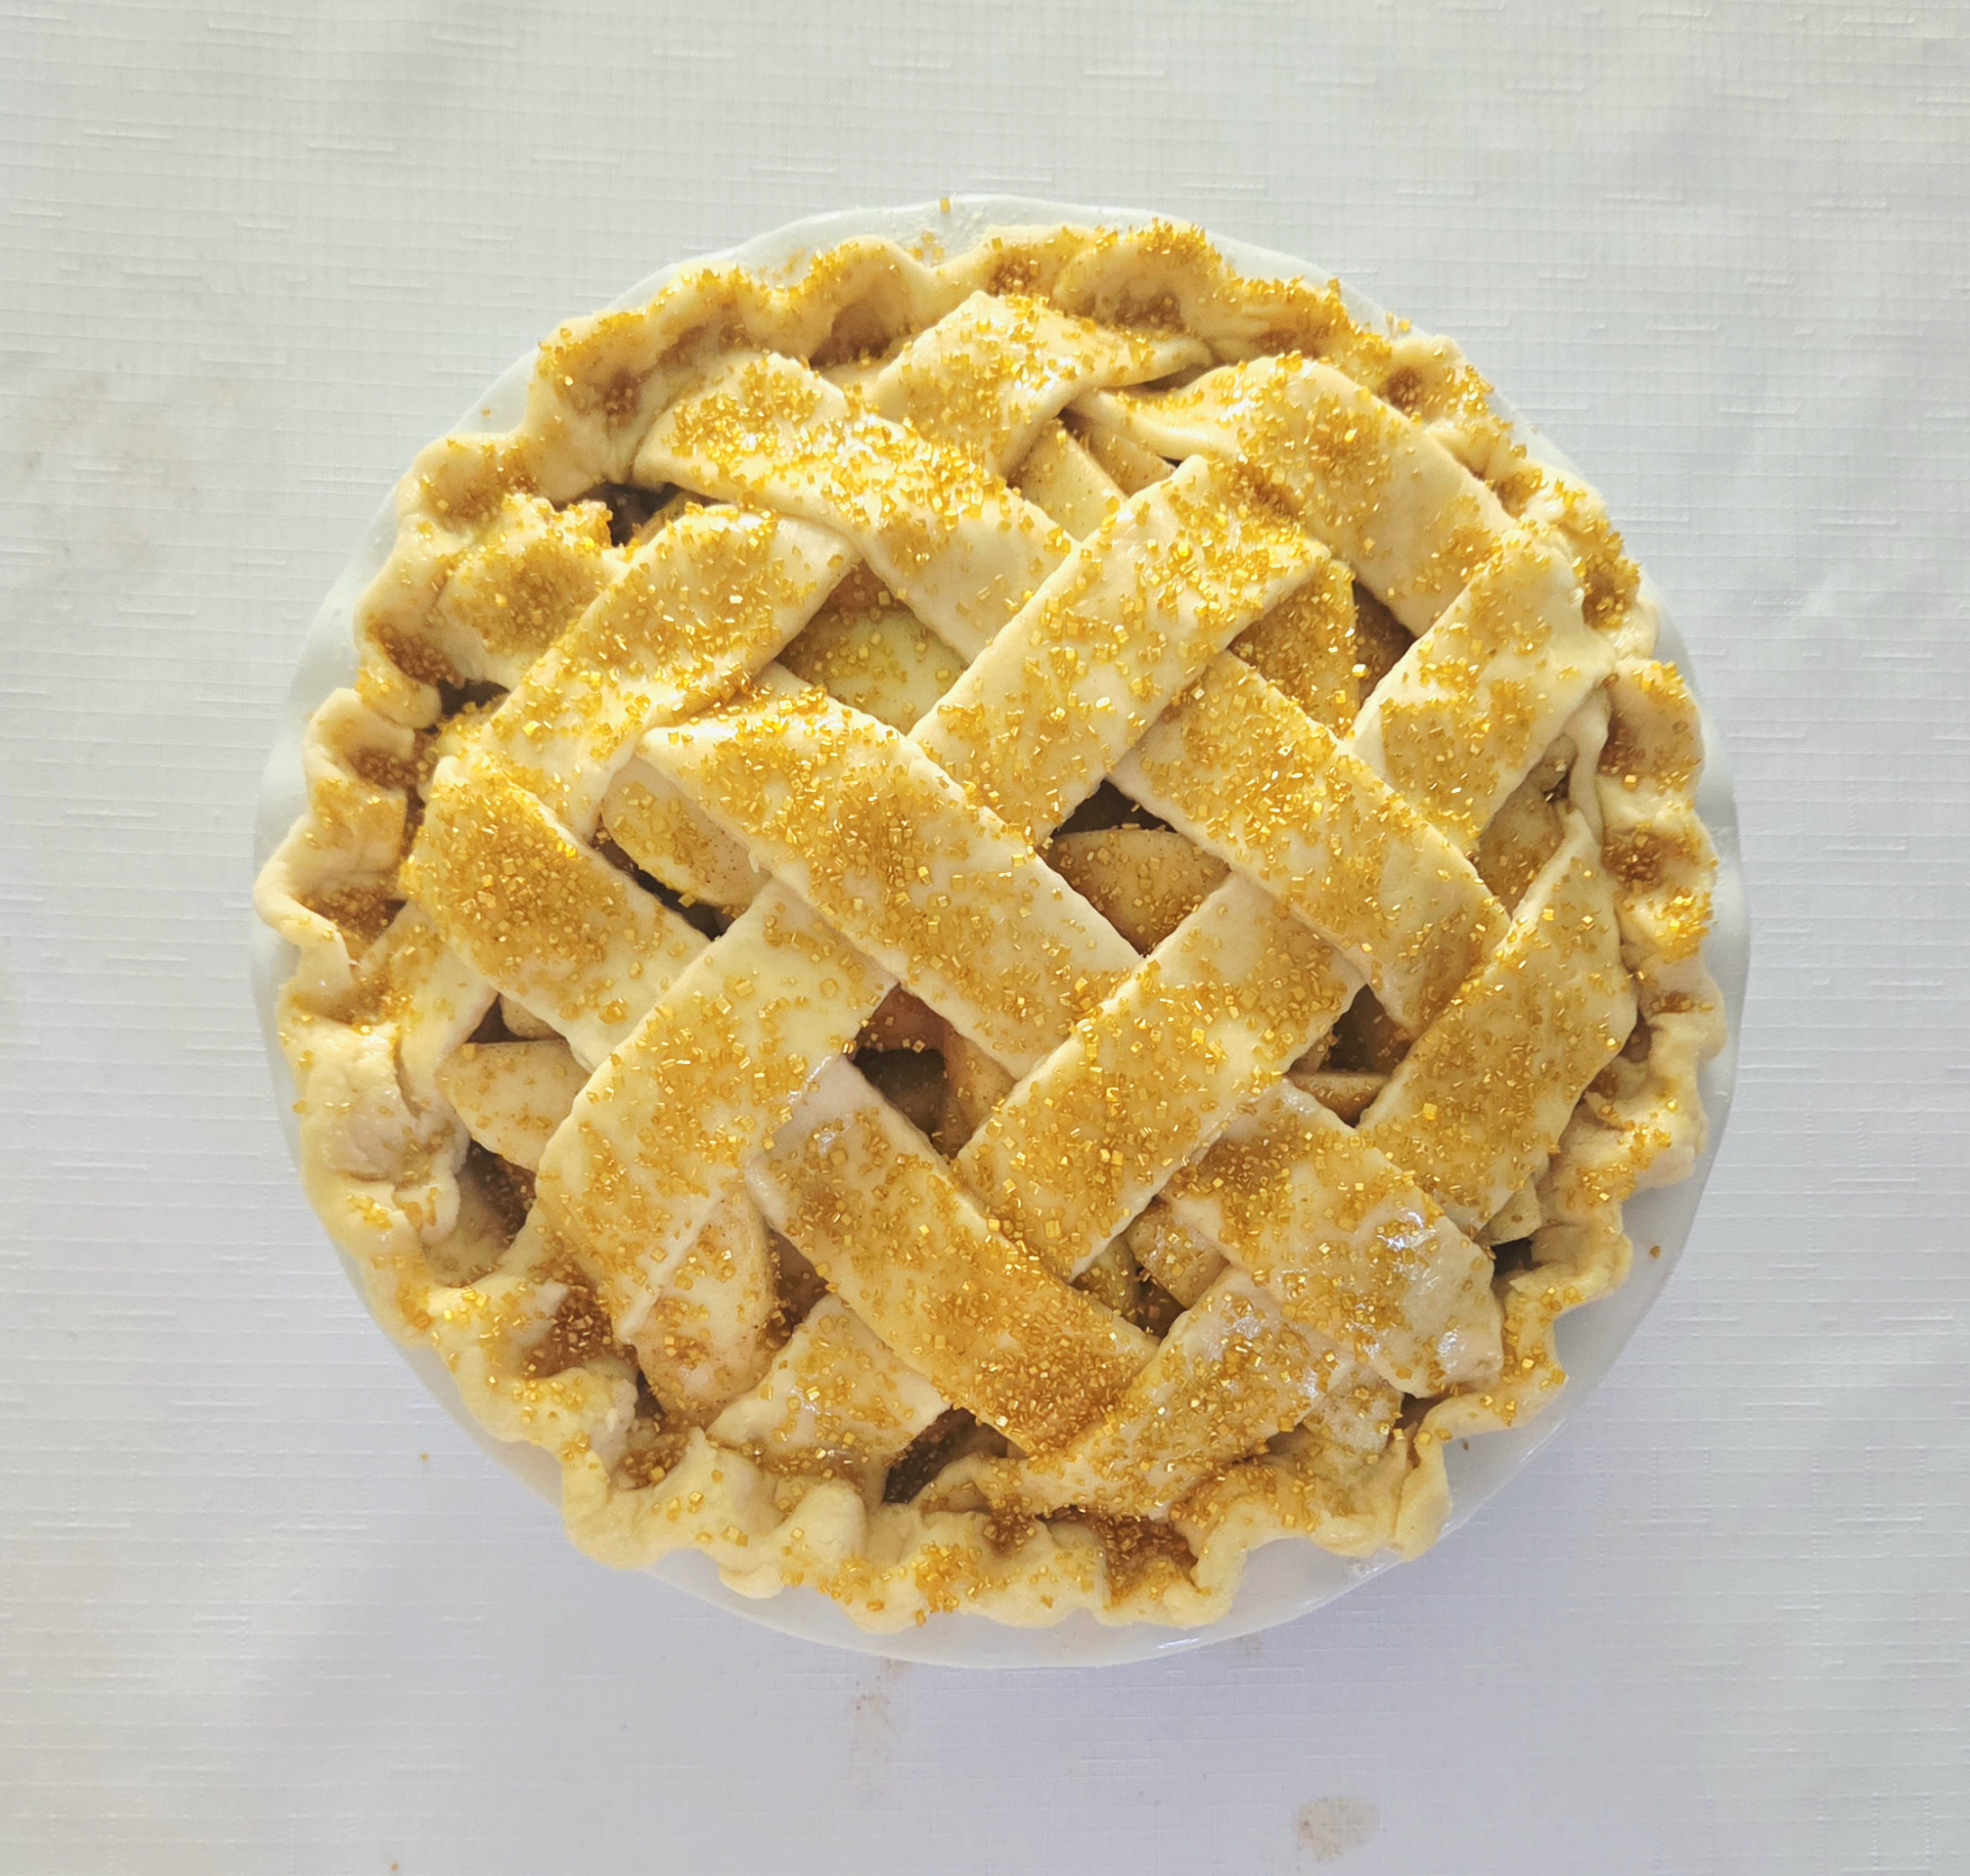
Repeat this process all the way around the rim. Lightly brush more egg wash onto the top of the lattice crust. If you want, you can also sprinkle some chunky sugar on top for an extra crunch.
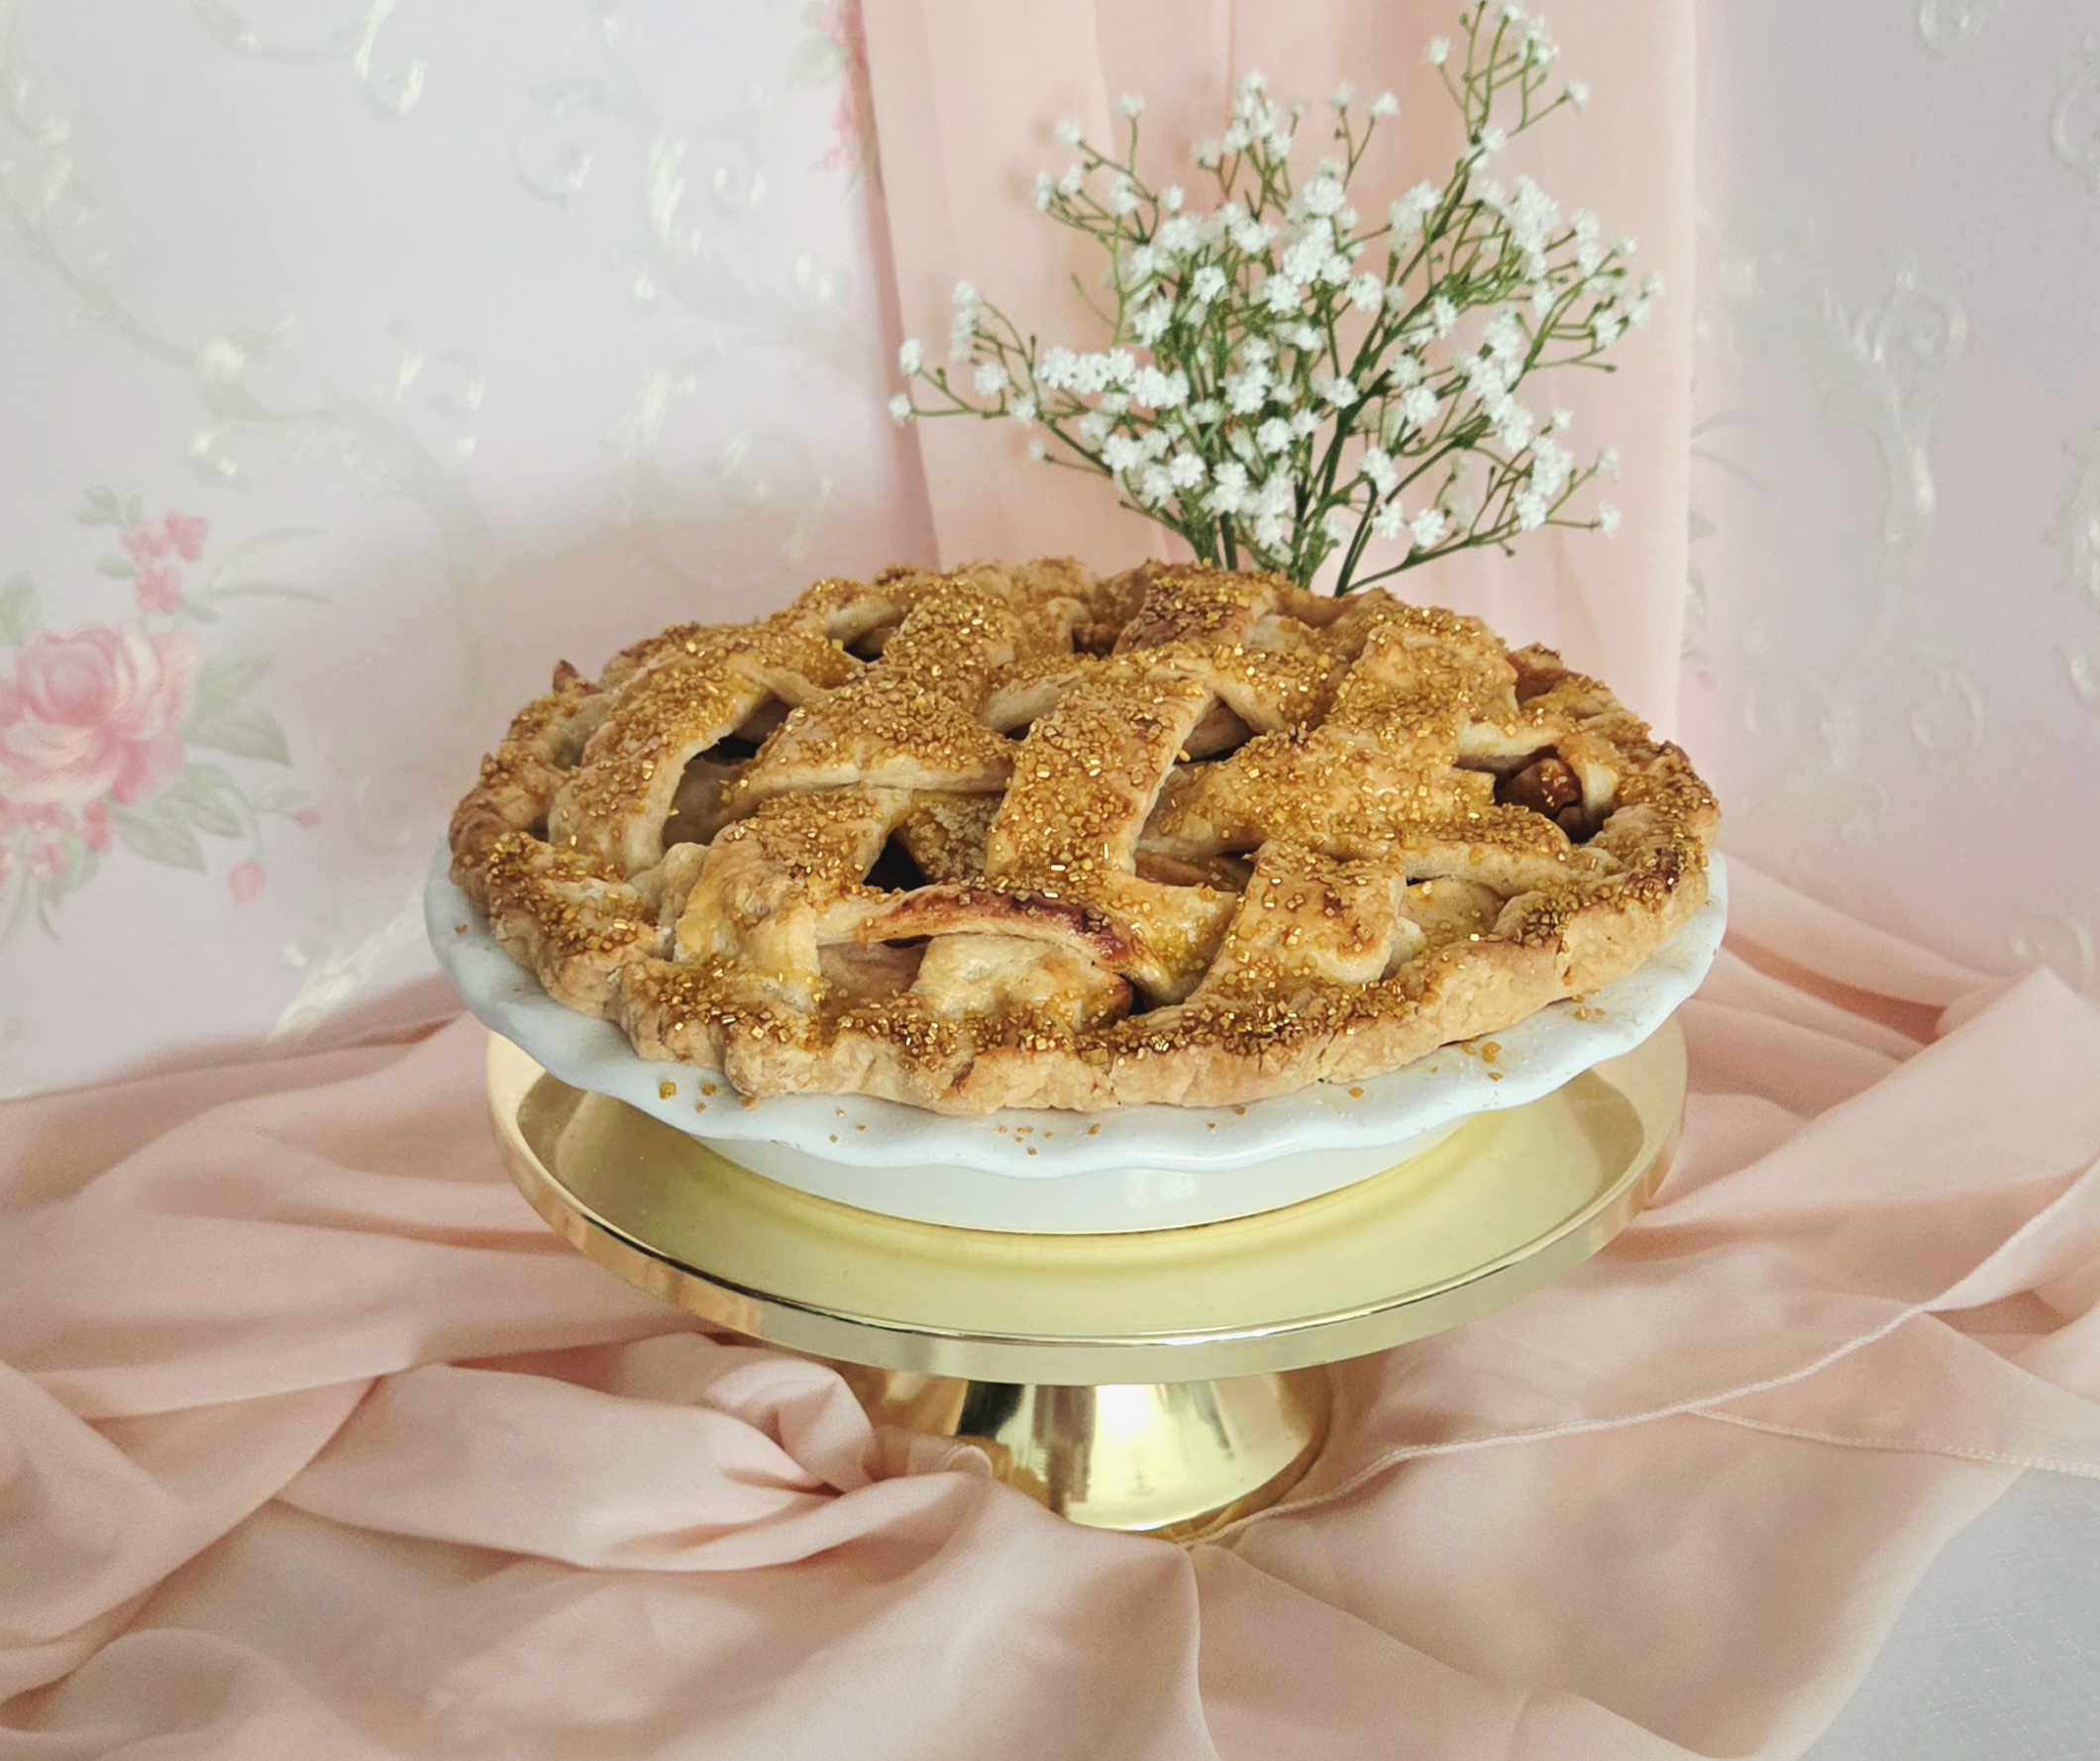
Place the pie in the heated oven for 25 minutes, then turn the temperature down to 350F and flip the pie around. Bake it for an additional 45-50 minutes, or until the top crust is a golden brown color.

Allow the pie to cool down to room temperature before slicing into 8 servings. Store the pie in an airtight container for up to 3 days, and enjoy!

Classic Apple Pie
Bake Time: 400F for 25 minutes then 350F for 45 minutes
Servings: 8 slices
Total Time: 2 hours
Prep Time: 50 Minutes
Ingredients
Double Recipe for Easy Pie Crust
Filling:
- 8-10 medium baking apples (such as granny smith or honey crisp)
- 1 cup granulated sugar
- ½ cup all-purpose flour
- 1 Tablespoon ground cinnamon
- ½ teaspoon ground allspice
- ¼ teaspoon ground nutmeg
- ⅛ teaspoon ground clove
- ¾ teaspoon salt
- 2 Tablespoons unsalted butter
- Juice of 1 lemon
Egg Wash:
- 1 large egg
- Pinch of salt
Directions:
Filling:
- Begin by preparing the apple filling. Peel the apples and cut them into ½ inch thick slices, as shown above. Set them aside.
- In a small bowl, whisk together the sugar, flour, cinnamon, allspice, nutmeg, clove, and salt. Set the dry goods aside.
- In a 4-quart saucepan, heat the butter. Once it’s melted, add the sliced apples, stirring to coat. Squeeze in the lemon juice.
- When the apples have begun to heat and release their juices, add the dry goods and stir to coat. Allow the filling to cook, stirring occasionally, until some of the water has evaporated and the syrup has thickened. This should take approximately 5-10 minutes.
- As the filling cooks, get the baking sheet handy. Once the filling has finished thickening, immediately pour it onto the sheet, spreading it out evenly. Allow it to sit, uncovered, to cool completely.
Assembly:
- Preheat the oven to 400F, on the convection setting if possible, and prepare your pie dish by coating it with a nonstick baking spray. Set the pan aside.
- Mix together the egg wash. In a small bowl, whisk together the egg, splash of water, and a pinch of salt. Set it aside.
- If you’ve prepared your own dough, remove one of the discs from the fridge and unwrap it. Lightly flour a clean counter, place the disc in the center, and lightly flour the top of the disc. Using a rolling pin, roll out the dough into a circle with a 13 inch diameter. If at any point the dough starts to stick to either the counter or the rolling pin, gently peel it away and add a little more flour.
- Fold the circle of dough in half, and transfer it over to the pie dish. Gently unfold it, and fit the dough snug into the pie dish, ensuring it’s touching the bottom, all sides, and where the bottom and sides meet. Allow any excess dough to hang over the sides of the dish. If you’re using store bought dough, line the dish using it in the same manner.
- Pour the cooled off filling into the dough lined pie dish, and using a pastry brush or your finger, lightly brush the outer rim of dough with the egg wash. Place the pie dish in the fridge while you work on the top crust.
- Lightly flour the counter once more, and place the smaller unwrapped disc of dough in the center. Lightly flour the disc and roll it out into a 10 x 10 inch square. Using a knife, bench scraper, or pizza wheel, cut the dough into 1 inch strips.
- Take every other strip of pie dough and place them onto the filled pie, spaced ¼-½ inch apart. Fold back every other strip of dough, so they’re in half. Grab one of the remaining strips and place it horizontally over the flat laid strips of dough. Fold the pulled back strips back over the horizontal strip, then pull back all of the opposite strips that had remained flat before over the horizontal strip. Lay a second horizontal strip down, then fold down all of the pulled back strips. Continue this process until all of the strips of dough have been used, and you’re left with a beautiful lattice top. See reference photos above.
- Trim any dough hanging over the sides of the pan with a paring knife or kitchen scissors. Lightly brush egg wash around the rim and gently fold it over itself, by around 1/4-1/2 inch. Press down gently to seal it.
- For an easy crimp, take a fork and gently press the tines into the rim of dough you just folded over. To ensure that it’s even, start the next crimp by placing the tine on the end into the previously made impression on the end. Continue all the way around the rim of dough.
- For a slightly fancier crimp, take your pointer finger and thumb on one hand and hold them about an inch apart. Gently press them against the sides of the rim of dough and use the pointer finger on the opposite hand to make a moderately deep impression in the space between your two fingers. Start the next finger crimp by placing your pointer finger against the previously made indent, and repeat the same actions as before. Repeat this process all the way around the rim. See reference photos above.
- Lightly brush more egg wash onto the top of the lattice crust. If you’d like to give the pie a little something extra, you can also sprinkle some chunky sugar on top for an extra crunch.
- Place the pie in the heated oven for 25 minutes, then turn the temperature down to 350F and flip the pie around. Bake it for an additional 45-50 minutes, or until the top crust is a golden brown color. Allow the pie to cool down to room temperature before slicing into 8 servings. Store the pie in an airtight container in the fridge for up to 3 days, and enjoy!
Tips
- If at any point the outer rim of crust starts to get too dark before the rest of the pie has finished baking, cover the rim with either tin foil or a silicone pie crust shield cover.
- Pie dough can be made up to two days ahead of time and kept wrapped airtight in the fridge until you’re ready to use it.
- Serve the pie warmed with ice cream, whipped cream, or a thin slice of sharp cheddar melted on top.

0 Comments