

Have you ever wondered how puff pastry is actually made? It’s light, flaky, buttery, and completely neutral for a plethora of baking projects. Whether you’re craving something rich and decadent, refreshing and fruity, savory and cheesy, warm and spicy, this is a perfect foundation. Puff pastry is an incredibly versatile dough, it’s just got such an intimidating reputation! I’m here to show you, it’s nowhere near as difficult to make as you’ve been convinced.
So, why make puff pastry when it’s so much easier to buy it from the freezer section of your local grocery store? Between kids and family, work, school, and any number of other time consuming obligations, I completely understand. Shortcut products like frozen puff pastry have a bright, shiny time-saving appeal. I’ve used it myself on a number of occasions when I just needed something fast! But there are definite benefits to making your own puff from scratch.
For starters, when you make something from scratch, you have complete knowledge and control over what goes into it. Maybe you’re someone who only uses grass fed butter. Perhaps you’re a bit of an overachiever who mills their own flour and needs more projects to use it in. Or you could just be trying to avoid food preservatives where you can. Whatever the case, creating something with your own two hands gives you that power!
It’s also super impressive to people when they hear you made your own dough from scratch. I’ve found this to be true of most kinds of dough, like pie crust or bread, but it seems especially true for puff pastry. Most people can’t seem to fathom where to even begin creating your own puff! So if you’ve been dabbling in baking and are partially in it for the praise from family, friends, neighbors, and coworkers, making your own puff pastry from scratch is a great addition to the recipes you use.
Most importantly, puff pastry made from scratch tastes far better than anything you can get from the freezer section. Pre-made manufactured puff pastry tends to be on the bland side, and although it’s flaky just like the scratch-made version, it’s missing that buttery flavor you get from making it yourself. If you want to elevate whatever creation you’re using the puff pastry in, this is definitely the way to do it!
FAQs and Science
What makes puff pastry puff up like it does?
Puff pastry falls under the category of laminated dough, which essentially means dough that’s been layered with fat. Other kinds of laminated dough includes croissant and danish. So why does that layering between dough and fat cause laminated doughs to puff up the way they do? It all has to do with the cold butter hitting a hot oven. The intense temperature change causes the water in the butter to turn into steam, and the force of that steam is enough to make the layers of dough individually puff up before the water evaporates. That’s why it’s so important to make sure your puff pastry is cold before you put it in the oven!
Does the number of layers created matter?
Yes! There’s a happy medium between so few layers that you have a sad, dense hunk of dough, and so many layers that they end up melding together from being too thin. This is why it’s important to keep track of how many “turns” or folds you’re completing as you go.
It’s so easy to get caught up in something else while your puff pastry is chilling and completely forget where you left off in the process. When I was at pastry school, I was taught to mark little indents in the dough itself to know just how many turns I’d made thus far. I’m not a huge fan of that technique. If your indents aren’t deep enough, it’s difficult to really tell how many are there, but if they’re too deep, they can end up messing with the lamination you’ve created. I find it easiest to just write tally marks on a piece of paper or whiteboard, so there’s no question about it.
Can you make puff pastry ahead of time?
Absolutely! This puff pastry will keep wrapped up tightly in the fridge for a few days, but it freezes beautifully for several months. I’d suggest rolling it out to around 1/2 inch in thickness and wrapping it tightly before freezing, so it will thaw out at a faster rate and be slightly easier to roll out. Frozen puff can be moved to the fridge the night before use, or left on the counter for an hour or so, still covered. That way, you can enjoy your scratch-made puff while still having the convenience of pulling it out of the freezer when you’re ready to bake!
Did I ruin my puff if I left it sitting for longer than 30 minutes to chill in between turns?
Not at all, there have been plenty of times I’ve gotten distracted working on a different part of the pastry I was making or chasing my toddler and the puff sat for even a few hours in between turns. 30 minutes is a minimum time frame, so the gluten can relax and the butter can stay cold. You may need to let the dough sit at room temperature for a bit longer if it’s sat in the fridge for quite a while just to get the butter to cooperate, but your puff will still come together just fine.
What You’ll Need
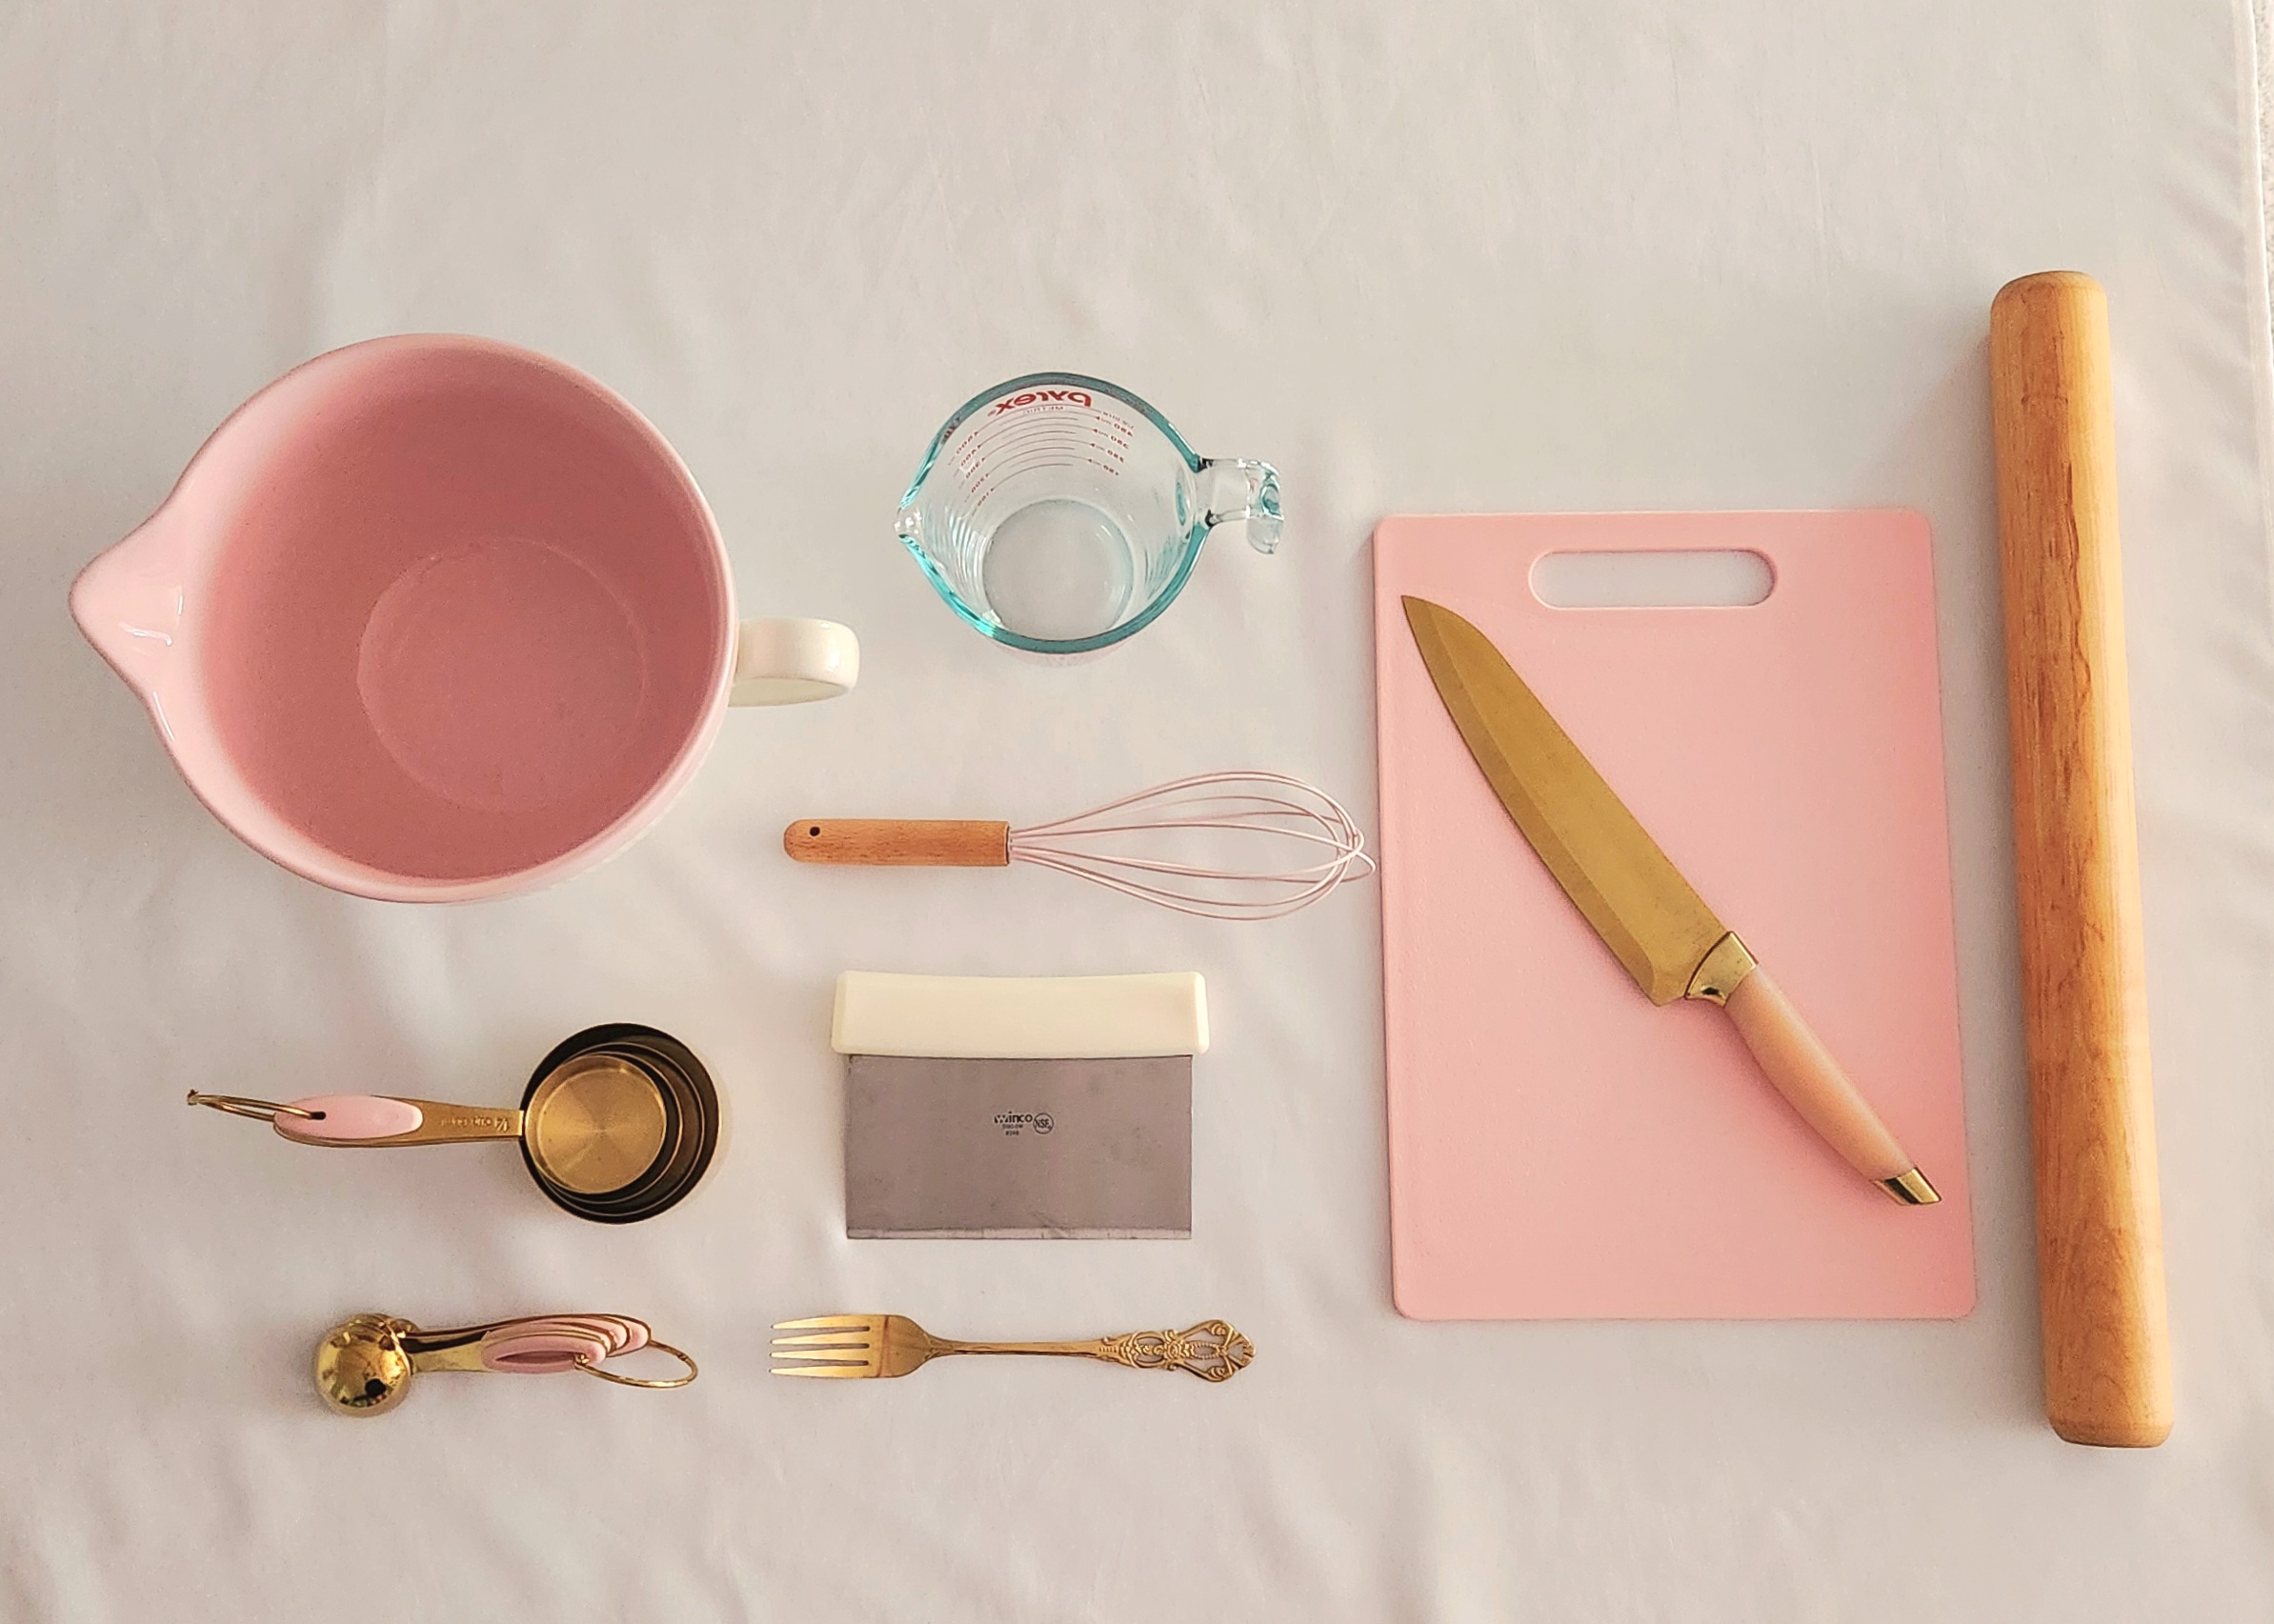
- Large mixing bowl
- Fork
- Plastic Wrap
- Measuring cups, both dry and wet
- Measuring spoons
- Rolling pin
- Knife
- Bench scraper (optional)
The Process
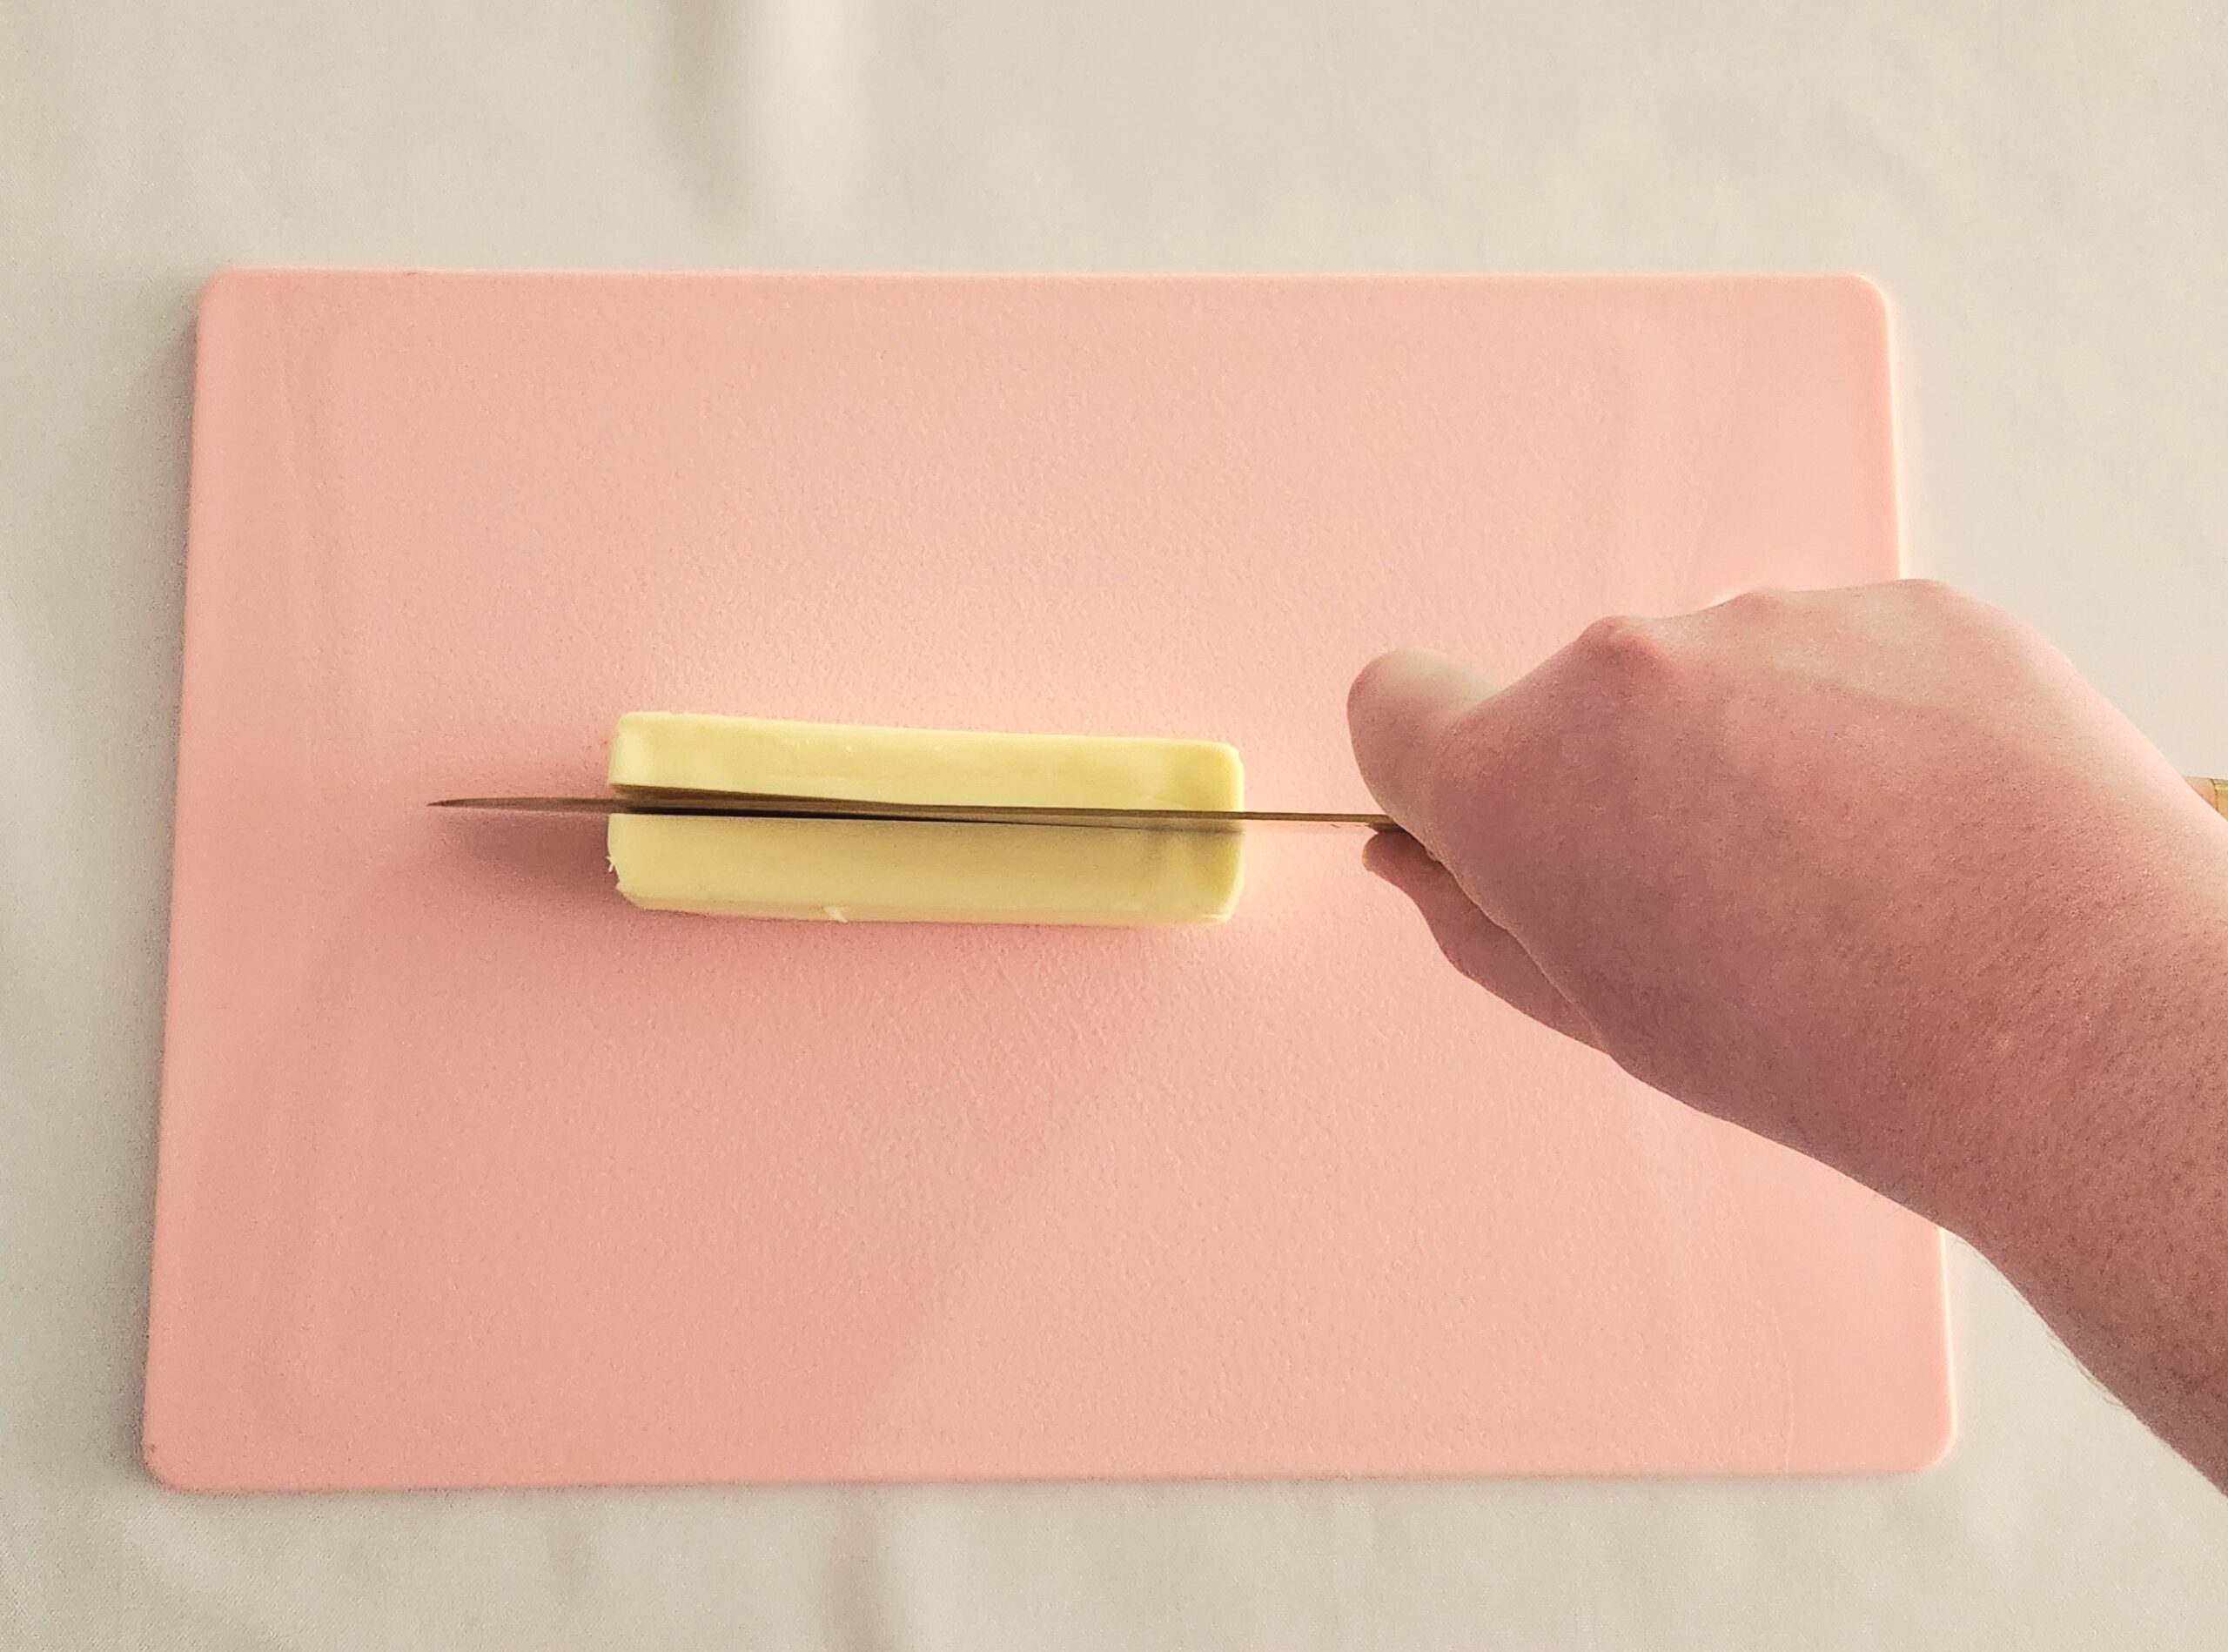
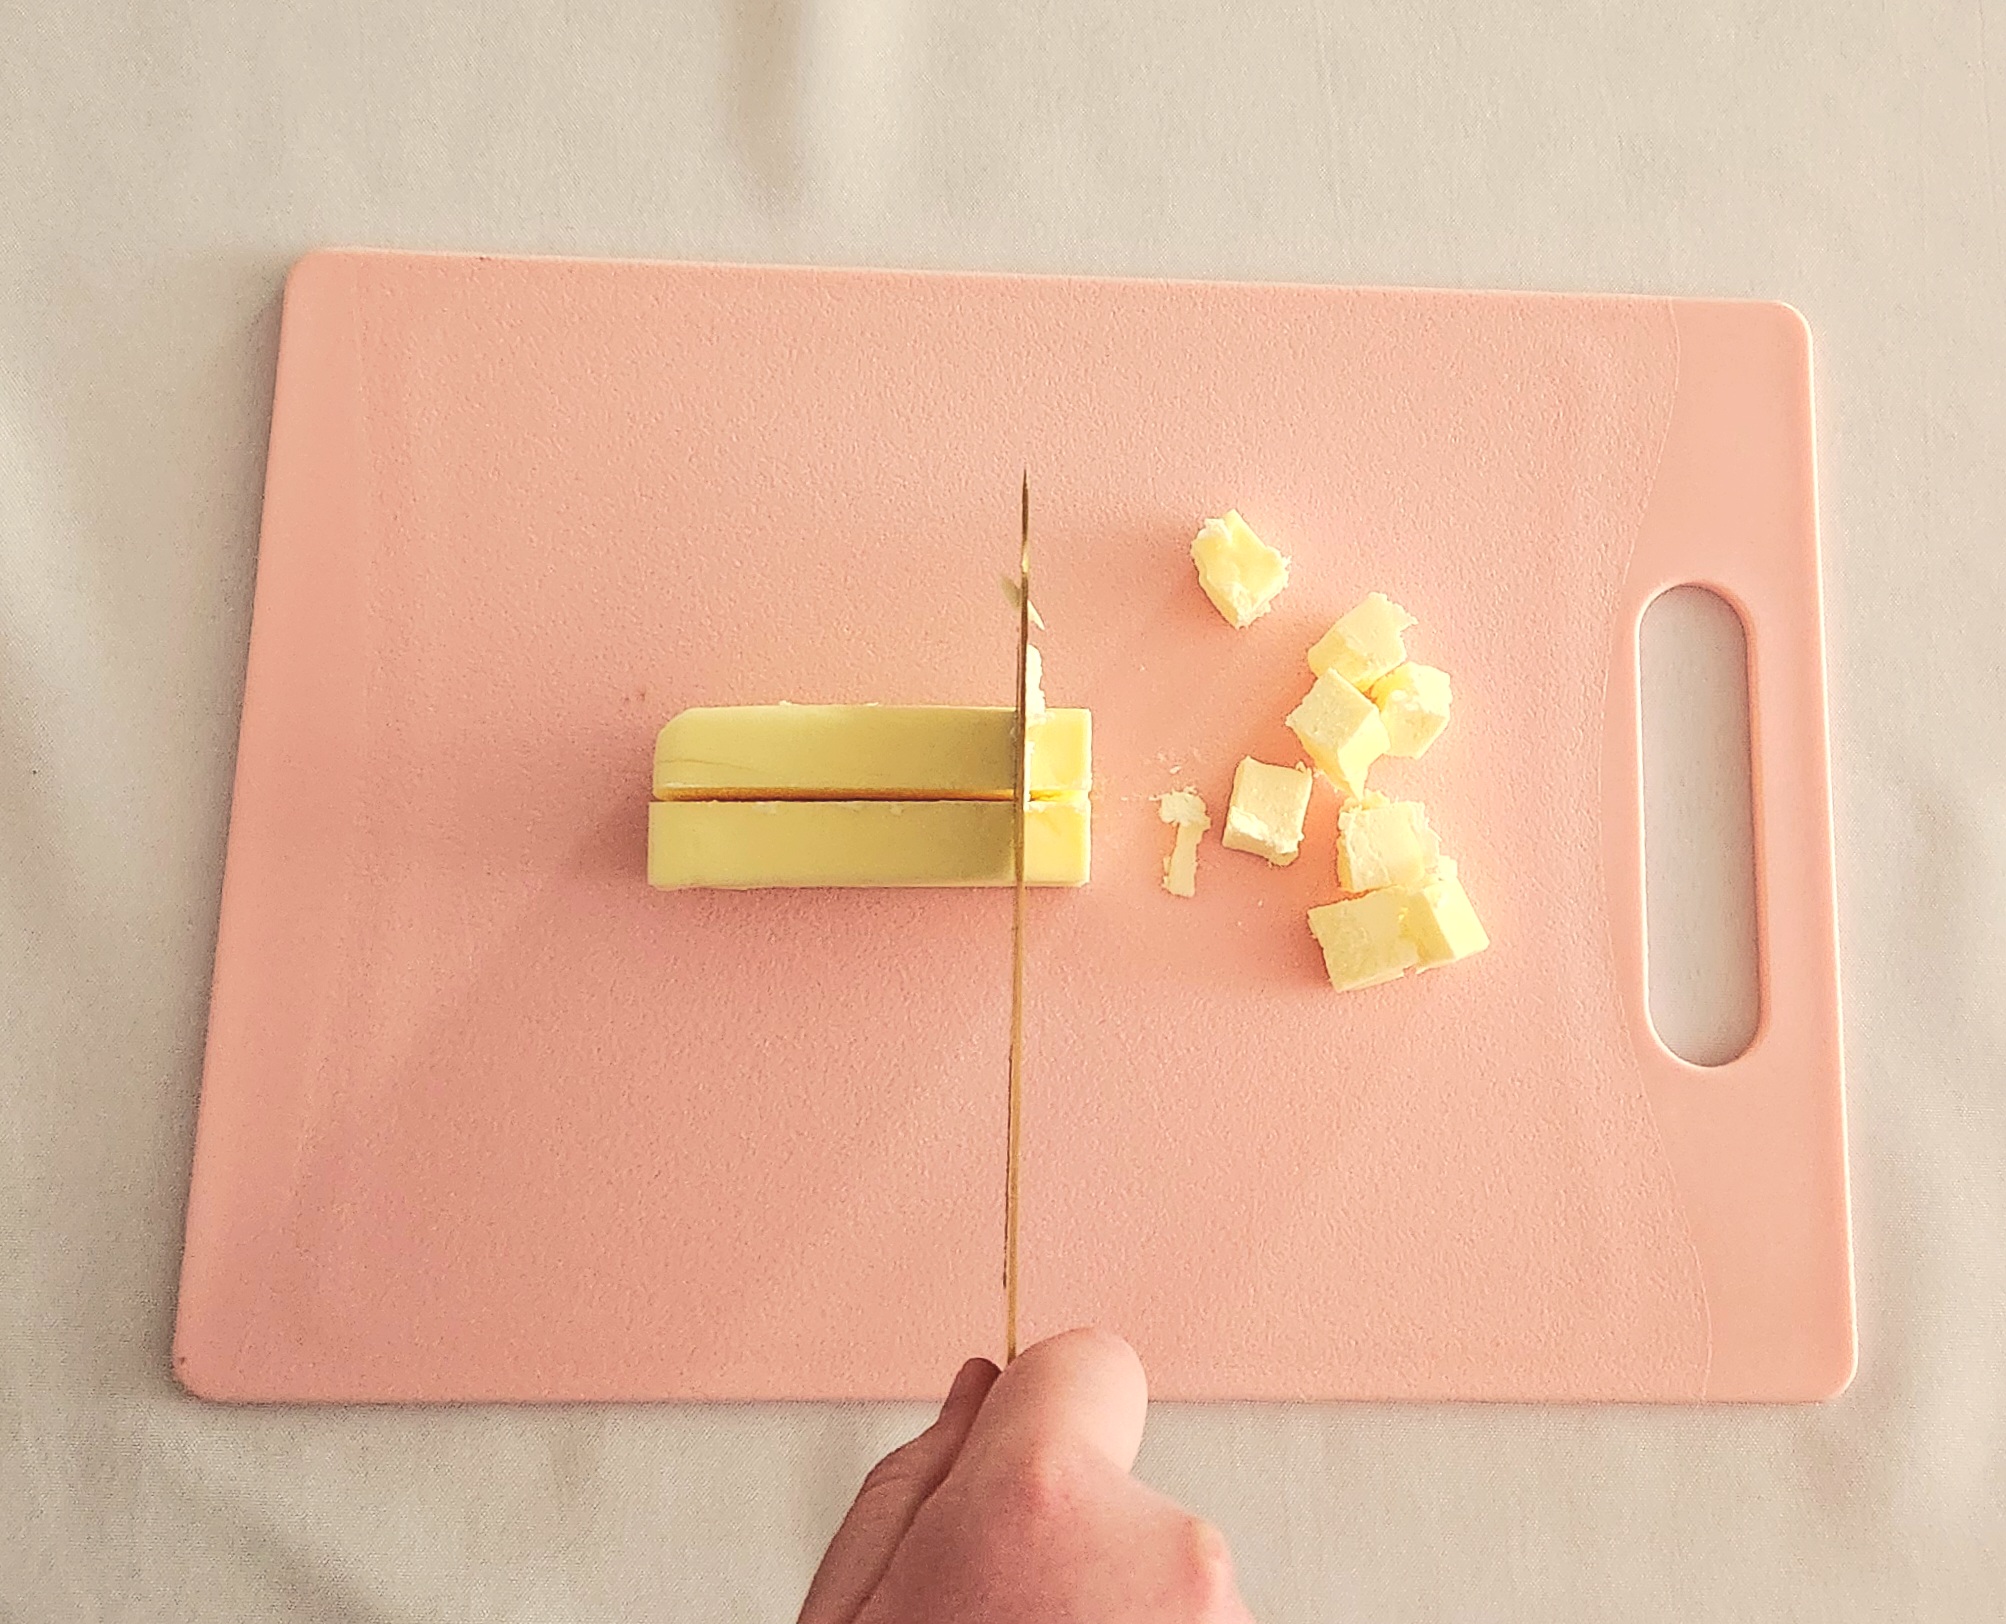
Start off by making sure your work area is clean, and you have a sheet of plastic wrap laid out. This way, you wont be scrambling to figure out what to do with the shaggy hydrated dough when you get there. Prep the butter by cutting it into 1/2 inch cubes, then place it in the fridge.
Cold is a very important factor in making puff pastry. If everything isn’t kept chilled throughout the recipe, the puff pastry wont be able to puff up as you need it to.
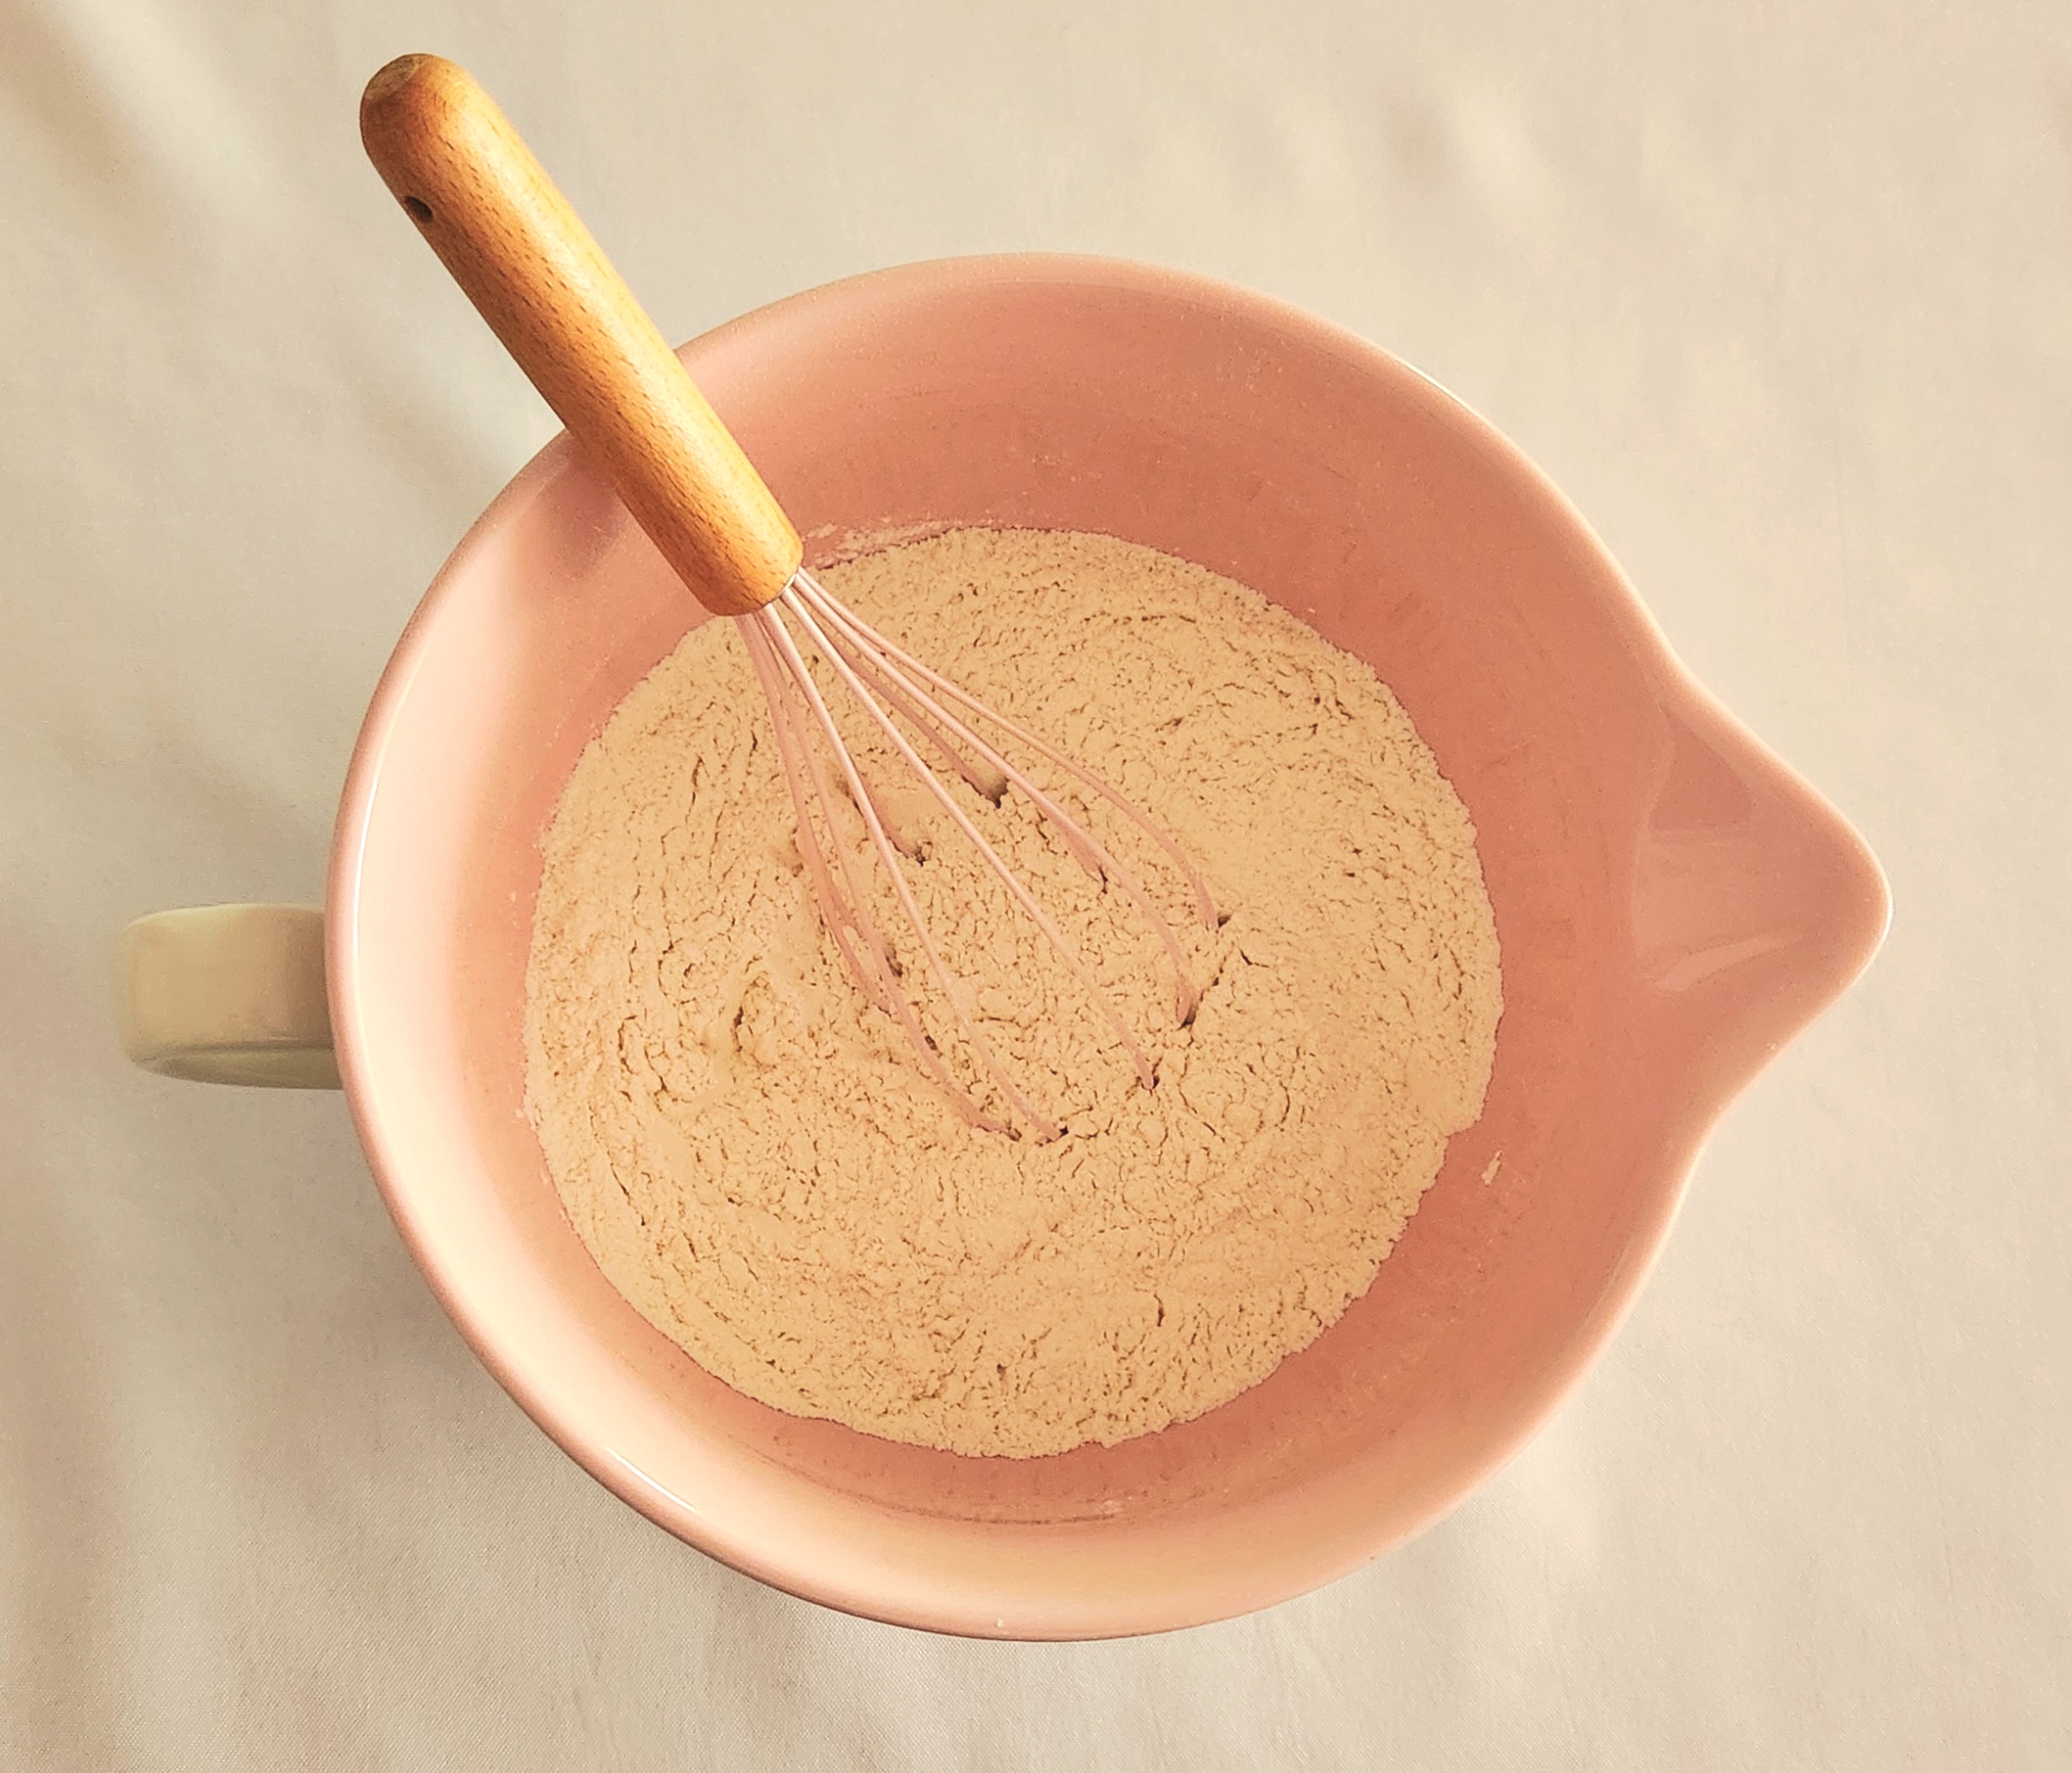
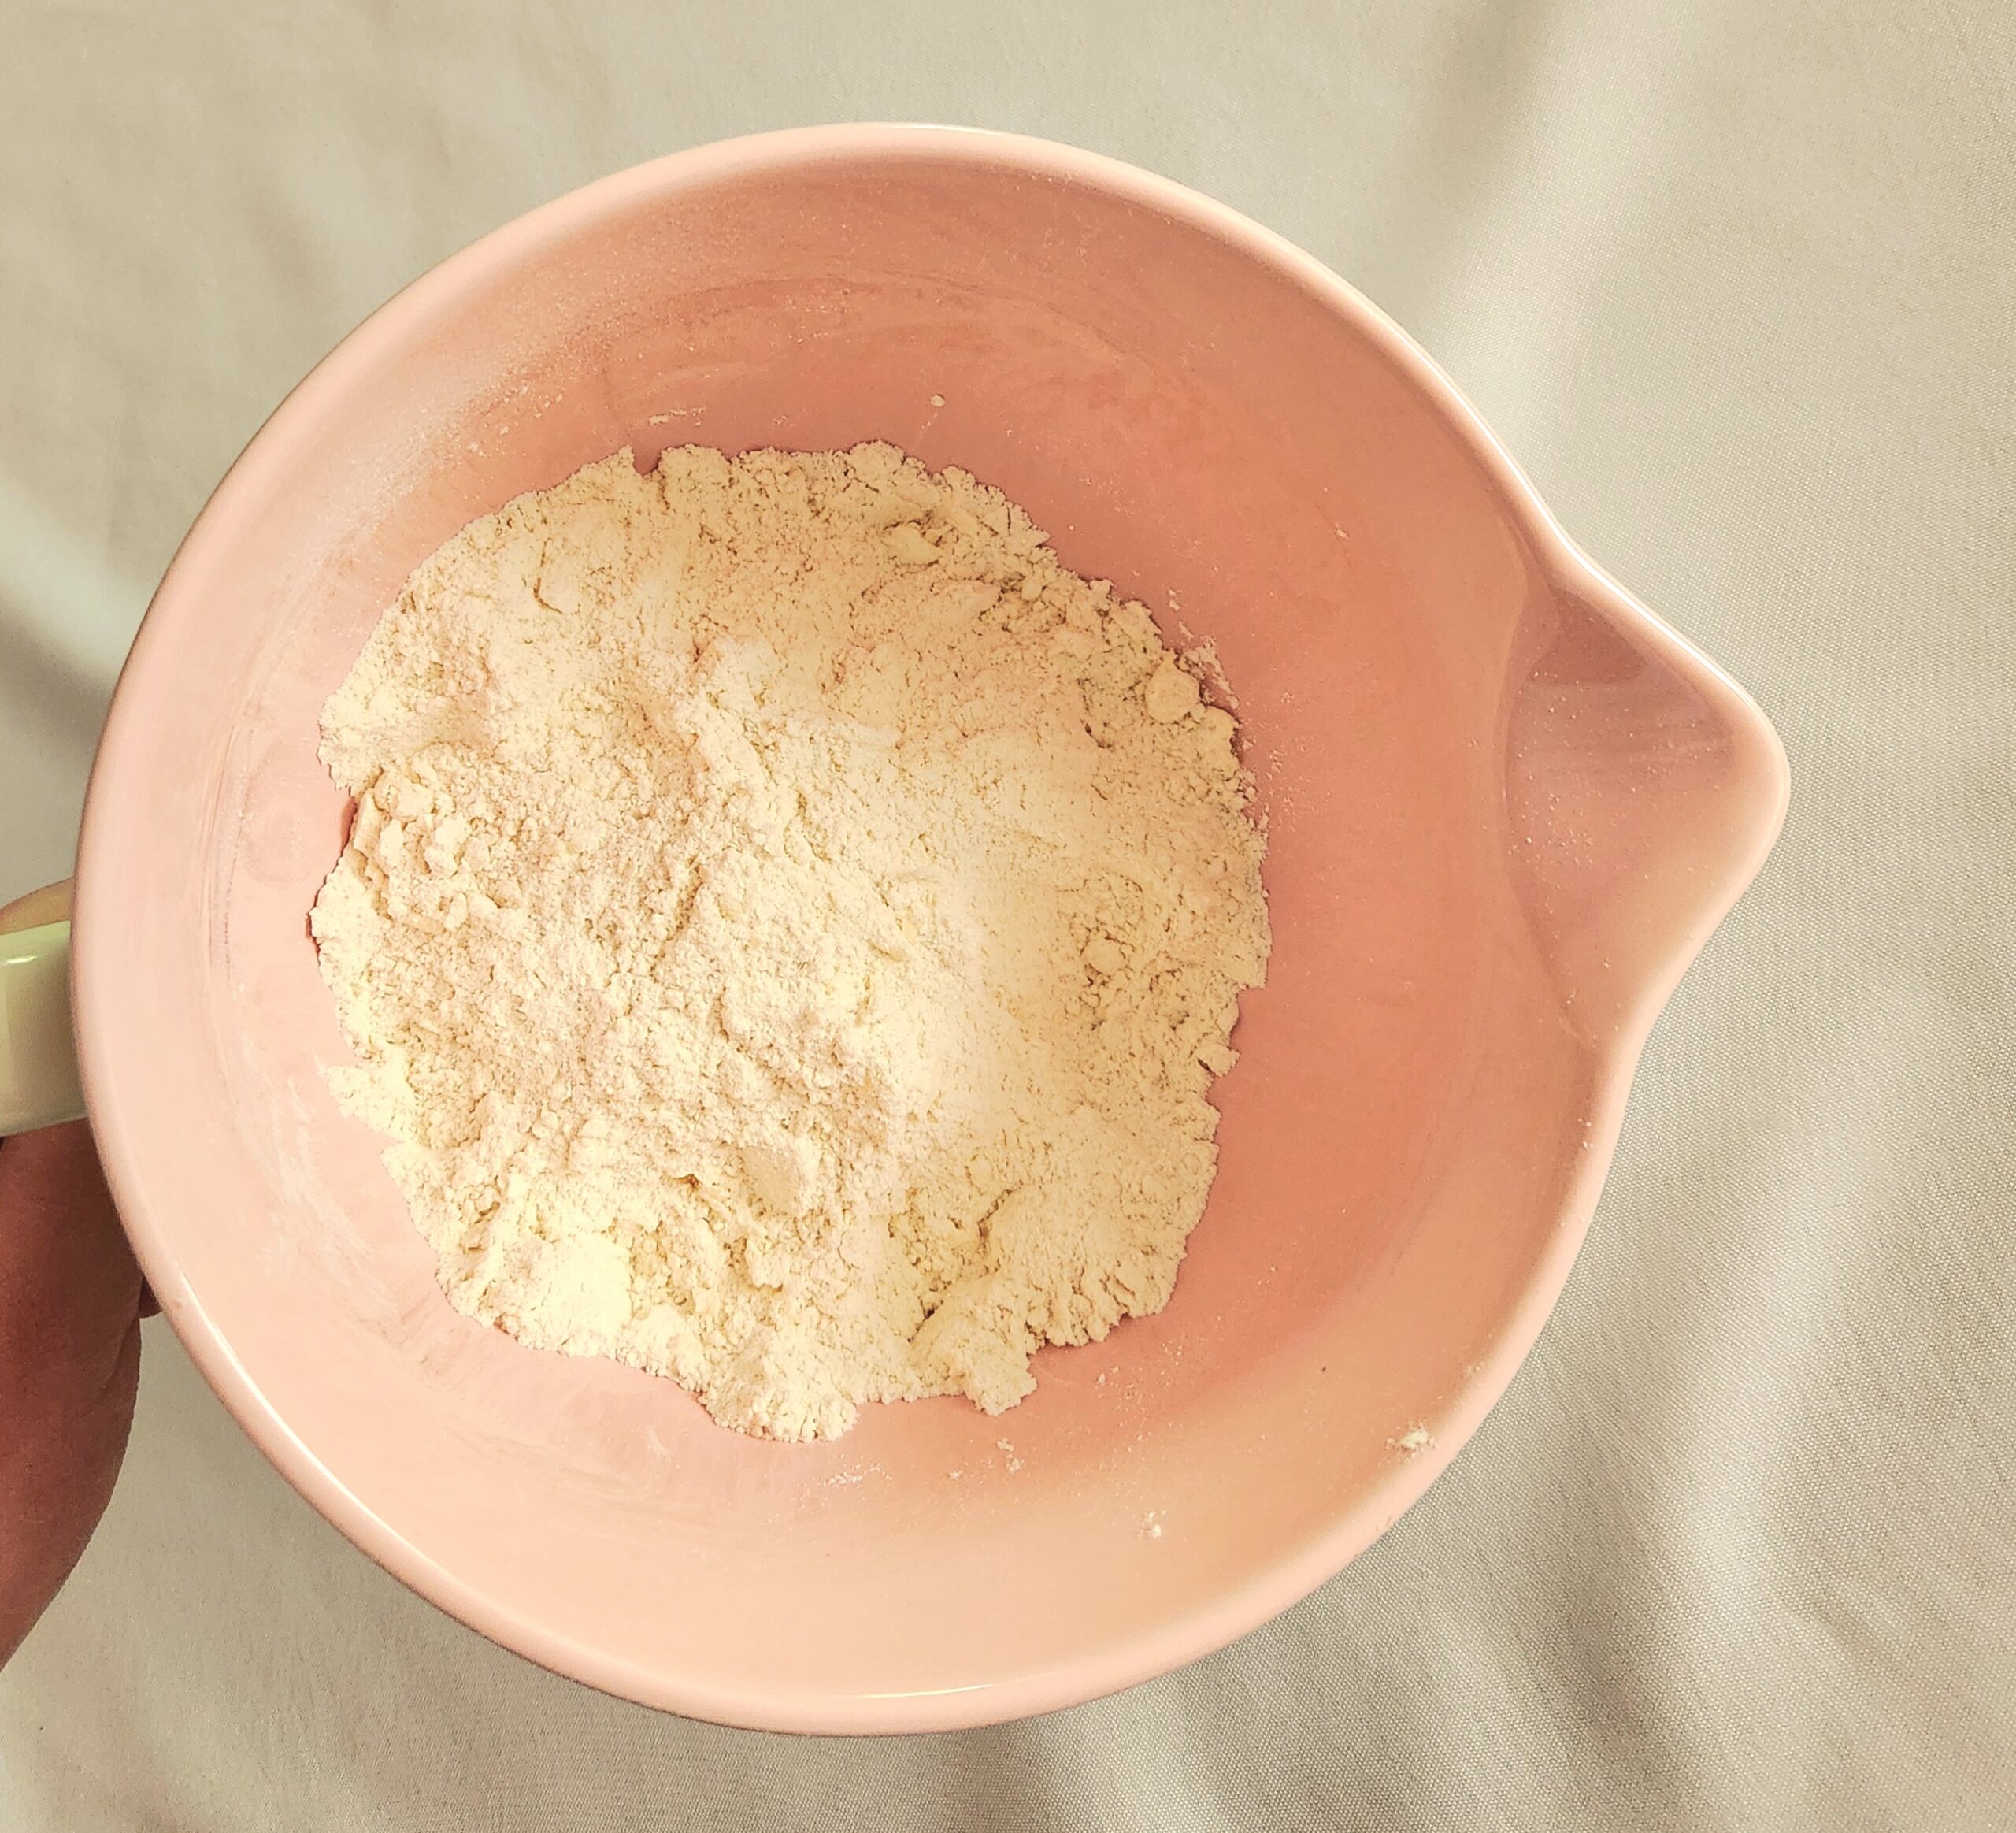
Whisk together the flour and salt. This will ensure that the salt is evenly distributed throughout the the puff pastry, so there’s flavor consistency and no salt pockets. Feel free to just use a fork.
Next, you need to work the smaller amount of butter (4T) into the flour mixture. The consistency of this butter needs to be cool and malleable, which sounds much harder to achieve than it is. A trick I learned in pastry school to achieve this is to take your cold hunk of butter, wrap it in either plastic, the wrapper it came in, or a baggy, and beat it with a rolling pin.

Really take any pent up frustration or aggression out on this butter. Unwrap it, fold the butter up, re-wrap it, and beat it some more. Repeat this until the consistency is something akin to play dough. It should still be solid and hold its shape, but easily maneuvered and able to hold a finger indentation.
Break off tiny hunks of your cool, softened butter, scatter them over the flour mixture.
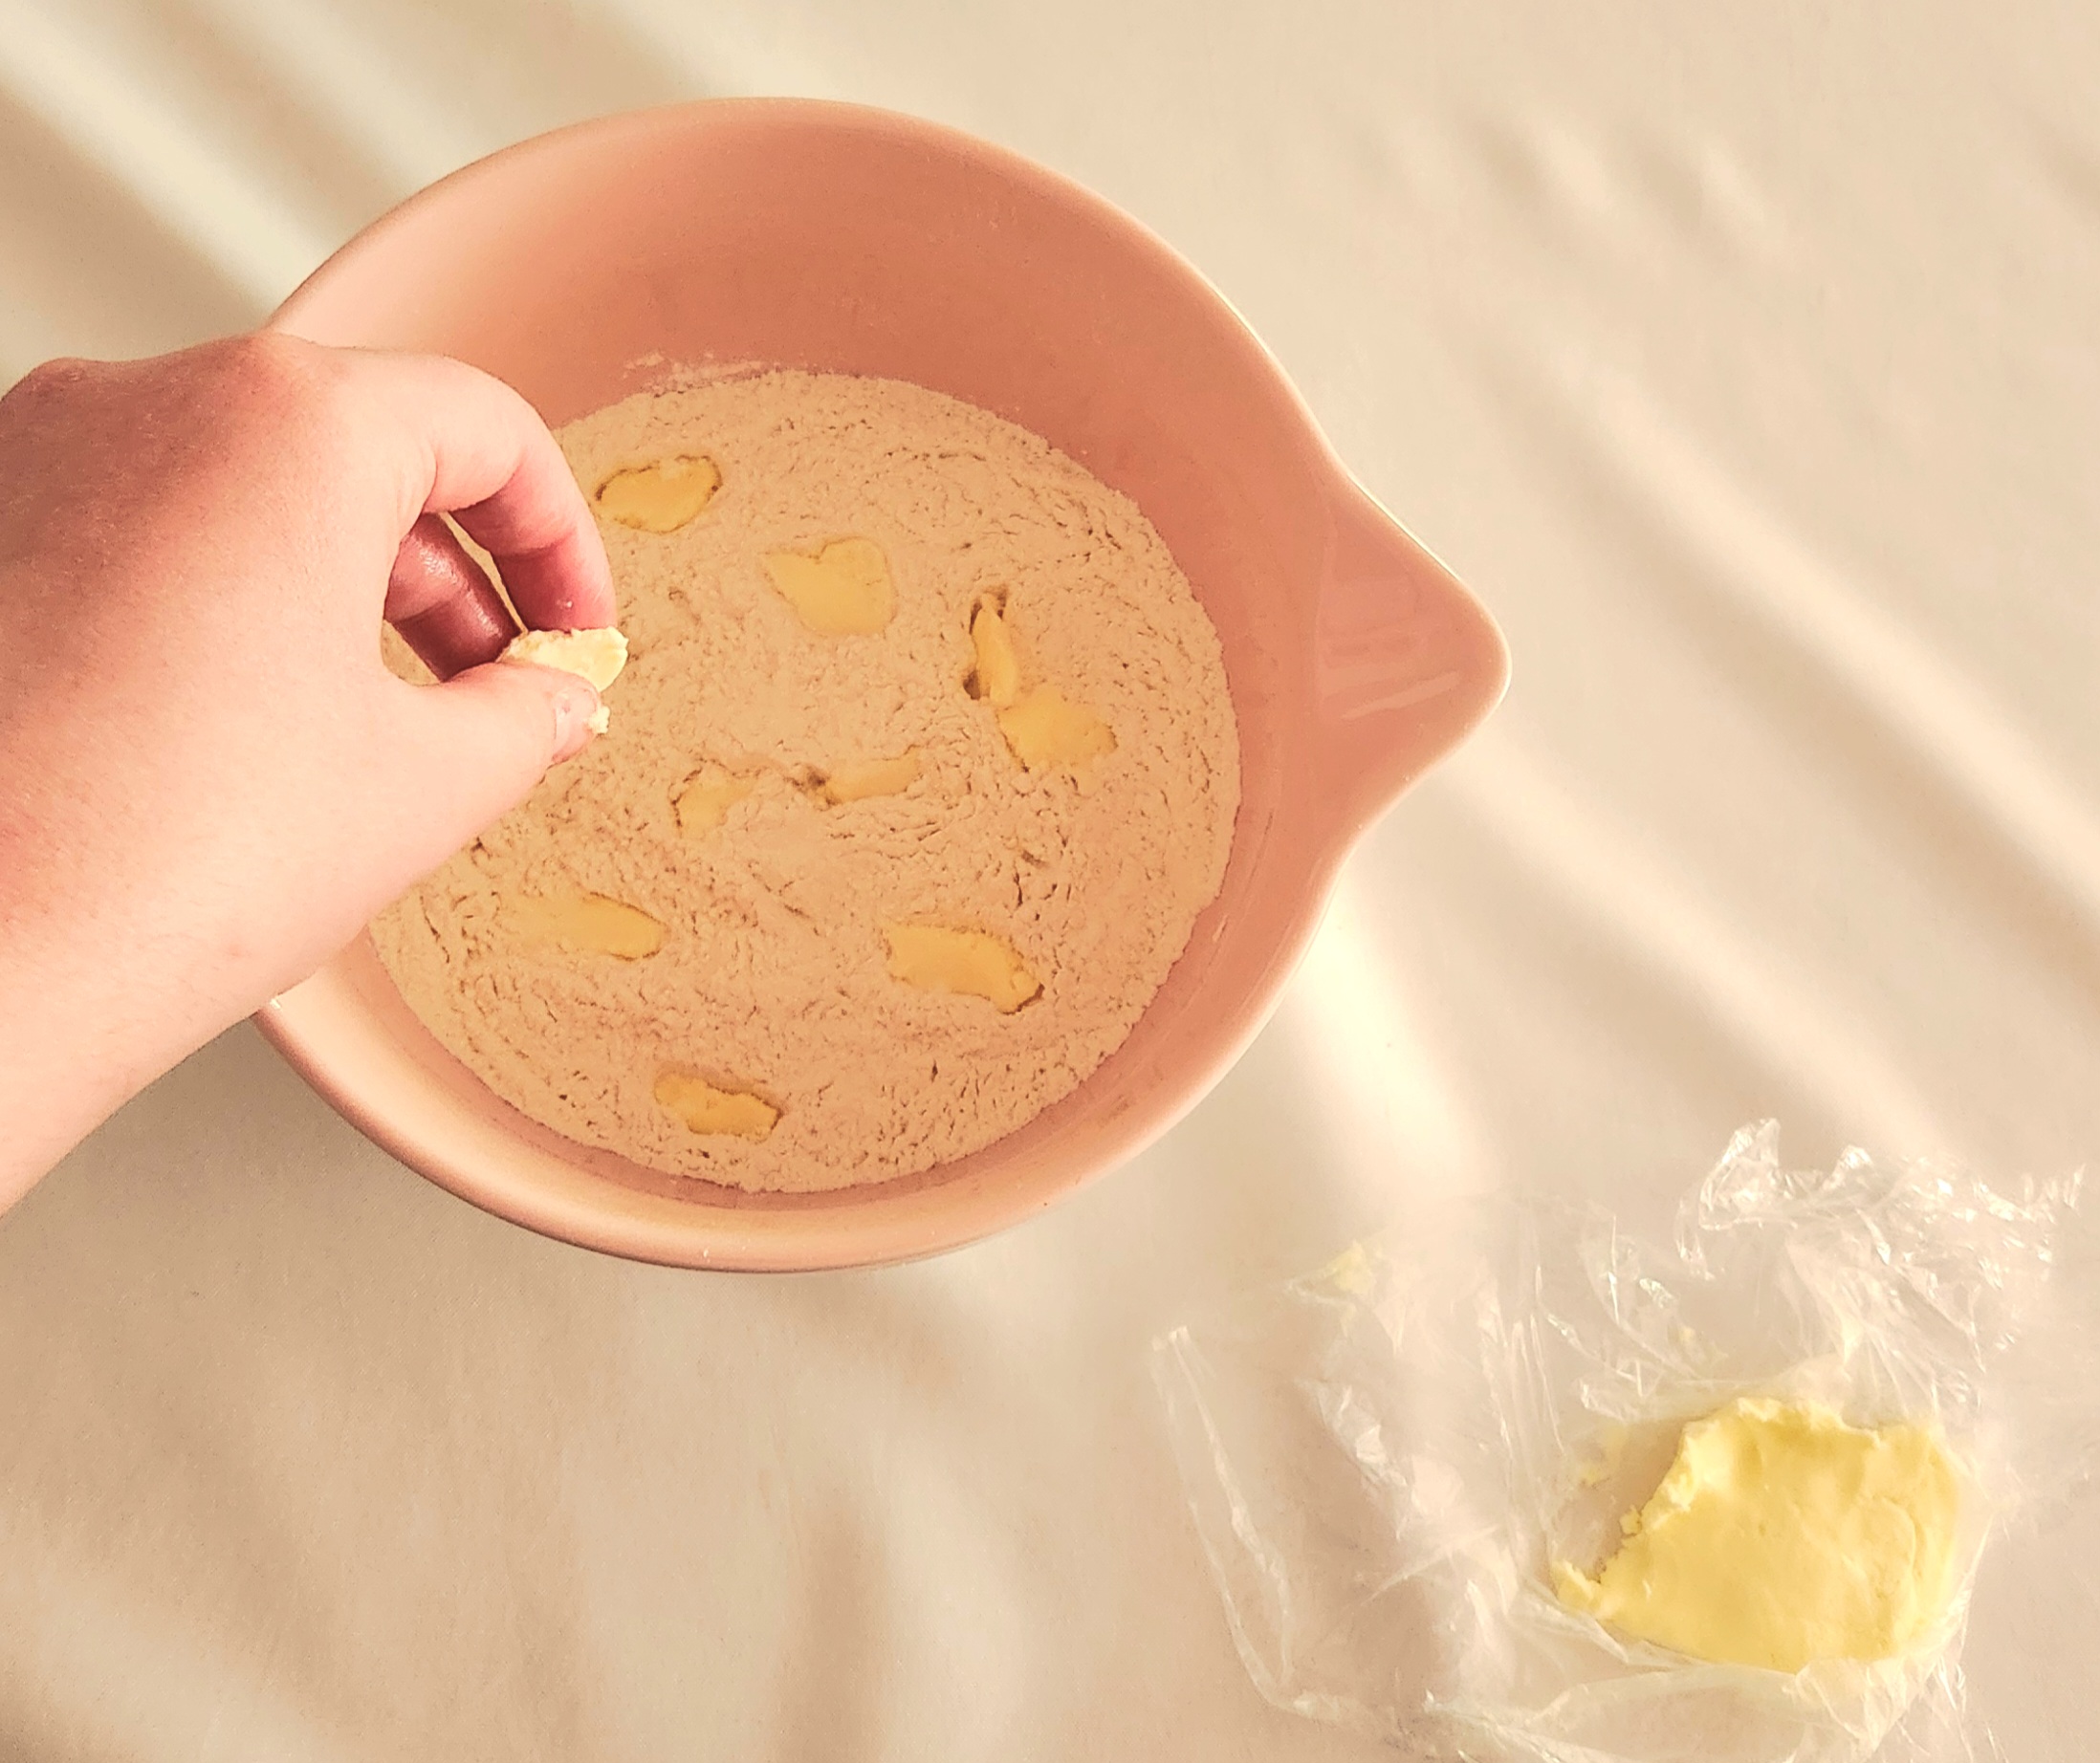
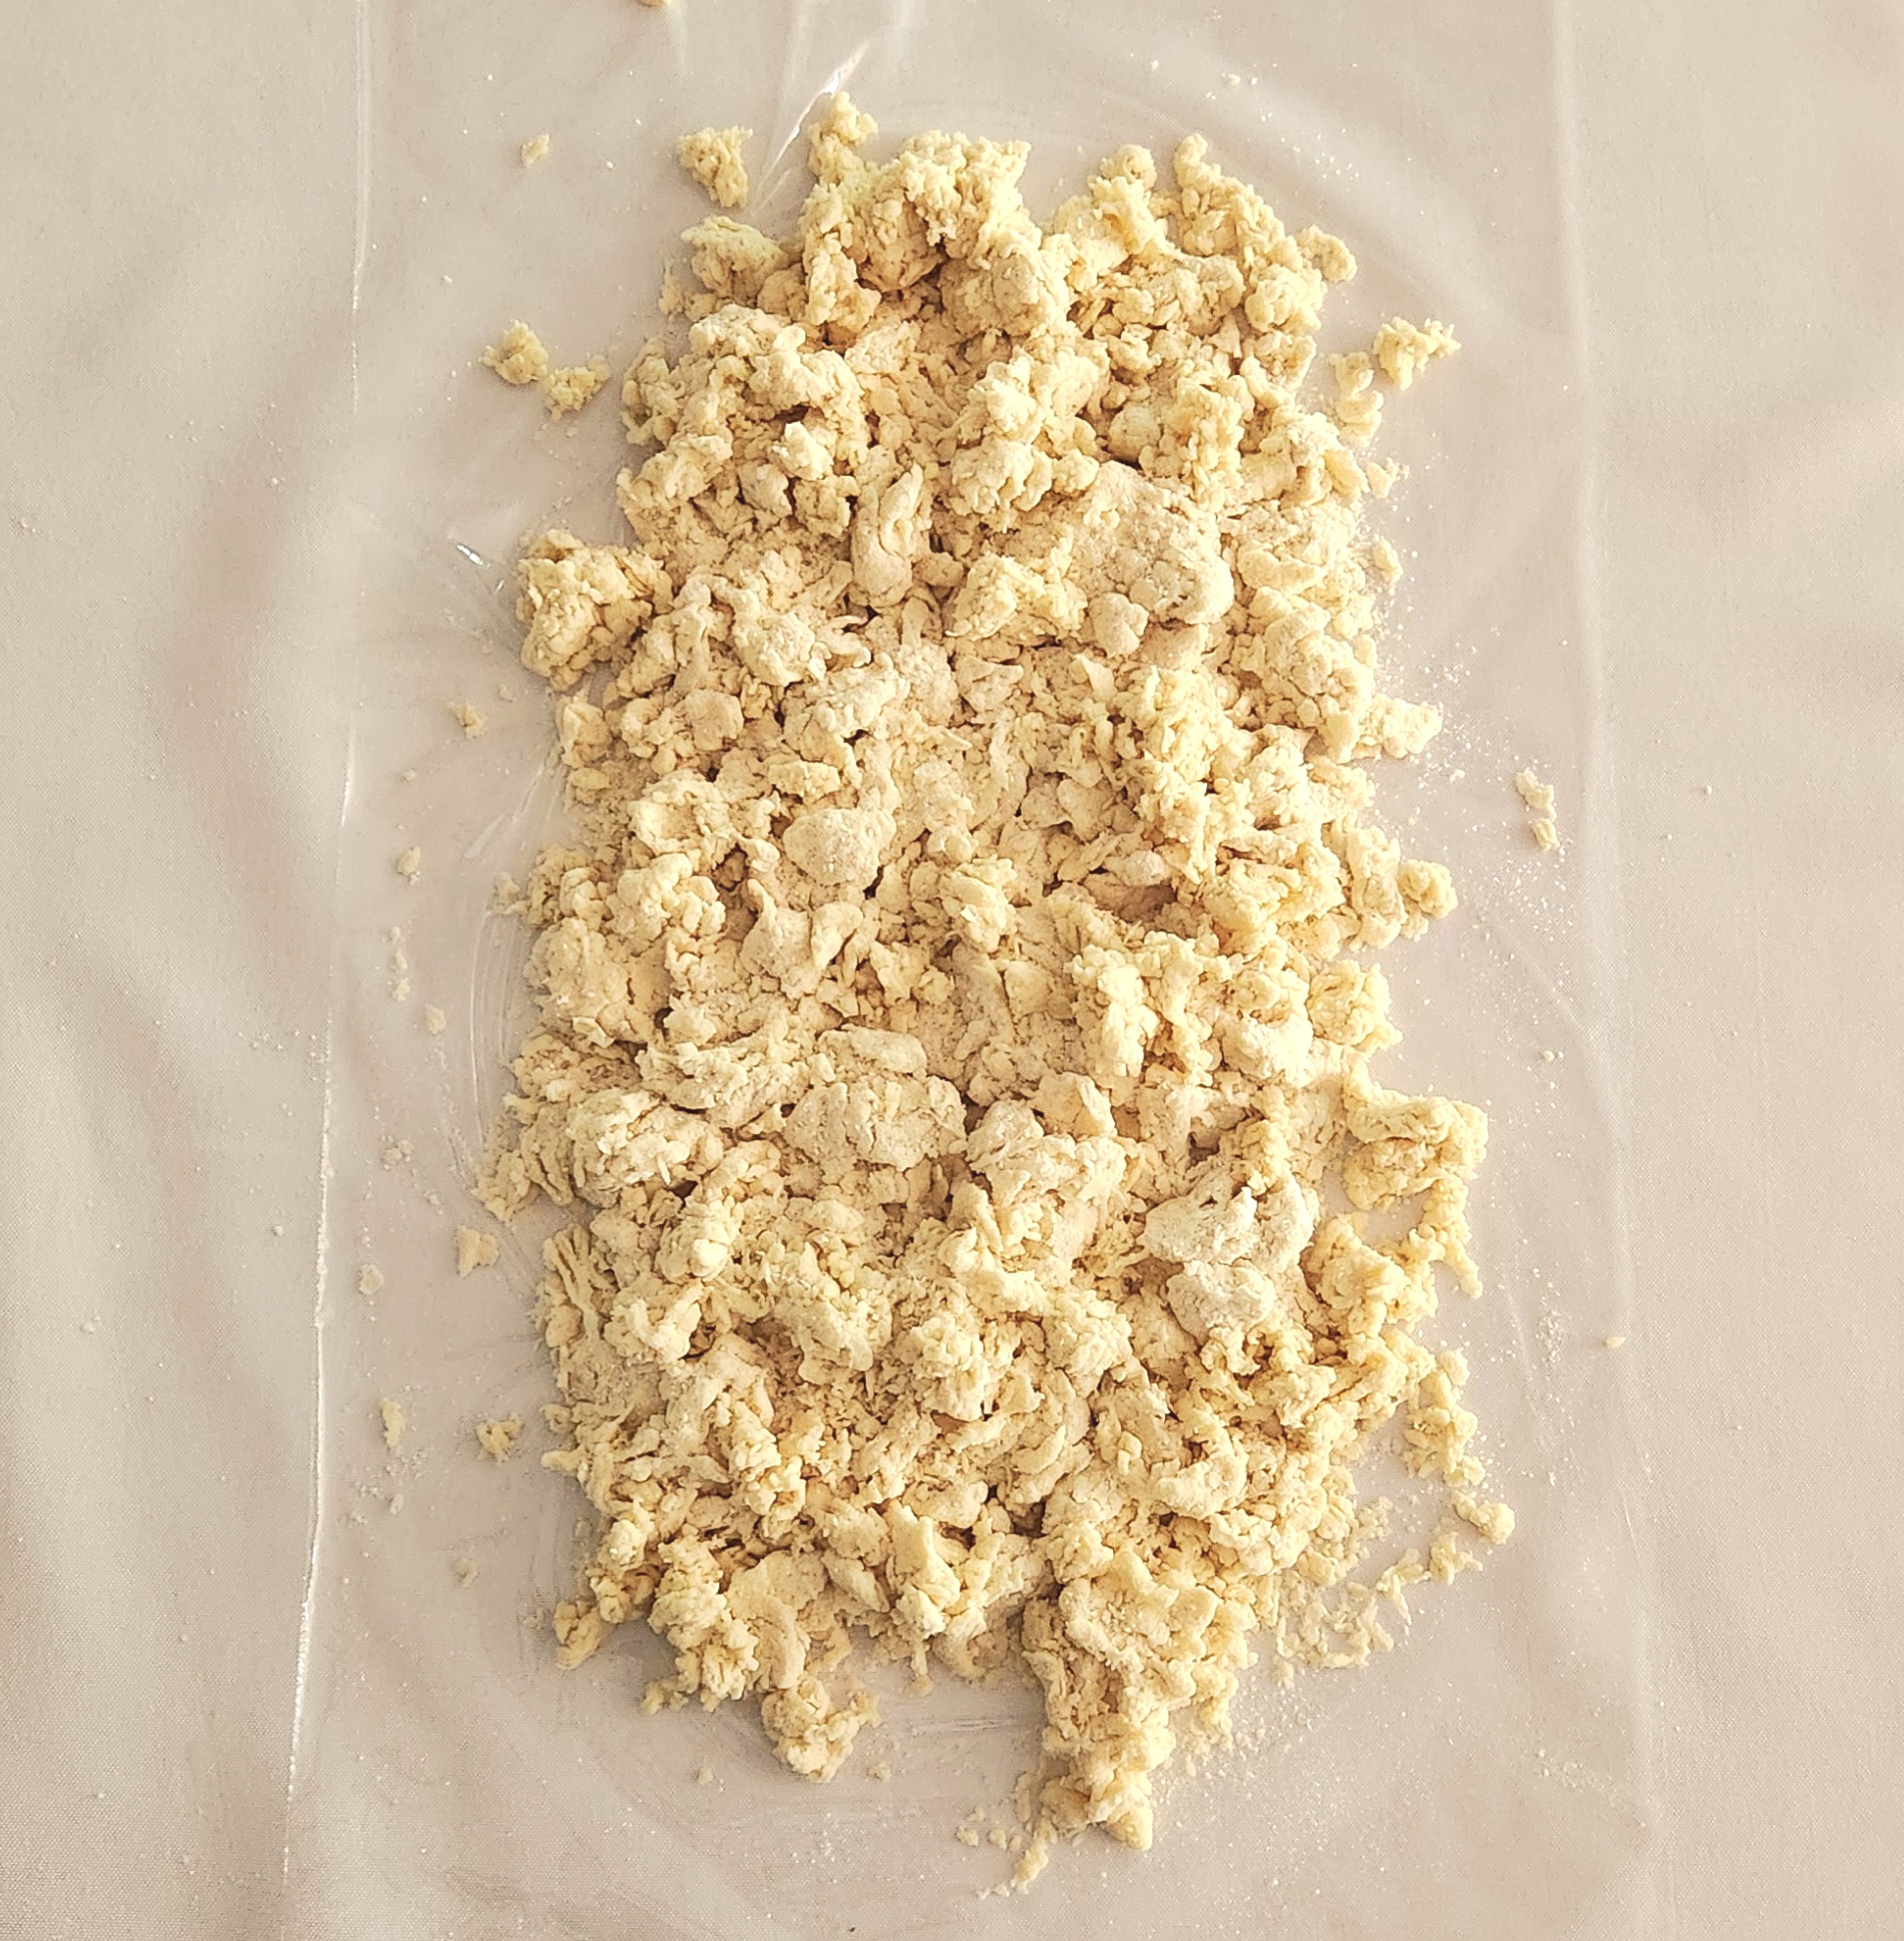
Rub them in with your fingertips, until it’s fully incorporated and the texture of the mixture is on the sandy side. A few hunks of butter here and there are fine, but they should be smaller than a pea. Avoid the use of your entire hand. The heat from your hand will inevitably melt the butter, and that’s exactly what you don’t want.

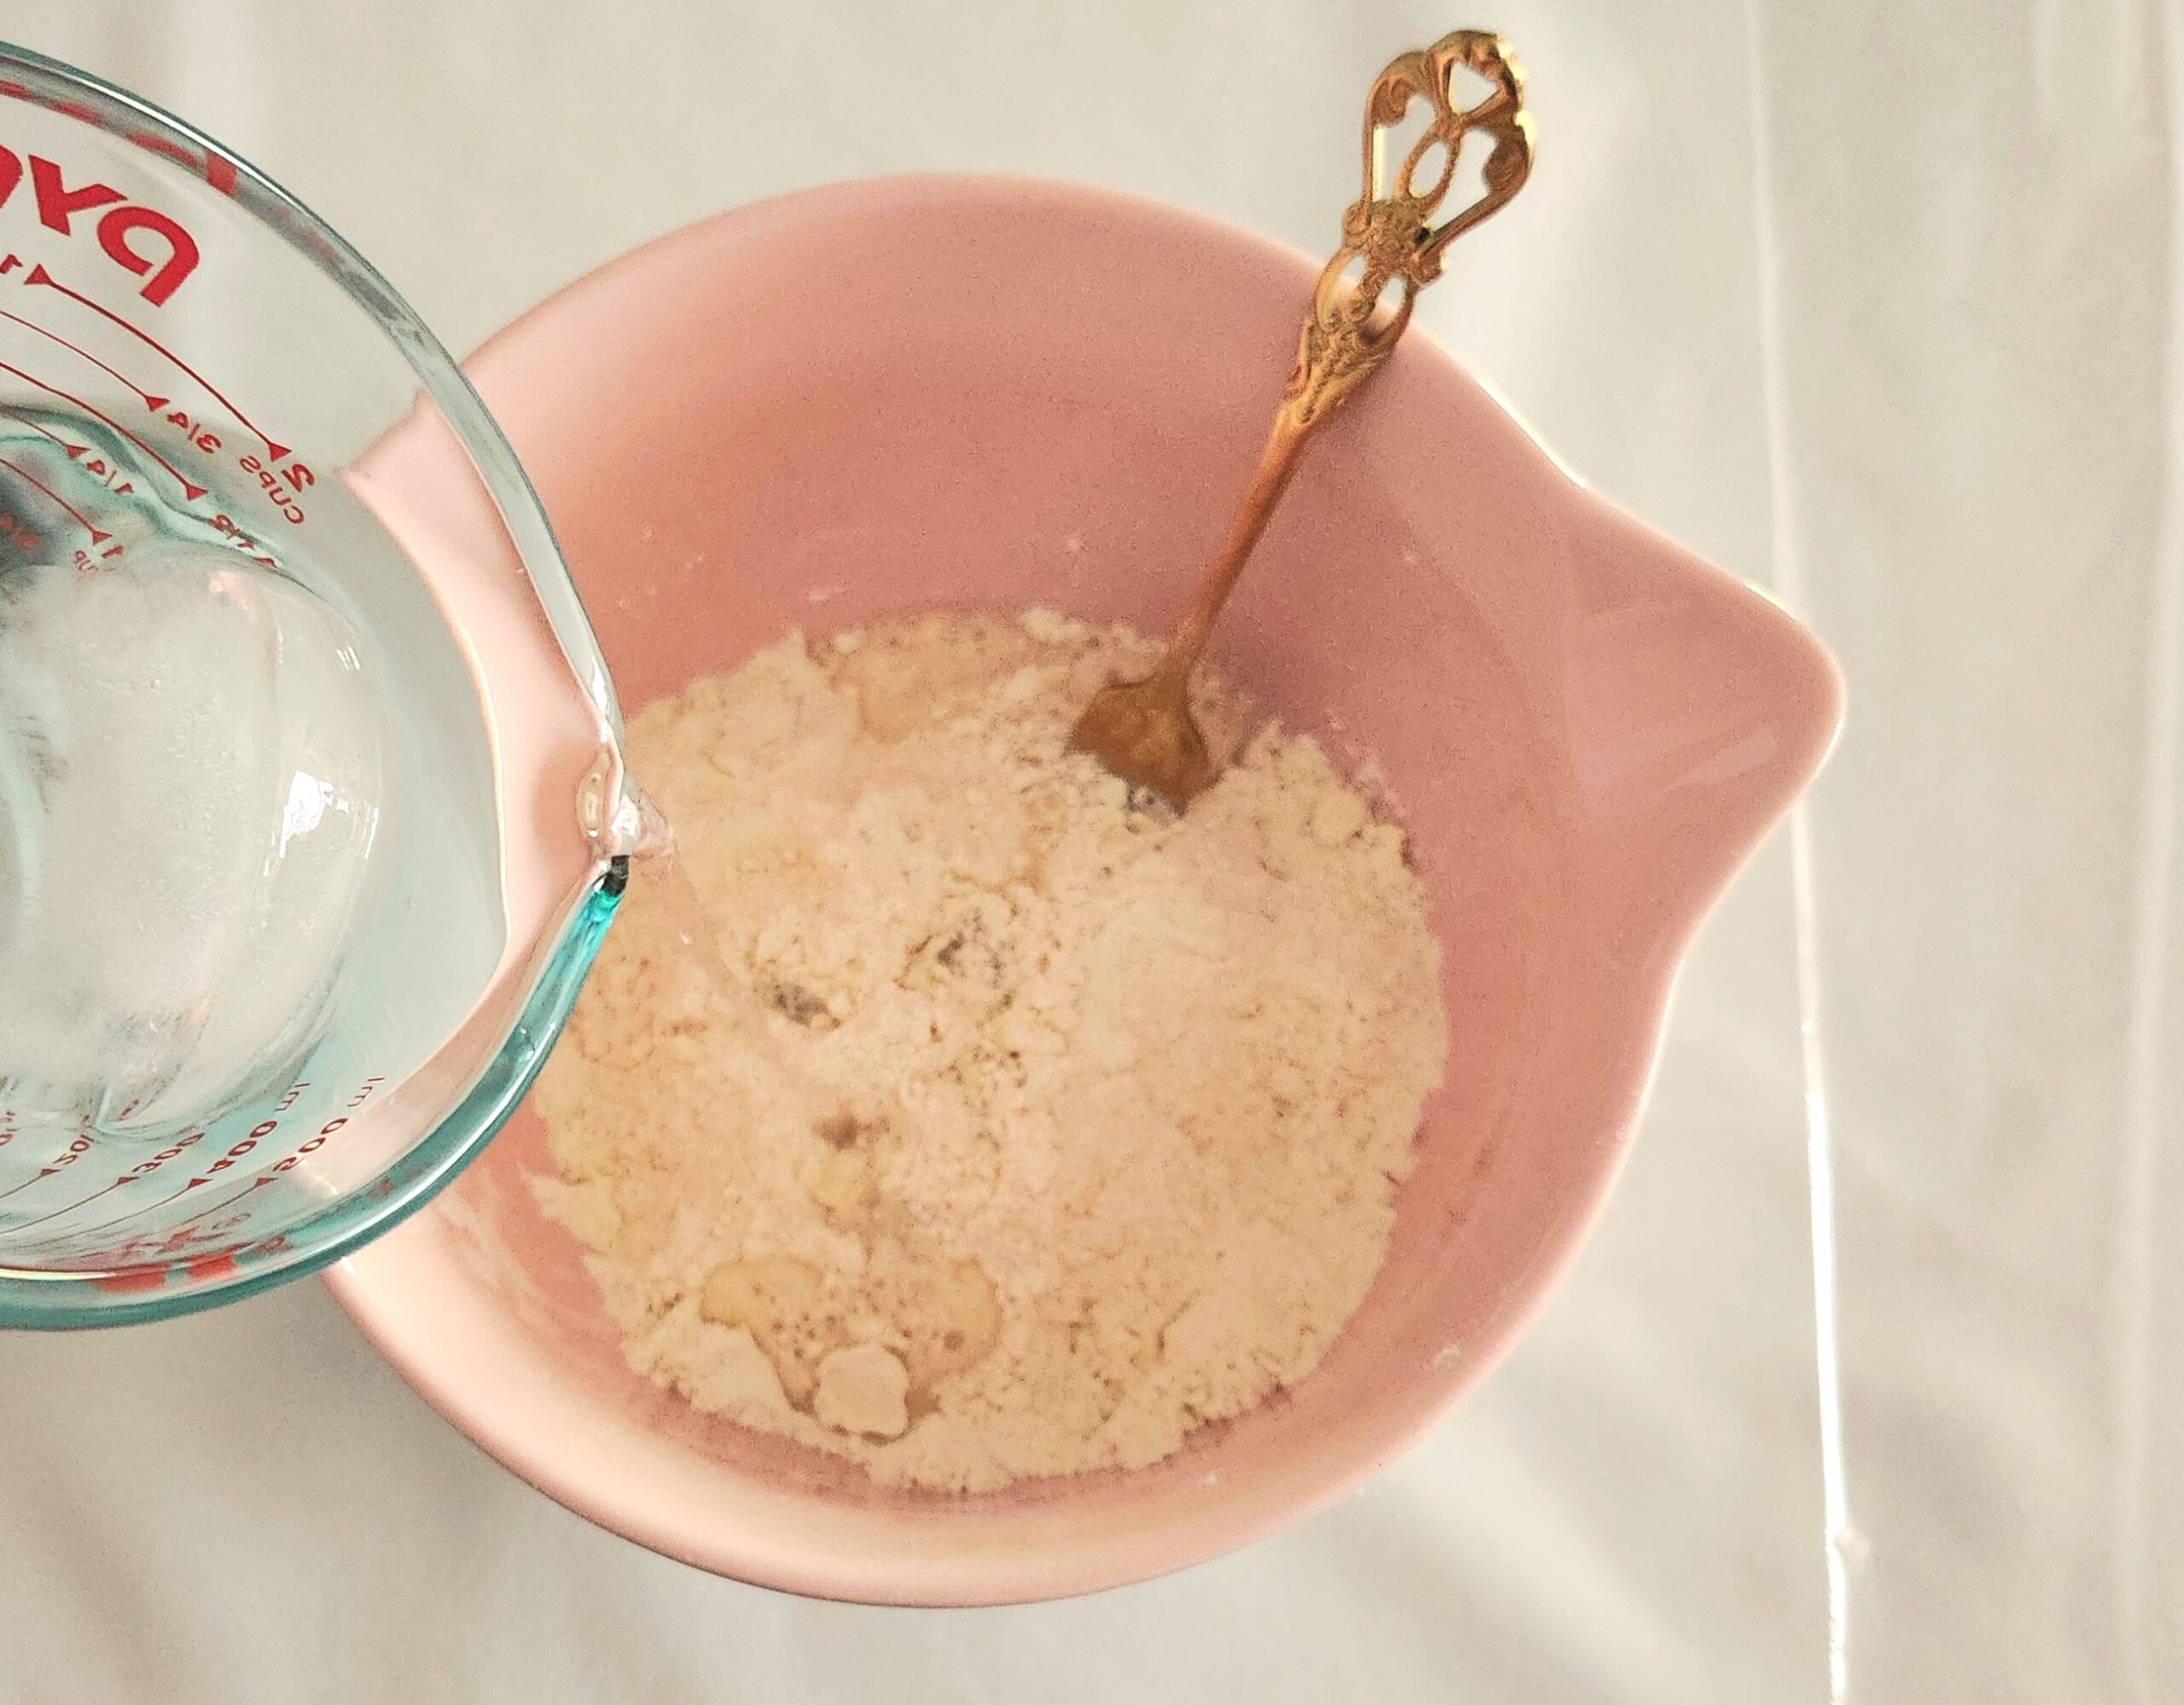
Slowly incorporate the ice water, mixing gently with a fork. If any chunks of ice fall into the dough, pick them out. They’ll melt eventually and create a very wet pocket, which isn’t welcome in any kind of dough.When shaggy hunks of hydrated dough form, move them over to your laid out plastic wrap.
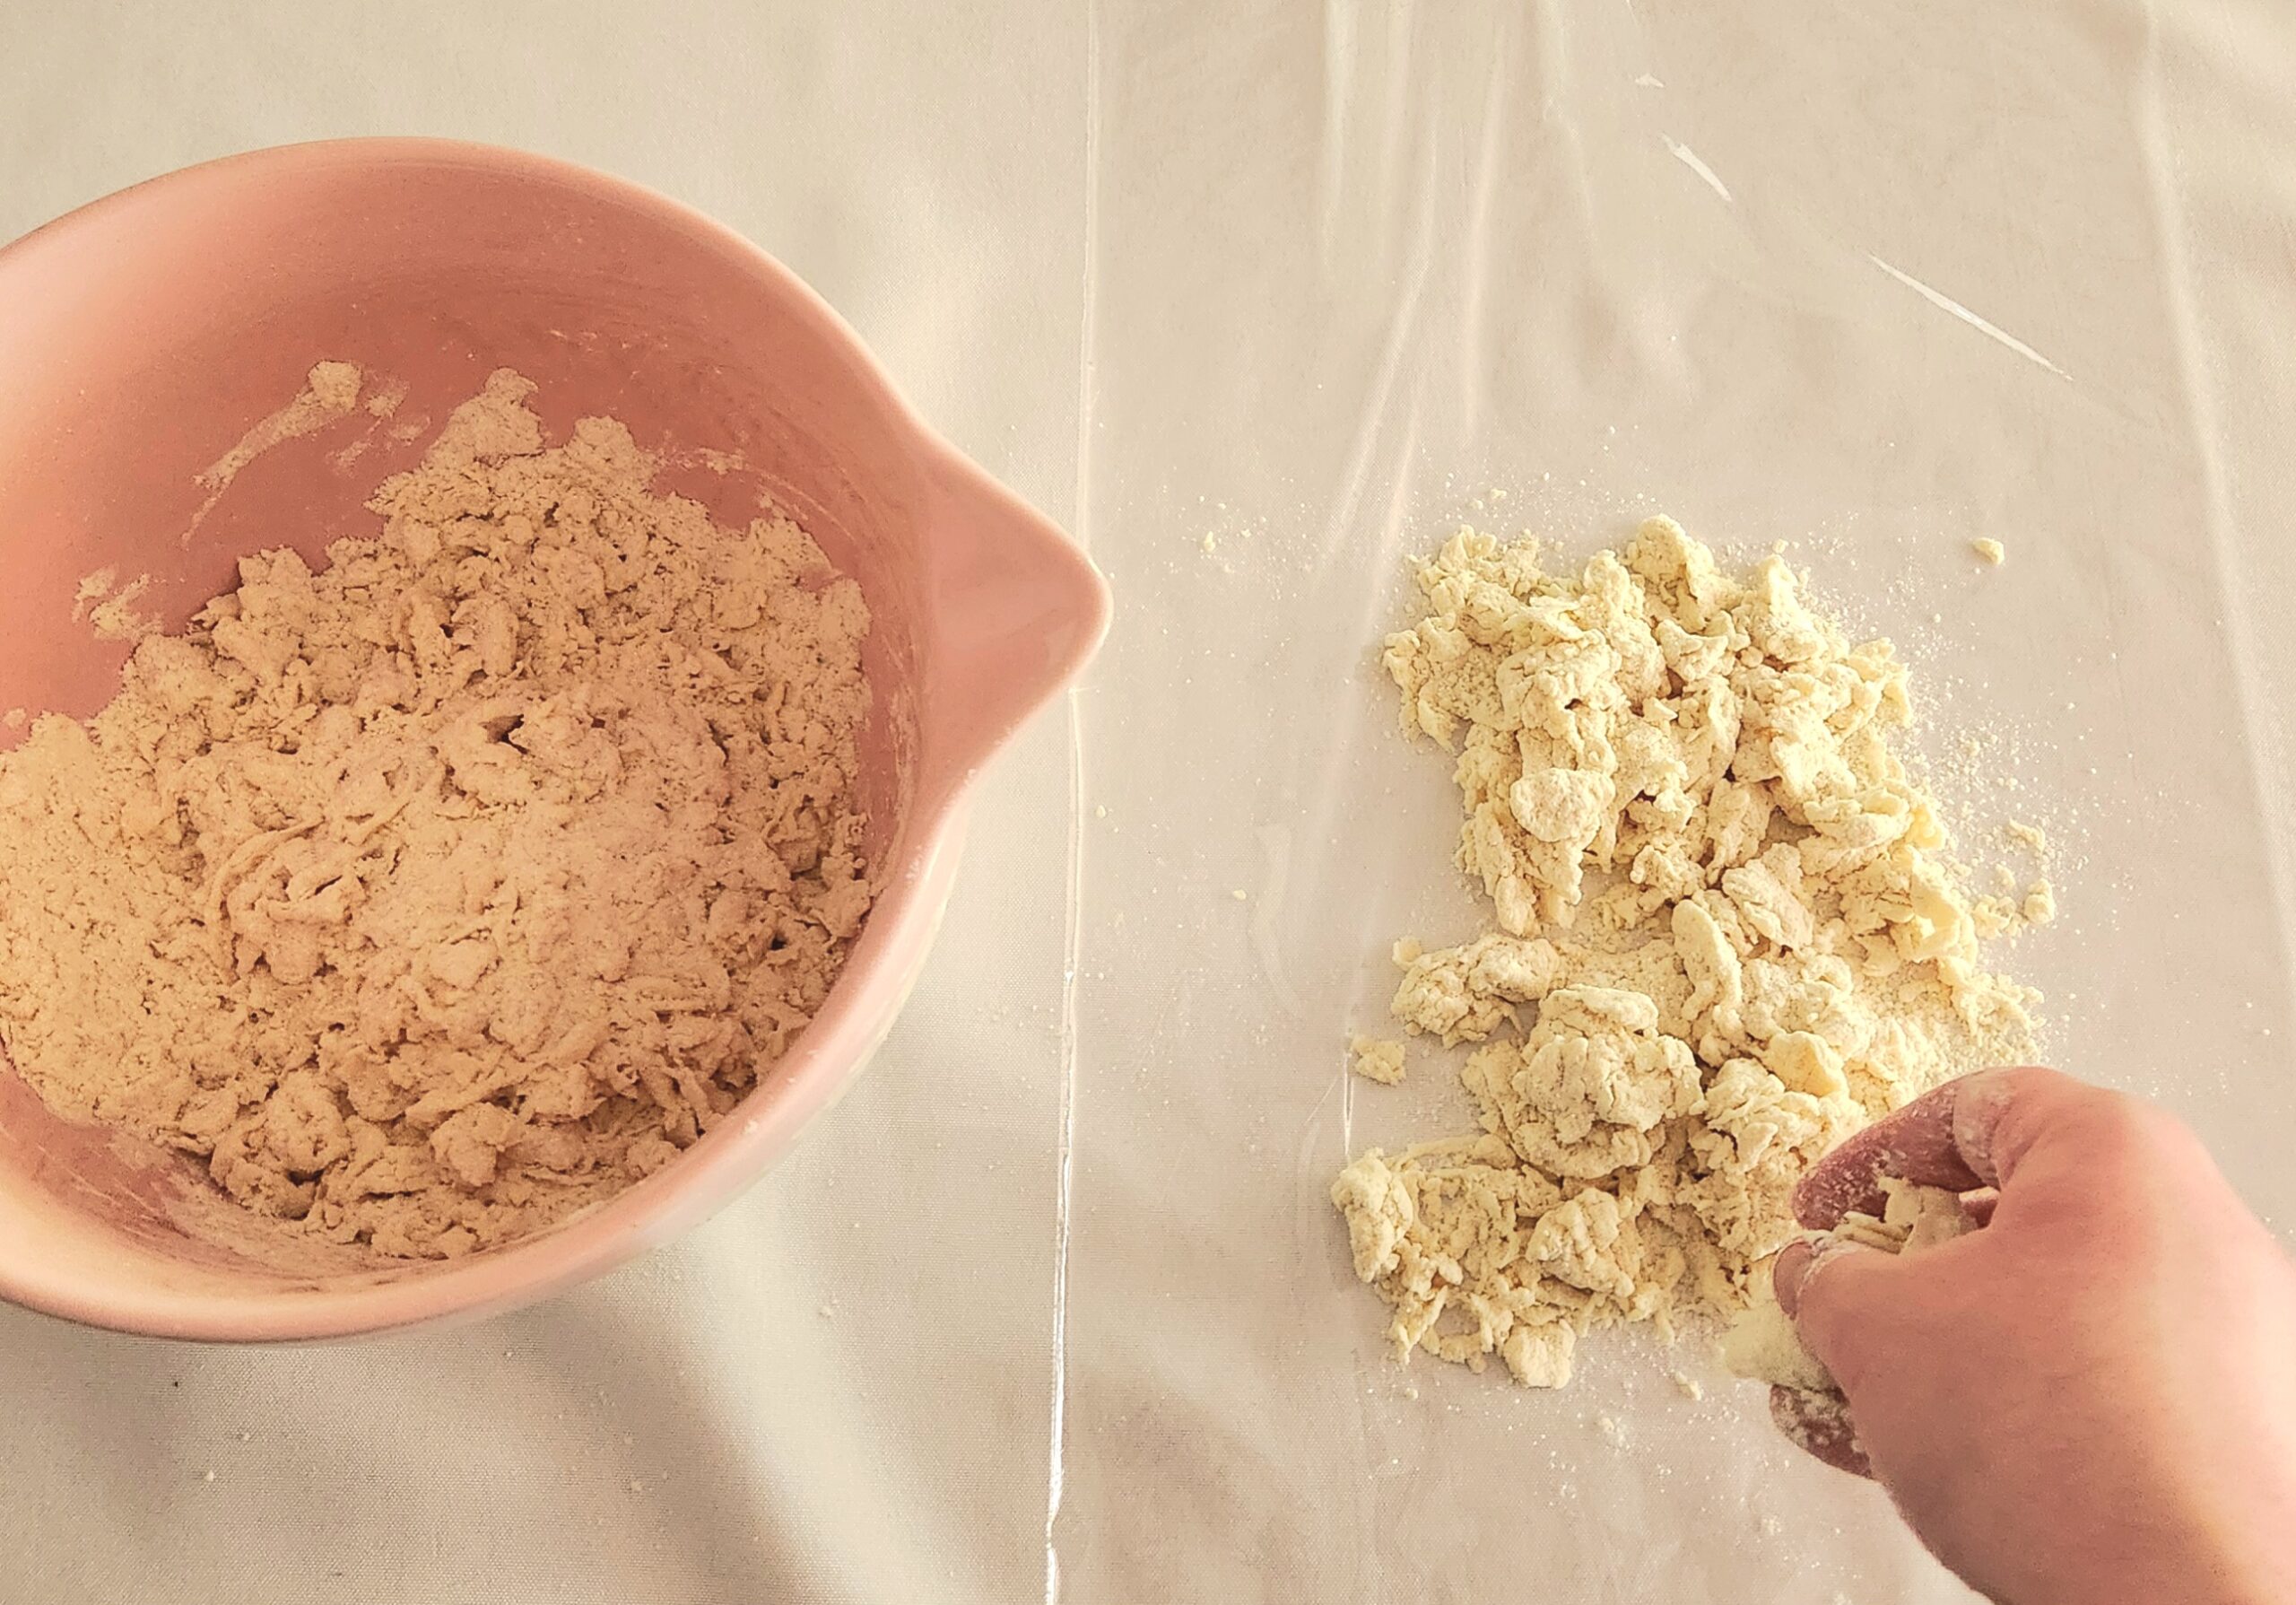
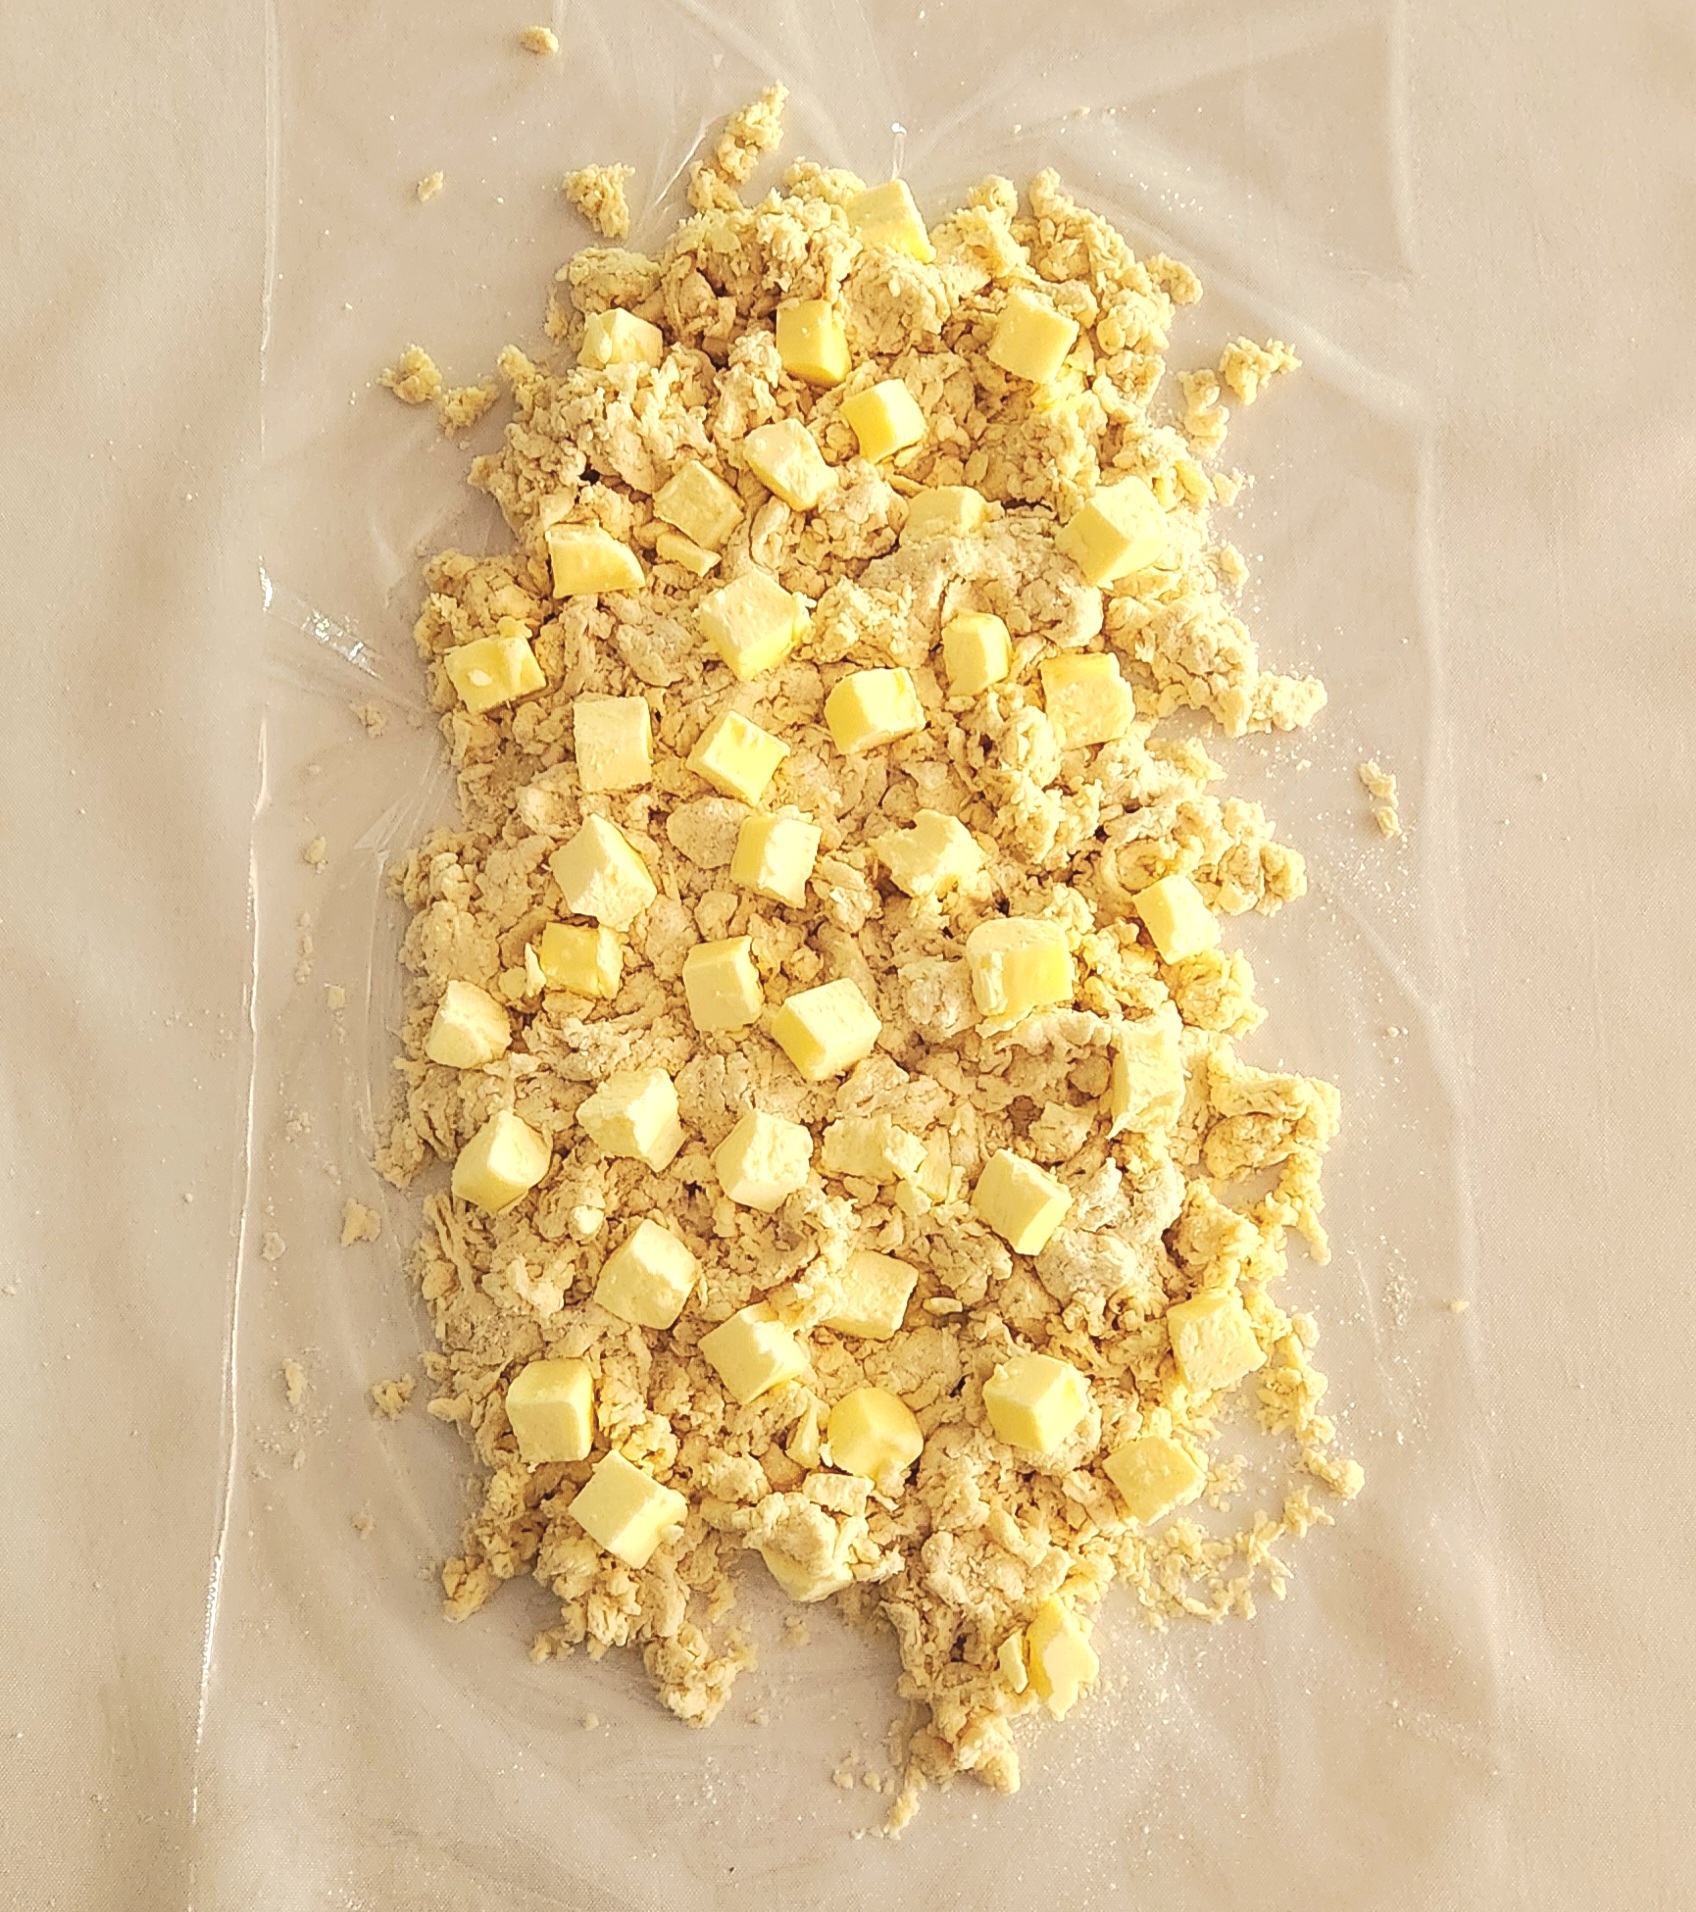
Be sure it’s in a flat, even layer, as this is where the cold cubes of butter will be joining the party. The flatness makes it easy to evenly incorporate the butter.
Now smush it all together so the dough forms a square, around an inch thick. This is where it’s helpful to have a tool like a bench scraper to make this step easier.
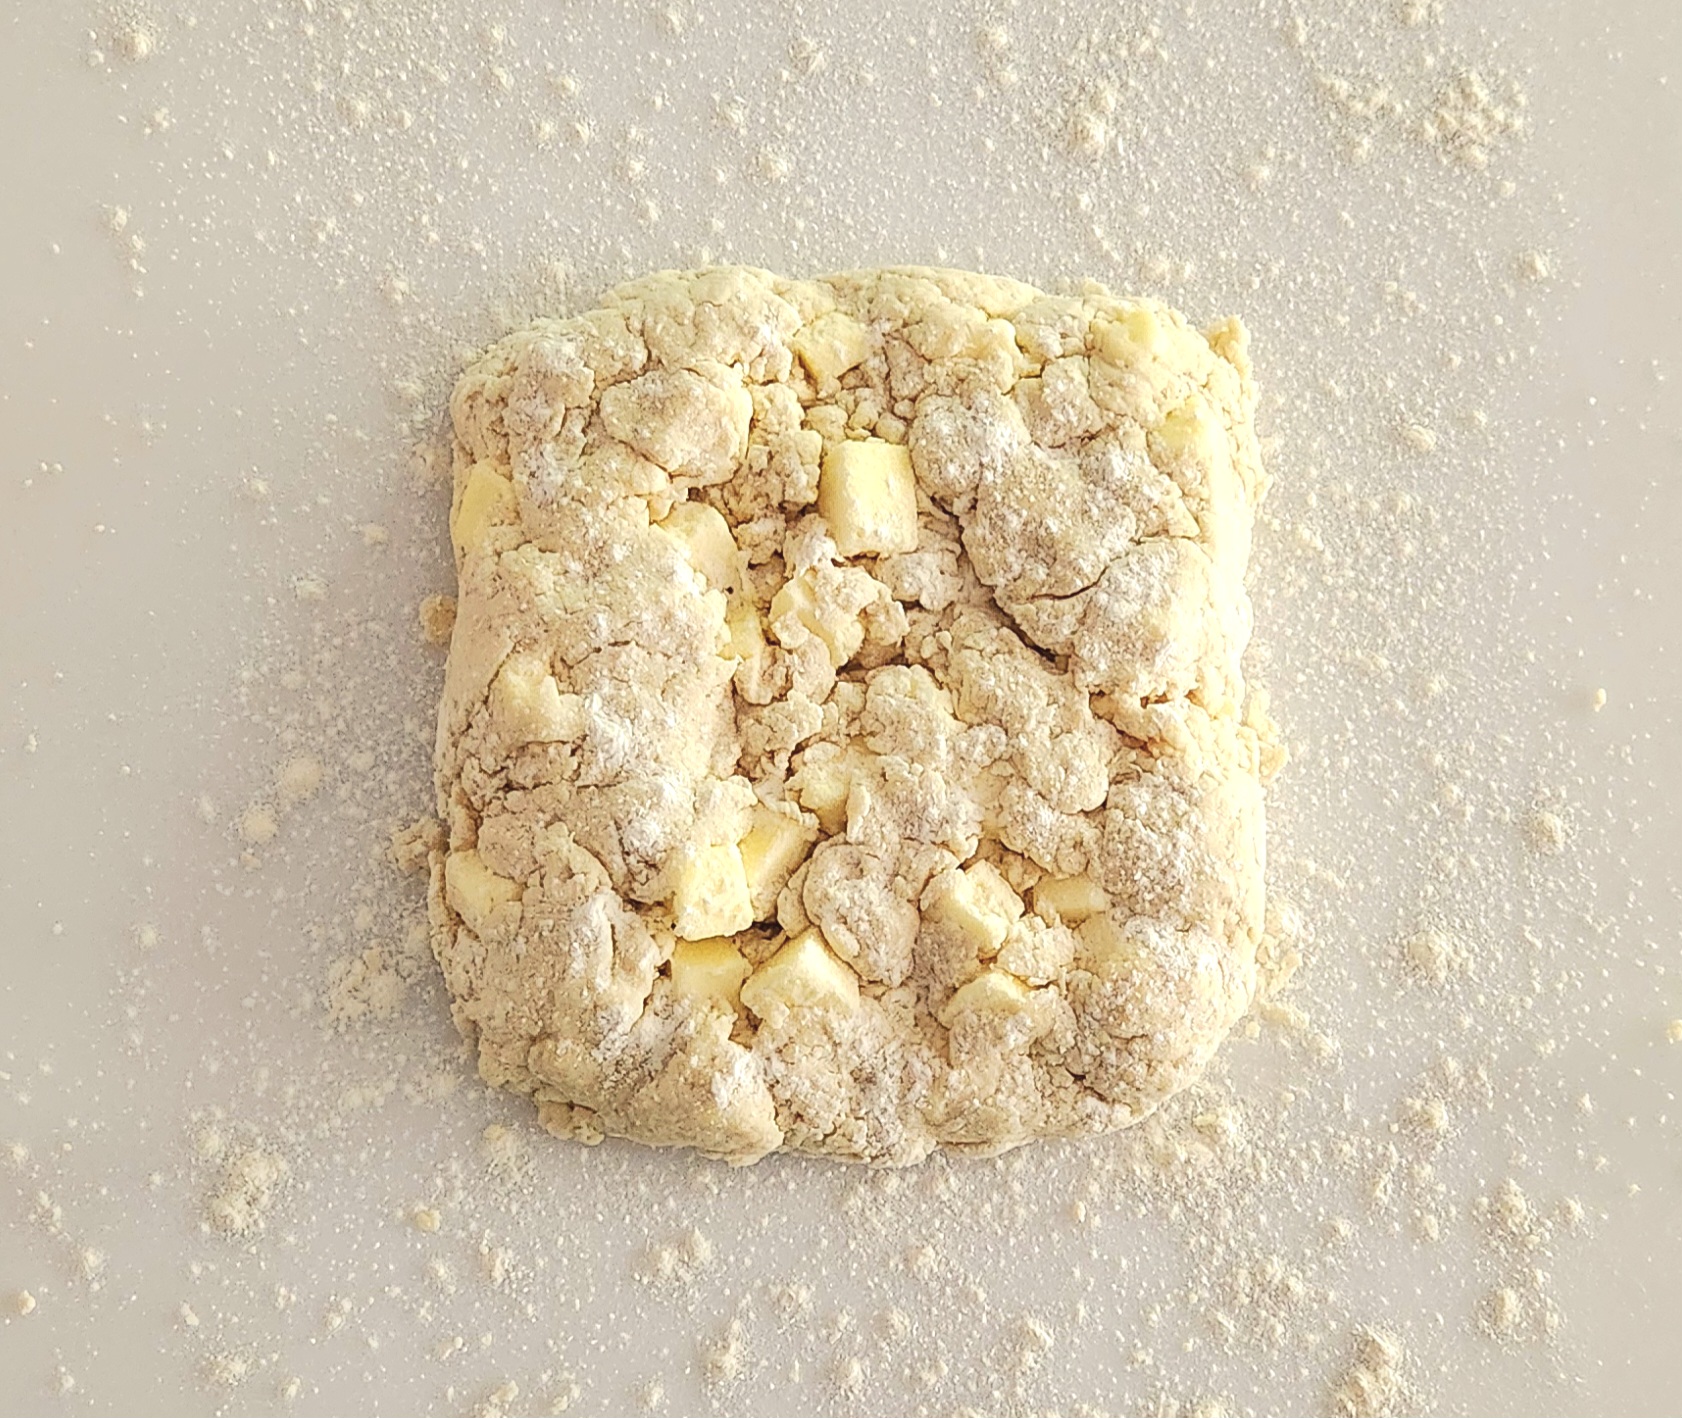
Tightly wrap your square up in the plastic wrap, and let it chill out in the fridge for 30 minutes. This allows for everything to chill again, and for the gluten in the dough to rest and relax. Well rested dough makes for much easier rolling later on.
Time to Turn
Time to start the “turns” or folds on your puff! It’s going to start off looking a little crazy, but don’t panic. Trust the process. Those cubes of butter will end up incorporated, and your puff is going to come together correctly.
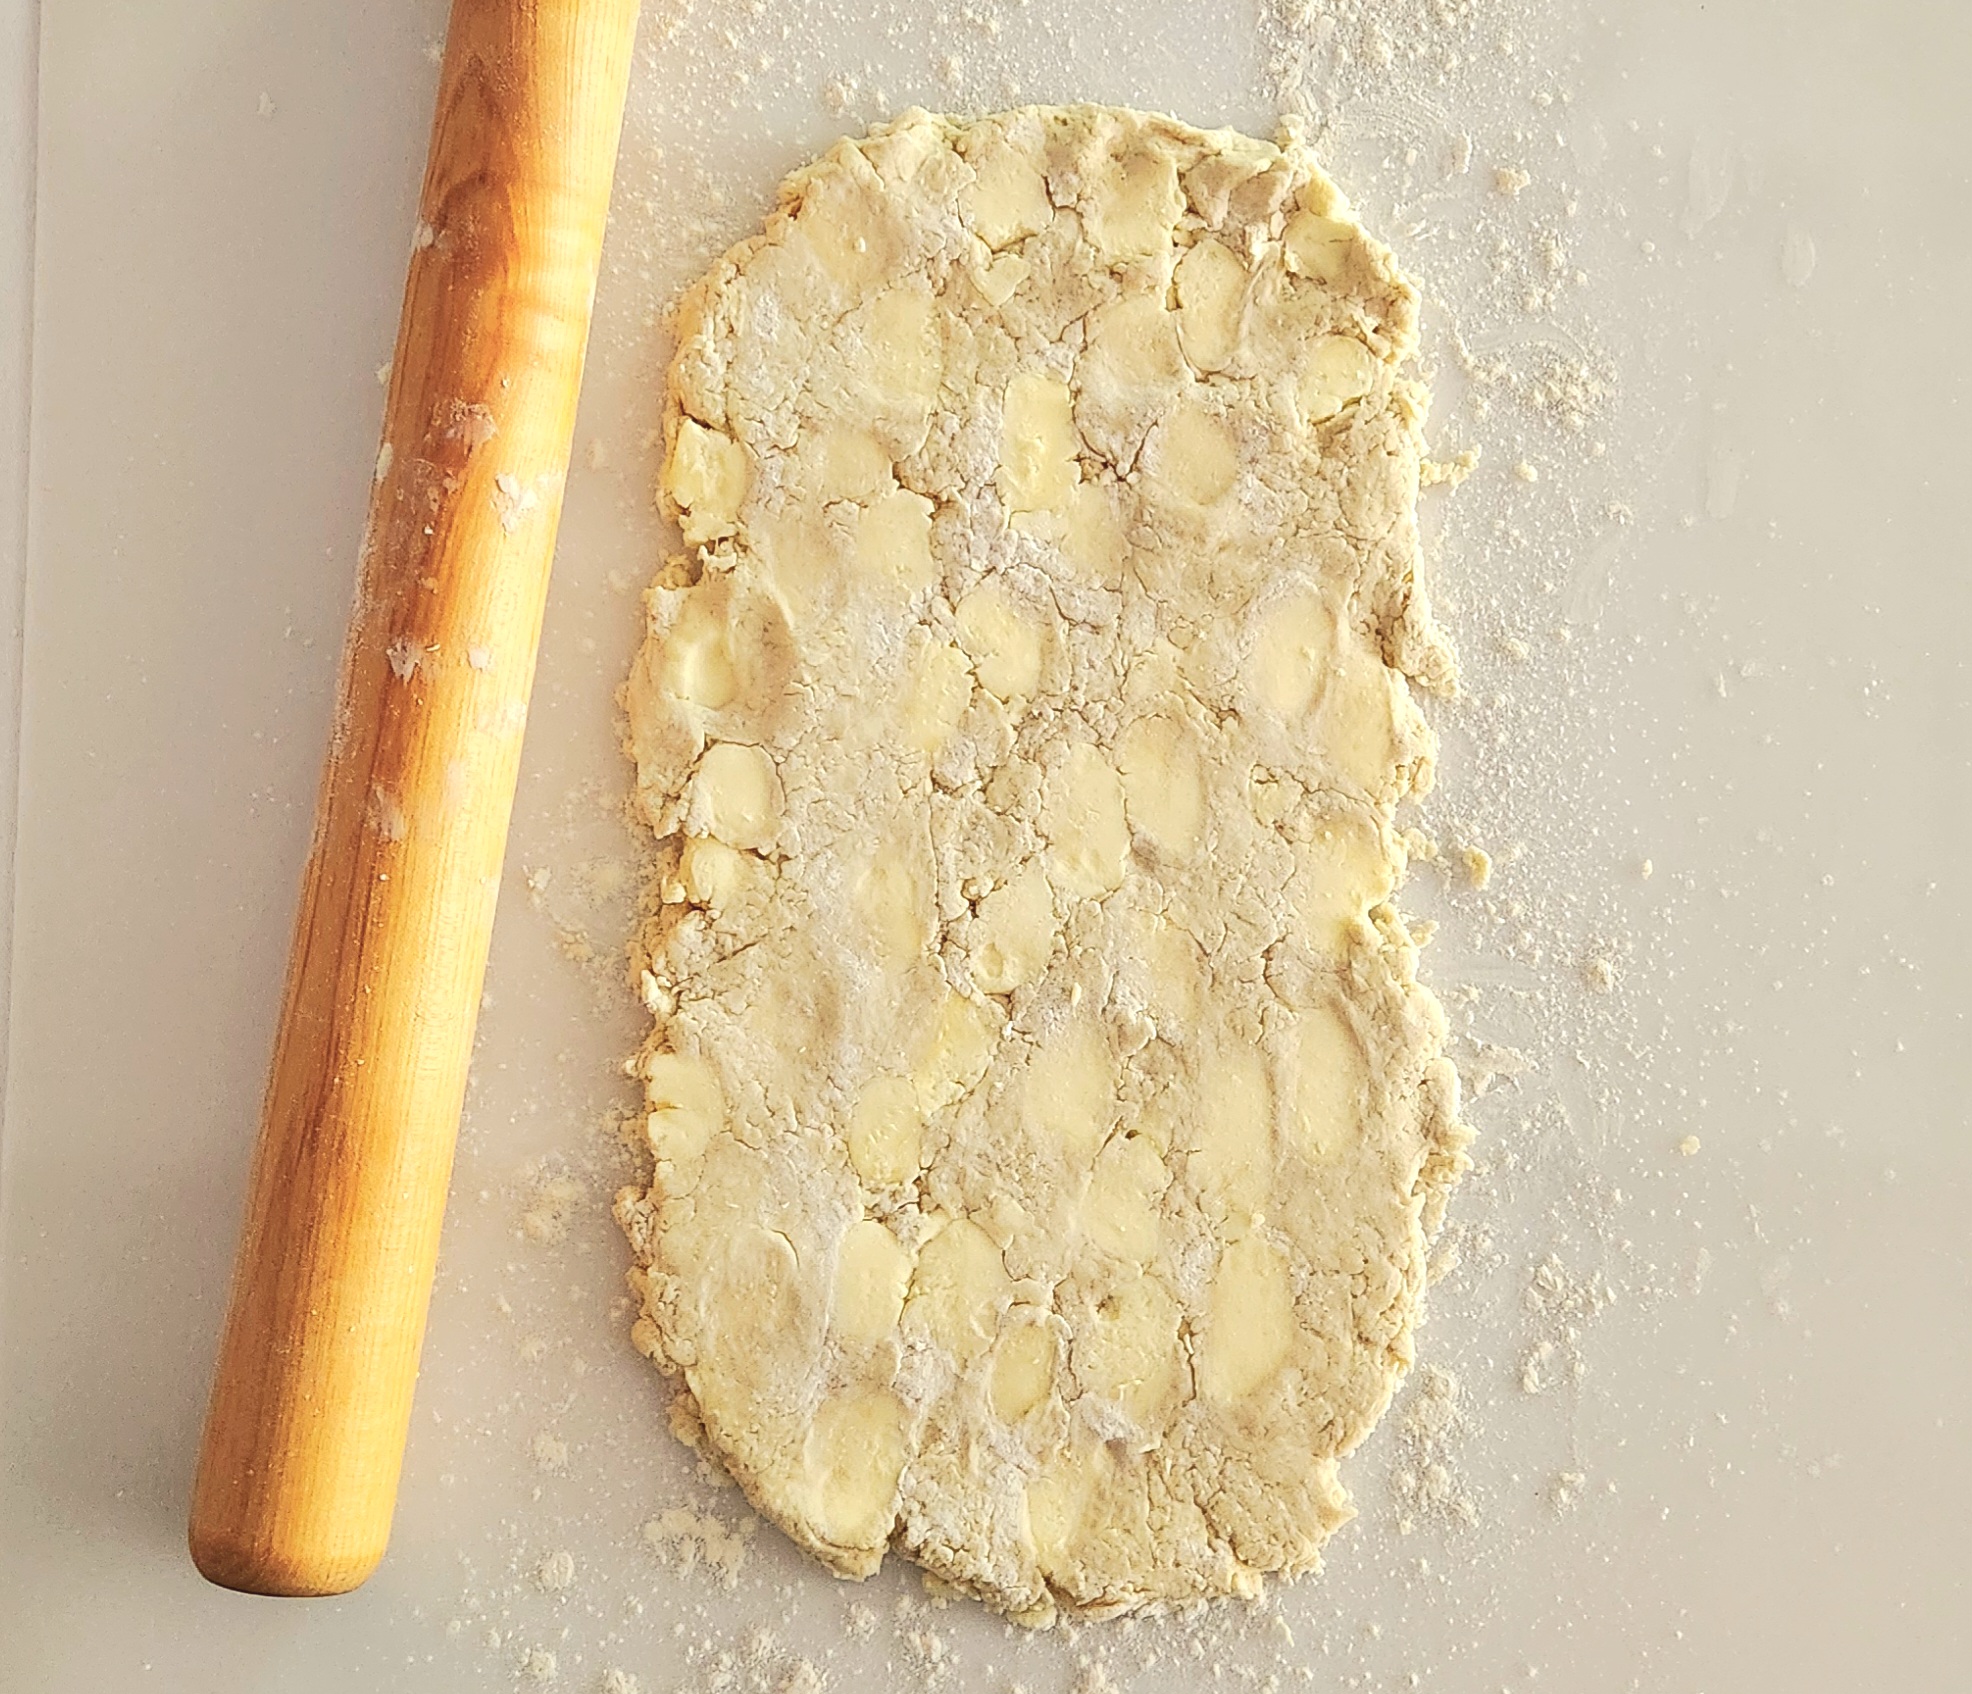
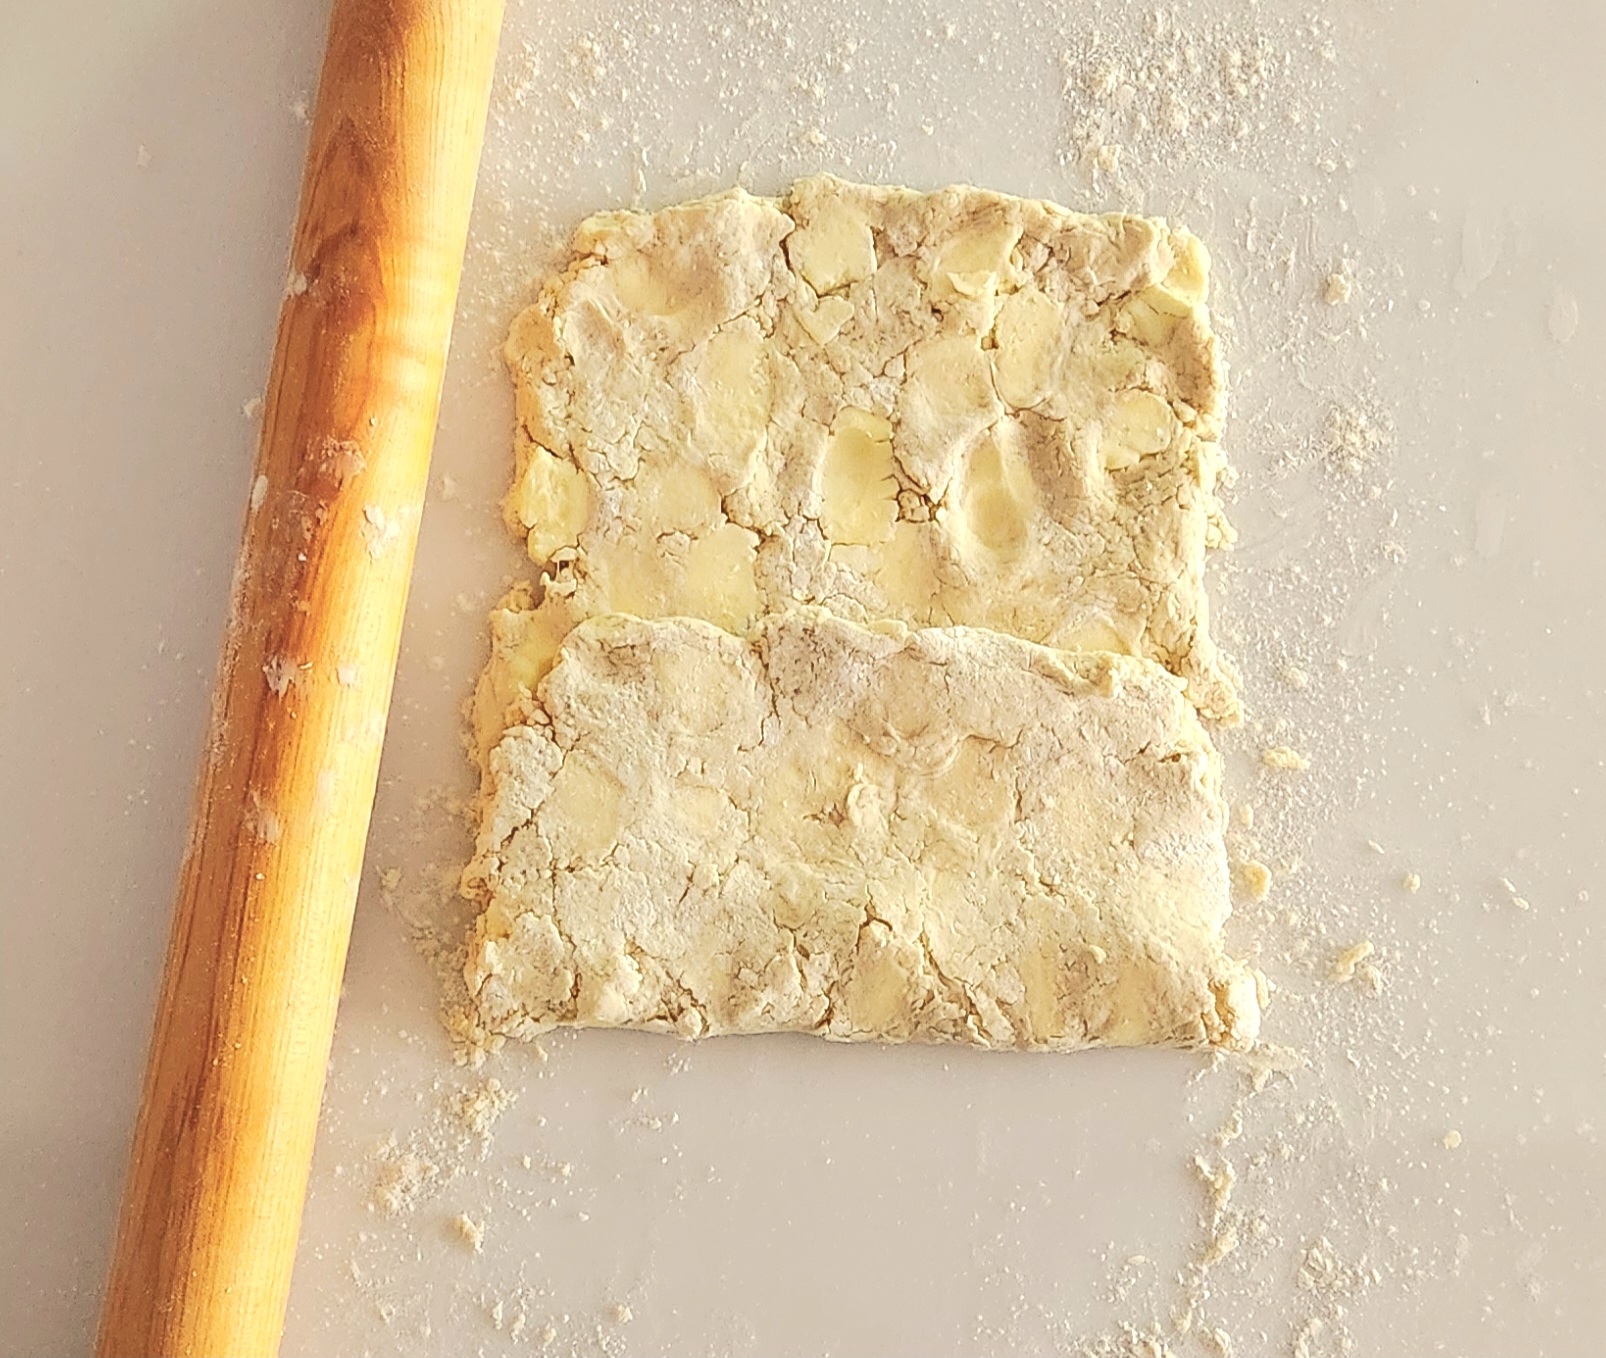
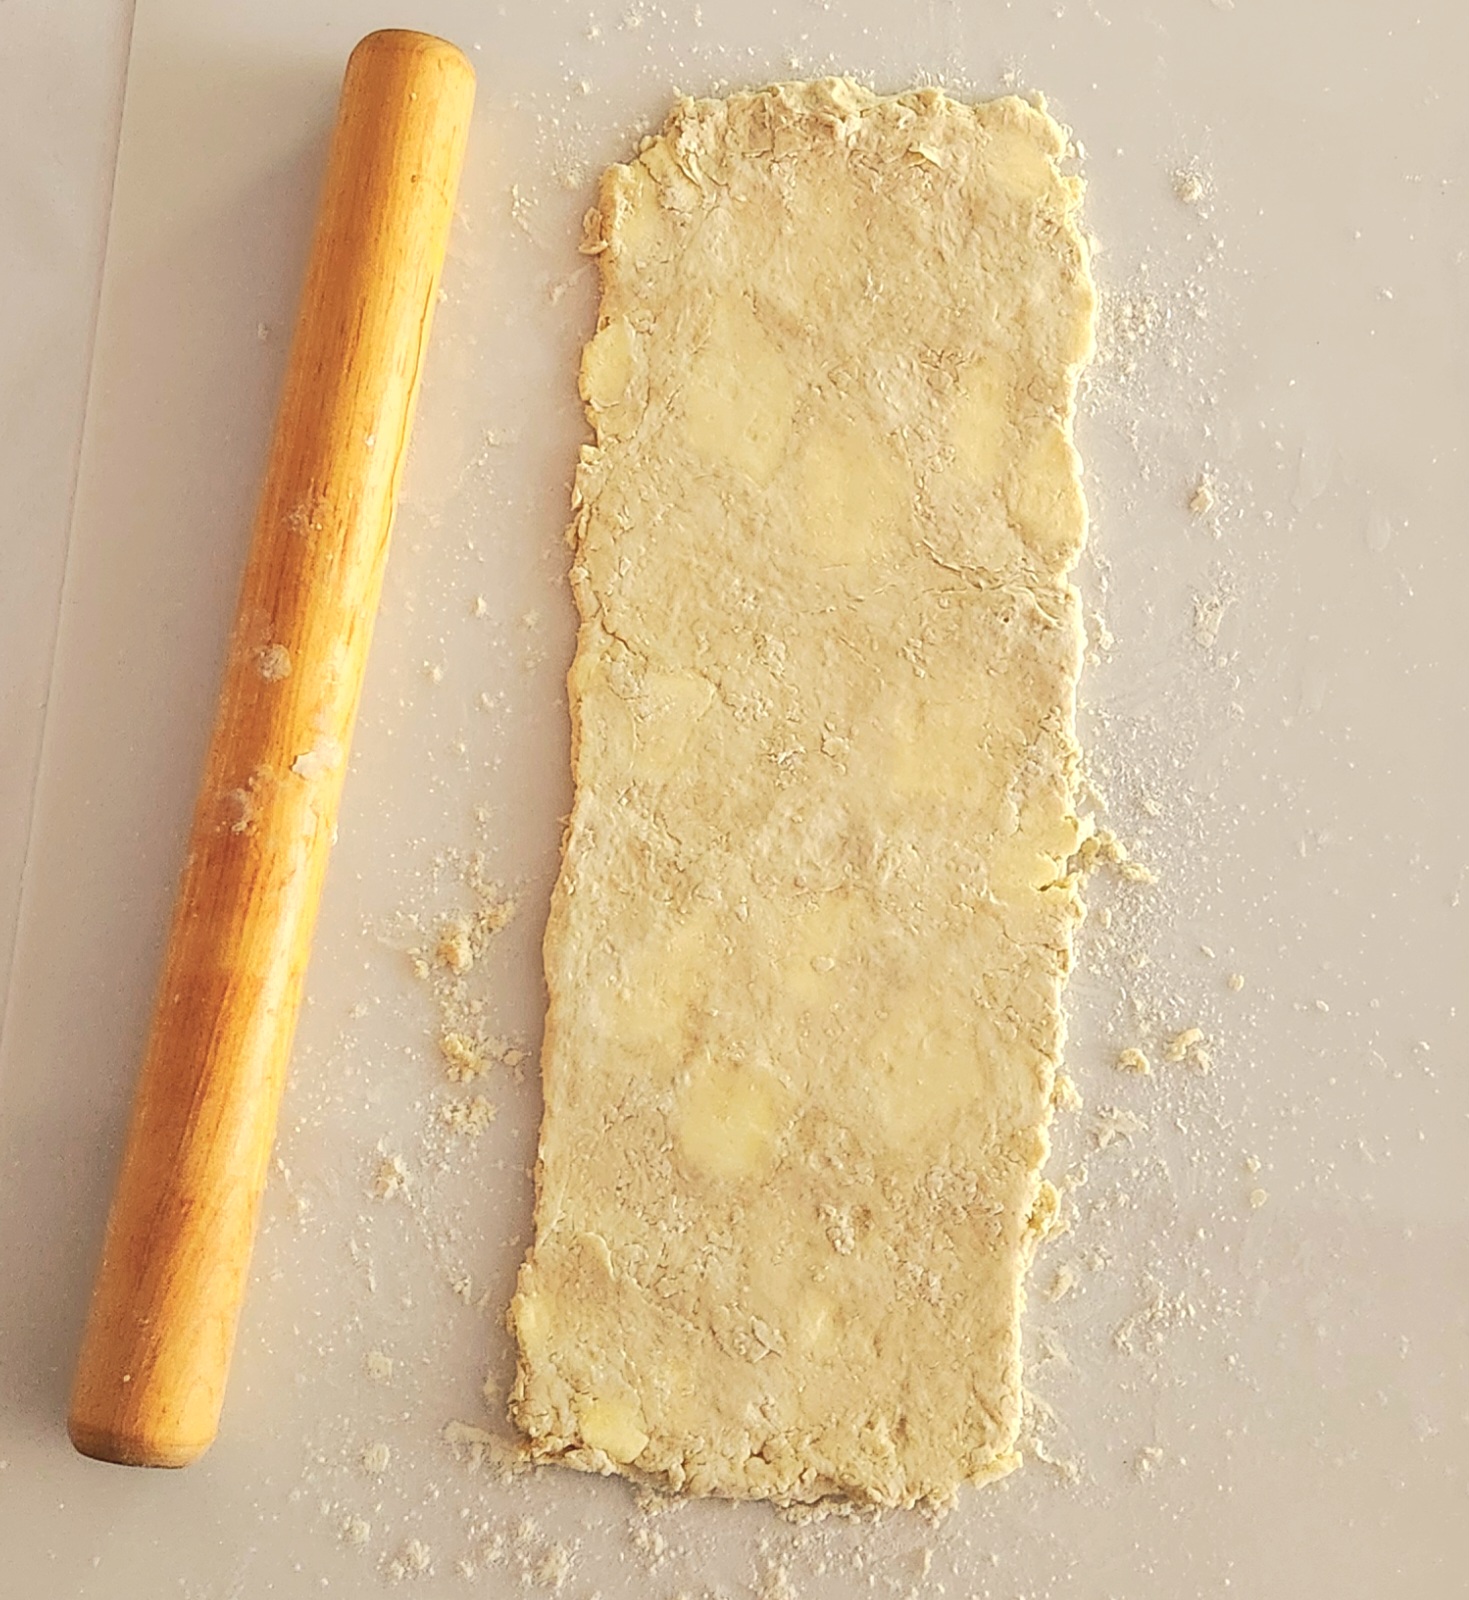
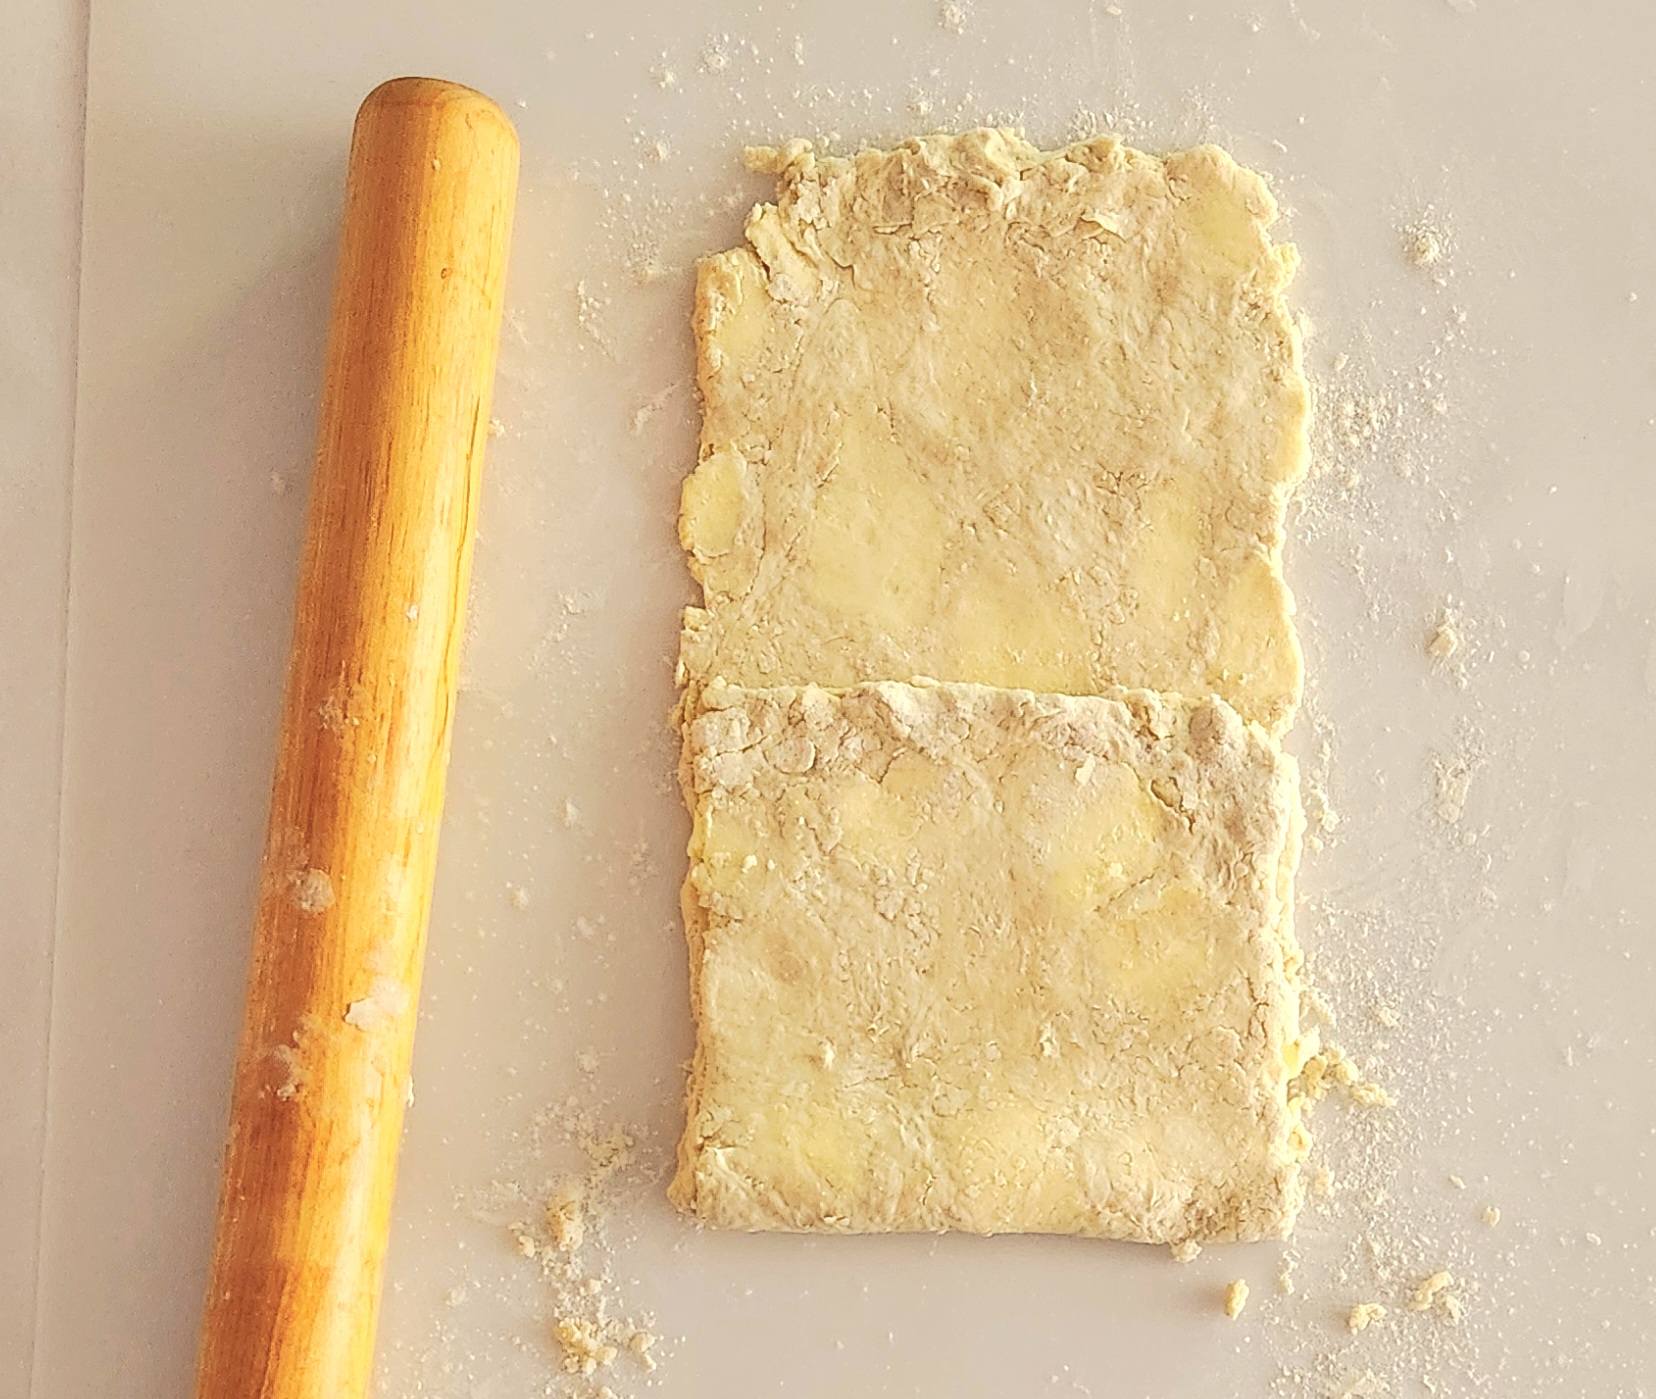
Remove your dough from the fridge and allow it to sit for a few minutes at room temperature. These few minutes help the butter to roll out without cracking. Sprinkle enough flour on your work surface so the dough wont stick, and then more flour on top of the dough so it wont stick to the rolling pin. Gently roll your dough lengthwise. You’re looking to create a long rectangle, around 1/4 inch thick. Don’t worry about how long the rectangle is, just try to keep the surface even. If at any point you notice the dough is sticking to either the counter or the rolling pin, just add a little more flour!
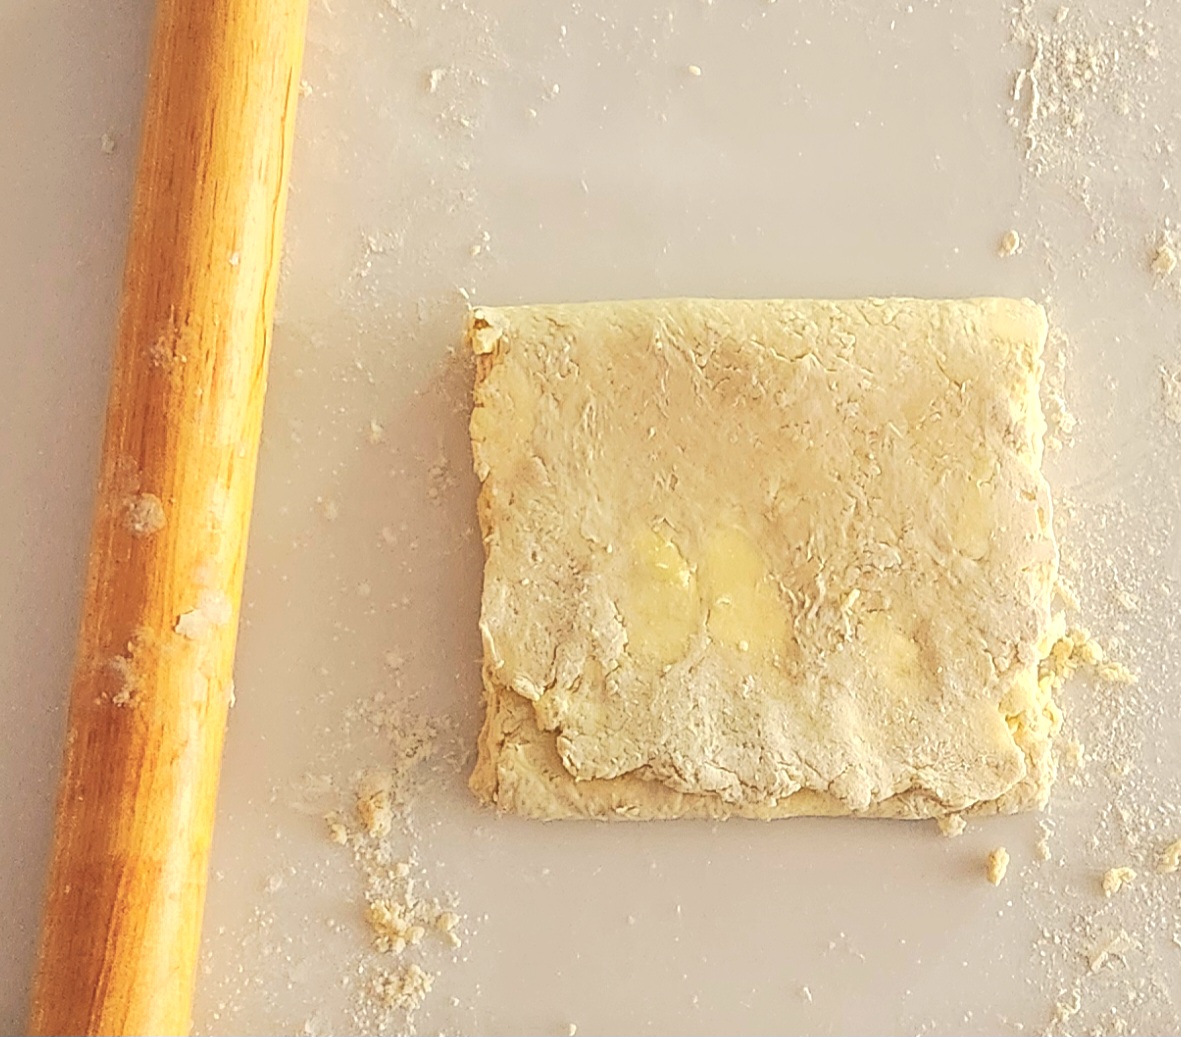
Now, you’re ready to make the first fold. The style of fold instructed here is called a letter fold, and it’s exactly what it sounds like. Start by folding the bottom edge of the rectangle 2/3 of the way up, and then take the top edge of the rectangle and bring it down to the bottom edge. Just like you’re folding a letter to stuff into an envelope.
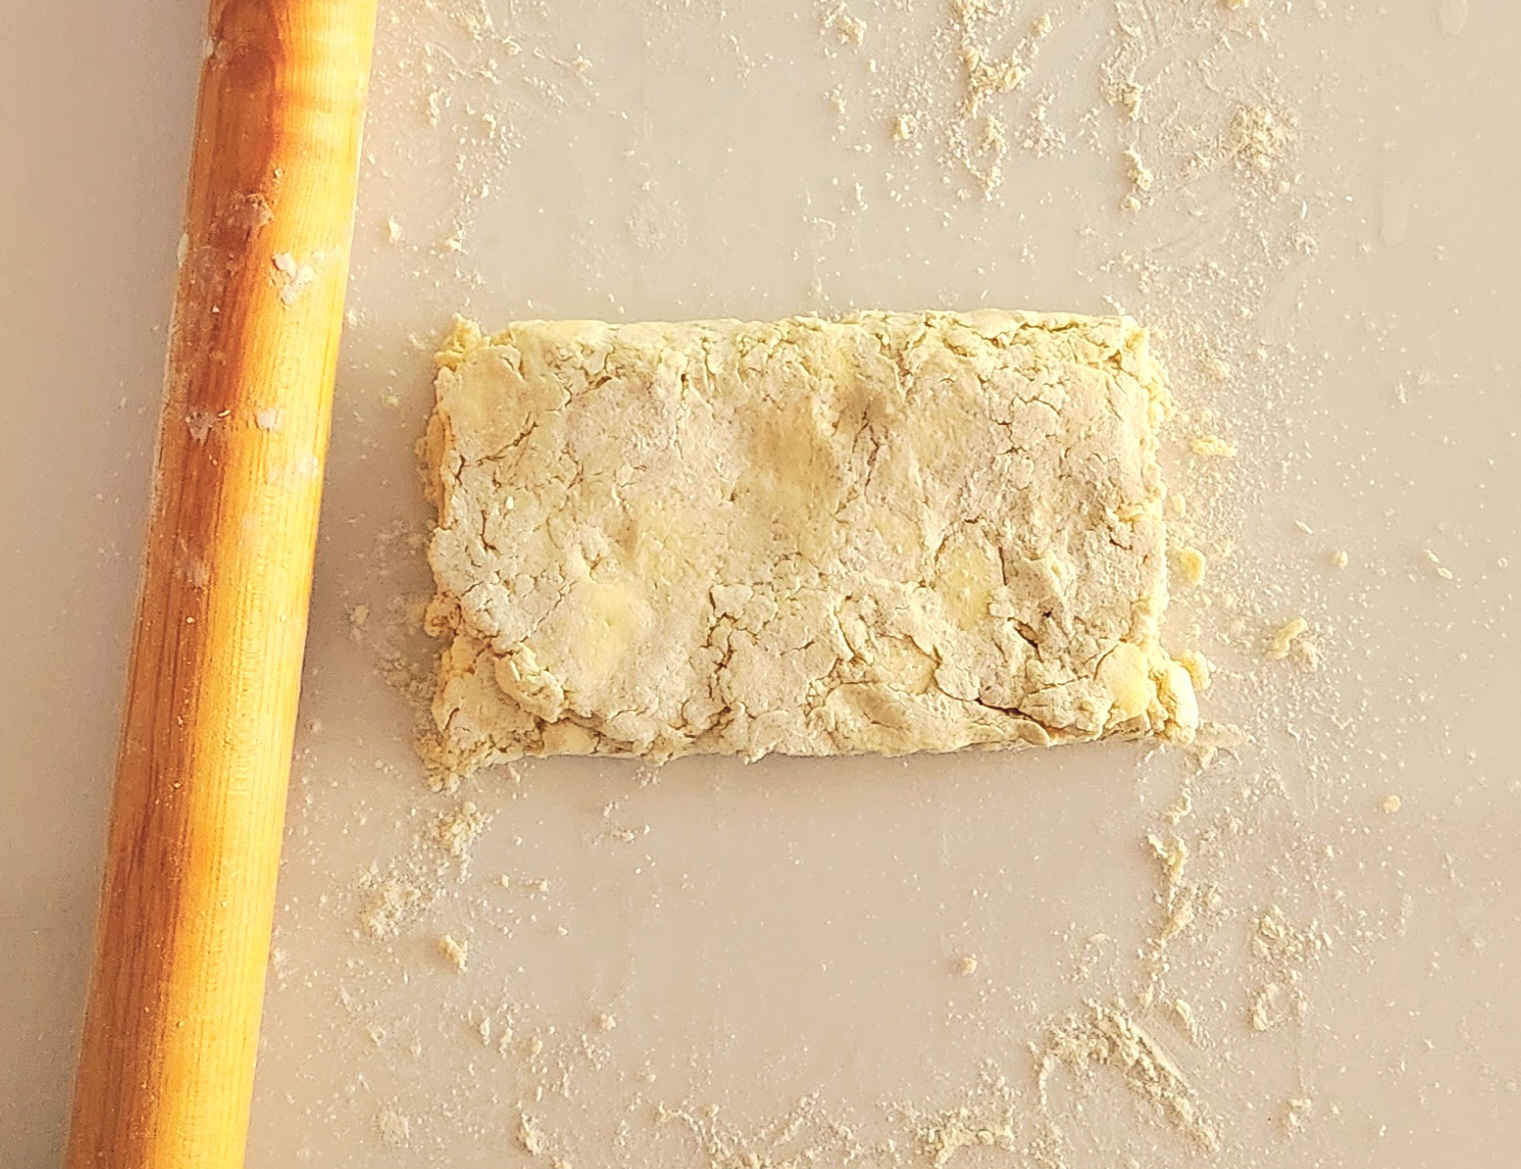
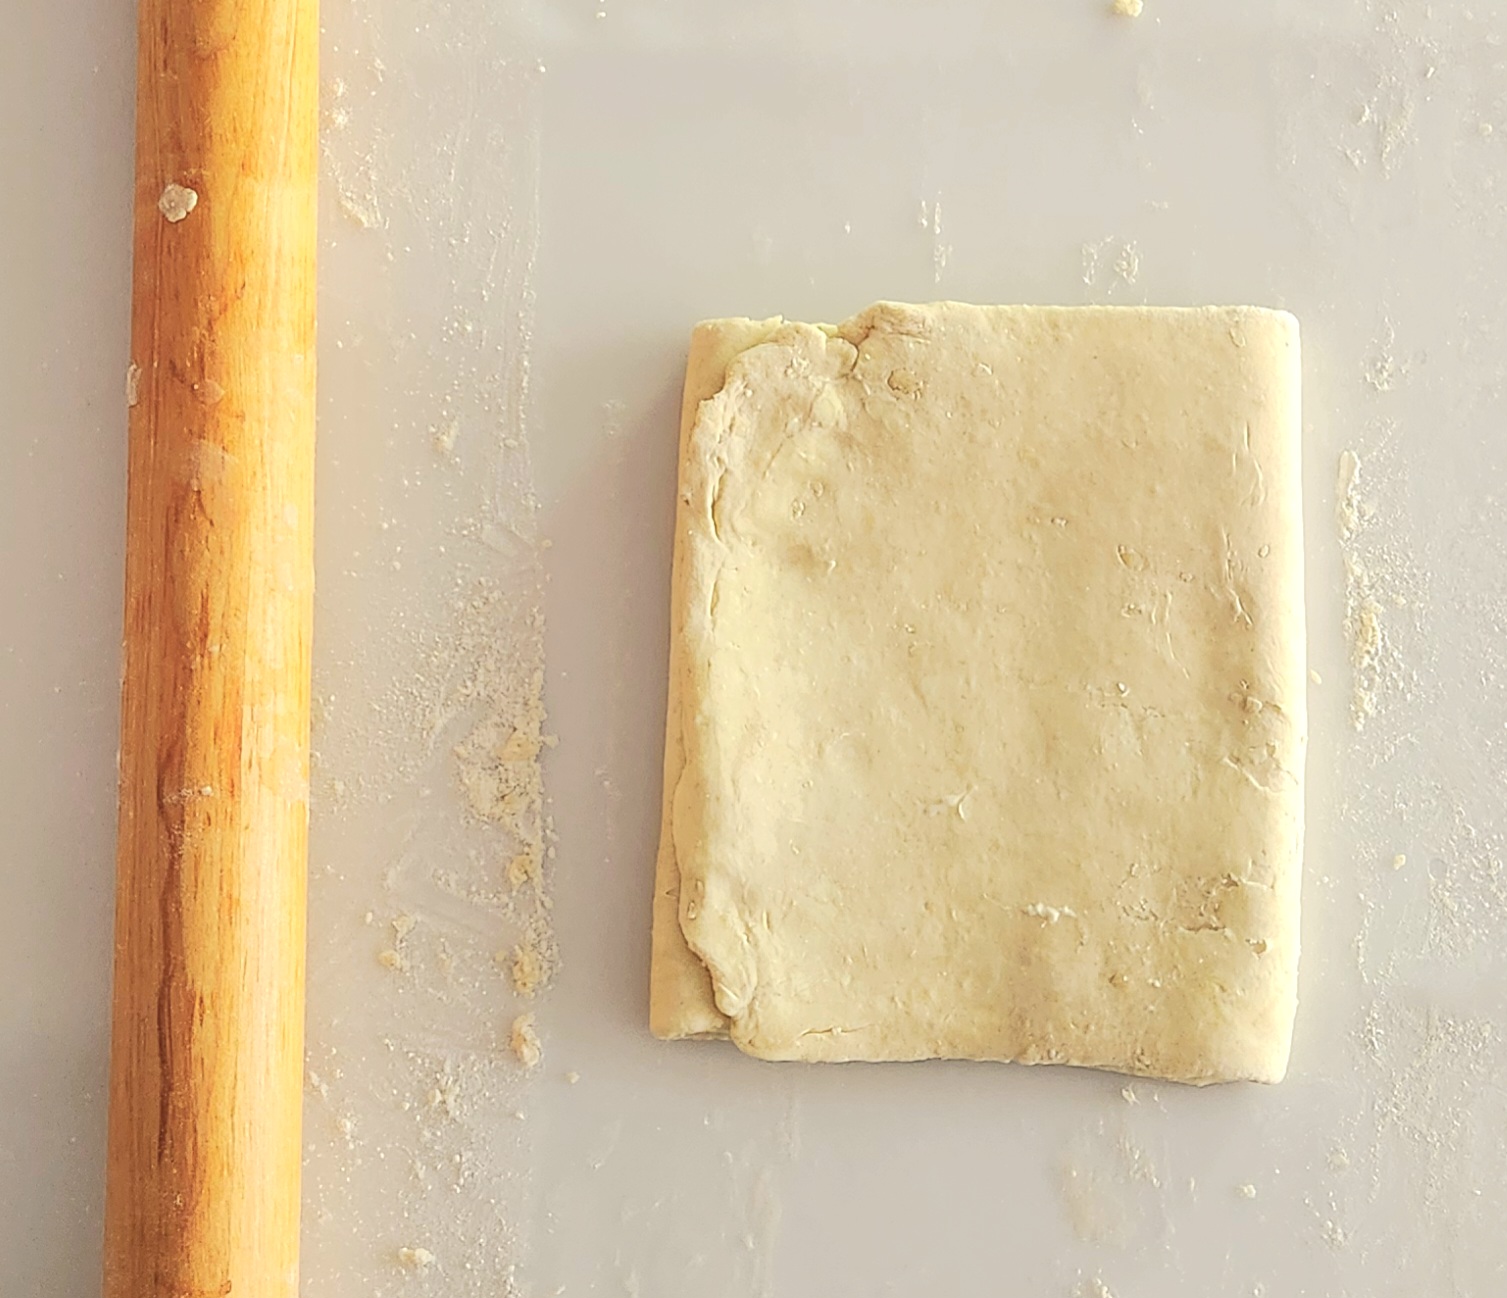
Next, you’re going to turn your dough 90 degrees so it’s elongated with the shortest sides closest to you once more. Now repeat the rolling out to 1/4 inch thick rectangle and doing the letter fold once more. If it’s sticking to the counter or rolling pin, just add a little more flour.
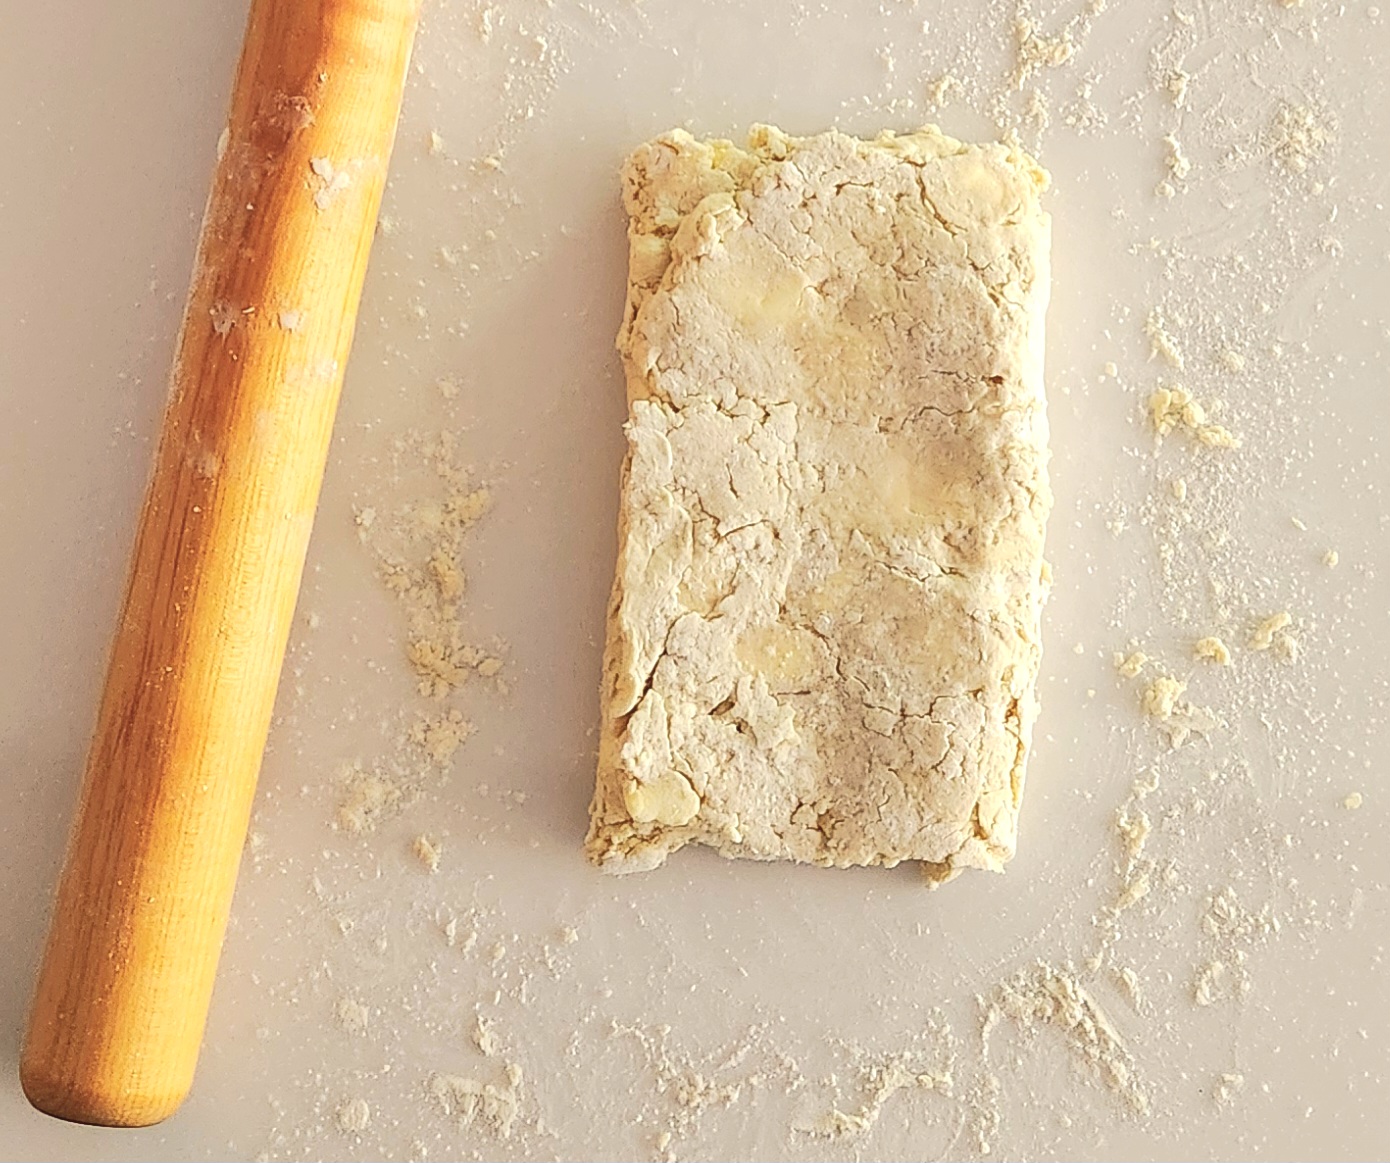
Wrap the dough back up in plastic, and allow it to chill out in the fridge for another 30 minutes. This way the butter remains cold, and the gluten in the dough can relax once more. It’s okay that it doesn’t look like a completely homogenized dough yet, it will get there. Trust the process!
When the 30 minutes are up, allow your puff to sit at room temperature for a few minutes so it will be easier to roll out. Make sure the edge you folded on the rectangle is on the side, and repeat the roll out and letter fold. Rotate the dough 90 degrees, and one last time roll out your rectangle to 1/4 inch thick and complete the letter fold. Allow to chill in the fridge for one last 30 minute increment.
By this point, you should have rolled out the dough to 1/4 inch and done the letter fold a total of 4 times. Congratulations, you’ve made your very own puff pastry from scratch! It’s ready to use now, or save for later. If you’re saving it for later, wrap it airtight and either tuck it back into the fridge for a few days or freeze it for several months.
Quick Puff Pastry
Makes: 1 batch
Total Time: 2 hour
Prep Time: 45 Minutes
Ingredients
- 2 1/4 cups All Purpose Flour
- 1 teaspoon salt
- 4 Tablespoons cool, softened unsalted butter
- 1/3-1/2 cup ice water
- 11 Tablespoons cold, unsalted butter
Directions
- On a clean surface, lay out a large sheet of plastic wrap. Cut the 11T of unsalted butter into 1/2 inch cubes, then return the butter to the fridge to keep it cold. In a large mixing bowl, whisk together the flour and salt. Feel free to use a fork.
- Using the tips of your fingers, work the cool, softened butter into the flour mixture until the butter is incorporated so the flour mixture is of a more sandy consistency. A few small chunks of butter here and there are okay, but nothing larger than pea sized. See the Tips section on how to get the butter to the desired consistency for this step.
- Slowly pour the ice water into the flour and butter mixture, stirring gently with a fork. As shaggy pieces of dough start to form. move them over to the plastic wrap you’ve laid out. Be sure to spread the dough into a fairly even surface, do not make a dough mountain.
- Take the cold butter cubes, and sprinkle them over the dough. Push the sides of the dough and butter layer into the shape of a square, approximately 1 inch thick. Wrap the dough square tightly in plastic wrap, and refrigerate for 30 minutes.
- Remove your dough from the fridge and allow it to sit at room temperature for a few minutes. Sprinkle just enough flour on your work surface and the top of the dough so nothing sticks.
- Gently roll your dough into a long rectangle, until it’s around 1/4 inch in width. Do not roll out the dough width wise, only roll it lengthwise. If you find the dough sticking to the work surface or the rolling pin, just add a little more flour.
- Take the top end of the dough and fold it 2/3 down the length of the rectangle. Take the bottom end and fold it up so it meets the top edge of the rectangle, as if you’re folding a letter to stuff in an envelope. See pictures above for reference. Turn the folded dough 90 degrees, so the short sides of the rectangle are in front of you. Congratulations, you’ve completed your first turn!
- Repeat steps 6 and 7 with the folded dough. After completing this second turn, wrap your folded dough tightly in plastic wrap once more and chill it for another 30 minutes.
- Repeat steps 6 and 7 two more times, one last time for a total of 4 turns. Wrap your dough and chill it for another 30 minutes. It’s now ready to roll out and use!
Tips
- Have somewhere to write down how many turns you’ve made on your dough so far. It’s easy to get distracted and forget while the dough is chilling in the fridge, and the number of turns matters!
- To easily get the smaller amount of butter to a cool, malleable state, wrap it in plastic and beat it with a rolling pin. Unwrap it and fold it onto itself, then re-wrap it and beat it some more until reaching the desired consistency.
- If you’re going to freeze your puff, roll it out so it’s around 1/2 inch thick. It’ll be easier both to thaw out and to work with later on that way.
- To thaw frozen puff pastry, either move it to the fridge the night before or put it on the counter around an hour or so before you need to use it.
- Before tossing whatever pastry you’re creating into the oven, give it one last chill in the fridge for 30 minutes. That way, it’ll be a very cold pastry hitting a very hot oven, resulting in a better, more consistent texture.


0 Comments