
Hot take, I know, but I love bread. Basic breads like a baguette, enriched breads like brioche. Sweet bread, savory bread, soft or chewy, if it’s bread, it’s probably for me. And I’m not alone! Bread has been a staple food in the human diet in some fashion or another for thousands of years. It brings friends and family together, even wars have been started over bread (here’s looking at you, French Revolution). Bread is so beloved universally that even an allergy won’t stop people from finding a way to make it work! Gluten free, keto, high protein, people really do refuse to let it go in the face of their specific diet.
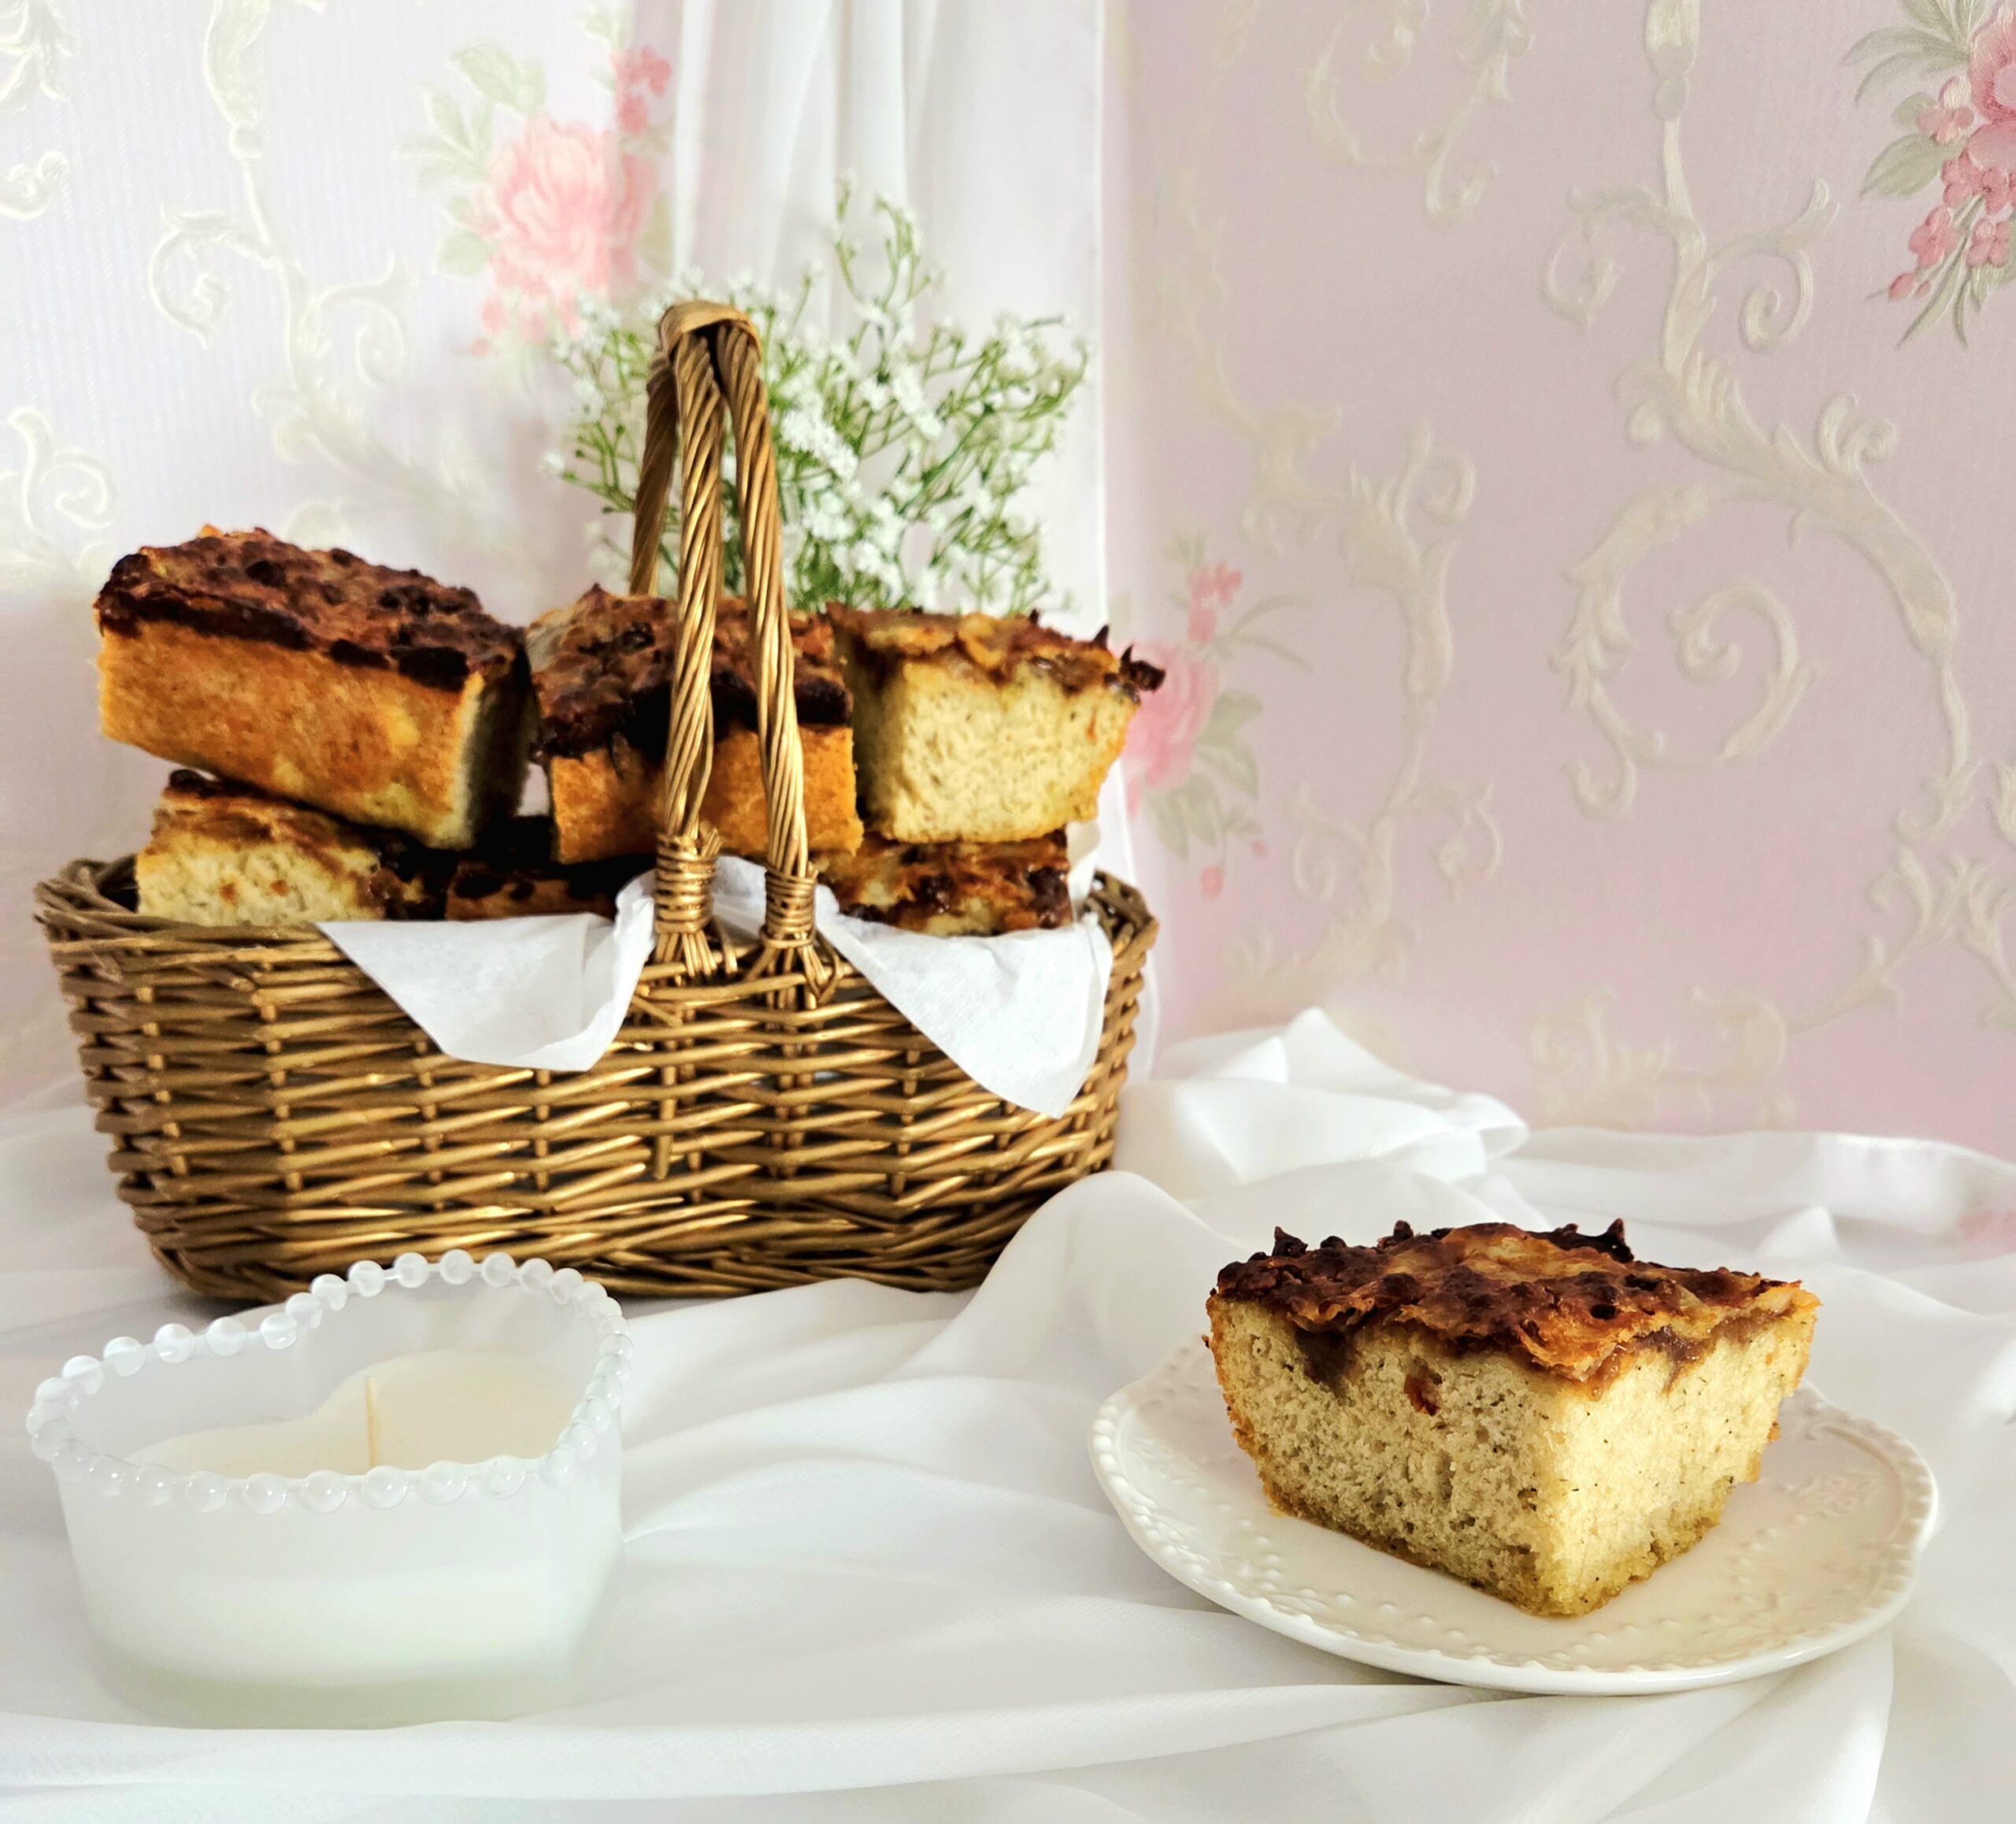
I think we can all understand why. With how versatile bread is, there truly is a flavor for everyone. As a lover of French onion tarts and French onion soup, it was easy to jump to French Onion Focaccia. Fragrant thyme, nutty cheese, that umami flavor of the beef and worcestershire complimenting the sweetness of the onions. What’s not to love, really? With a crisp exterior, fluffy interior, this focaccia is an easy and flavorful labor of love. Serve it at your next Sunday supper, cozy date night in, or relaxing solo dinner.
FAQs and Science
What is a “turned off oven”?
Bread dough likes a warm environment to proof in. In a professional commercial bakery, there are special boxes designed just for this. But you’re likely baking at home, so need to use what’s at your disposal. Gently heating the oven to the lowest setting then turning it off helps mimic that environment enough for the dough to thrive. Hence the term, “turned off oven.”
Why use beef stock in the dough?
To get more of that savory flavor you’d find in a french onion soup!
Could the dough just proof in the bowl of the mixer?
Yes! Just place the dough onto a clean surface while you oil the inside of the mixer bowl instead of a new one.
What is Better Than Bouillon? Do I need to use low sodium?
Better Than Bouillon is a thick, concentrated paste, often used as the base of soups. It’s intensely flavorful, and perfect for adding some umami flavor into the onions similar to that of a french onion soup. It is also, however, very high in sodium! So if you don’t use the lower sodium version, it will be like biting into a soft block of salt.
Was it an oversight not to put salt into the onions?
Nope! All of the salt they need comes from the Better Than Bouillon.
Does the cheese have to be freshly grated?
I will always advise you to grate cheese by hand when it’s going to melt on top of something. However, if you already have pre-shredded cheese or can’t be bothered with using the grater, it won’t ruin the bread to use the stuff from the bag.
Why not add the cheese when the onions are added to the top of the dough?
I tried sprinkling the cheese with the onions pre-bake, the cheese gets too dark by the end.
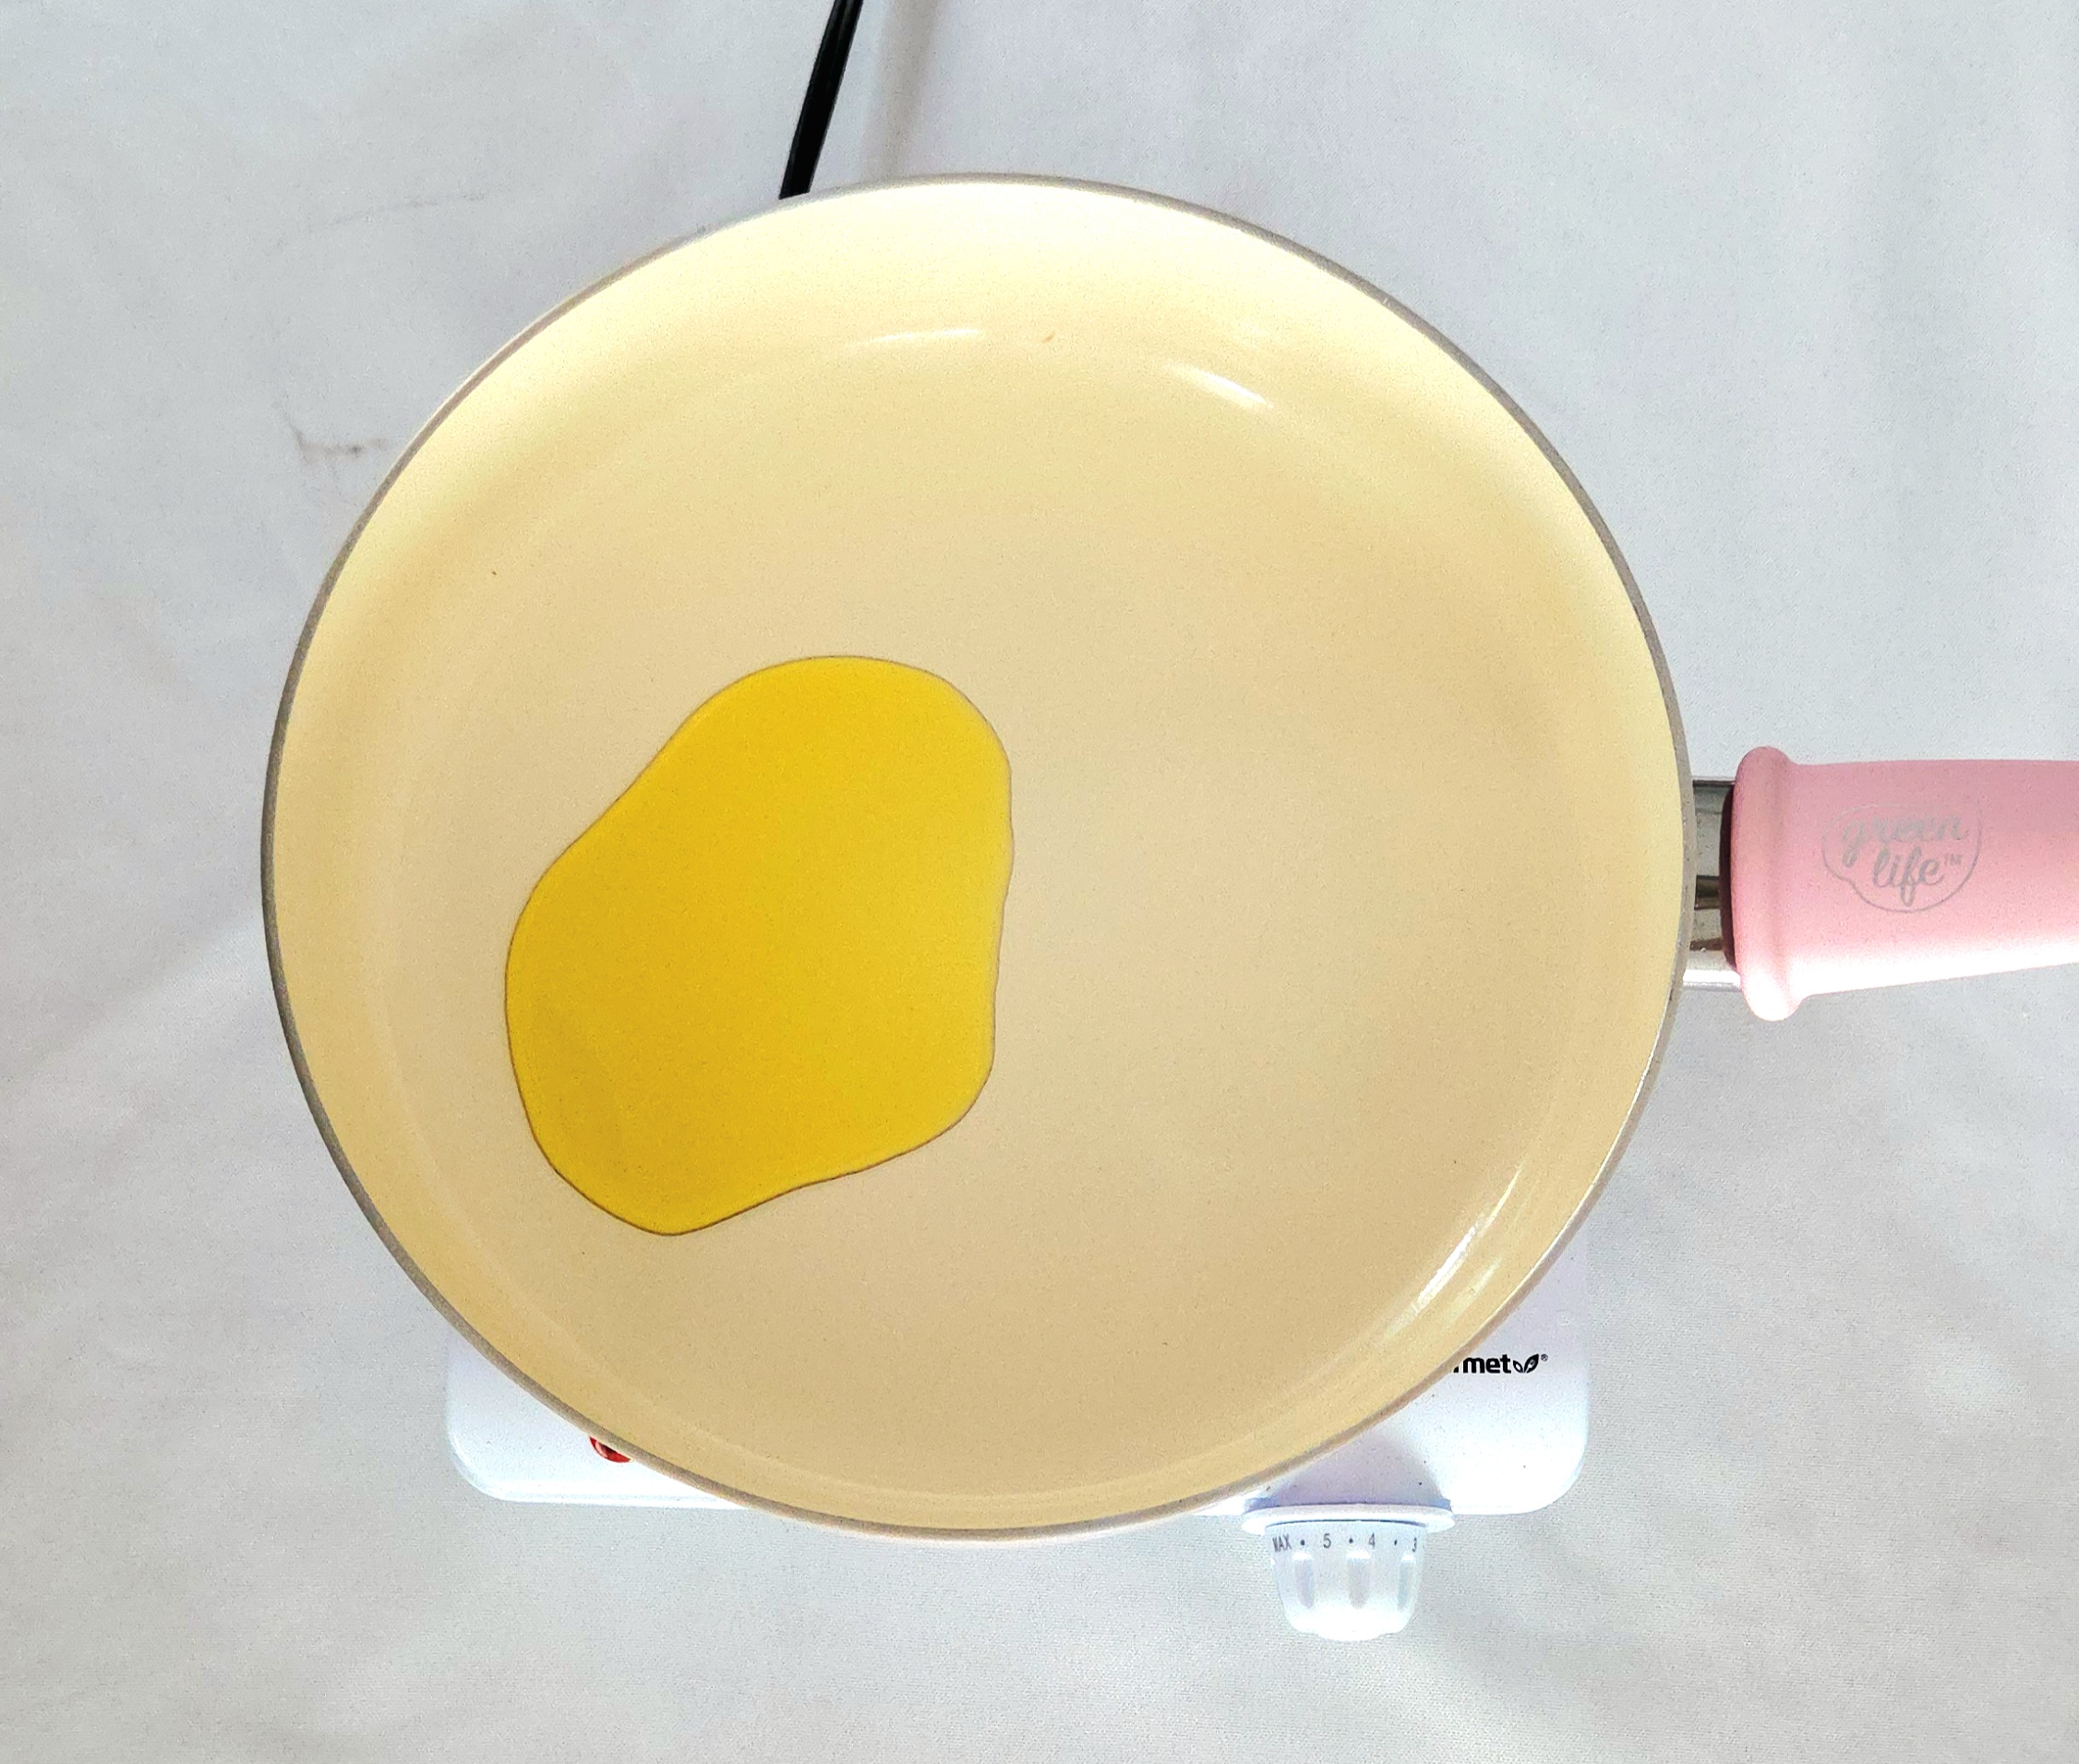
How much oil should be poured into the pan before dumping in the dough?
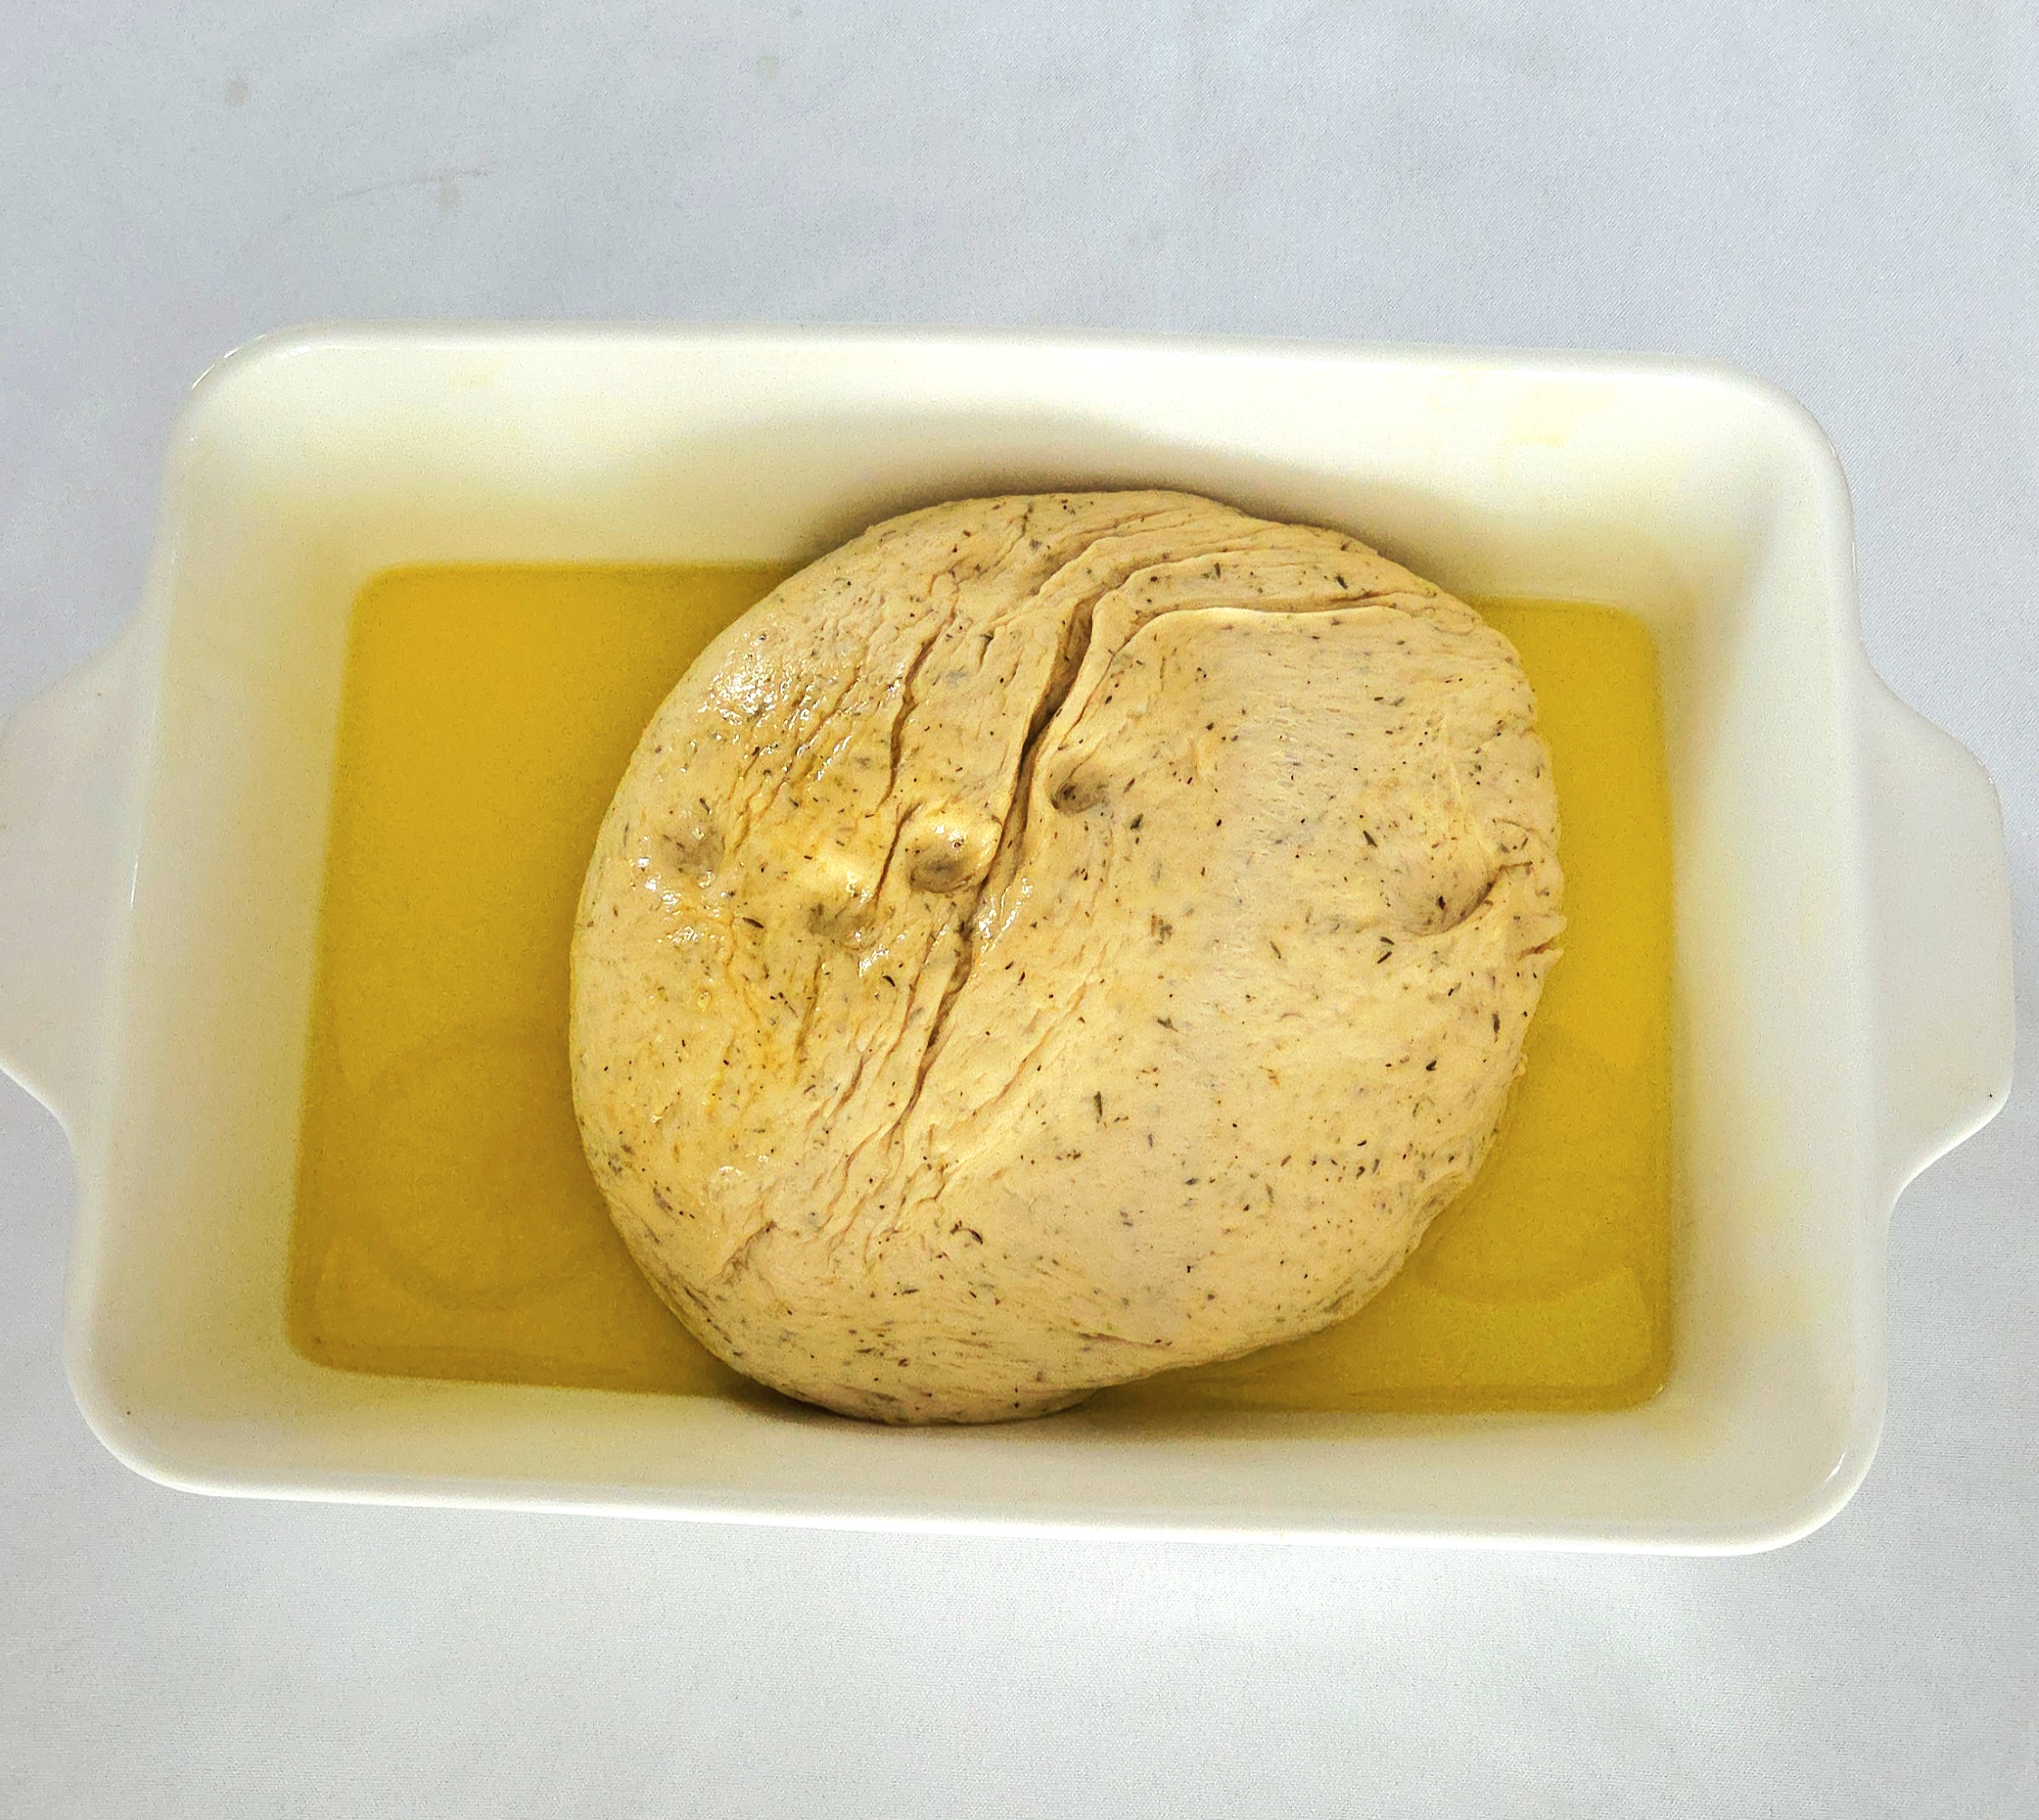
Enough to coat the pan well and leave a bit extra pooled in the bottom. Use your discernment, with the pictures below for reference.
What You’ll Need
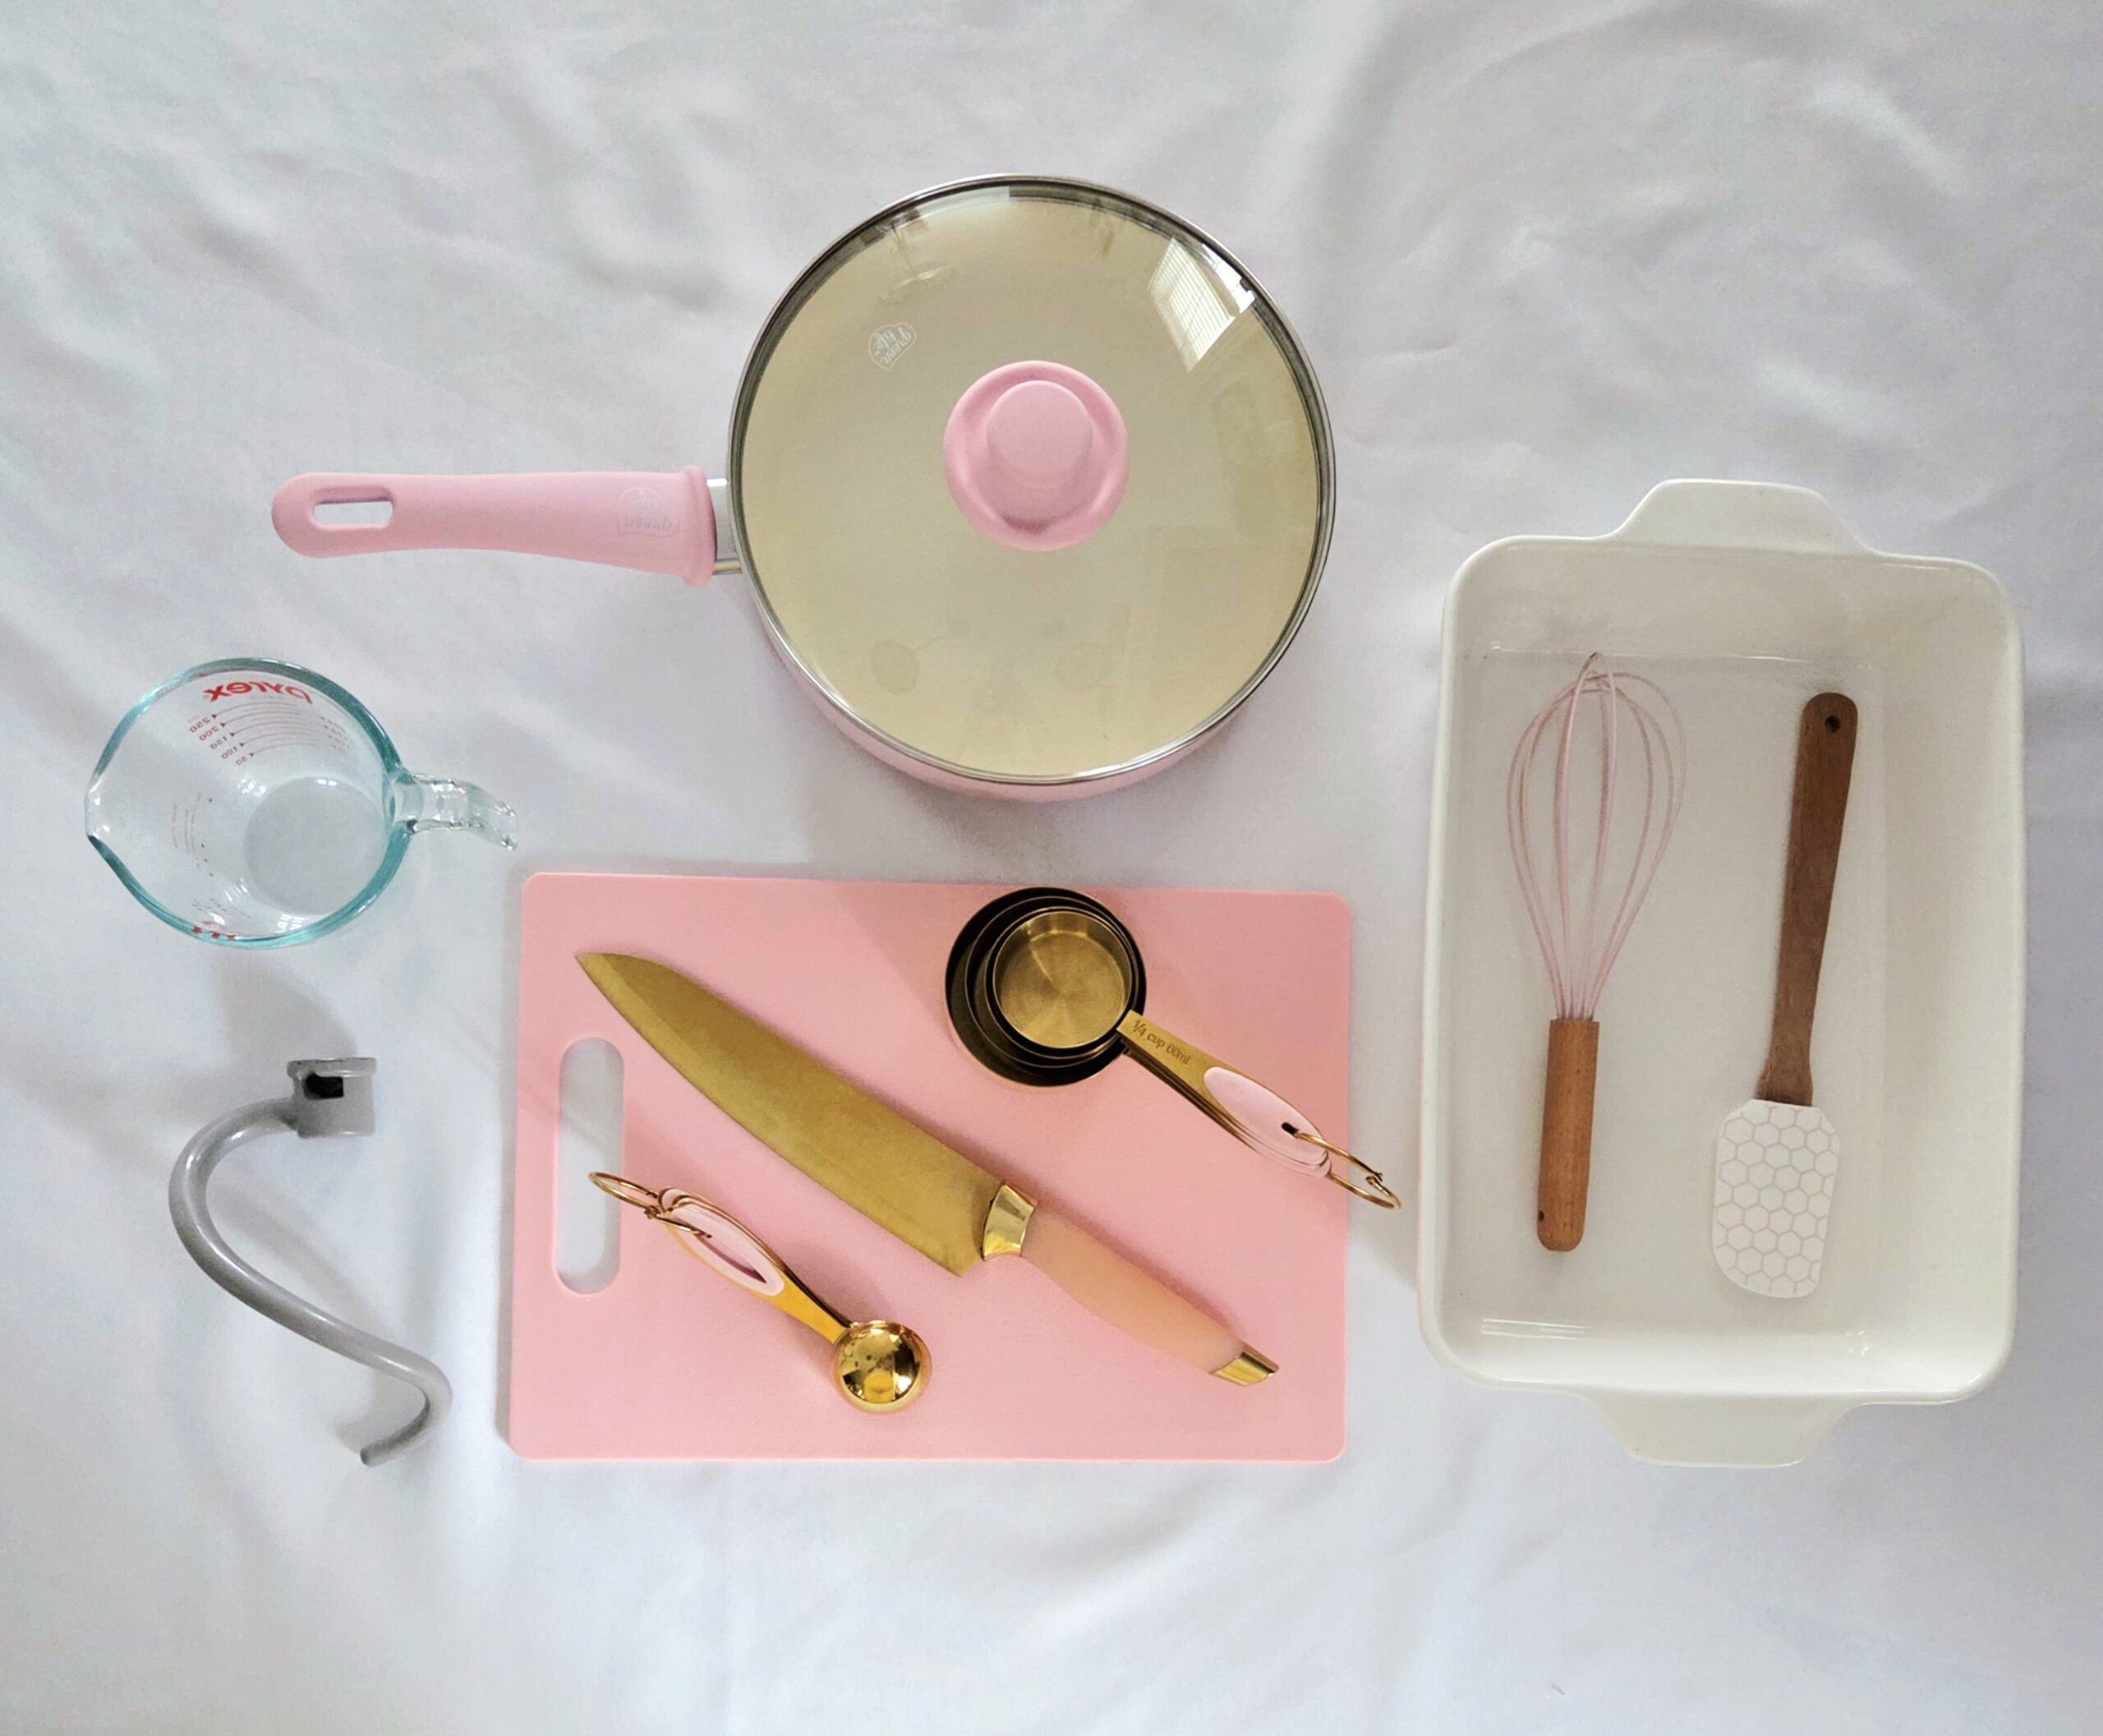
- Stand mixer fitted with the dough hook
- Plastic wrap
- 9×13 inch baking dish
- Large mixing bowl (optional)
- Dry measuring cups
- Liquid measuring cup
- Measuring spoons
- Whisk
- Chef’s knife
- Cutting board
- Large skillet
- Heat safe spatula
- Cheese grater (optional)
- Cooling rack
The Process
The Dough
Begin by preparing the dough. Set up a turned-off oven by turning it to the lowest setting it will heat to, typically 175-200F. This will mimic a proofing box for the dough to rise in after it’s brought together. Keep it on until the dough is ready to rest inside of it.
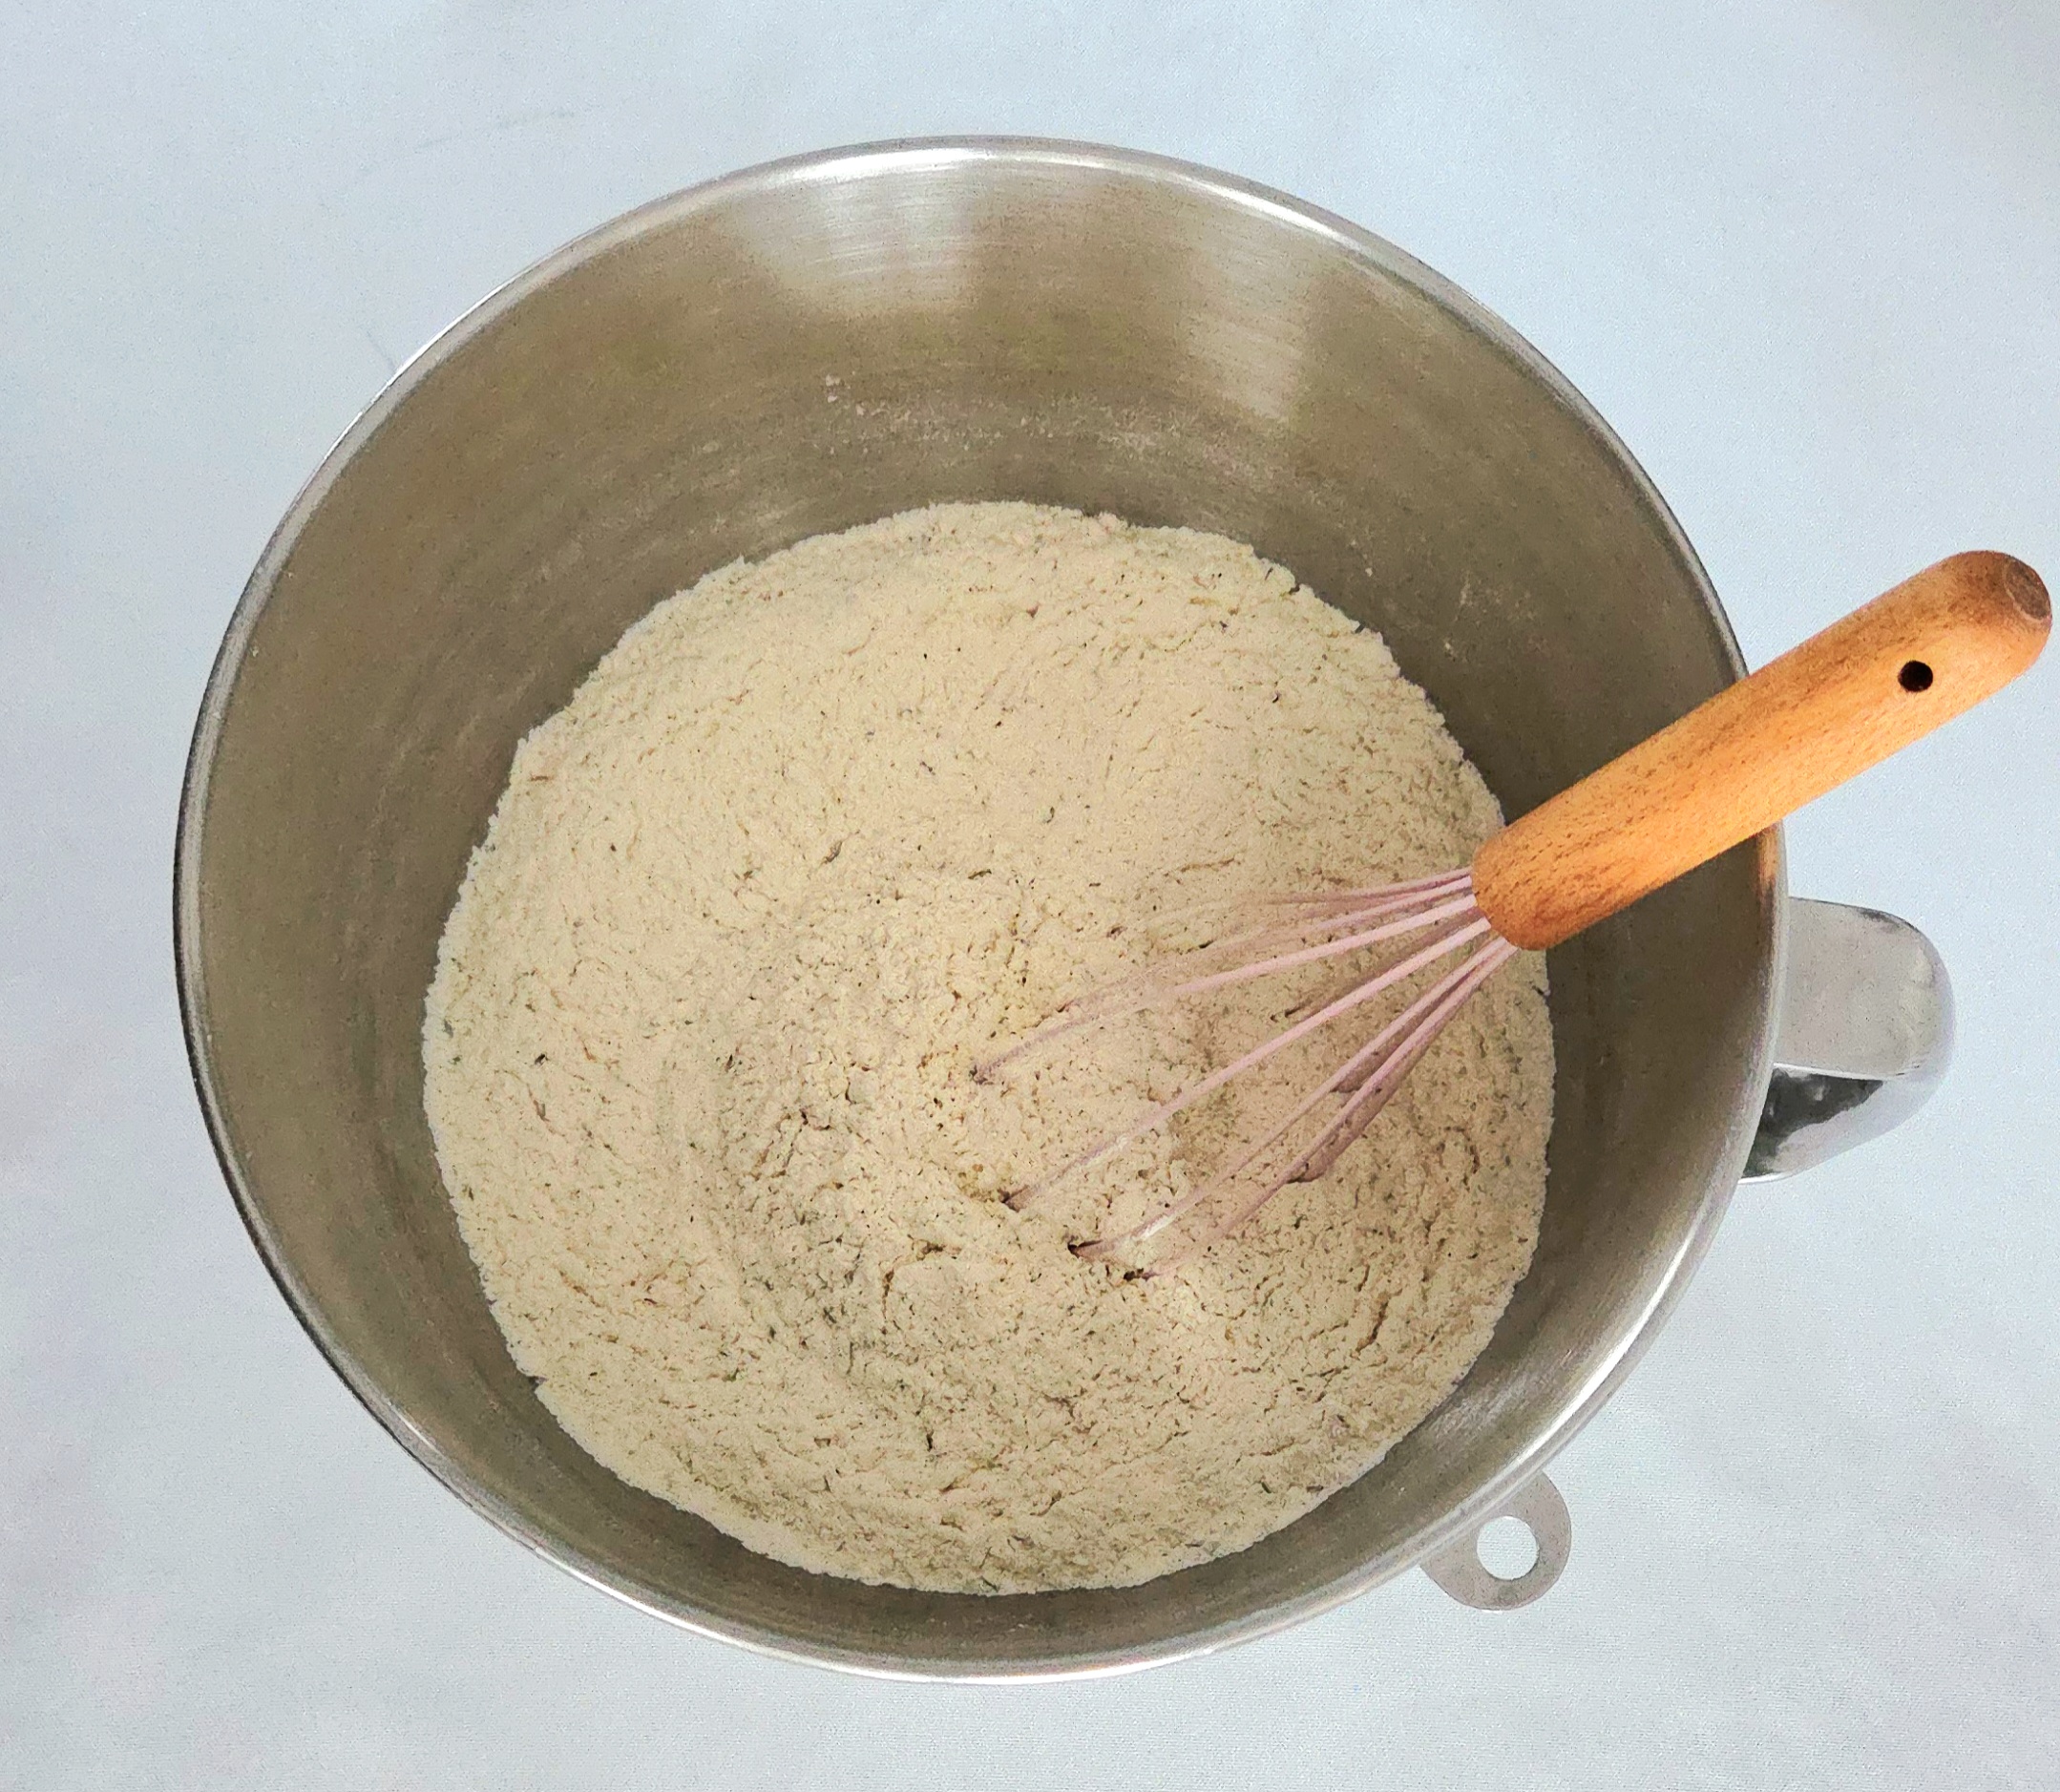
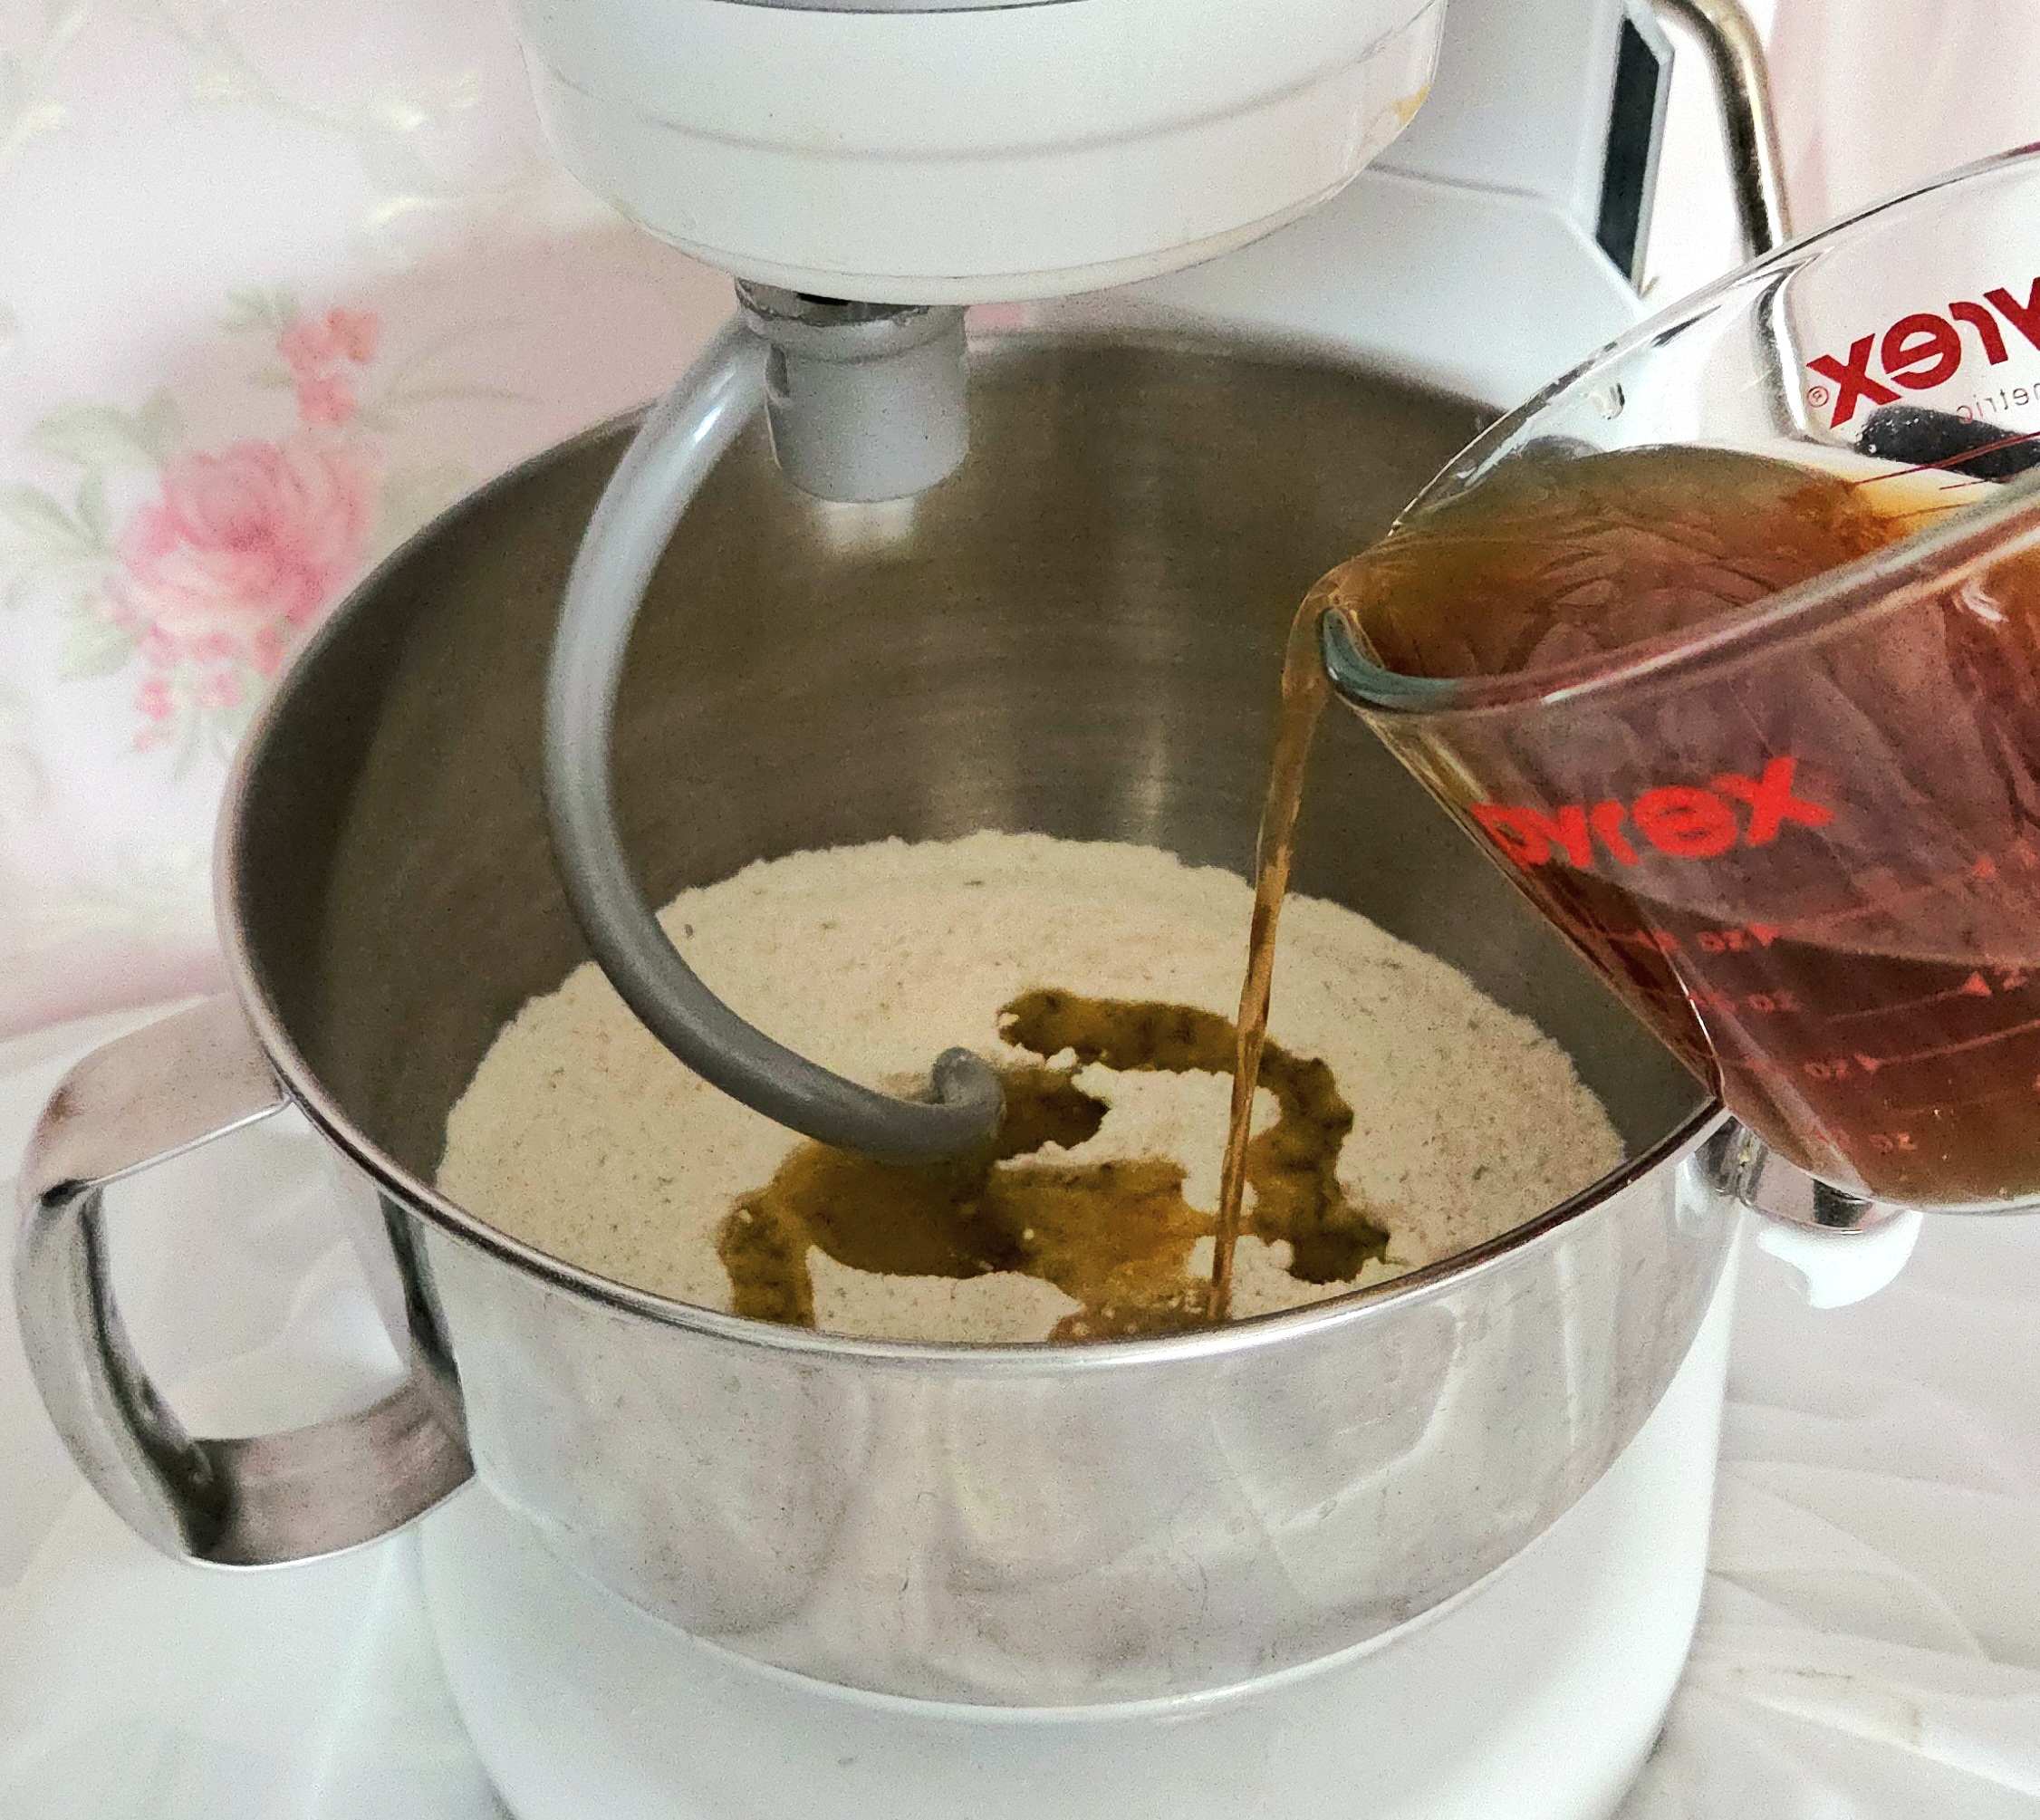
Whisk together the flour, yeast, sugar, salt, and thyme in the bowl of a stand mixer that’s been fitted with the dough hook. Yes, many people will tell you it’s okay to skip this step and that it will all mix together just find if you dump in every part of the dough now and turn the mixer on. No, I am not one of those people. Whisking the dry goods separately ensures that they’ll be evenly distributed, rather than getting a pocket of salt in one corner and thyme in another. Take 10 seconds and whisk it all together.
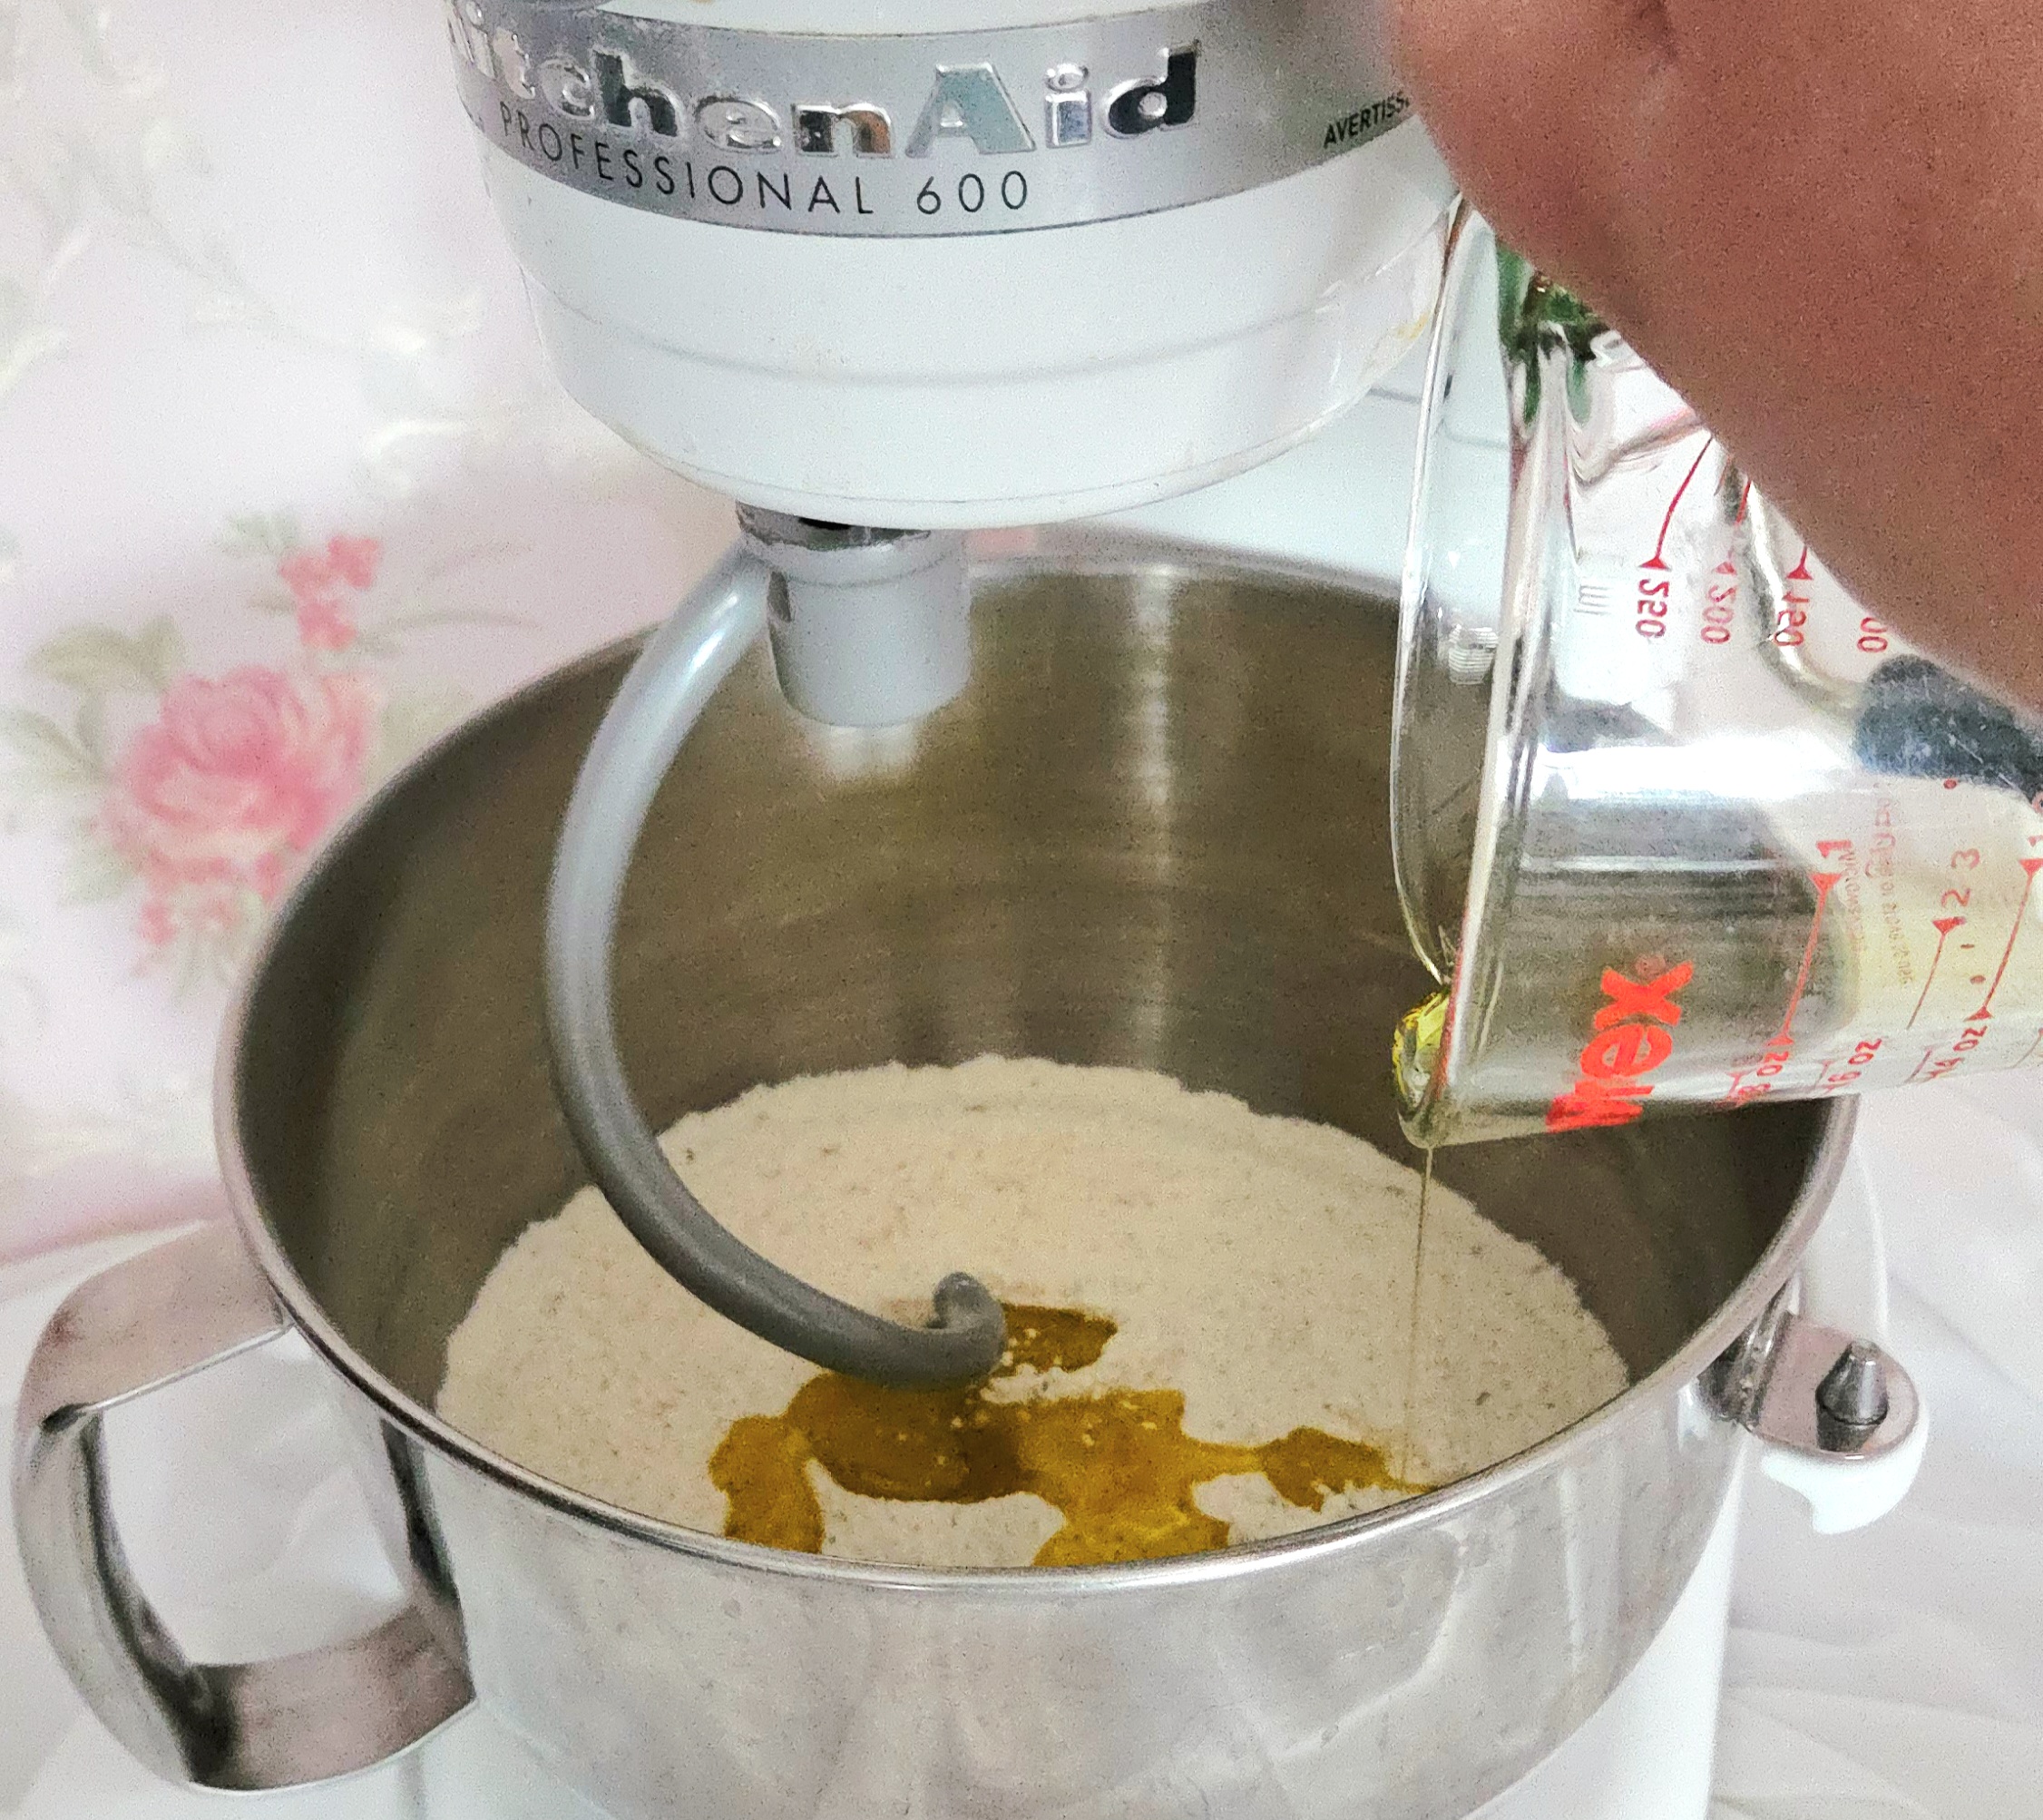
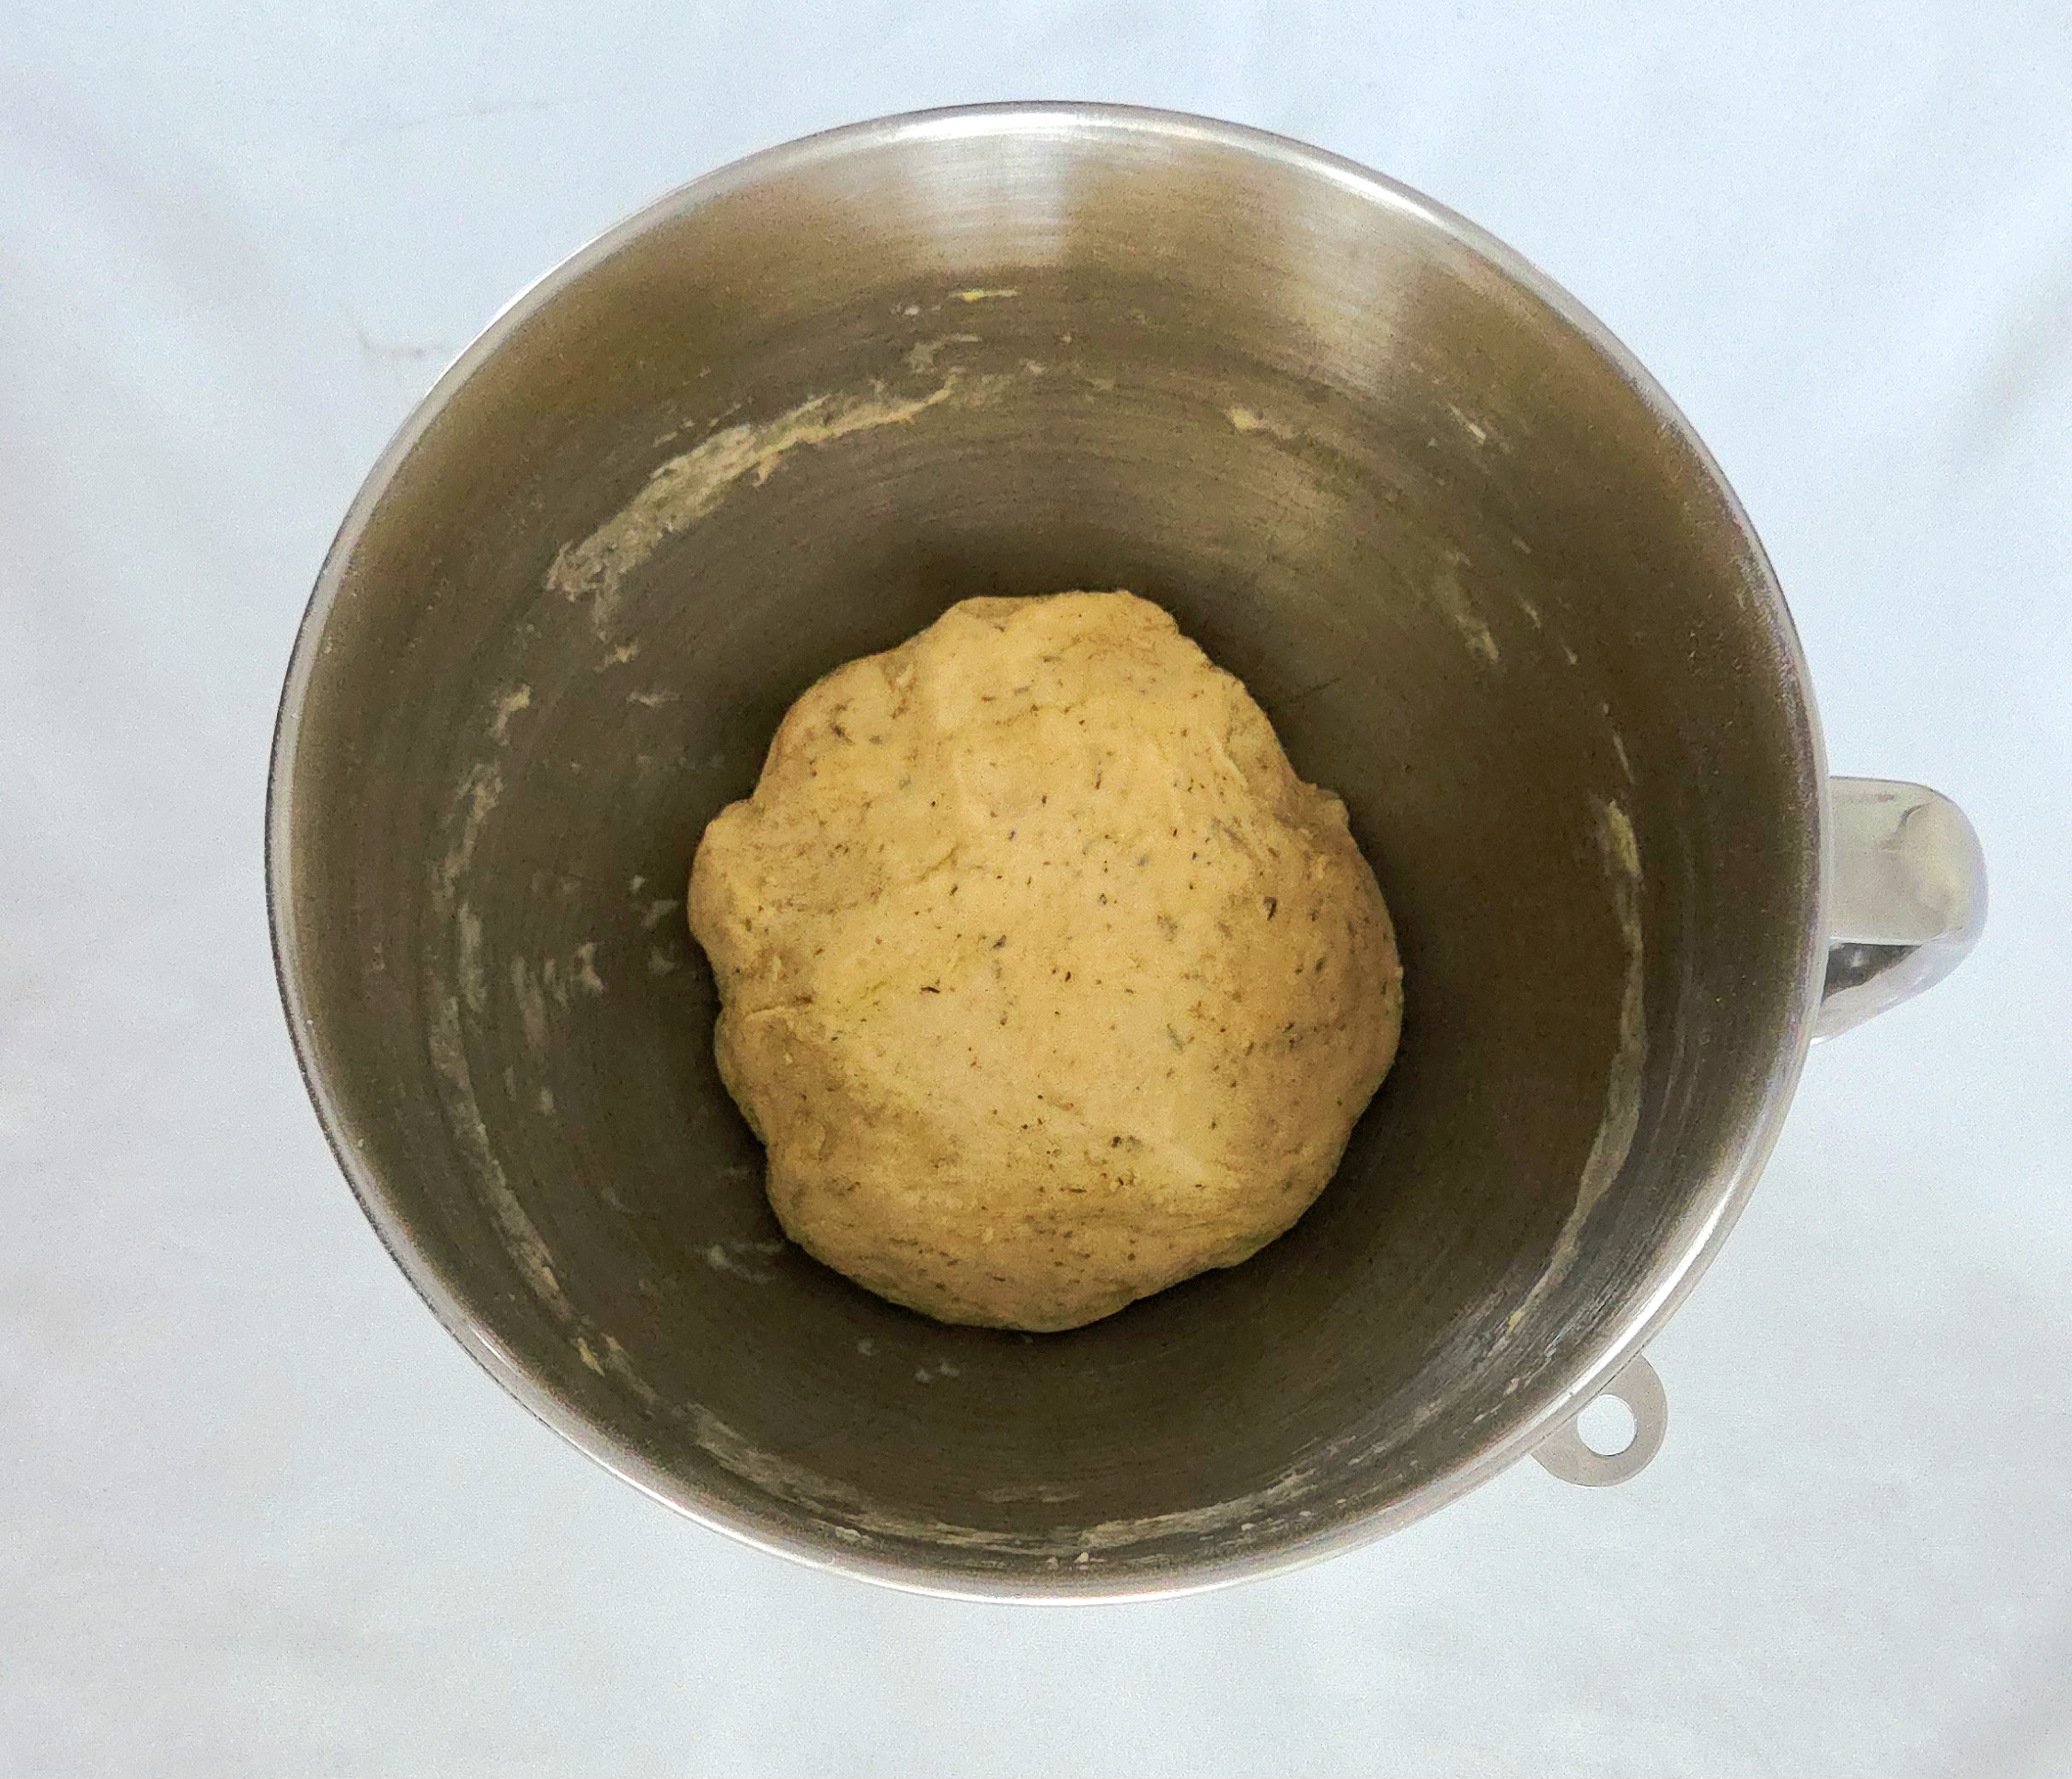
In a microwave, heat the beef stock in 30 second increments, stirring in between each, until it’s warm but not hot to the touch. This should take between 60-90 seconds total. Alternatively, the stock can be heated in a pot on the stove. Just make sure it doesn’t exceed 130F, as that’s the temperature at which yeast starts to die. Pour the warm stock into the dry goods and turn the mixer to level 2, kneading for a few minutes.
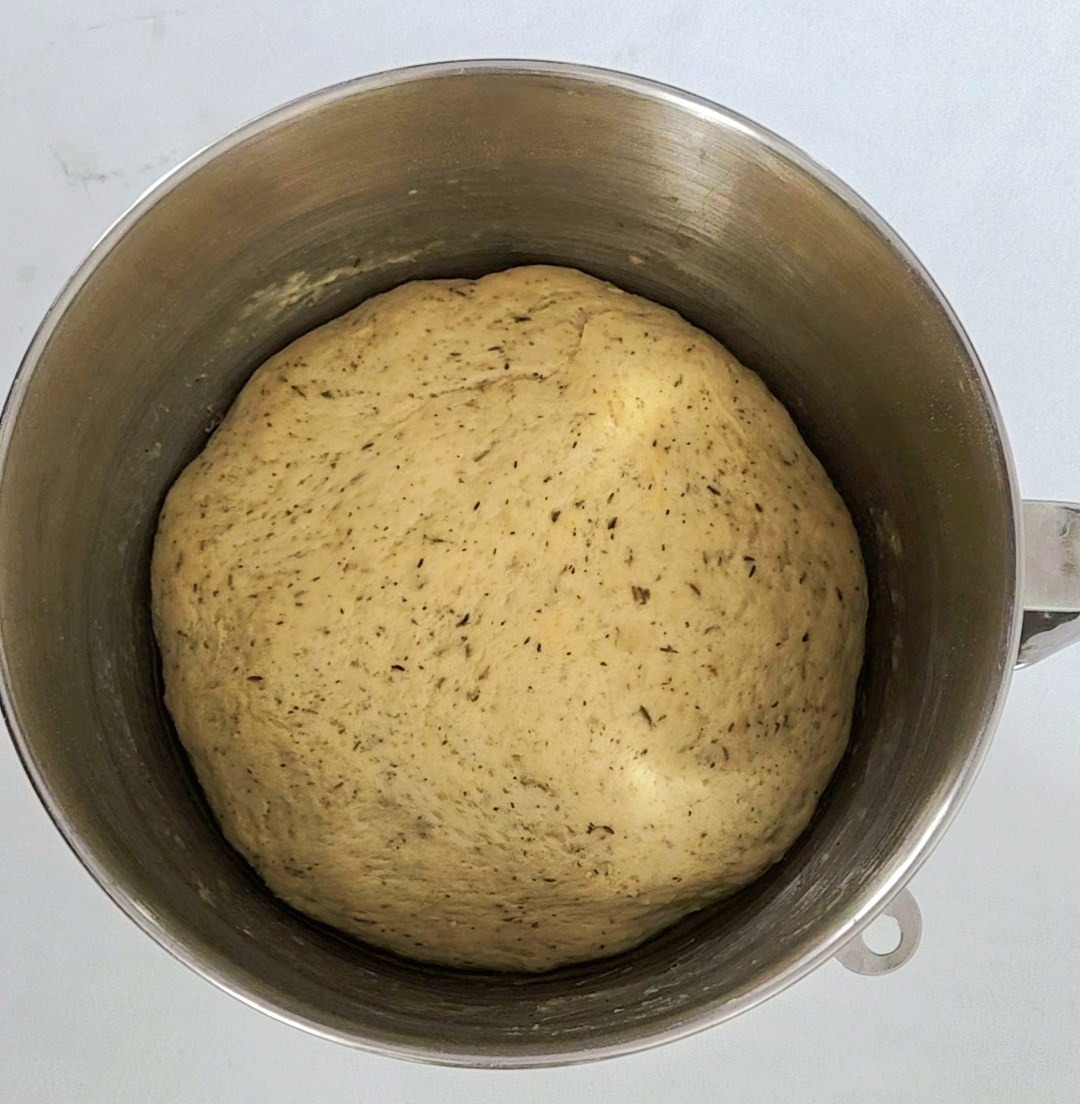
Oil the inside of a large heat-safe mixing bowl. Boule the dough and place it into the oiled bowl, turning it around a few times to coat the outside of it. Alternatively, you could briefly place the dough onto a clean counter and just use the bowl from the stand mixer, rather than dirtying up another one! Cover the top of the bowl with plastic wrap. Turn off the prepared oven and place the dough inside, on the center rack. Allow the dough to proof until it’s doubled in size, about 1-2 hours.
The Toppings
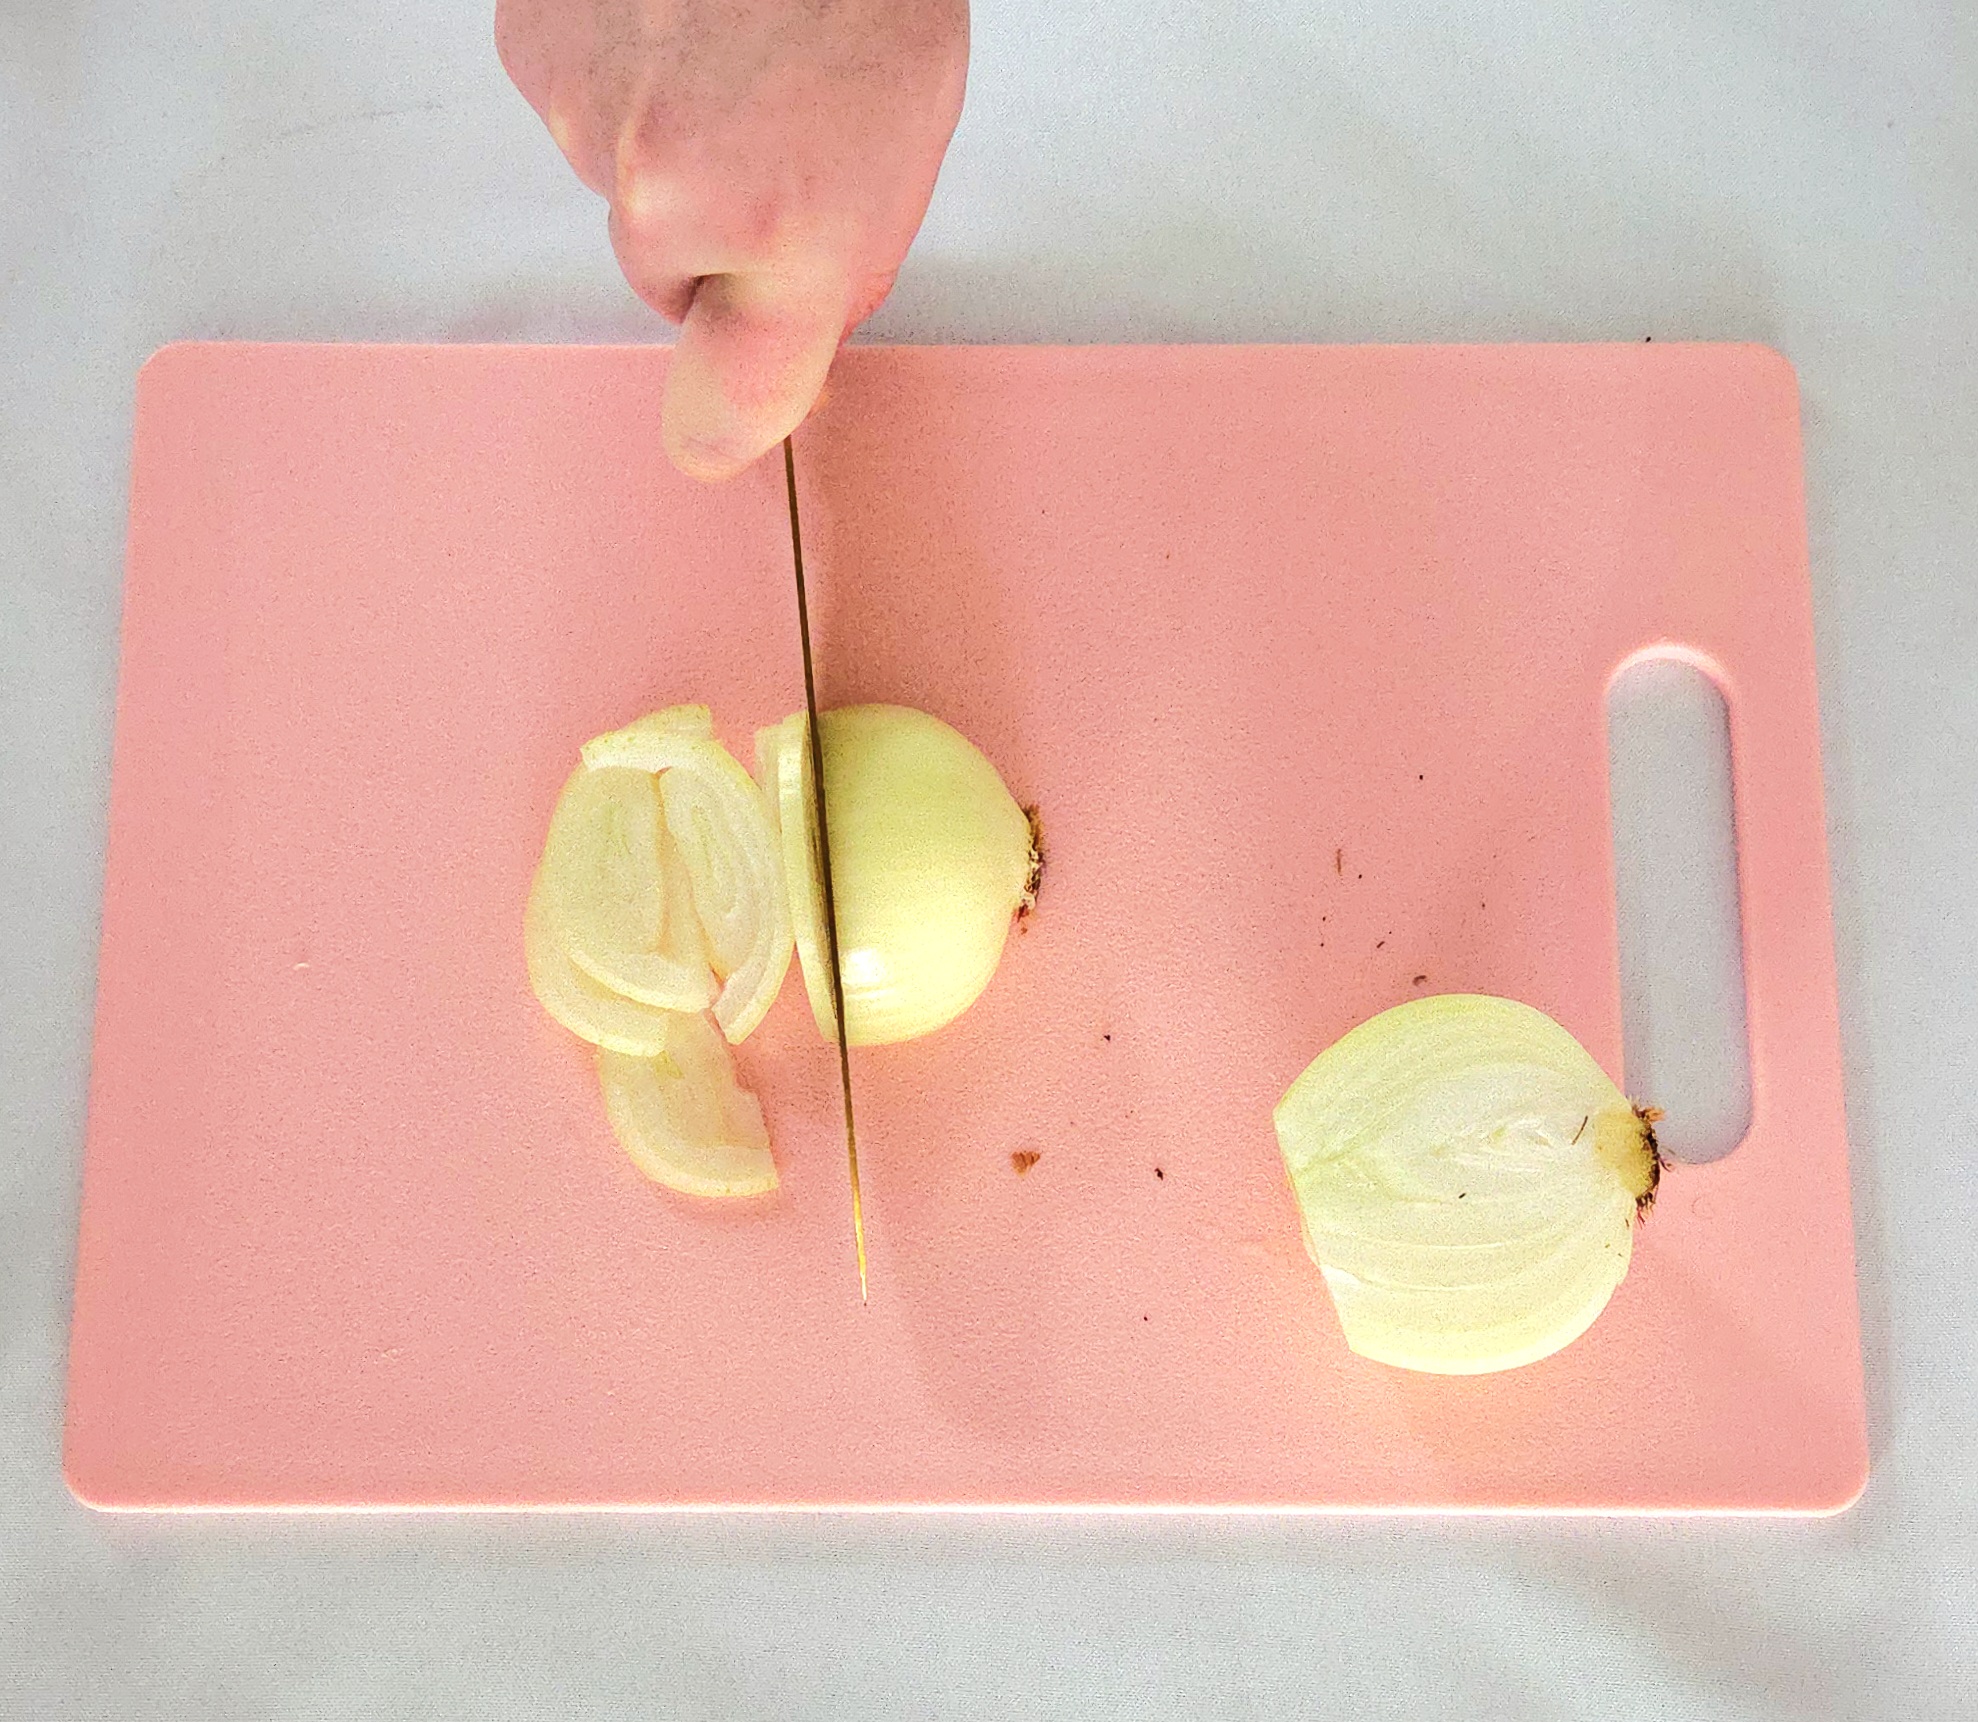
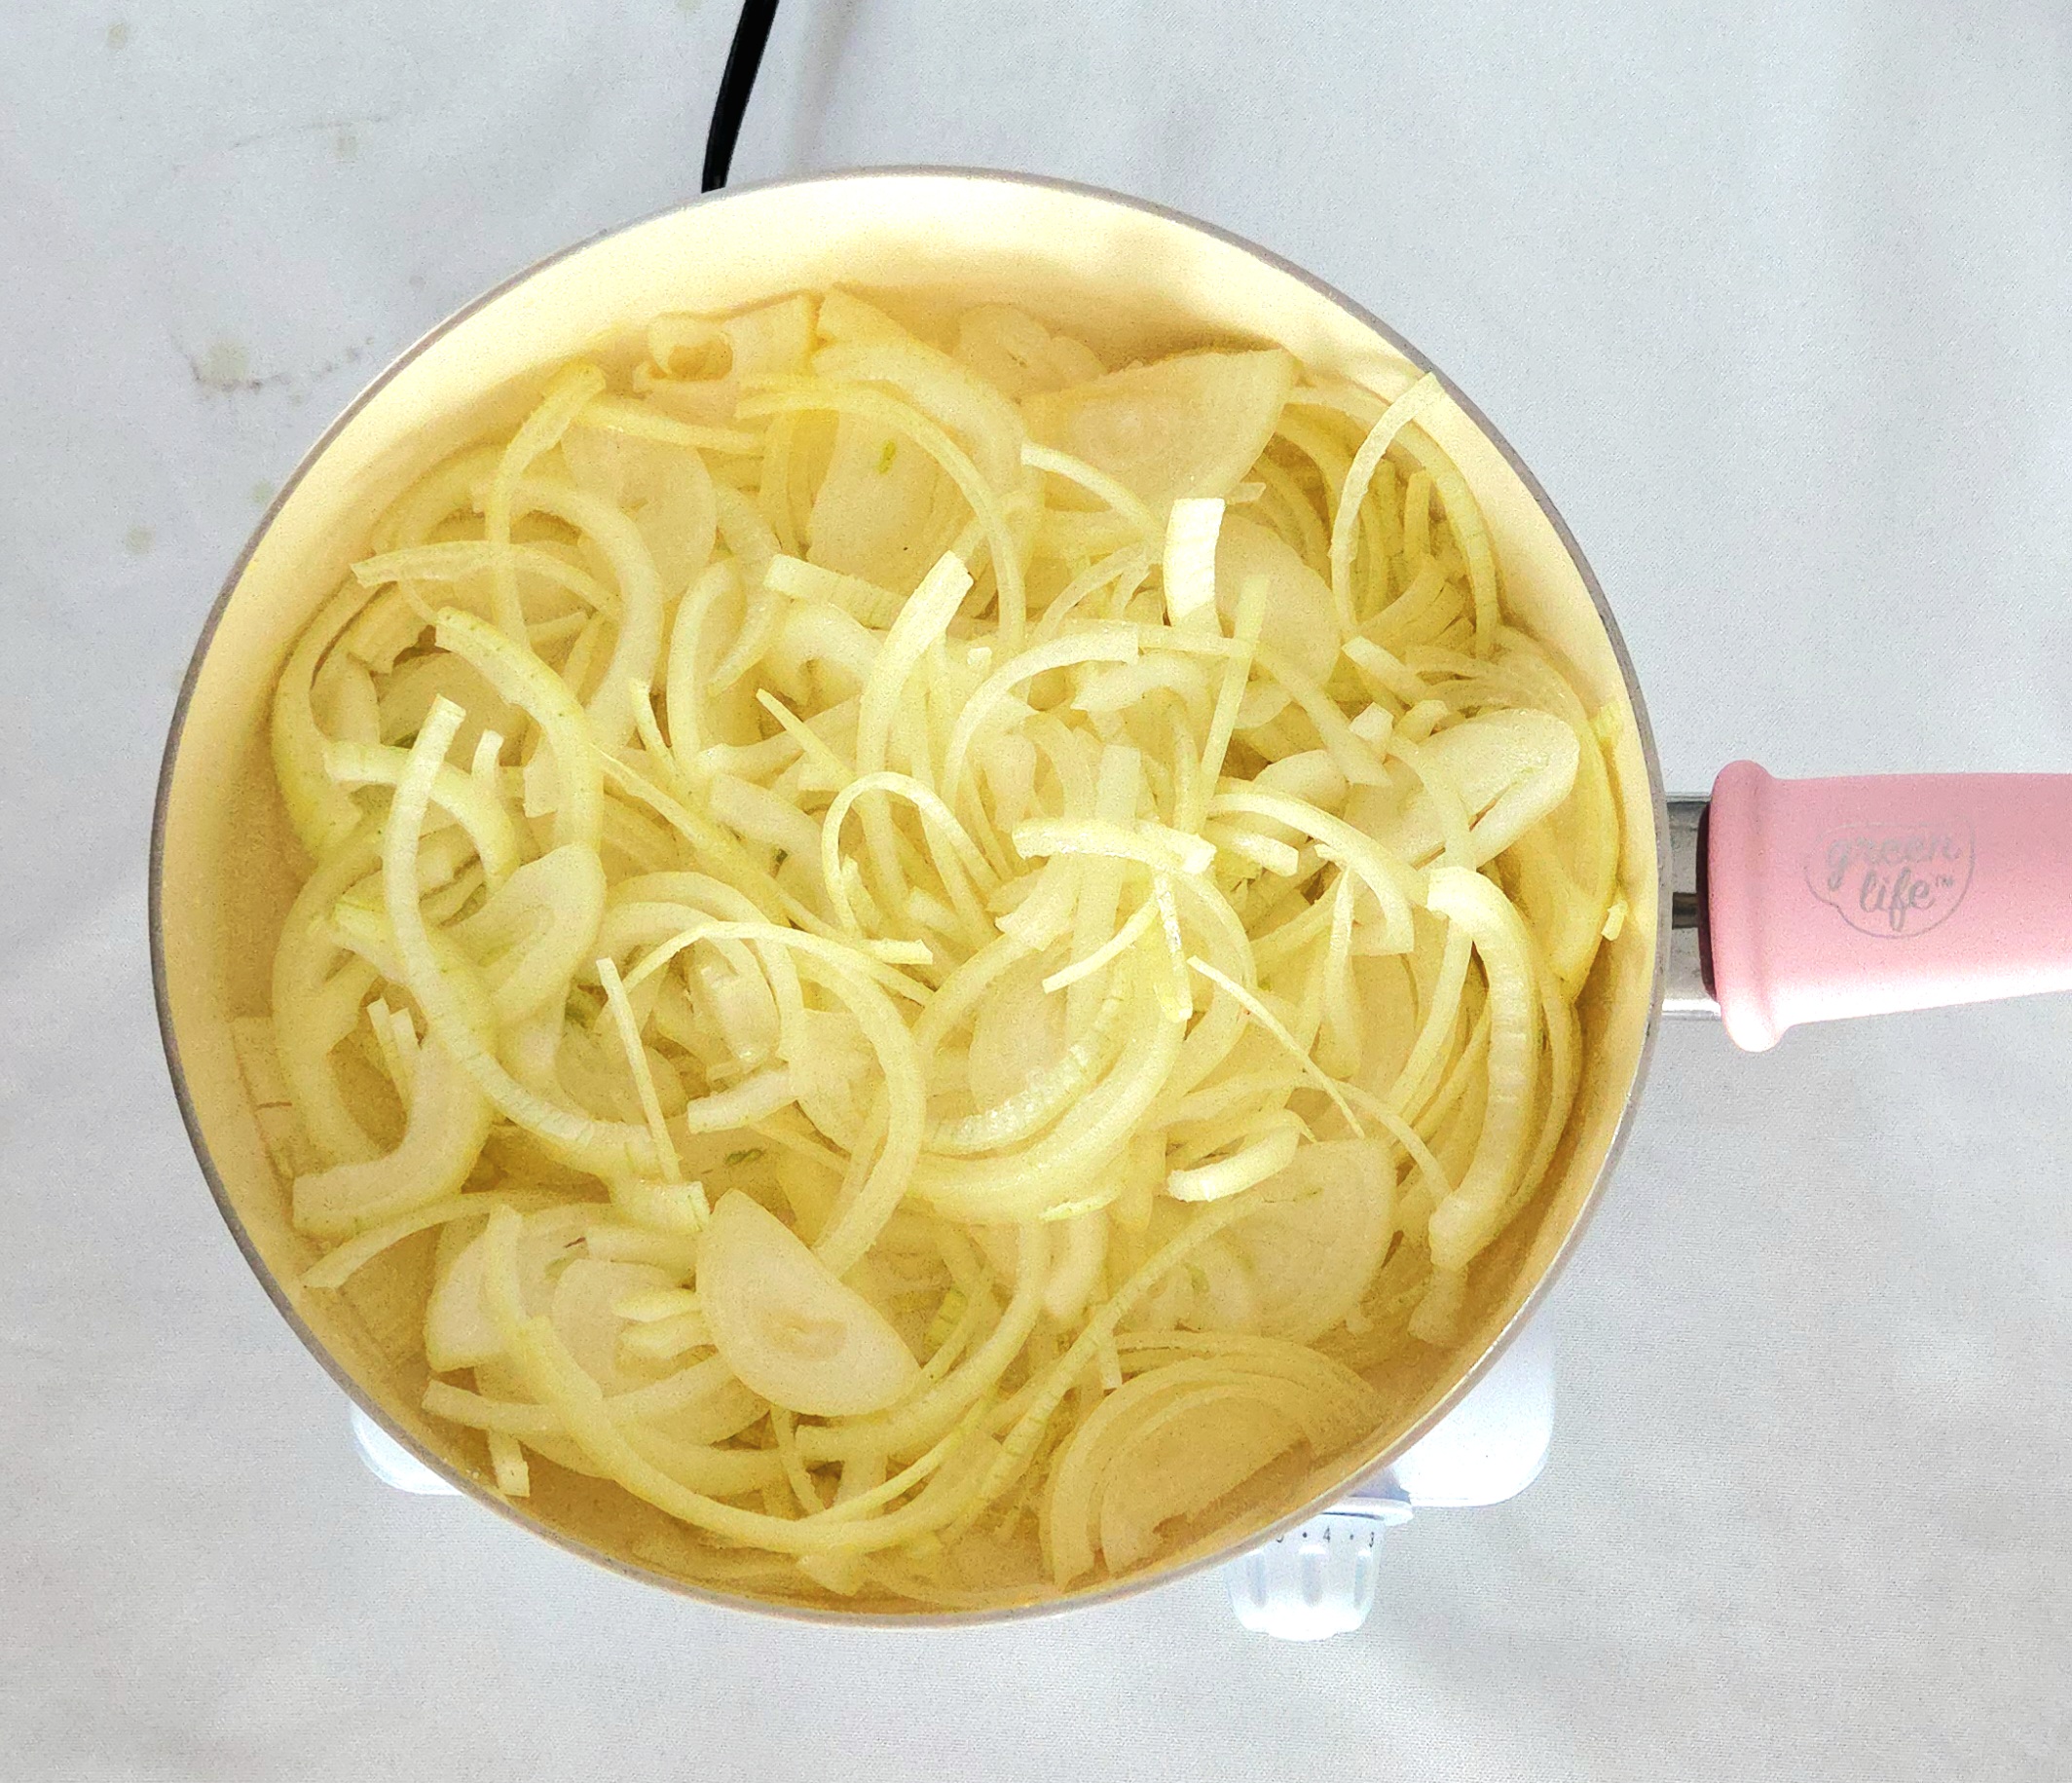
As the dough proofs, get the toppings ready to go. Thinly slice the onions, so they’re around 1/8th of an inch thick.
Place a large skillet over medium-high heat. Give it a minute or two to dry heat, then add the olive oil in. This just reduces the chances of the oil getting too hot and smoking up the kitchen. Add the onions and sugar to the pan, and toss them together. You’ll notice I didn’t mention salt, this was intentional. All the salt you’ll need will come from the bouillon paste in a bit, so please, ignore the urge to salt the onions now. Reduce the heat to low and cover the pan.

When the onions have softened and begin releasing their juices, uncover the pan and turn the heat up to medium-low. Give the onions an occasional stir, until the liquid evaporates and they go from translucent white to a light golden brown. It will take around 30-45 minutes, just be patient.
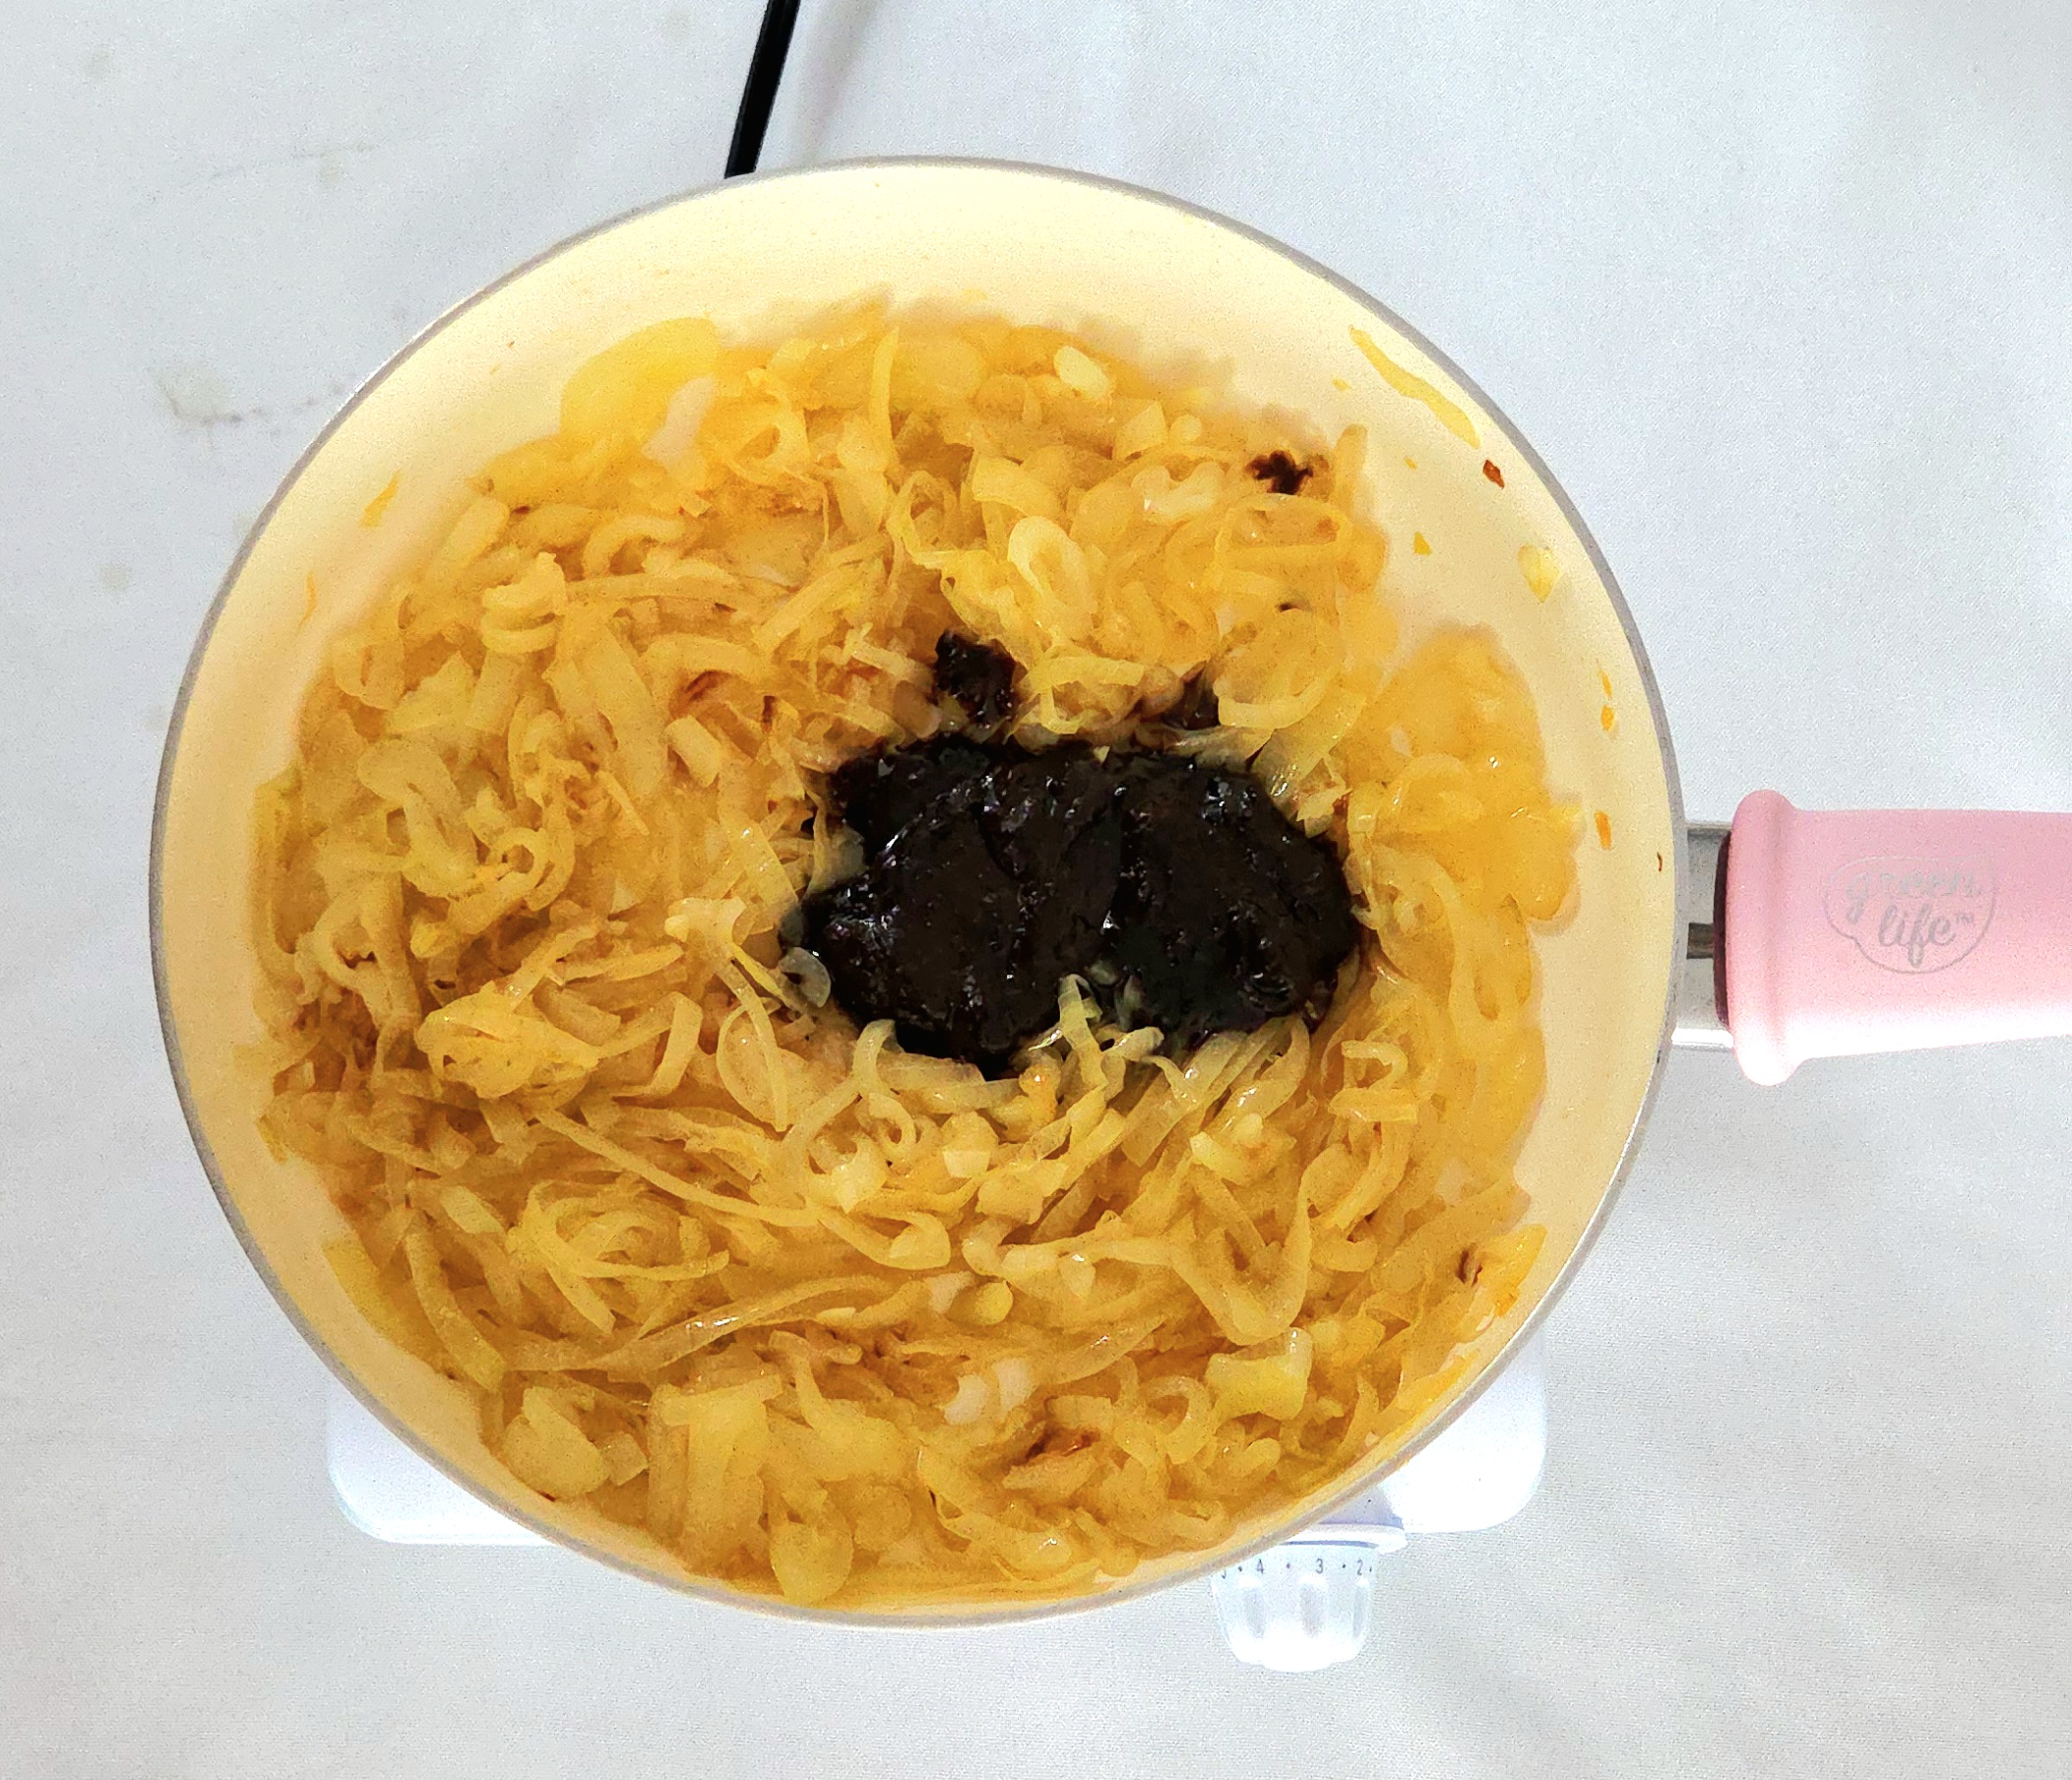
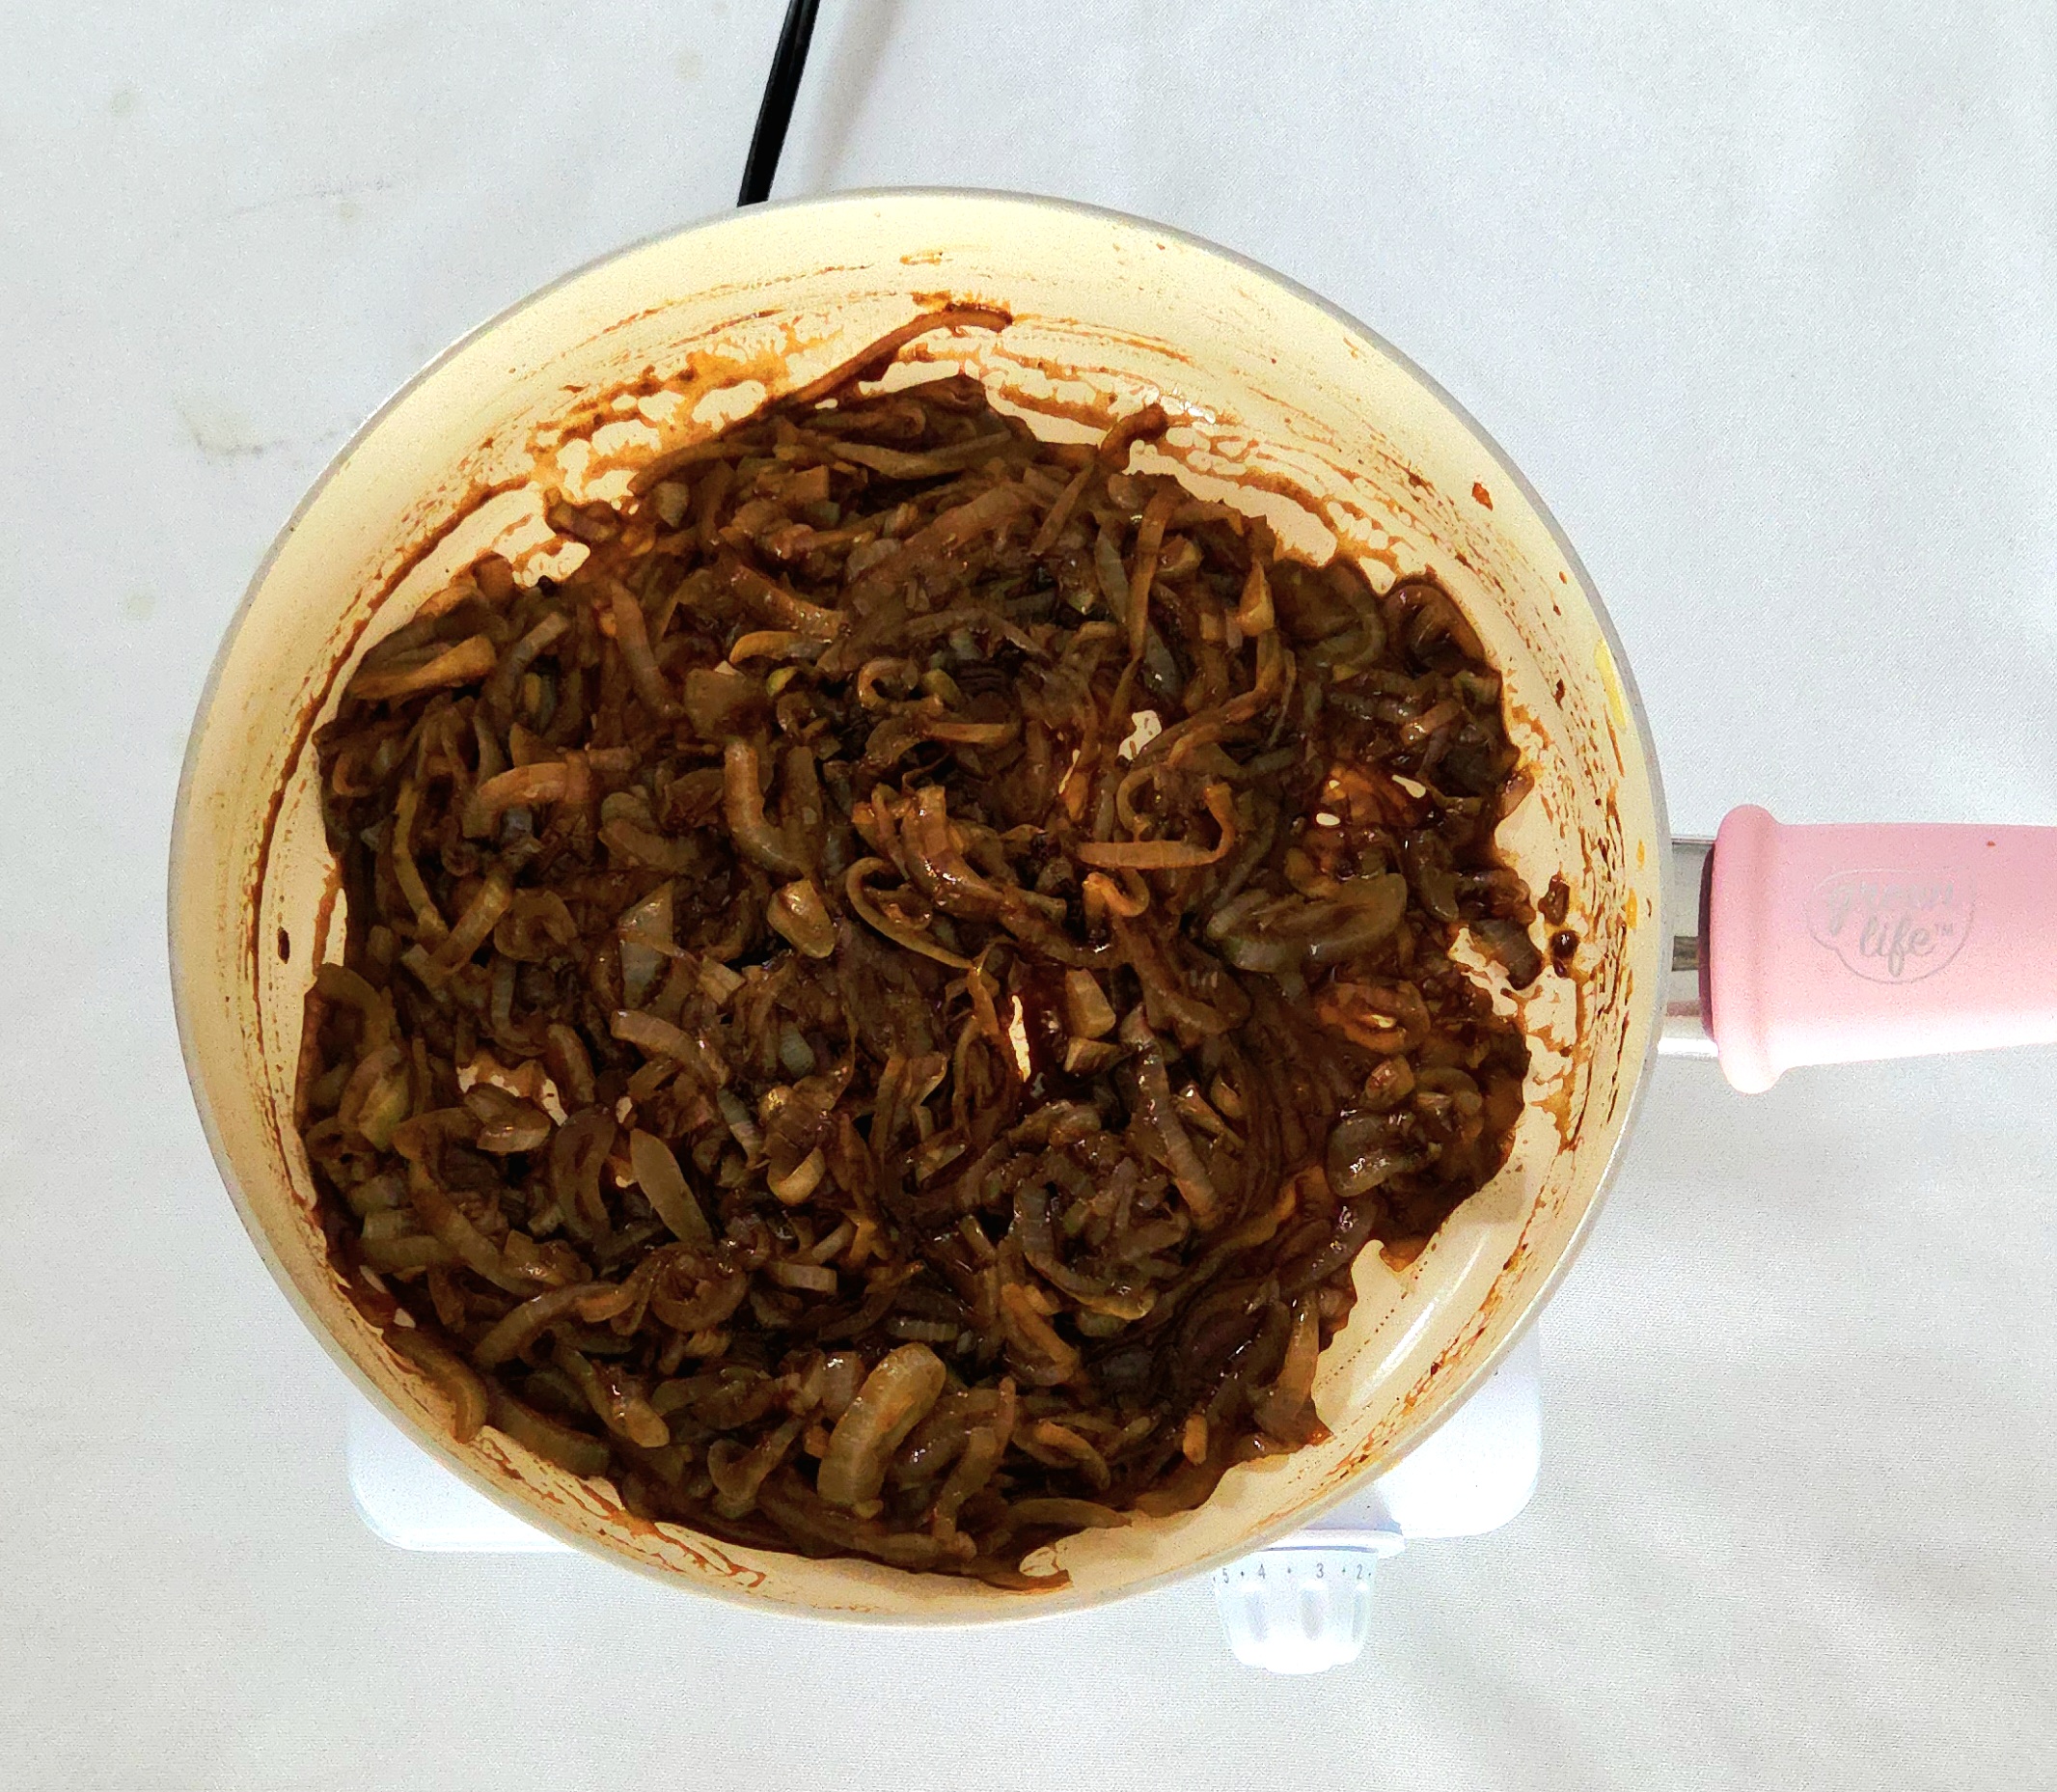
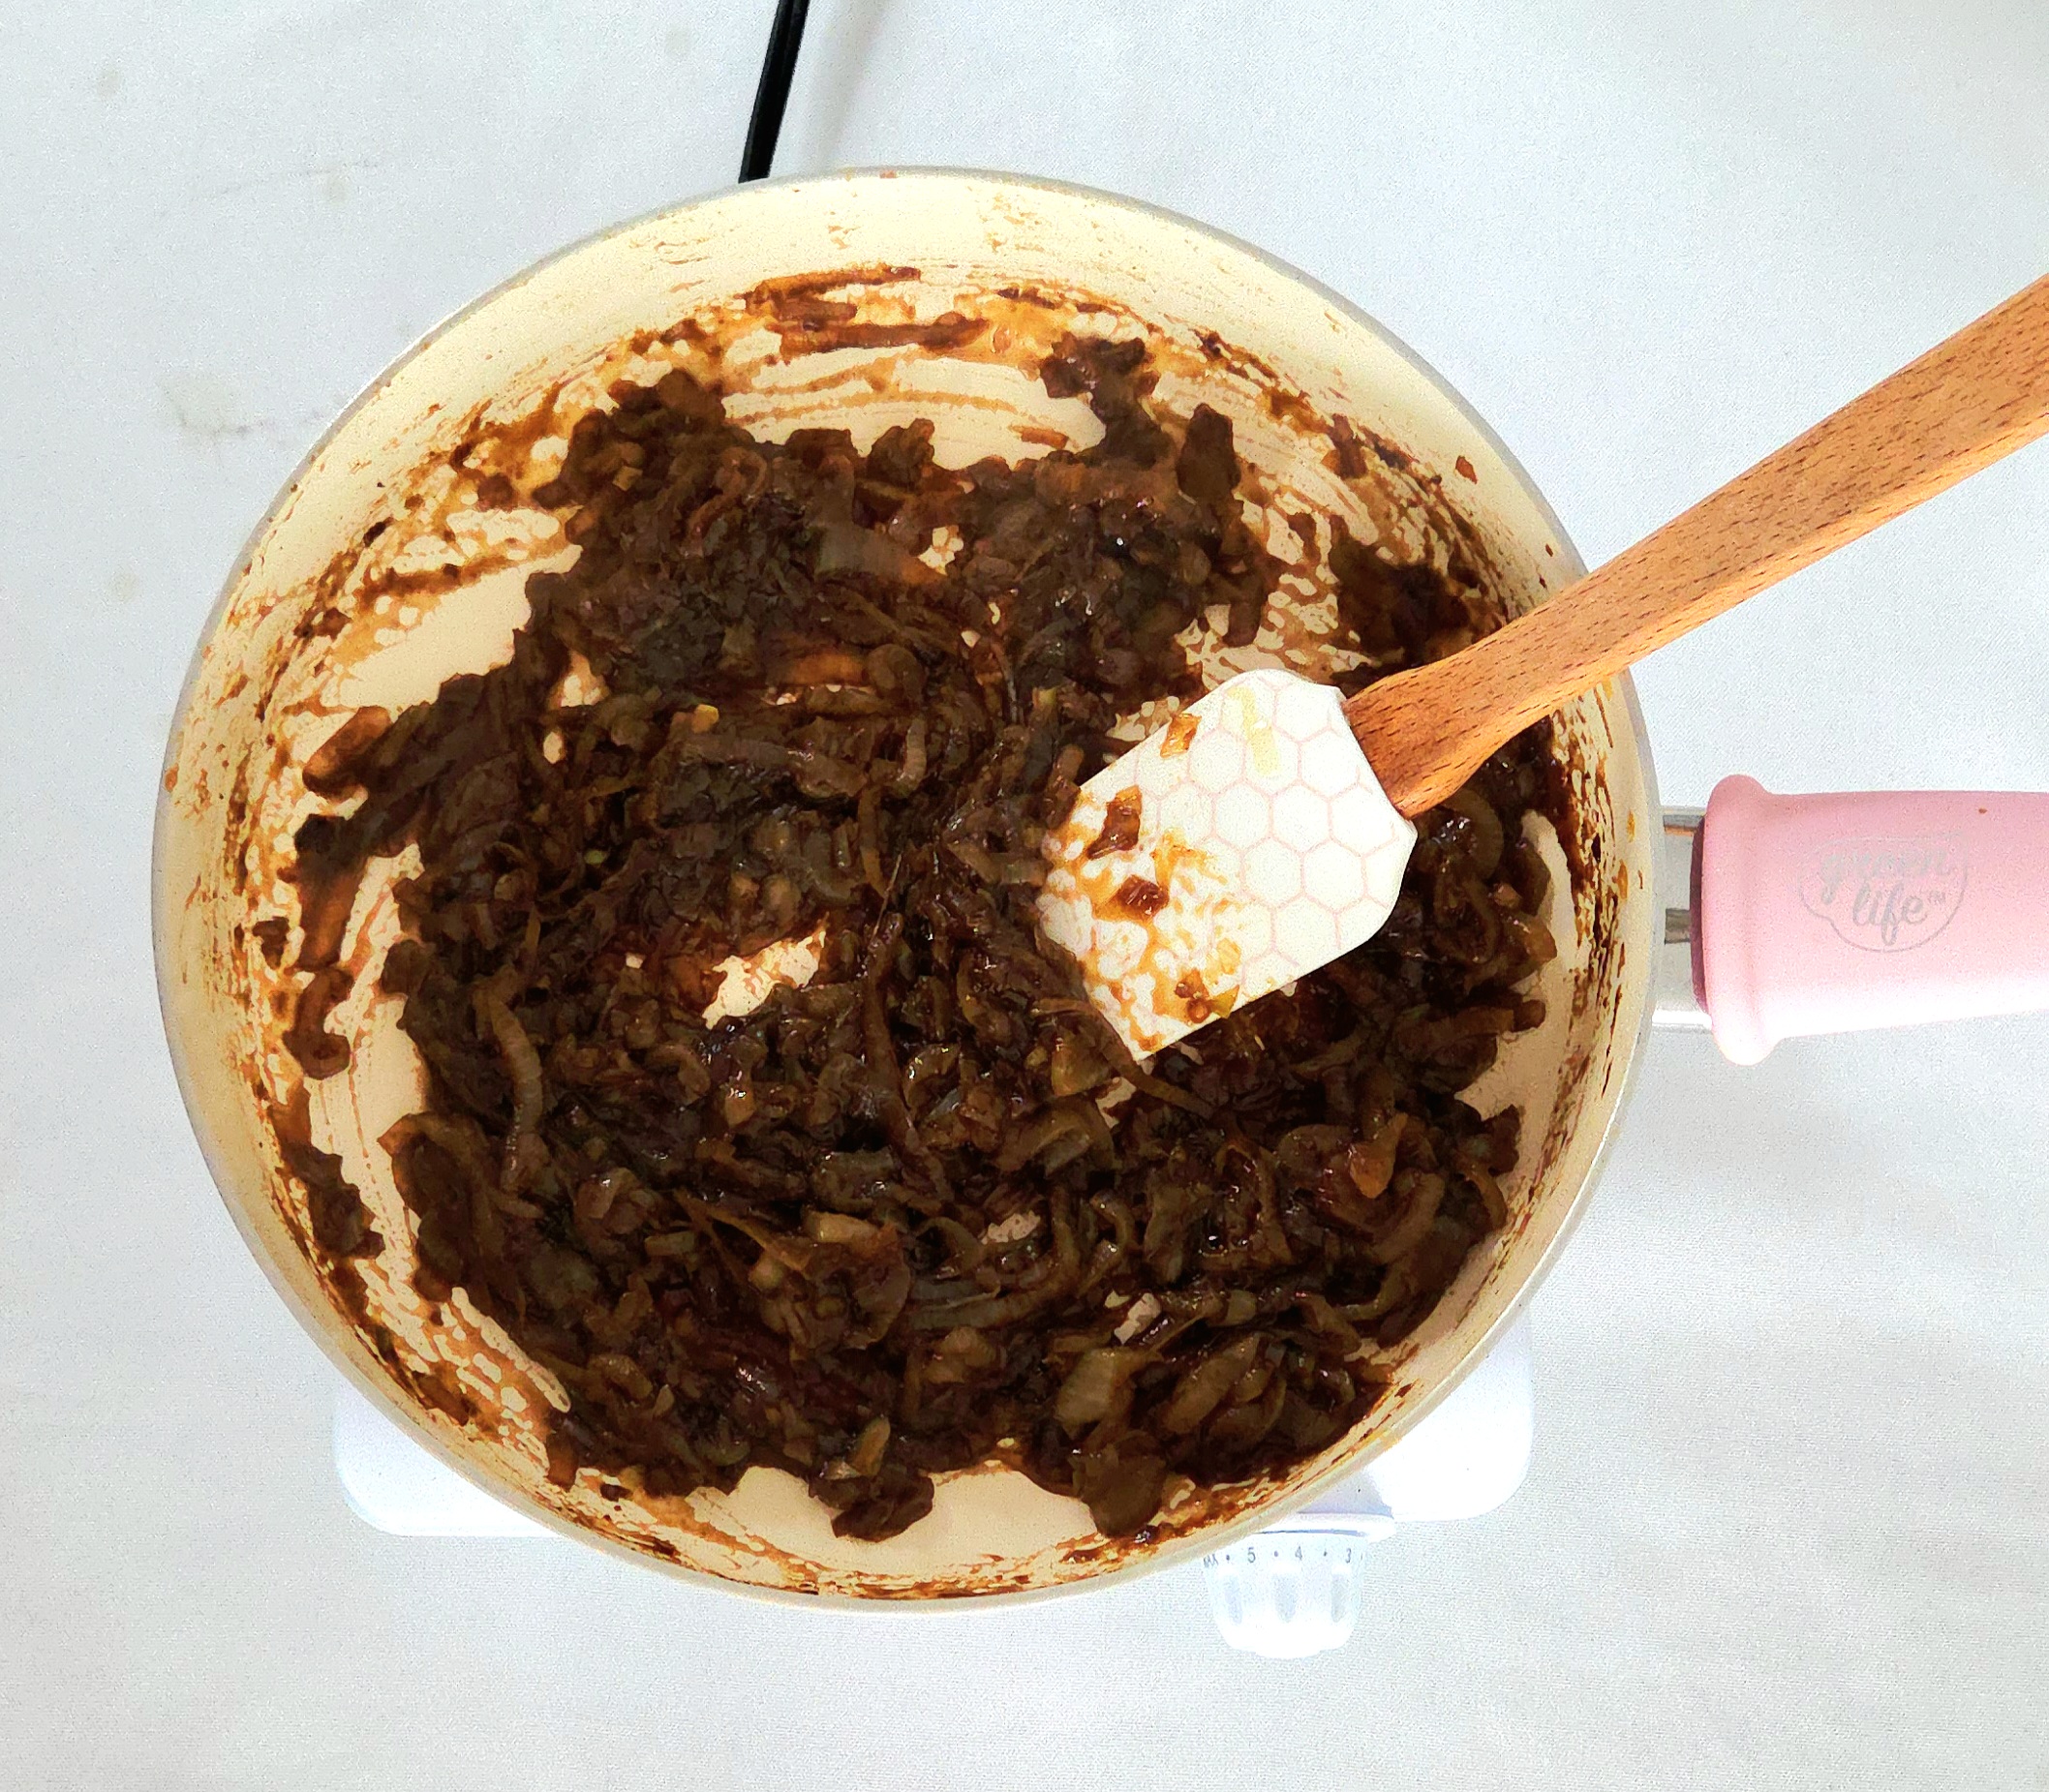
Plop in the beef bouillon paste and worcestershire sauce. Stir the onions to coat them in the bouillon and sauce. Because salt has now been introduced to the party, it’s likely the onions will release even more liquid now. That’s perfectly normal and to be expected, just allow the water to evaporate and keep stirring every so often, until they turn a dark golden brown. Transfer the onions to a small heat-safe bowl to cool down. Place them in the fridge to speed the process.
Now that the onions are cooling, get the cheese ready. Grate it into a small bowl, then cover it up and place it in the fridge with the onions. If you’d rather take the lazy route and use pre-shredded cheese, I won’t blame you! You absolutely could opt for that convenience, the cheese just won’t melt as well as the stuff you grate by hand.
The Assembly:
When the dough has doubled in size, remove it from the oven. Allow it to rest, still covered, on the counter. Switch the oven on to 425F. Liberally oil a 9×13 inch baking dish. This will prevent the bread from sticking, and help give that signature focaccia texture!
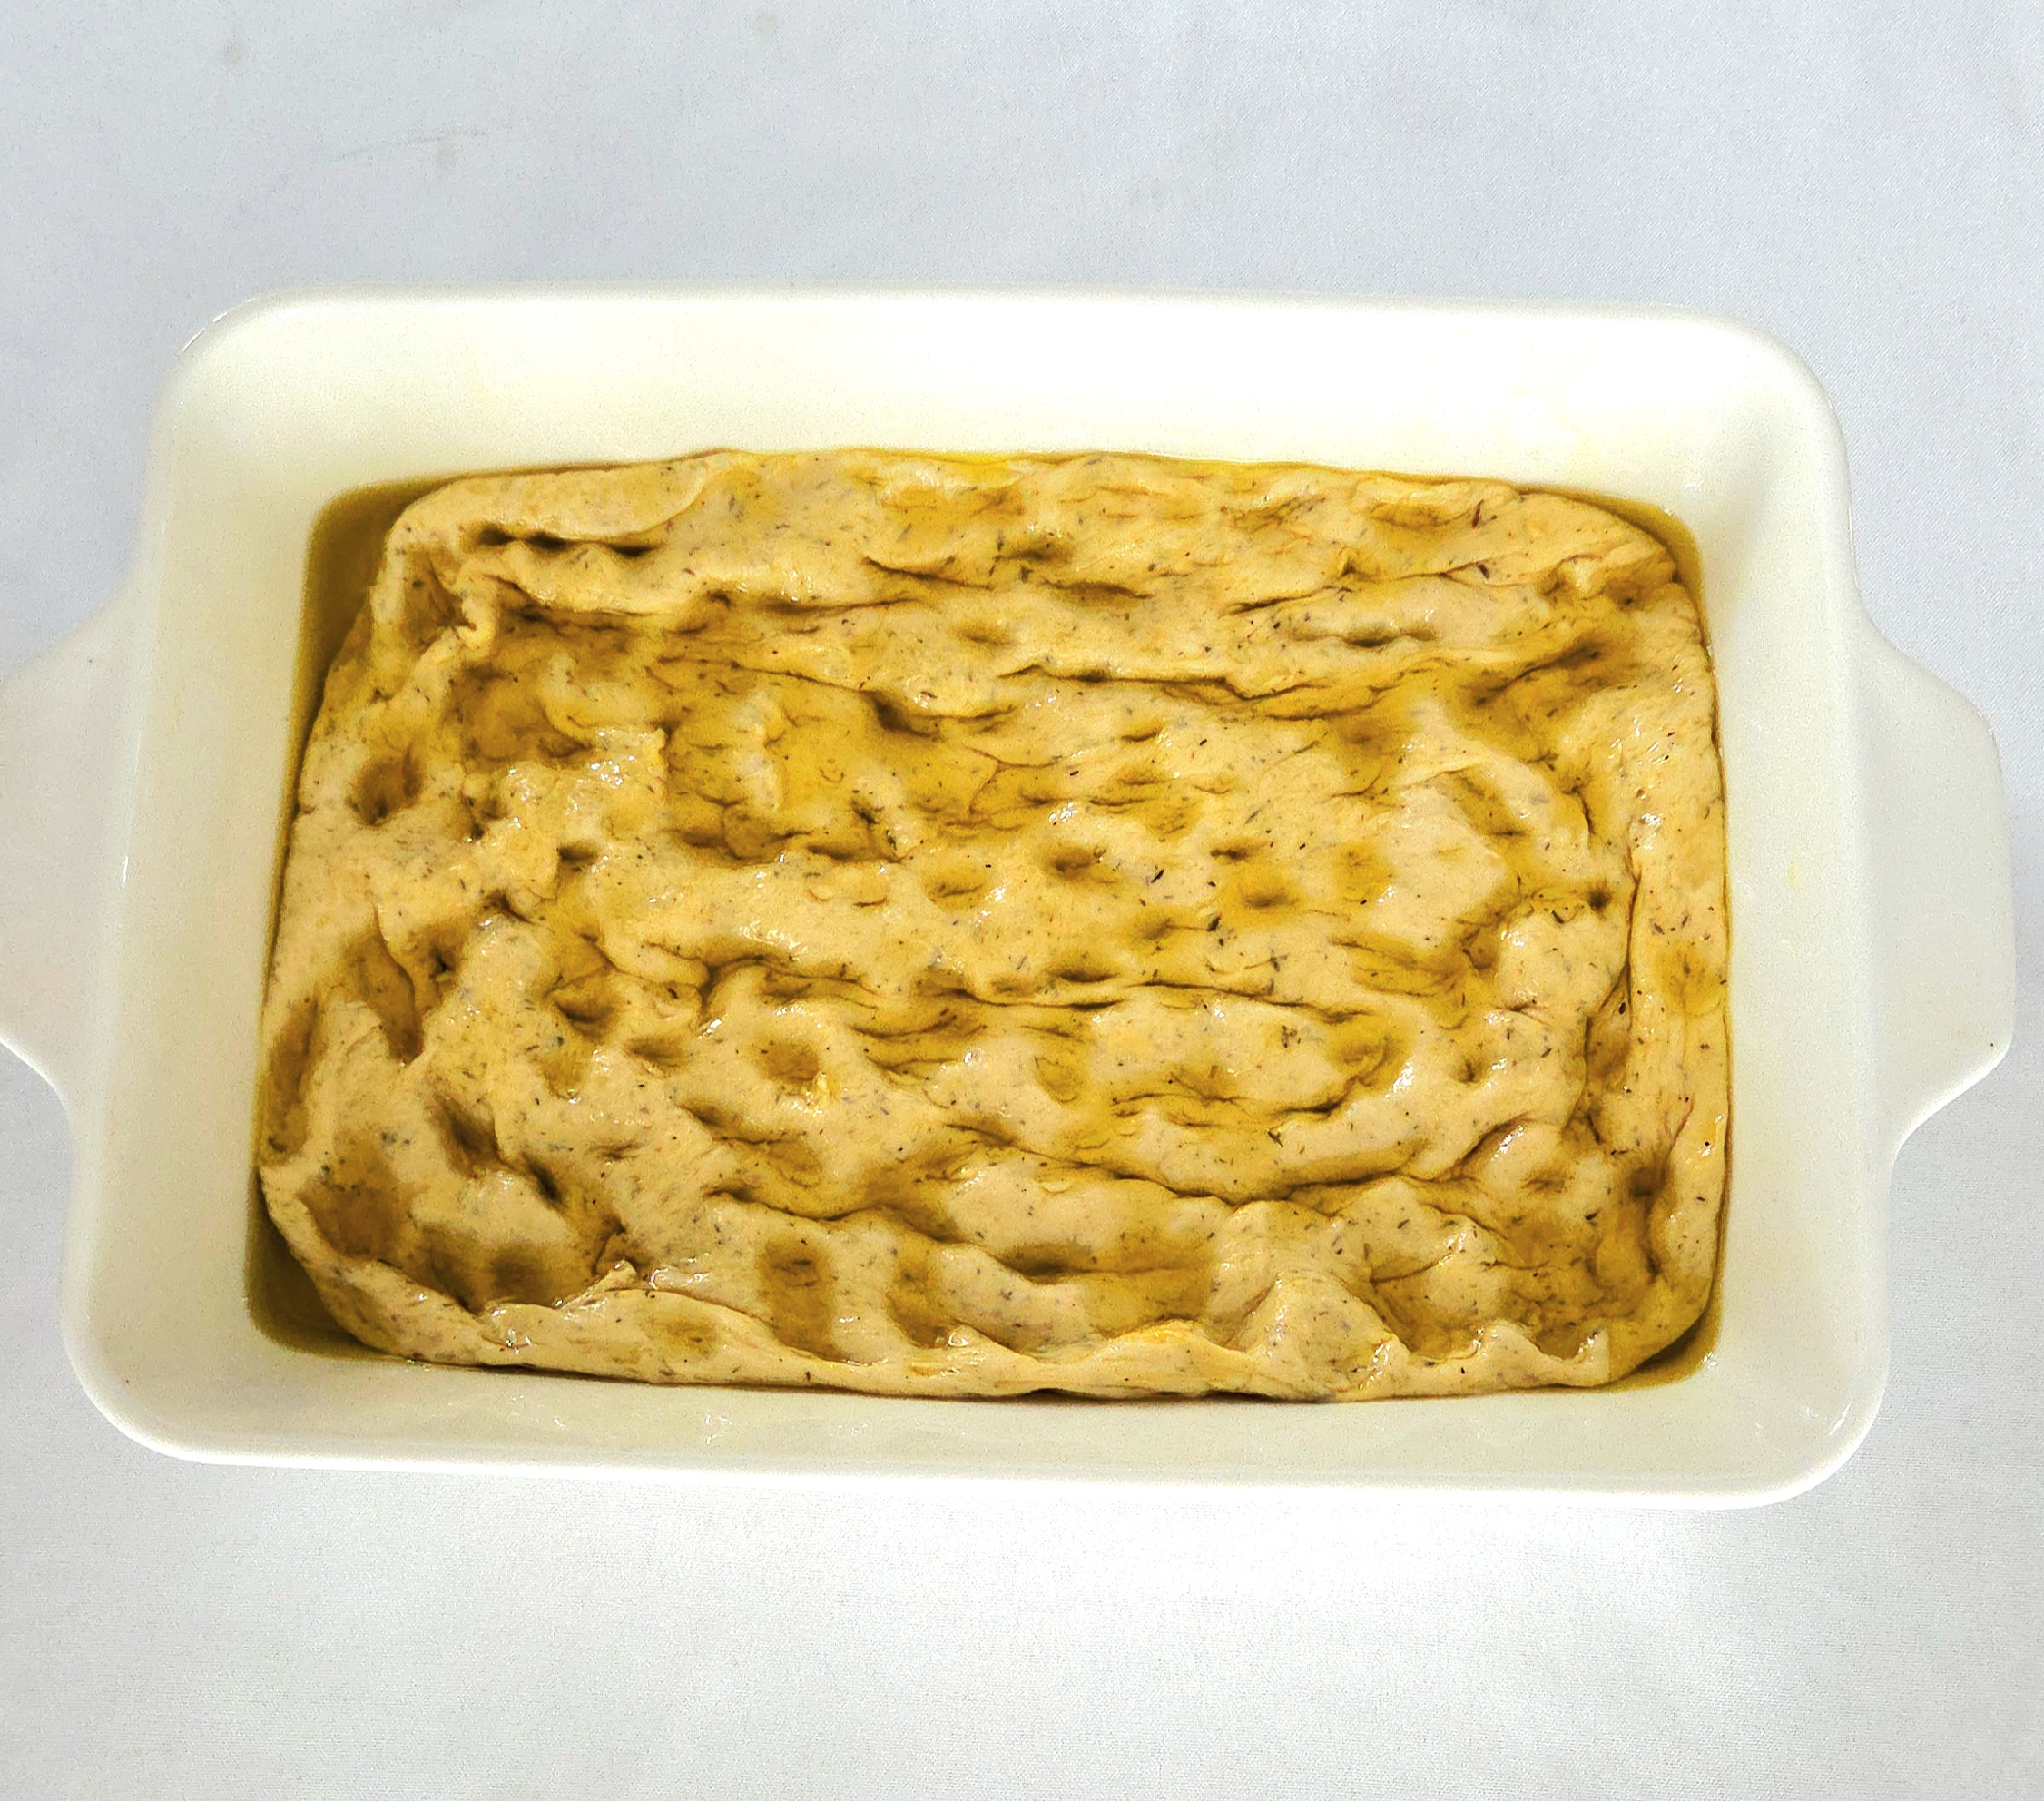
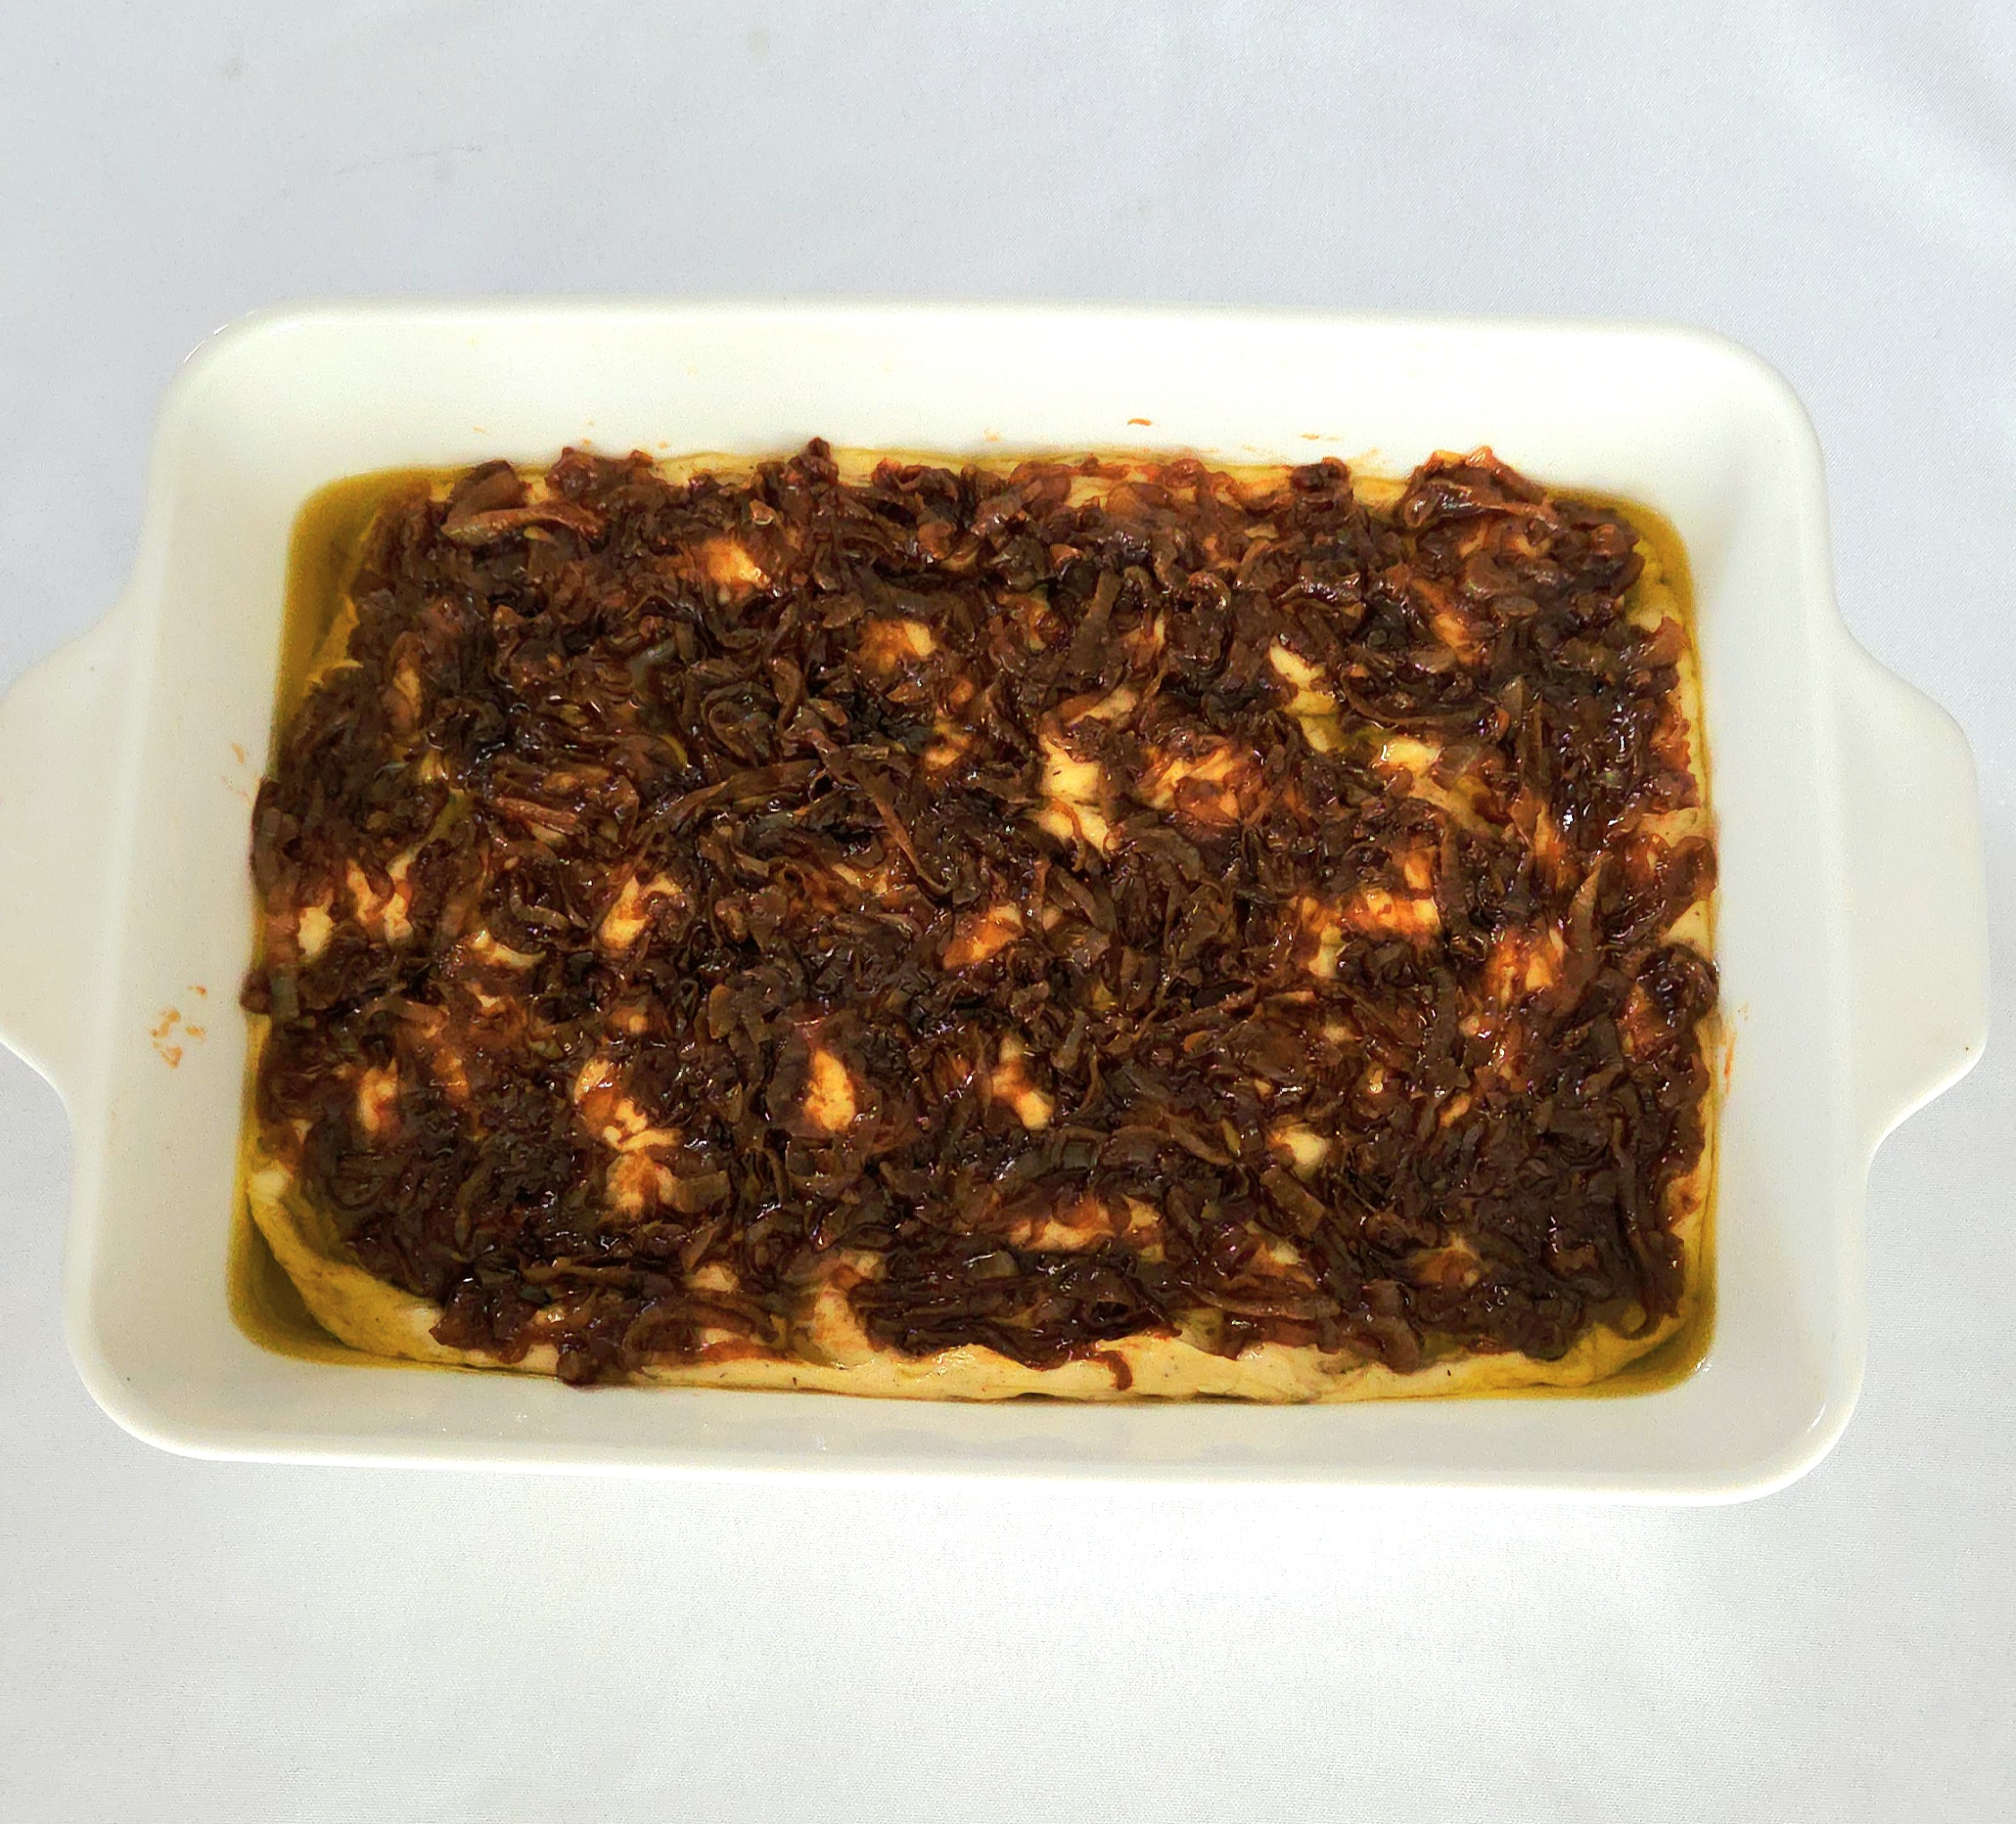
As the oven hits the 425F mark, dump the dough into the oiled pan. Pour a bit more oil on top of the dough, and use your fingers to dimple the dough and spread it out in the pan. Be careful not to completely puncture the dough, you want your fingers to make deep impressions without tearing a hole.
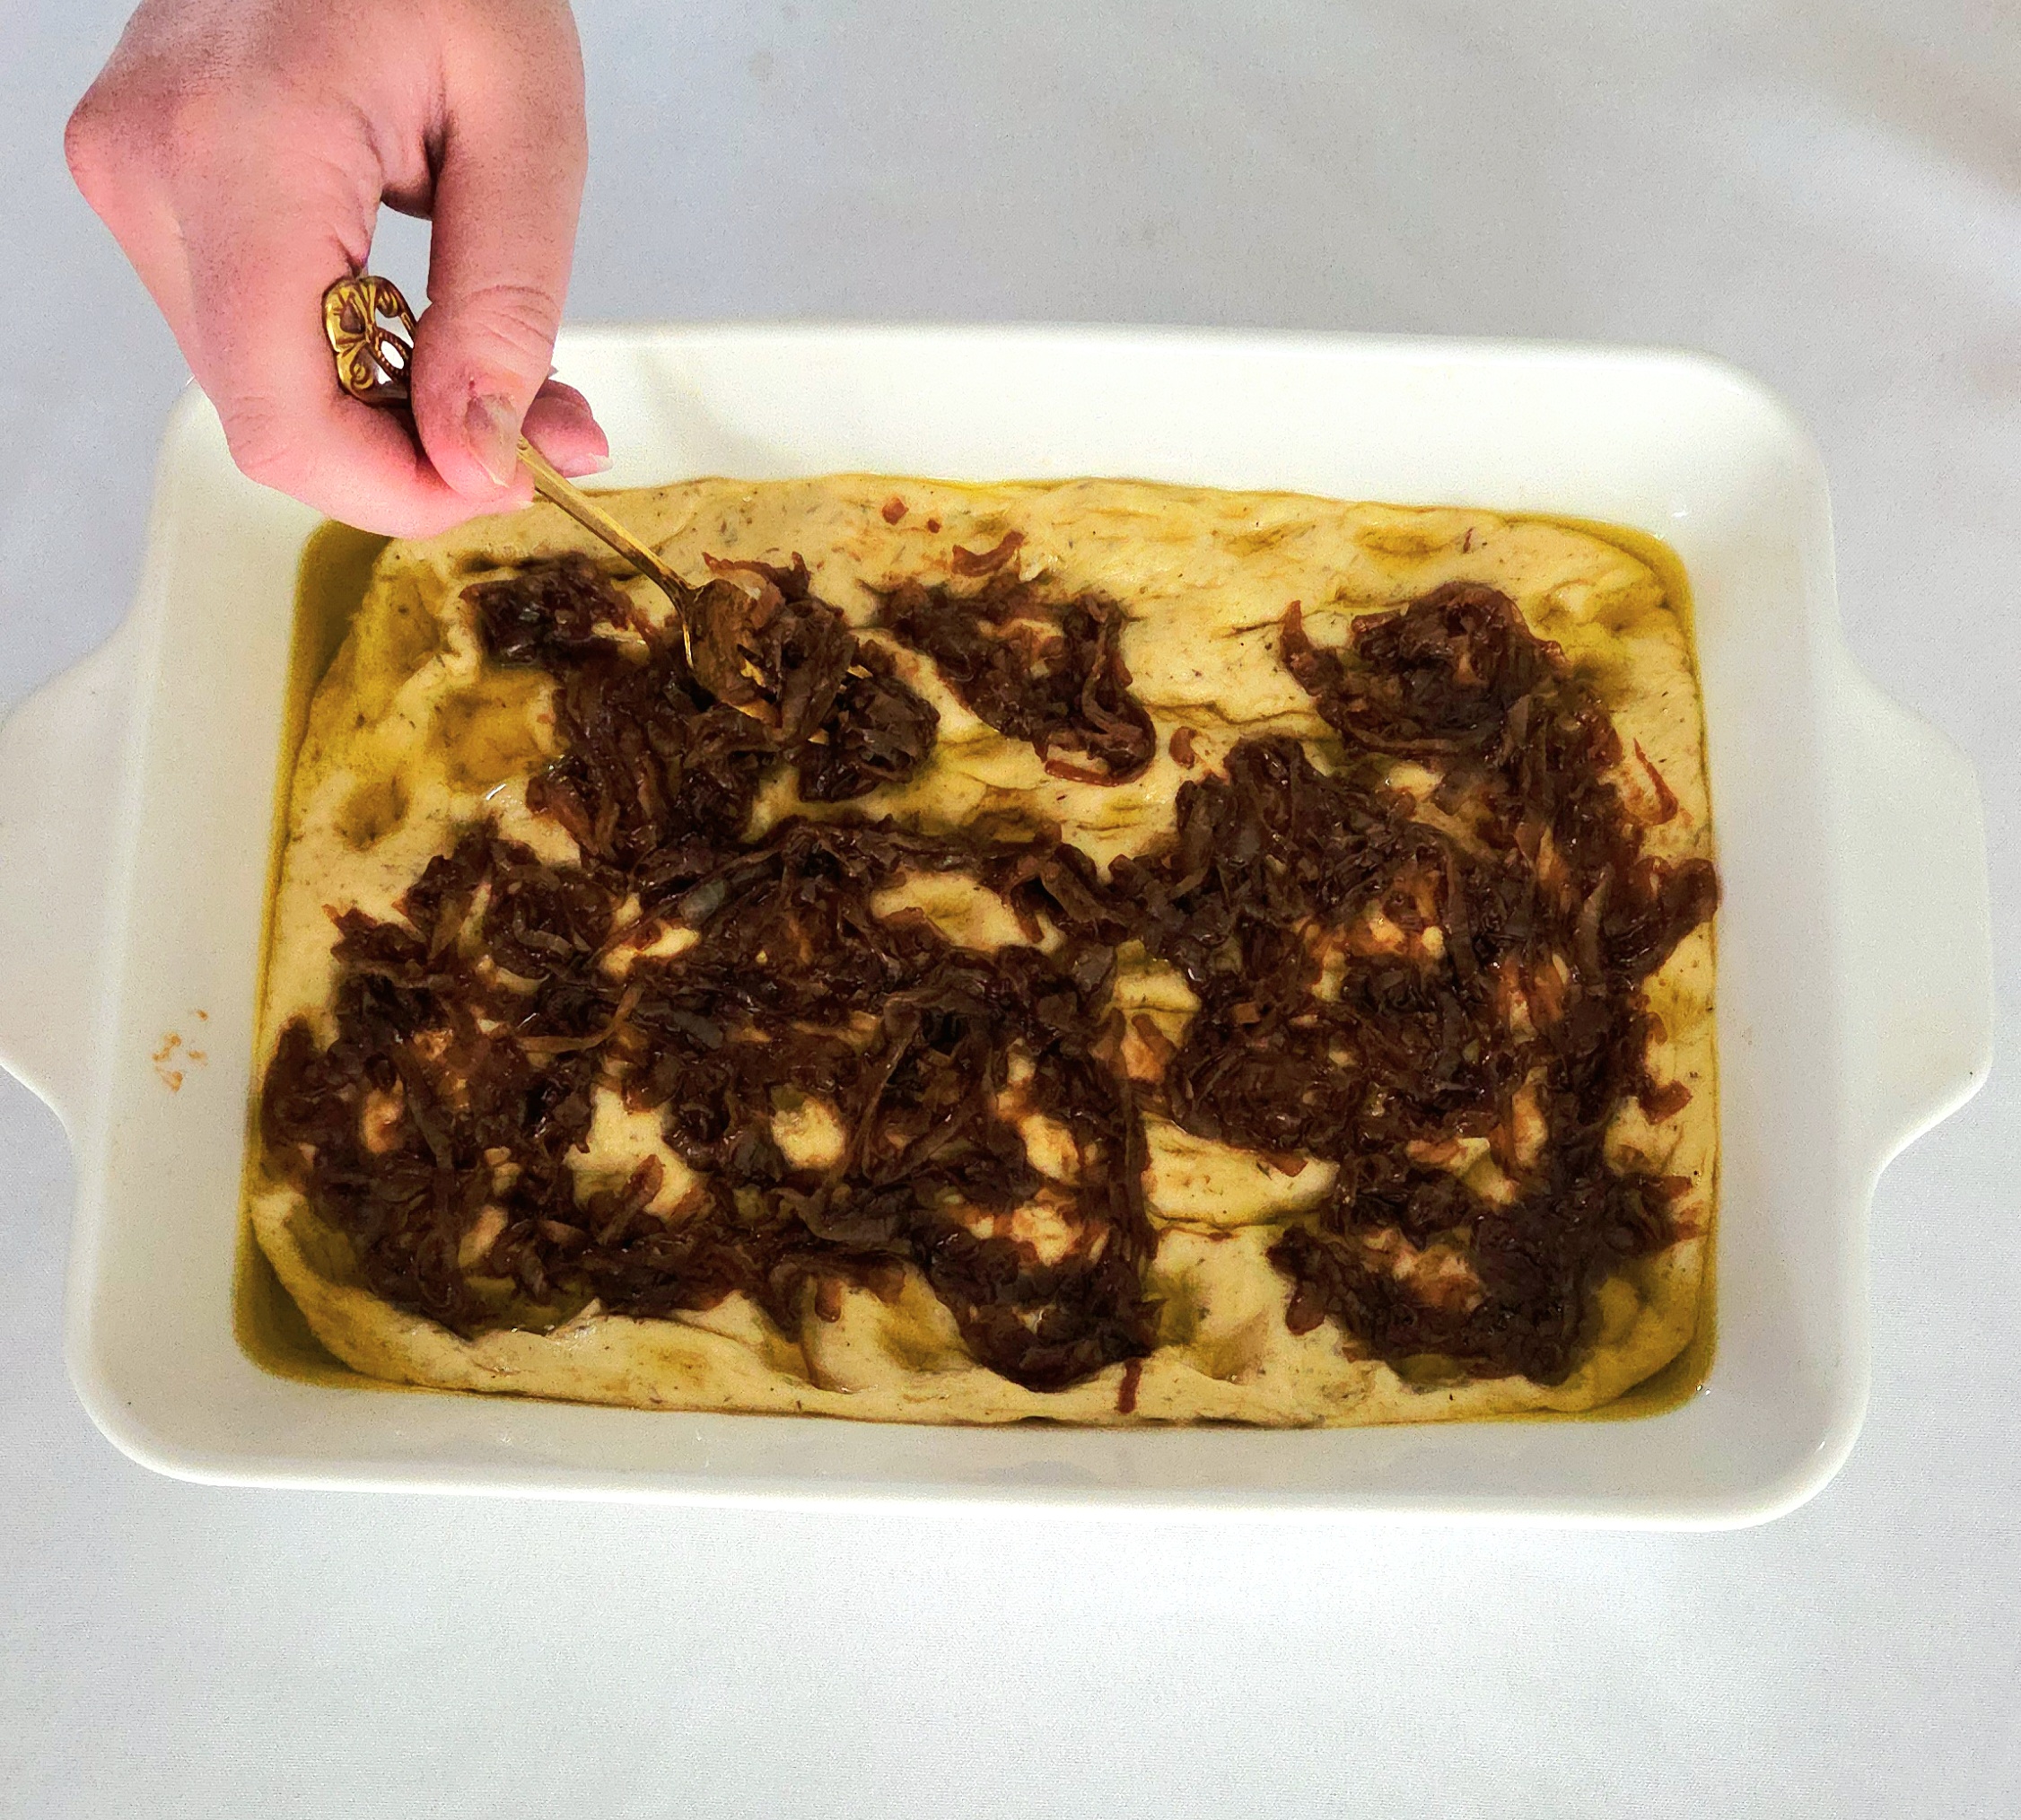
Now to top it off! Use a fork or spoon and dollop the completely cooled caramelized onions over the top of the dough. Hold off on the cheese for now. Place it into the center rack of the oven and bake the bread for 15 minutes.
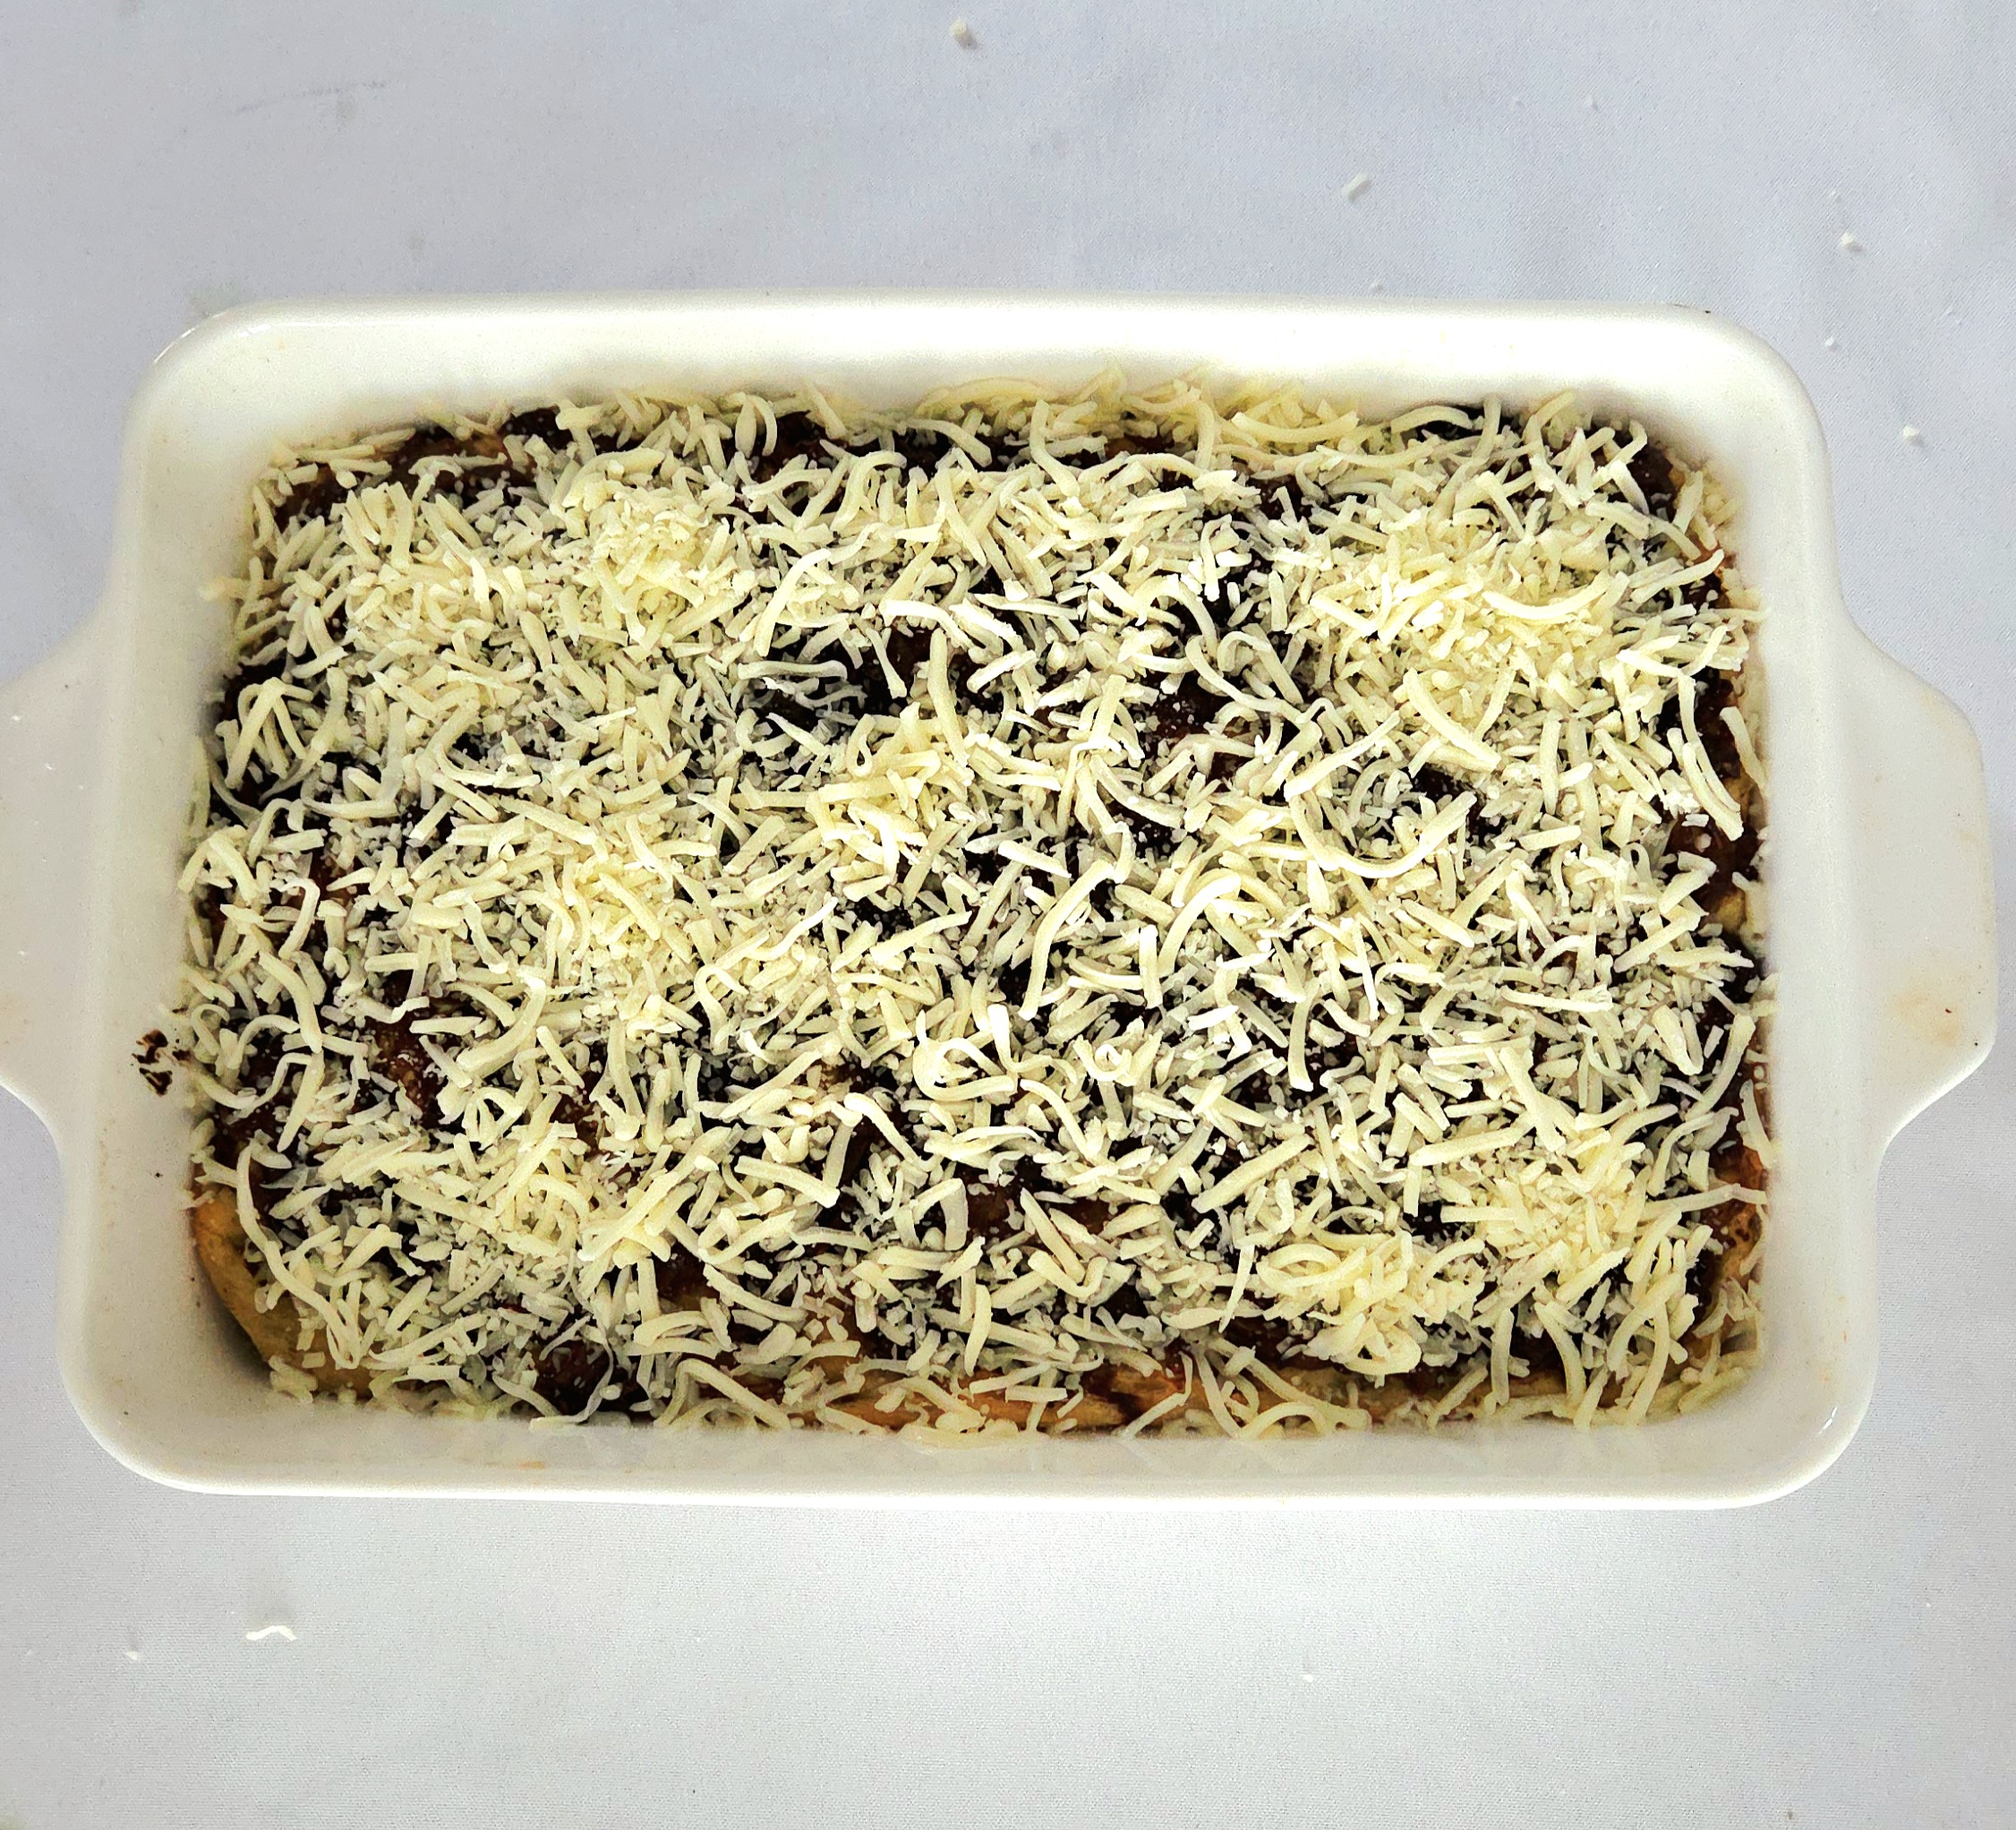
When 15 minutes is up, temporarily remove the bread from the oven. Shut the door behind it, so as not to let too much heat out. Sprinkle the cheese evenly over the top of the bread now, then return the bread to the oven for another 10-15 minutes, until the top is a delightful golden brown. Waiting halfway through baking for the cheese prevents it from burning in the high heat.

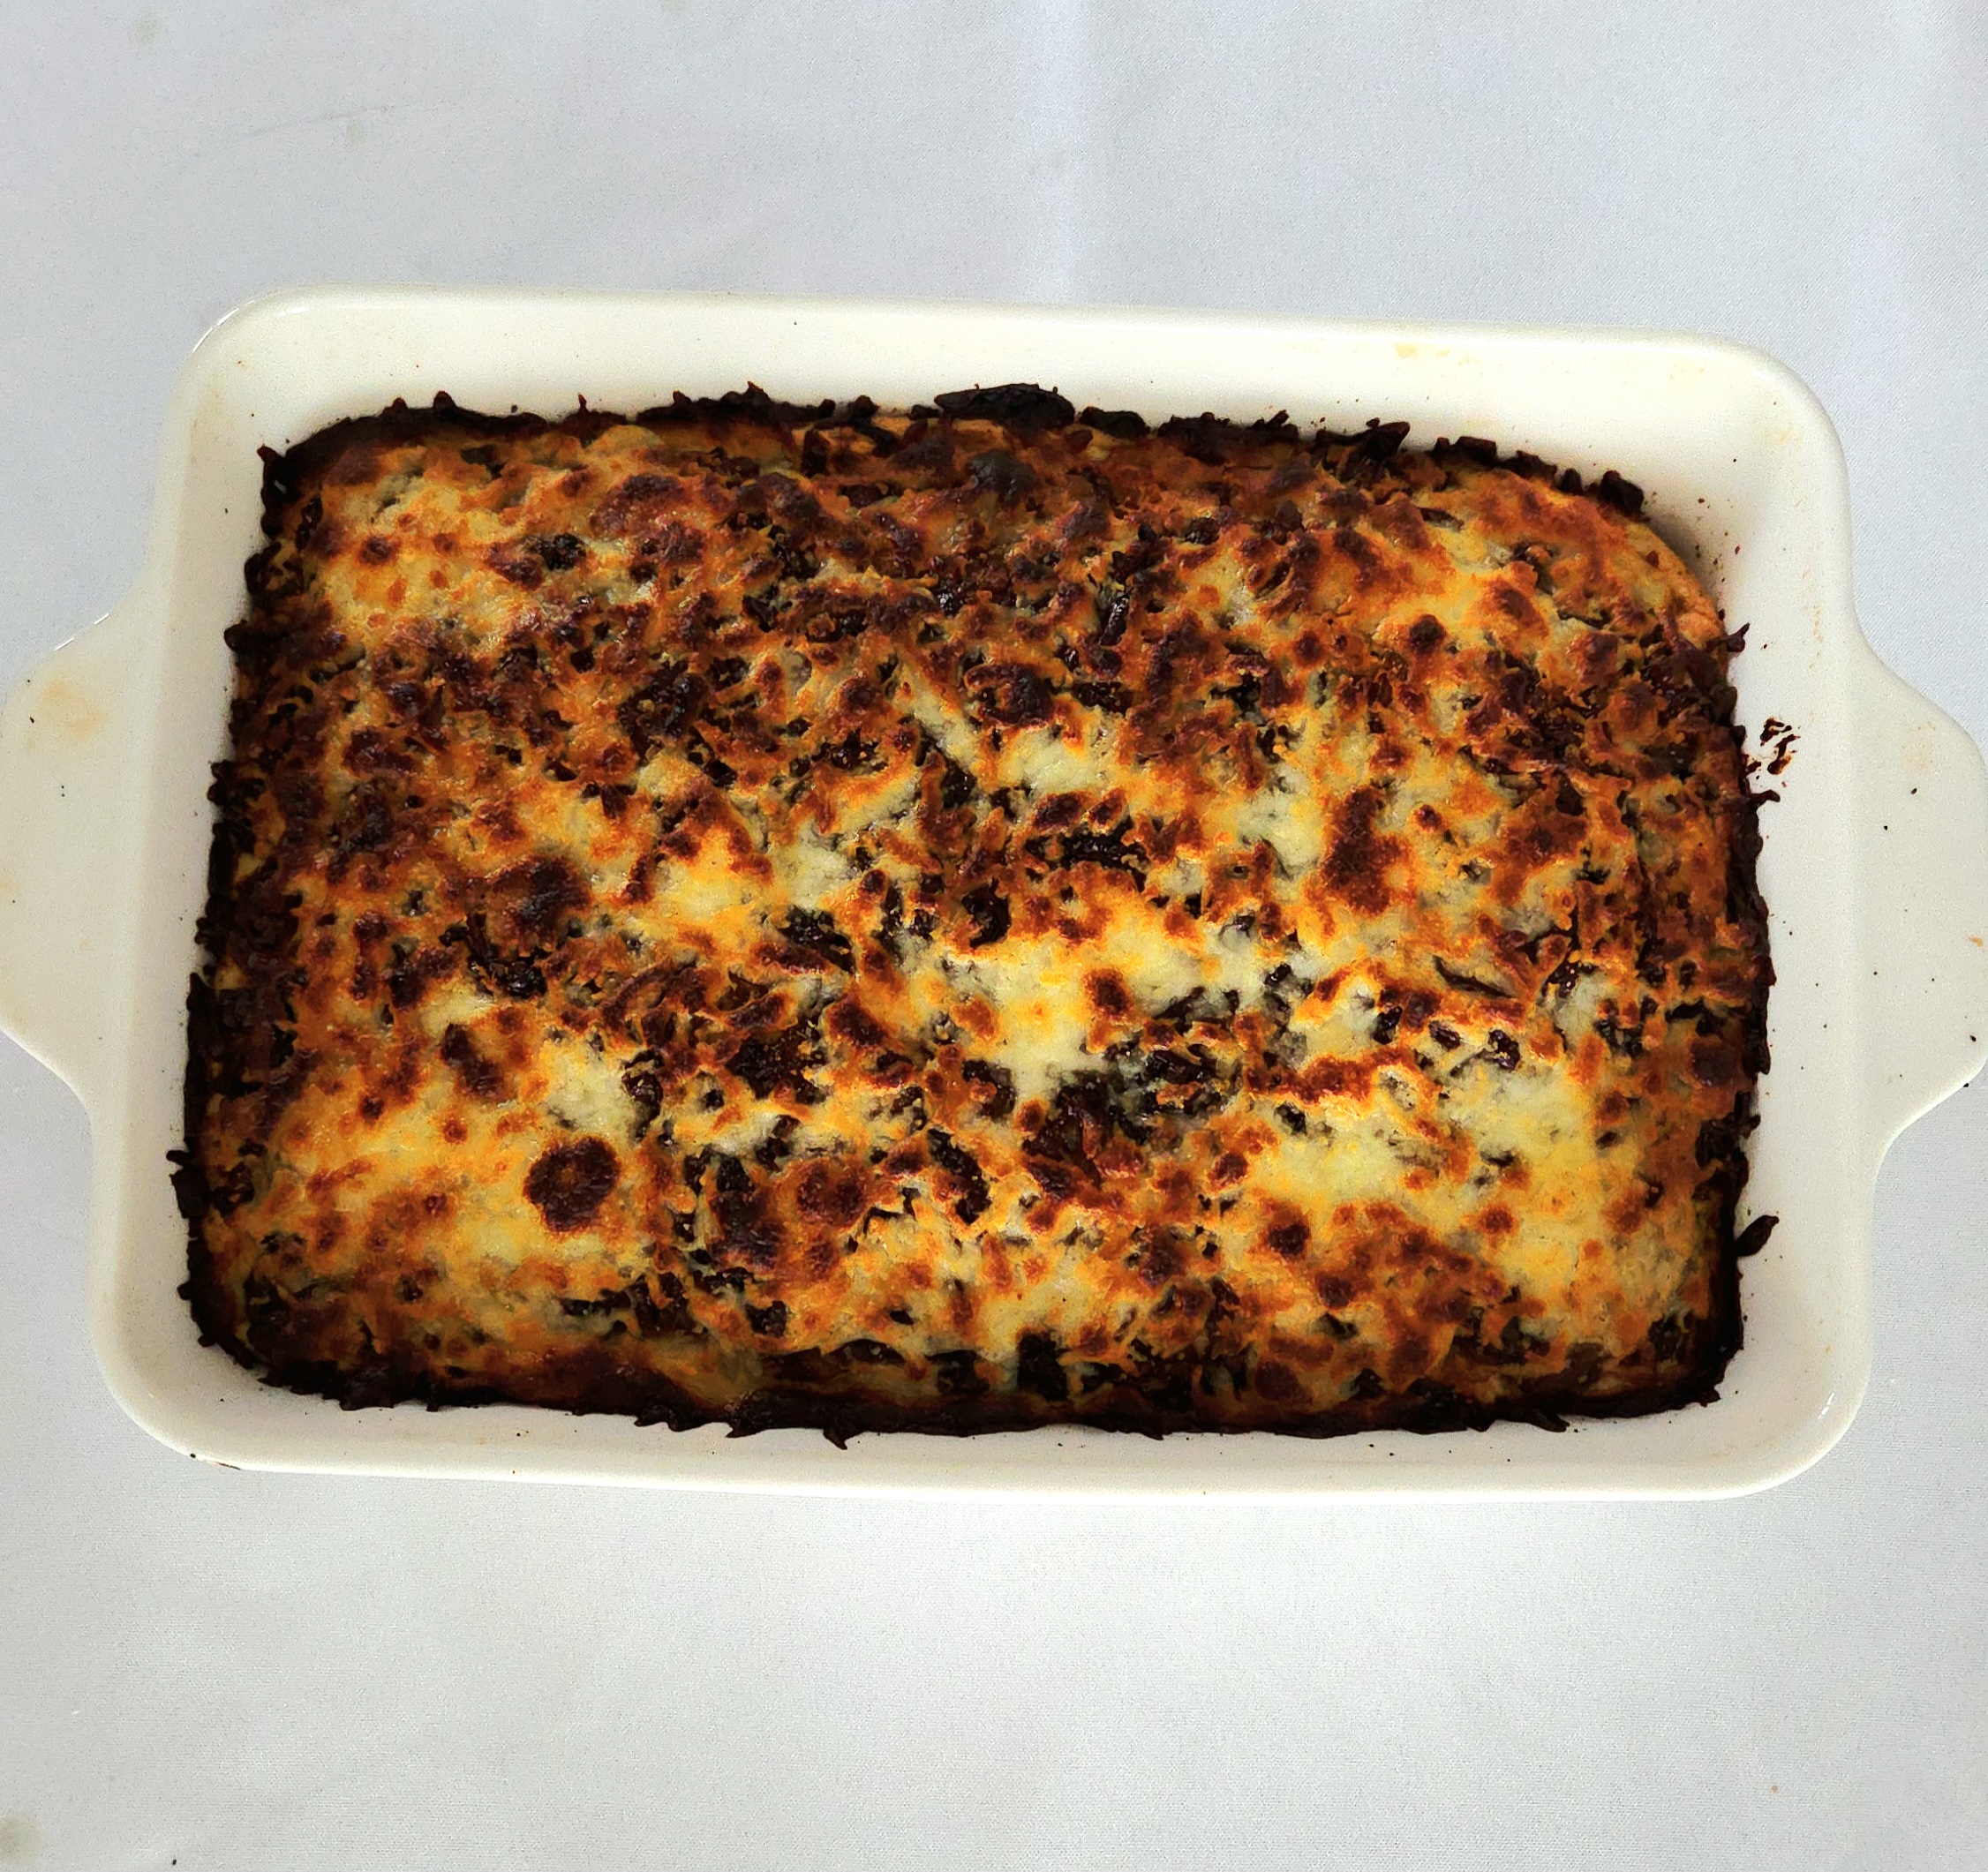
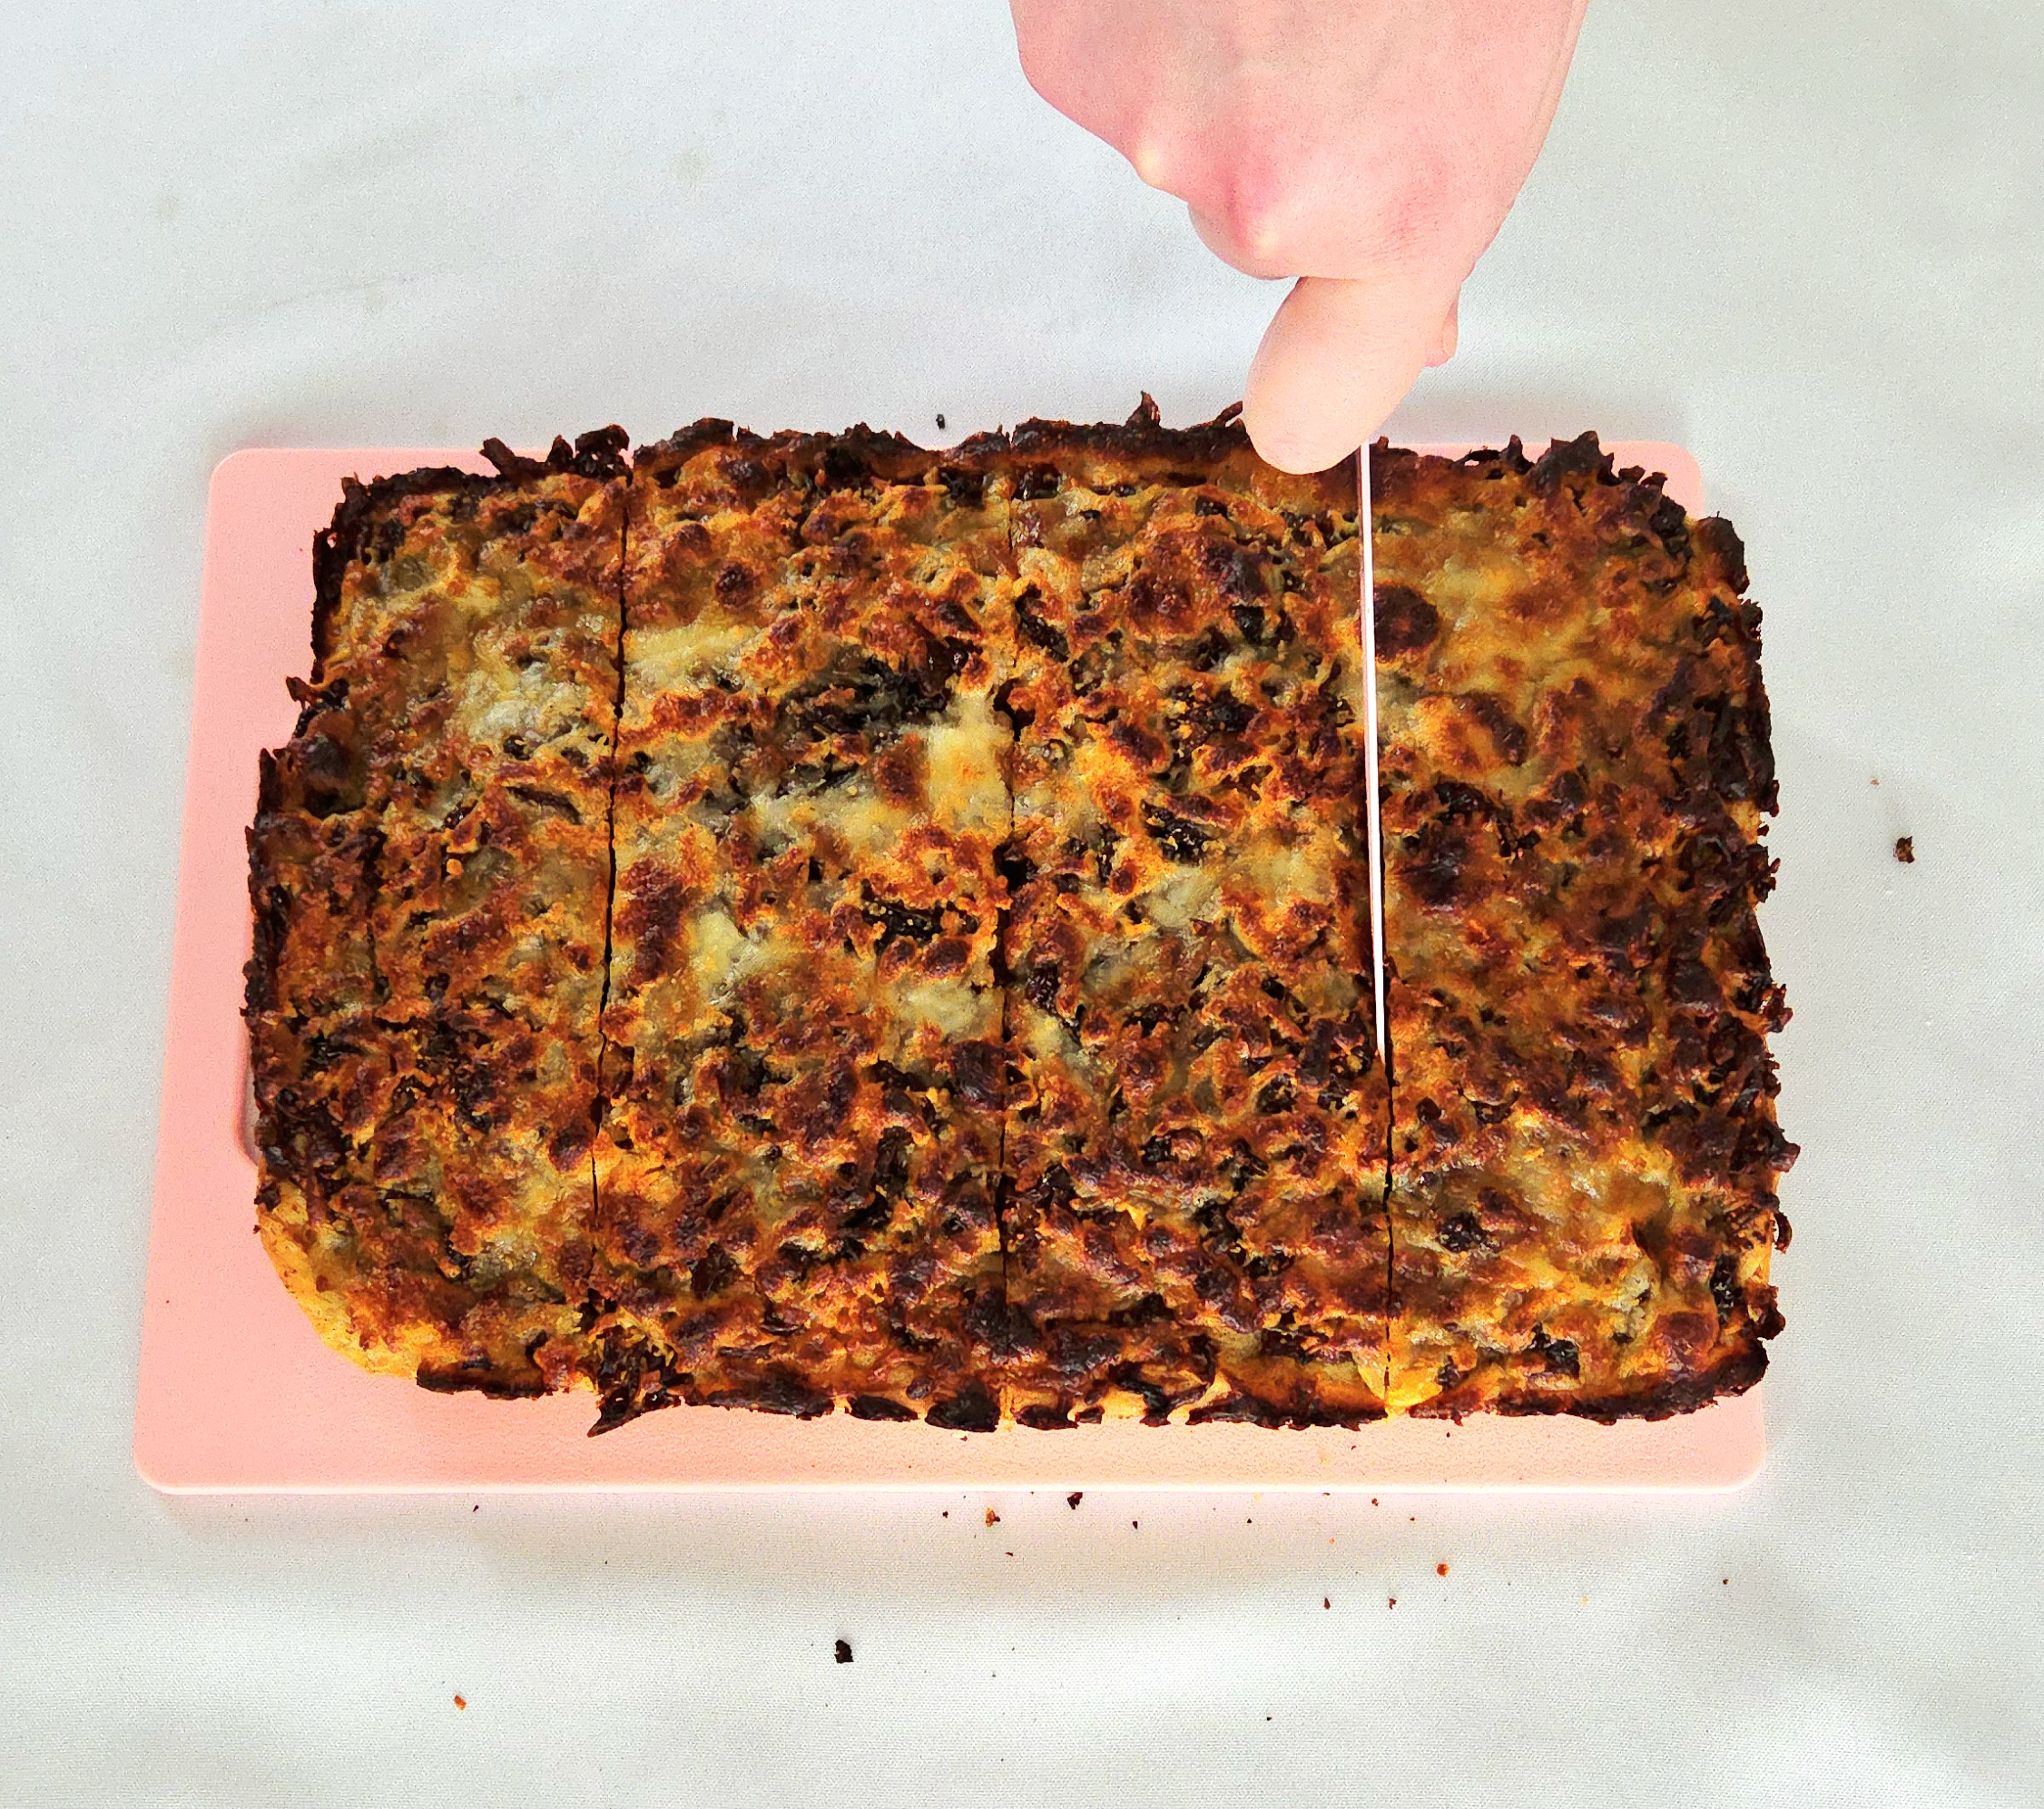
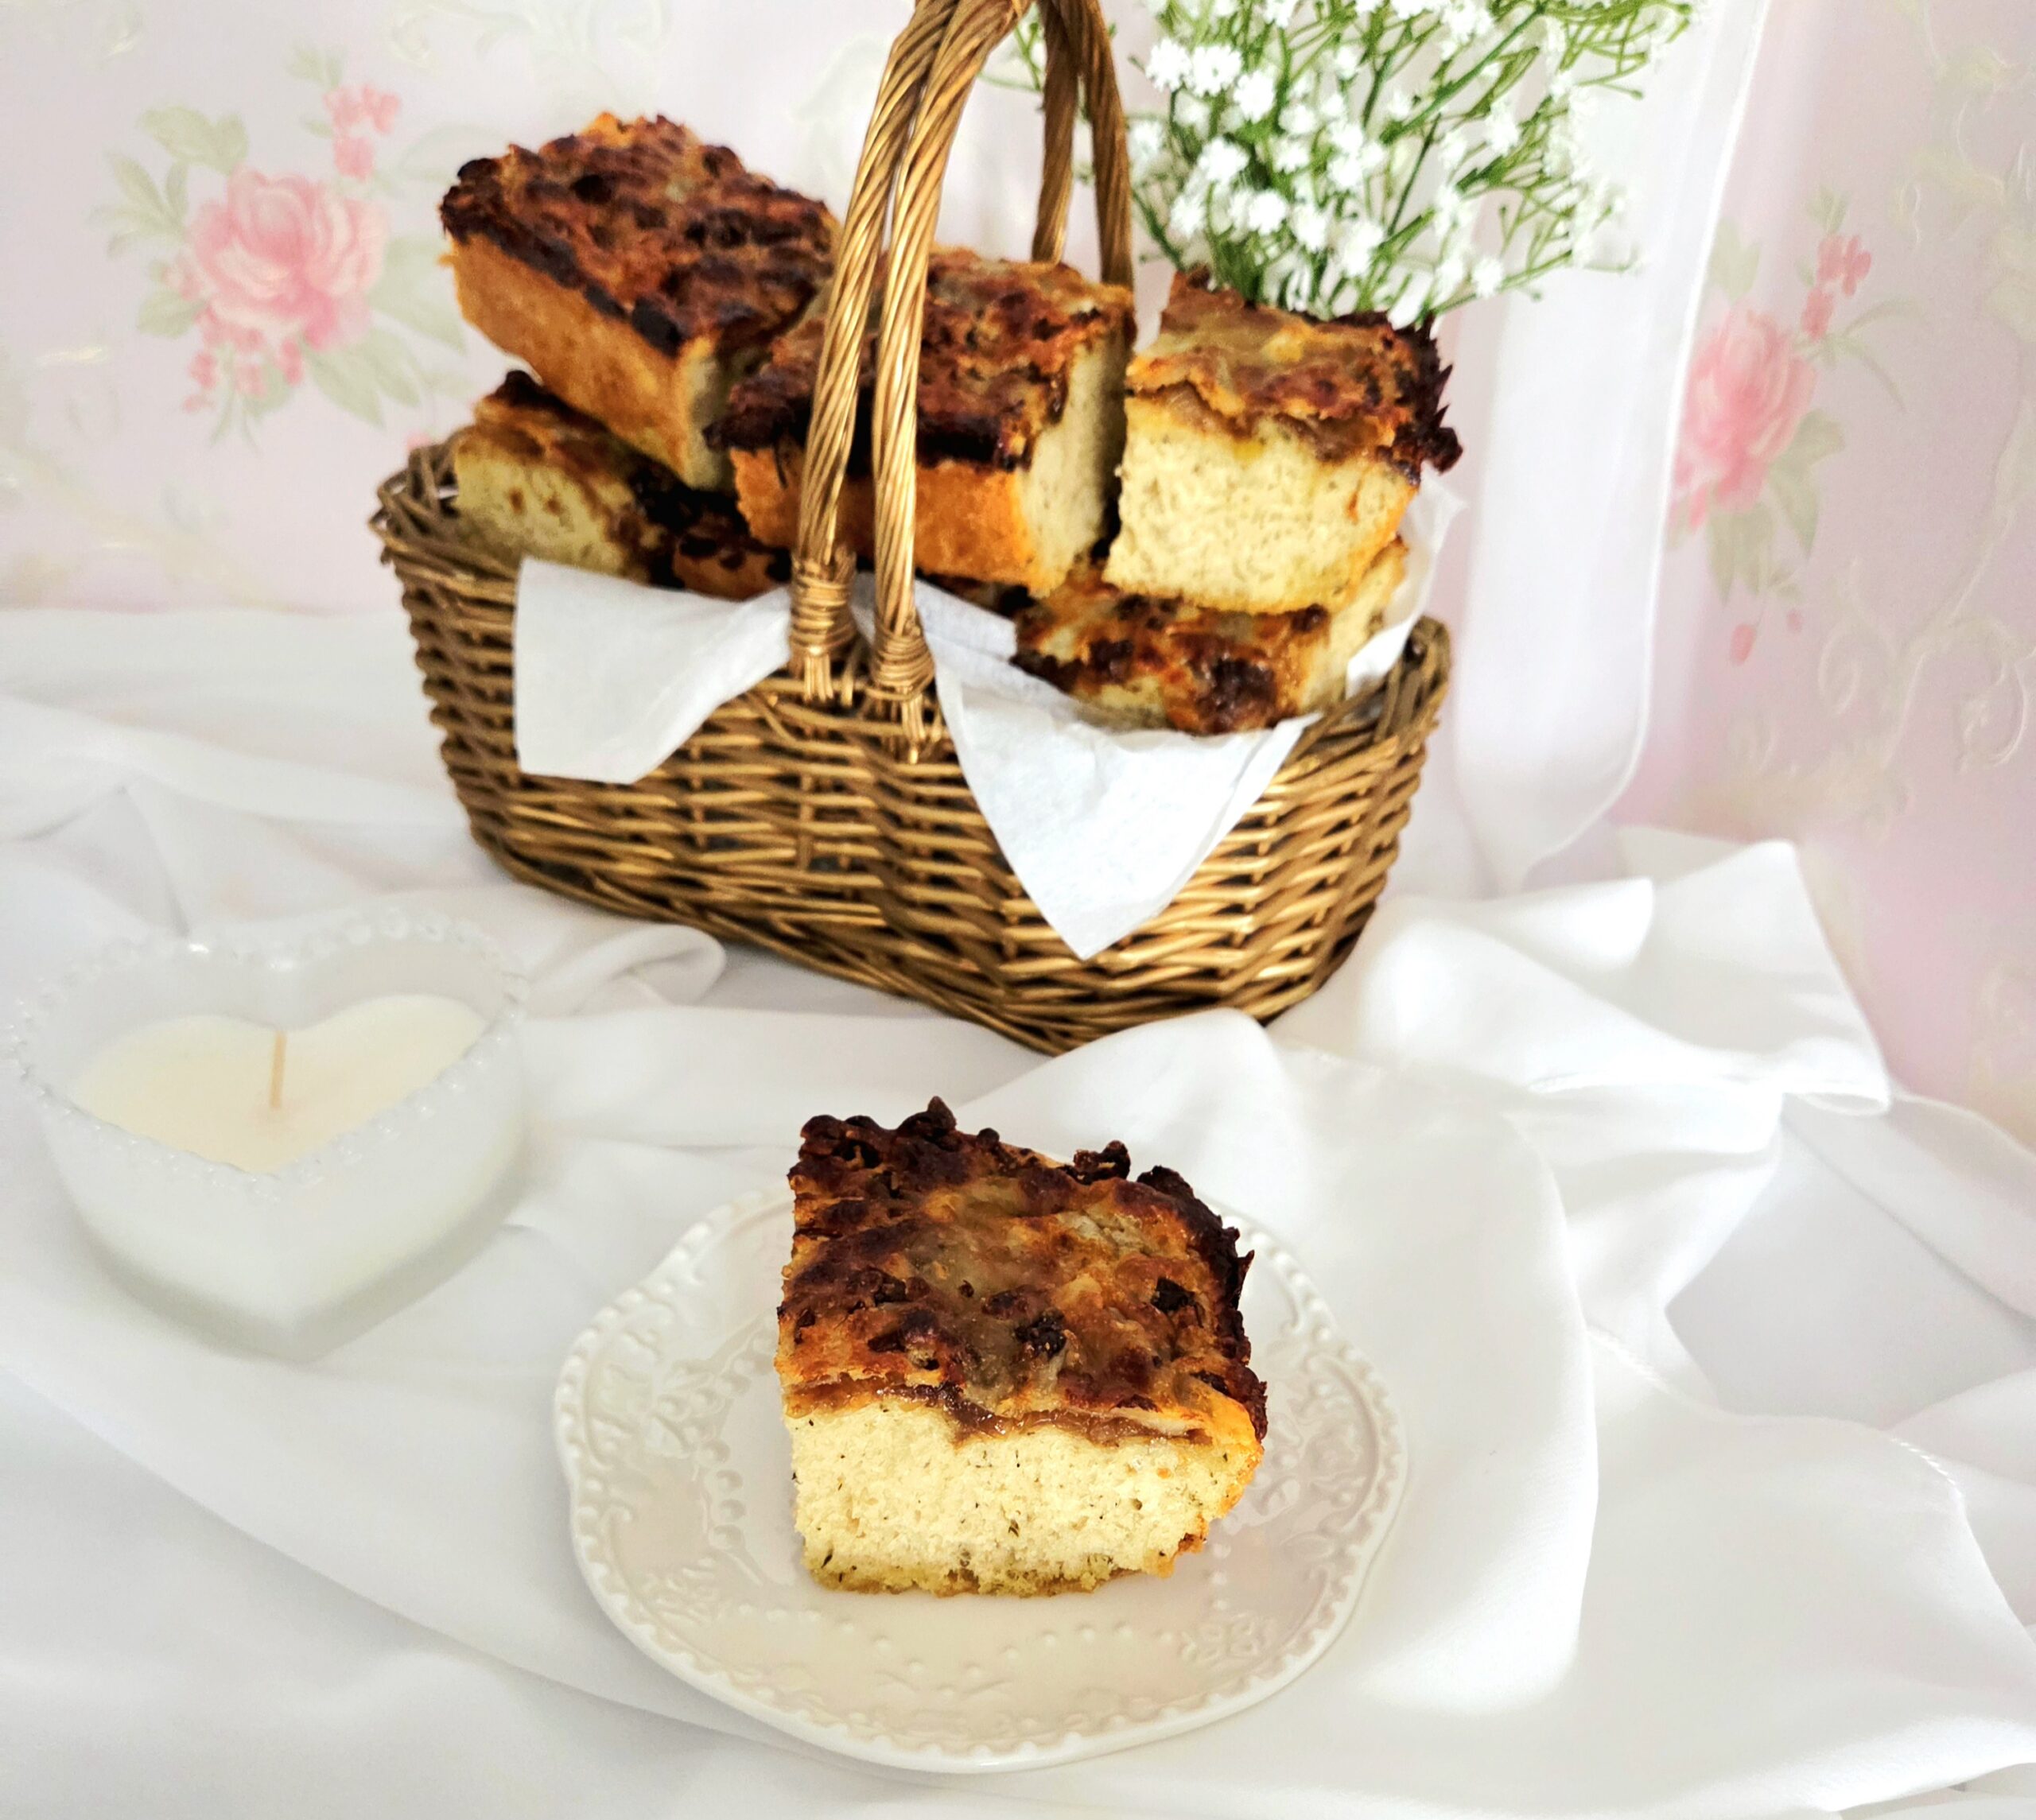
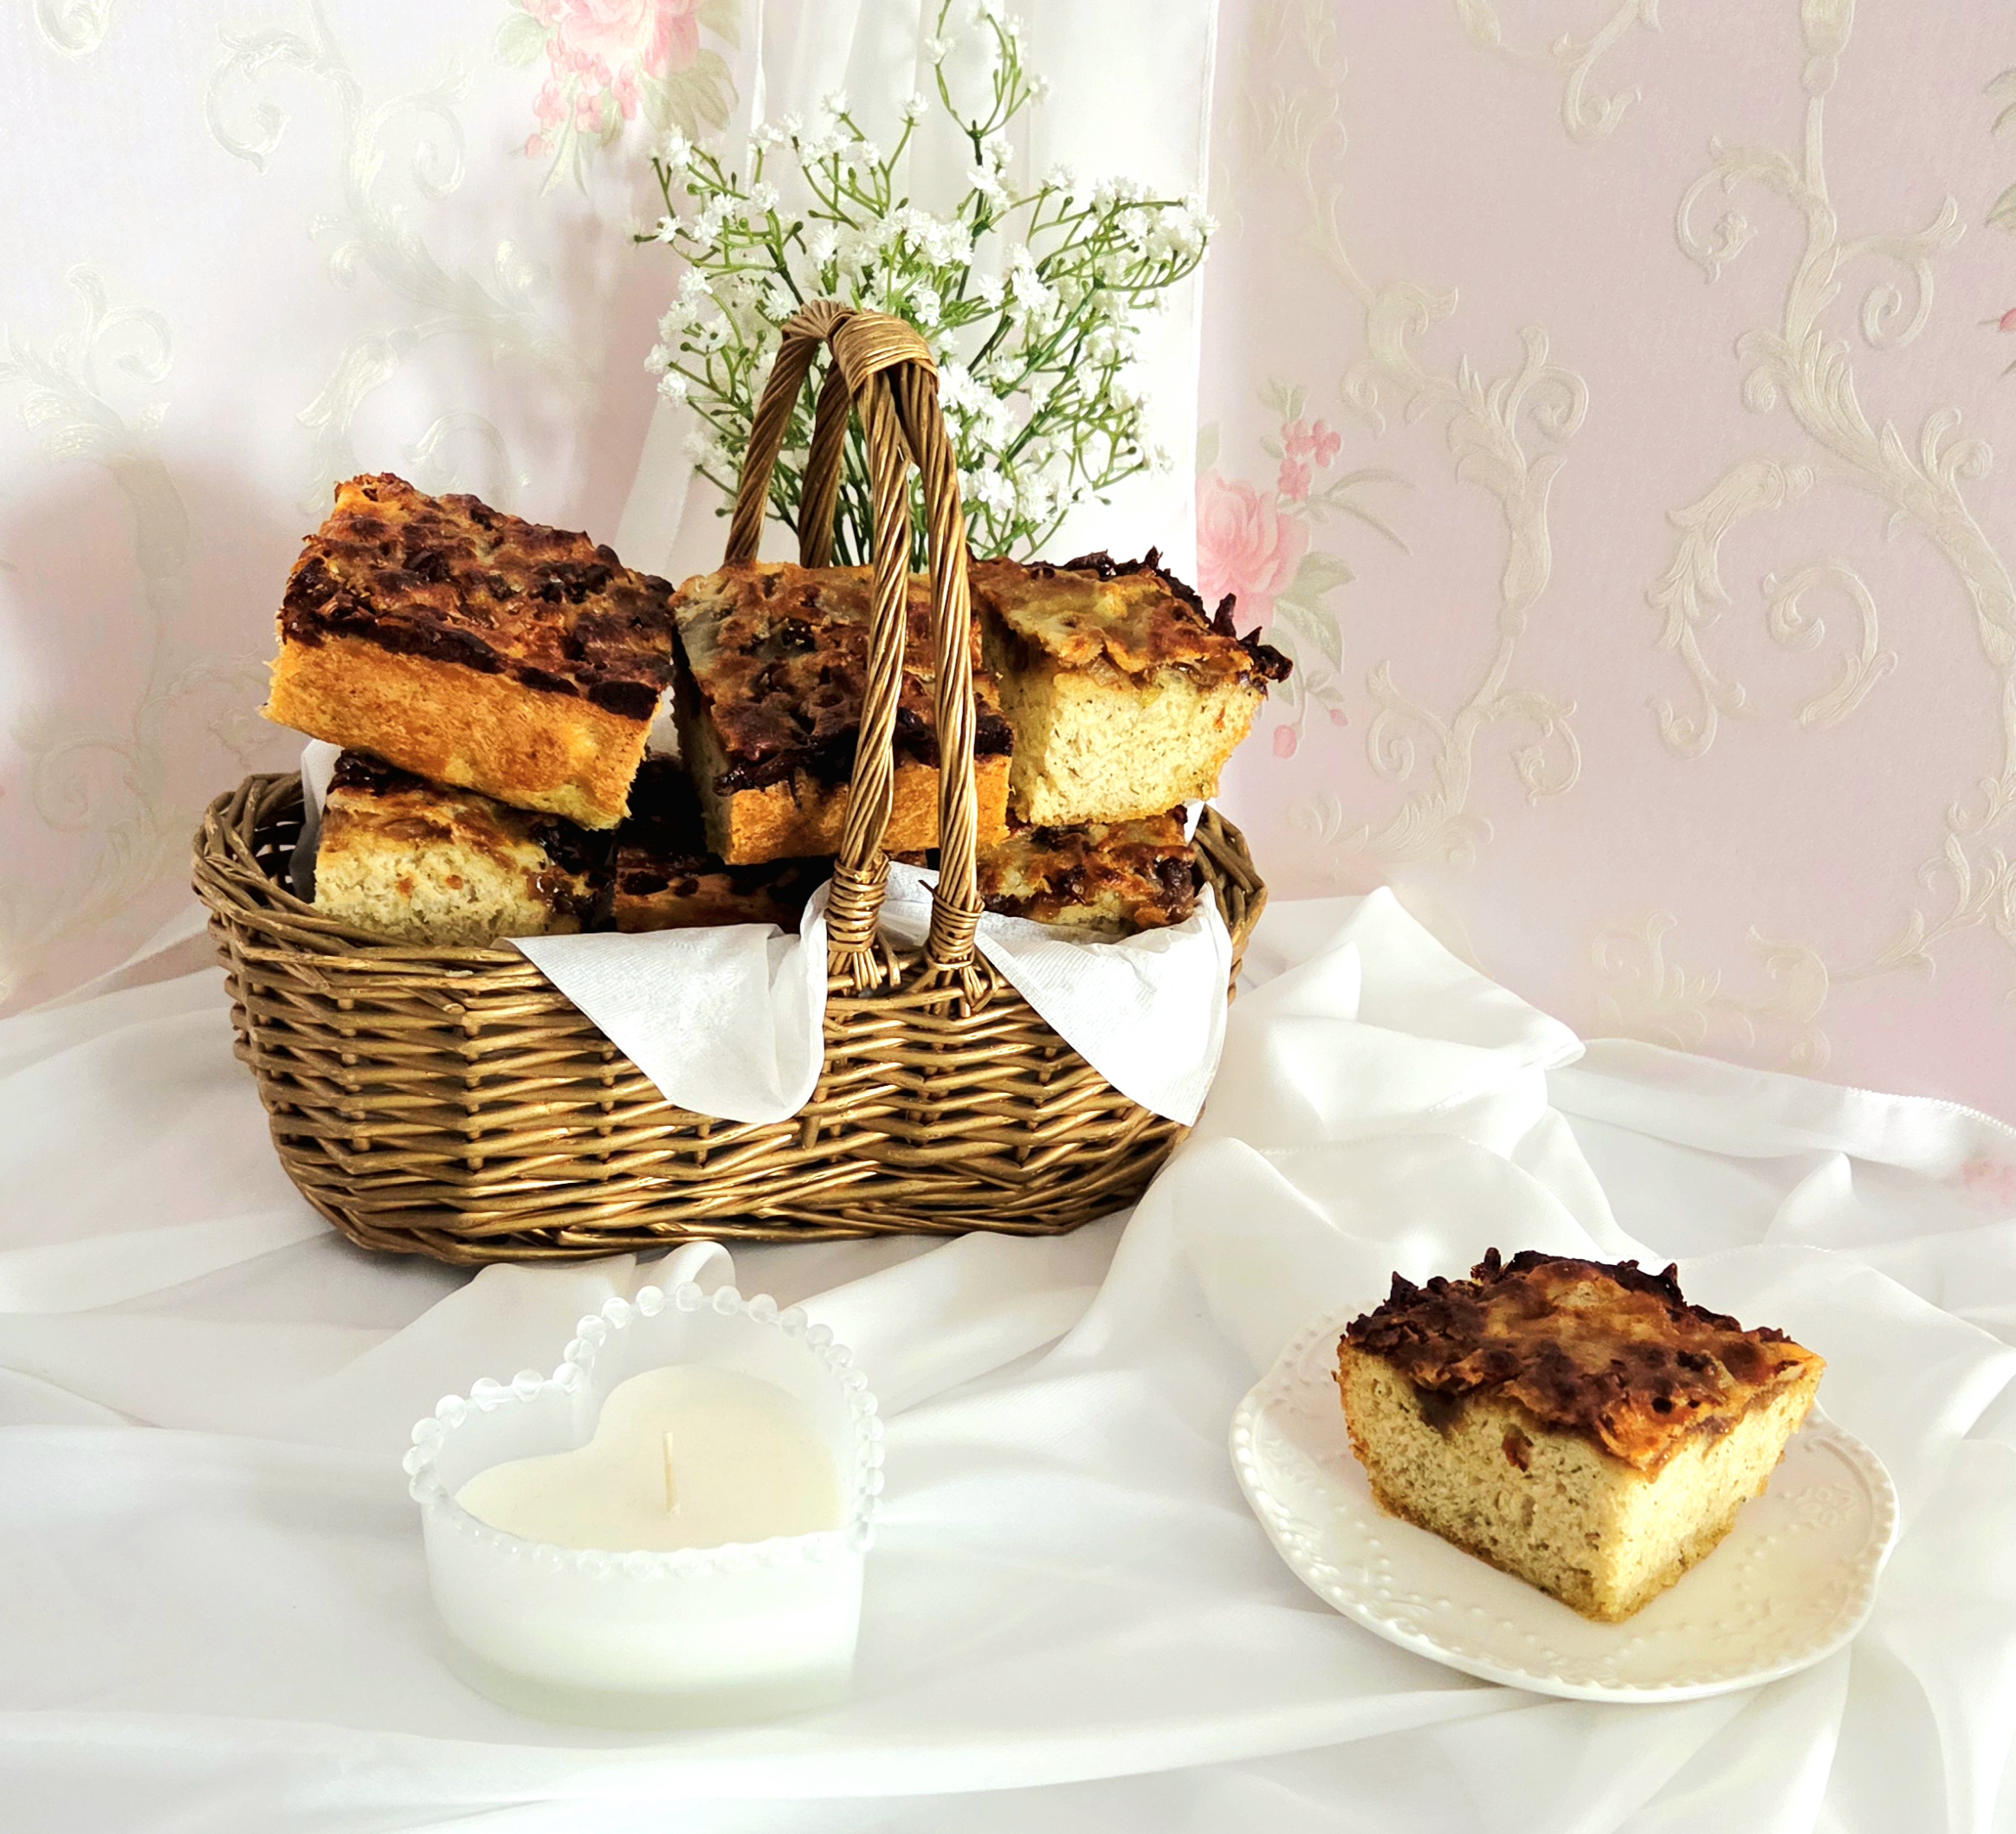
Transfer the bread to a cooling rack and allow it to come down to room temperature. Slice it into 12 squares, or however many the desired portion size is.
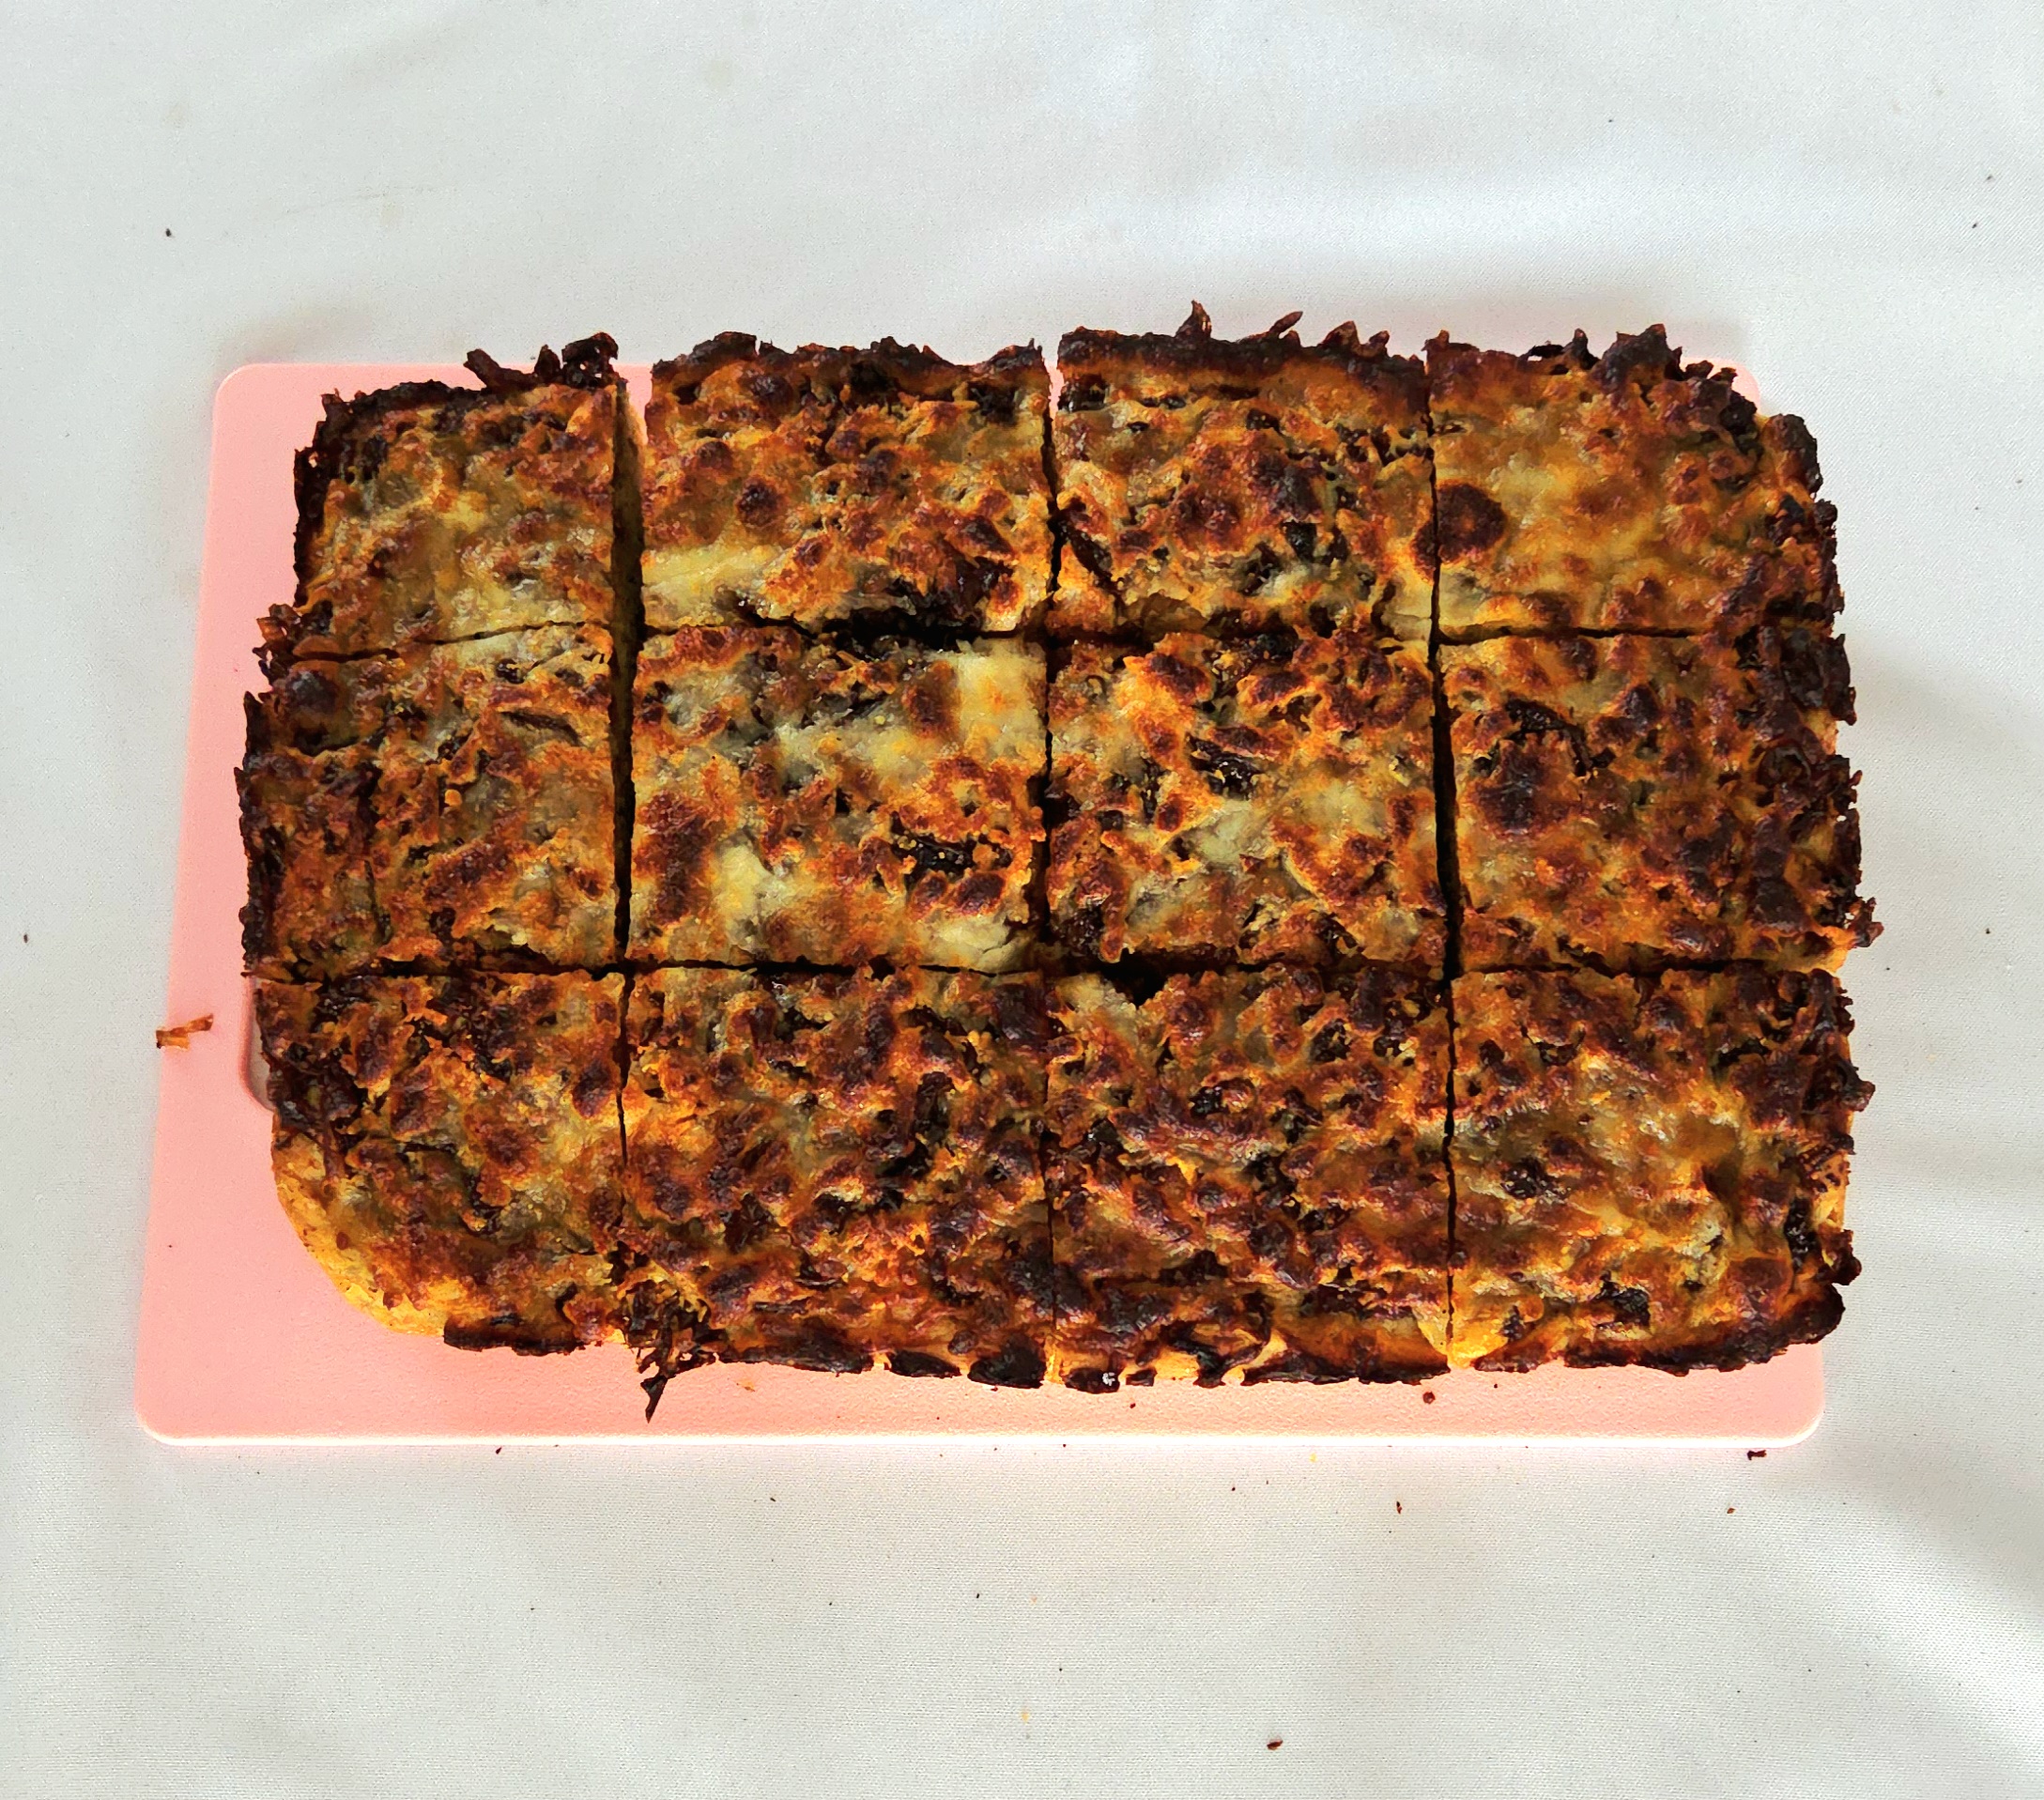
Store any leftover bread in either a gallon sized zip-top bag, or airtight container for up to 1 day, and enjoy!

French Onion Focaccia
Bake Time: 425F for 25-30 minutes
Servings: 12 servings
Total Time: 4 hours
Prep Time: 1 hour
Ingredients
Dough:
- 4 cups all-purpose flour
- 2 ¼ teaspoons instant yeast
- 2 teaspoons granulated sugar
- 1 ½ teaspoons salt
- 2 Tablespoons of fresh thyme or 2 teaspoons dried thyme
- 1 ½ cups unsalted beef stock
- ¼ cup olive oil, plus extra for pan later
Toppings:
- 3 medium yellow onions
- 1 Tablespoon olive oil
- 2 teaspoons granulated sugar
- 2 Tablespoons low sodium better than bouillon roasted beef
- 1 teaspoon worcestershire sauce
- 1 ½ cups shredded gruyere or mozzarella cheese
Directions
For the Dough:
- Prepare a turned-off oven before bringing the dough together. Turn the oven onto the lowest temperature it will heat to, making sure there’s enough space on a rack to fit a heat-safe bowl inside.
- In the bowl of a stand mixer, whisk together the flour, yeast, sugar, salt, and thyme. Place the bowl onto the mixer, fitted with the dough hook.
- Heat the beef stock in the microwave in 30 second increments, stirring in between, until it’s just warm to the touch. This should take about 60-90 seconds.
- Pour the warm stock and ¼ cup of olive oil into the dry goods. Turn the mixer to level 2 and allow it to knead together for a few minutes. Use your hands to bring the dough together into a large ball shape.
- Lightly oil a heat-safe mixing bowl and transfer the dough there, turning it over several times to coat. Cover the bowl with plastic wrap. Turn off the lightly heated oven and place the dough inside. Allow the dough to proof for 1-2 hours, or until doubled in size.
The Toppings:
- While the dough proofs, prepare the caramelized onions. Very thinly slice the onions using a chef’s knife. Place a large skillet over medium heat, then pour in the olive oil after it’s had a minute or two to heat up well. Add the onions and sugar. Give the onions a stir and turn the heat down to low, covering the pan.
- Once the onions have wilted and started to release their juices, uncover the pan and turn the heat up to medium low. Stir the onions occasionally until the liquid has evaporated and they’ve started to turn a beautiful golden brown. This should take around 30-45 minutes.
- Add the better than bouillon and worcestershire sauce to the onions. Stir the onions, so everything mixes together. More liquid may be released from the onions at this point, and if it does, cook them until this liquid evaporates and the onions are a dark brown color. Transfer them to a small bowl to cool completely.
- While the onions cool, shred the cheese into a small bowl. Place both the cheese and the onions into the fridge to chill, until the focaccia is ready to assemble.
Assembly:
- When the dough has finished proofing, remove it from the oven. Switch the oven back on to 425F, making sure the rack is in the center of the oven. Allow the dough to rest in the bowl on the counter, still covered.
- Once the oven has come up to temperature, generously oil a 9×13 inch baking dish. Dump the dough out into the oiled pan and pour a bit more oil on top of the dough. Using your fingers, dimple the dough over and over again, spreading it out to the edges as you do. There should be large crevices all over the focaccia.
- Using a spoon or fork, dollop out the caramelized onions all over the dough. Place the bread into the oven and bake it for 15 minutes.
- At the 15 minute mark, briefly remove the bread from the oven, closing the oven door to trap the heat. Sprinkle the grated cheese evenly over the top of the bread, then return it to the oven for 10-15 minutes. Remove the golden brown bread from the oven, then immediately transfer it to a cooling rack.
- Allow the bread to cool to room temperature, then slice the bread into 12 squares, or the desired serving sizes. Store any leftover bread in either a gallon sized zip top bag, or airtight container for up to one day, and enjoy!
Tips
- The caramelized onions can be prepared up to two days ahead of time! Store them in an airtight container in the fridge until the bread is ready for them.
- Fully baked focaccia can be frozen. Prepare the recipe as written, then after slicing the bread into the desired portion sizes, place them into a freezer-safe bag for up to 3 months. Pull and thaw slices at your will.


0 Comments