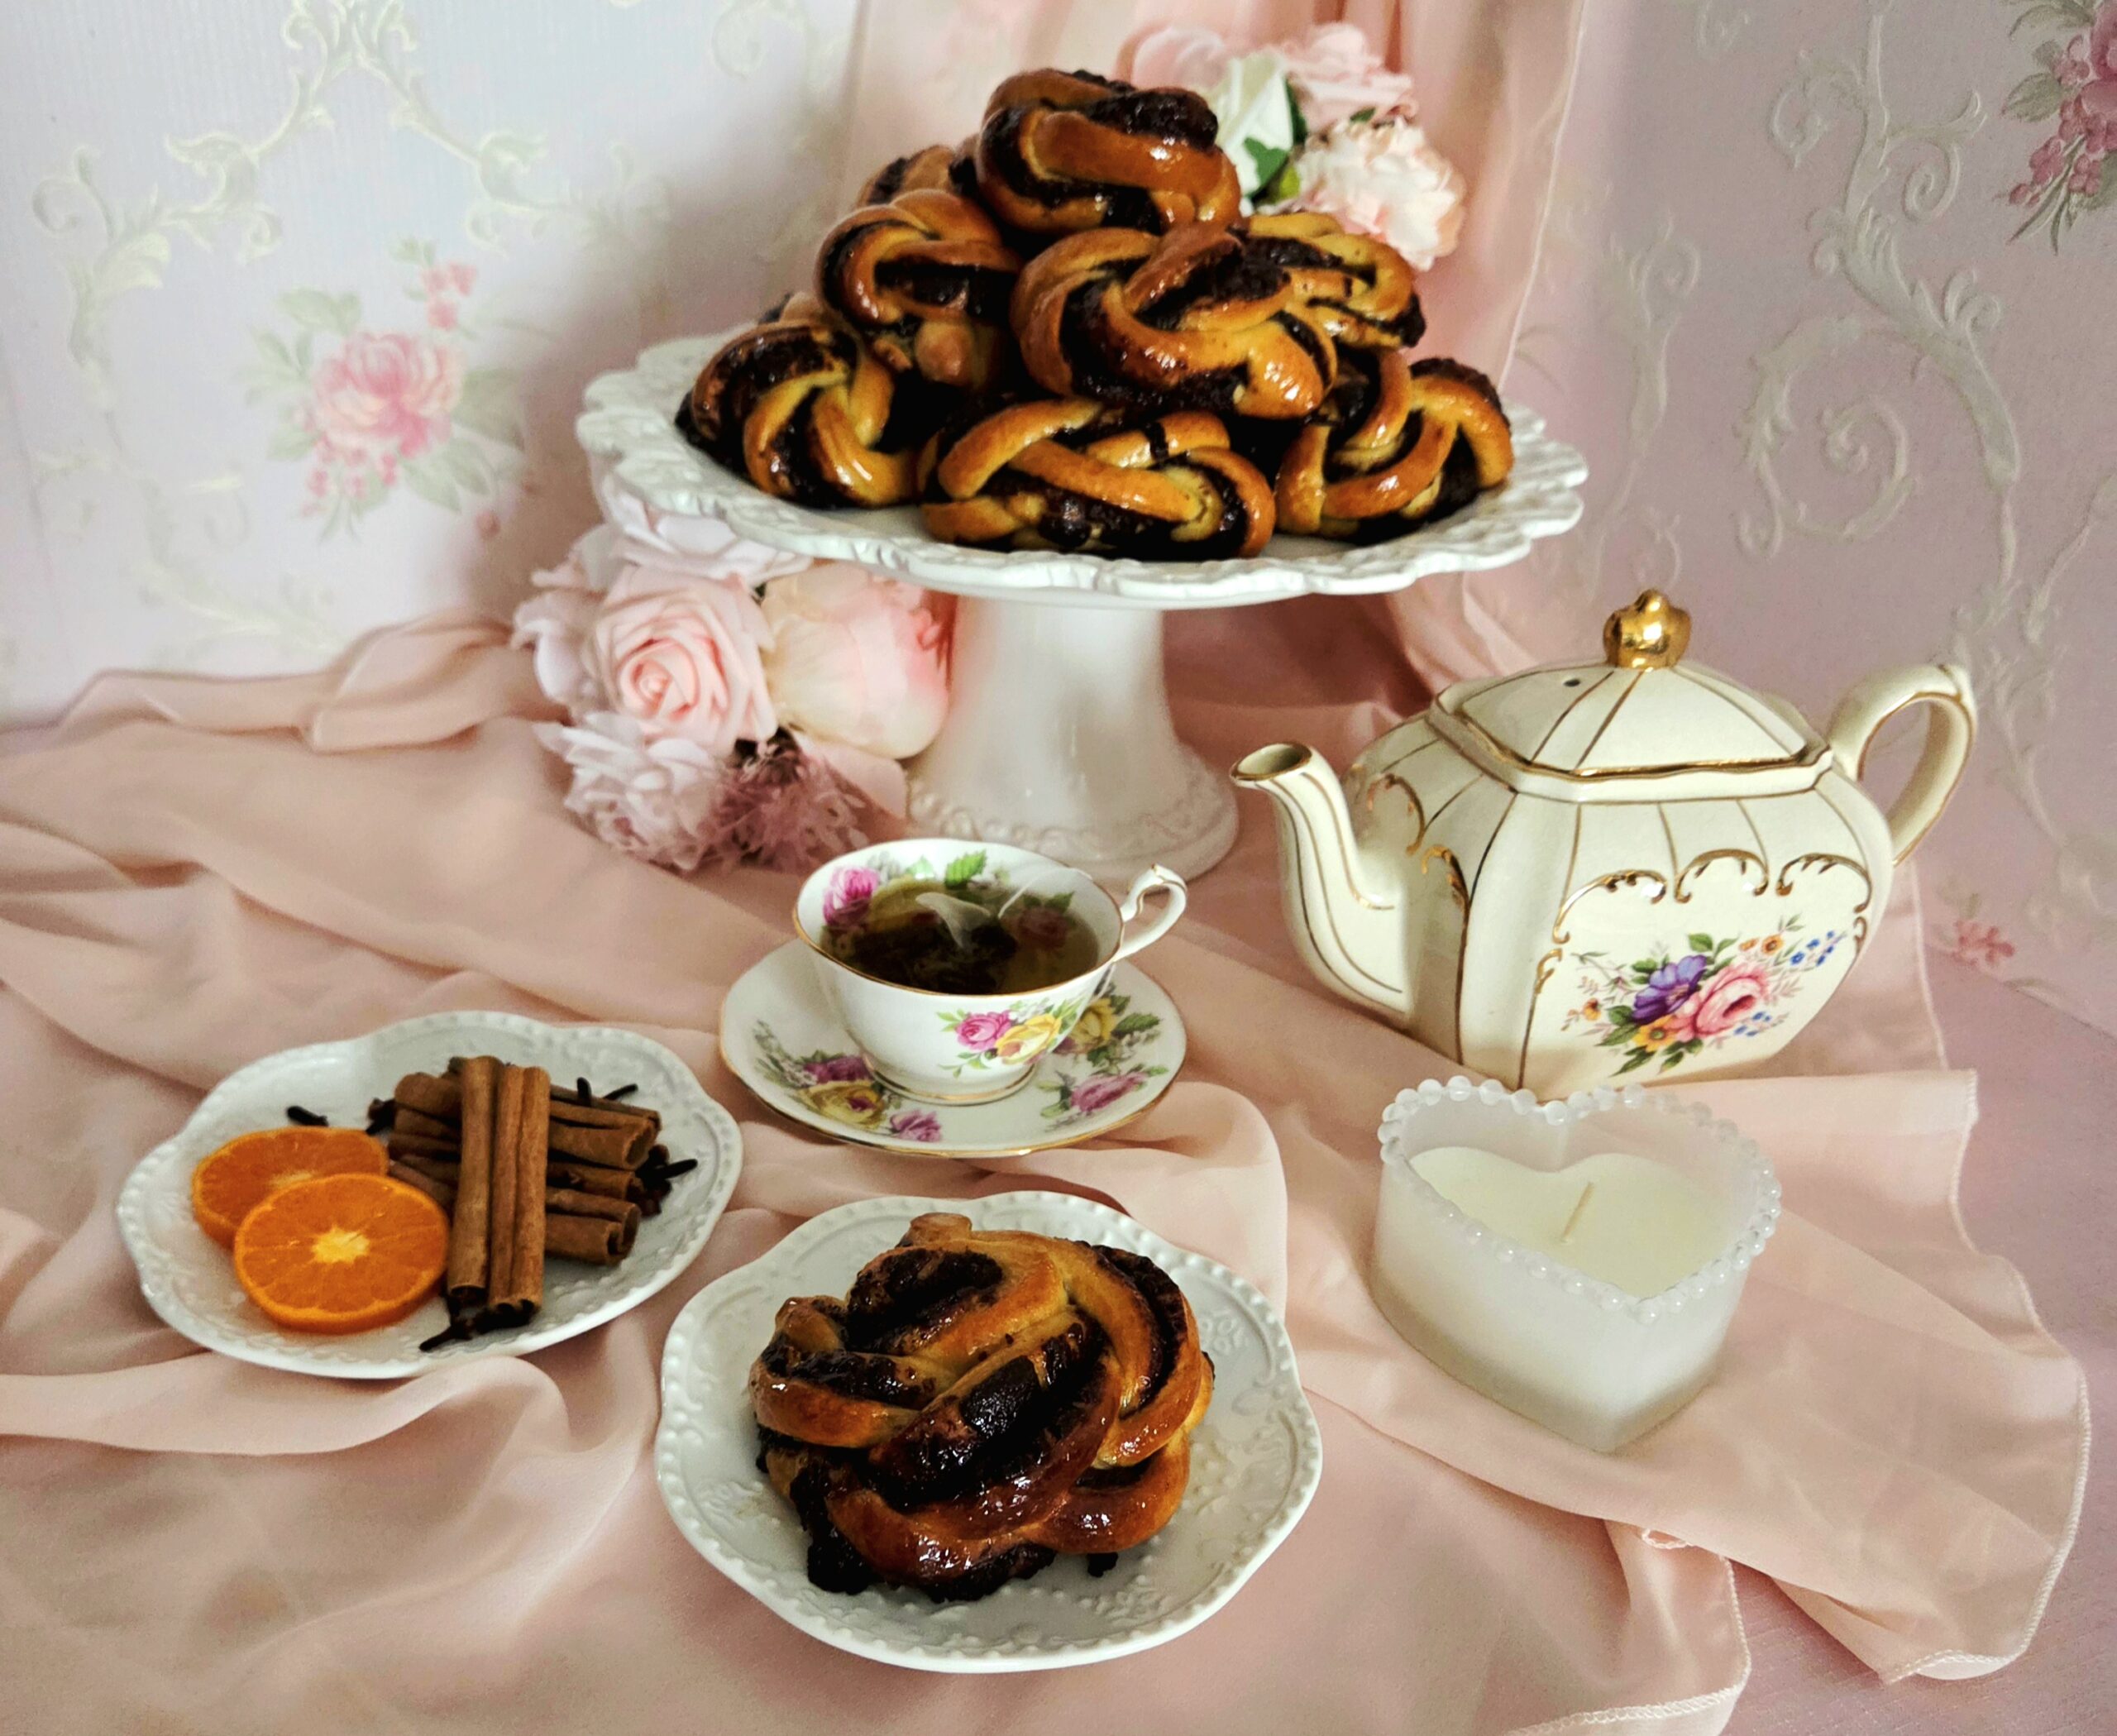

One of the things I love most about baking is, of course, how absolutely incredible my house smells by the end of it, particularly in the Fall and Winter. That’s never more true than with a recipe as fragrant as this one. The warm spices, the tangy citrus, the rich chocolate, it’s like concocting an autumnal potpourri simmer pot you get to eat in the end. Don’t lie, we’ve all wanted to consume that smell.
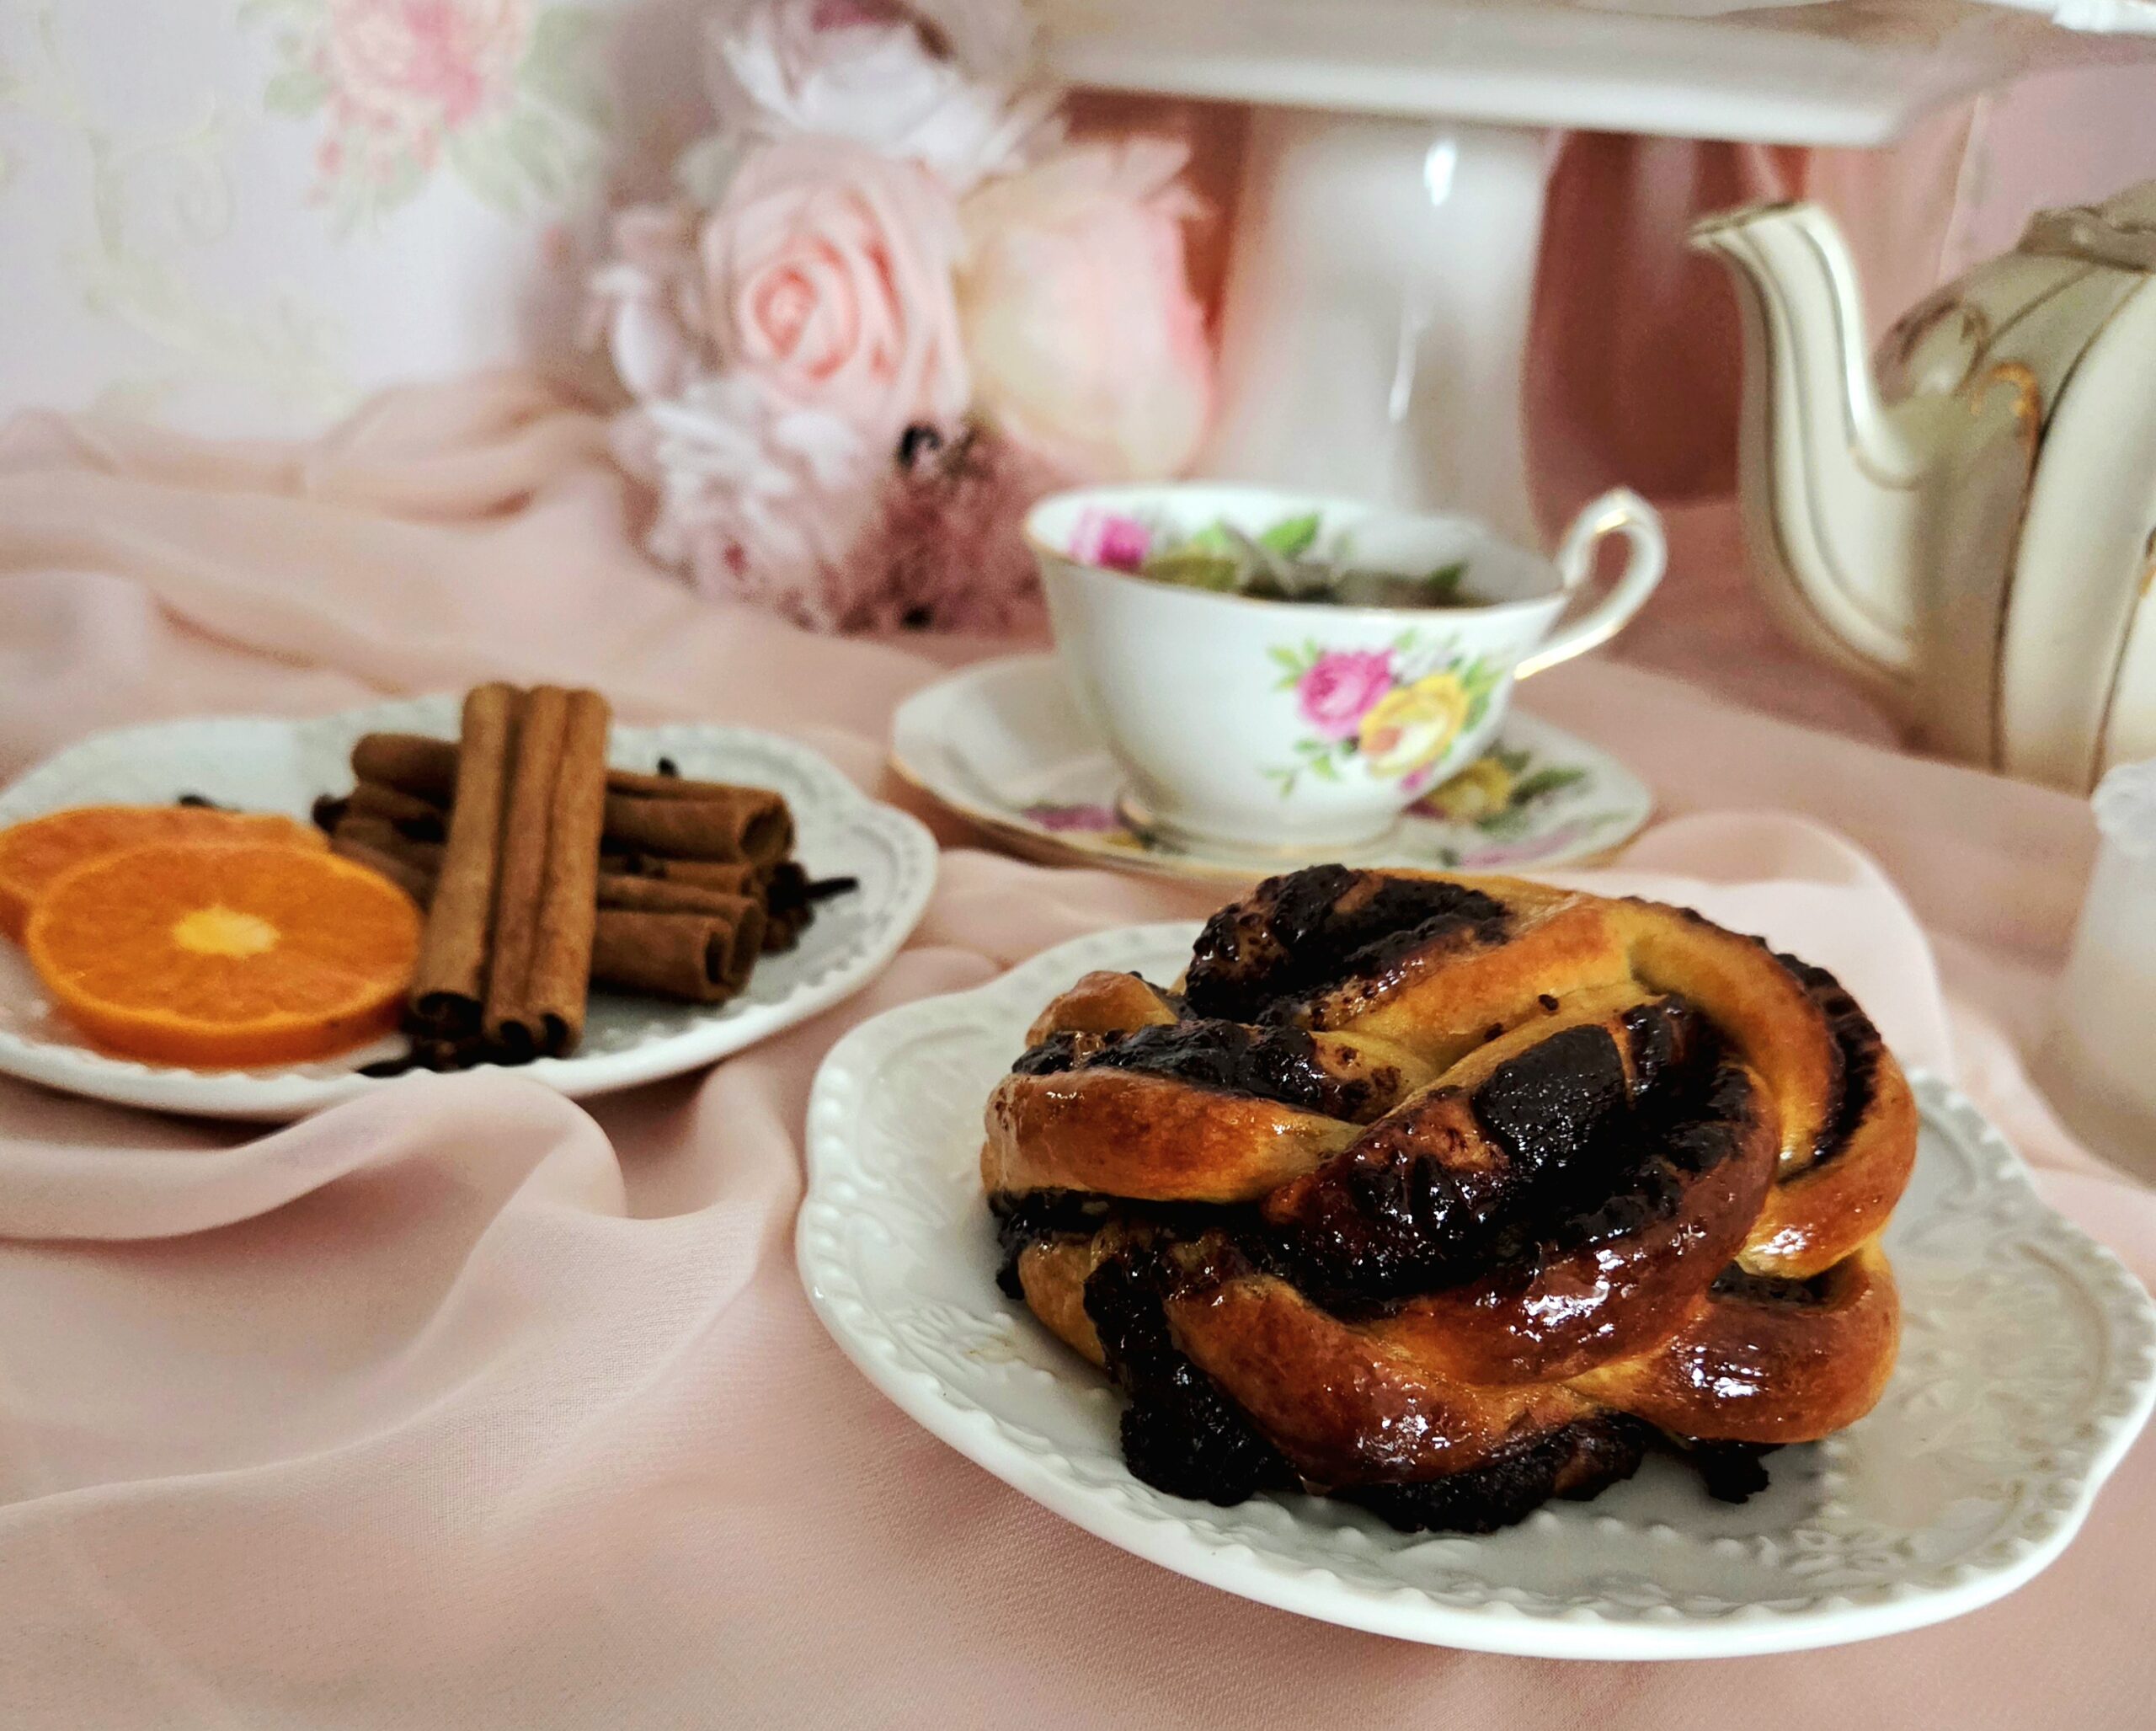
These knots are soft inside, with a delightful toothy texture on the outer crust. The orange, chocolate, and spices create a beautiful symphony of flavor, where everyone gets an equal chance to shine. They’re sweet without being cloyingly so, and they’re the perfect substitute for a sweet holiday prep-ahead breakfast if you’re maybe a little sick of cinnamon rolls. Plus, the braided strands make these knots fun to pull apart! They may be a bit time consuming to create, but it’s a labor of love that’s worth the cost.
FAQs and Science
Do I have to use fresh squeezed orange juice?
Fresh squeezed orange juice will yield much better flavor than processed juice from a bottle. So yes, I’d highly recommend you go through the trouble of squeezing your own orange juice fresh.
My dough seems too dry or too sticky, what can I do to fix it?
If it’s too dry, so it feels firm and it’s hard to knead, add more water 1 Tablespoon at a time until it’s reached the correct tacky but not sticky consistency (if you poke it, it will feel a little sticky but wont actually stick to your finger).
If it feels too sticky, add 2 Tablespoons of flour and continue to knead it until that tacky but not sticky consistency is achieved.
Why oil the dough before proofing it the first time?
This light coating of oil will prevent the dough from sticking to the bowl and keep it from drying out.
Why let the orange zest sit in the sugar for several minutes before mixing them into the rest of the filling?
Doing this step helps with flavor development. The sugar will draw out the natural oils in the orange zest, thus intensifying the orange flavor in the knots.
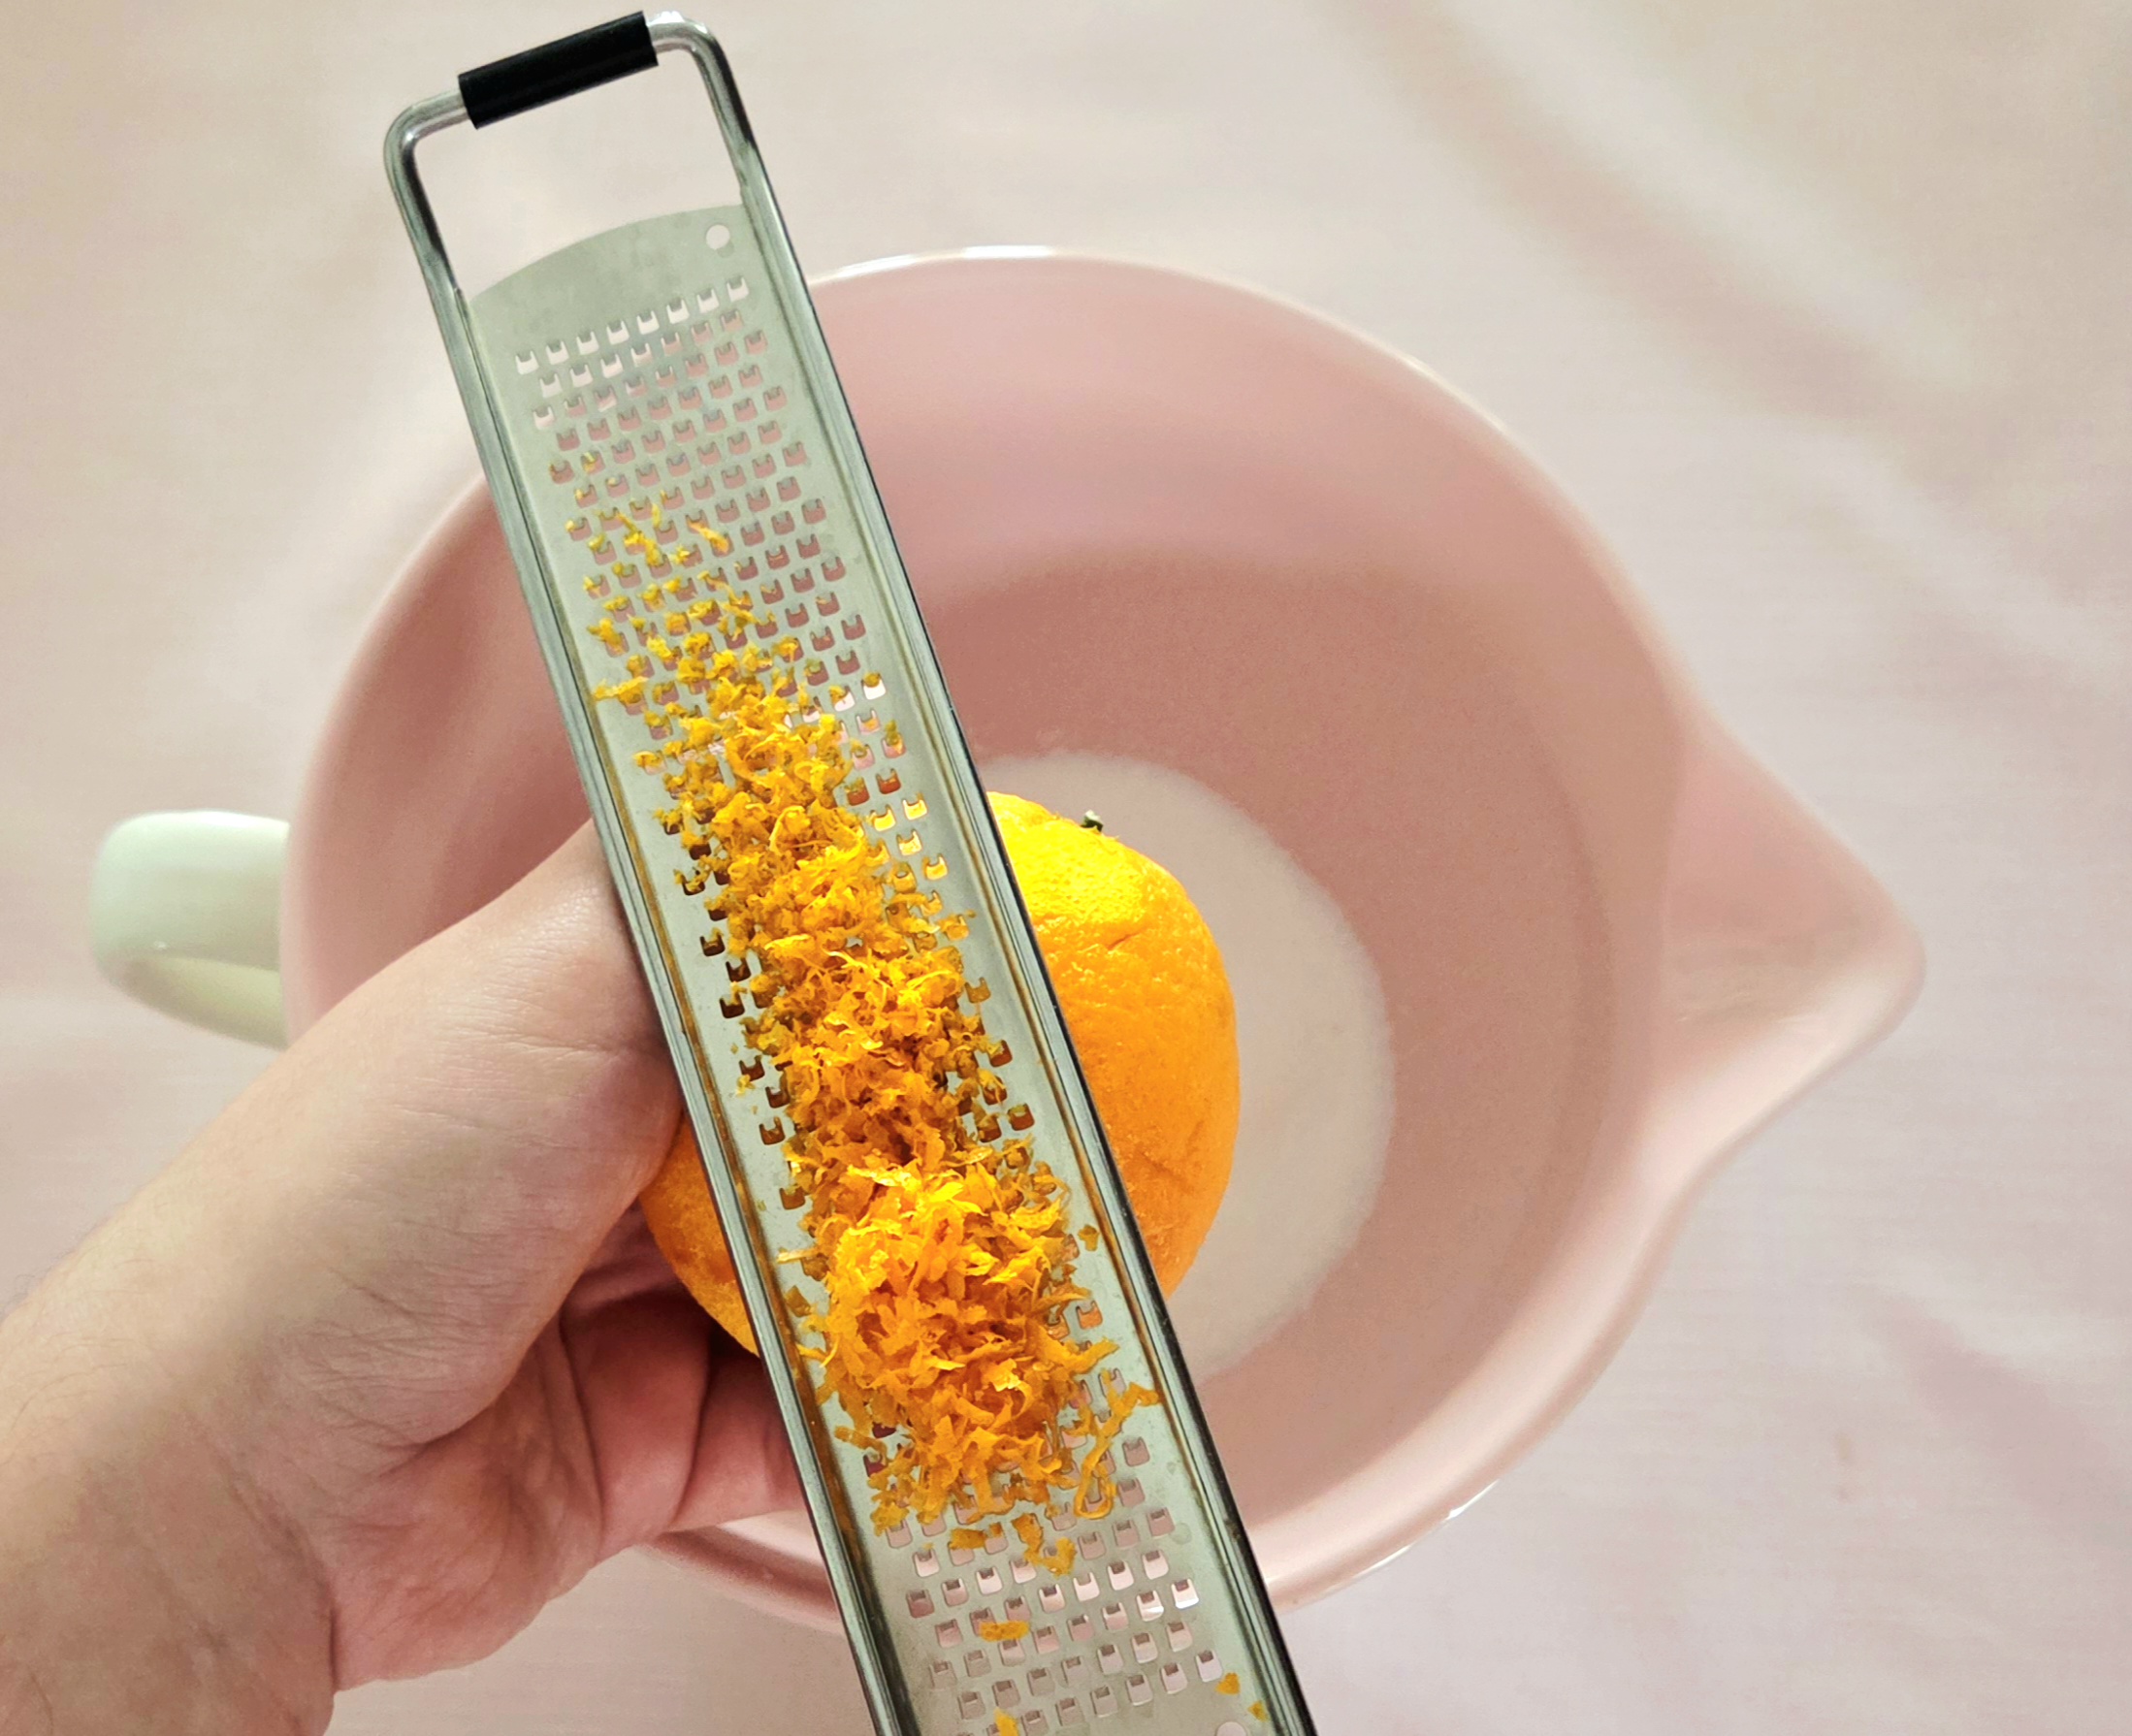
How do I zest an orange?
I like to use the Martha Stewart method, since it’s easier to see what’s going on with the fruit that way. Take your microplane or fine grater and drag it along the top of the orange in short bursts, shaving off the outer orange part of the peel and avoiding the white pith underneath. Turn the orange as you need to. The zest will collect on top of your tool of choice, simply dump it into the sugar when you’re ready to.
Why should I avoid that white stuff when I’m zesting?
The white pith beneath the zest is incredibly bitter. It wont add good flavor to your knots, only sadness. Don’t do it.
Could I use milk chocolate instead of dark?
I’d recommend using dark chocolate in this case, as the bitter notes add to the depth of flavor in the knots. However, if milk is what you have on hand or you really would prefer to use it, it wont ruin them by any means!
Does it matter if I use natural cocoa powder instead of dutch processed?
Natural cocoa powder has more notes of acidity than dutch processed, so the flavor will be slightly different. But if it’s what you’ve already got on hand or what you can find and afford, then use it!
Can these knots be made ahead of time?
Yes, these can be prepped up to a day ahead of time! Follow the recipe up until step 7 in the Assembly section, then instead of proofing them right away, place the knots in the refrigerator overnight. When you’re ready to bake, take them out and proof them in a warm area for 60-90 minutes and continue on with the recipe as written.
What You’ll Need
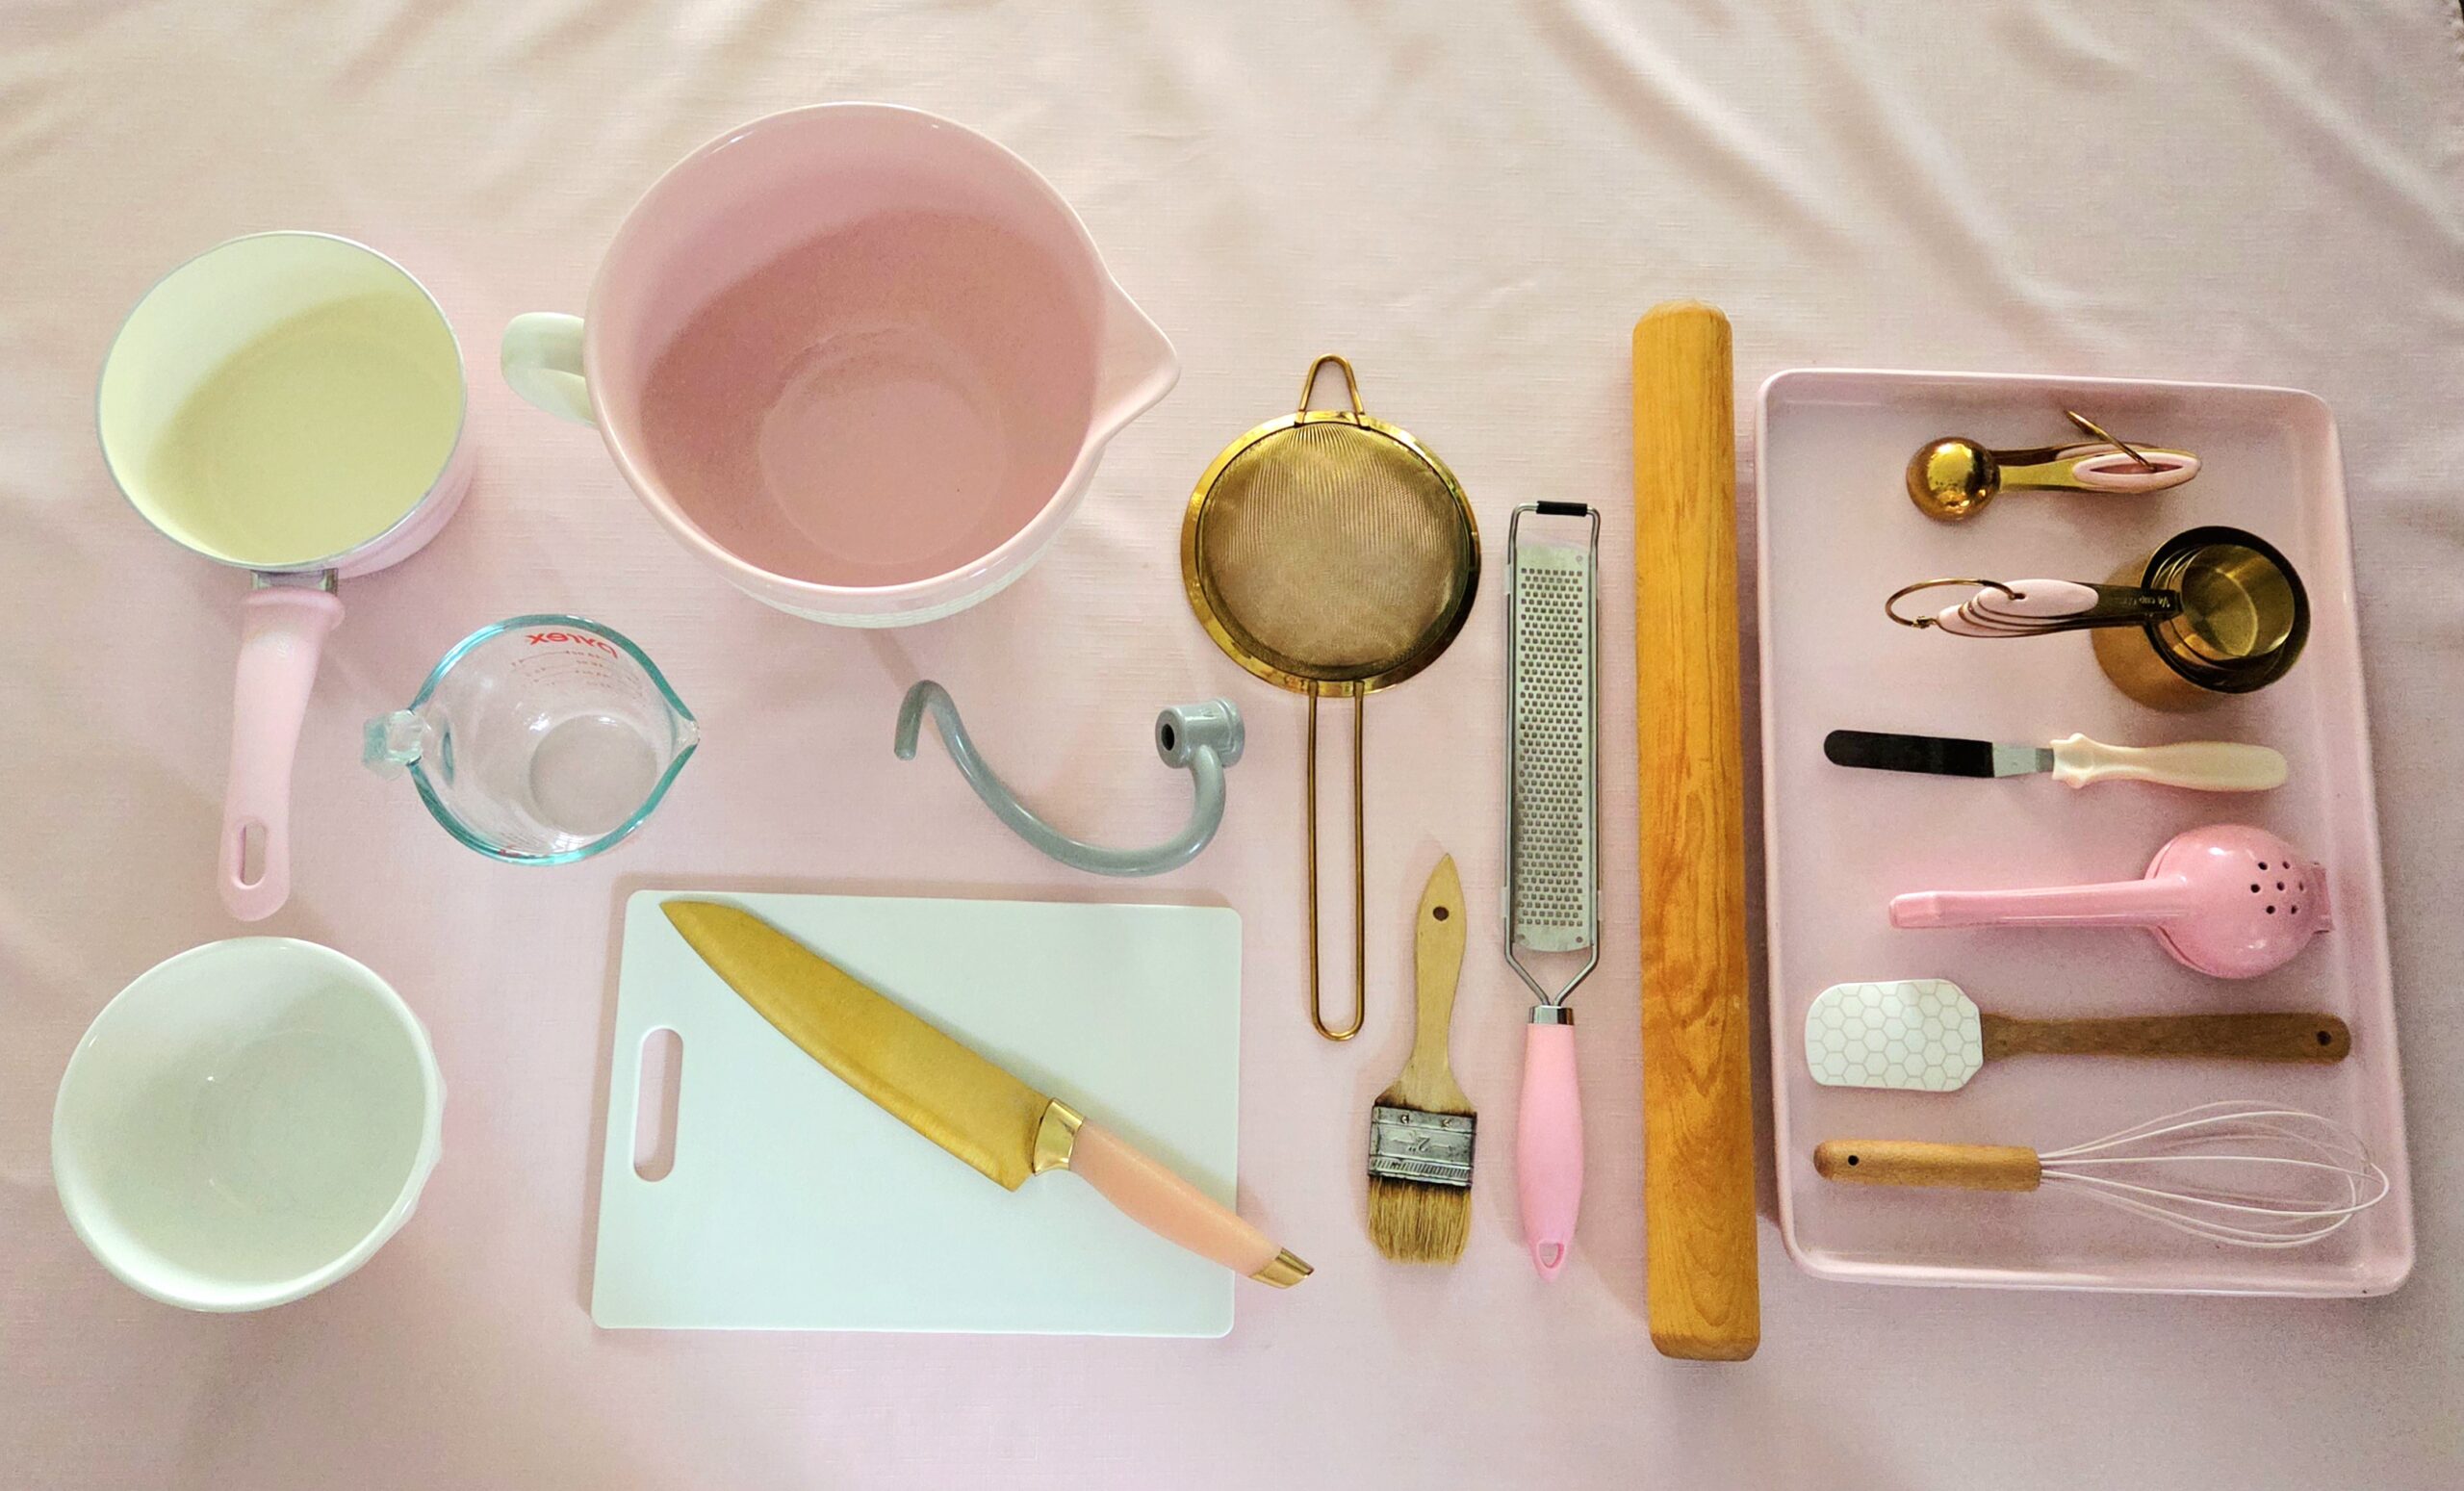
- Stand mixer with dough hook attachment
- 3 baking sheets
- Parchment paper
- Plastic wrap
- Medium mixing bowl
- Small mixing bowl, microwavable
- 1 qt saucepan
- Dry measuring cups
- Liquid measuring cup
- Measuring spoons
- Whisk
- Sieve or sifter
- Chef’s knife
- Citrus squeezer or reemer
- Cutting board
- Microplane
- Rolling pin
- Offset spatula or butter knife
- Pastry brush or large tablespoon
The Process
Prepare the dough
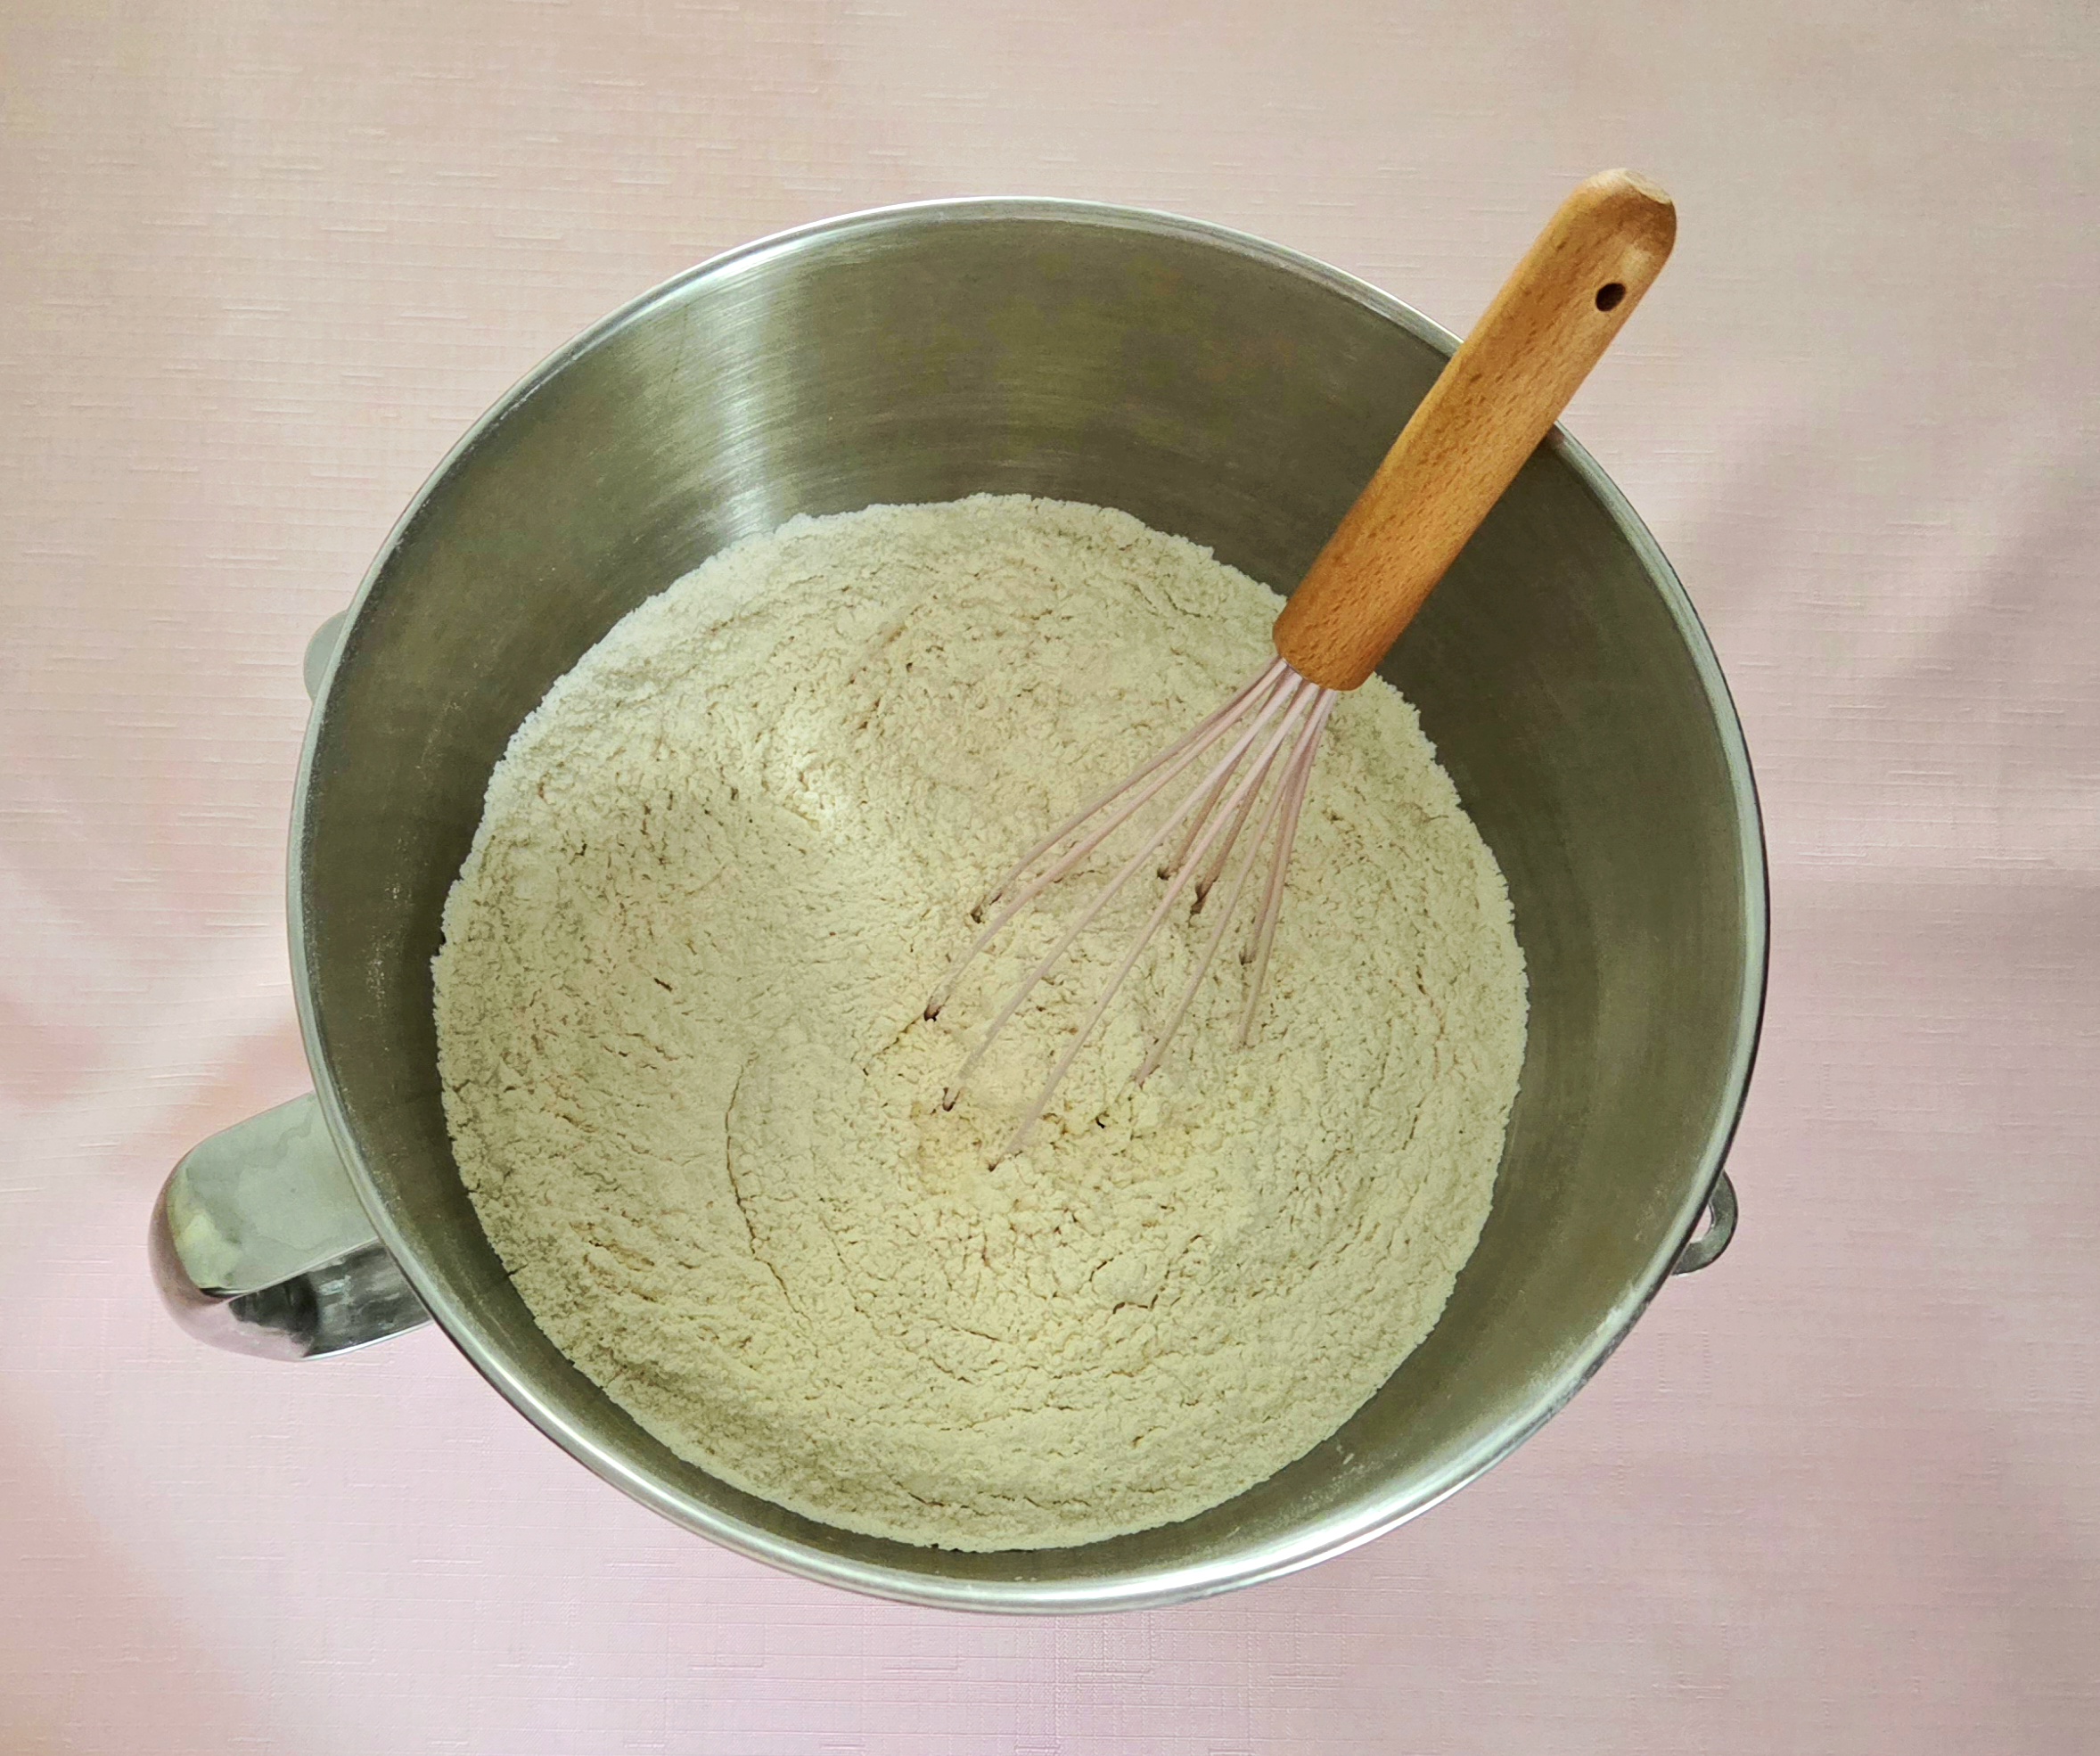
Begin by bringing your dough together. In a small microwavable bowl, heat the butter in 30 second increments, swirling in between to eliminate any hot spots, until it’s just melted and set it aside to cool. In the bowl of a stand mixer, whisk together the flour, sugar, salt, and yeast.
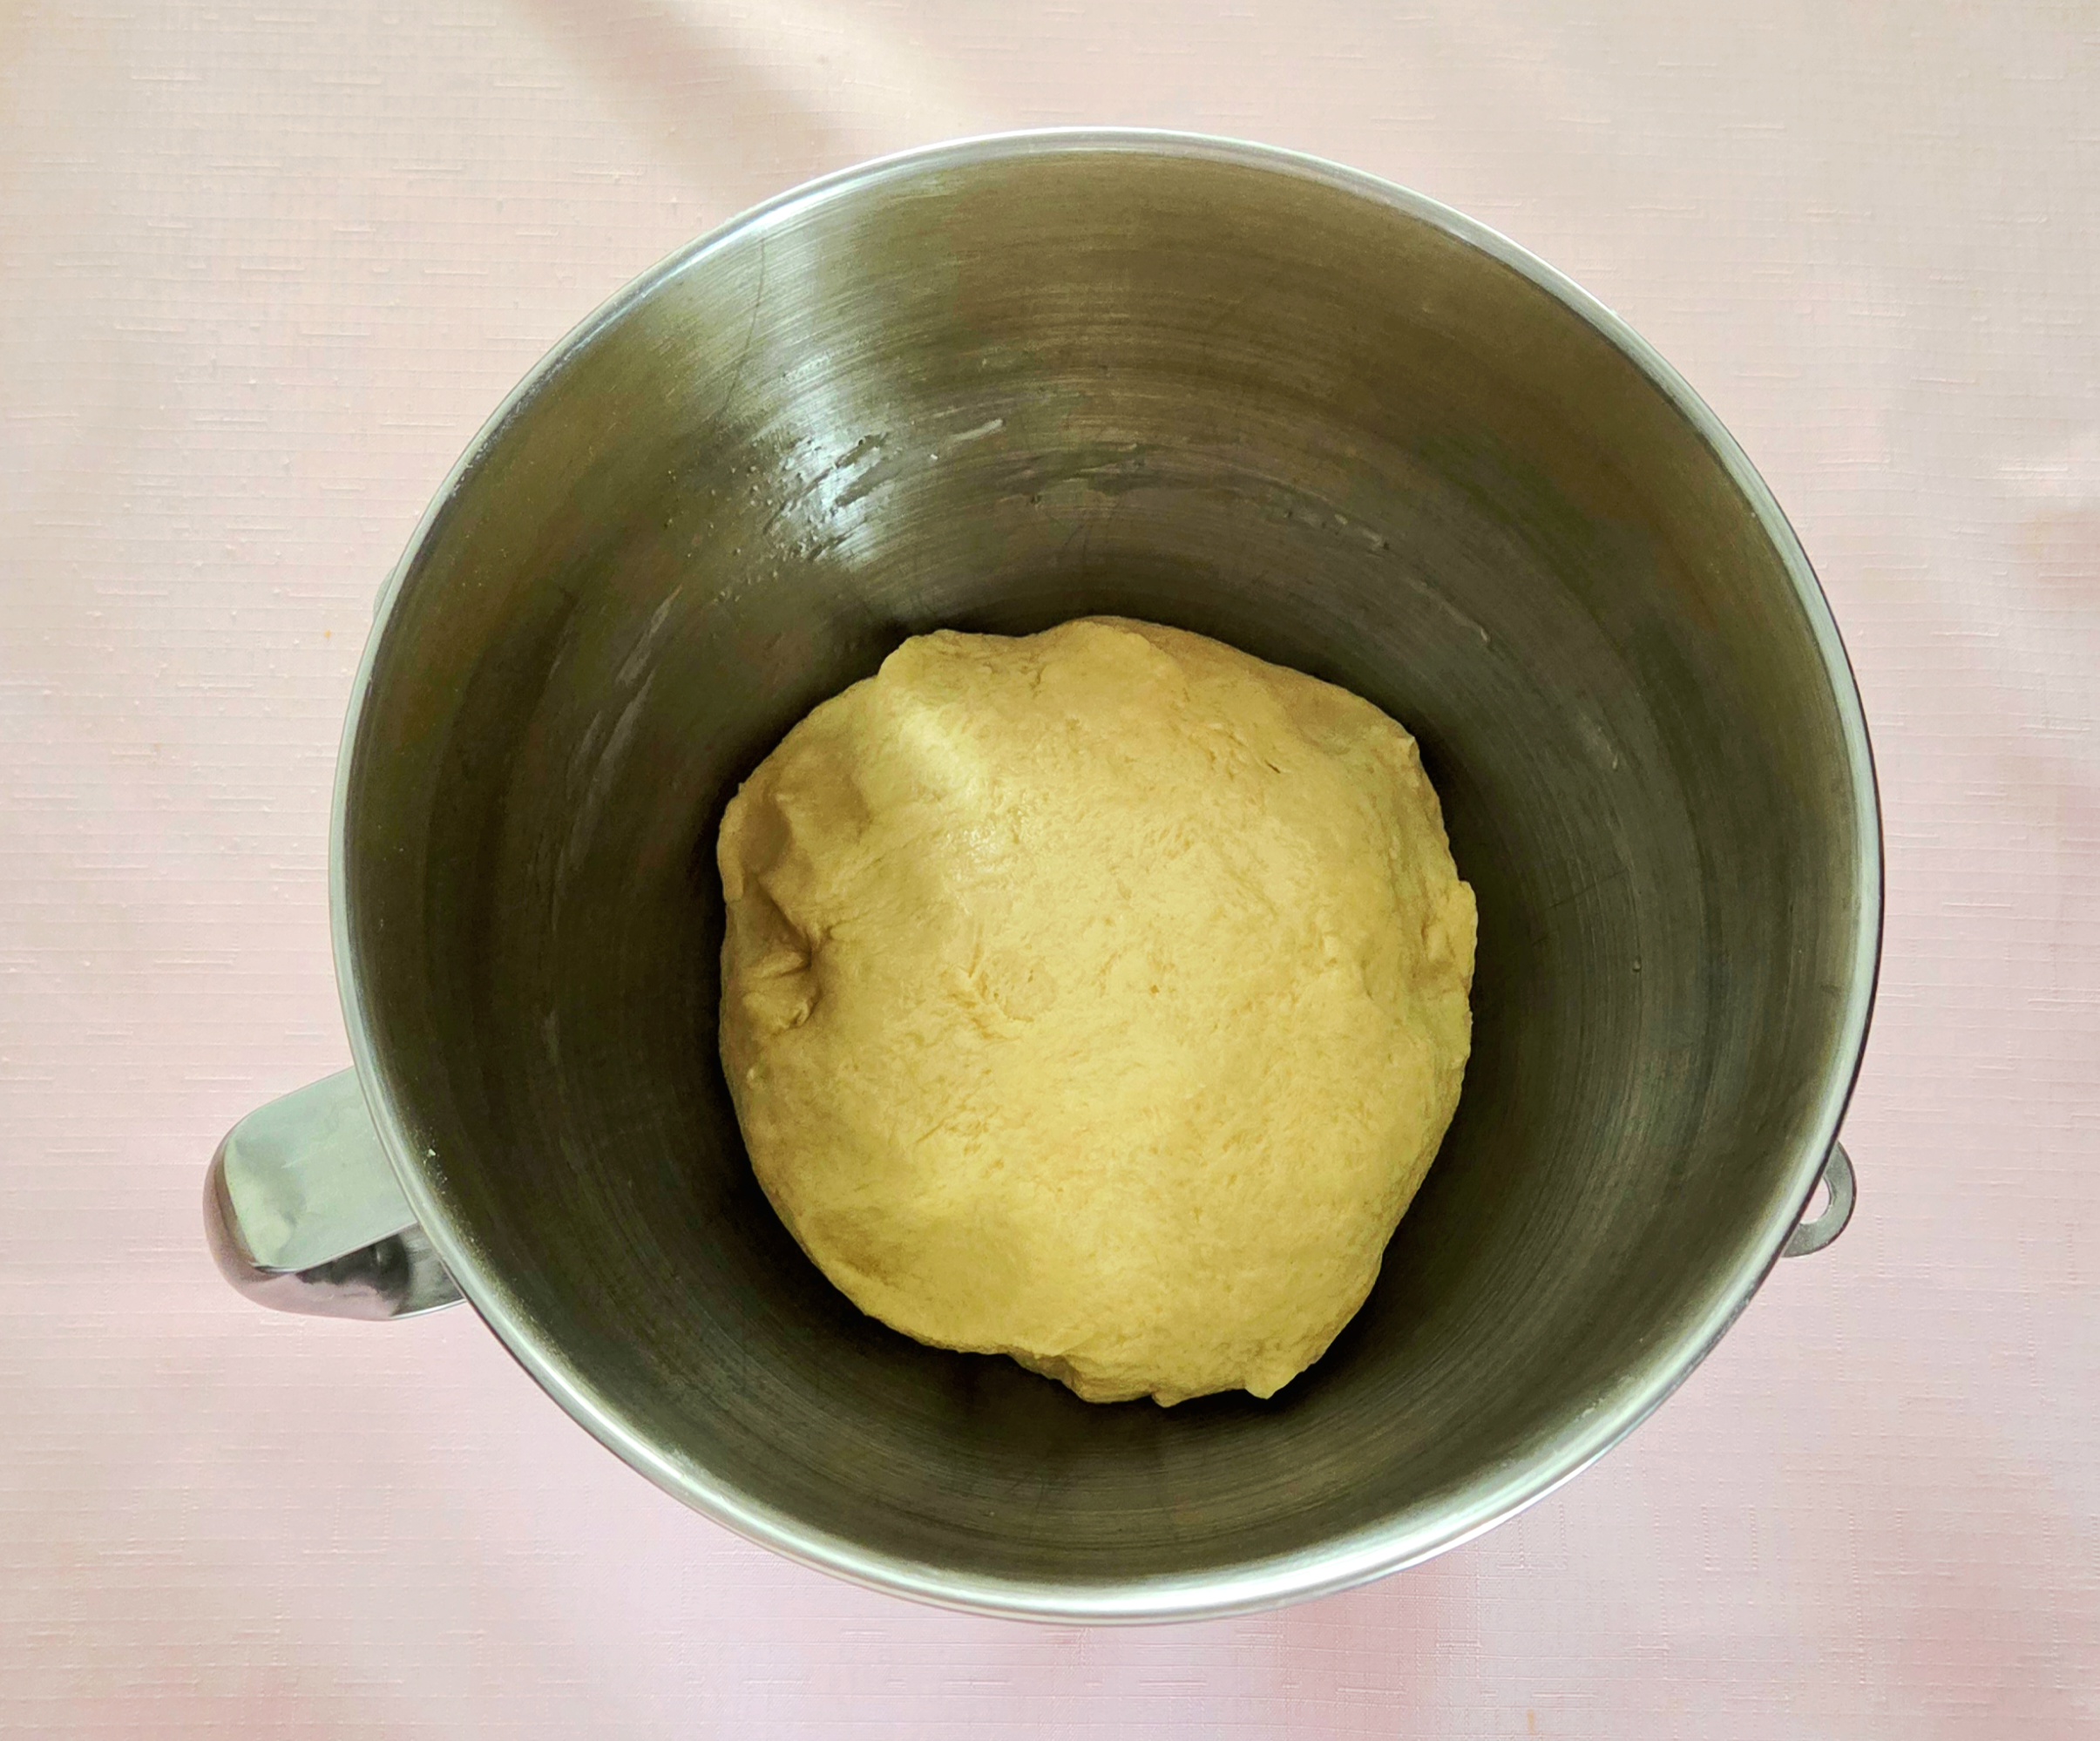
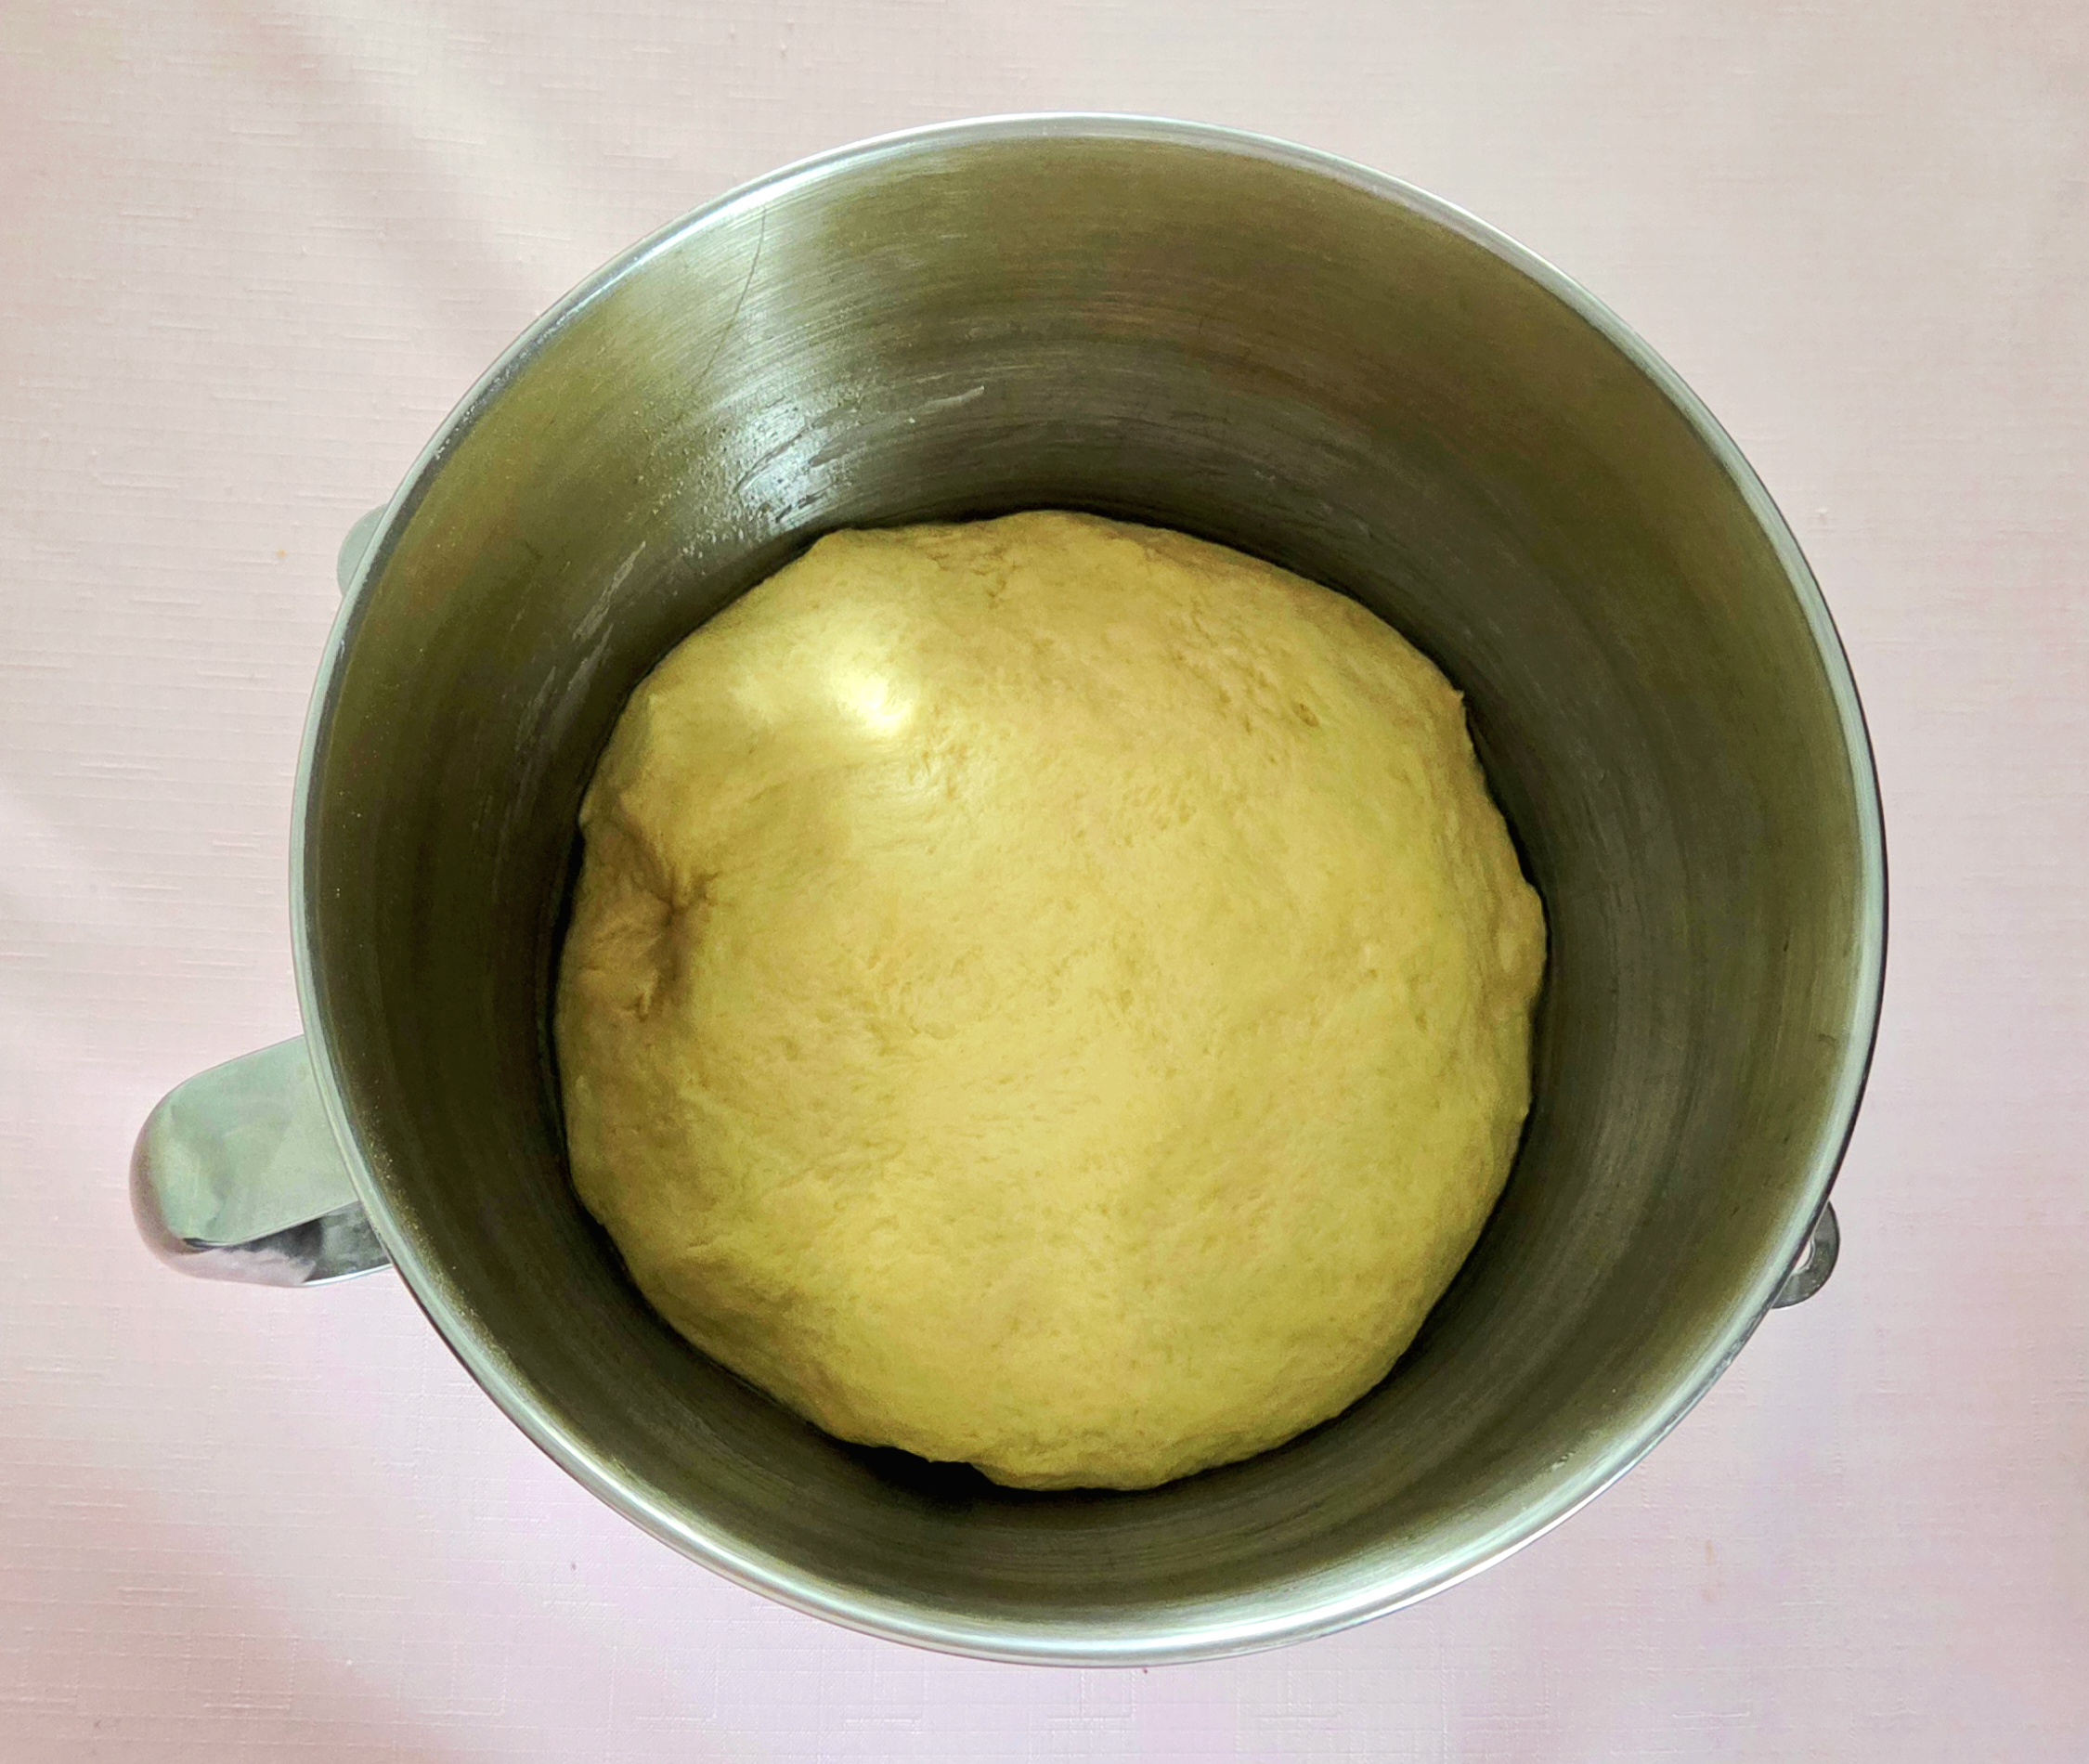
Slice 8-10 medium oranges and squeeze out 1 cup worth of orange juice into a liquid measuring cup. Yes, this will take a long, tedious time, but your future self will be thanking you for putting in the extra effort for the sake of better flavor! Pour the orange juice, water, and cooled melted butter into the dry goods. Using the dough hook attachment, knead the dough in the stand mixer on level 2 until a tacky but not sticky dough comes together, then knead it for 5 minutes more.

Gather the dough into a ball shape and place it in a lightly oiled bowl, flipping it around a few times so the dough gets a light coating of oil as well. Cover the bowl with plastic wrap and place it in a warm area to proof for 60-90 minutes, or until doubled in size. I’m partial to utilizing either a heating vent or a turned-off oven for proofing.
Make the Filling
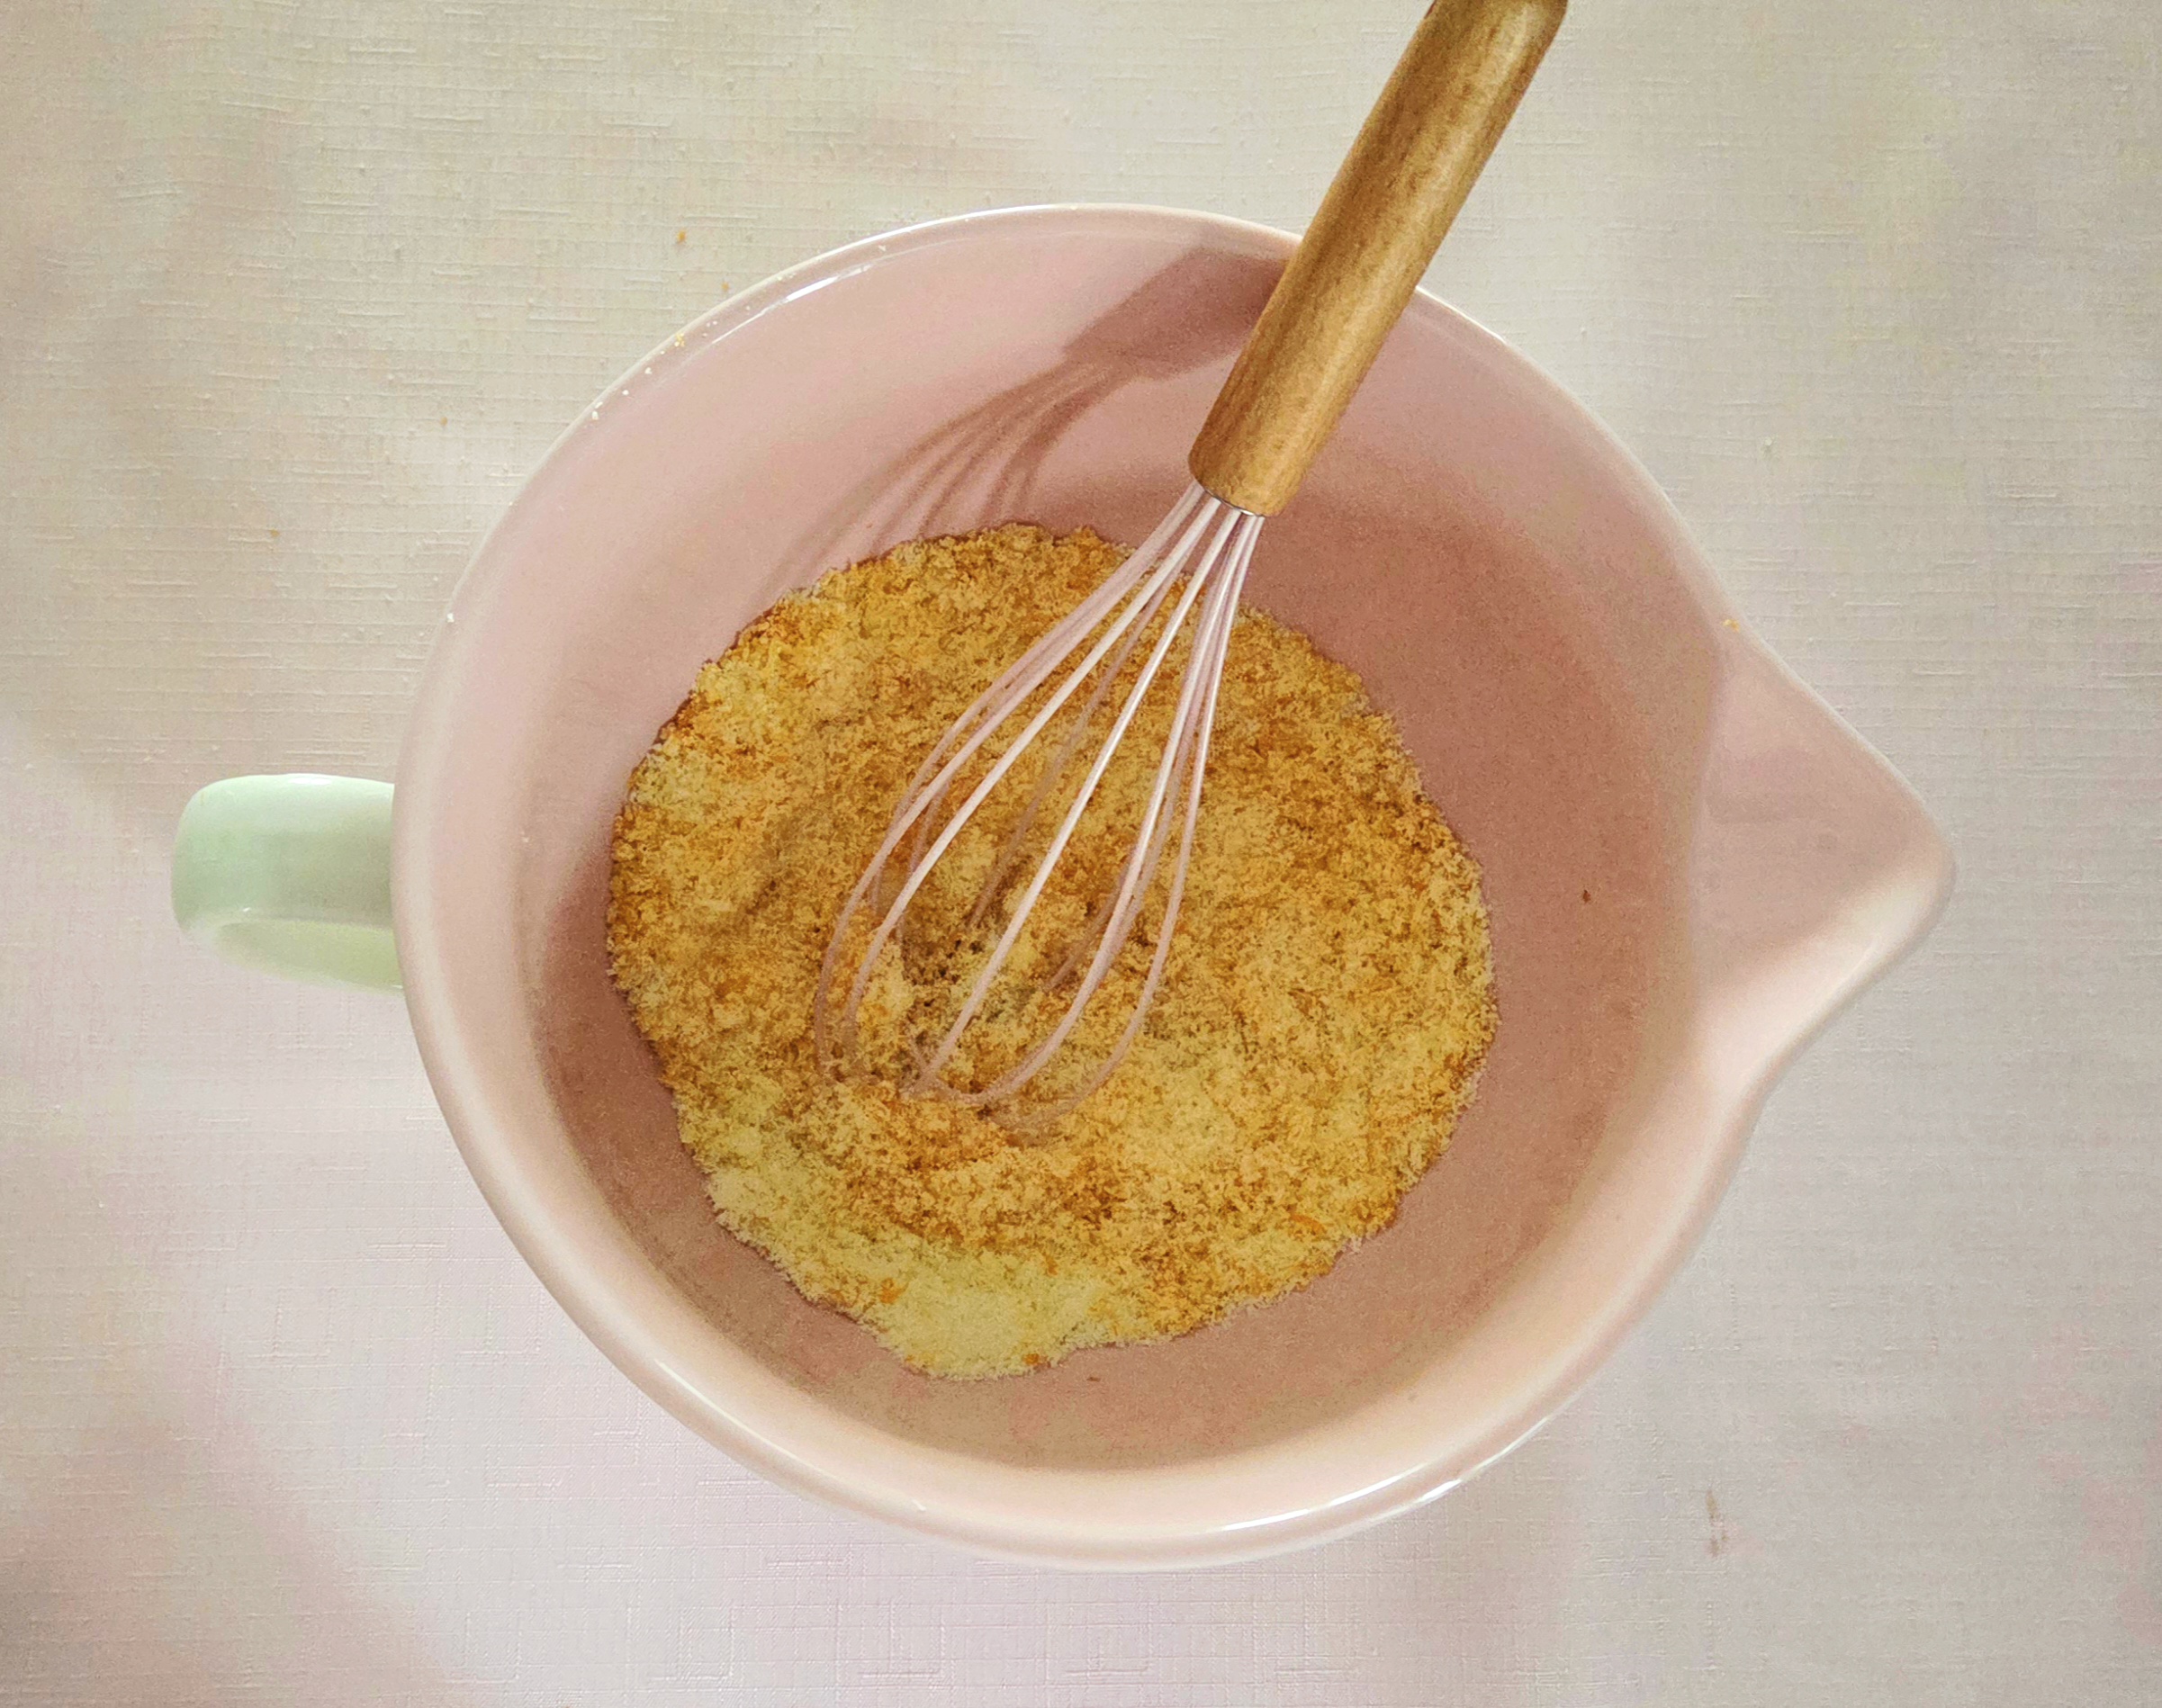
While the dough proofs, prepare the filling. In a medium mixing bowl, add the sugar and grate the zest of two oranges directly into it. Take care to only grate the outermost layer of the orange into the sugar, that’s where all the good flavor it. If you’re grating white, you’ve reached the bitter, bitter pith. Definitely not what we’re looking for here. Whisk the sugar and zest together, and allow it to sit for 5 minutes before continuing on. Allowing the sugar and zest this alone time together will draw out the natural oils from the zest into the sugar, making for a much stronger orange flavor in the filling.
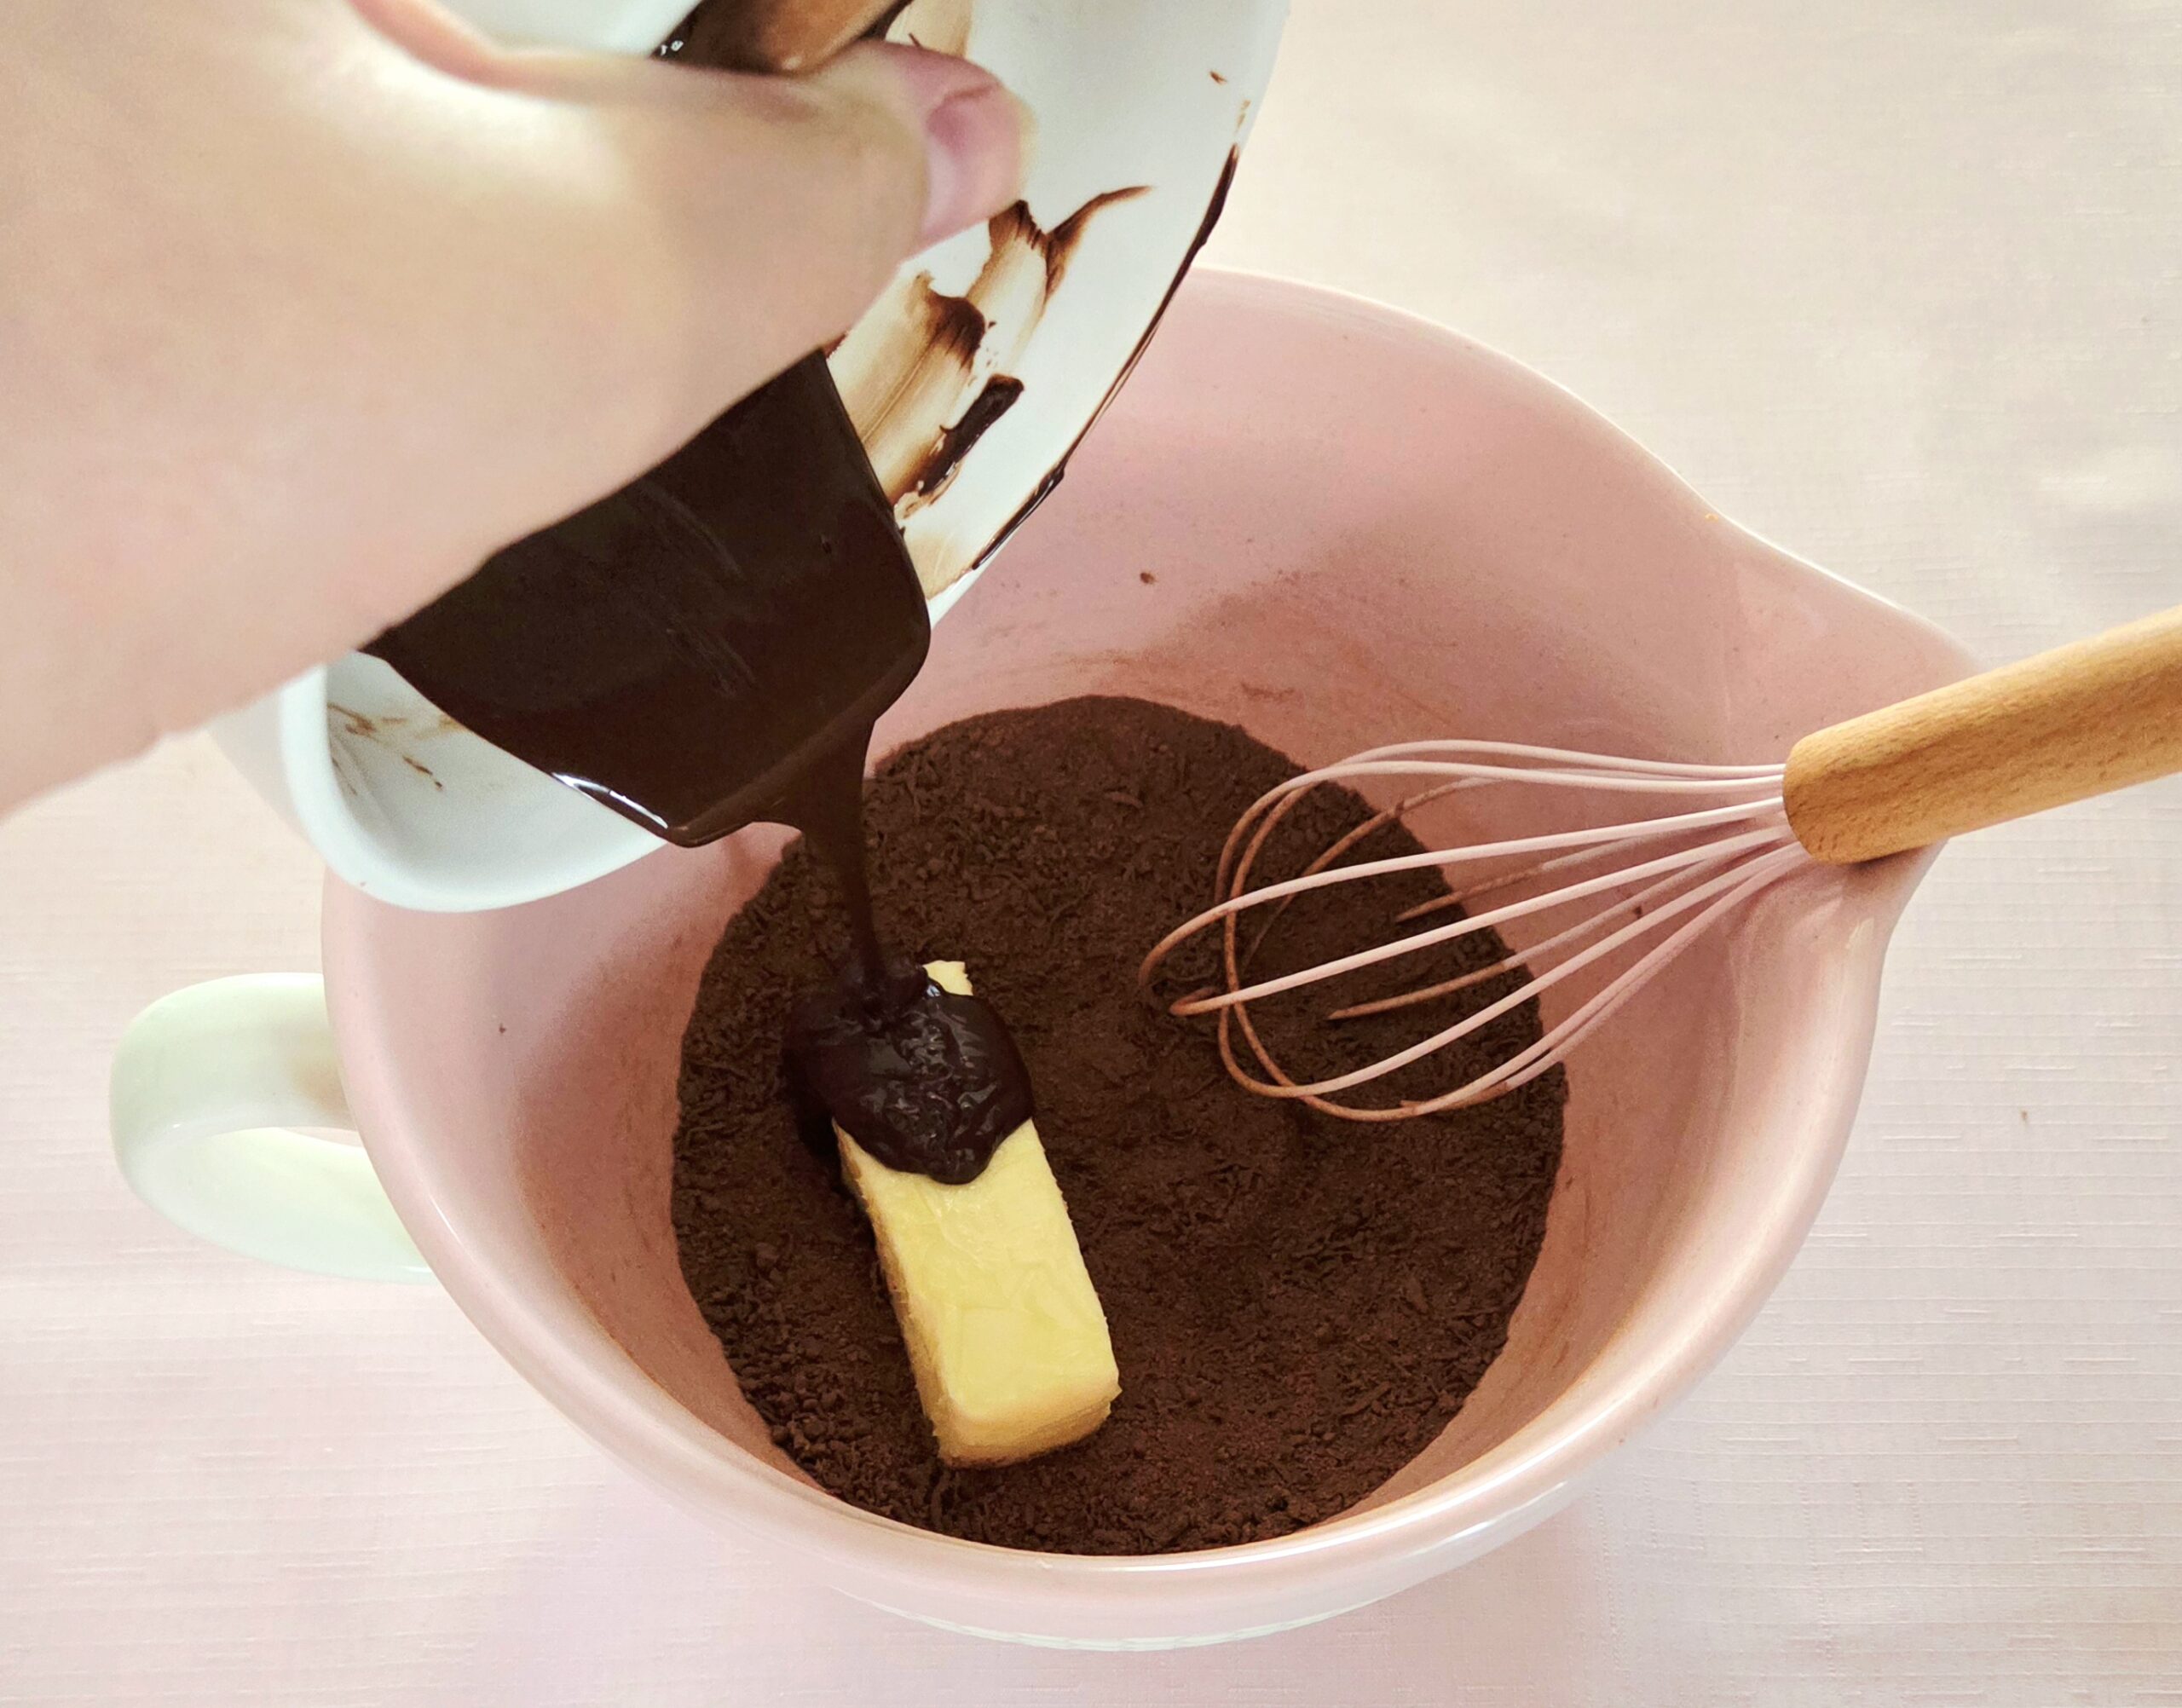
As the orange sugar sits, melt the chocolate in 30 second increments in a small microwavable bowl, mixing with a spoon or rubber spatula in between. Set this aside to cool.
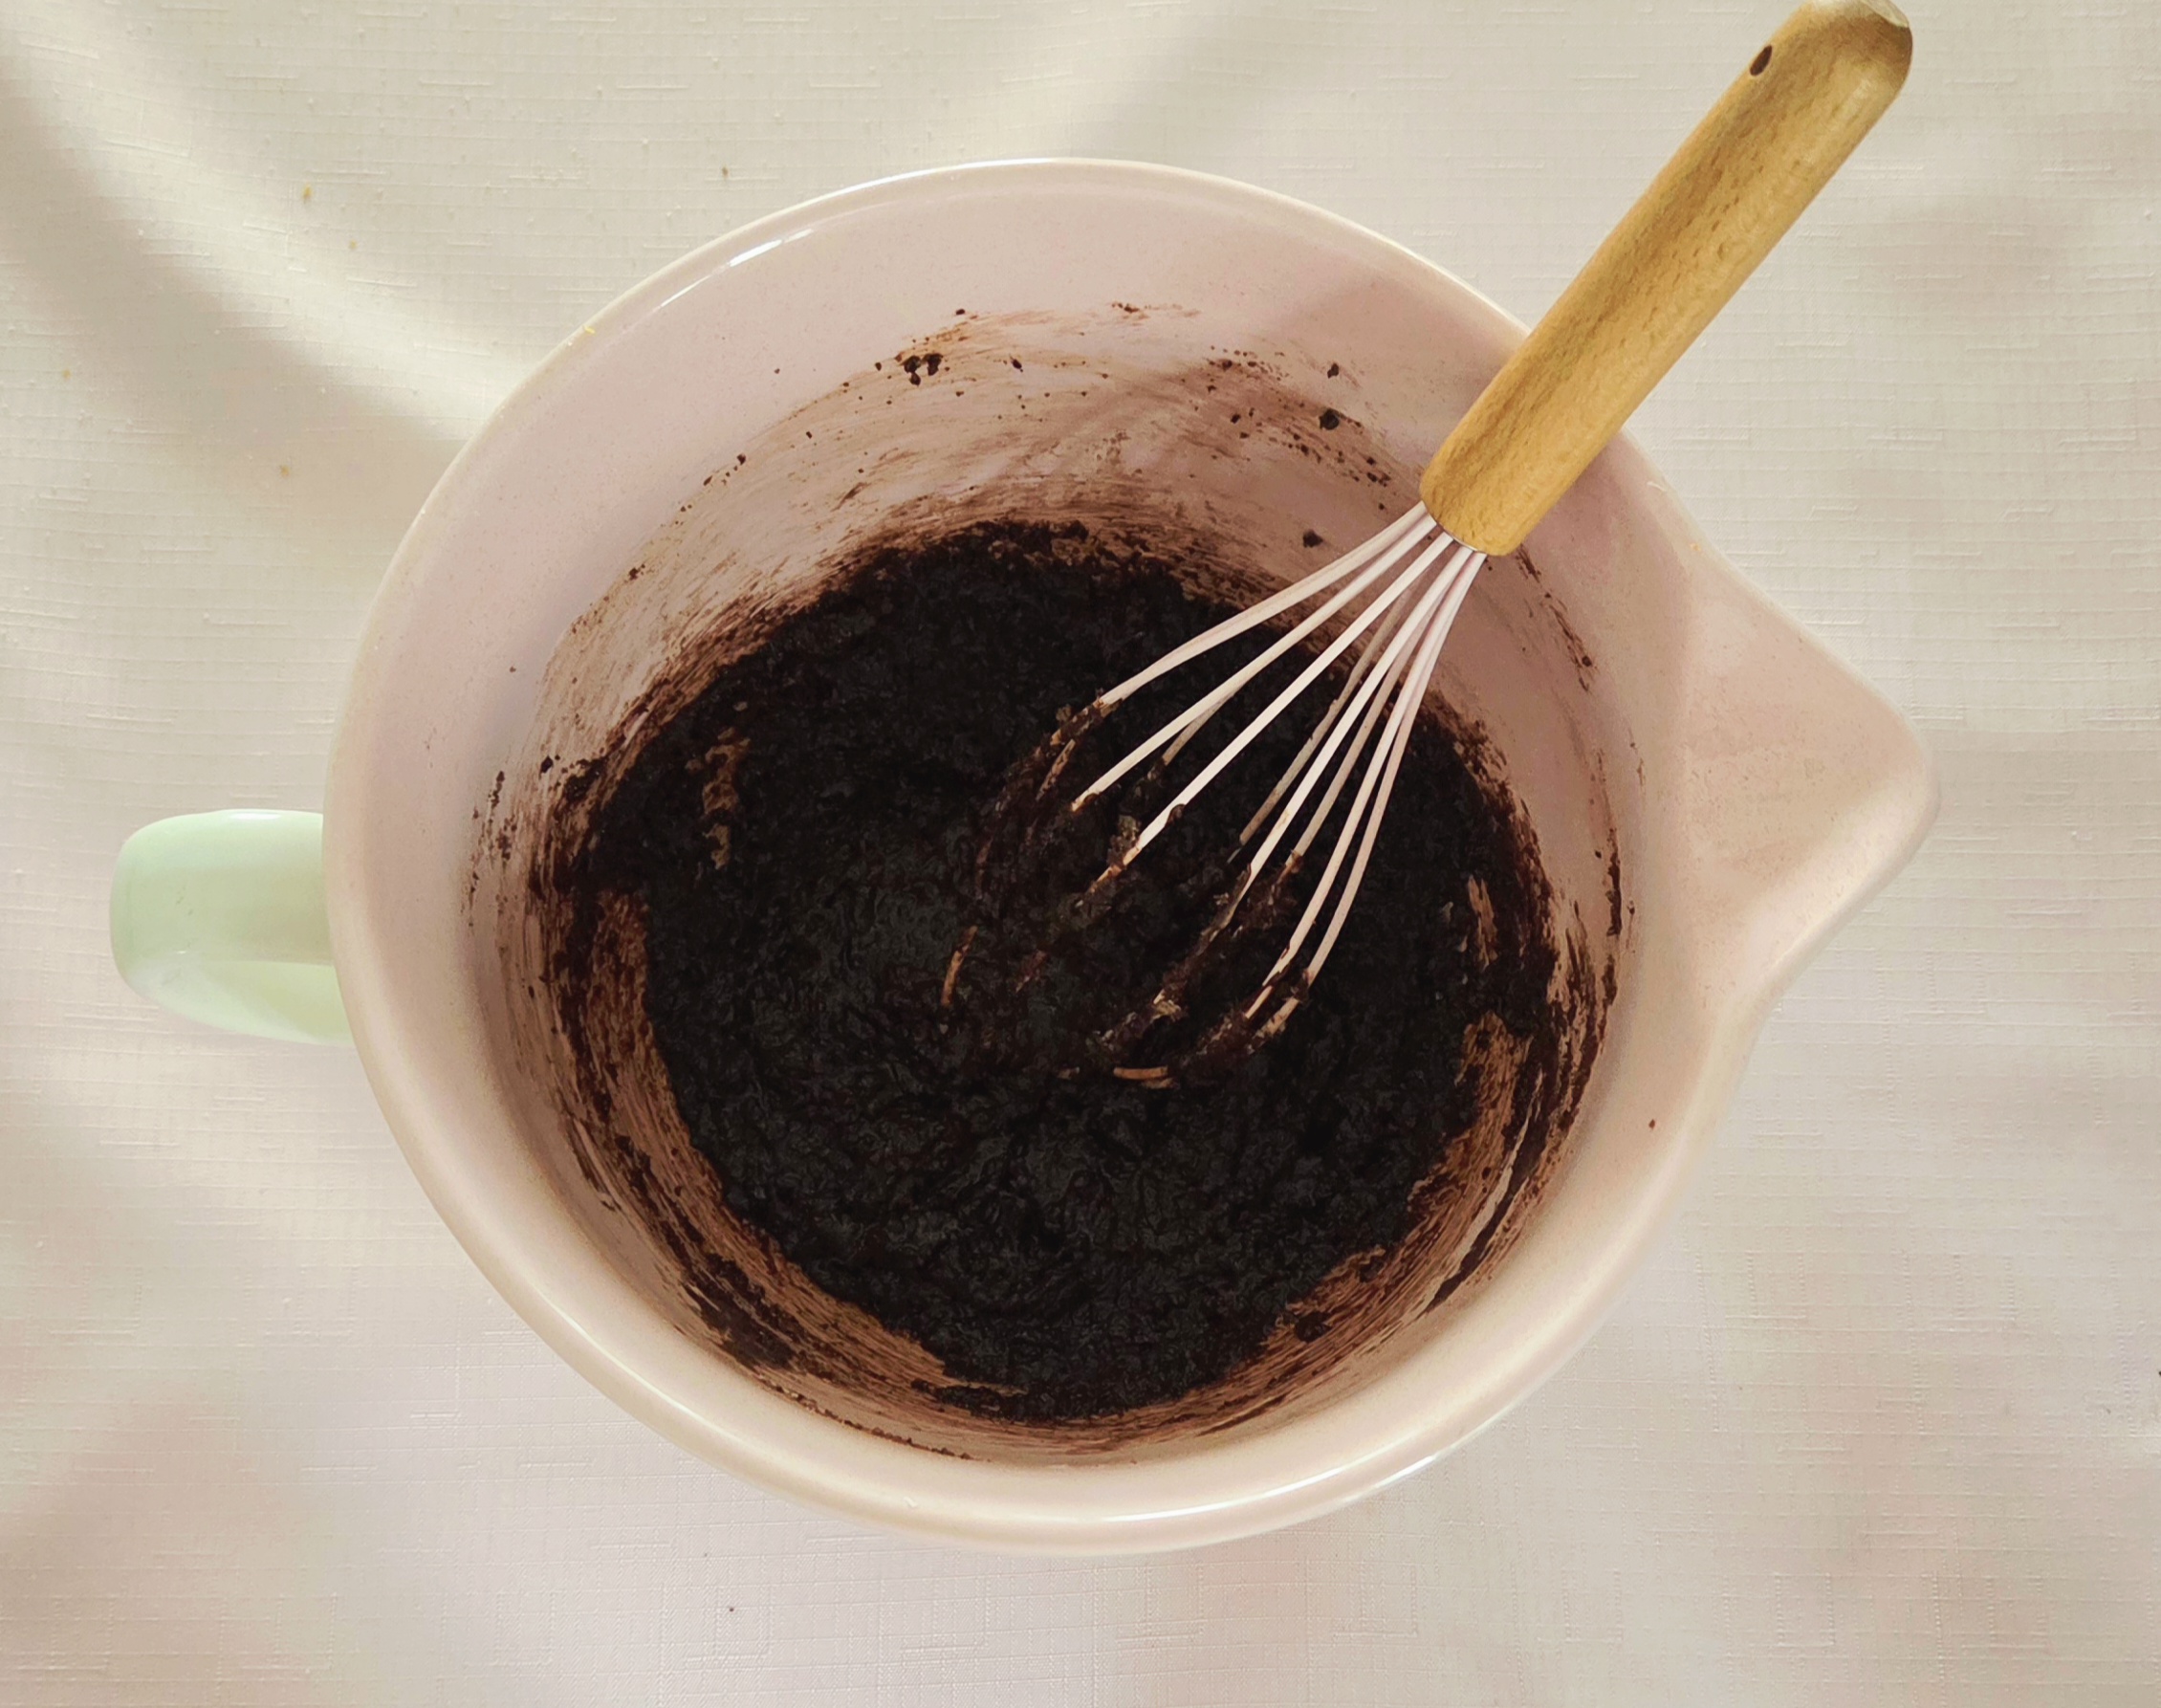
To the orange sugar, sift in the cocoa powder then add the cinnamon, clove, allspice, and salt. Whisk them all together. Add softened butter and the melted chocolate into the orange spice sugar, and whisk them together until combined. Set the filling aside.
The Glaze
Also while the dough proofs, prepare the glaze. This is essentially orange simple syrup, so it comes together very easily and quickly! But yes, I’m asking you to slice and juice even more oranges for it. Slice 4-5 oranges and squeeze out ½ cup worth of juice.
Pour the juice into a small saucepan and add the sugar to the juice. Gently mix the two together, just until the sugar is wet, and place the pan over medium heat. Bring the mixture to a boil, then immediately remove the pan from the heat. Set it aside and allow it to cool until you need it later on.

Time to Assemble
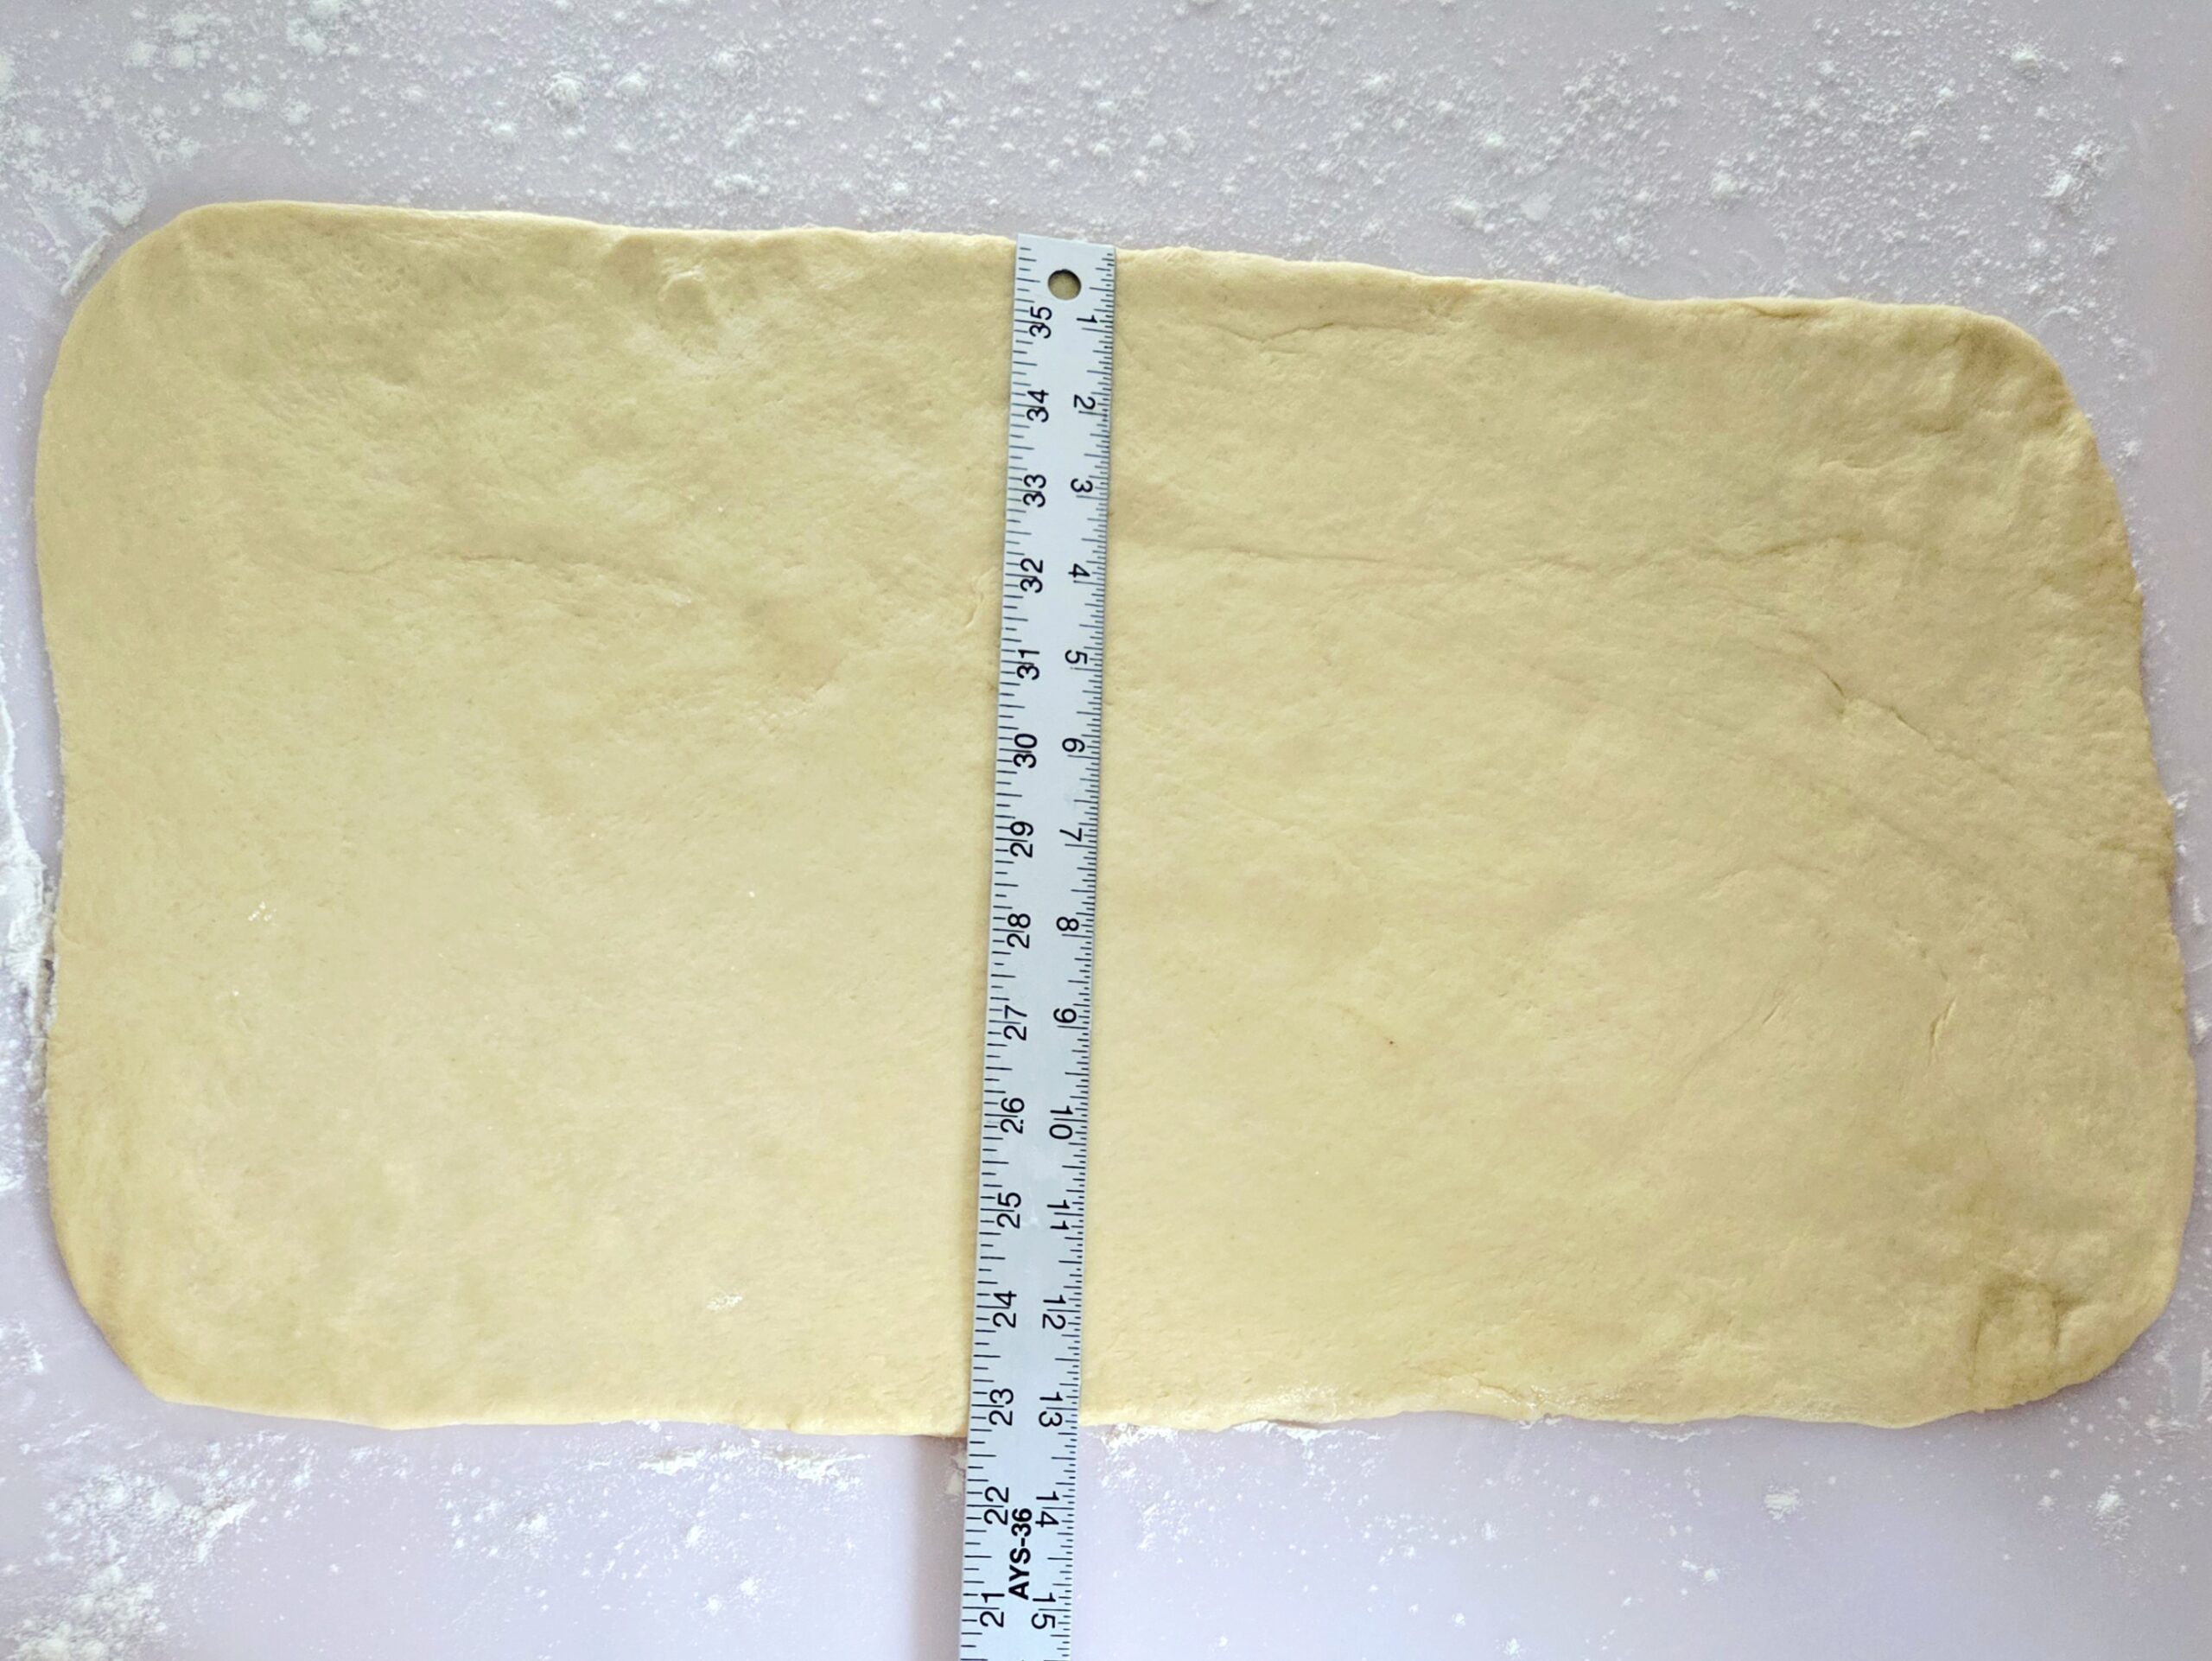
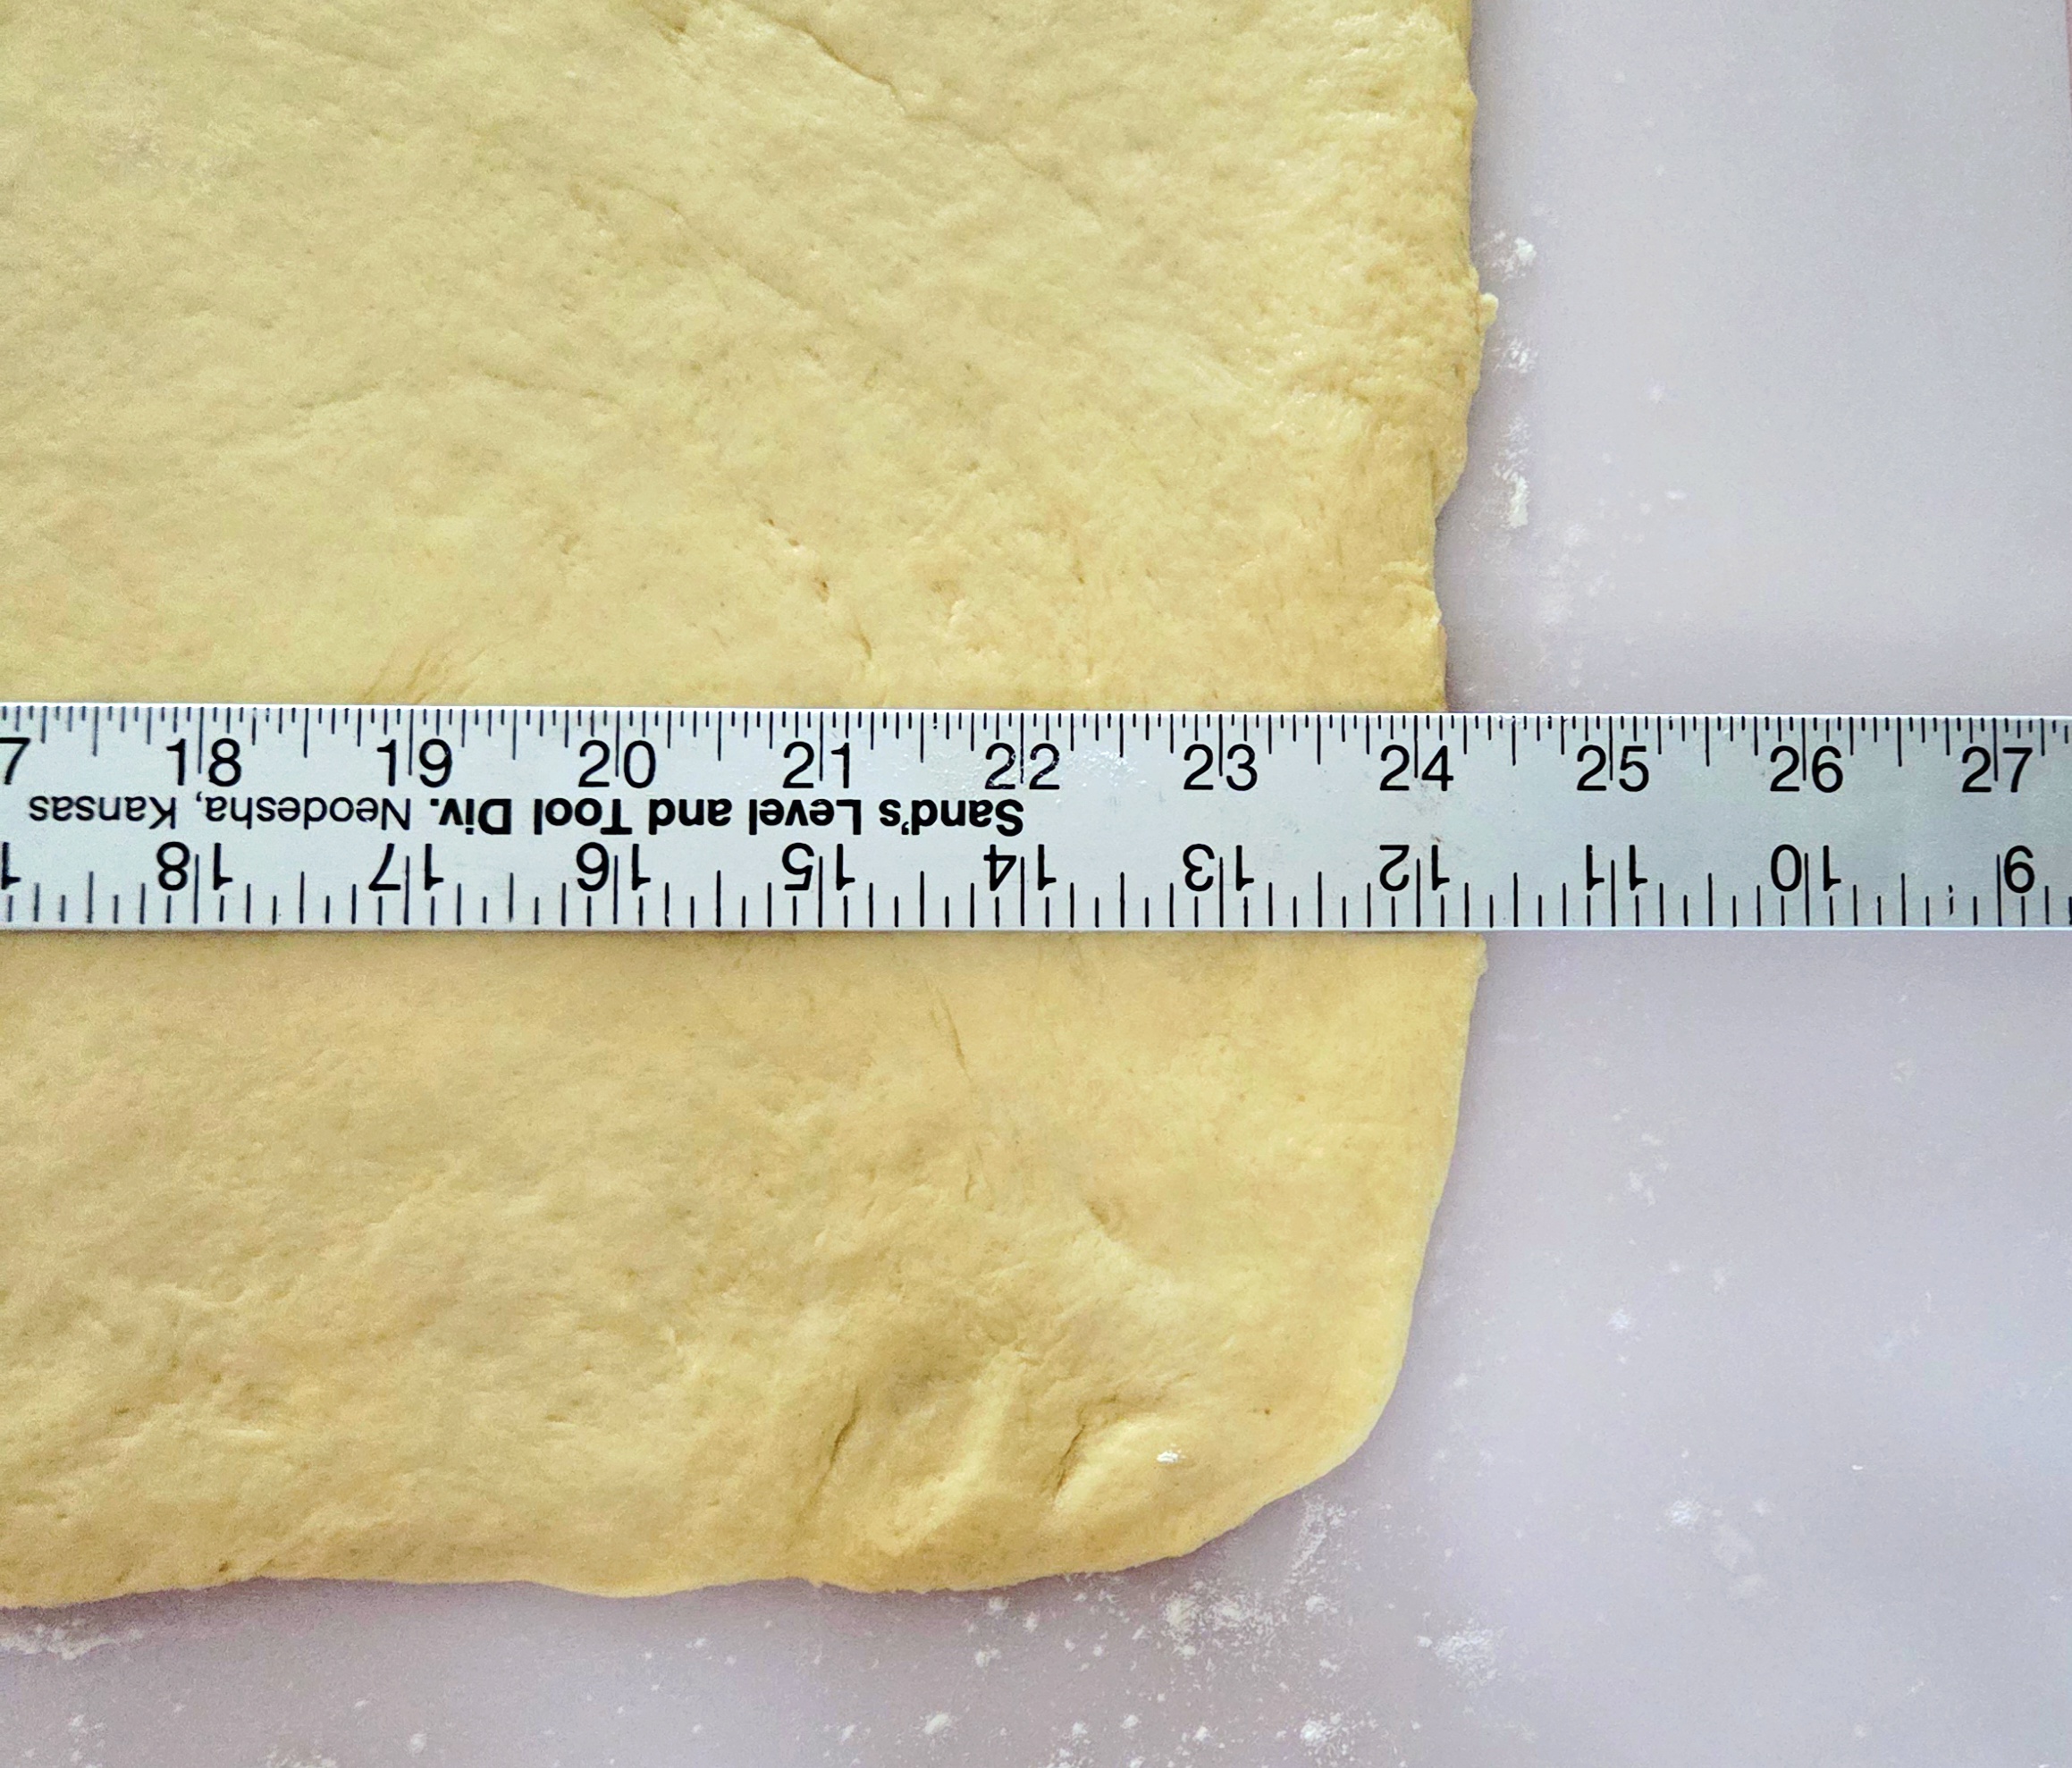
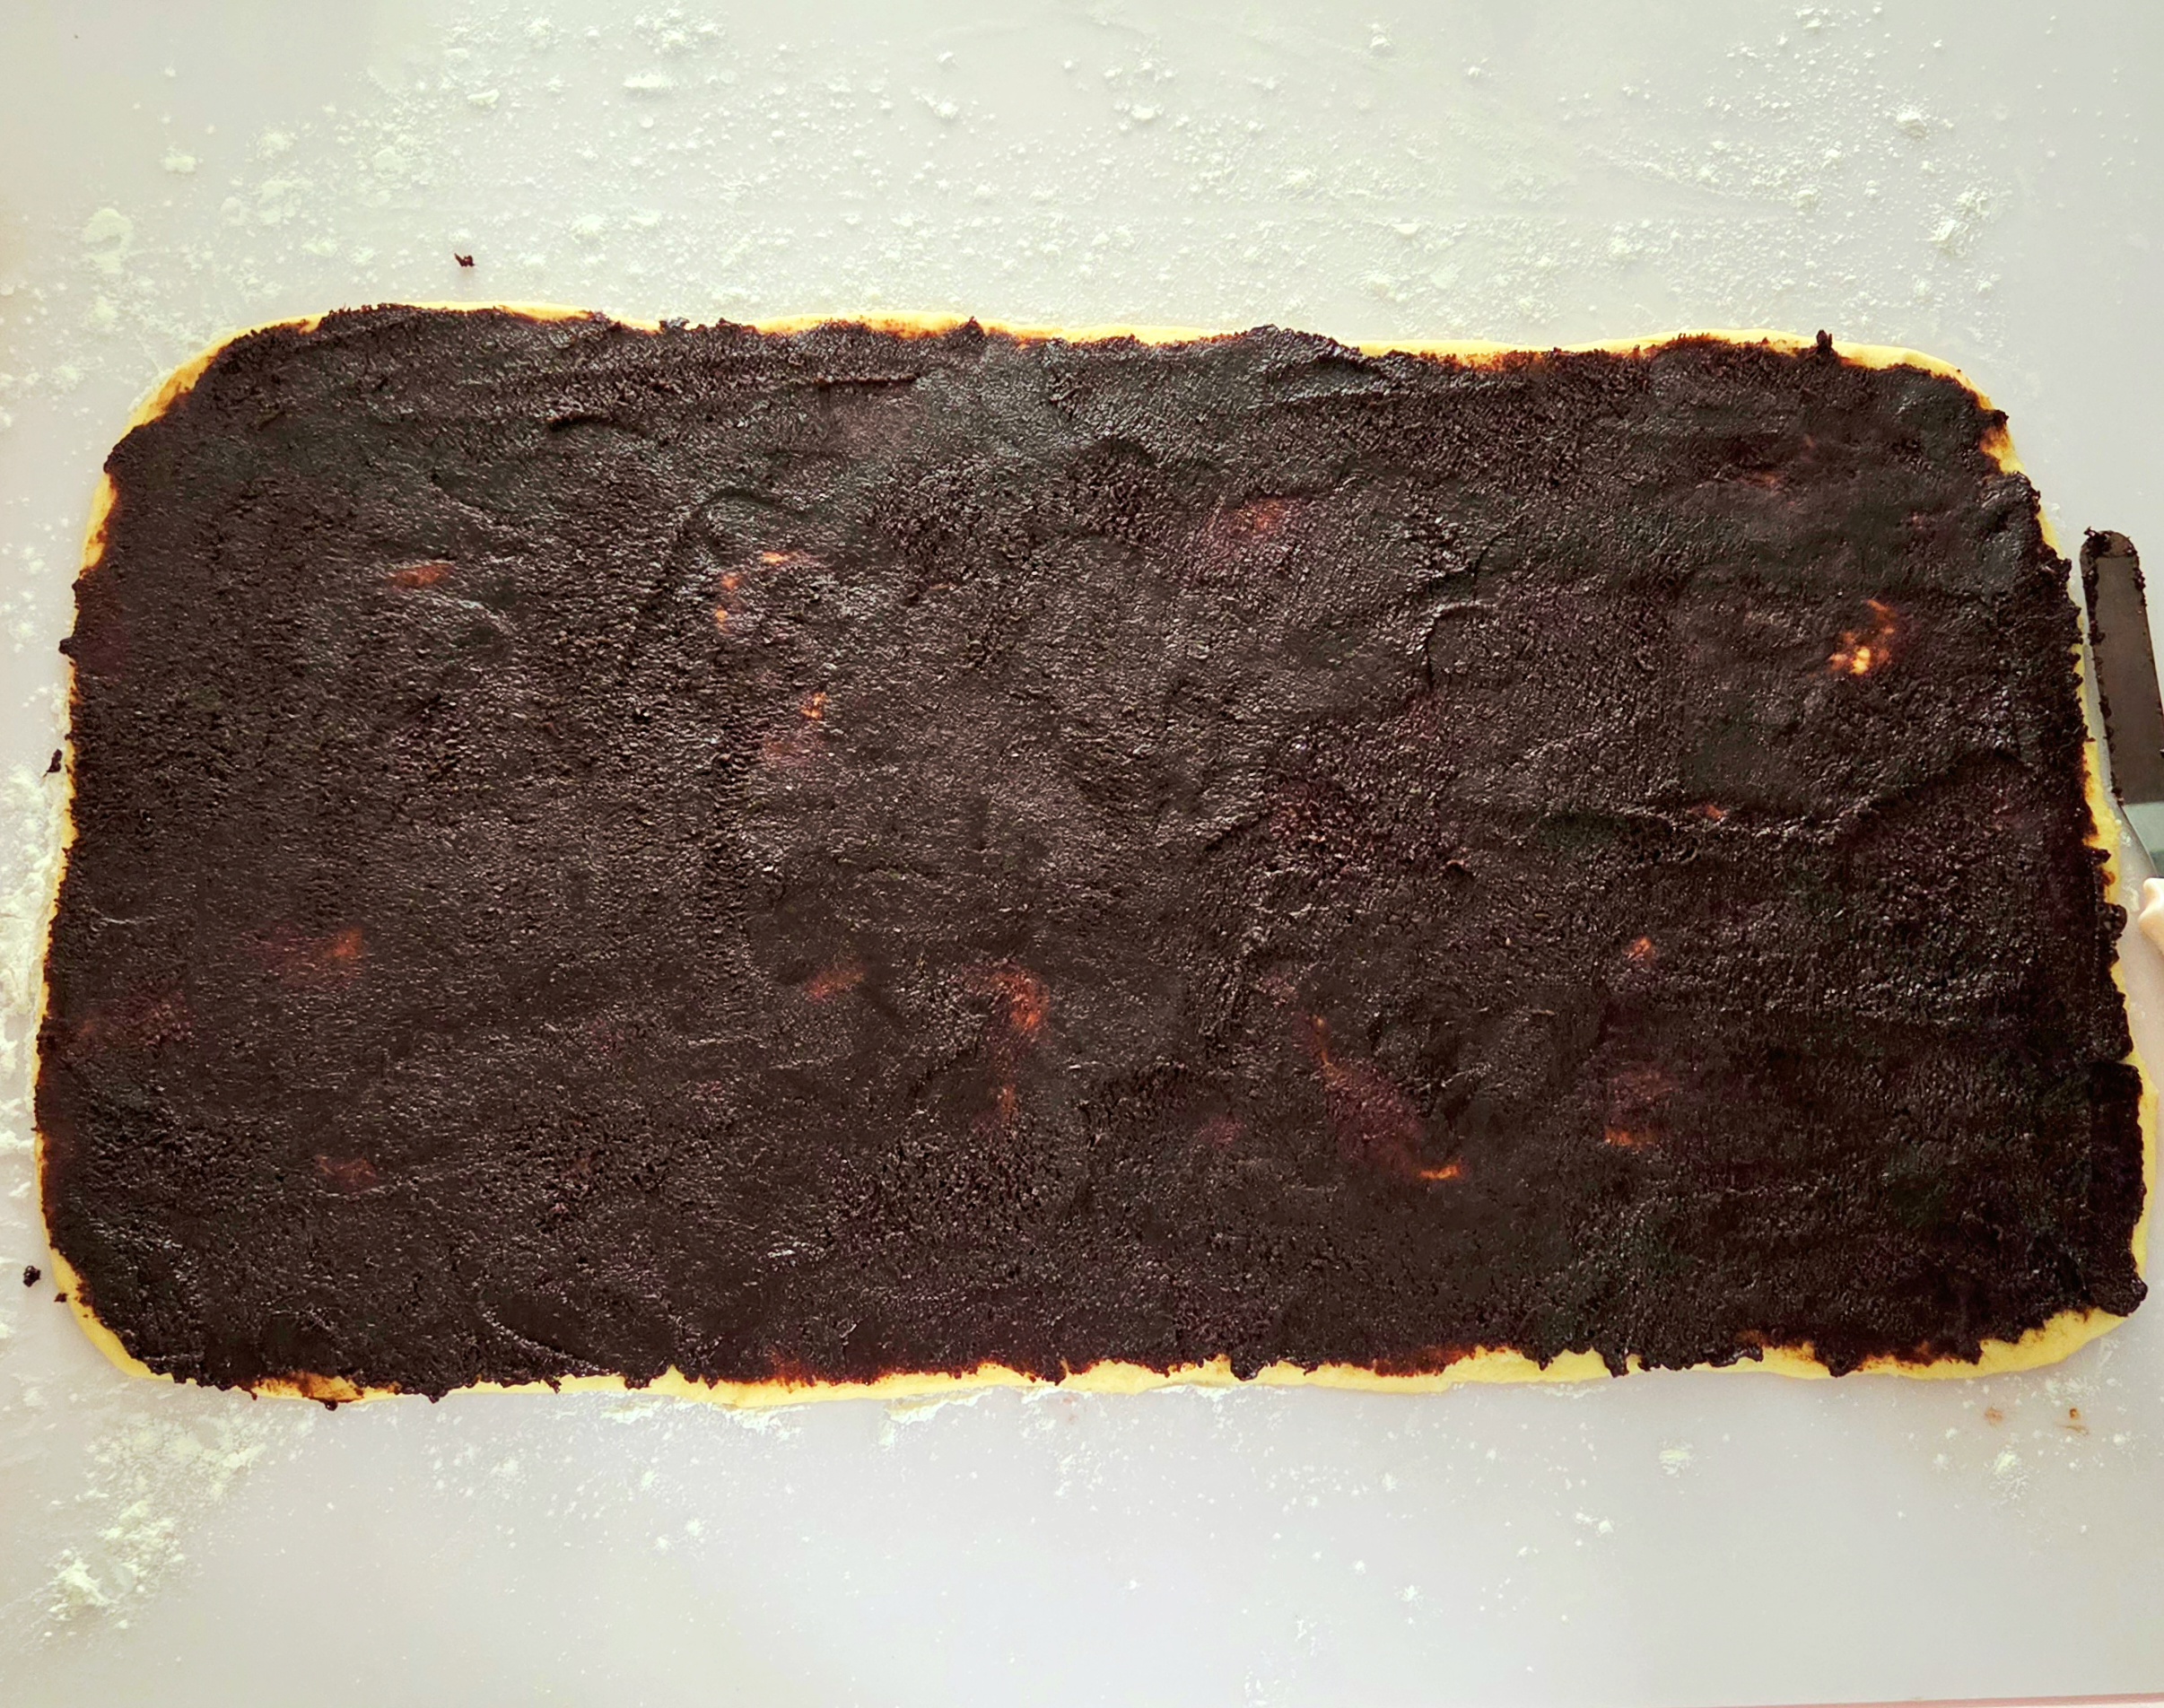
Now that the dough has proofed, it’s time to assemble everything! On a clean counter, lightly sprinkle flour and place the proofed dough in the center. Sprinkle more flour onto the dough and roll it out to a 13 x 24 inch rectangle. If it starts to stick to either the rolling pin or the counter, add a bit more flour and continue on.
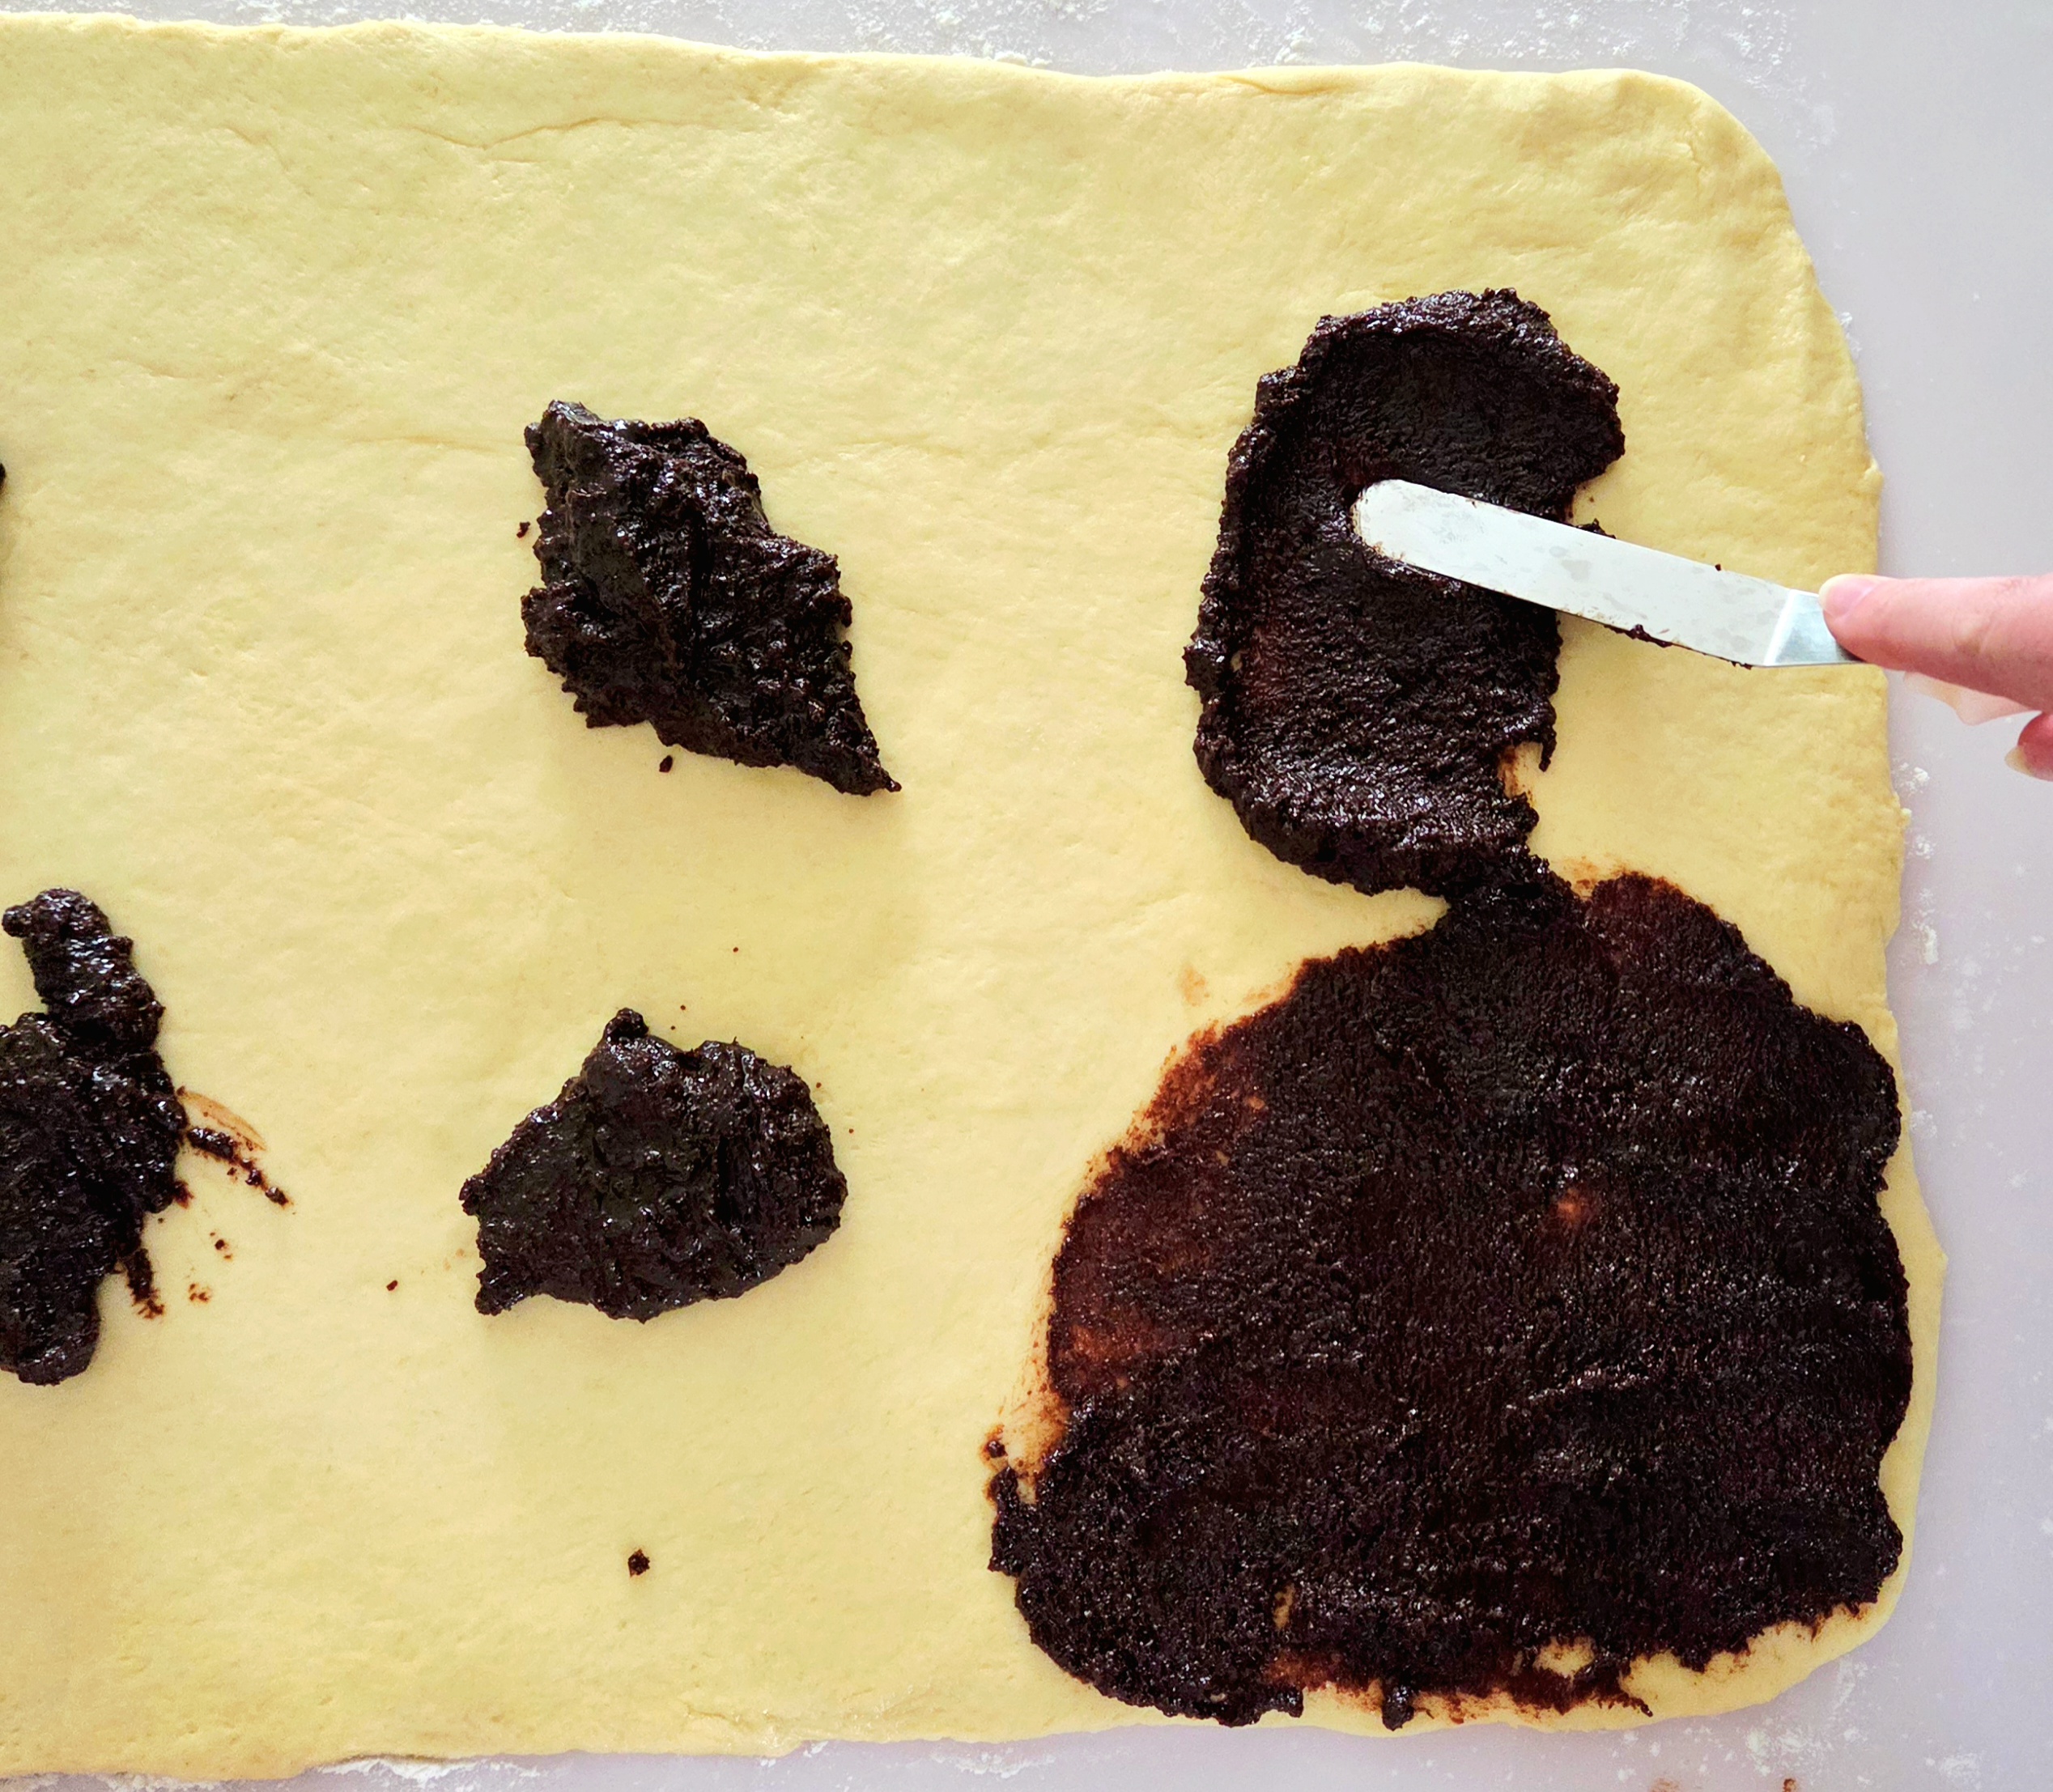
Take the filling and dollop portions over the expanse of the dough. Doing the dollops all over, rather than dumping it all in the center, makes it easier to spread the filling out to cover the entire thing. Using an offset spatula or butter knife, gently spread out the filling so it covers the entirety of the rectangle.
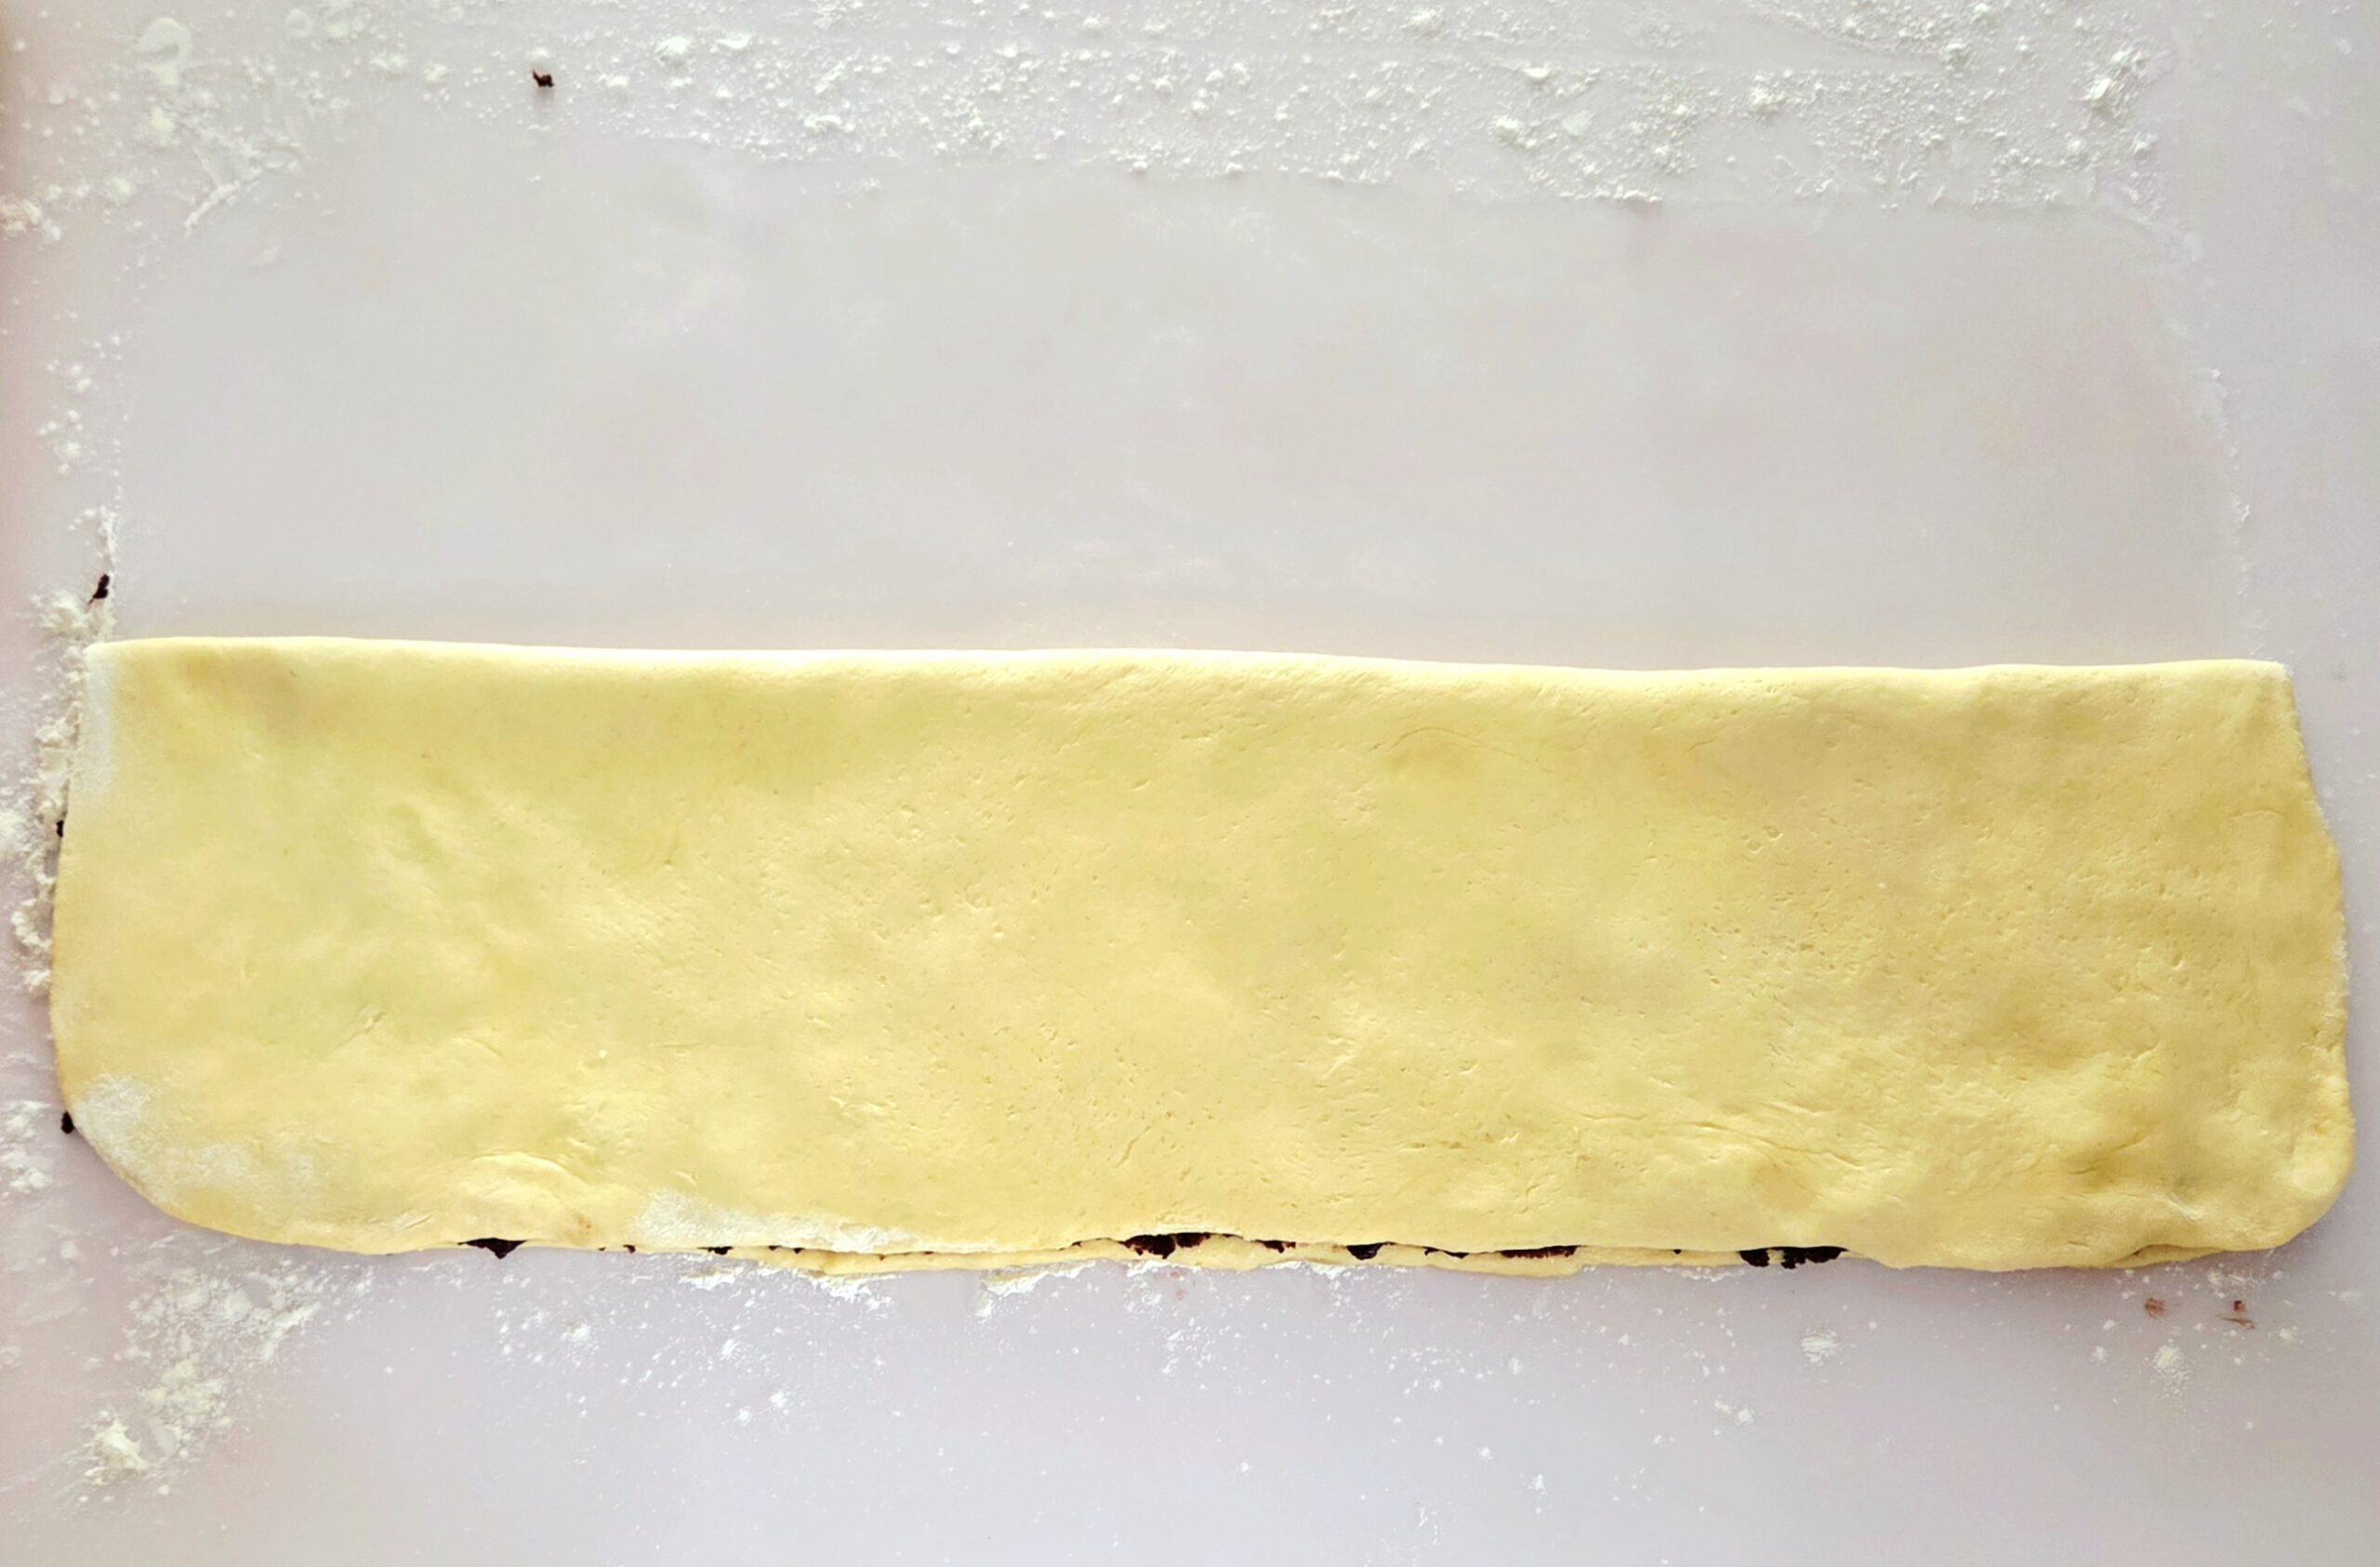
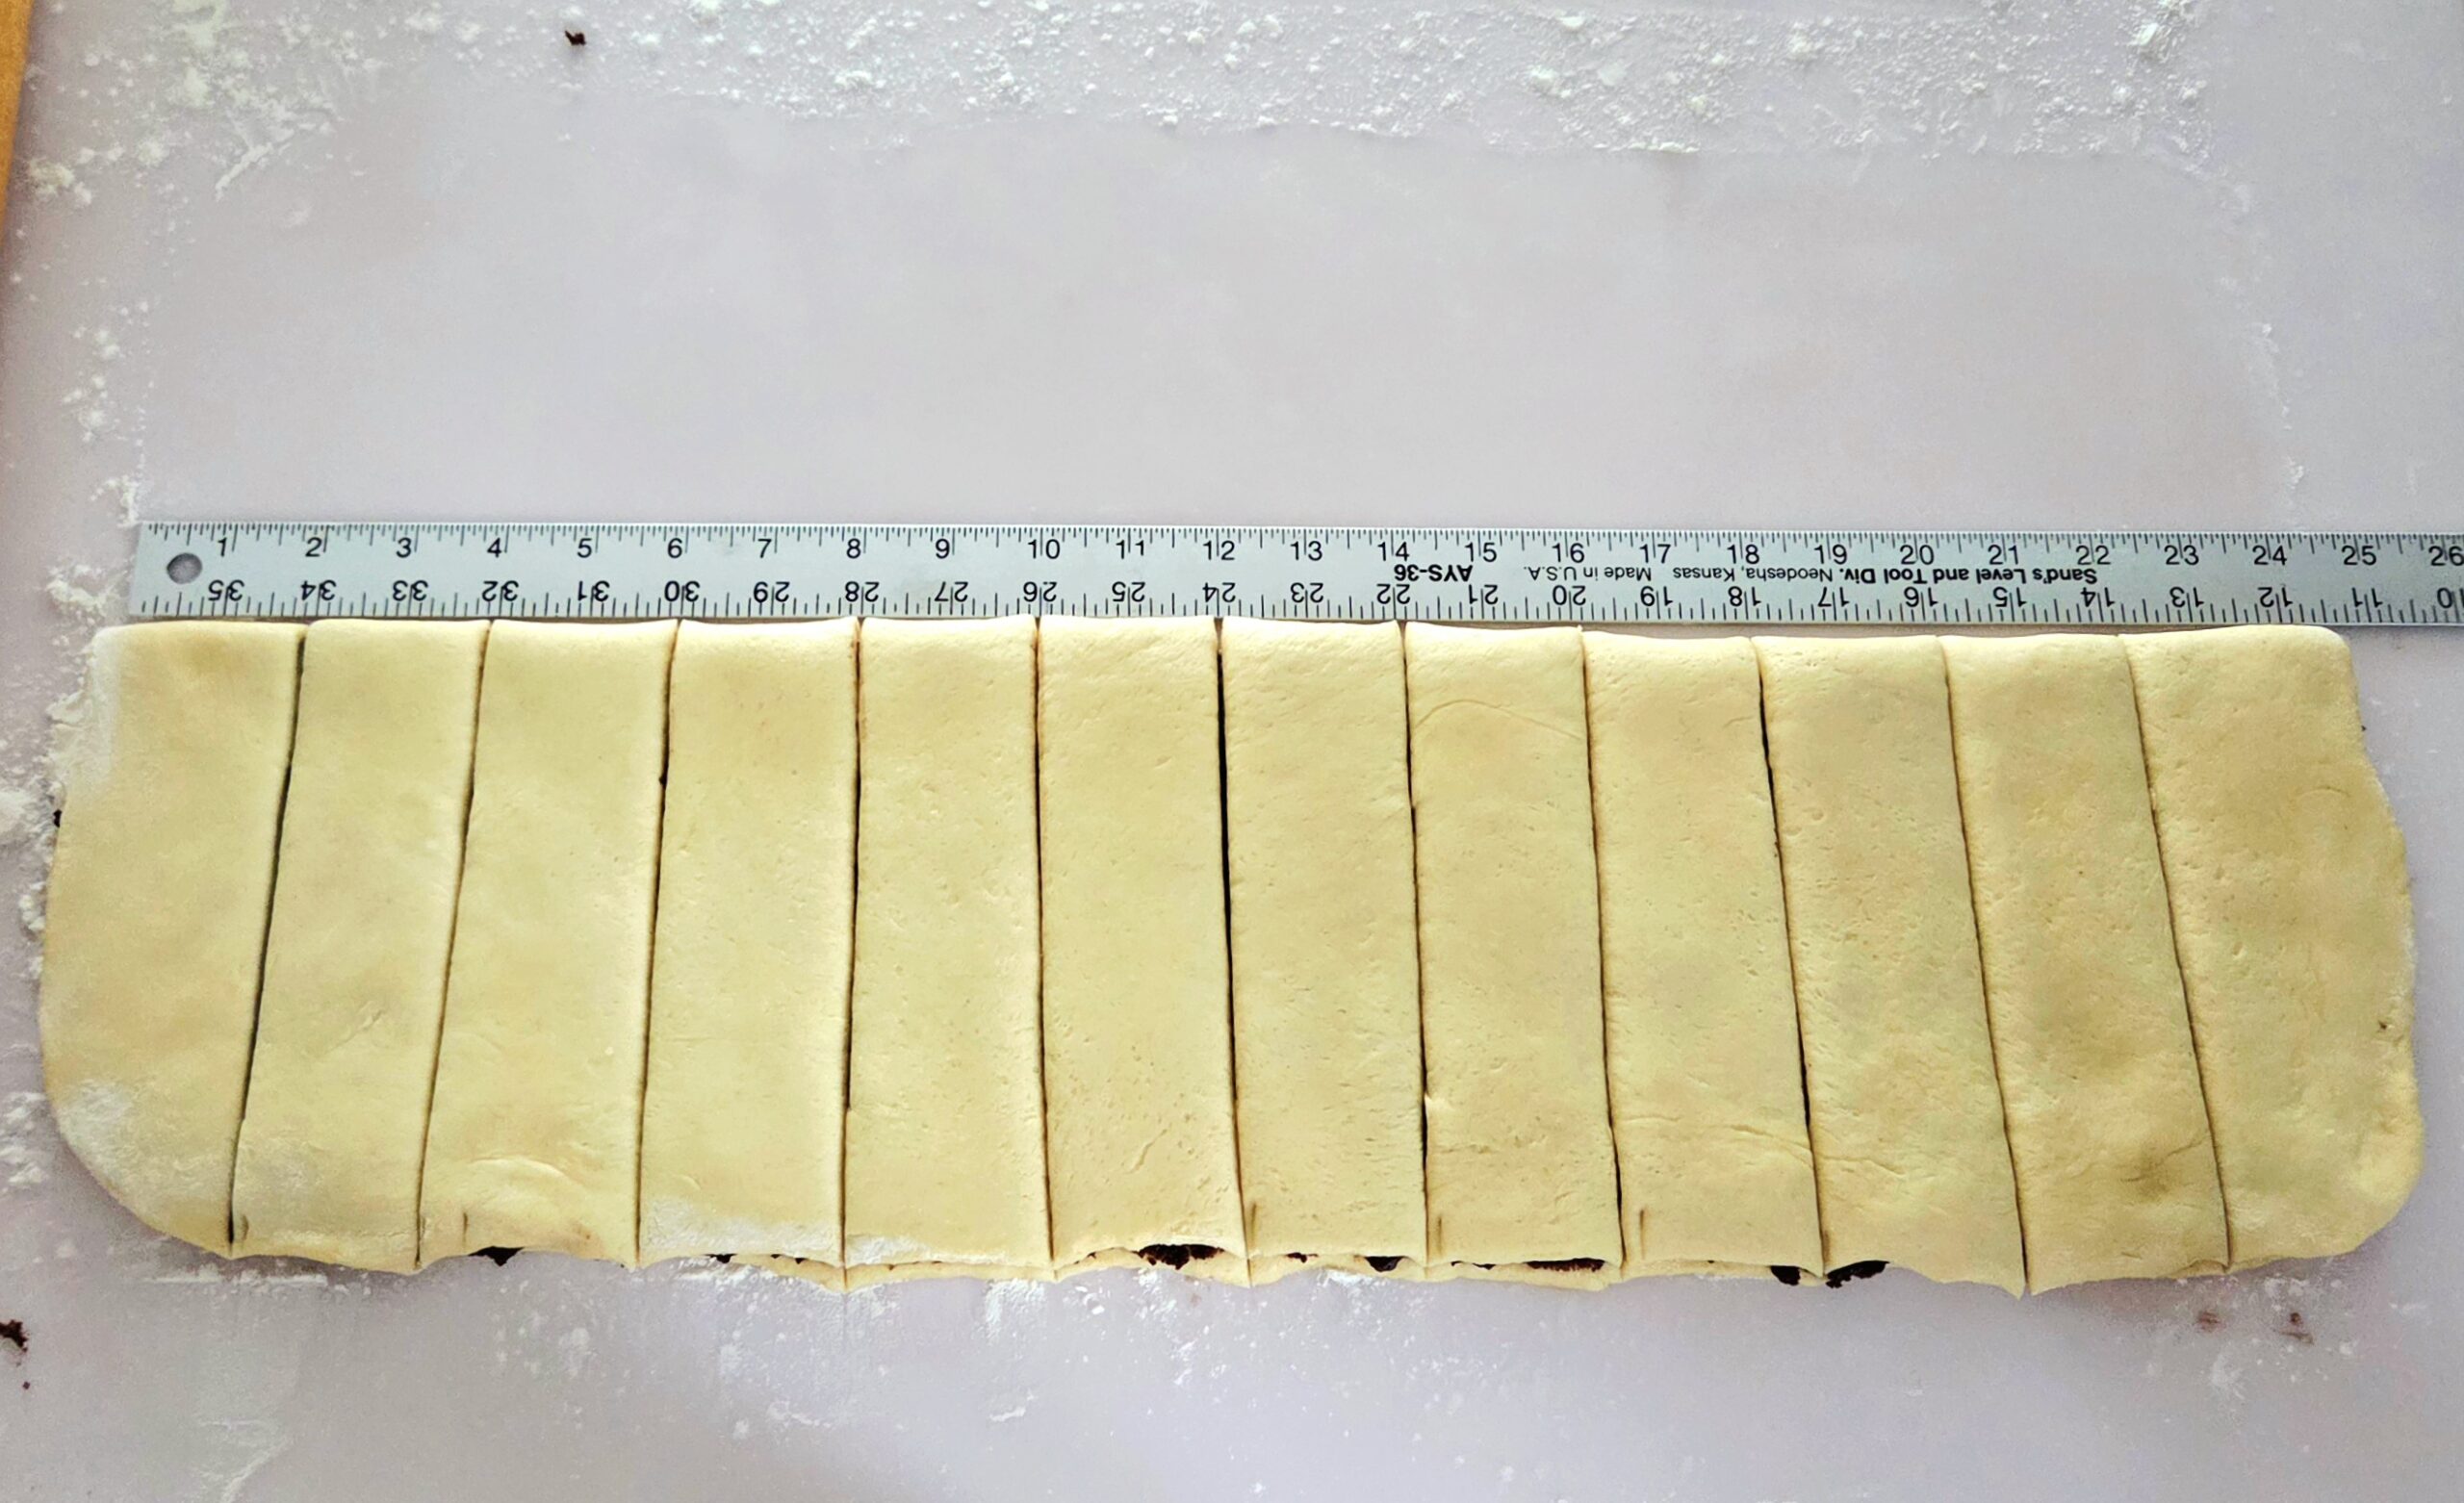
Fold the rectangle in half width-wise, so it now measures about 6 x 24 inches. Using either a chef’s knife or a bench scraper, cut strips of dough every two inches, so you end up with 12 strips. I’m incredibly meticulous, so I measure out every two inches along both the top and the bottom of the rectangle before lining up a bench scraper along both marks and pressing firmly down. It takes an extra minute or two, but it helps keep everything more uniformed.
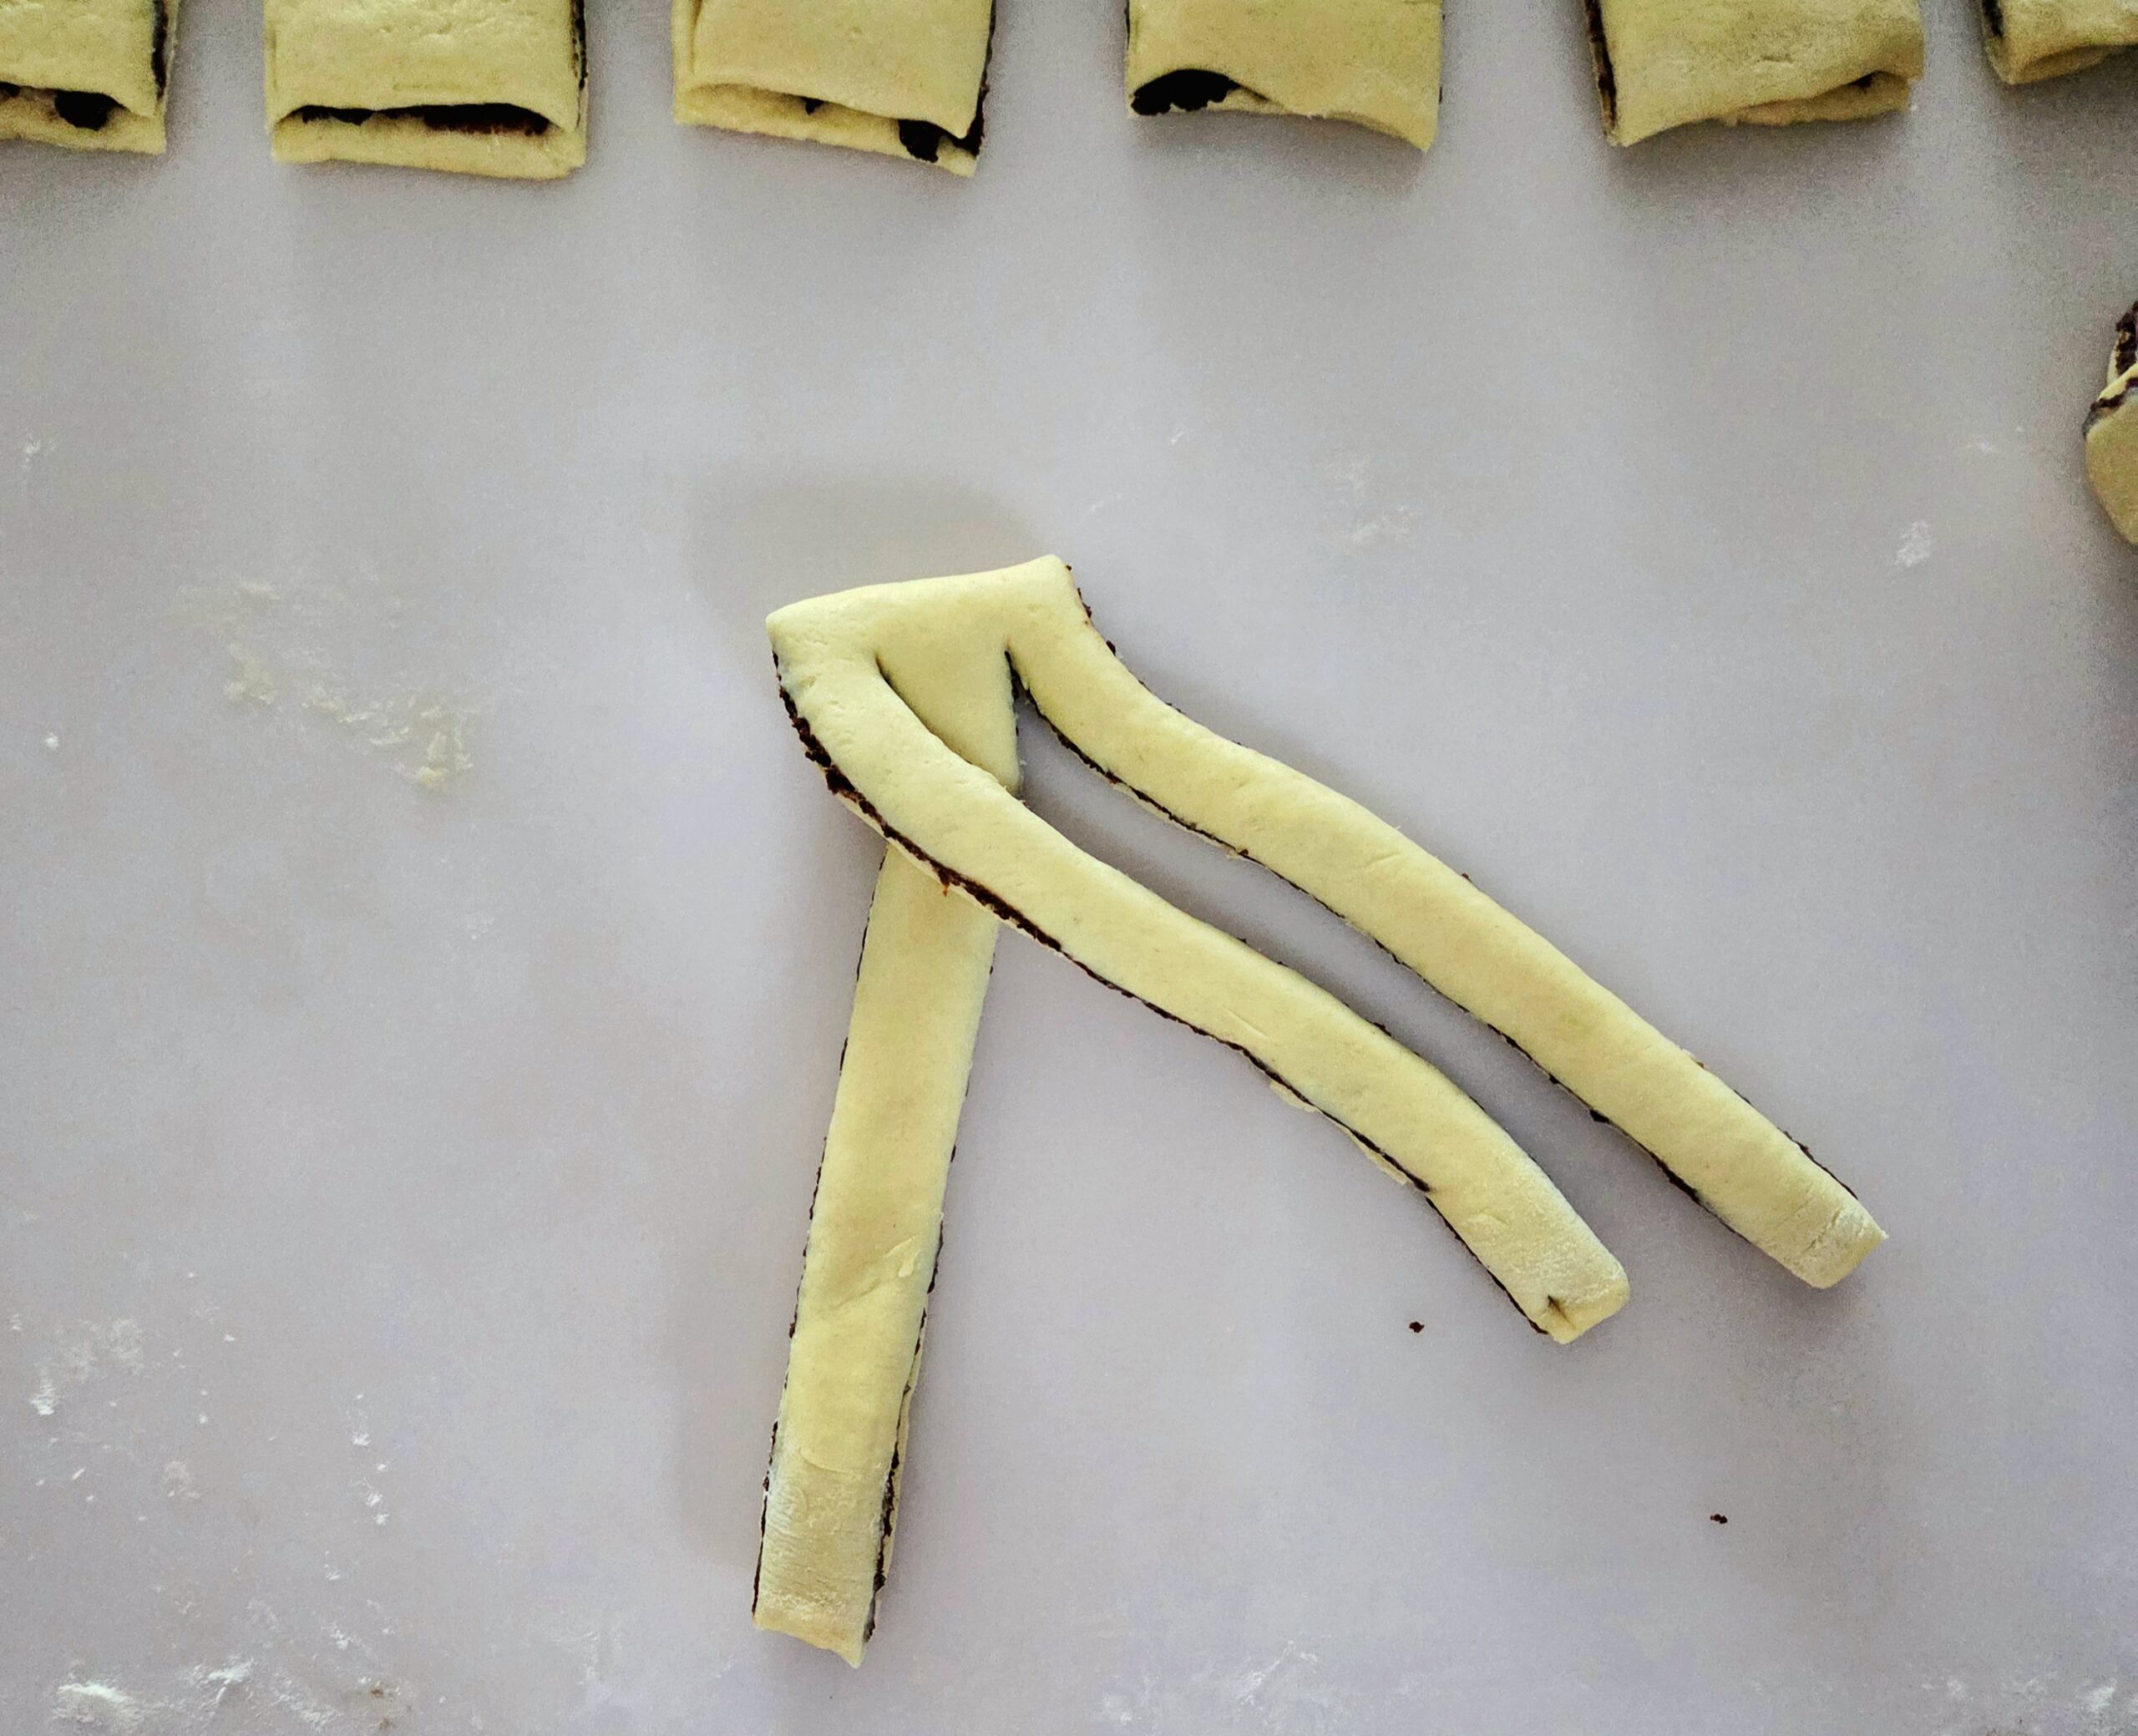
Take a strip of dough and, using the knife or bench scraper, cut the strip into 3 equal strands. Be sure to cut on the open end, NOT the folded end. If you cut the folded end, they’re much more likely to fall apart as you’re working with them. Leave about ½ an inch between the top of the strip and the top of the cut strands, so they all stay attached to the folded end.
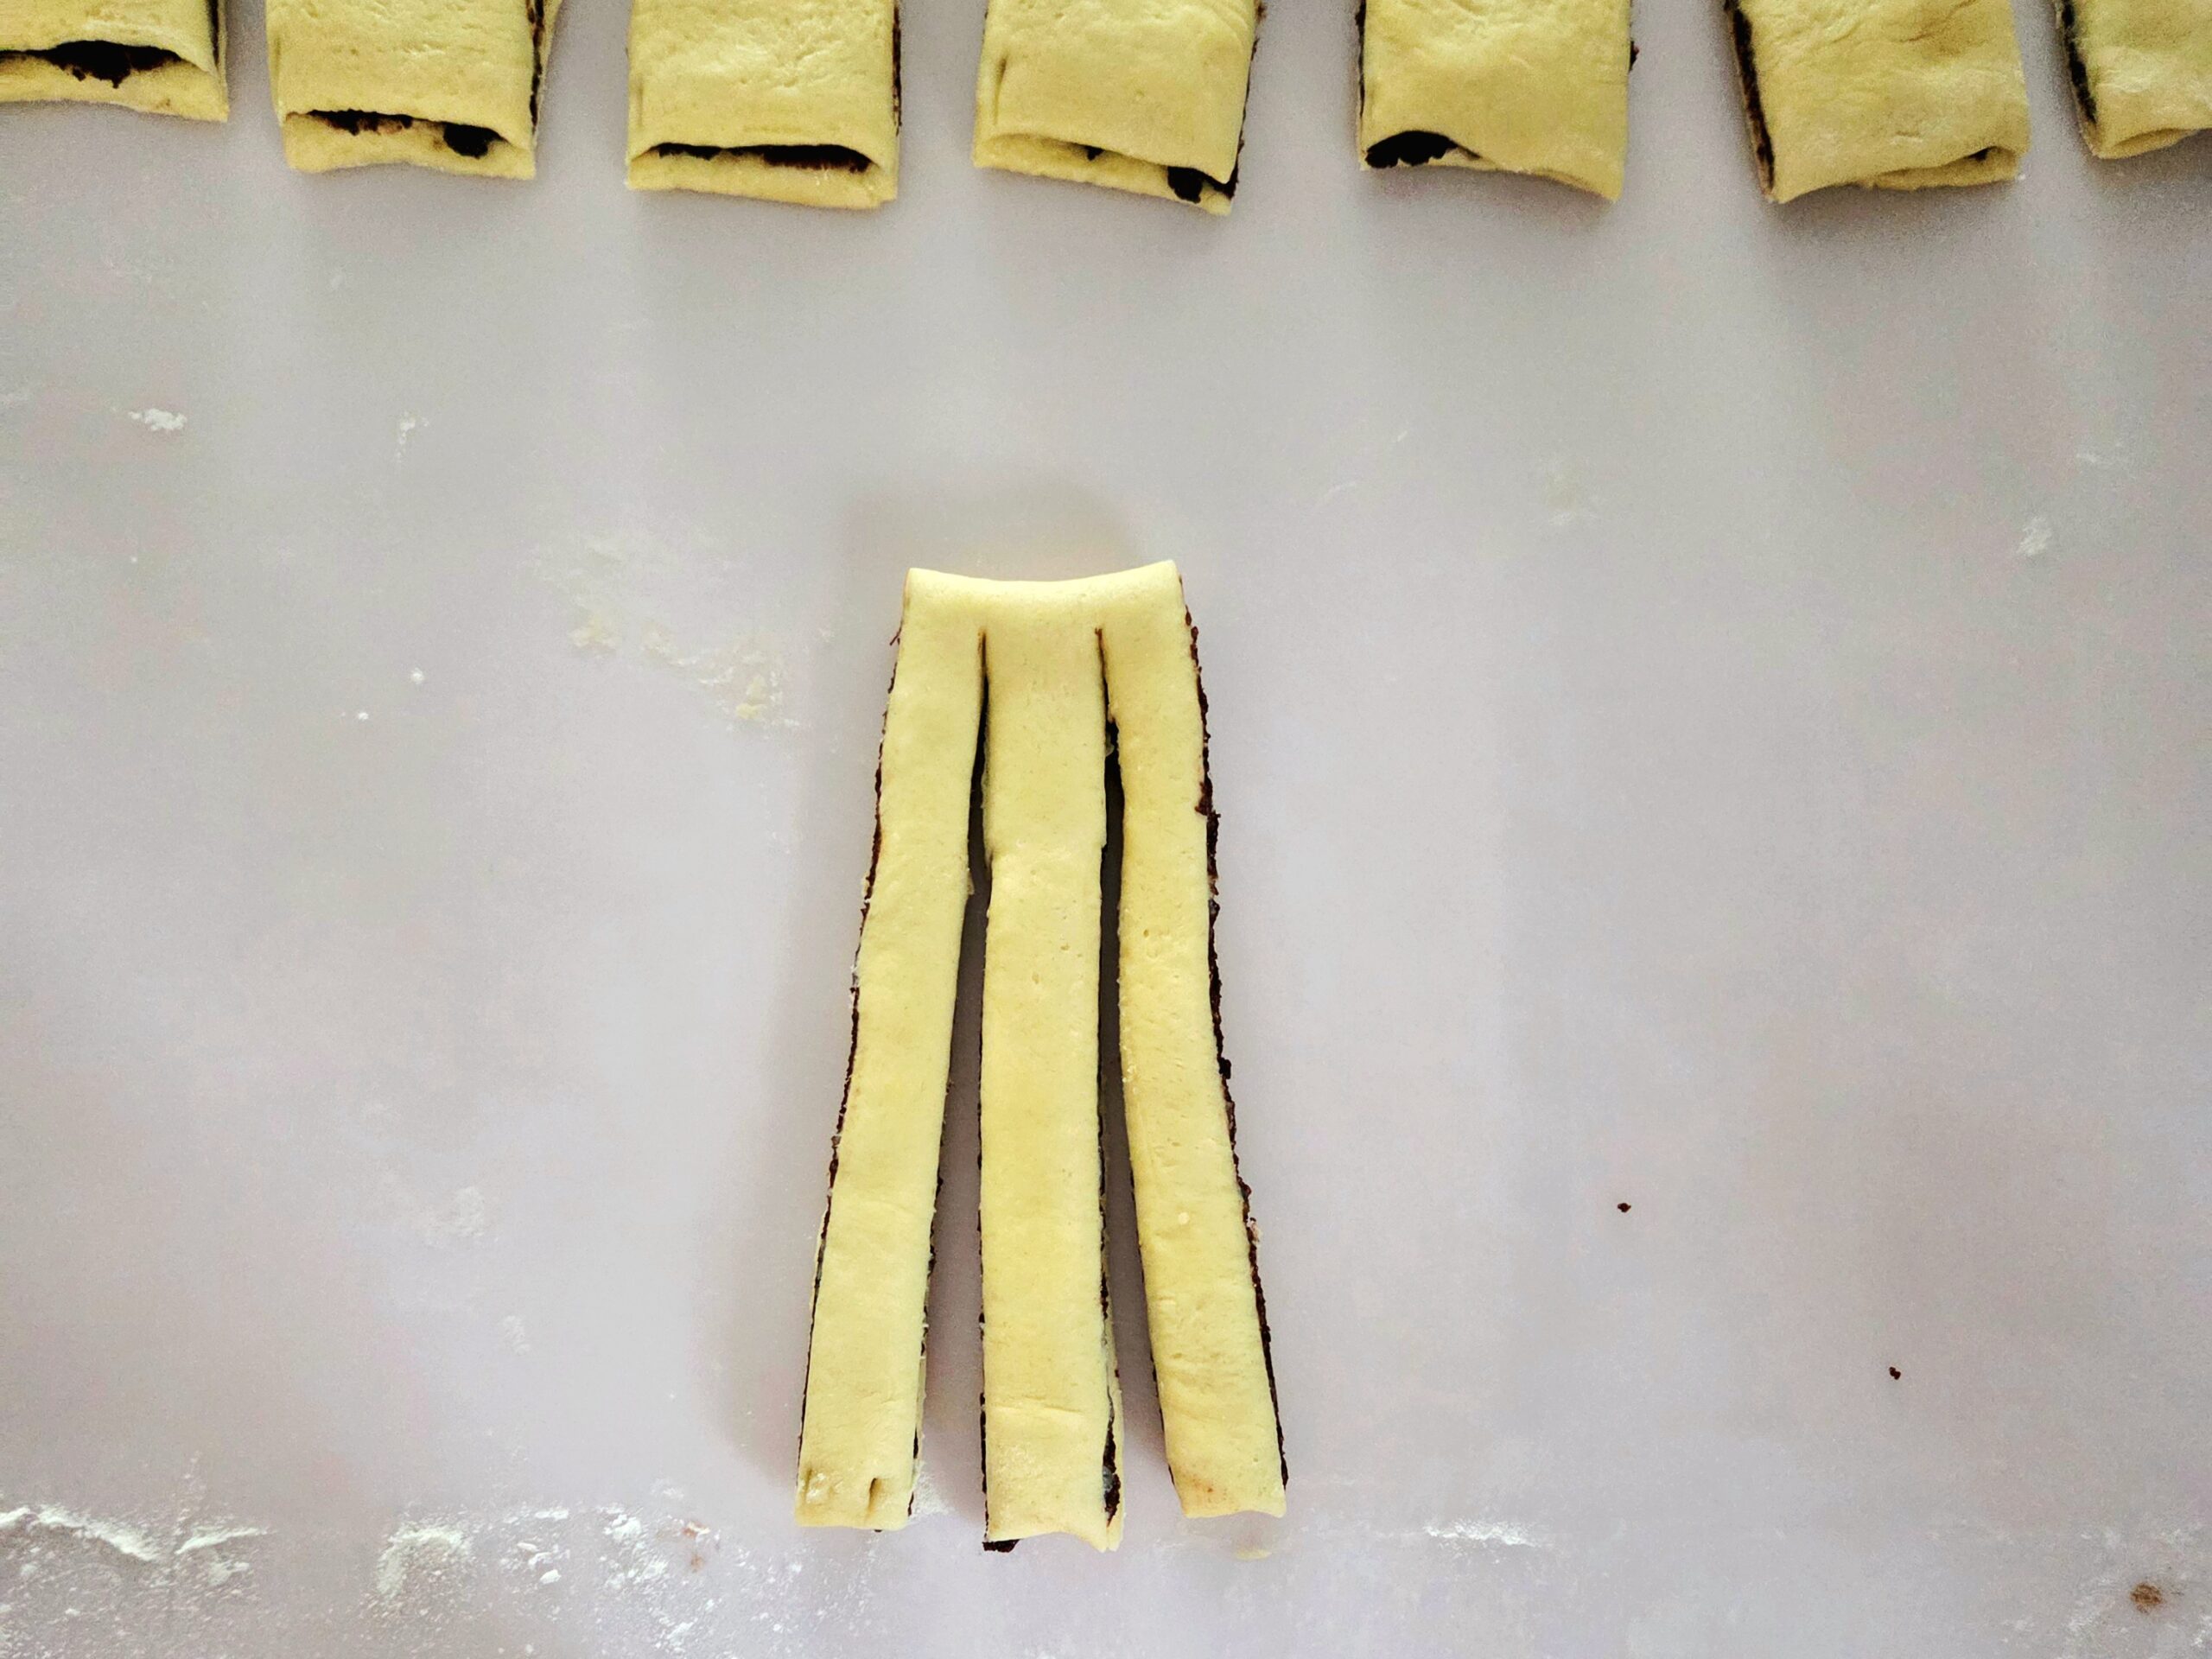
Space out the 3 strands to prepare to create a 3 strand braid. Take the center strand and fold it over the left strand, making the center now the left strand and the left now the center strand.
Take the new center strand and cover the right strand with it, making the center now the right strand and the right now the center strand.
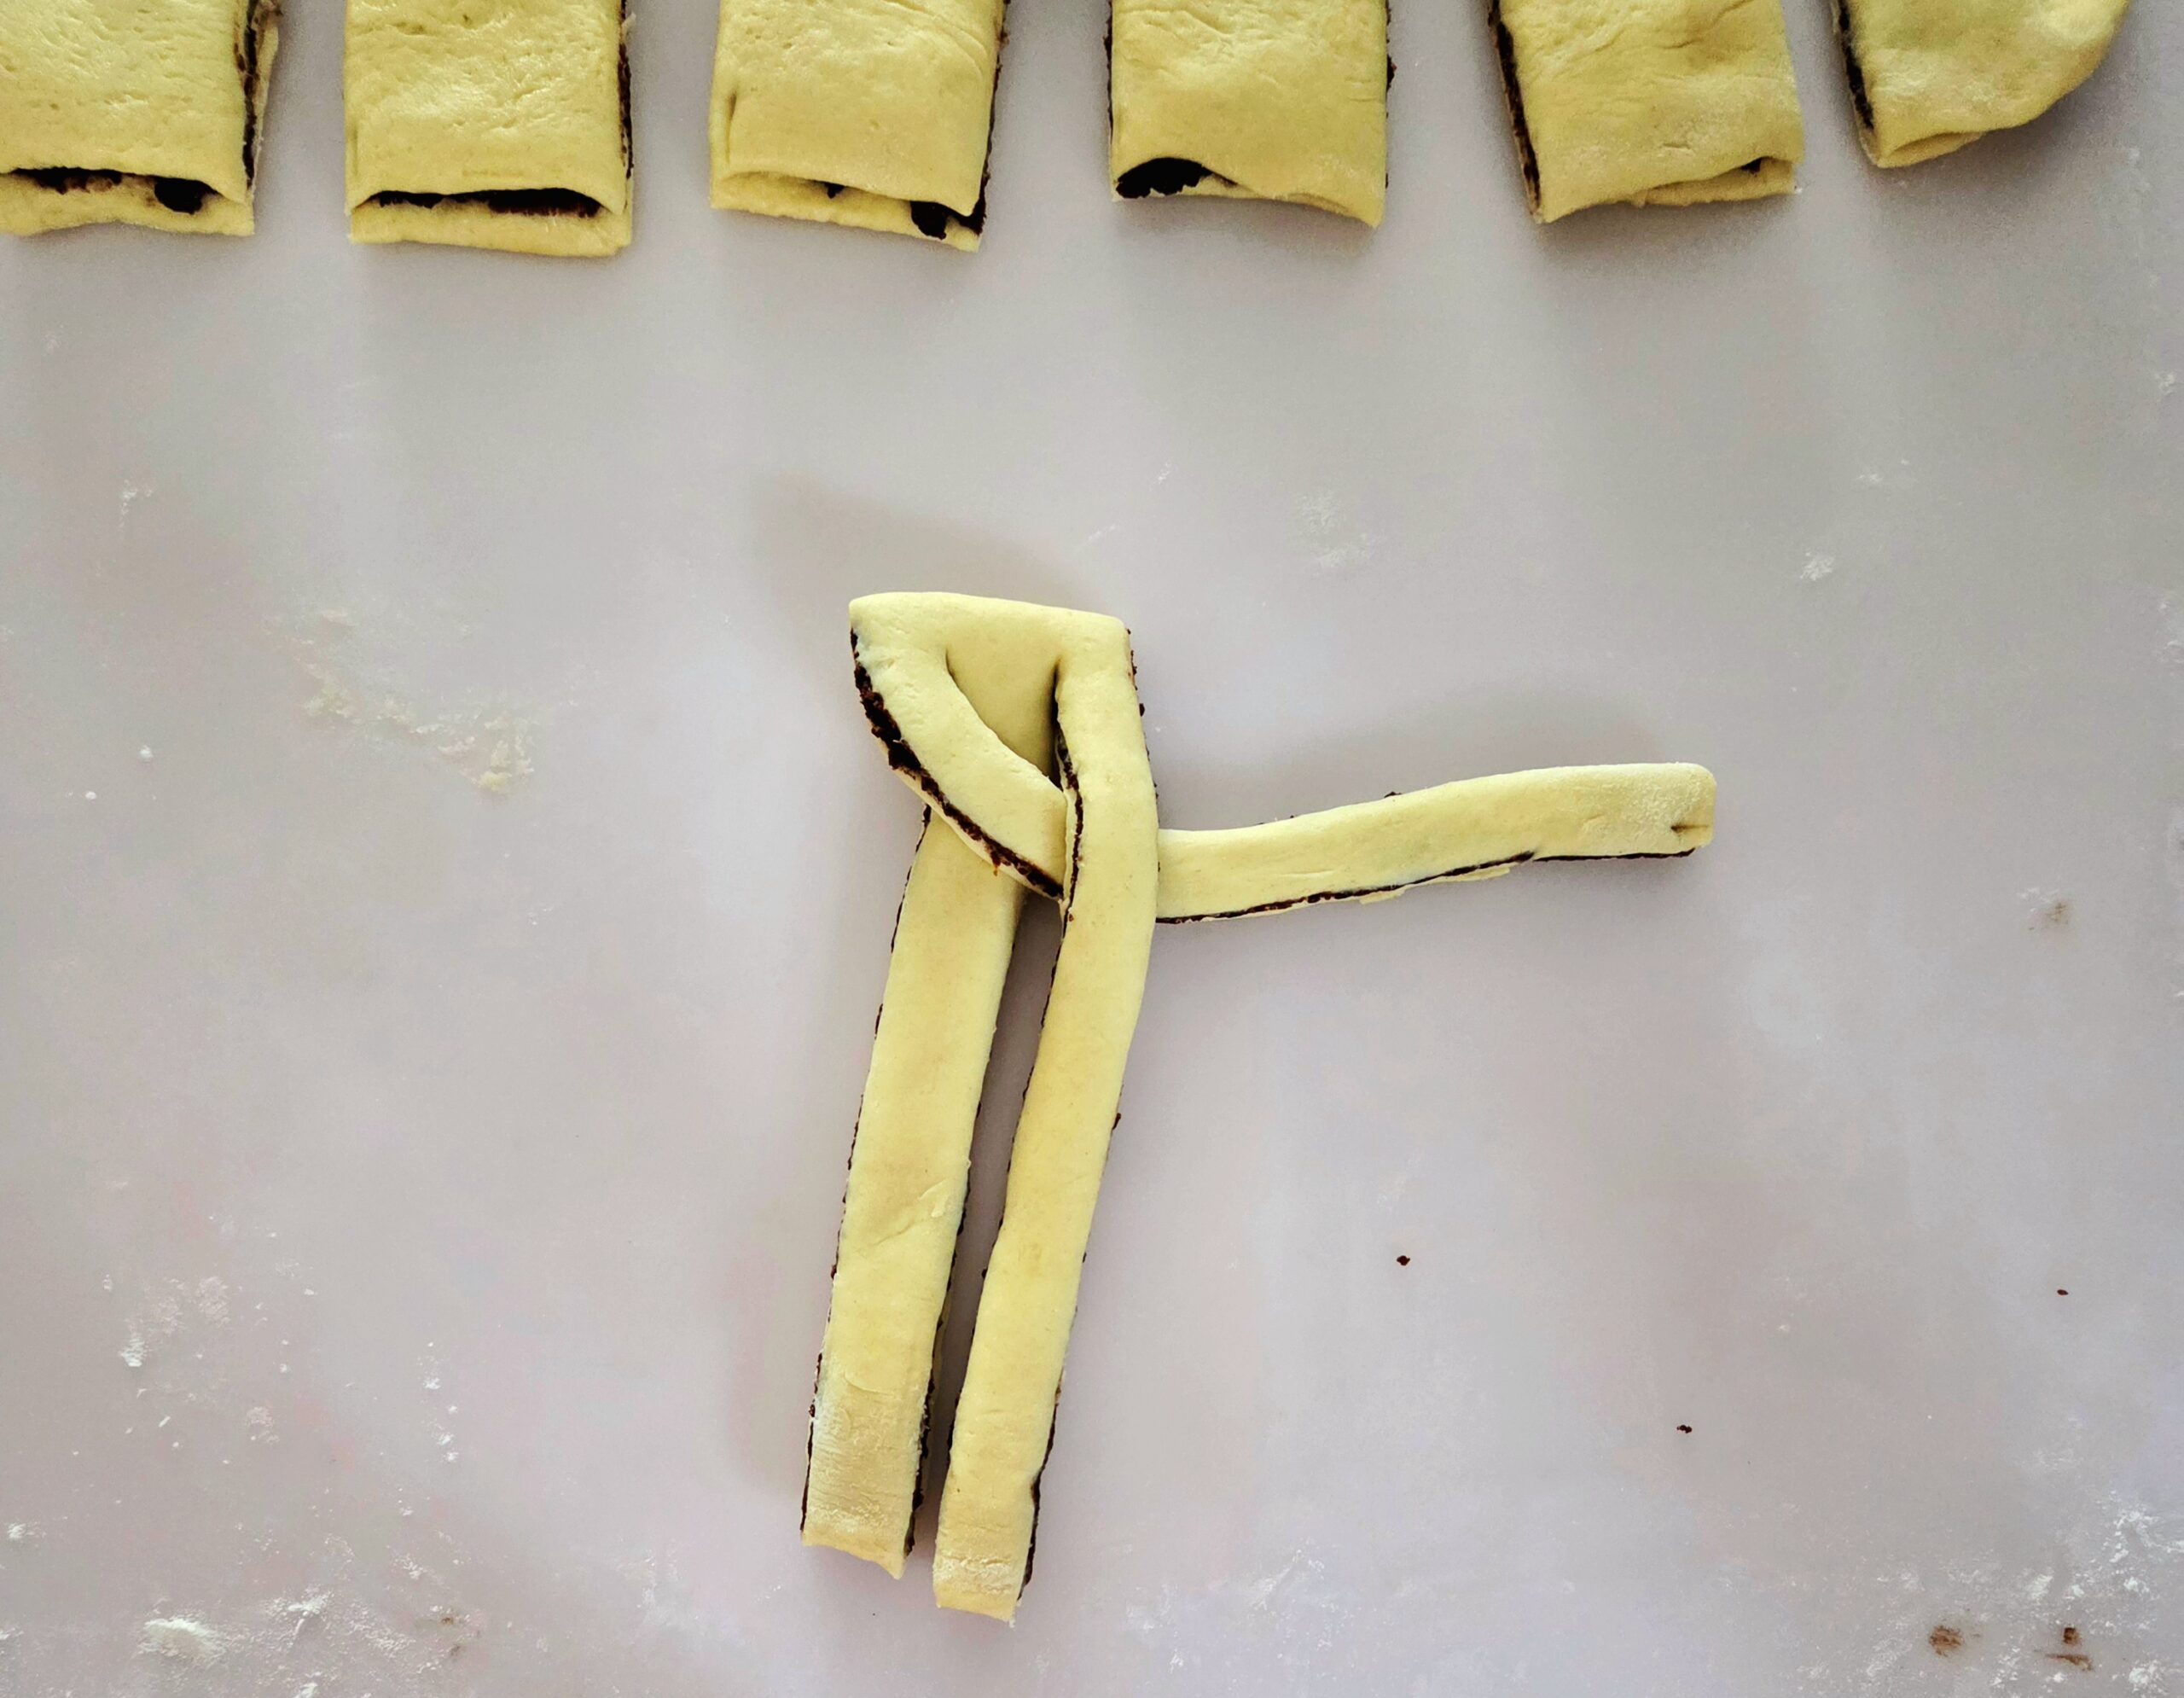
Continue on with the center covering the left and then the right strands until the entire strip of dough has been braided.
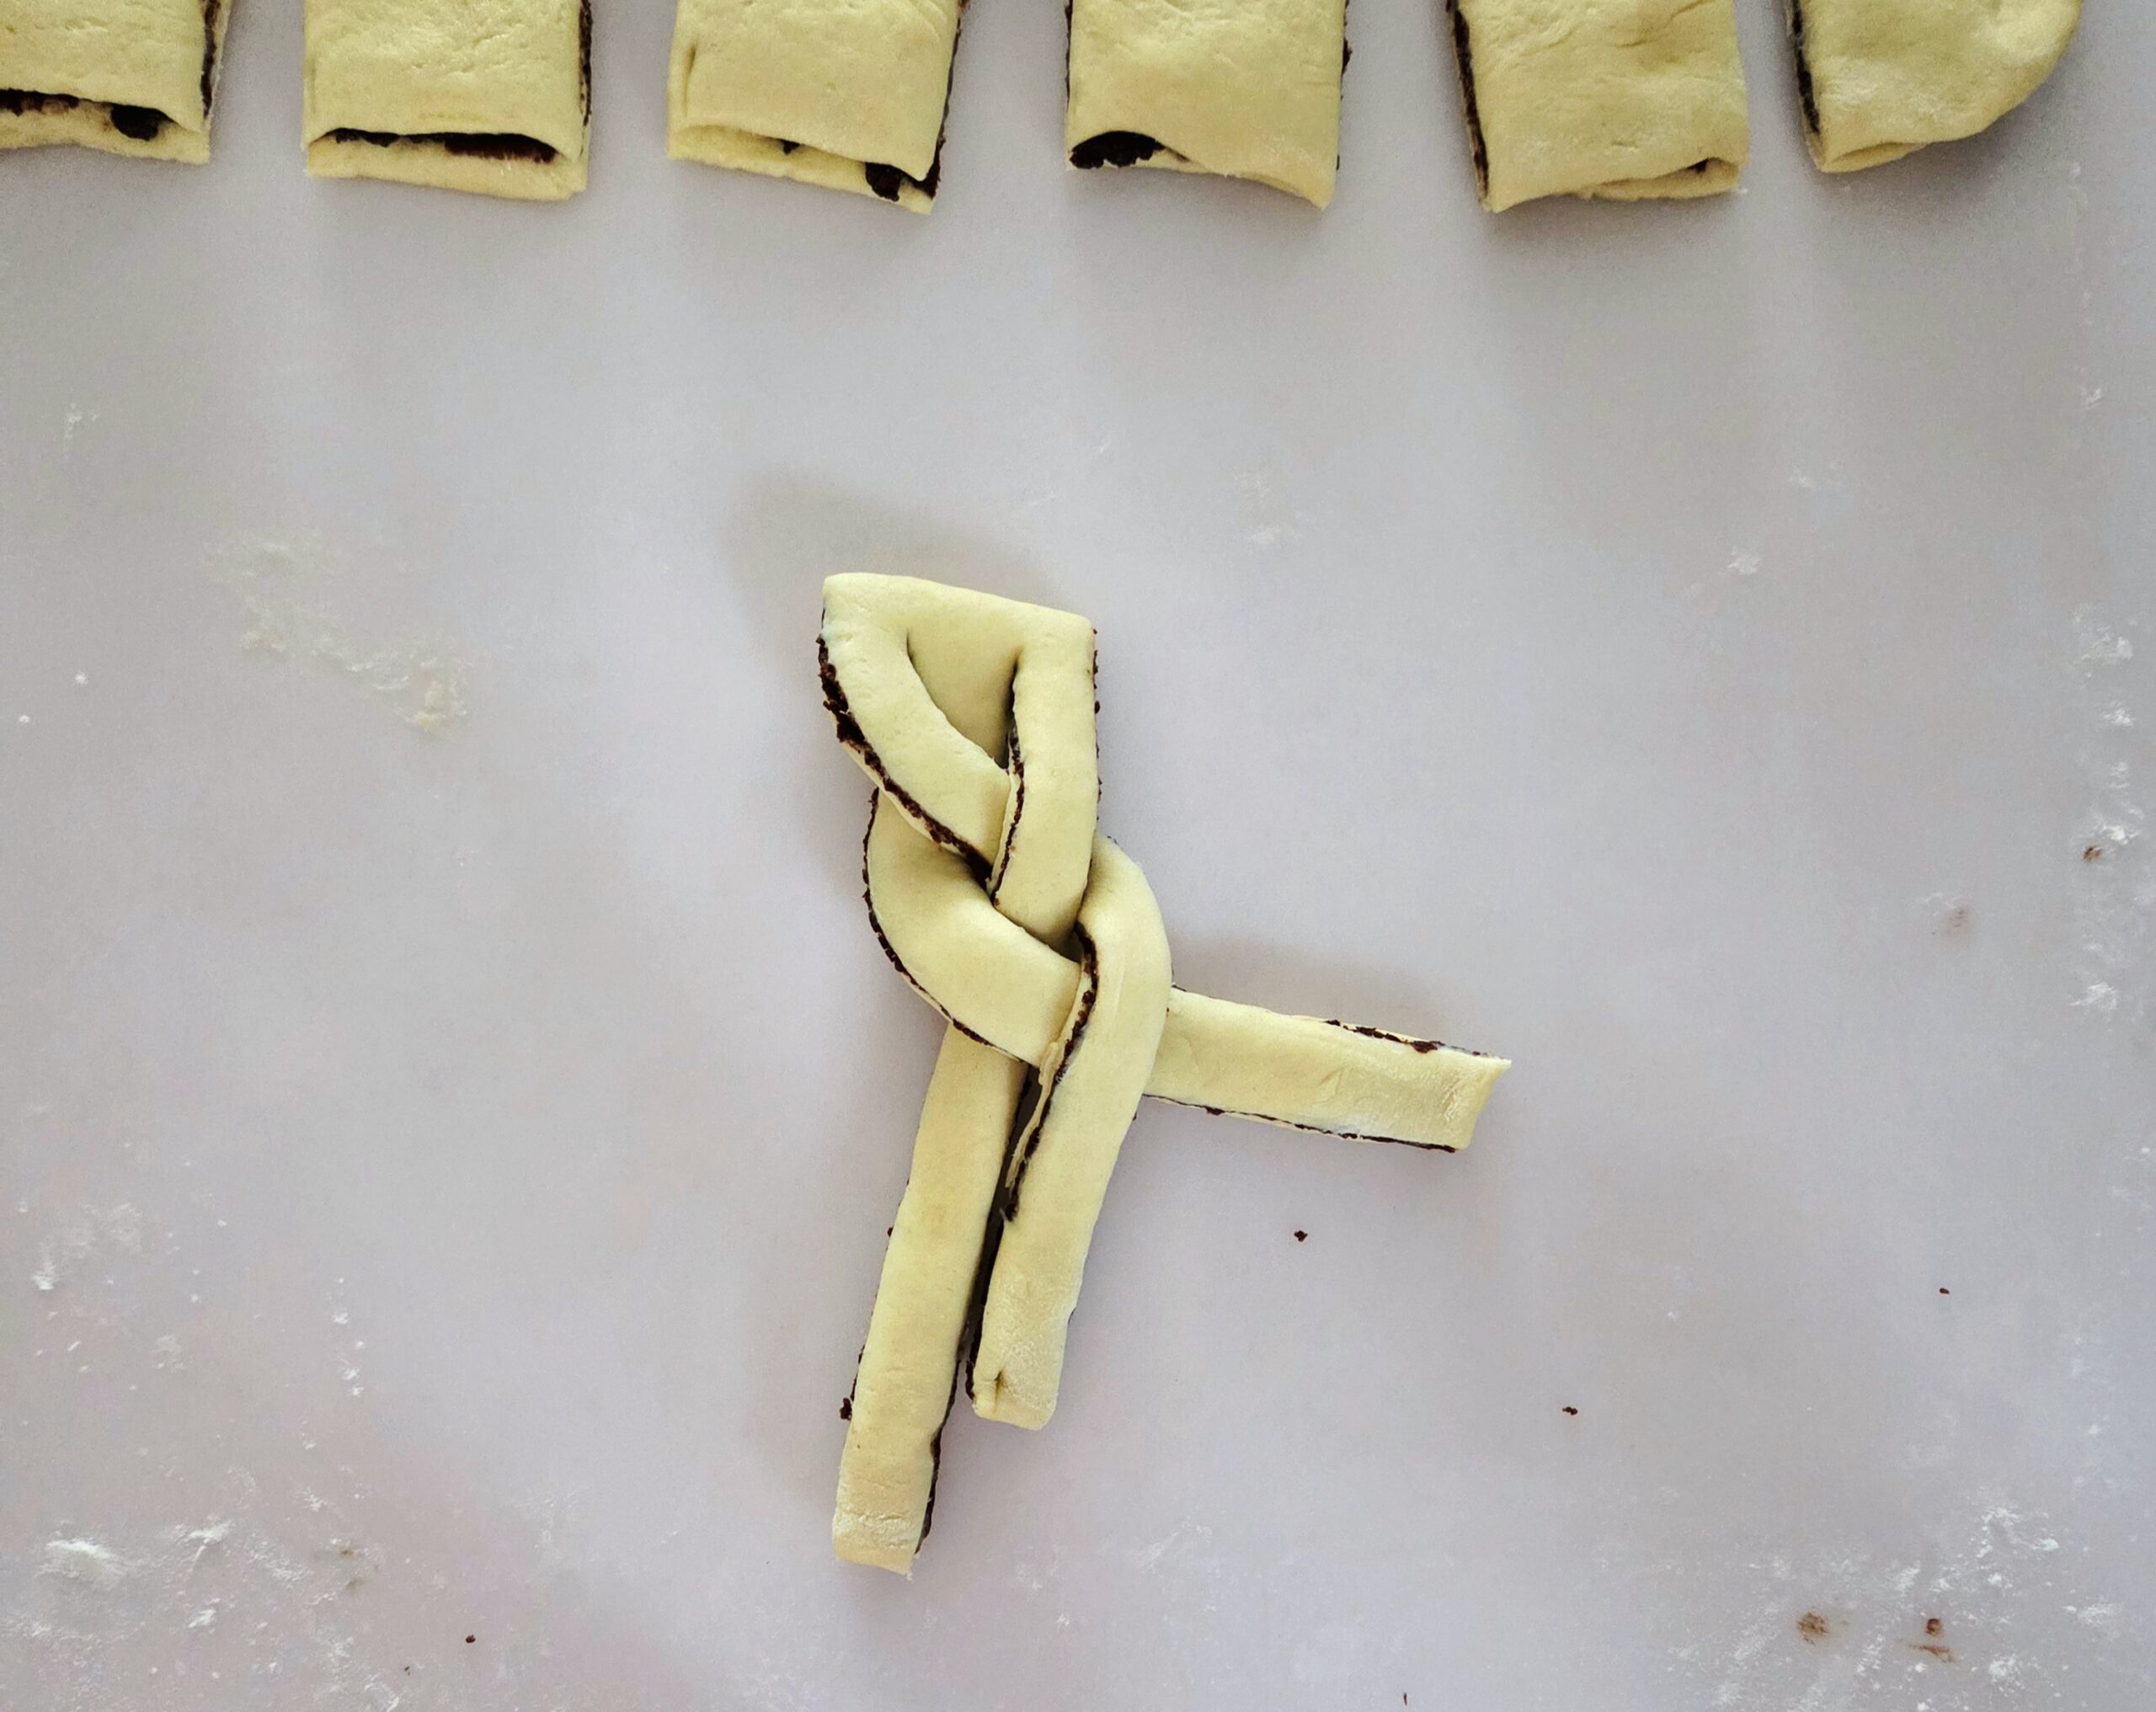
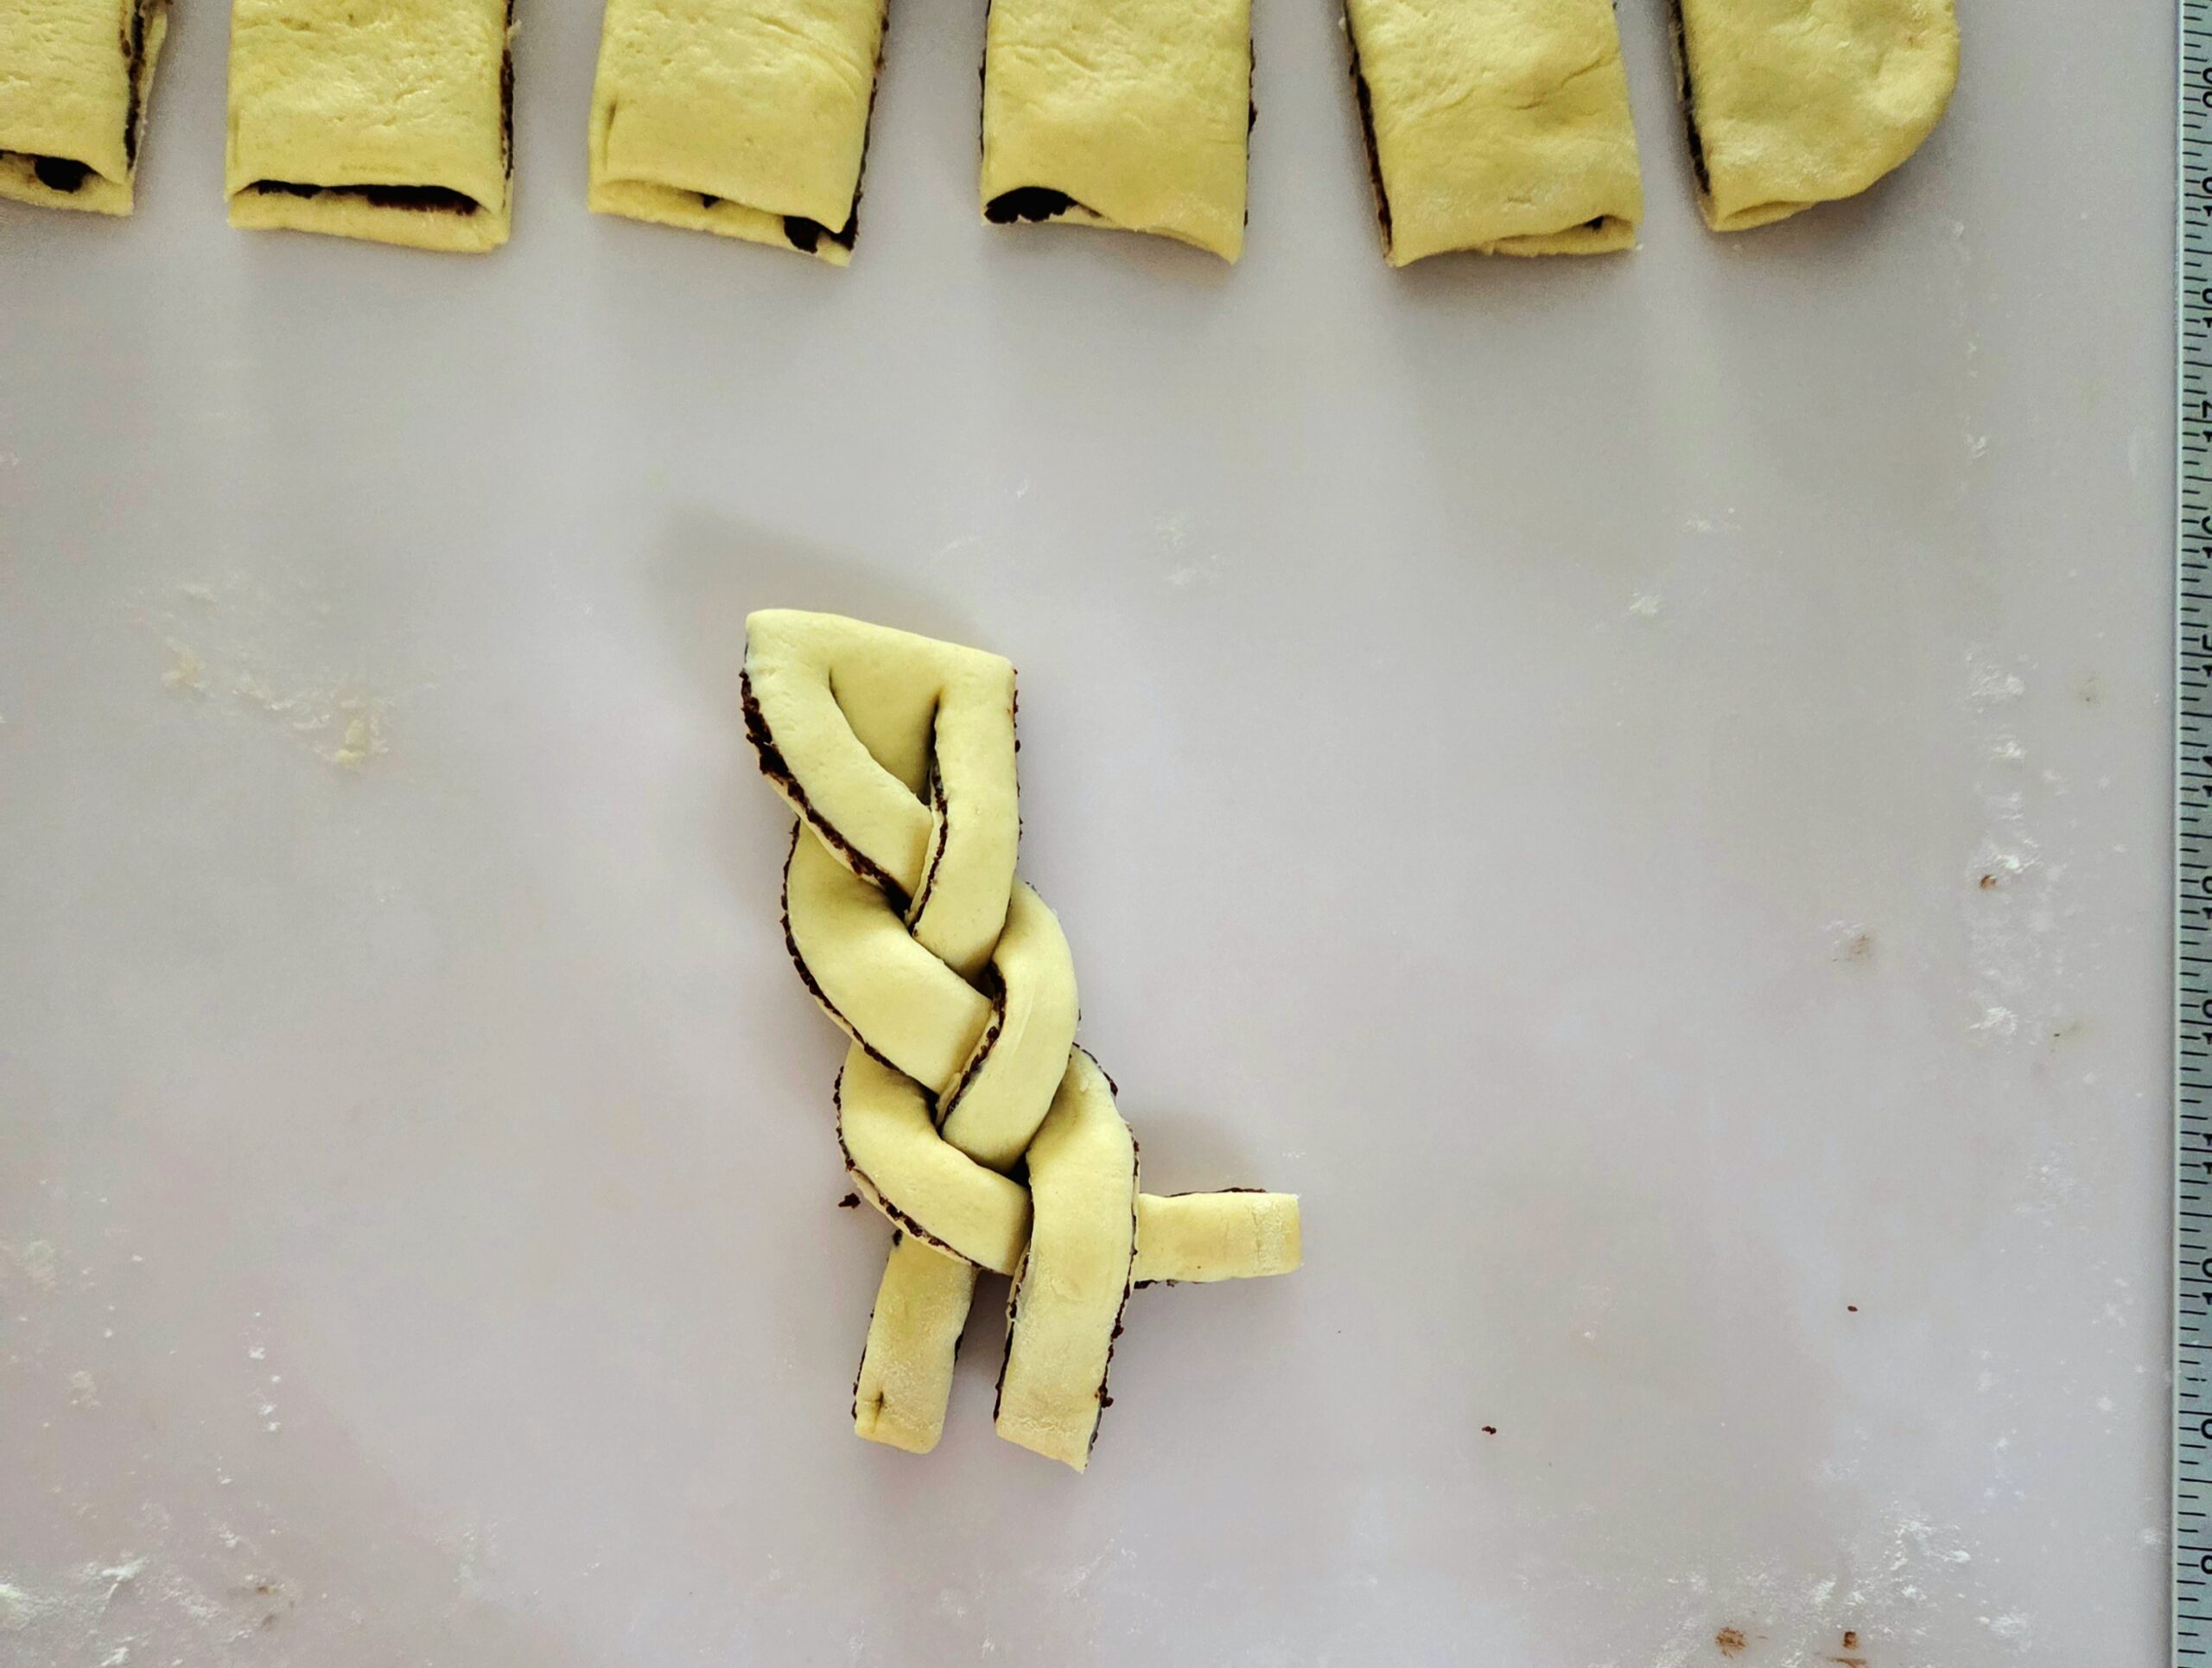
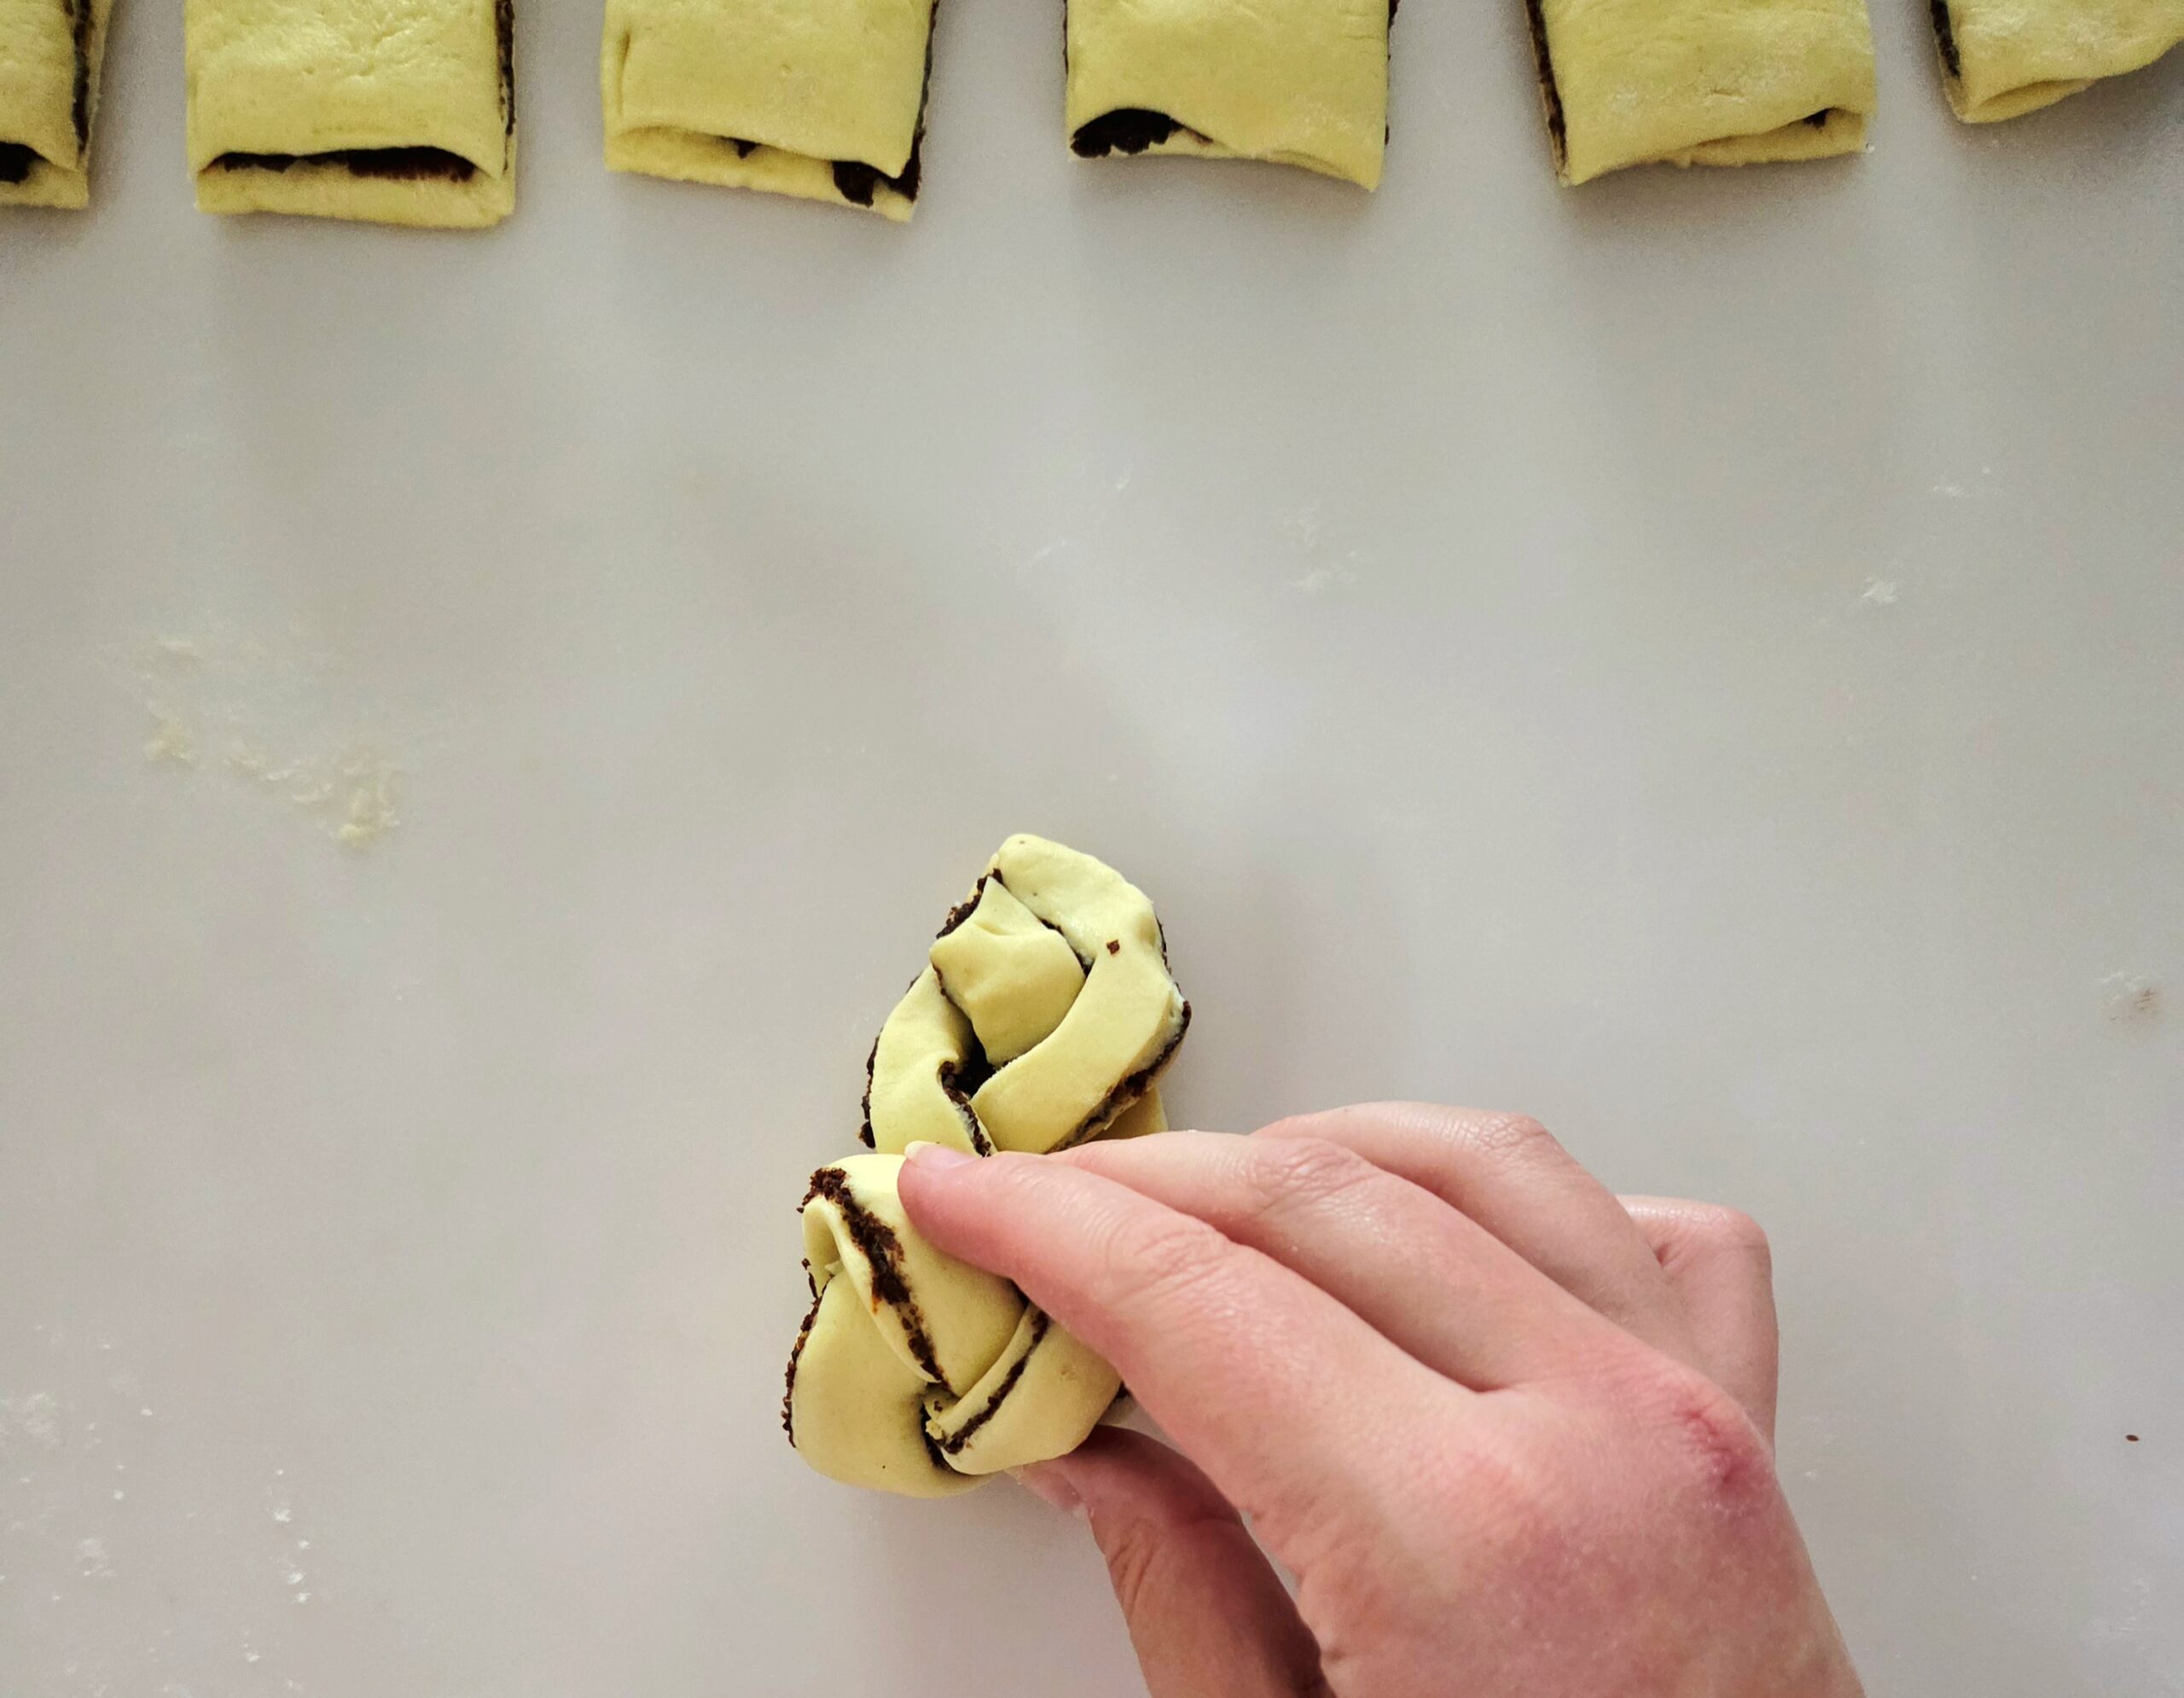
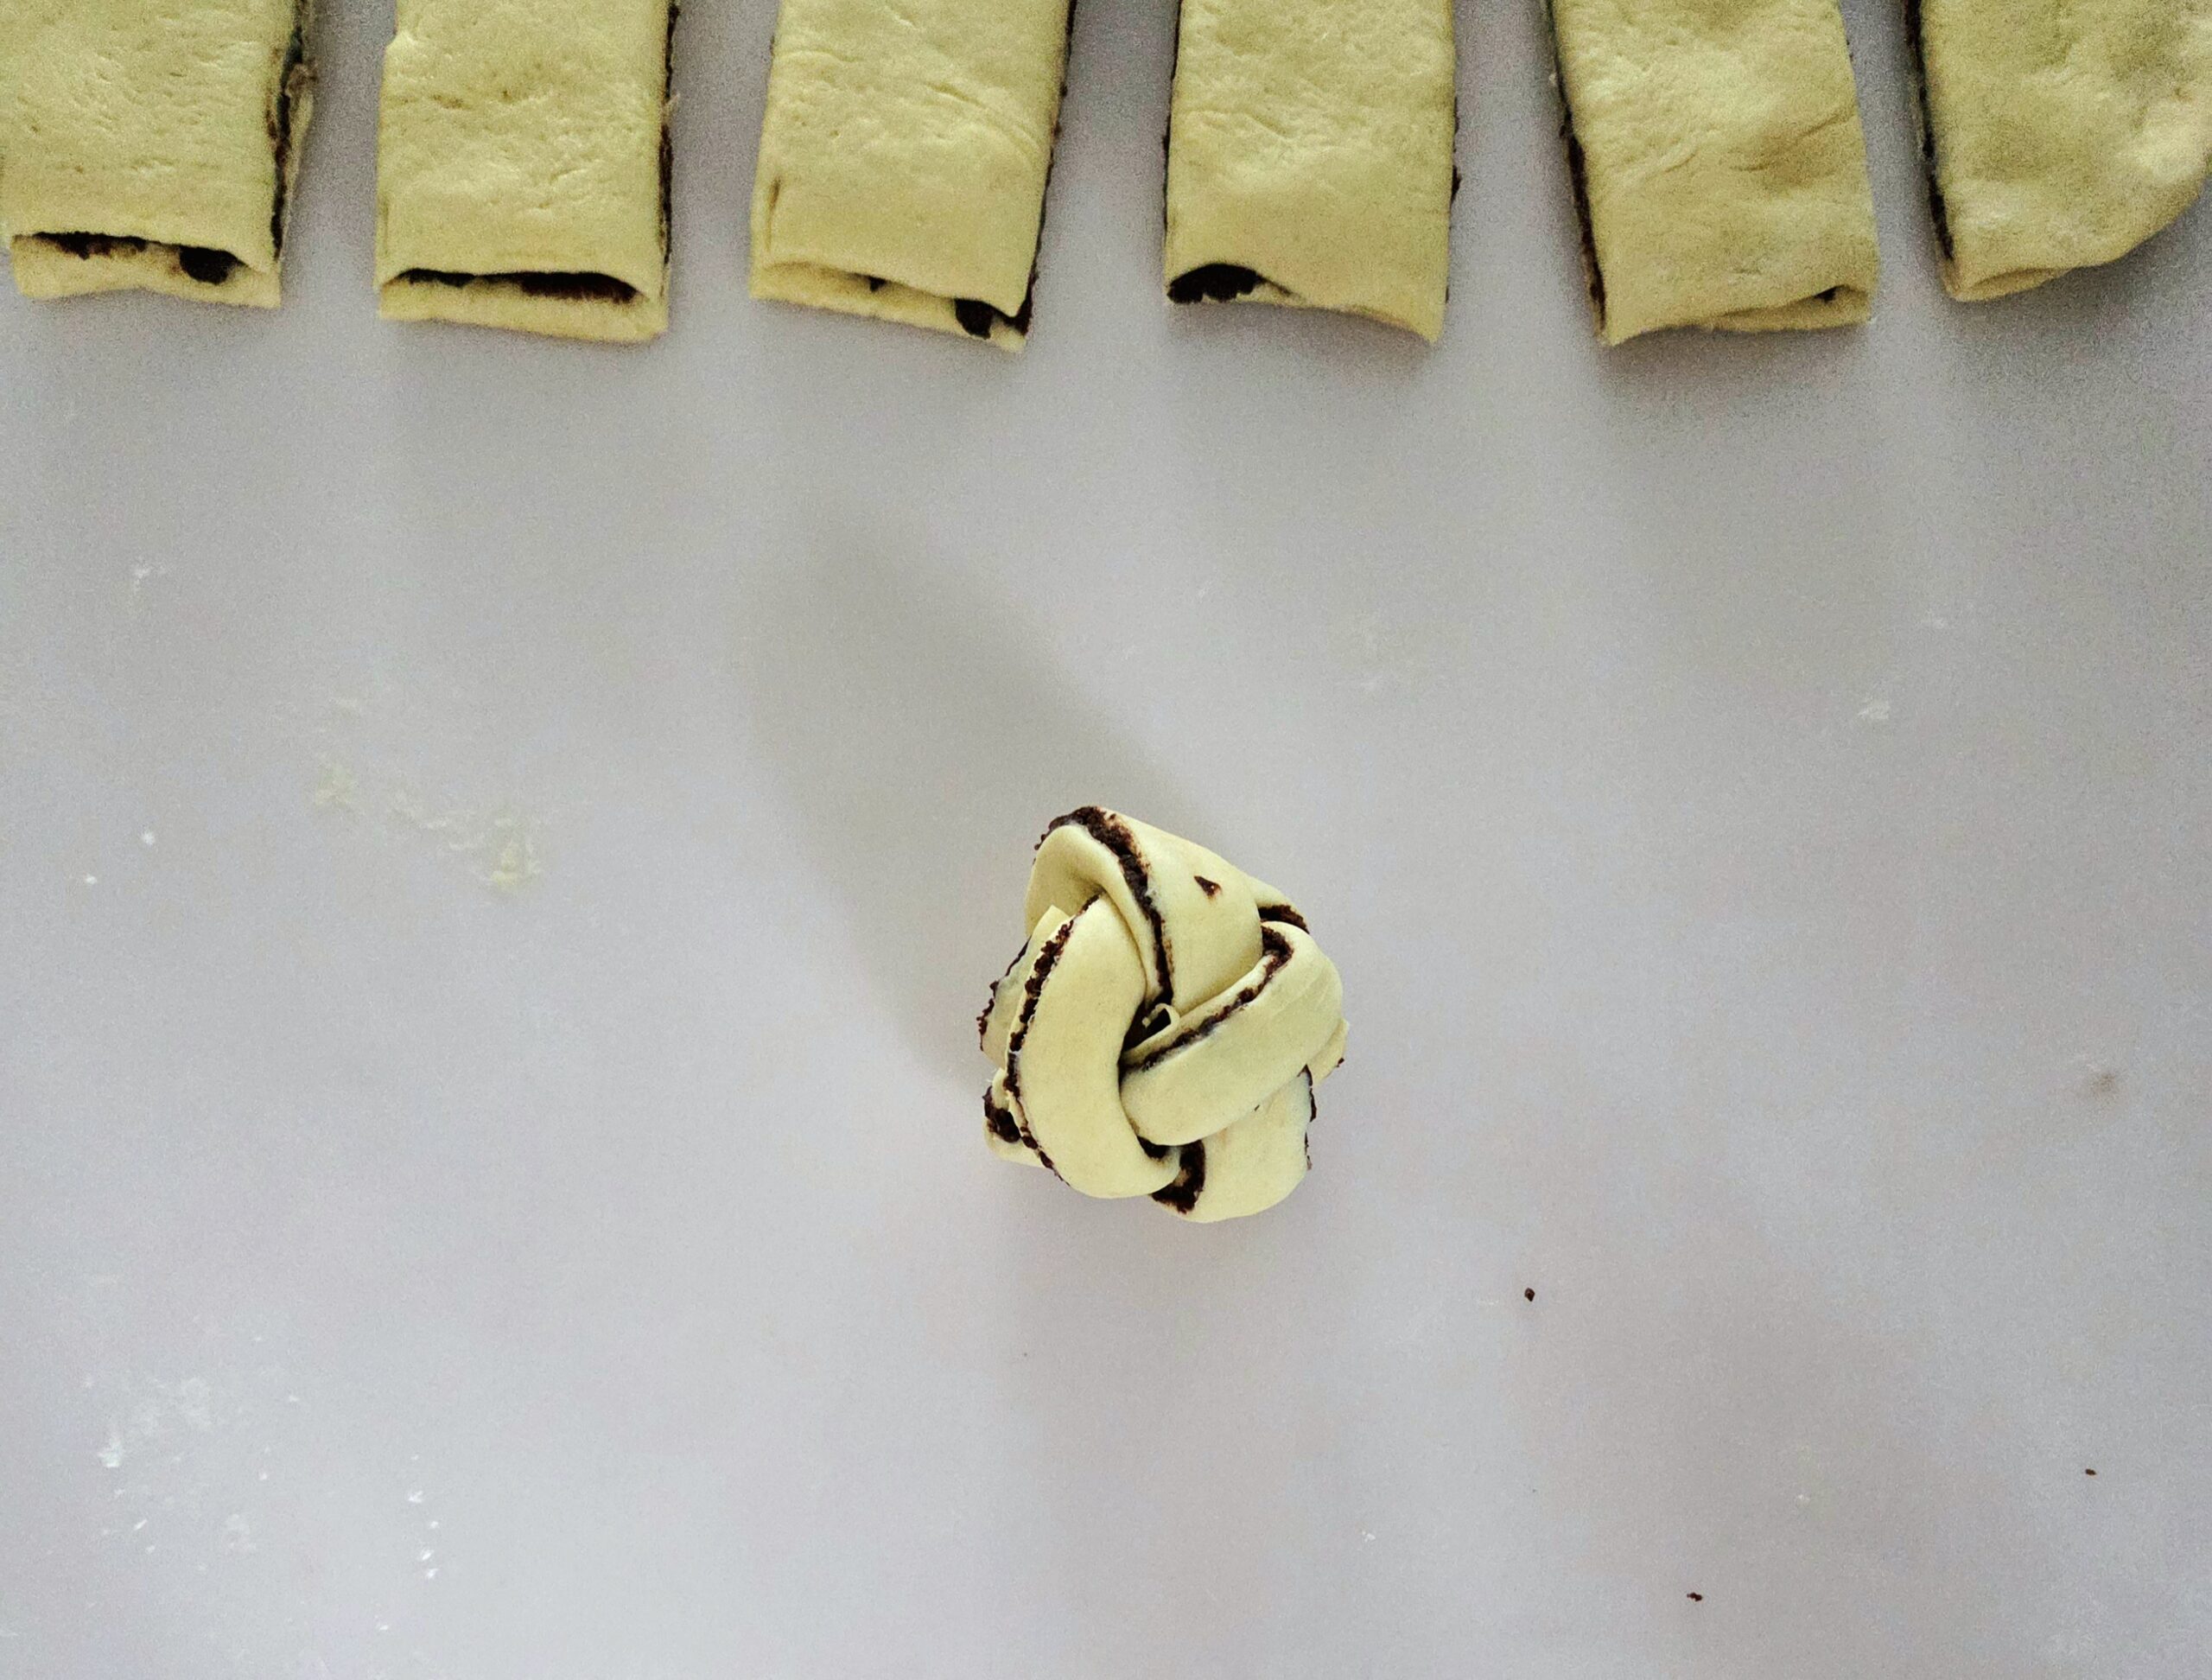
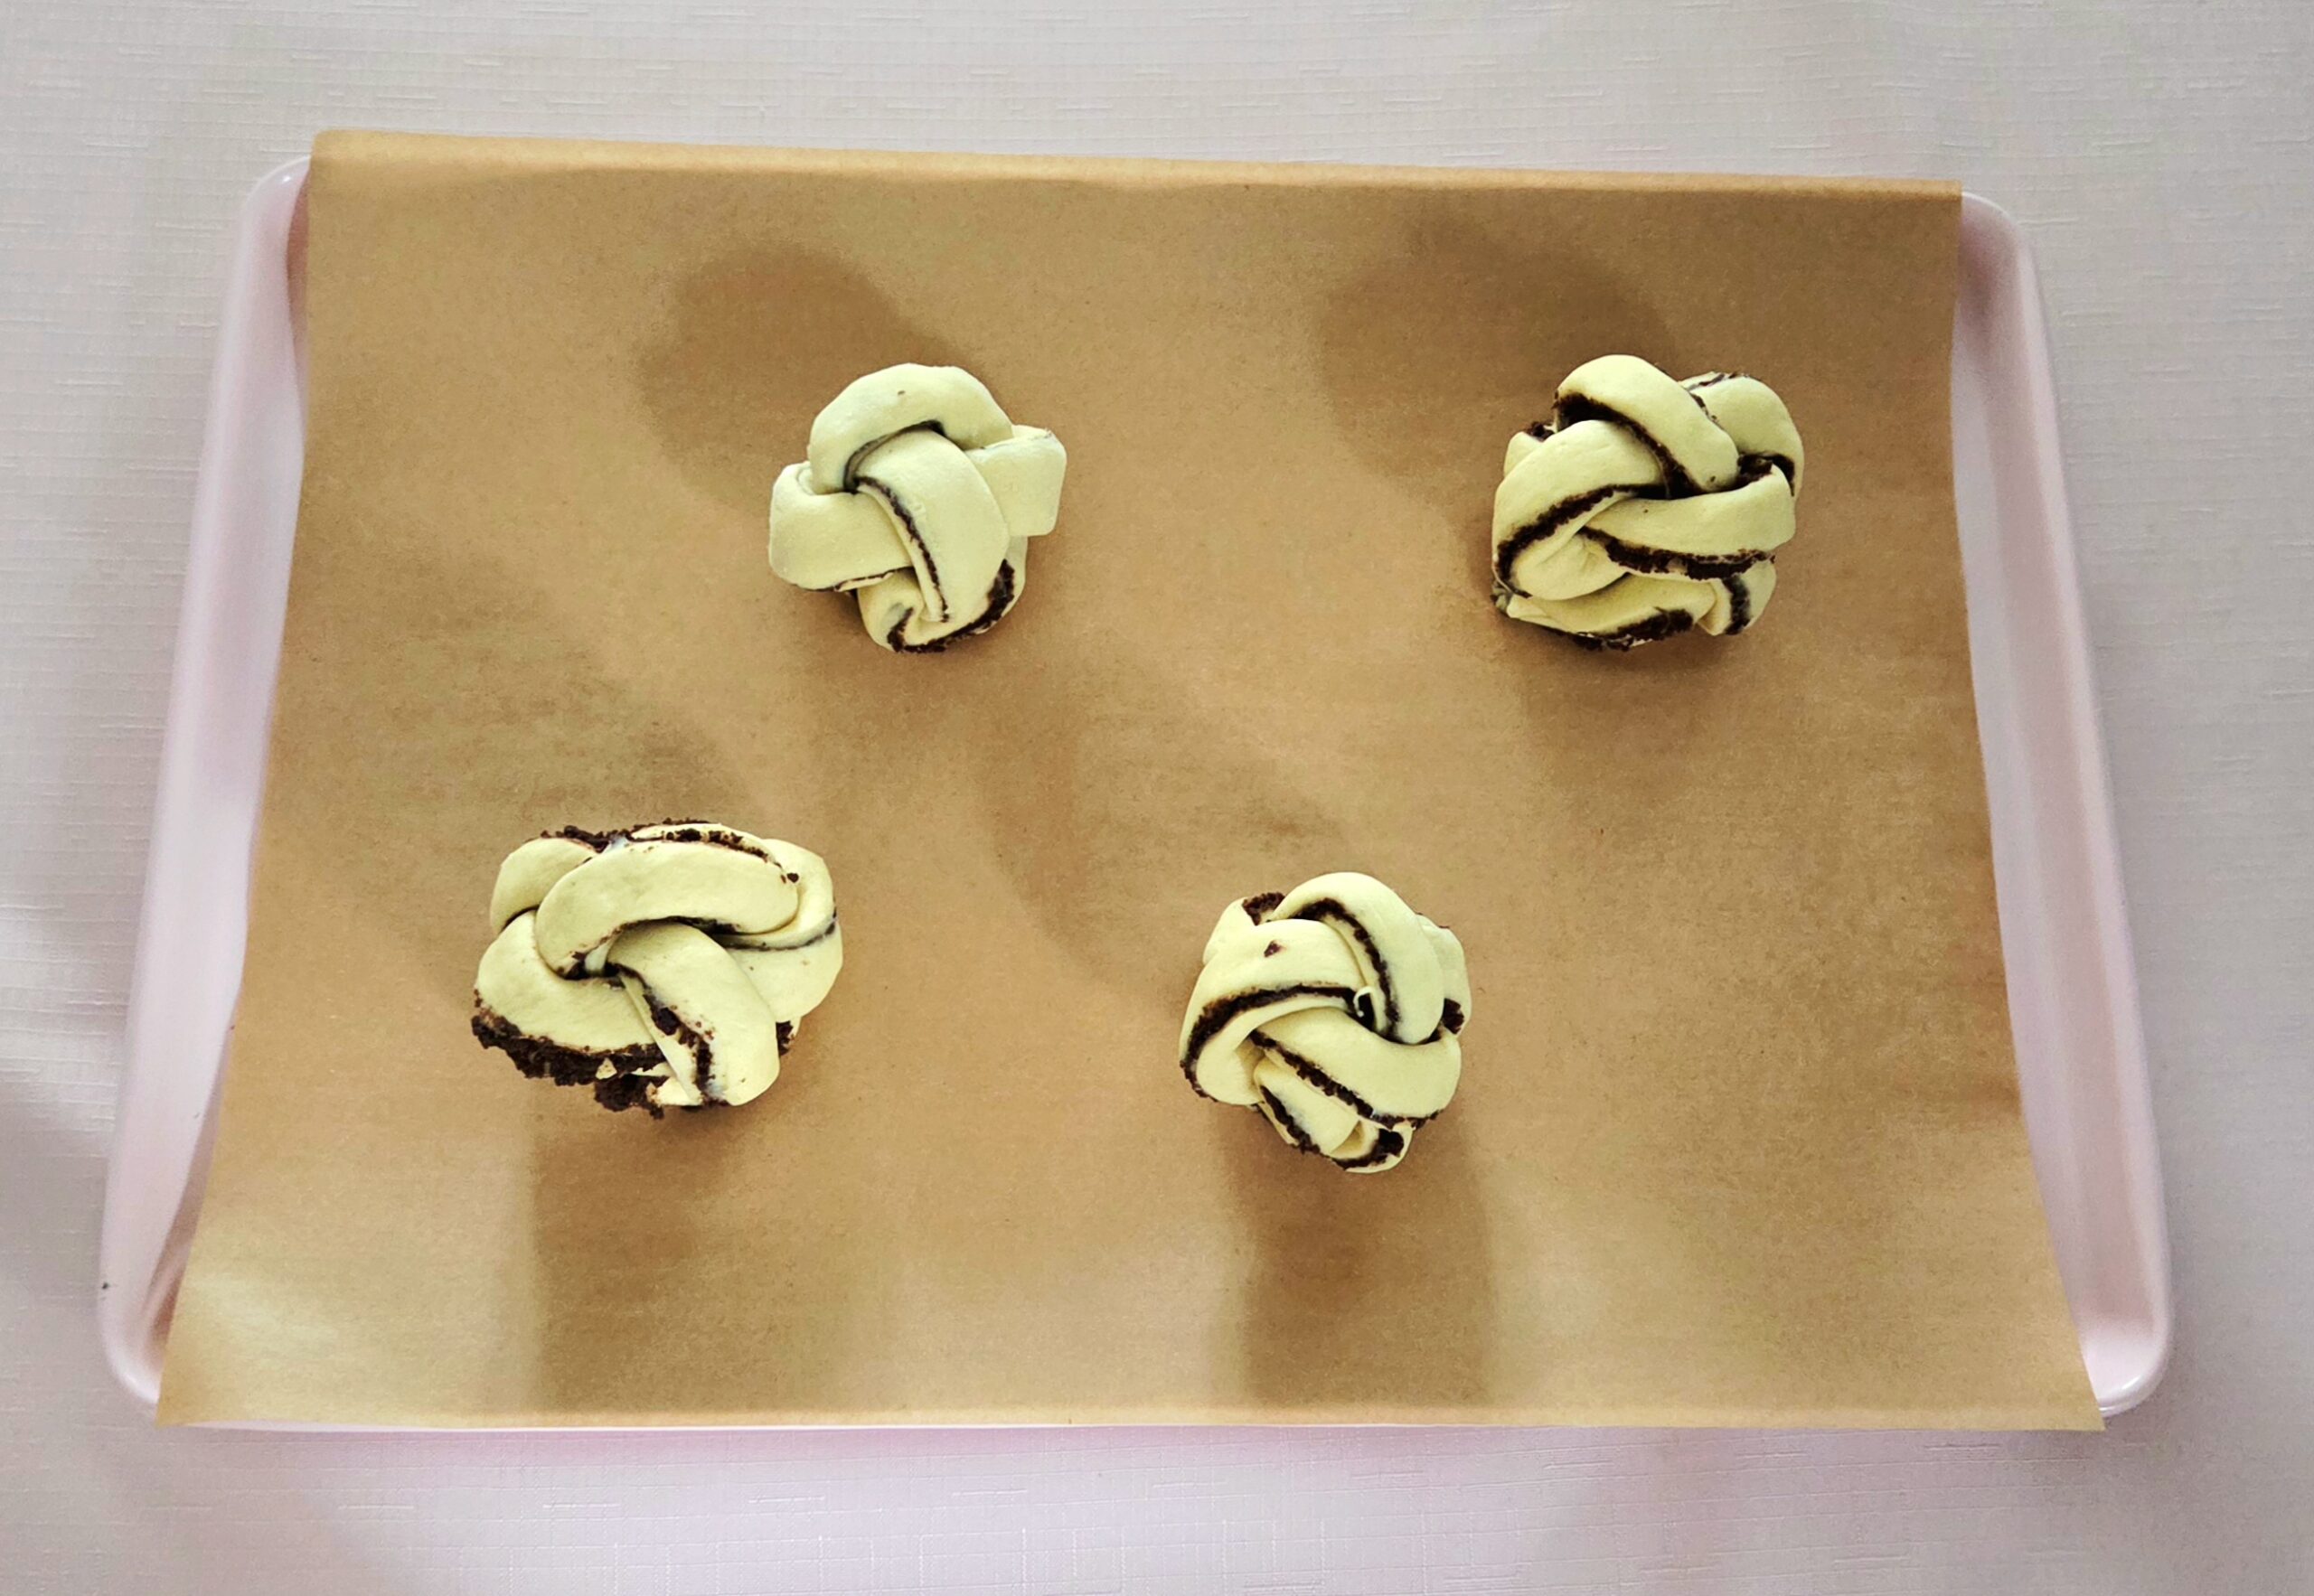
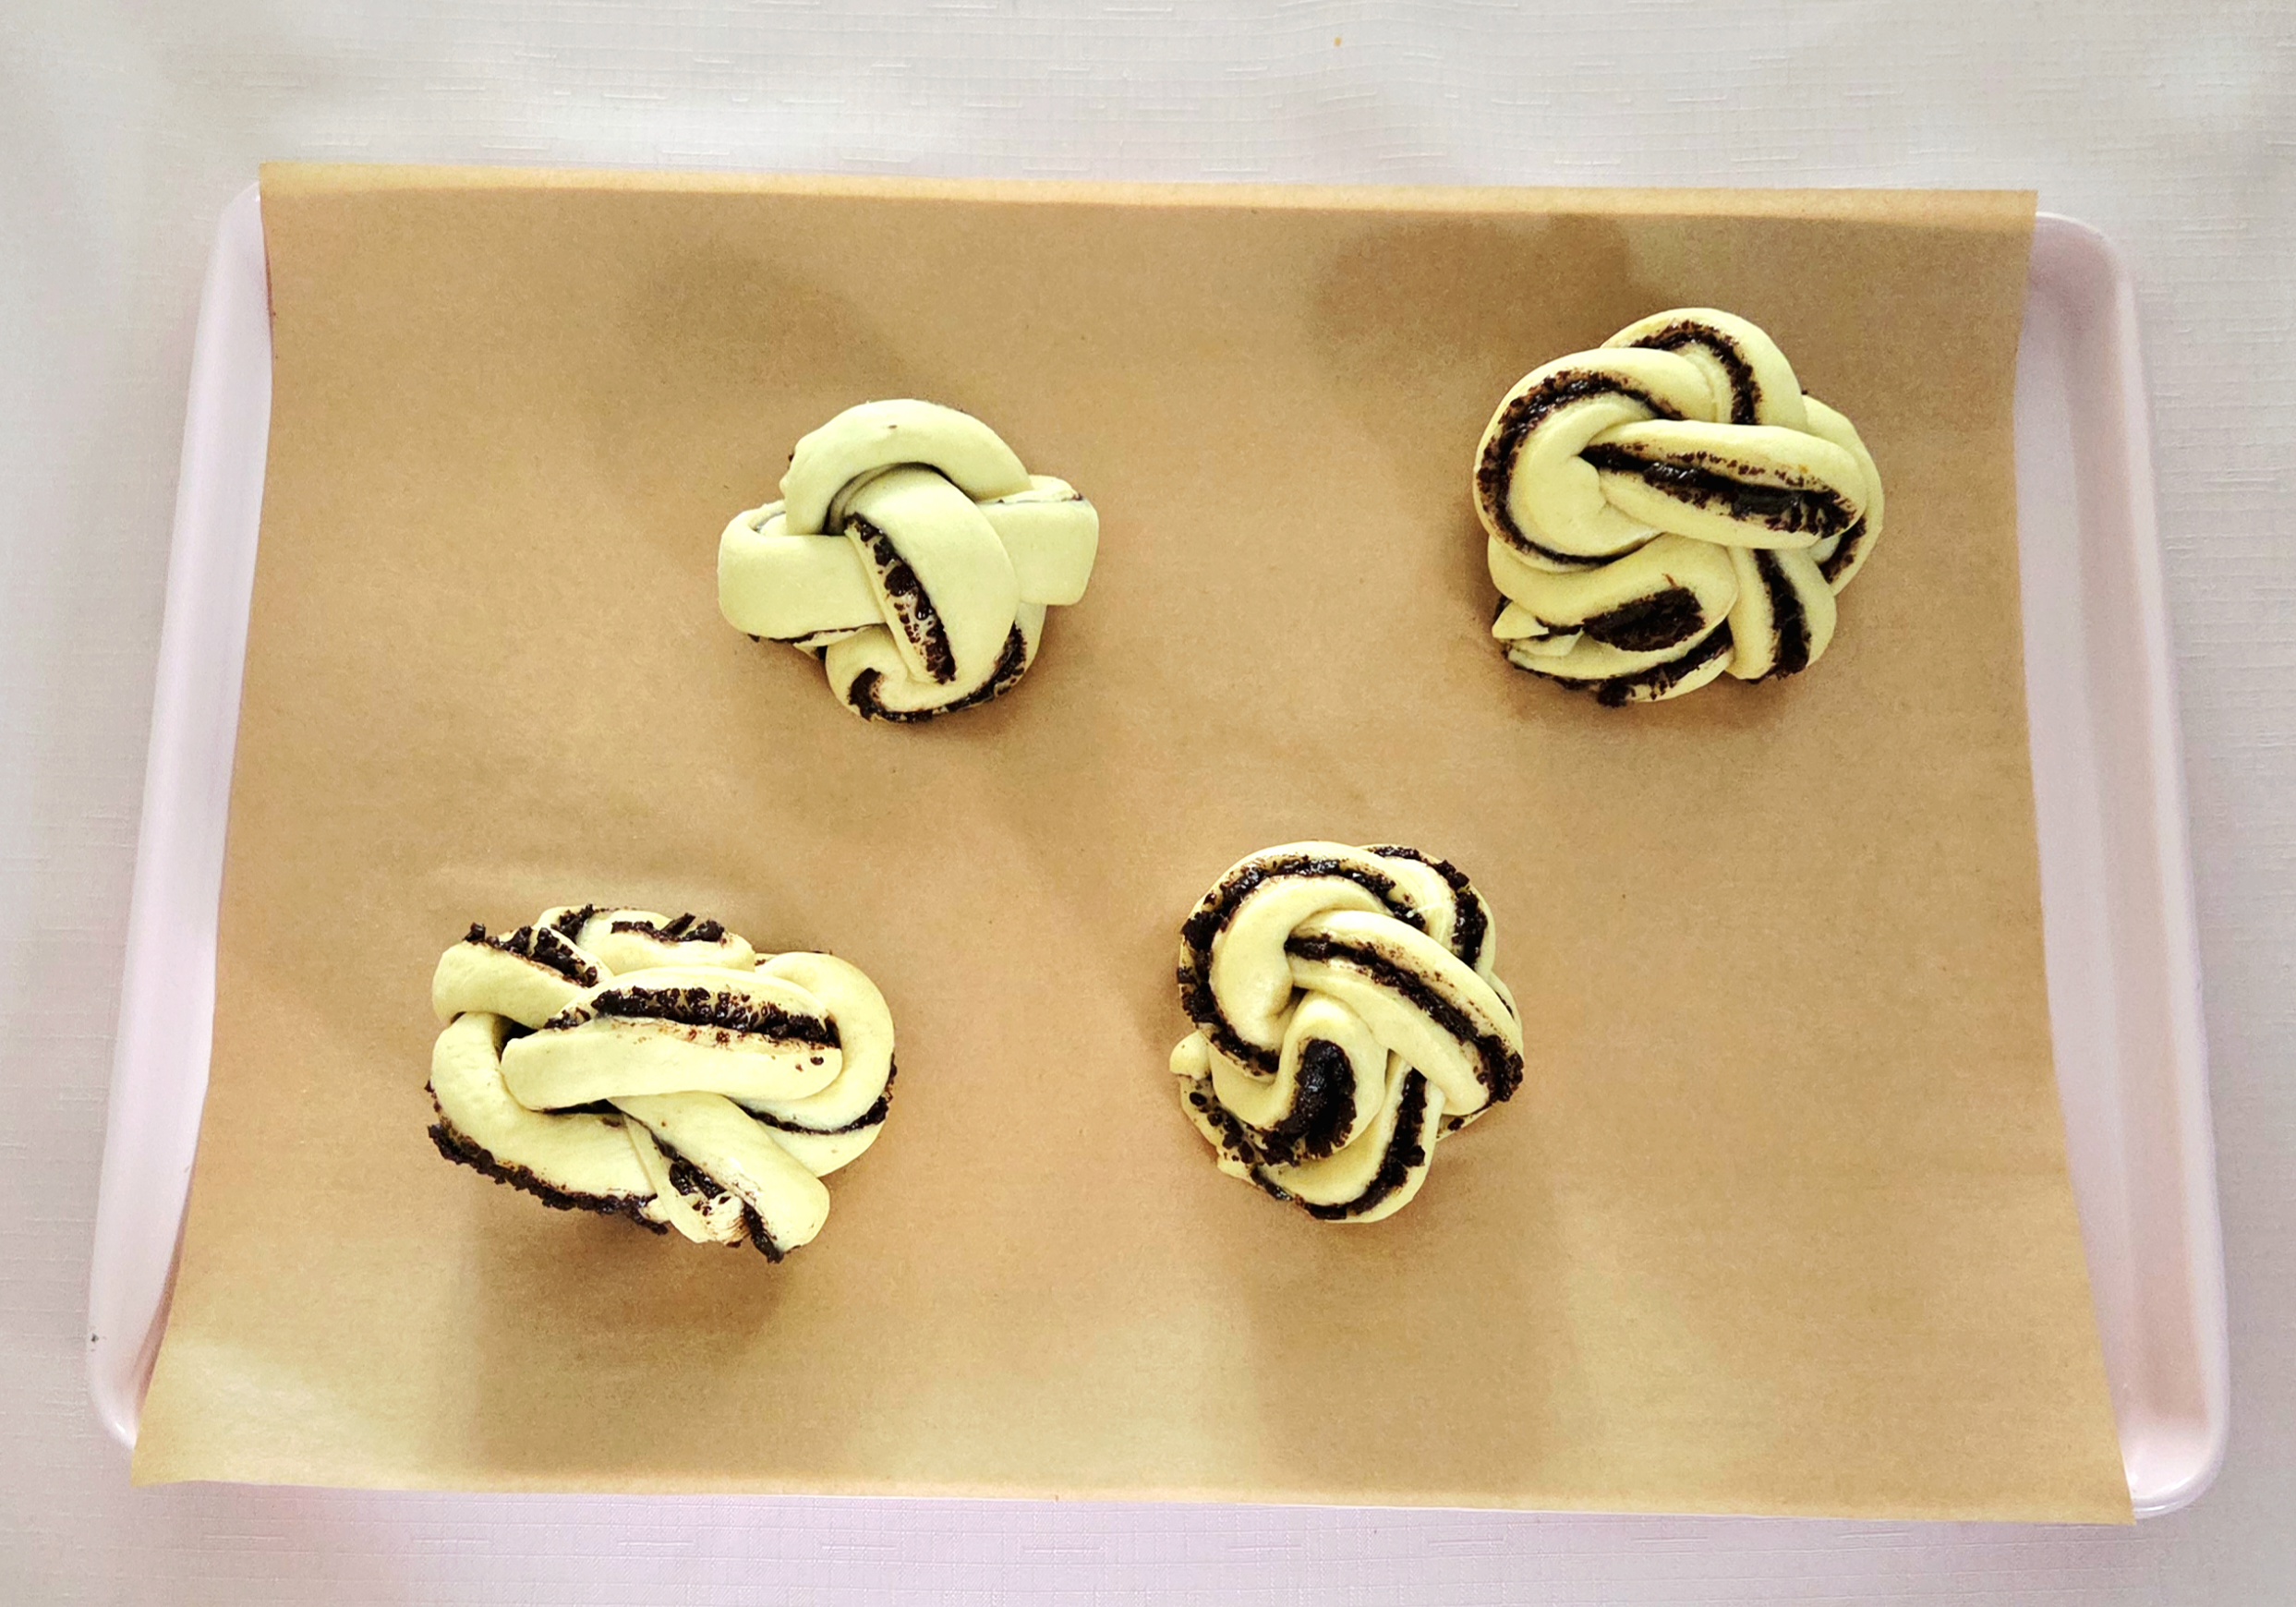
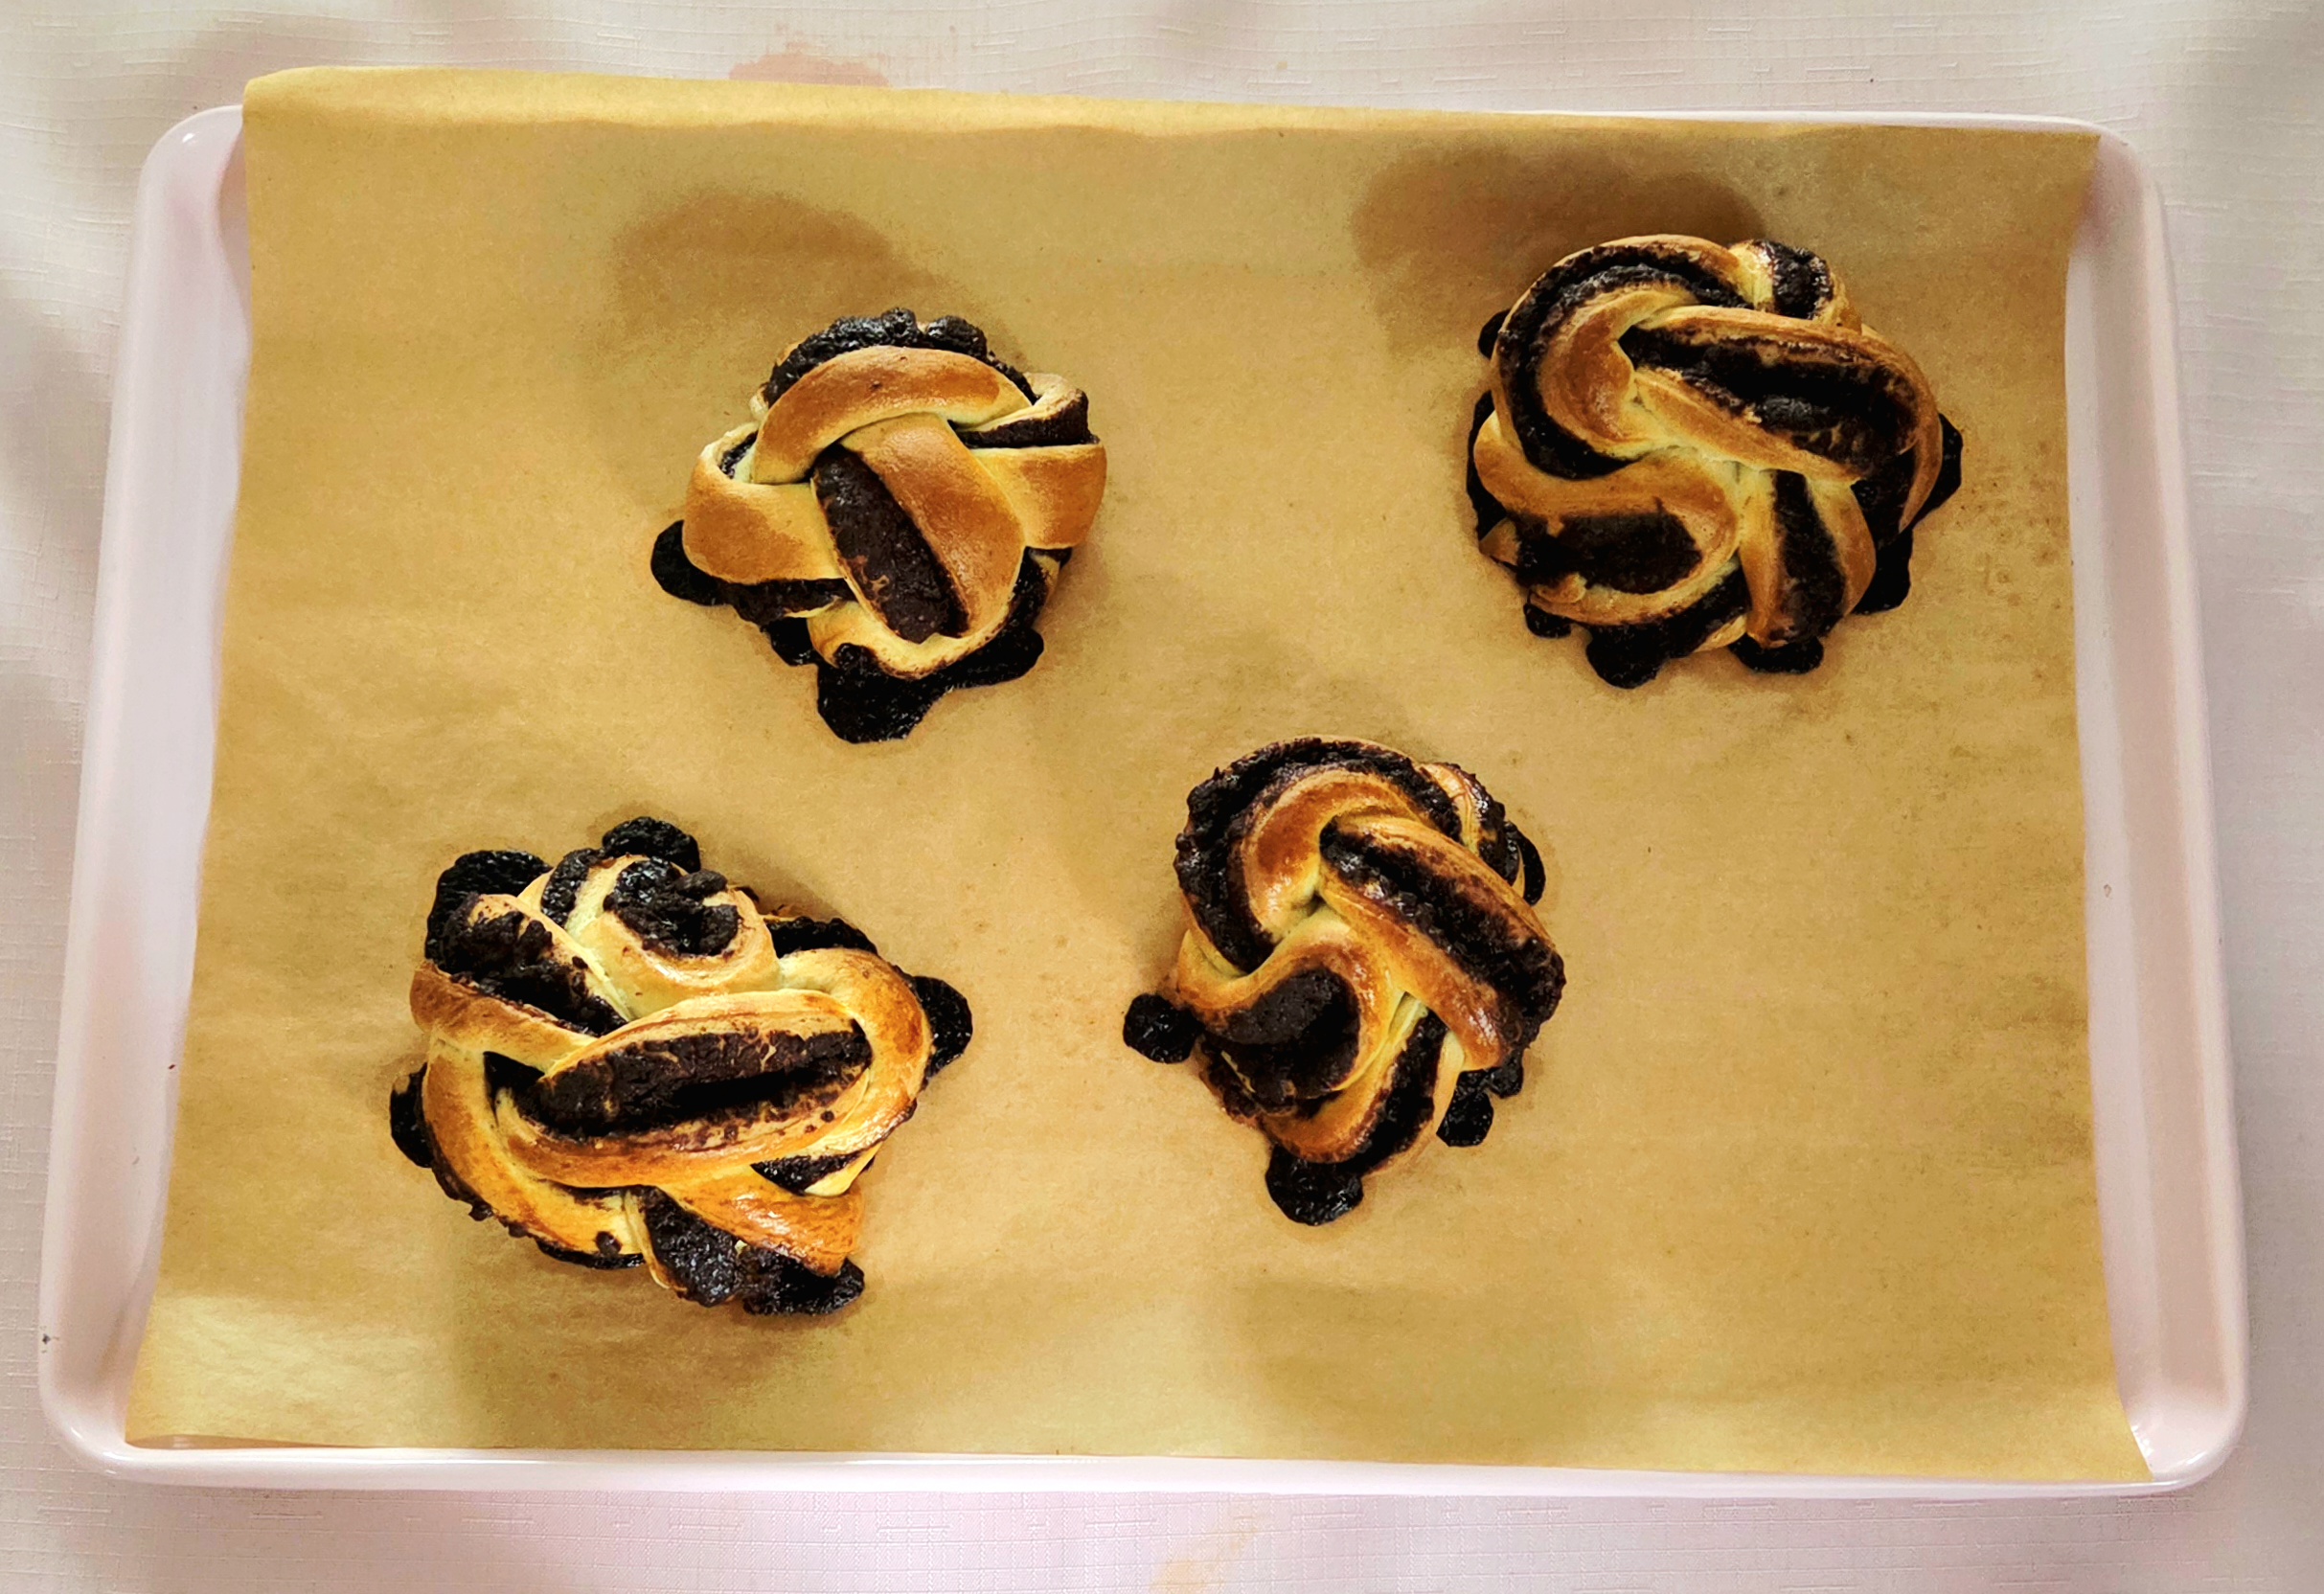
Take the folded end of the braid and gently roll it up, leaving the braided tail on the bottom of the bun. Repeat this process with ever strand, placing 4 knots on each baking sheet spaced about 2-3 inches apart.

Cover each pan with plastic wrap and leave them somewhere warm to proof once more for 1 hour. About halfway through proofing, prepare the oven. Arrange the racks so you’ll be able to place two in the oven at once and preheat it to 350F, on the convection setting if possible.
Once the knots are done proofing, place one pan on each rack and bake for 30-35 minutes or until golden brown on top, rotating the pans halfway through baking. Repeat with the remaining pan.
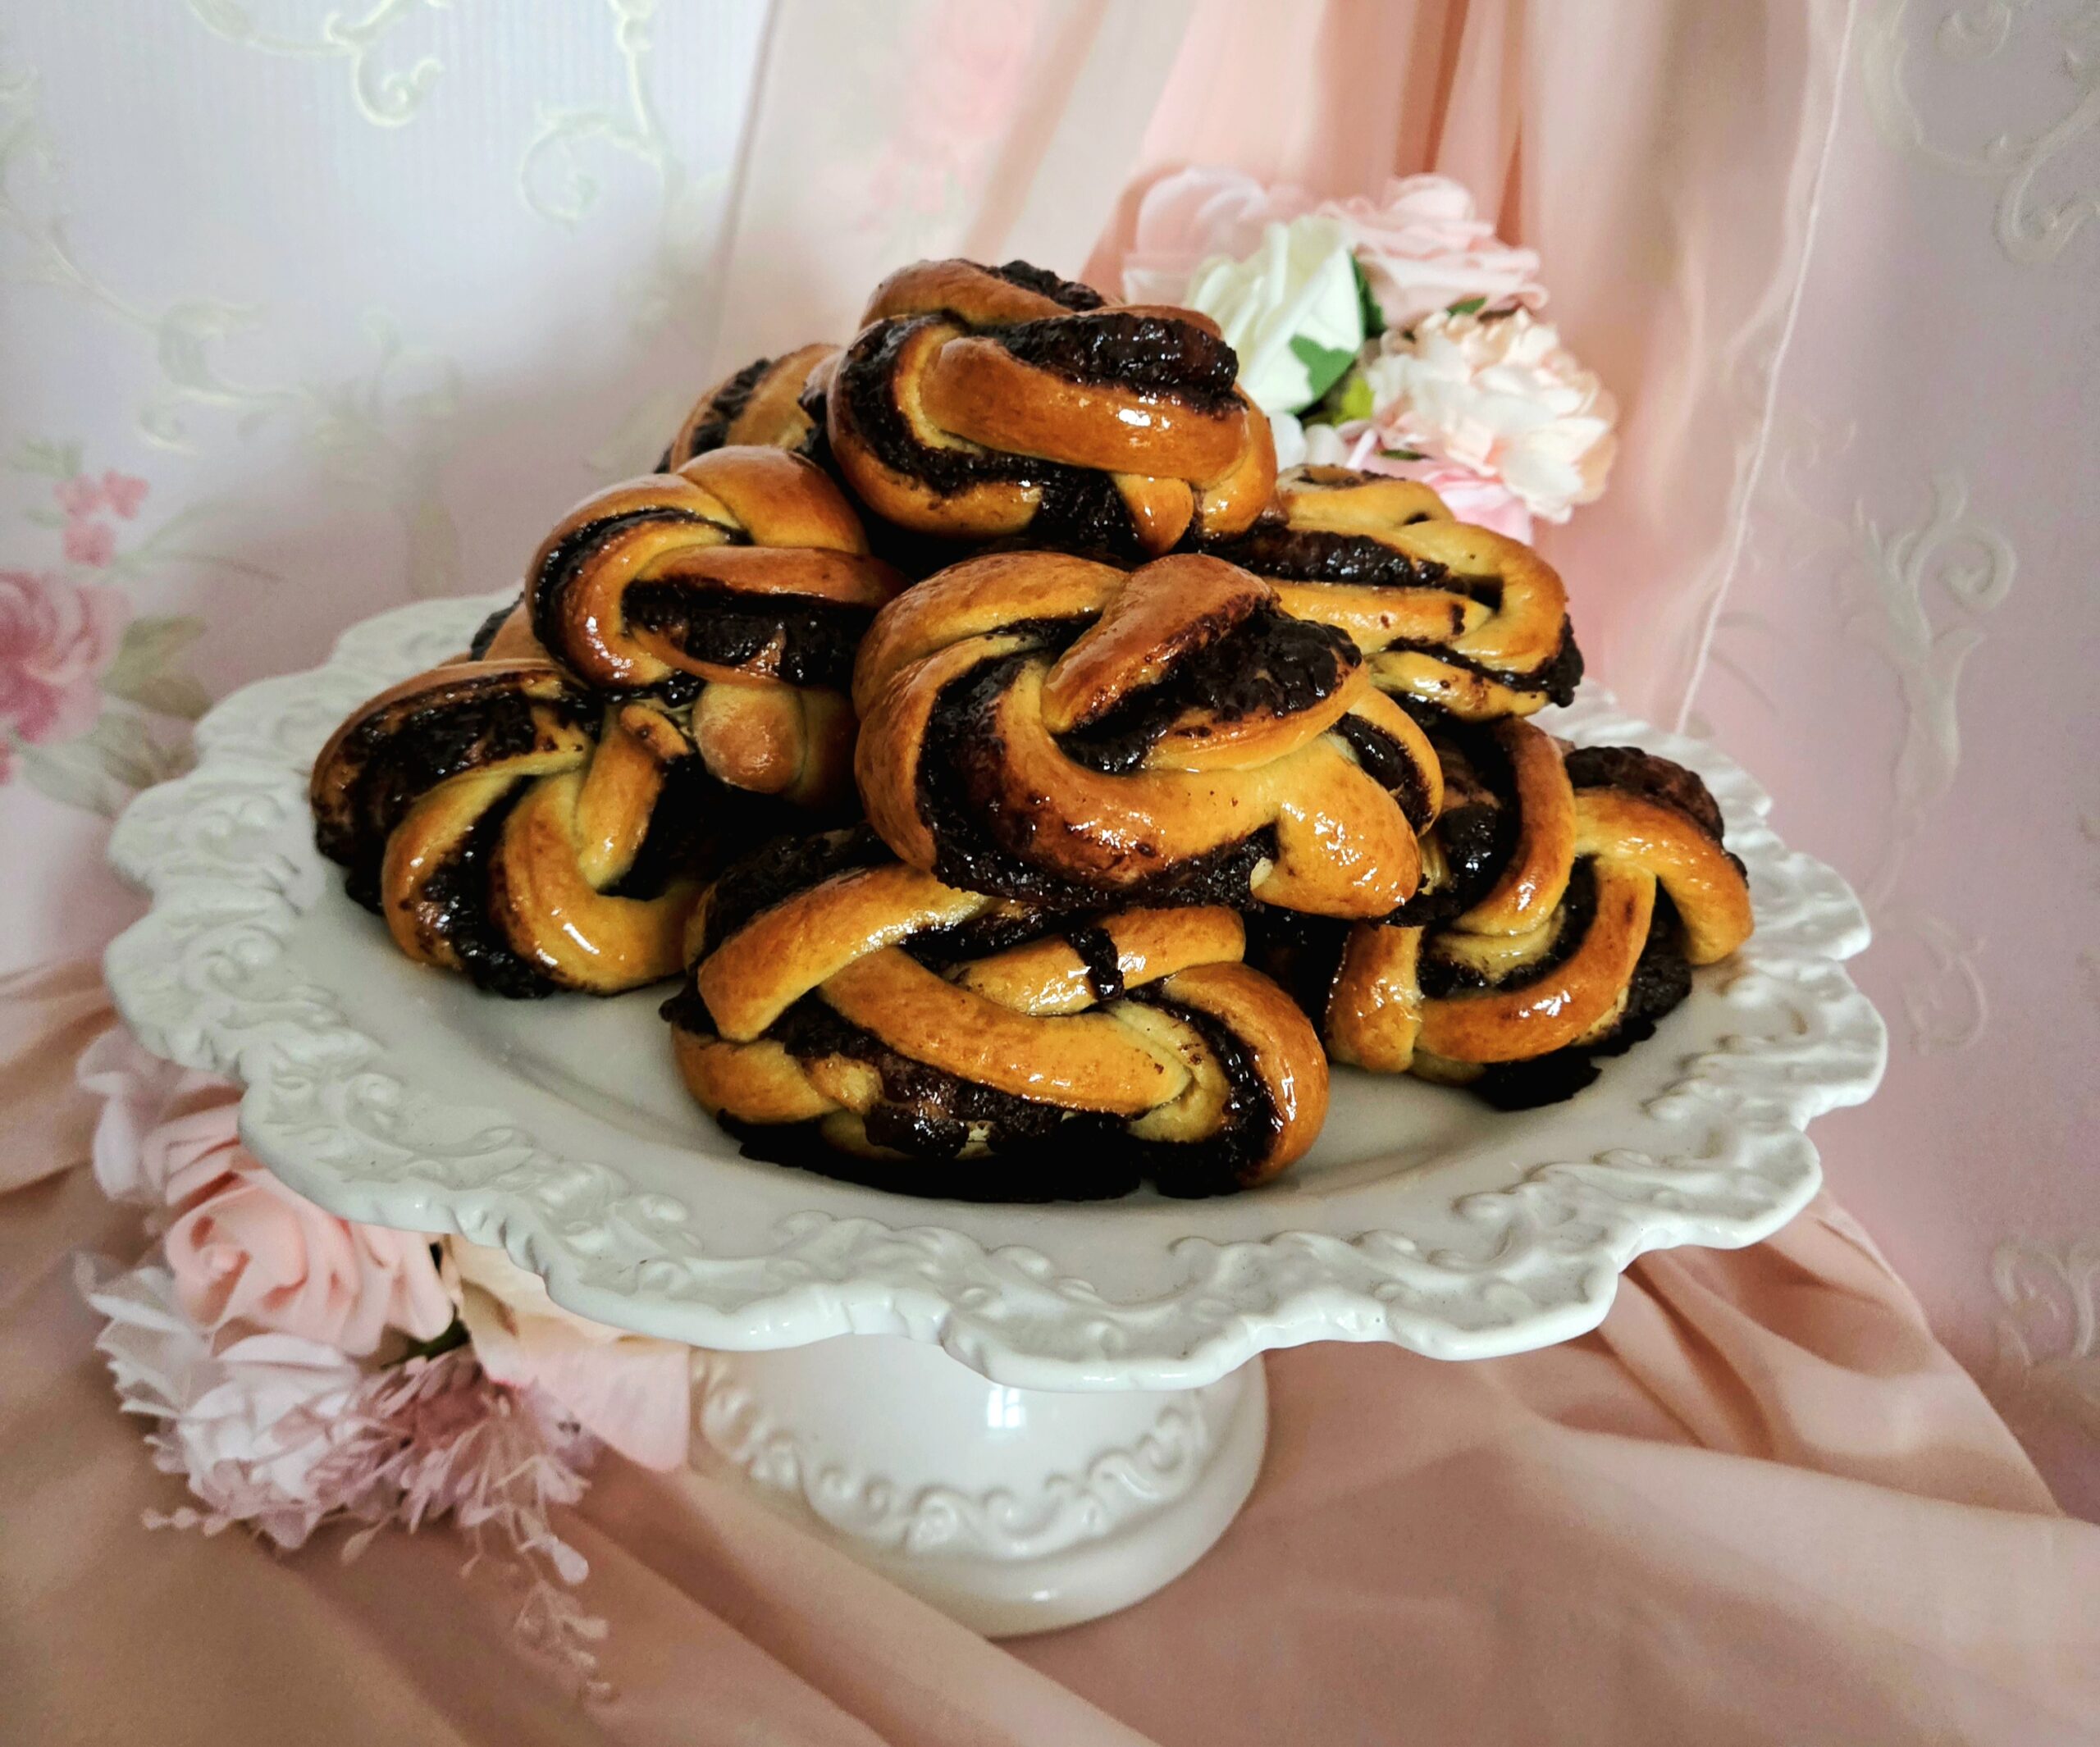
When all of the knots have come out of the oven, using either a pastry brush or a large spoon, coat each knot in a layer of the orange glaze from earlier. Rotate between coating each bun until all of the glaze has been used up, approximately 4 coats per bun. Don’t fret, they wont become soggy. Allow them to cool completely and the glaze to set.


Store the knots in an airtight container for up to 2 days, and enjoy!
Chocolate Orange Spice Knots
Bake Time: 350F for 30-35 minutes
Servings: 12 buns
Total Time: 3 hour 30 minutes
Prep Time: 60 Minutes
Ingredients
Dough:
- 5 cups bread flour
- ⅓ cup granulated sugar
- 2 ¼ teaspoon instant yeast
- 1 ½ teaspoon salt
- 1 cup orange juice, fresh squeezed
- ¾ cup warm water
- ½ cup unsalted butter
Filling:
- ¾ cup granulated sugar
- Zest 2 oranges
- 2 oz dark chocolate
- ¼ cup dutch processed cocoa powder
- 1 ½ teaspoon ground cinnamon
- ½ teaspoon ground clove
- ½ teaspoon ground allspice
- ½ teaspoon salt
- 6 Tablespoons unsalted butter, softened
Glaze:
- ½ cup orange juice, fresh squeezed
- ½ cup granulated sugar
Directions:
Dough:
- In a small microwavable bowl, heat the butter in 30 second increments, swirling in between to eliminate any hot spots, until it’s just melted and set it aside to cool. In the bowl of a stand mixer, whisk together the flour, sugar, salt, and yeast.
- Slice 8-10 medium oranges and squeeze out 1 cup worth of orange juice into a liquid measuring cup. Pour the orange juice, water, and cooled melted butter into the dry goods. Using the dough hook attachment, knead the dough in the stand mixer on level 2 until a tacky but not sticky dough comes together, then knead it for 5 minutes more.
- Gather the dough into a ball shape and place it in a lightly oiled bowl, flipping it around a few times so the dough gets a light coating of oil as well. Cover the bowl with plastic wrap and place it in a warm area to proof for 60-90 minutes, or until doubled in size.
Filling:
- While the dough proofs, prepare the filling. In a medium mixing bowl, add the sugar and grate the zest of two oranges directly into it. Whisk the sugar and zest together, and allow it to sit for 5 minutes before continuing on.
- As the orange sugar sits, melt the chocolate in 30 second increments in a small microwavable bowl, mixing with a spoon or rubber spatula in between. Set this aside to cool.
- To the orange sugar, sift in the cocoa powder then add the cinnamon, clove, allspice, and salt. Whisk them all together.
- Add softened butter and the melted chocolate into the orange spice sugar, and whisk them together until combined. Set the filling aside.
Glaze:
- While the dough proofs, prepare the glaze. Slice 4-5 oranges and squeeze out ½ cup worth of juice.
- Pour the juice into a small saucepan and add the sugar to the juice. Gently mix the two together, just until the sugar is wet, and place the pan over medium heat. Bring the mixture to a boil, then immediately remove the pan from the heat. Set it aside and allow it to cool until you need it later on.
Assembly:
- On a clean counter, lightly sprinkle flour and place the proofed dough in the center. Sprinkle more flour onto the dough and roll it out to a 13 x 24 inch rectangle. If it starts to stick to either the rolling pin or the counter, add a bit more flour and continue on.
- Take the filling and dollop portions over the expanse of the dough. Using an offset spatula or butter knife, gently spread out the filling so it covers the entirety of the rectangle.
- Fold the rectangle in half width-wise, so it now measures about 6 x 24 inches. Using either a chef’s knife or a bench scraper, cut strips of dough every two inches, so you end up with 12 strips. See reference photos above.
- Take a strip of dough and, using the knife or bench scraper, cut the strip into 3 equal strands. Be sure to cut on the open end, NOT the folded end, and leave about ½ an inch between the top of the strip and the top of the cut strands, so they all stay attached to the folded end.
- Space out the 3 strands, as shown in photos above, to prepare to create a 3 strand braid. Take the center strand and fold it over the left strand, making the center now the left strand and the left now the center strand. Take the new center strand and cover the right strand with it, making the center now the right strand and the right now the center strand. Continue on with the center covering the left and then the right strands until the entire strip of dough has been braided.
- Take the end of the braid and gently roll it up, leaving the folded end on the bottom of the bun. See reference photos above. Repeat this process with ever strand, placing 4 knots on each baking sheet spaced about 2-3 inches apart.
- Cover each pan with plastic wrap and leave them somewhere warm to proof once more for 1 hour.
- About halfway through proofing, prepare the oven. Arrange the racks so you’ll be able to place two in the oven at once and preheat it to 350F, on the convection setting if possible.
- Once the knots are done proofing, place one pan on each rack and bake for 30-35 minutes or until golden brown on top, rotating the pans halfway through baking. Repeat with the remaining pan.
- When all of the knots have come out of the oven, using either a pastry brush or a large spoon, coat each knot in a layer of the orange glaze from earlier. Continue coating until all of the glaze has been used, and allow them to cool down and the glaze to set. Store the knots in an airtight container for up to 2 days, and enjoy!
Tips
- These knots can be prepped up to a day ahead of time! Follow the recipe up until step 7 in the Assembly section, then instead of proofing them right away, place the knots in the refrigerator overnight. When you’re ready to bake, take them out and proof them in a warm area for 60-90 minutes and continue on with the recipe as written.

0 Comments