

One of the best jobs I’ve ever had was when I was a teenager and worked at a candy shop. They were particularly well known for the historical candy the company was founded on, and still produce to this day, but they made all sorts of things in-house! Fudge, hard candy, truffles, buttercreams, cherry cordials, caramels, coconut haystacks, peppermint patties, the list goes on and on. My personal favorite were the chocolate turtles. Now, most candy shops you visit make their turtles with pecans, and this shop did as well! But they also made them using almonds or cashews.
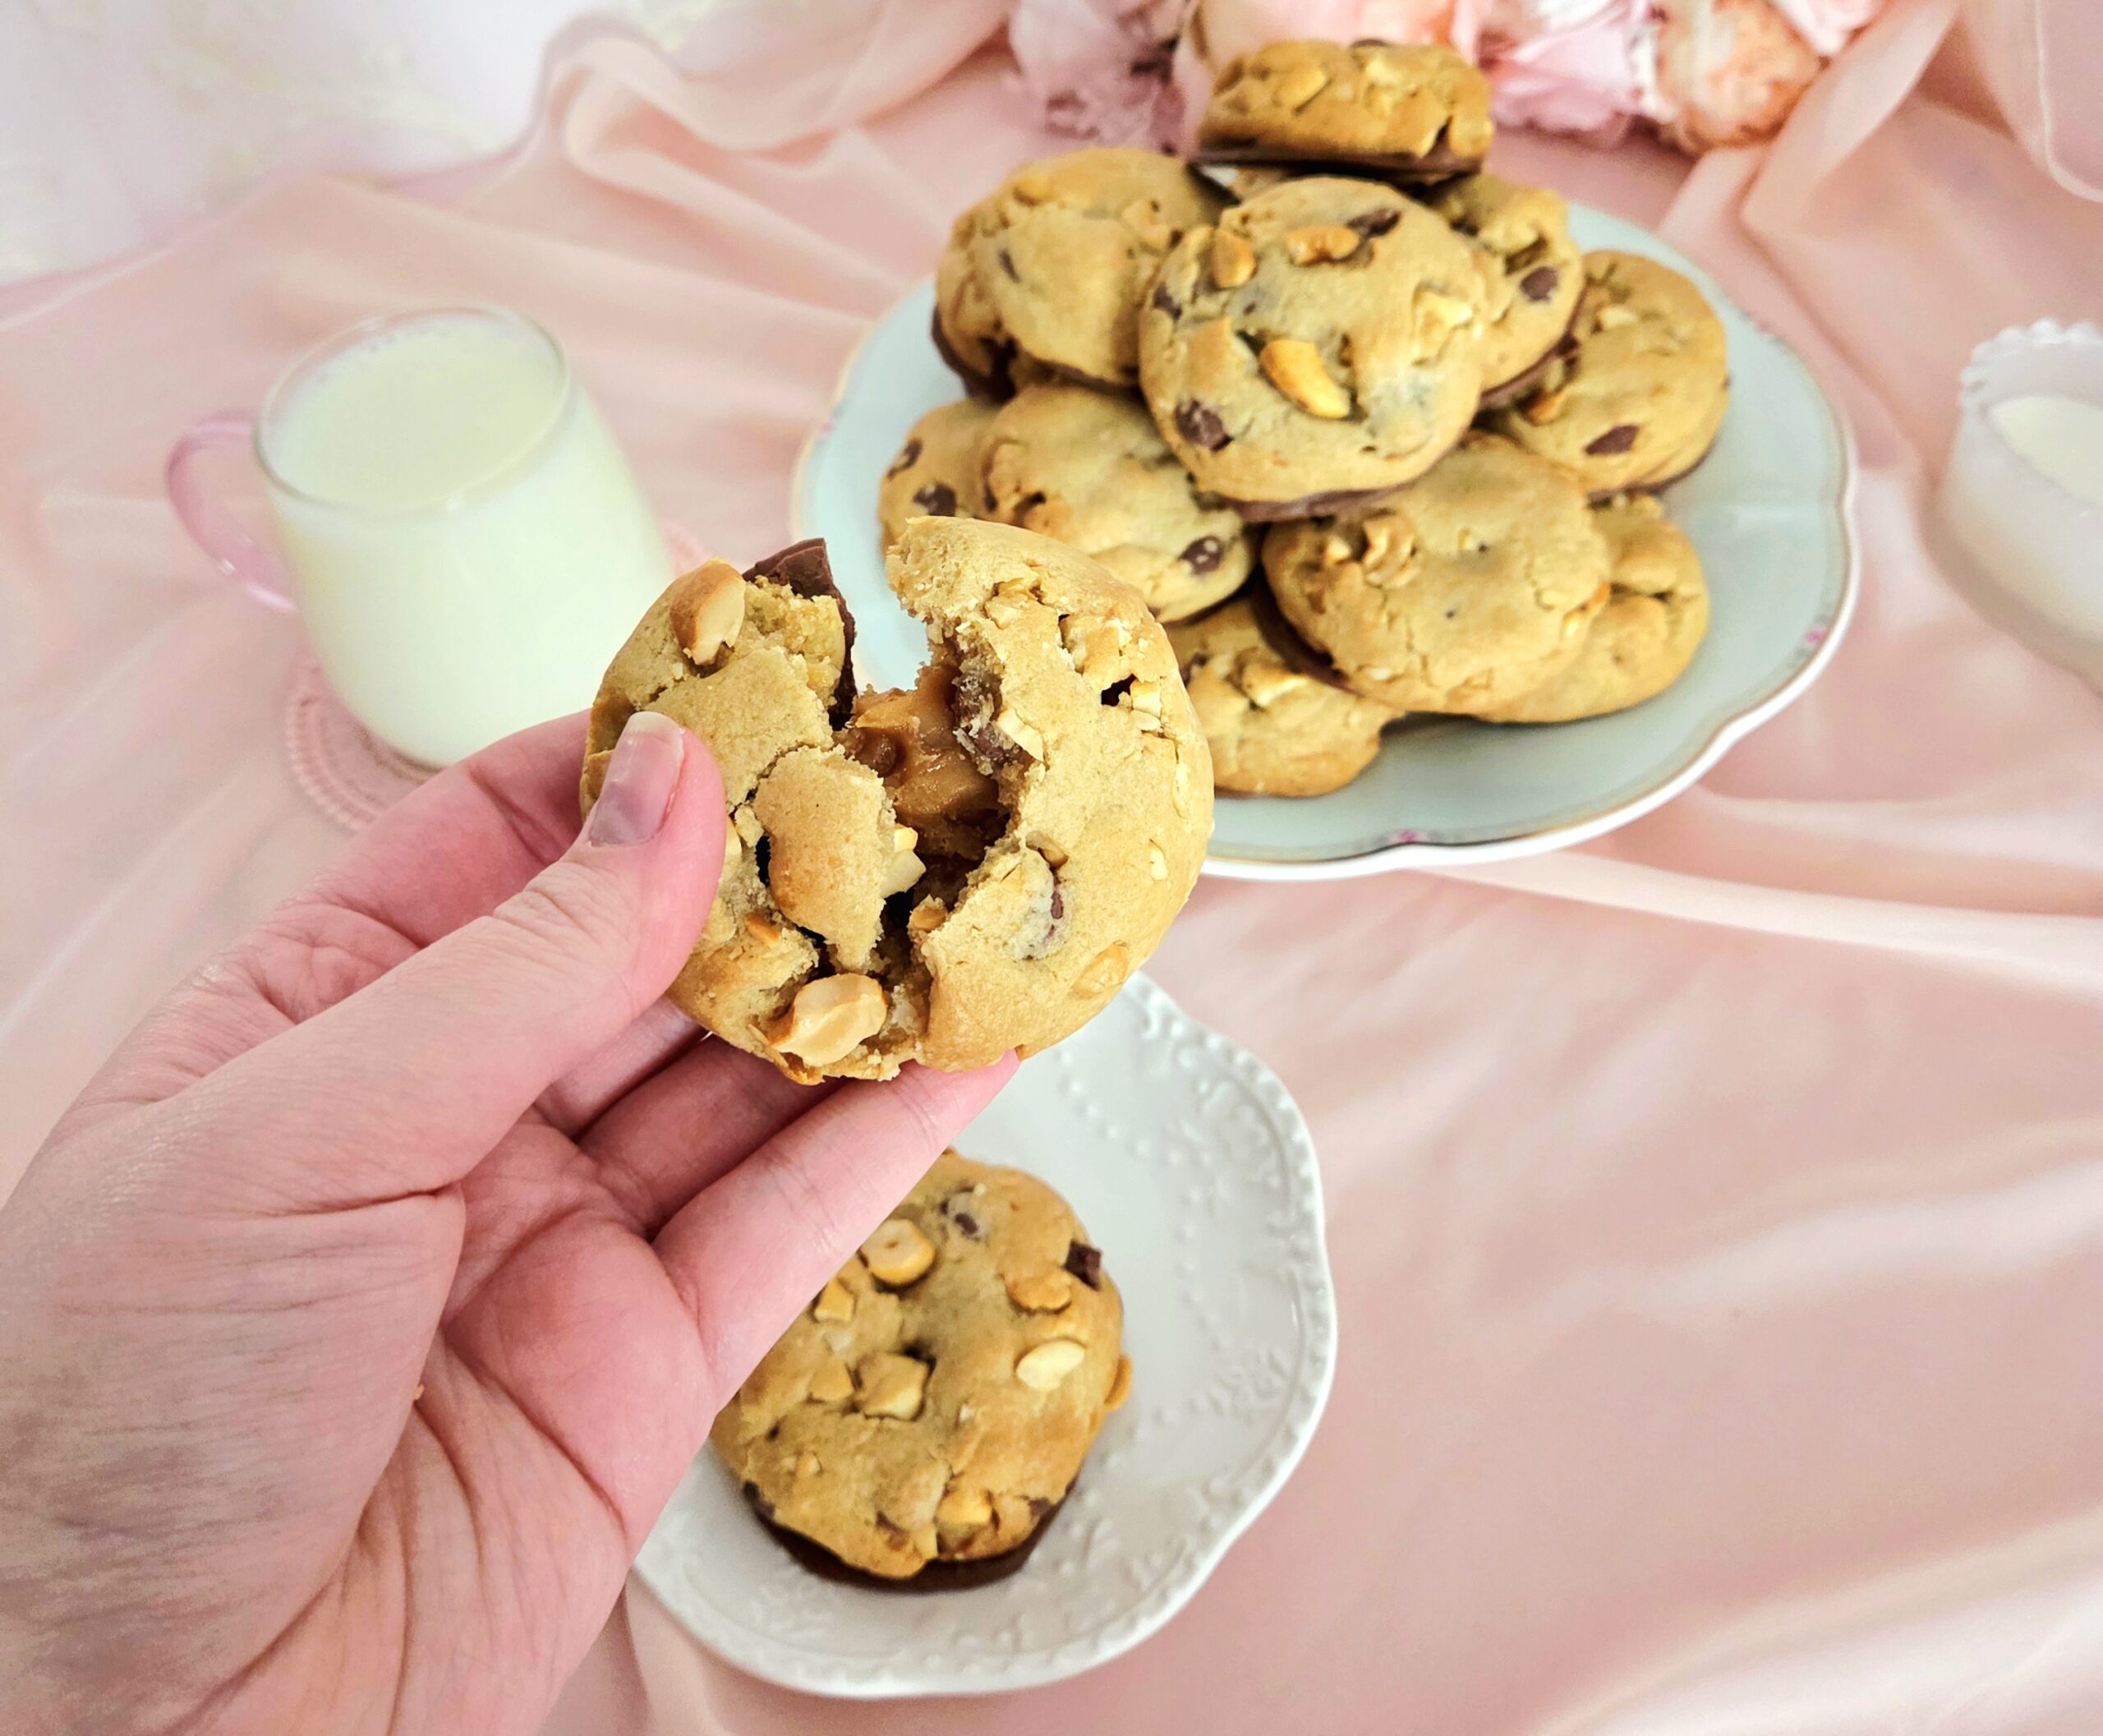
These chocolate cashew turtles were my first introduction to combining cashews with anything sweet, and let me tell you, it was a game changer. Especially with a milk chocolate pairing. These turtles absolutely inspired the creation of this recipe. These cookies are impeccable to any lover of decadent desserts. The perfect balance between sweet and salty, a beautiful chewy texture, the crunch from the nuts, the smooth chocolate coating on the bottom.
FAQs and Science
Why cashews over pecans?
Cashews and milk chocolate are a severely underrated combination that I fell in love with back when I used to work for a candy shop. It’s a pairing that’s near and dear to my heart, and I really think more people need to give it a shot! However, if you truly hate cashews and insist on pecans, by all means, switch them out. You’re in charge of your own cookies.
Is there a benefit to using melted butter rather than softened butter in cookie dough?
This is where baking being a chemistry comes into play. Using a liquid fat, like melted butter, over a solid fat, like softened butter, changes the final texture of the cookies. Using melted butter results in a cookie that’s chewier, which is exactly what’s desired from this recipe.
Why only coat the bottoms in melted chocolate, rather than dipping the whole thing?
When this recipe was being developed, I tried coating the whole cookie in chocolate. It was just too much, the chocolate ended up being overwhelming. The caramel and cashews couldn’t stand out at all the way they’re supposed to. Scaling back so only the bottom gets that layer of chocolate significantly improved on that.
Do I really need to chill the dough before baking?
Yes. Thoroughly chilled dough spreads much less and results in a stronger flavor. So while it may be a bit tedious having to wait to finish baking off the cookies, it’s worth the wait.
Is it necessary for the eggs to be room temperature? How do I warm them quickly?
In order for everything to emulsify properly, they need to be the same temperature. To rapidly warm the eggs up from fridge temp, place them into a bowl before doing any other step. Cover the eggs with the hottest water that will come out of the tap. By the time the eggs are needed, they should be at the perfect temperature!
What kind of caramel should I use?
Any kind of chewy caramel you prefer, around a 1-inch square. Salted caramel works just as well as standard vanilla caramel in this recipe.
What You’ll Need

- Parchment paper
- Plastic wrap
- Large mixing bowl
- Medium mixing bowl
- Dry measuring cups
- Measuring spoons
- Whisk
- Rubber spatula
- Chef’s knife
- Cutting board
- Spatula
- 2 baking sheets
- Cooling rack
- Cookie scoop (optional)
The Process
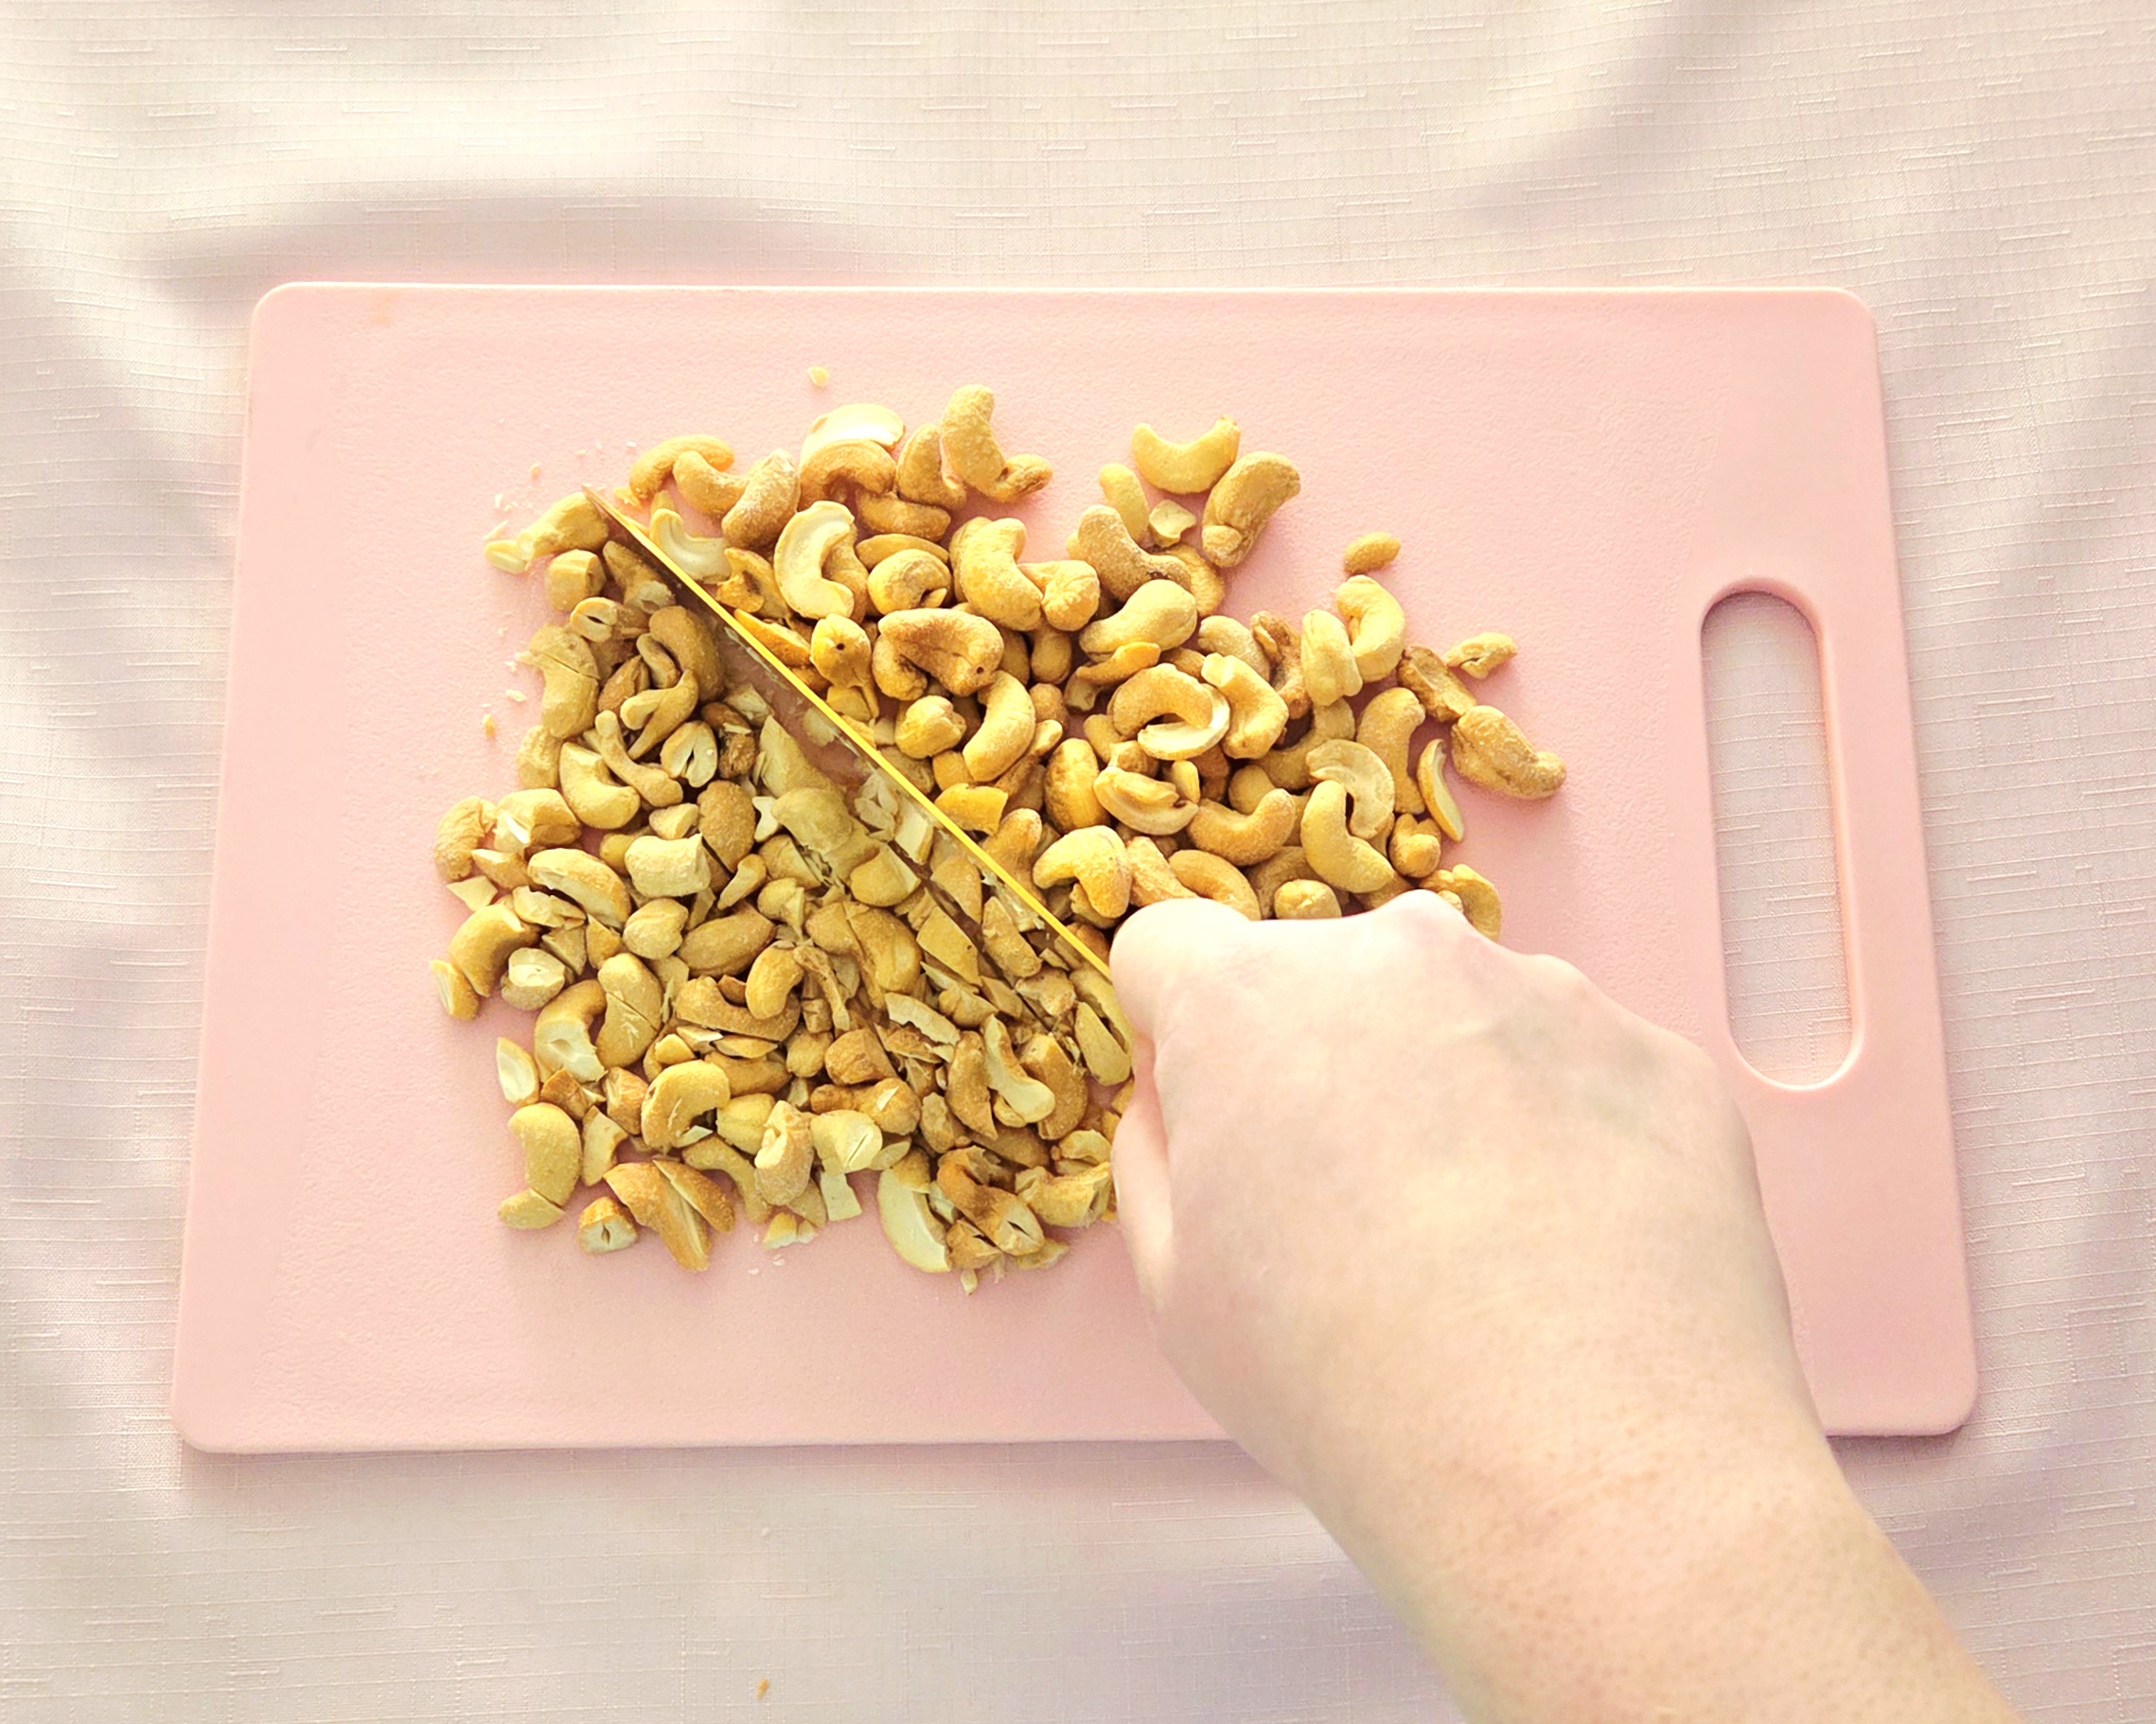
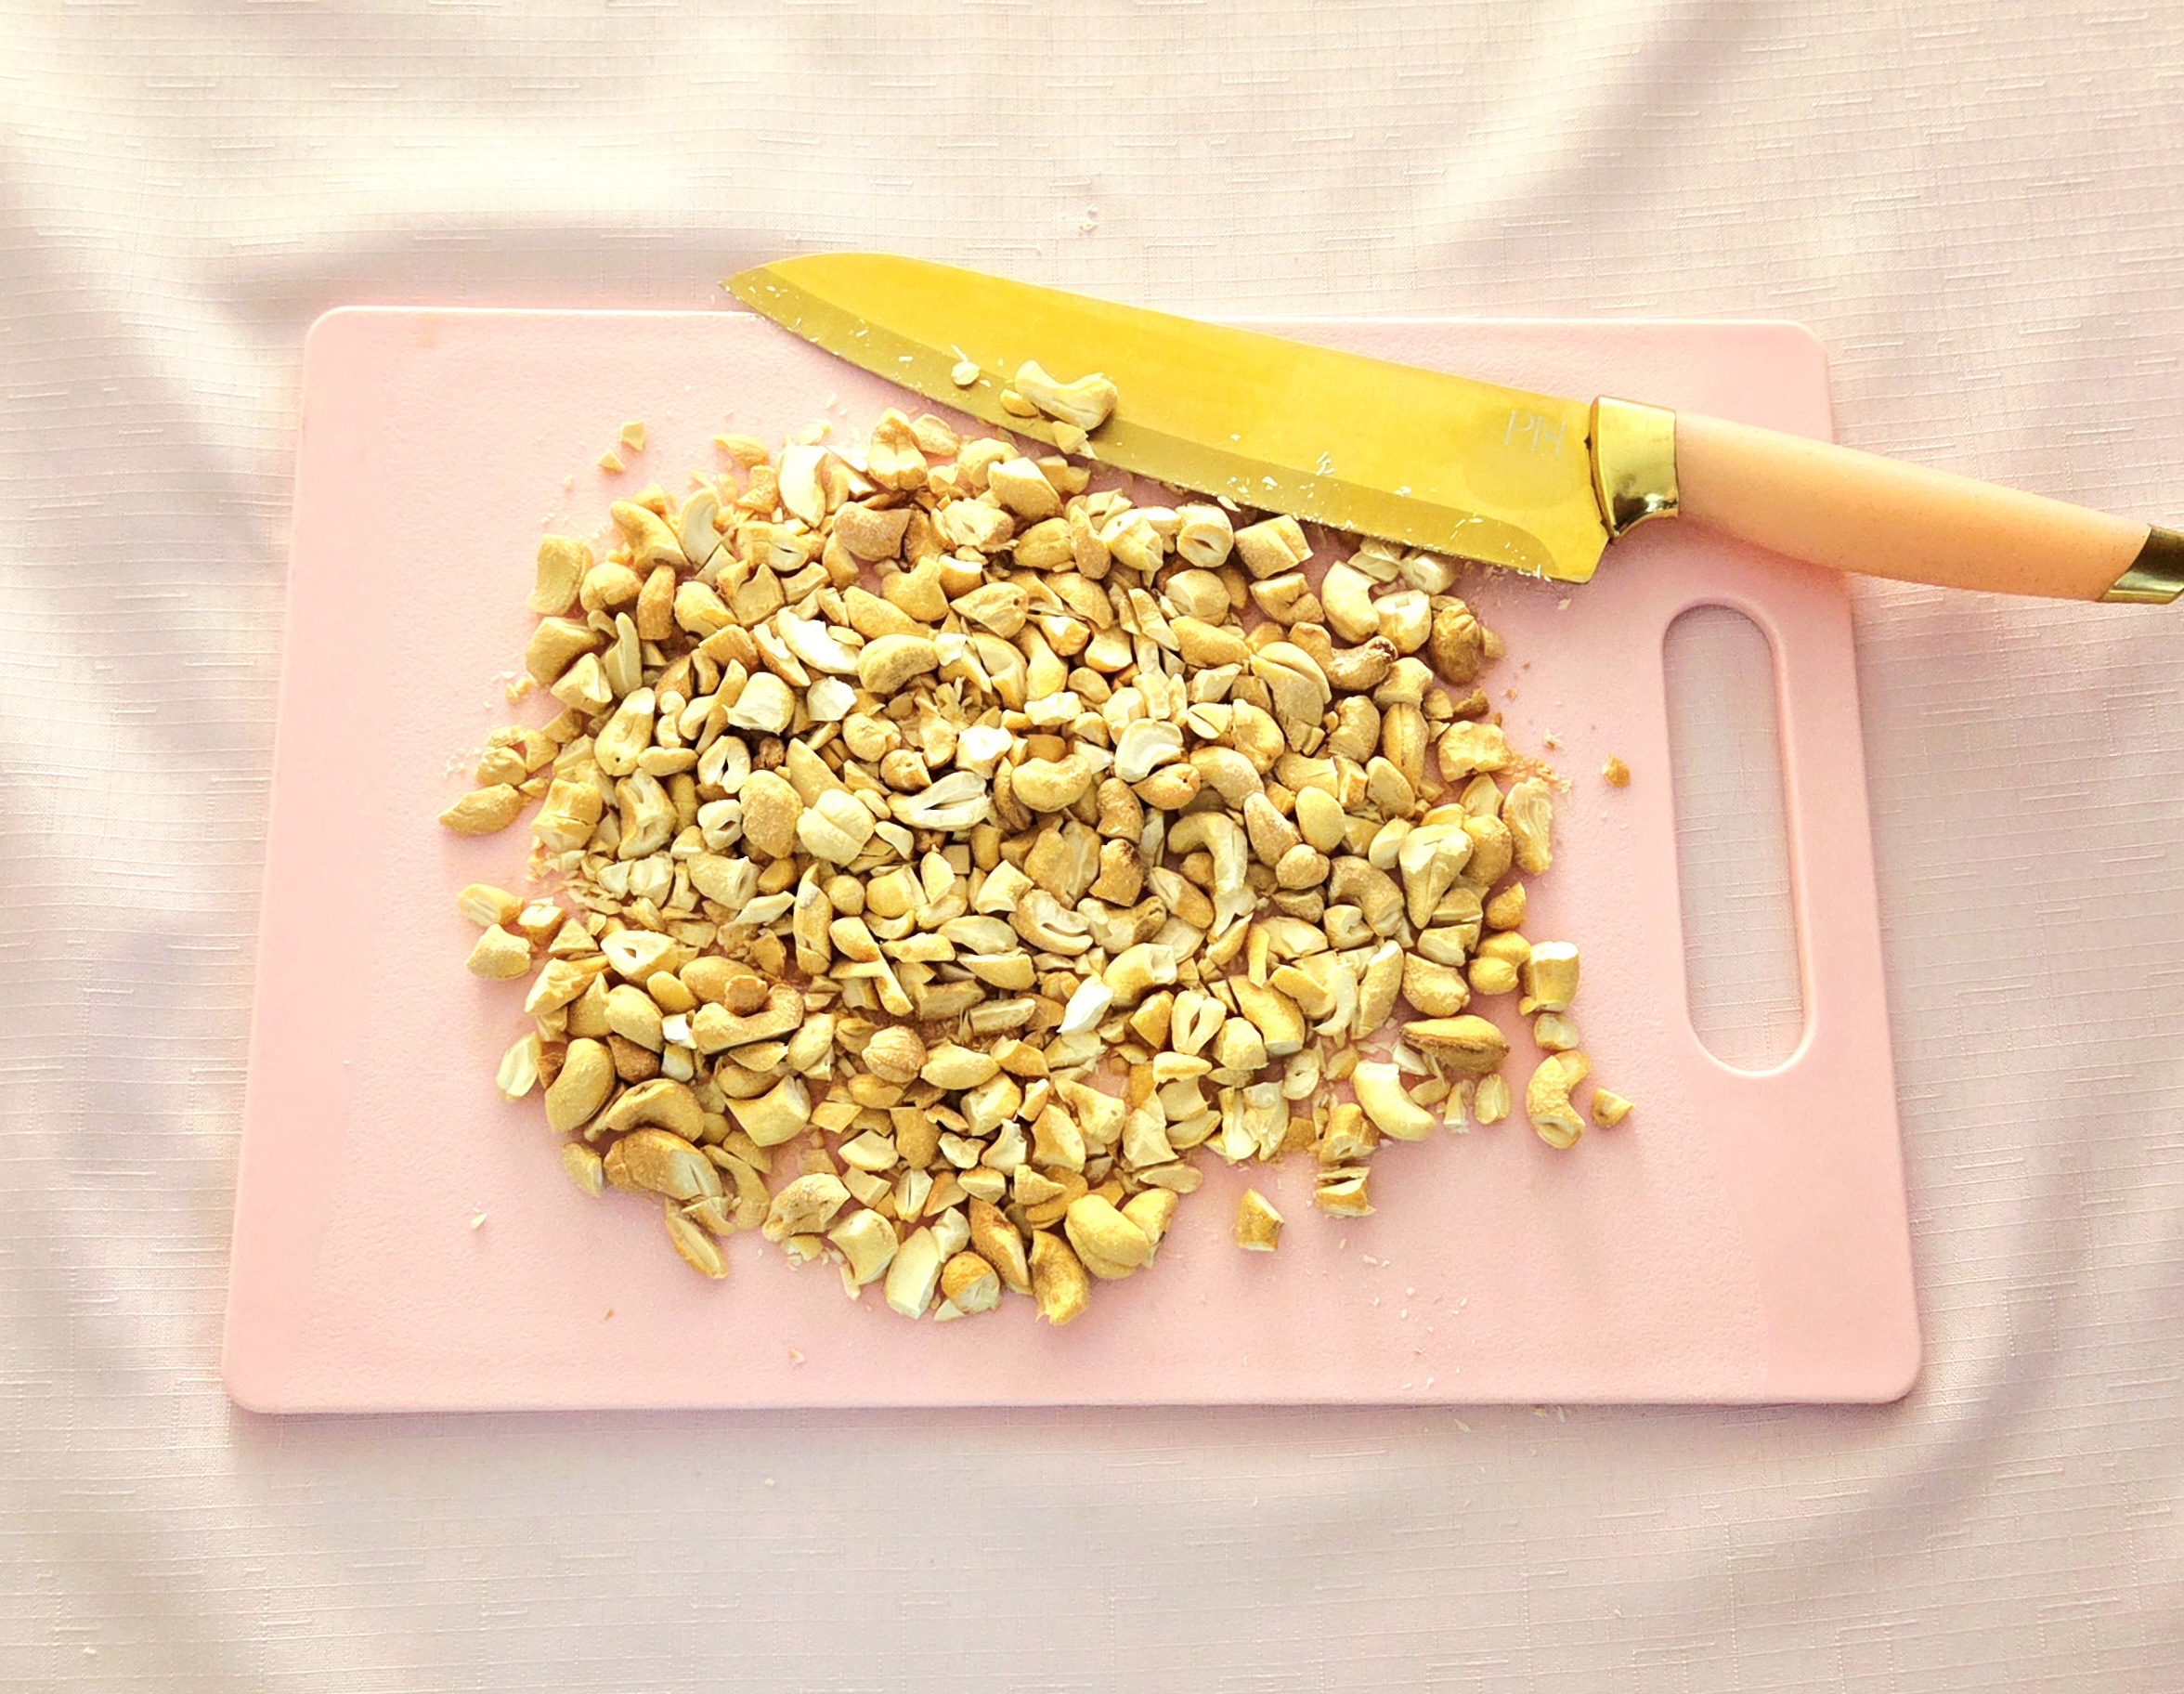
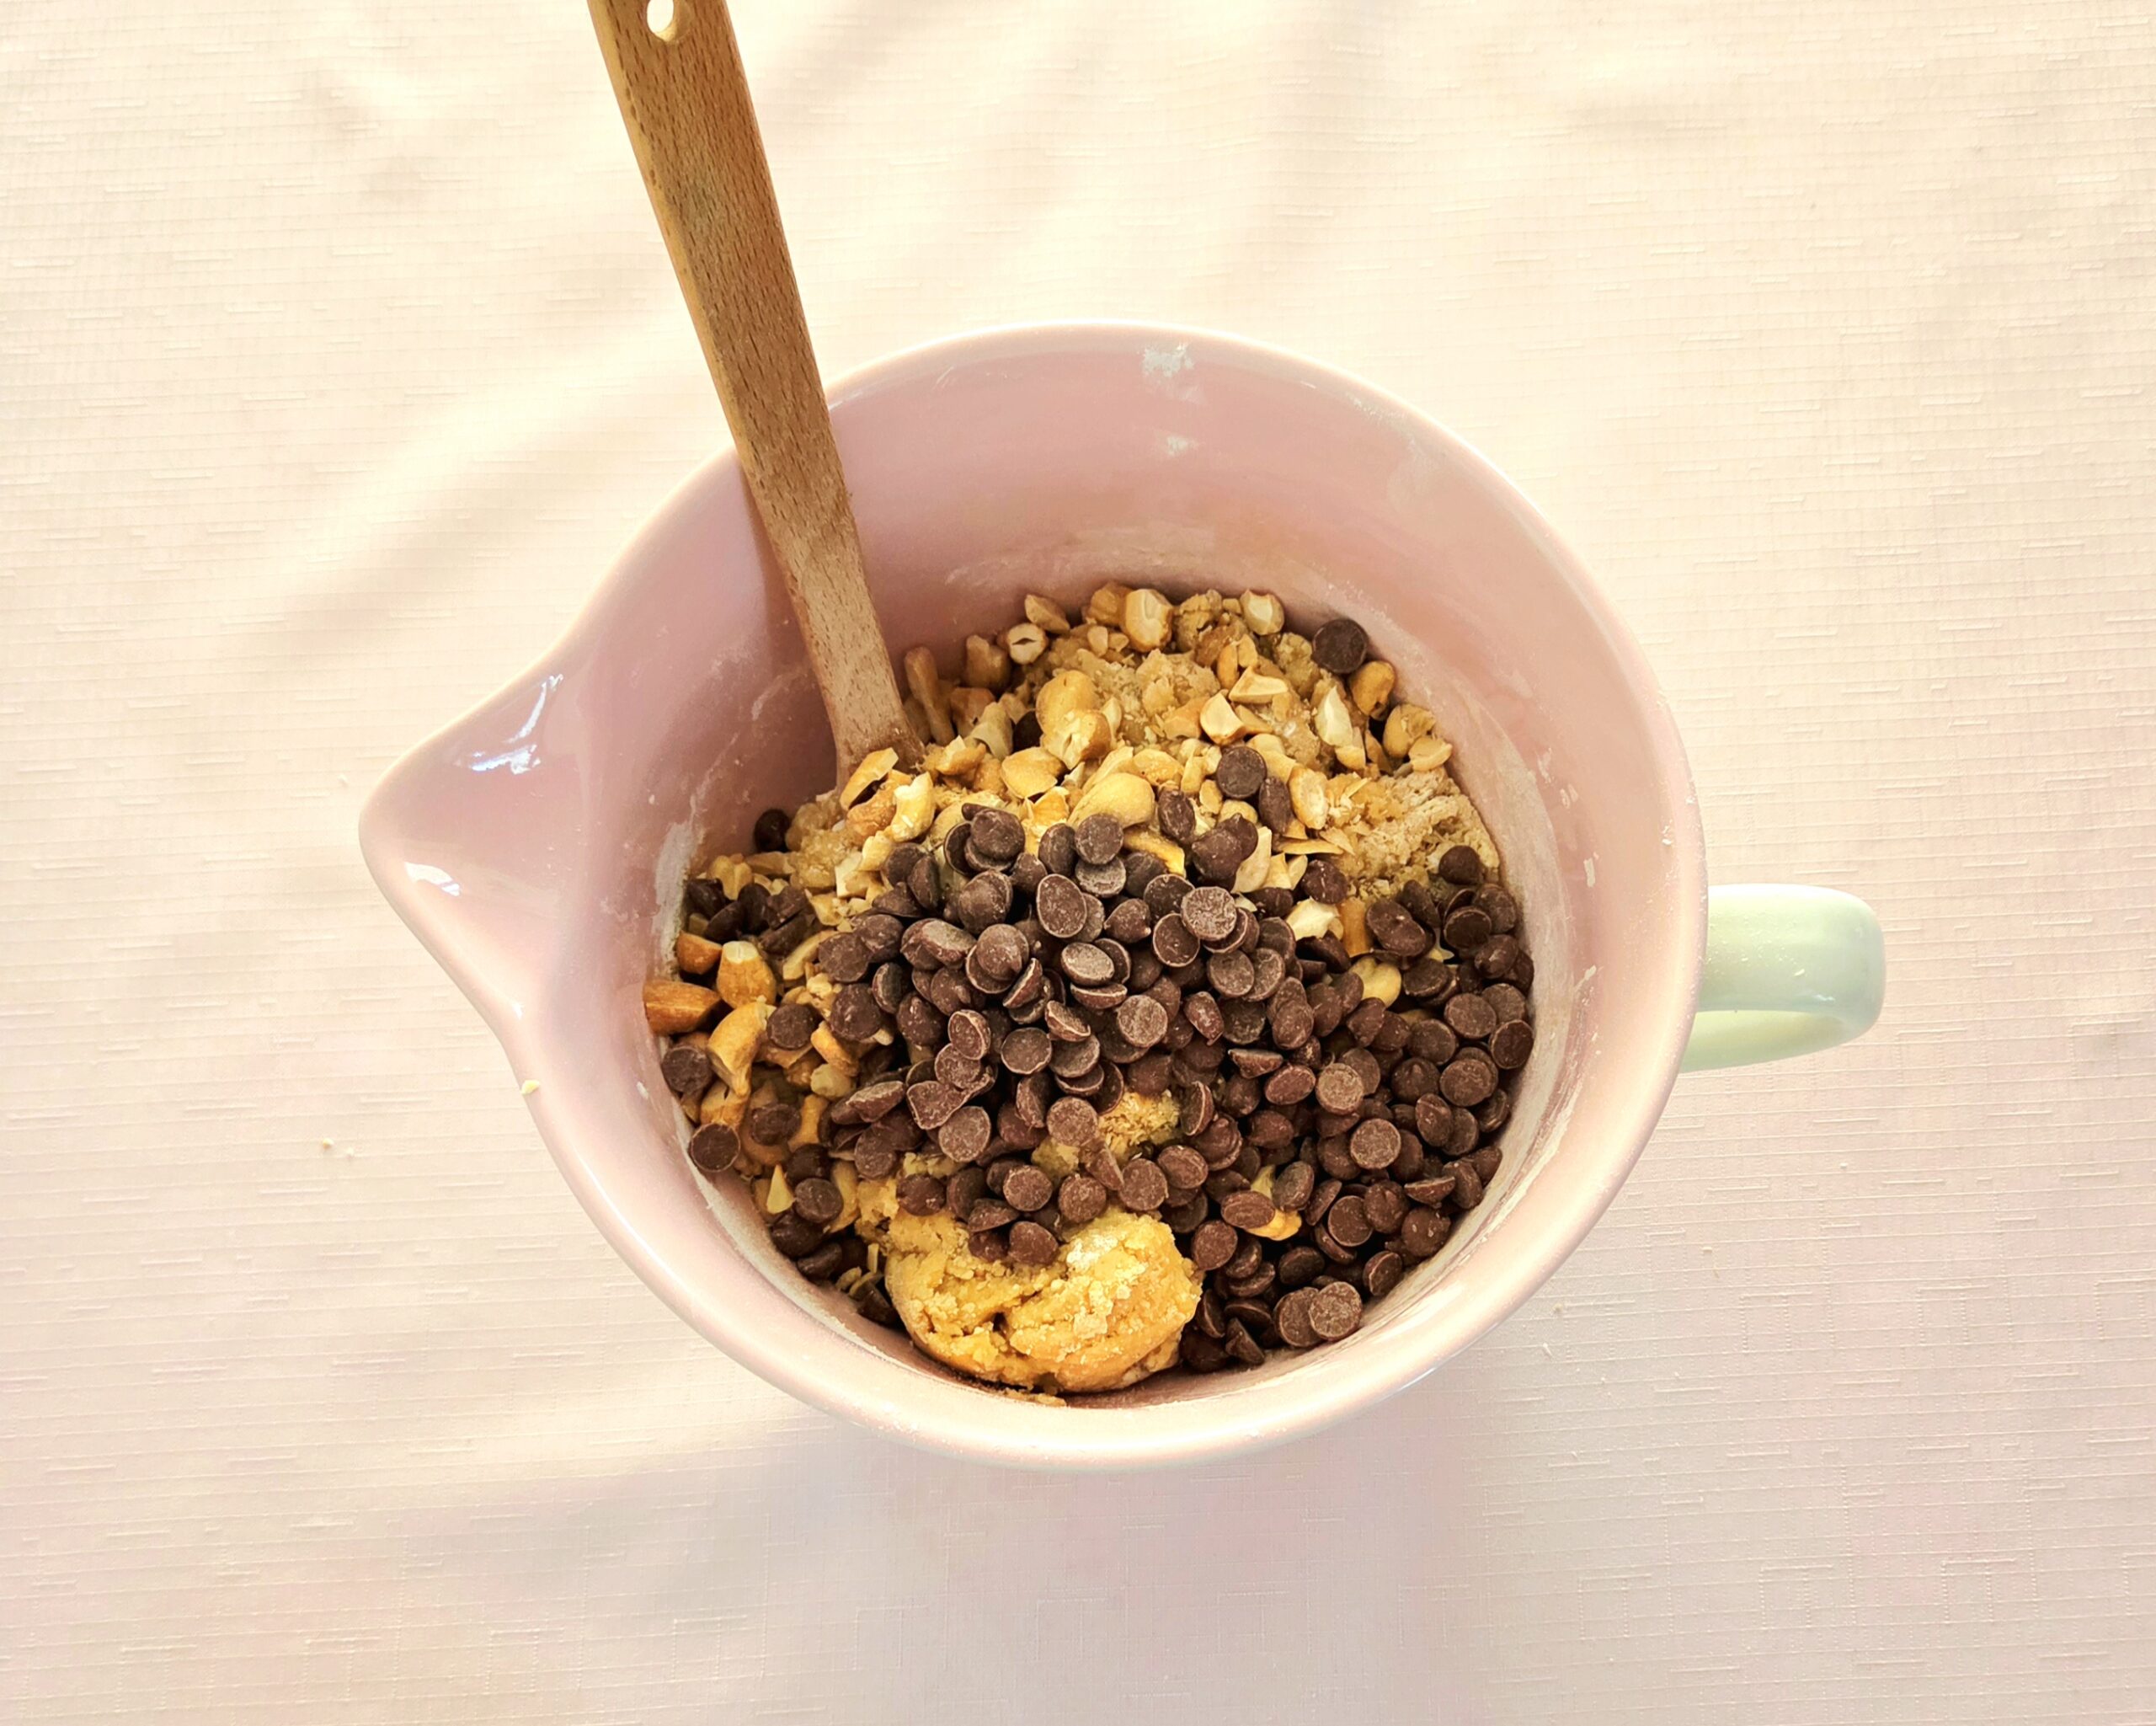
These cookies come together quickly, so if that’s what you’re looking for, you’ve come to the right place. Start by giving the cashews a rough chop, so they’re anywhere from ¼-½ inch big. That way, the pieces are large enough to actually taste the cashews in the cookies, but not so big that they’ll make shaping the cookies difficult. Set the nuts aside.
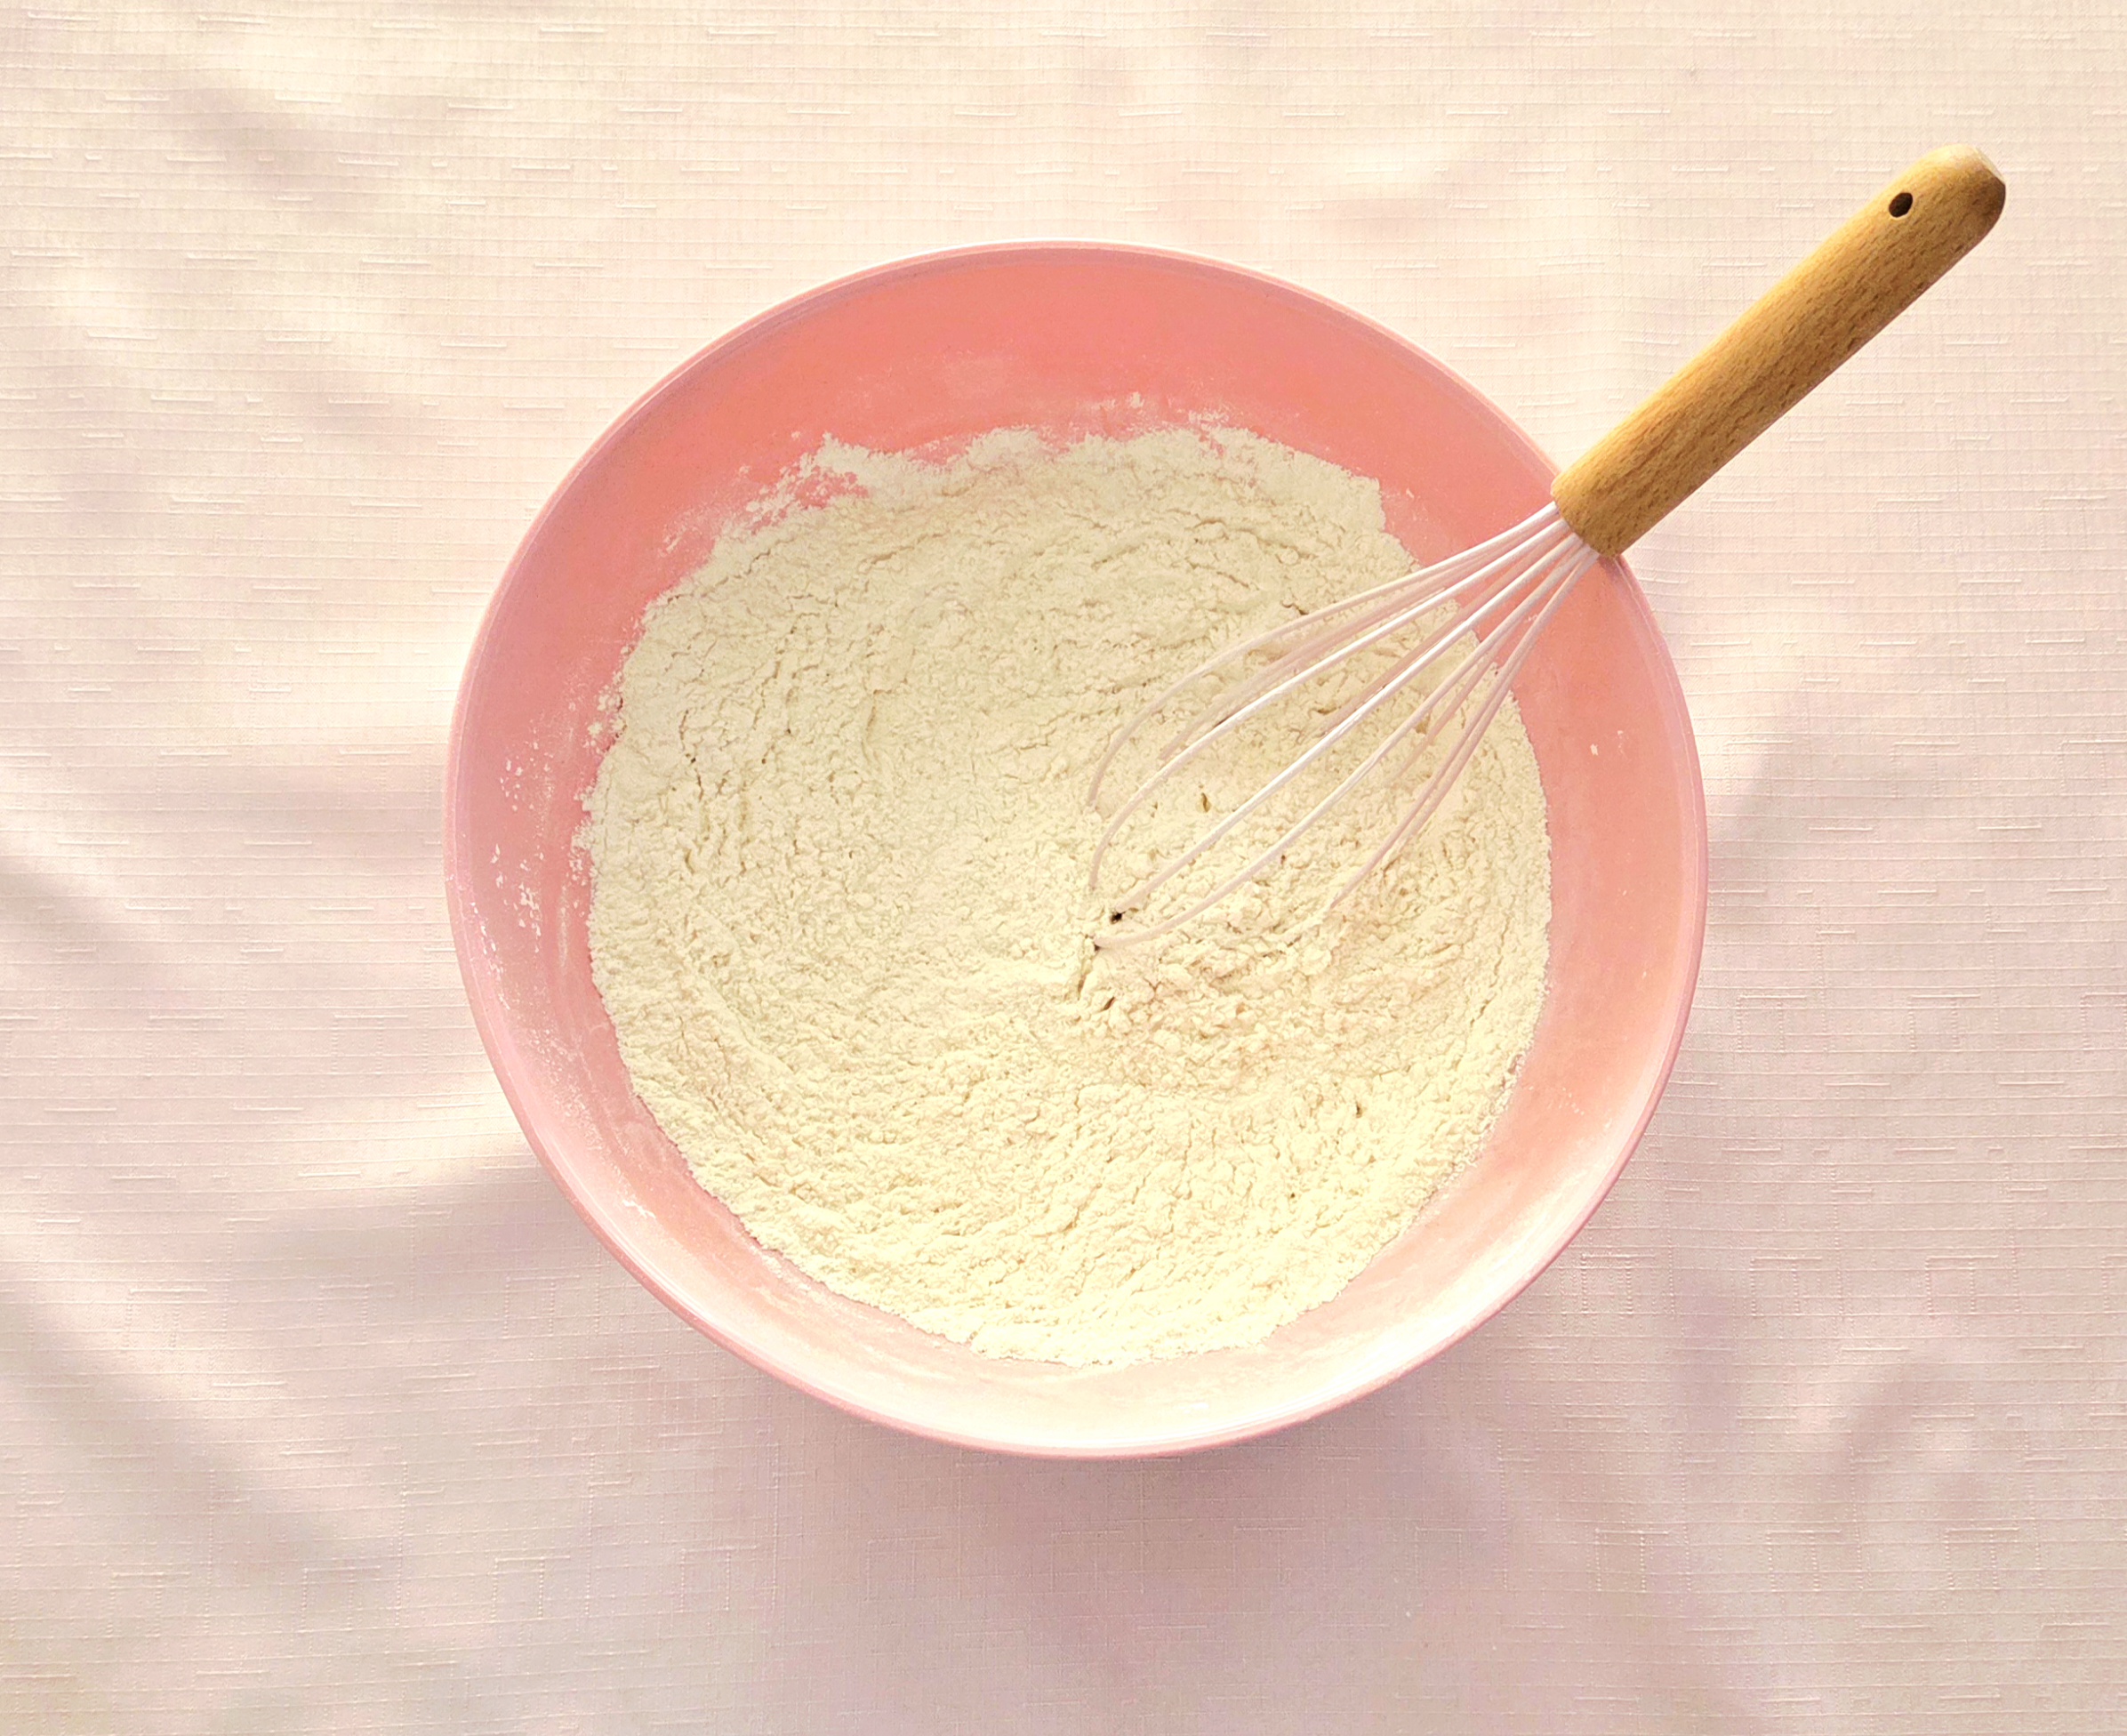
Next, bring together the dry goods. In a medium sized mixing bowl, whisk together the flour, salt, and baking soda. Yes, there are plenty of people who will tell you this step is pointless and that you can skip it. Yes, those people are also wrong, if you hope for consistently delicious cookies. Neglecting to whisk together the dry goods ahead of time on their own runs the risk of winding up with a salt pocket in some cookies, not enough of a leavening agent in others. It’s an inconsistent mess, just take 10 seconds to whisk the dry together.
Now, the wet mixture! In a large heat-safe mixing bowl, heat the butter in the microwave until it’s just melted. If you would prefer to, you could also melt the butter in a small pot on the stovetop, but my thought is, why dirty another pan if you don’t have to? Just do your best not to make the butter too hot. If it’s hot, it could cook the eggs and melt the chocolate when they’re added, neither of which you can really fix. Add the brown sugar to the melted butter.
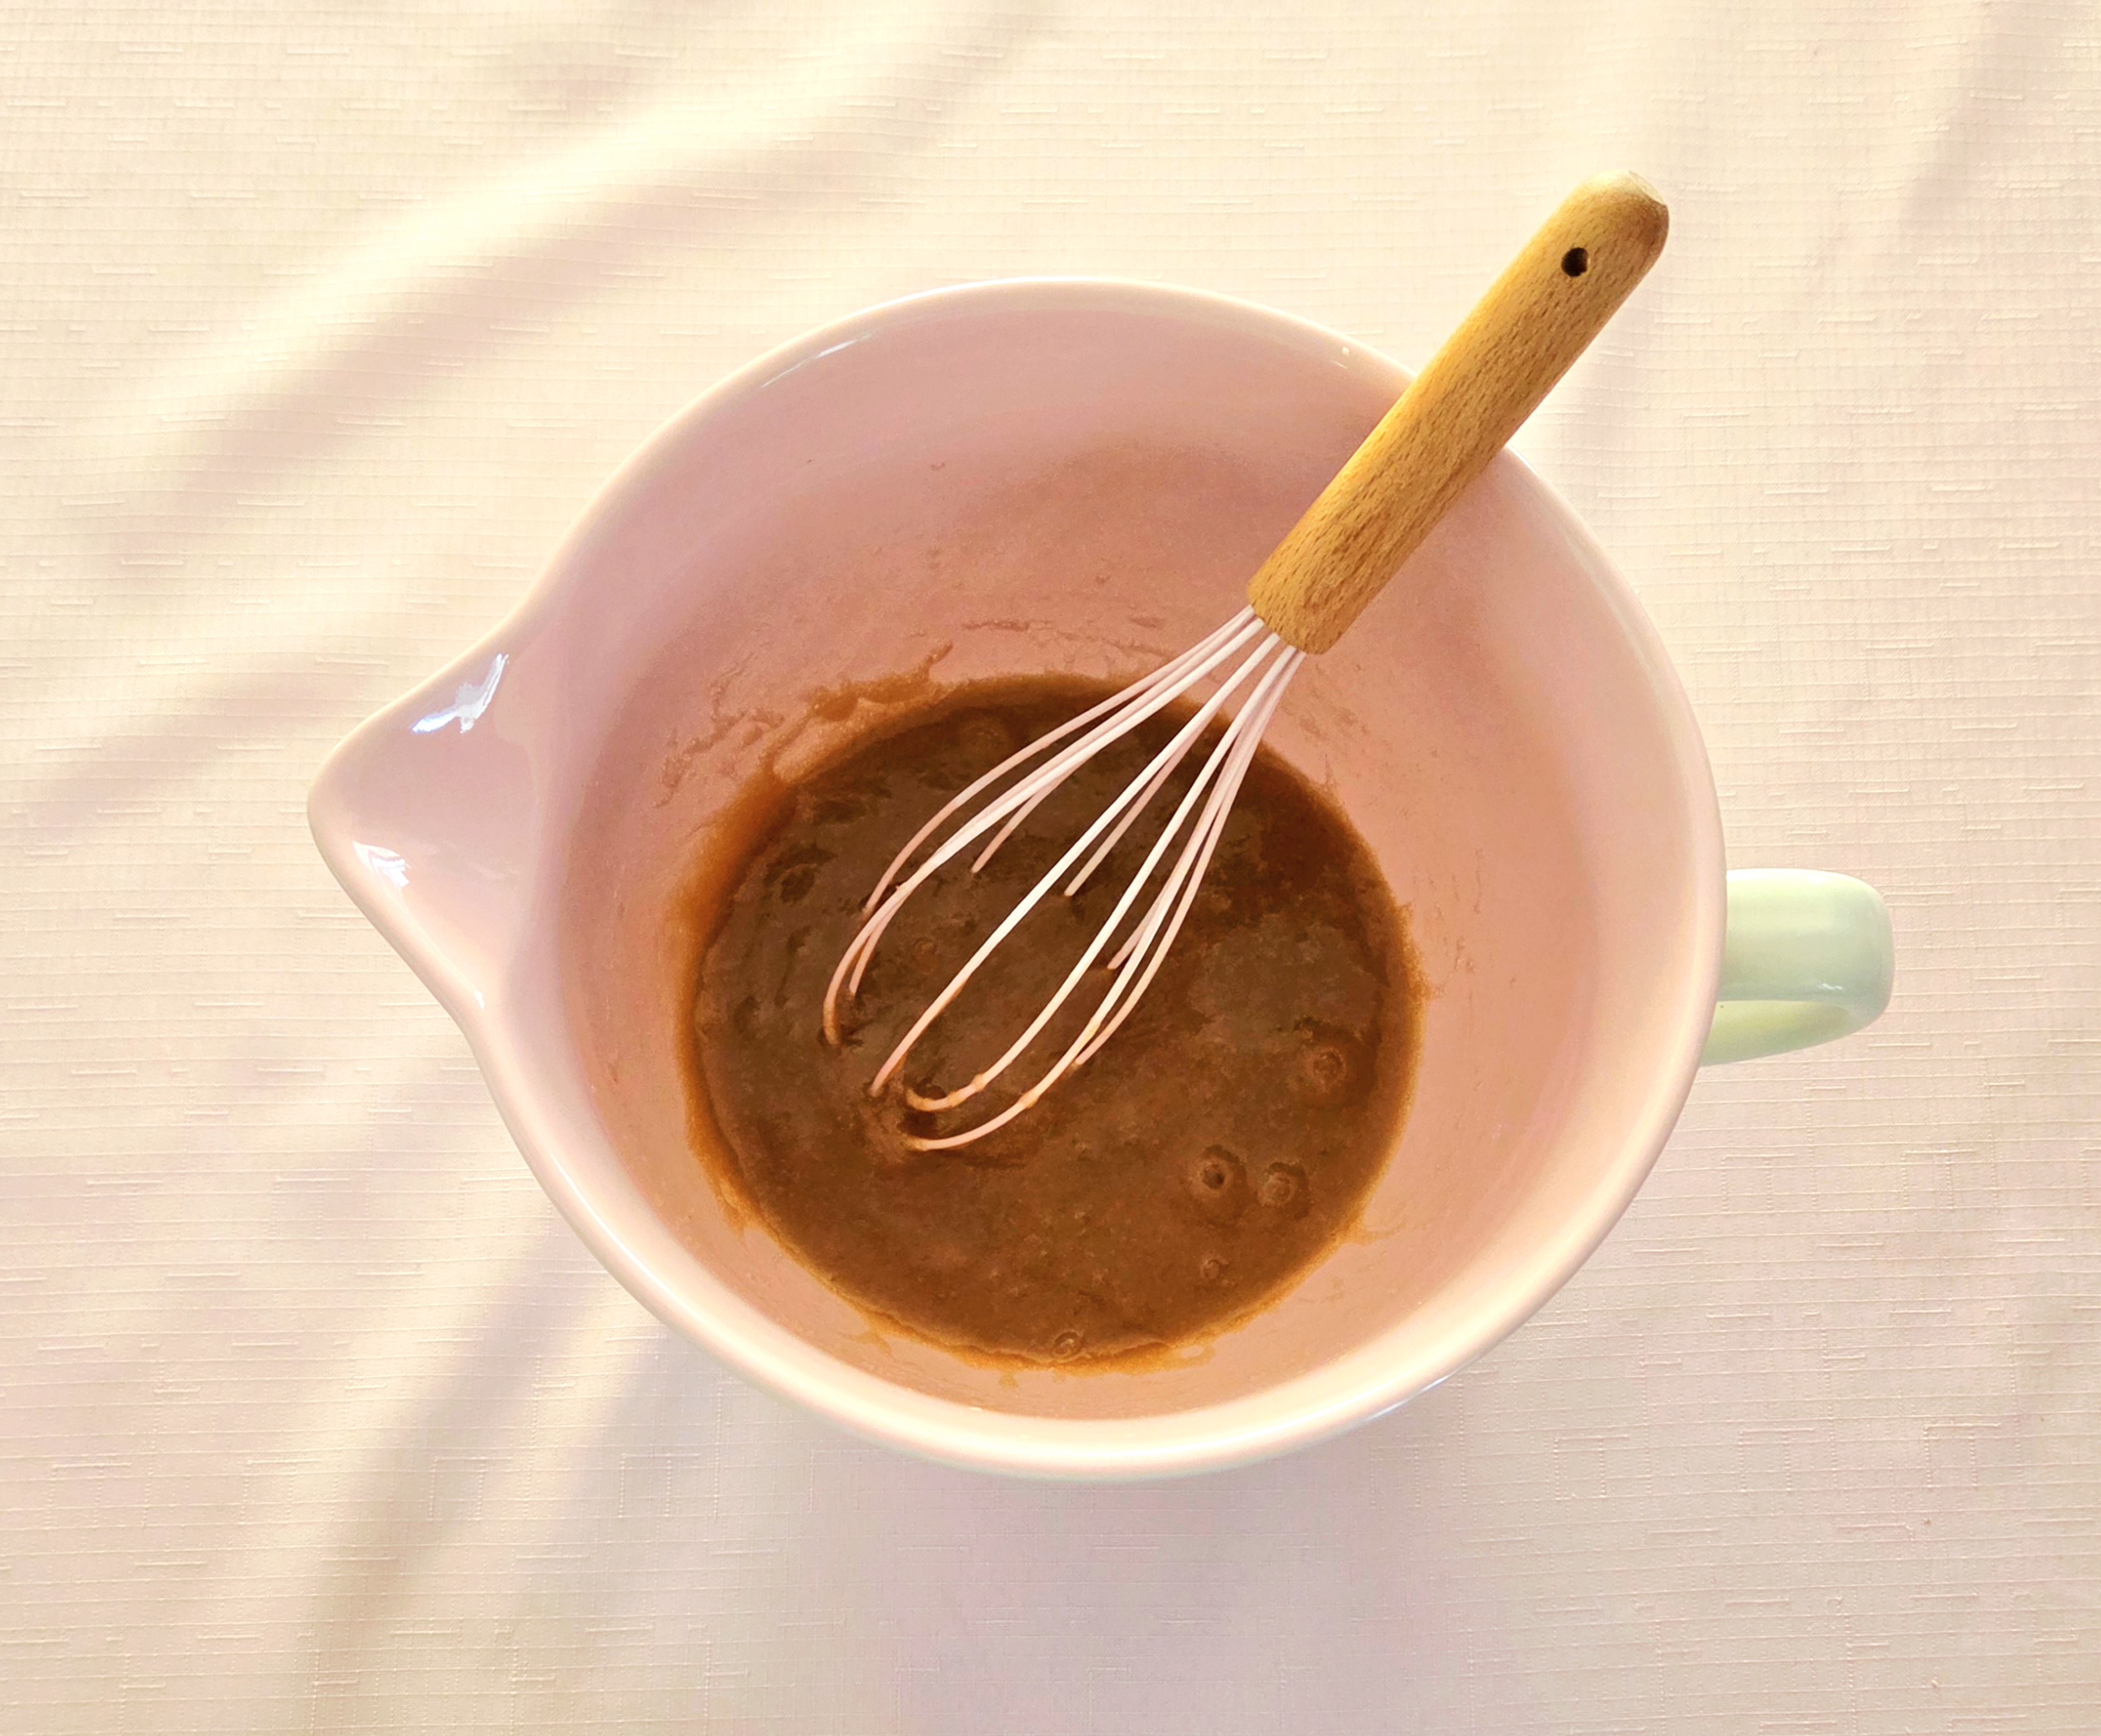
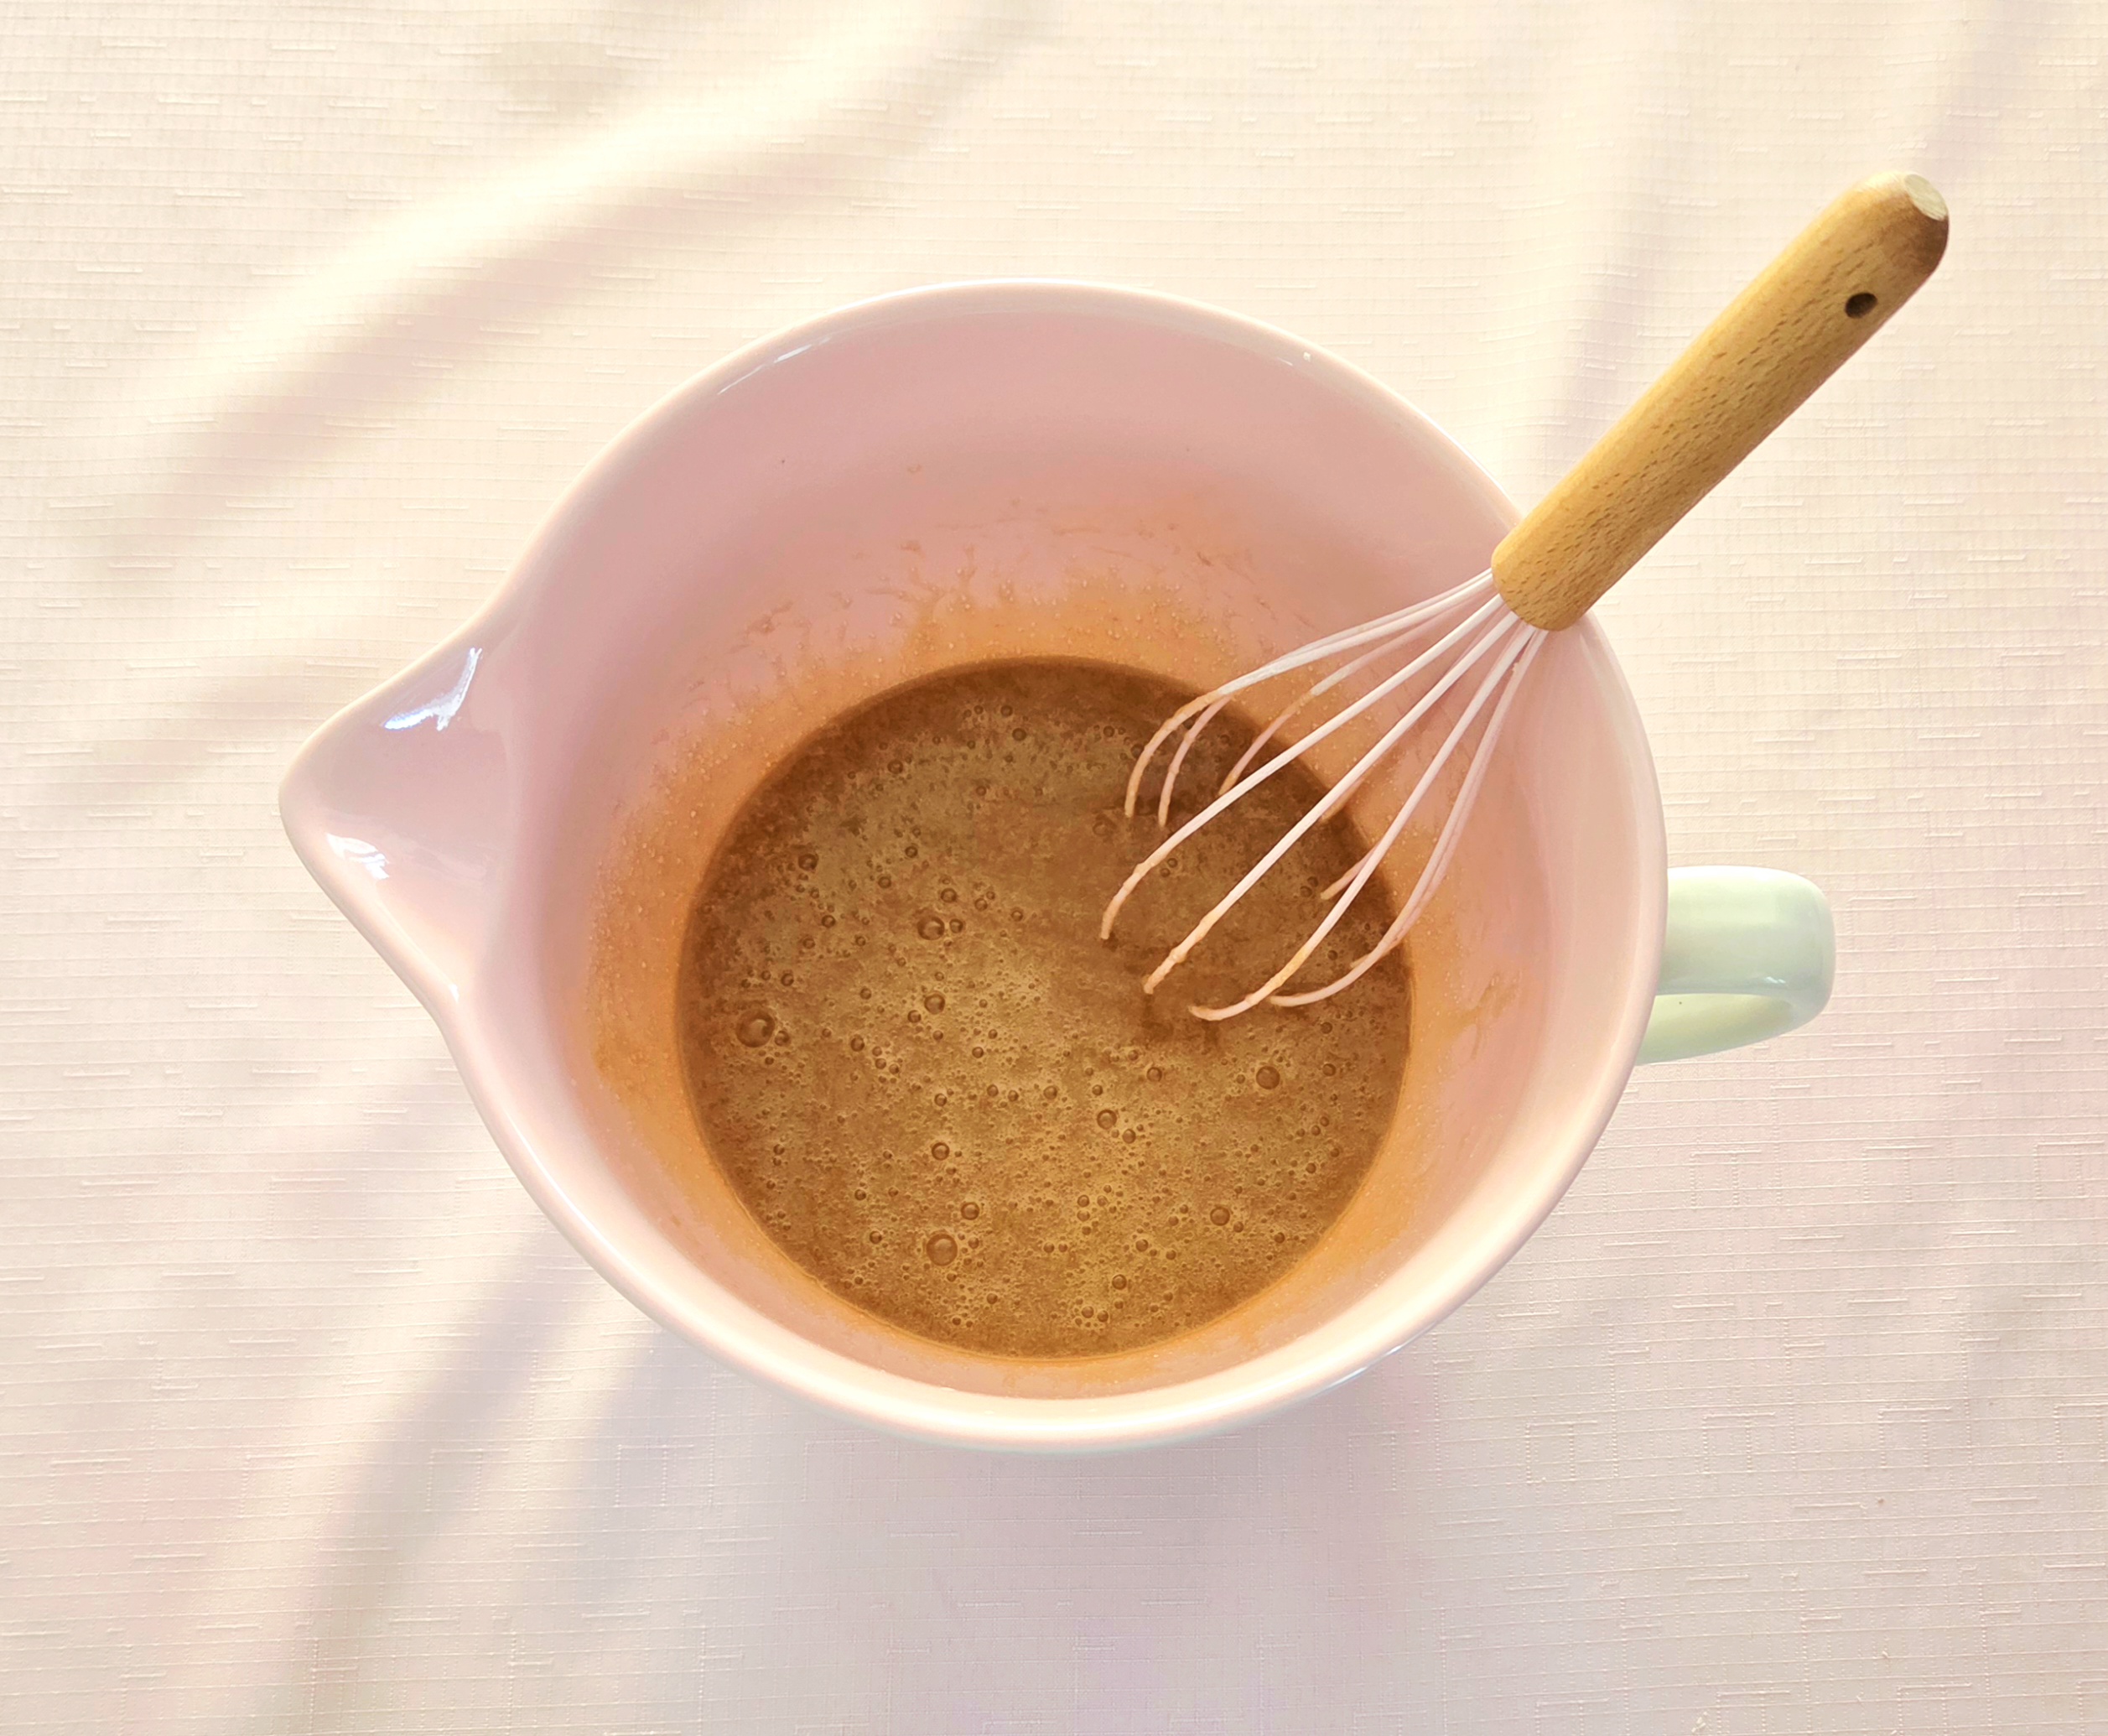
Whisk the sugar in, until the mixture is homogeneous. Adding the sugar before anything else is kind of a safety net, in case the butter is a little hot. The heat from the butter melts the sugar, and whisking everything helps it to cool down a bit faster. Though at this point, if things are still hot, it’s important to give it time to cool again. Next, crack in the egg, egg white, and vanilla extract. Whisk everything until it’s all thoroughly combined.

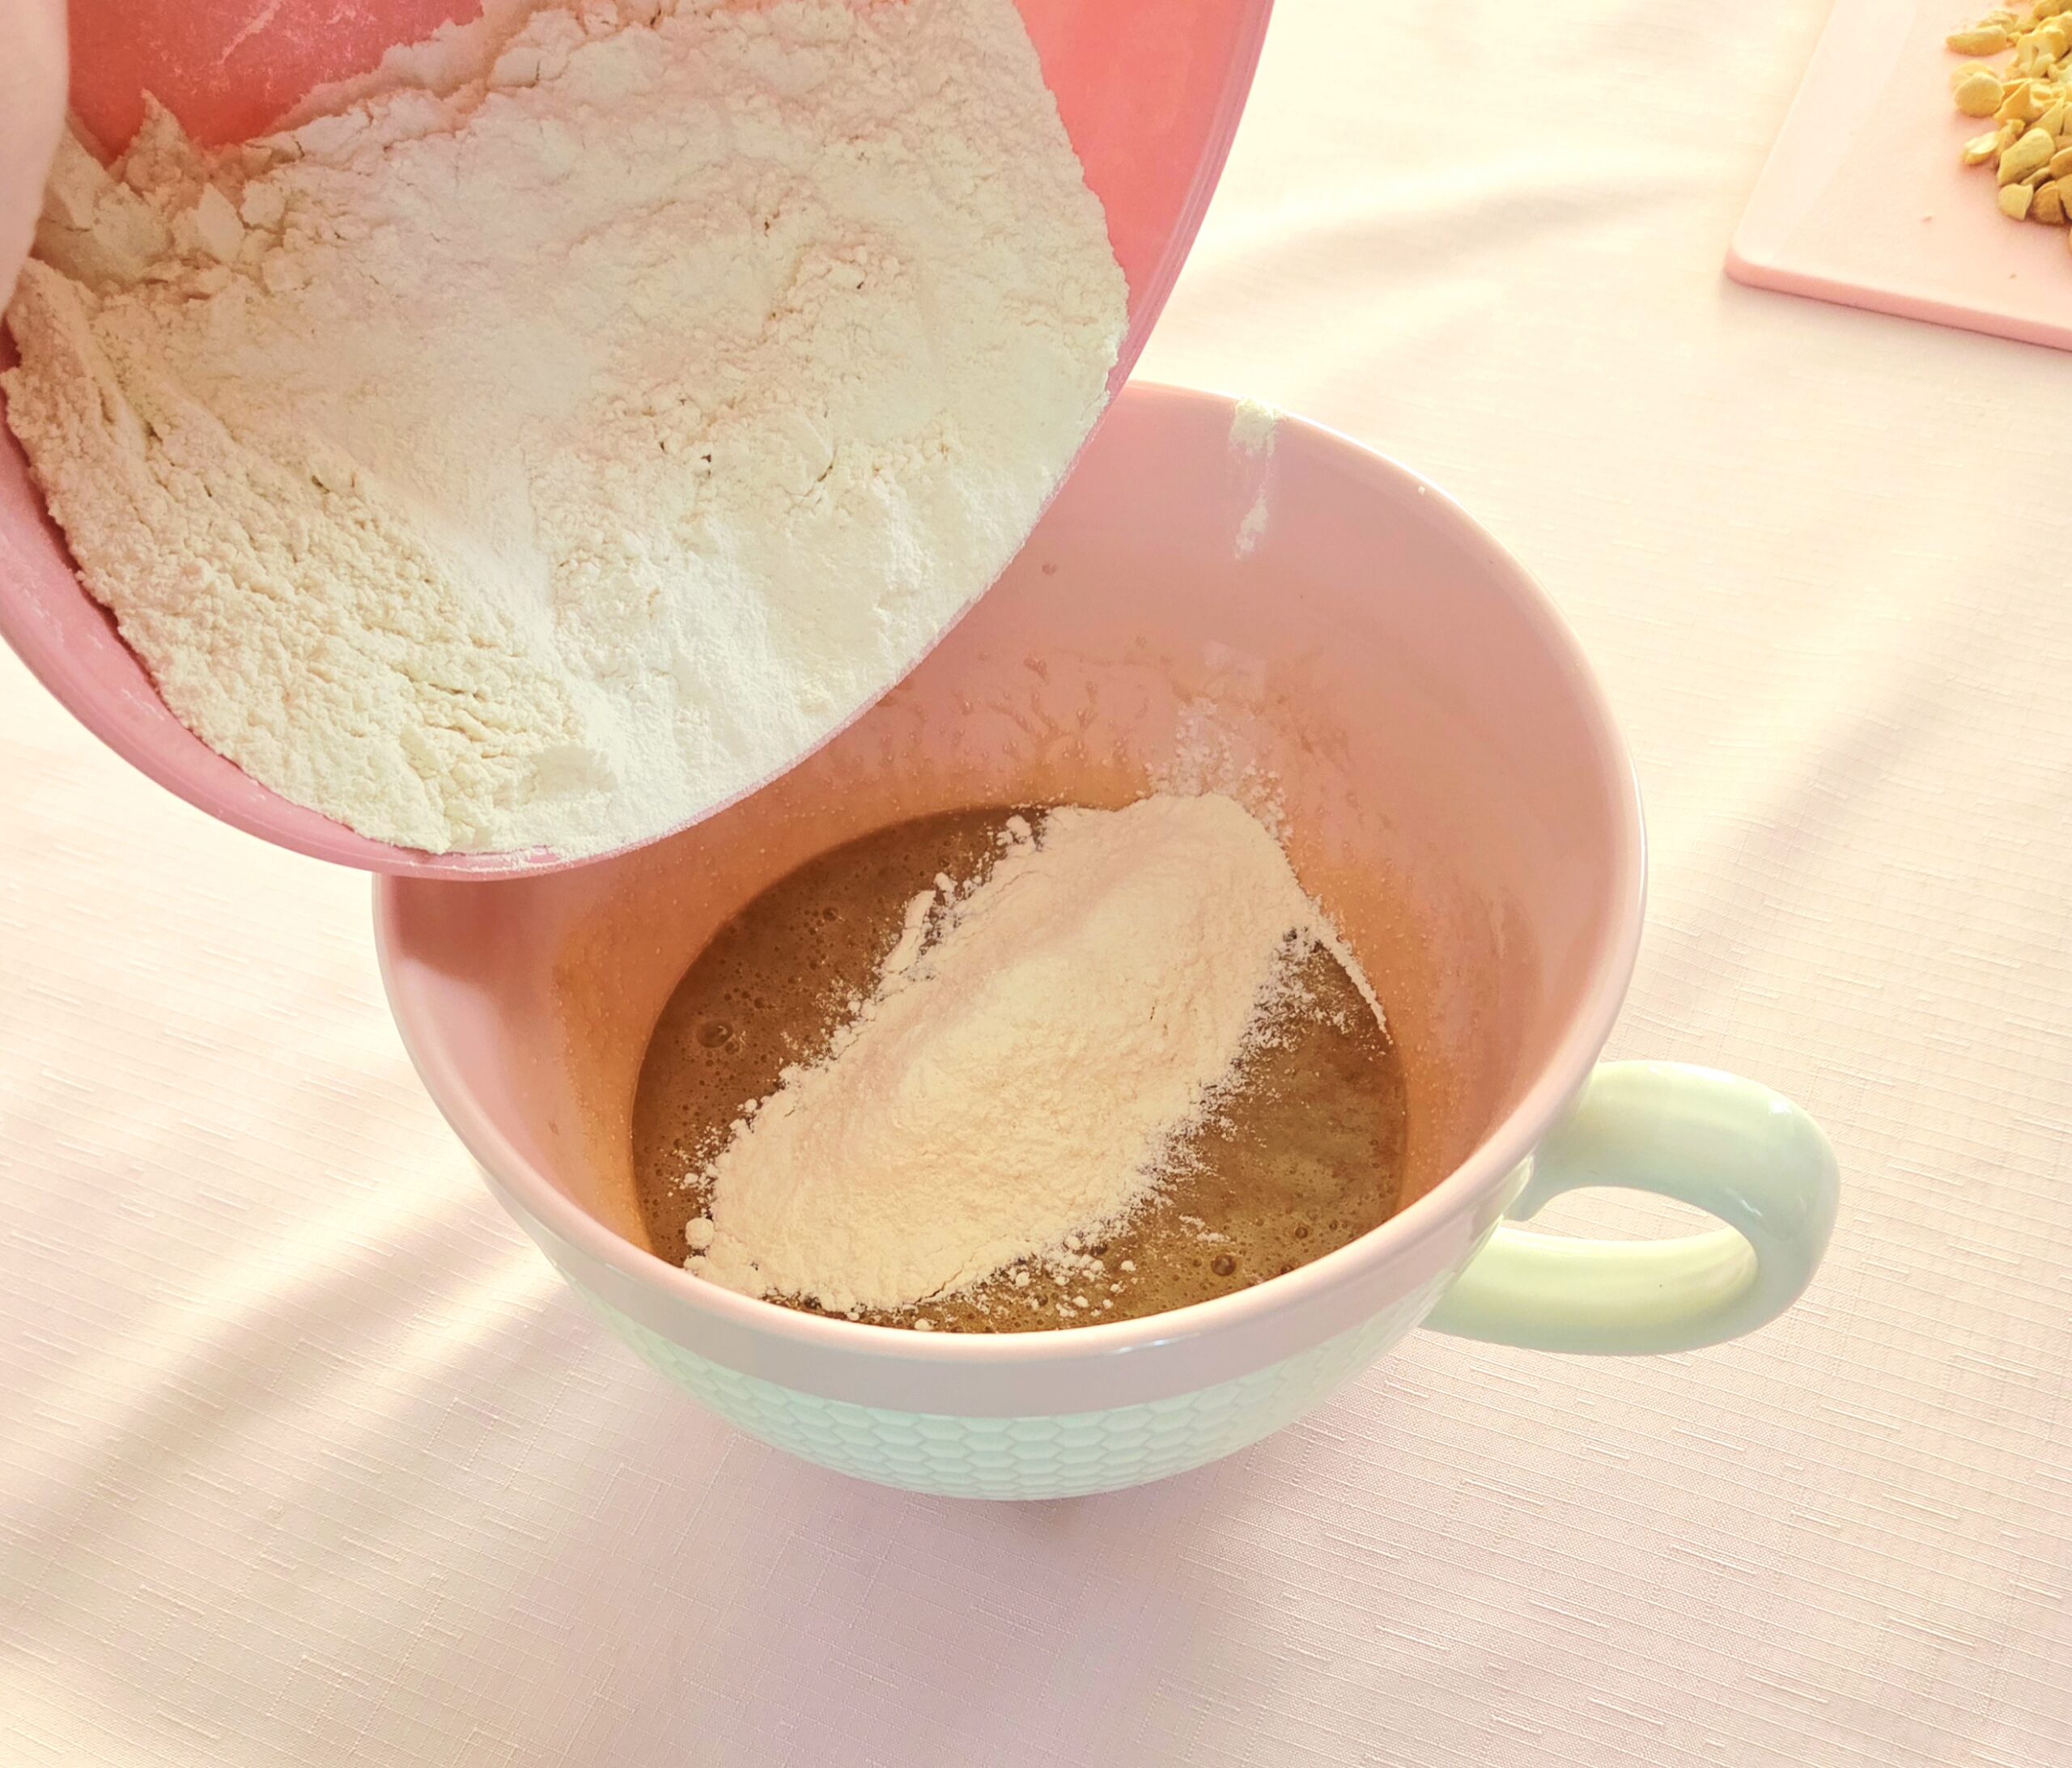
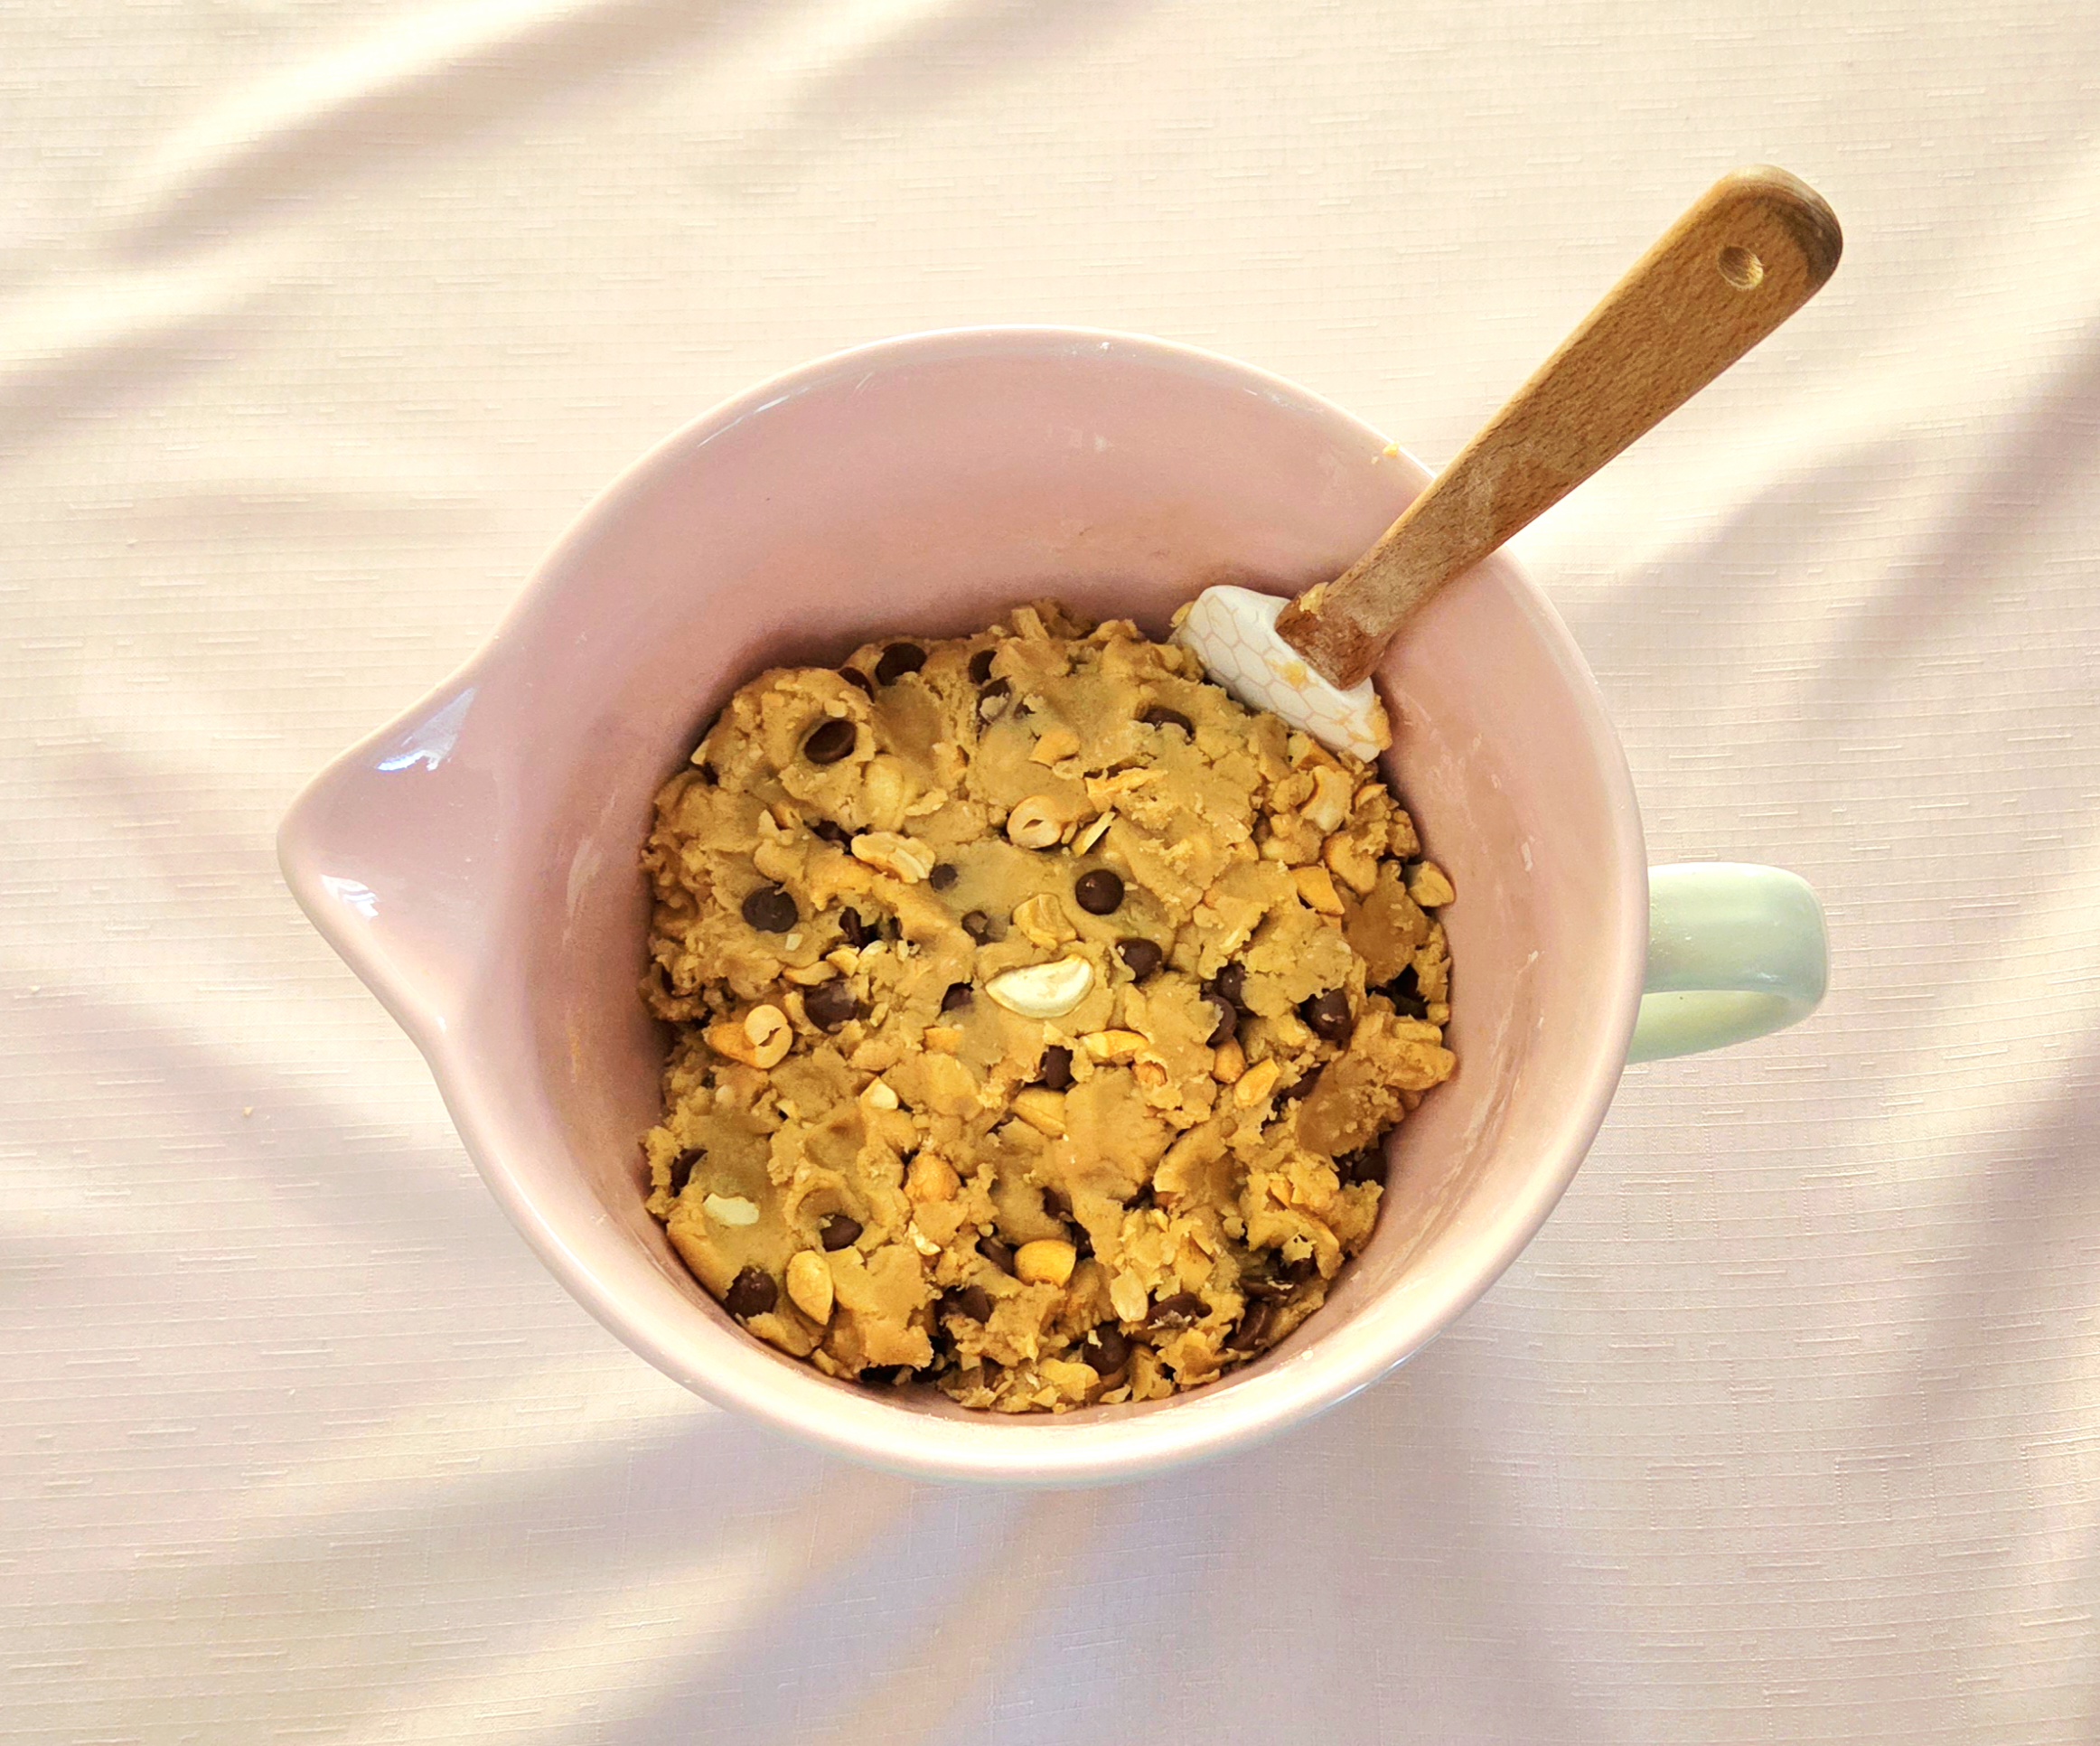
Dump the dry goods all at once into the wet mixture. Use a rubber spatula to gently mix the dough together, stopping when only a few streaks of flour visibly remain. Add the chopped cashews and chocolate chips, then continue stirring the dough until the nuts and chocolate evenly disperse, and the flour absorbs completely.
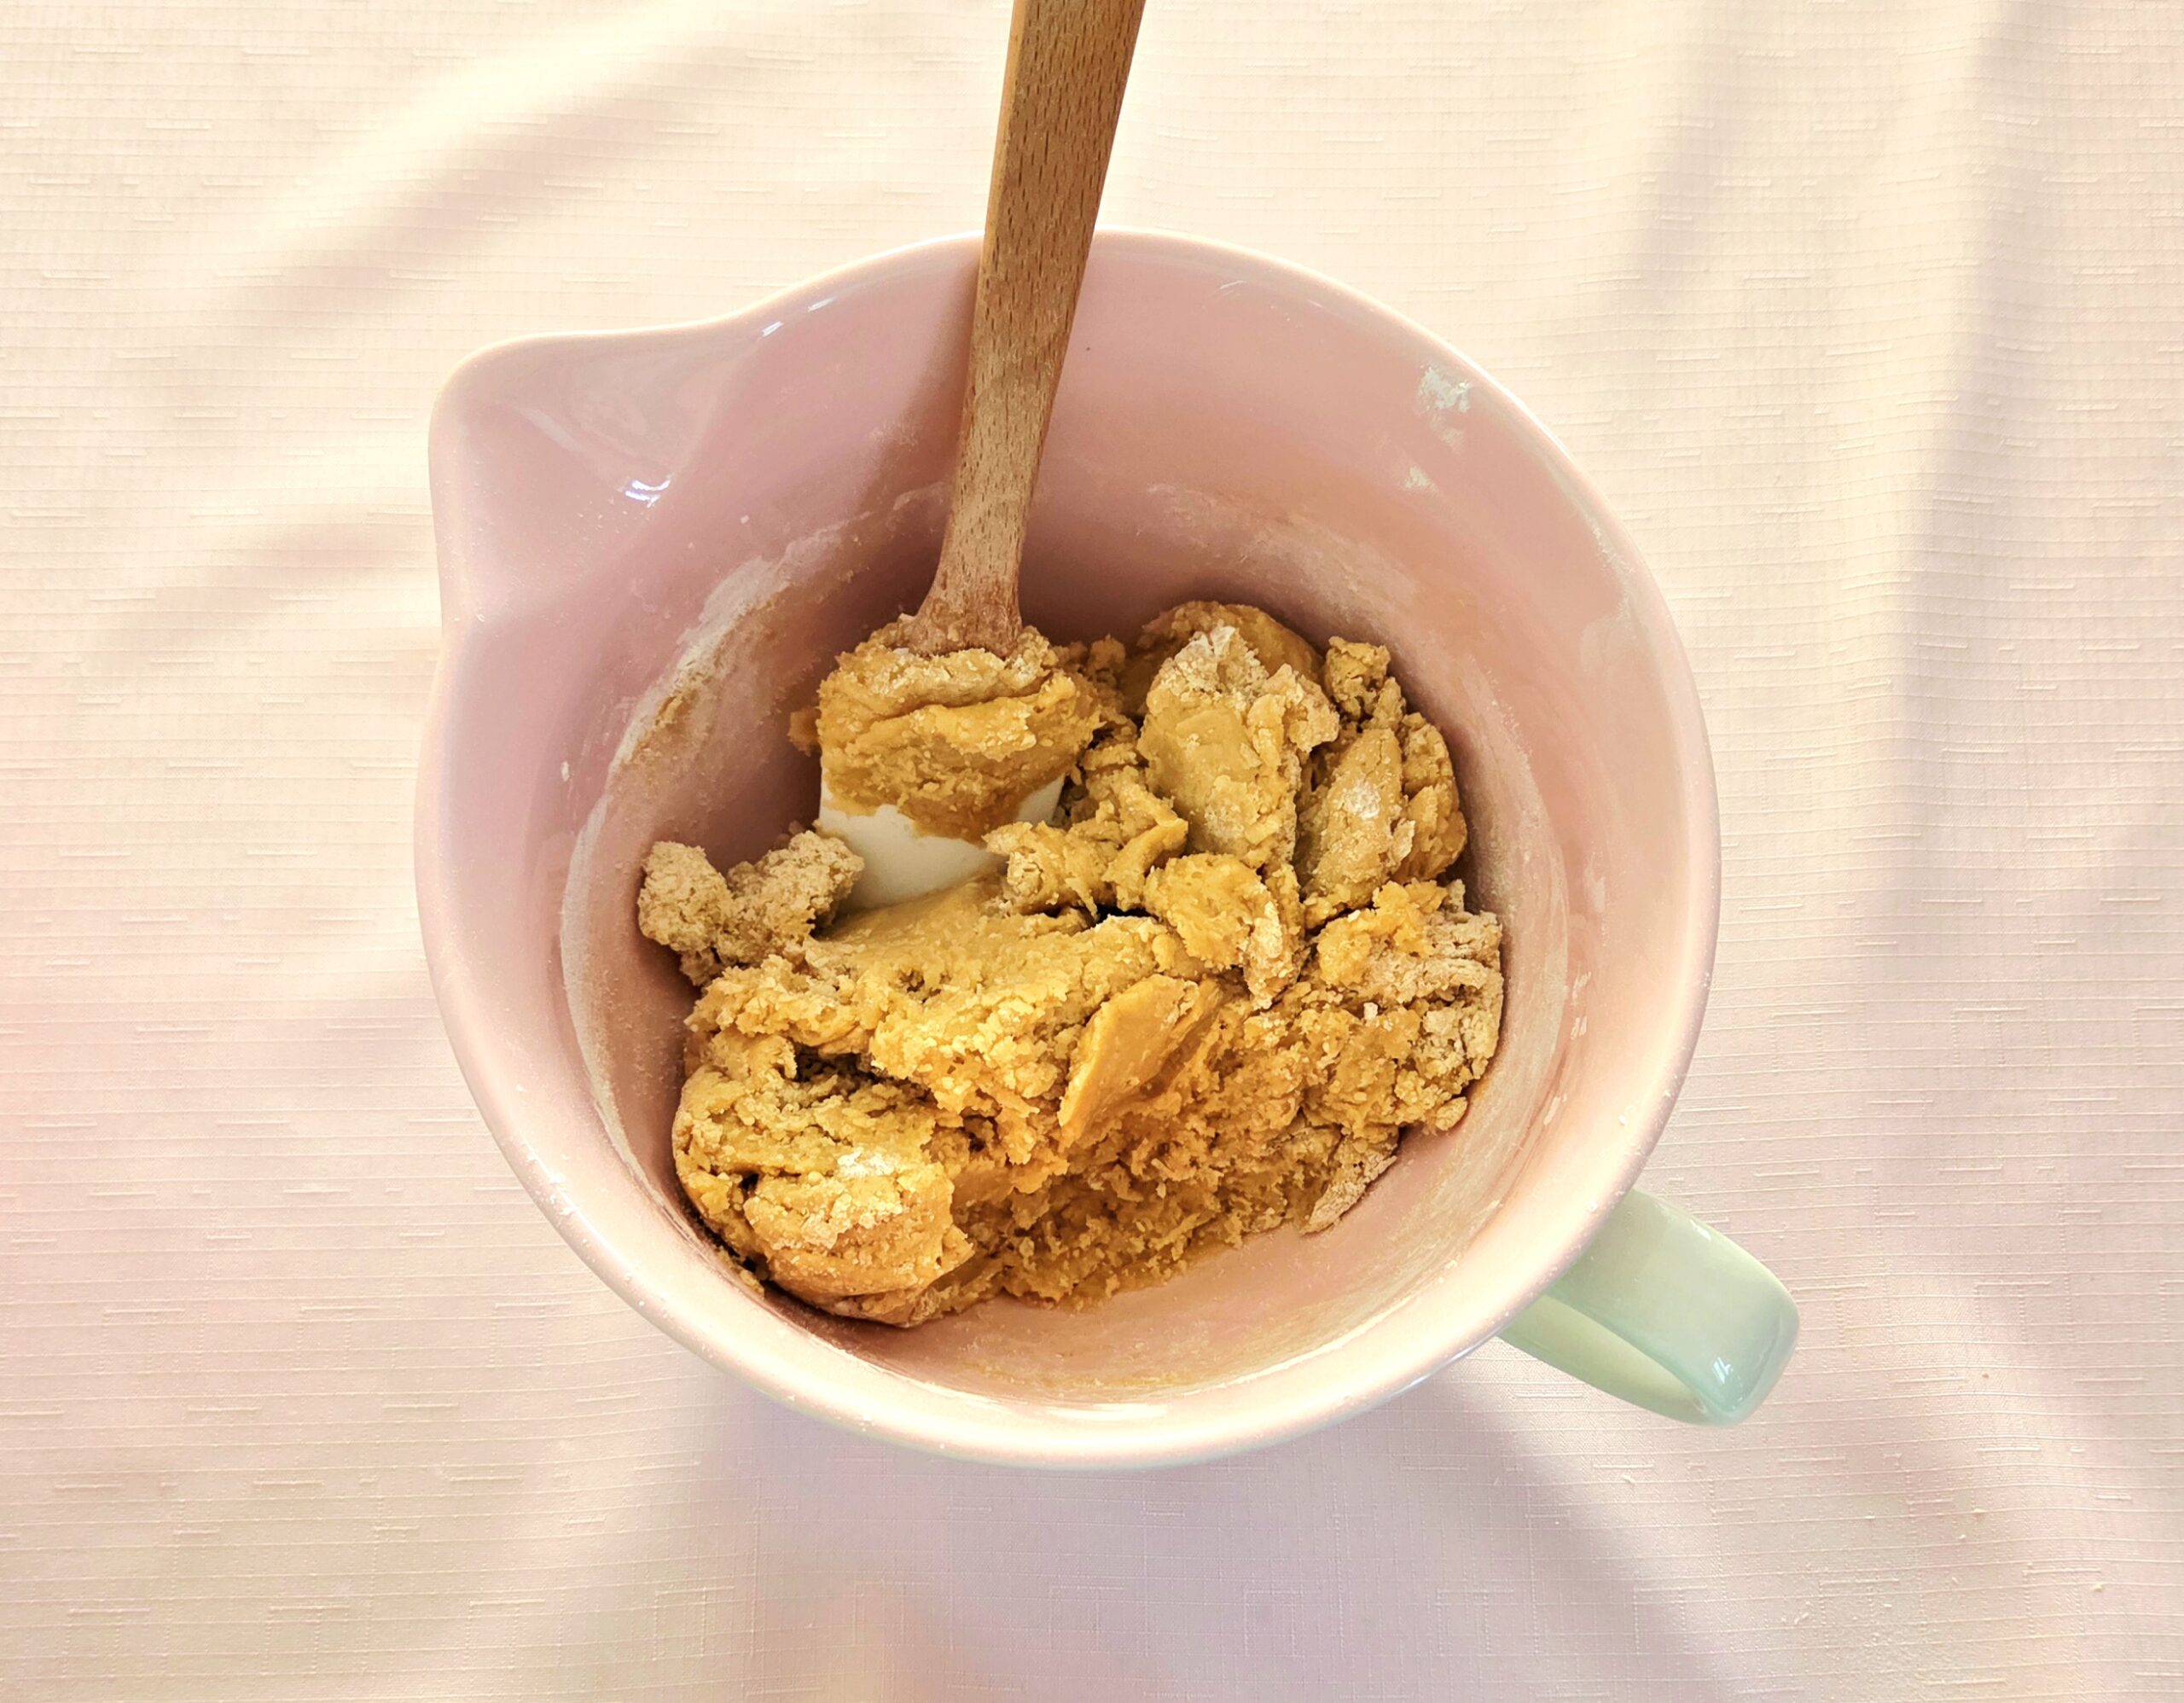
Leaving those few streaks of flour before adding the rest in just gives you a visual cue that the dough hasn’t been over-mixed, and leaves some wiggle room to finish stirring everything without developing too much gluten. Too much gluten means a tough cookie. Not exactly what I’d call delicious.
Cover the dough with plastic wrap, so it’s airtight. Place the dough into the fridge and chill it for a minimum of 3 hours, or up to two days. Extensive chilling allows the dough to develop a deeper flavor, and prevents it from spreading too much in the oven.
Around 30 minutes before the cookies are ready to bake, preheat the oven to 350F, on the convection setting if possible. Line two baking sheets with either parchment paper or silicone baking mats, to prevent the cookies from sticking as they bake.
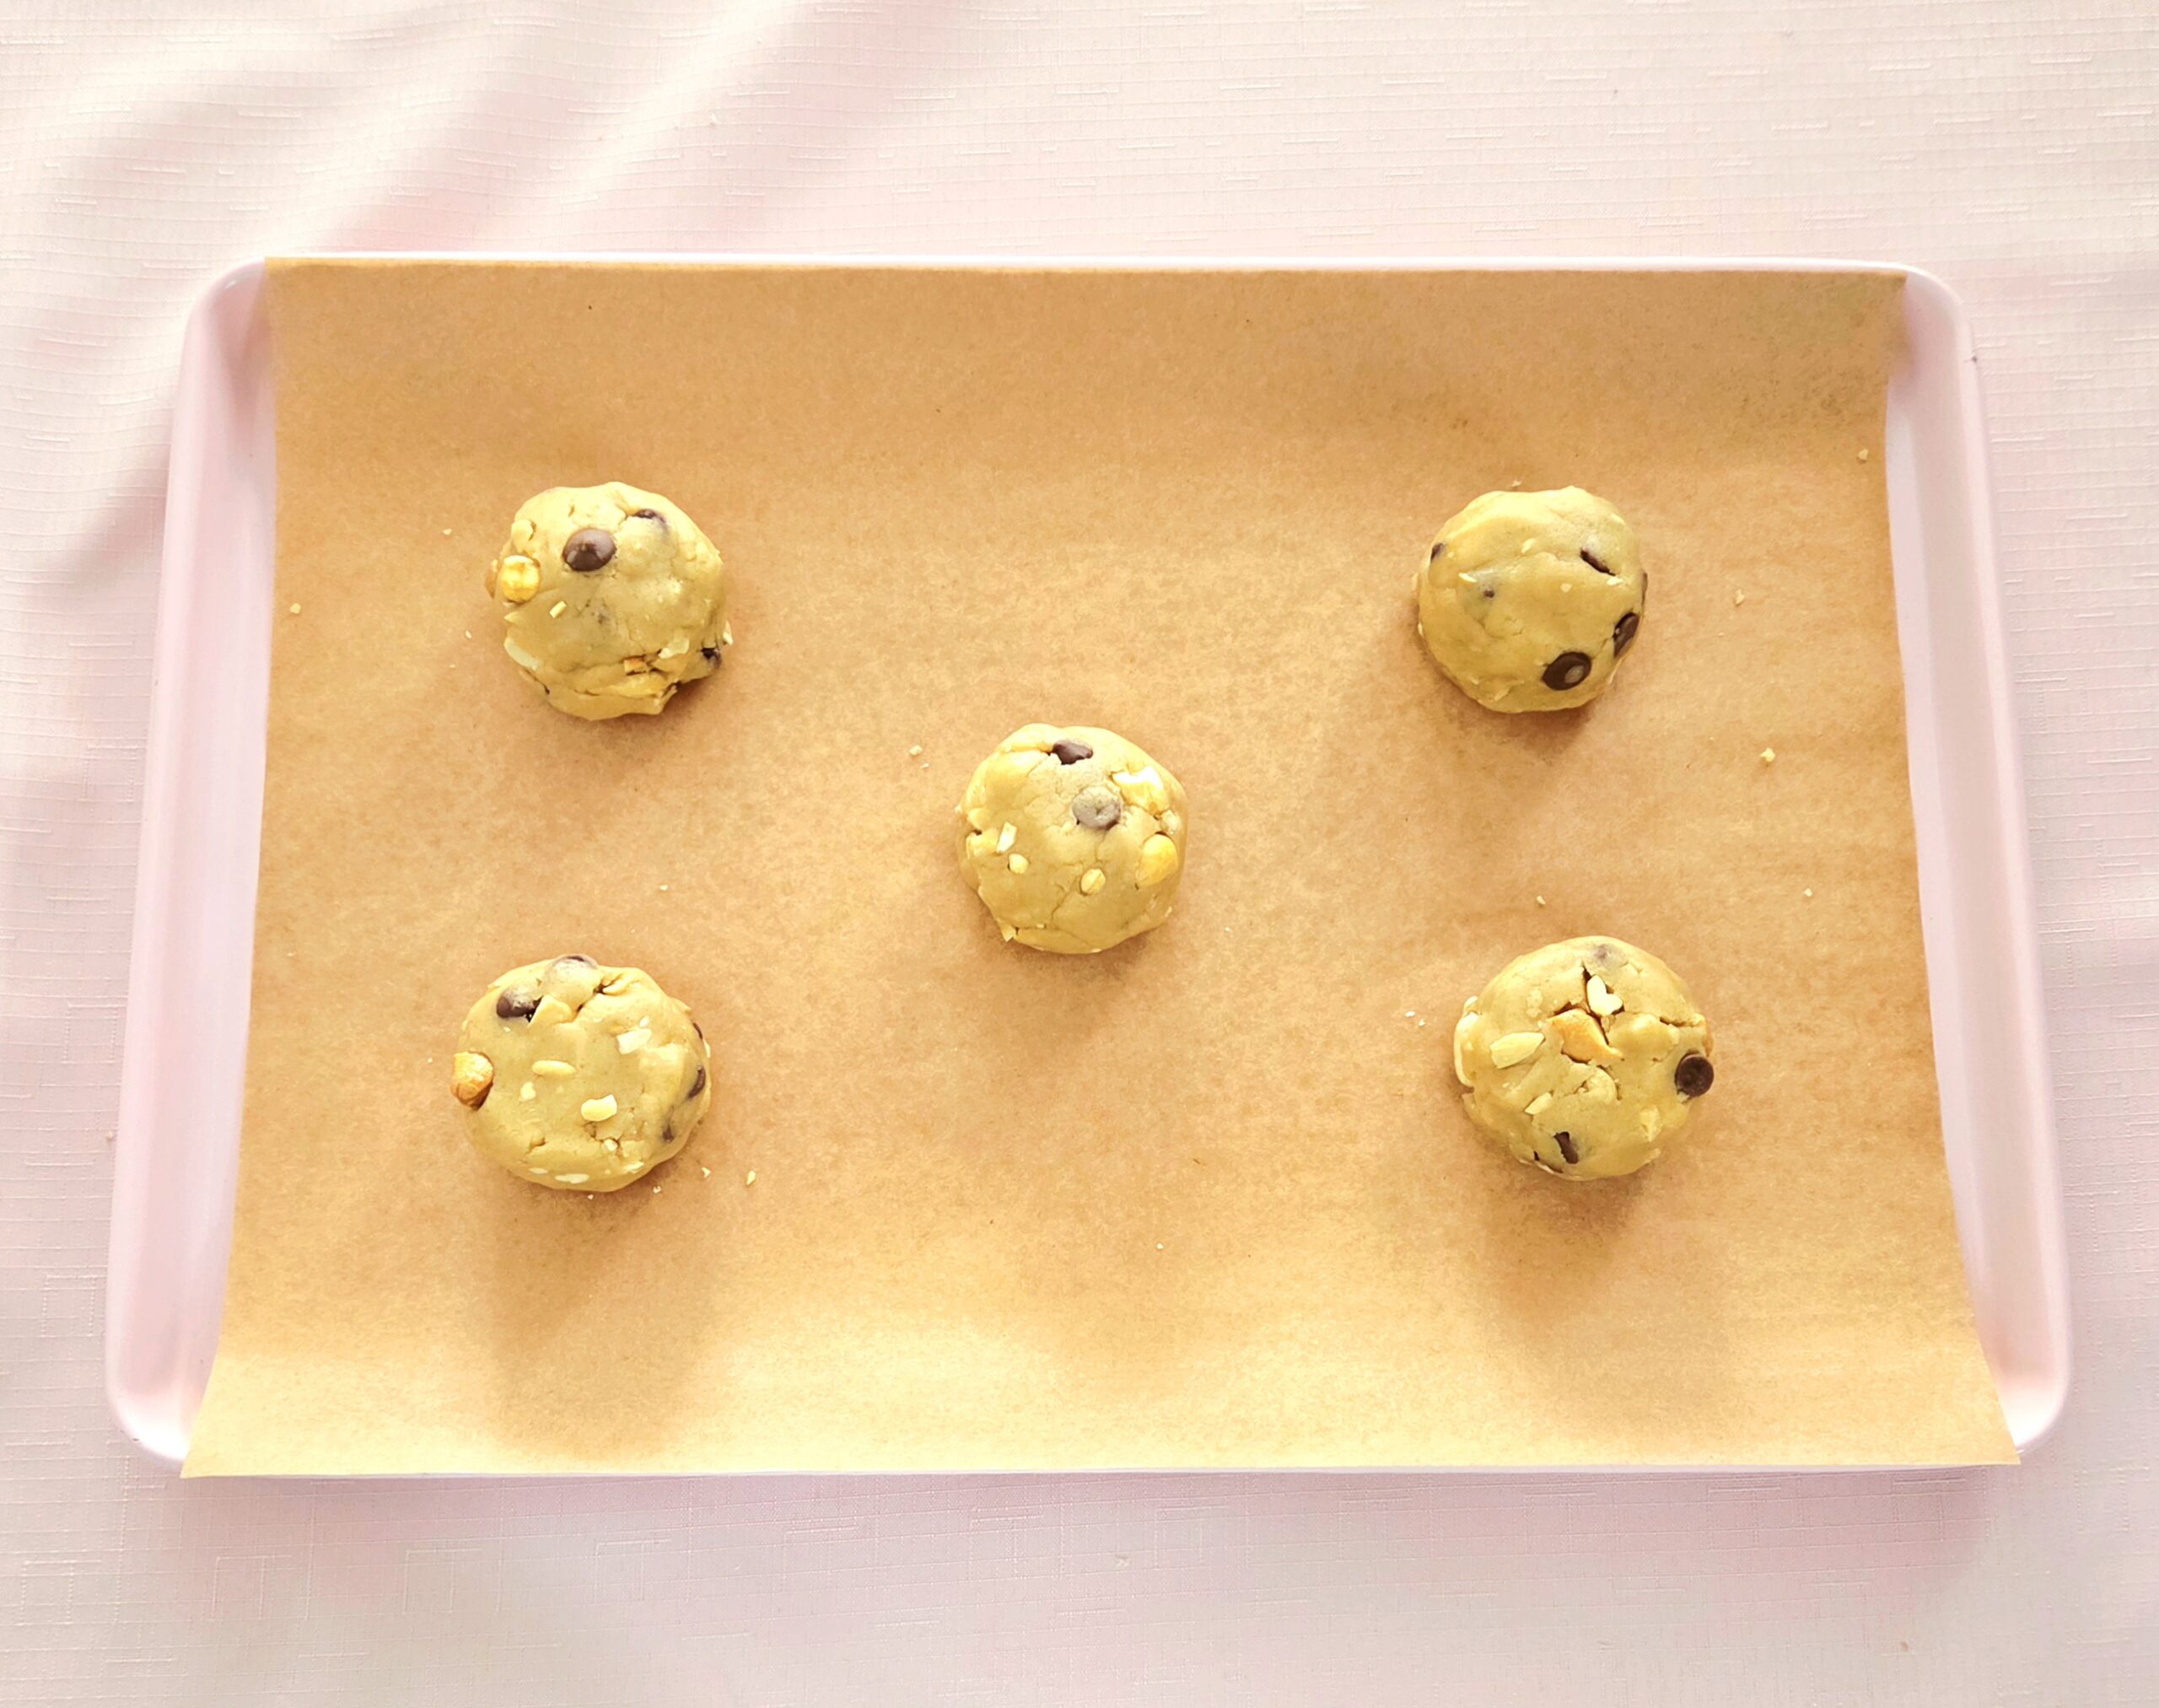
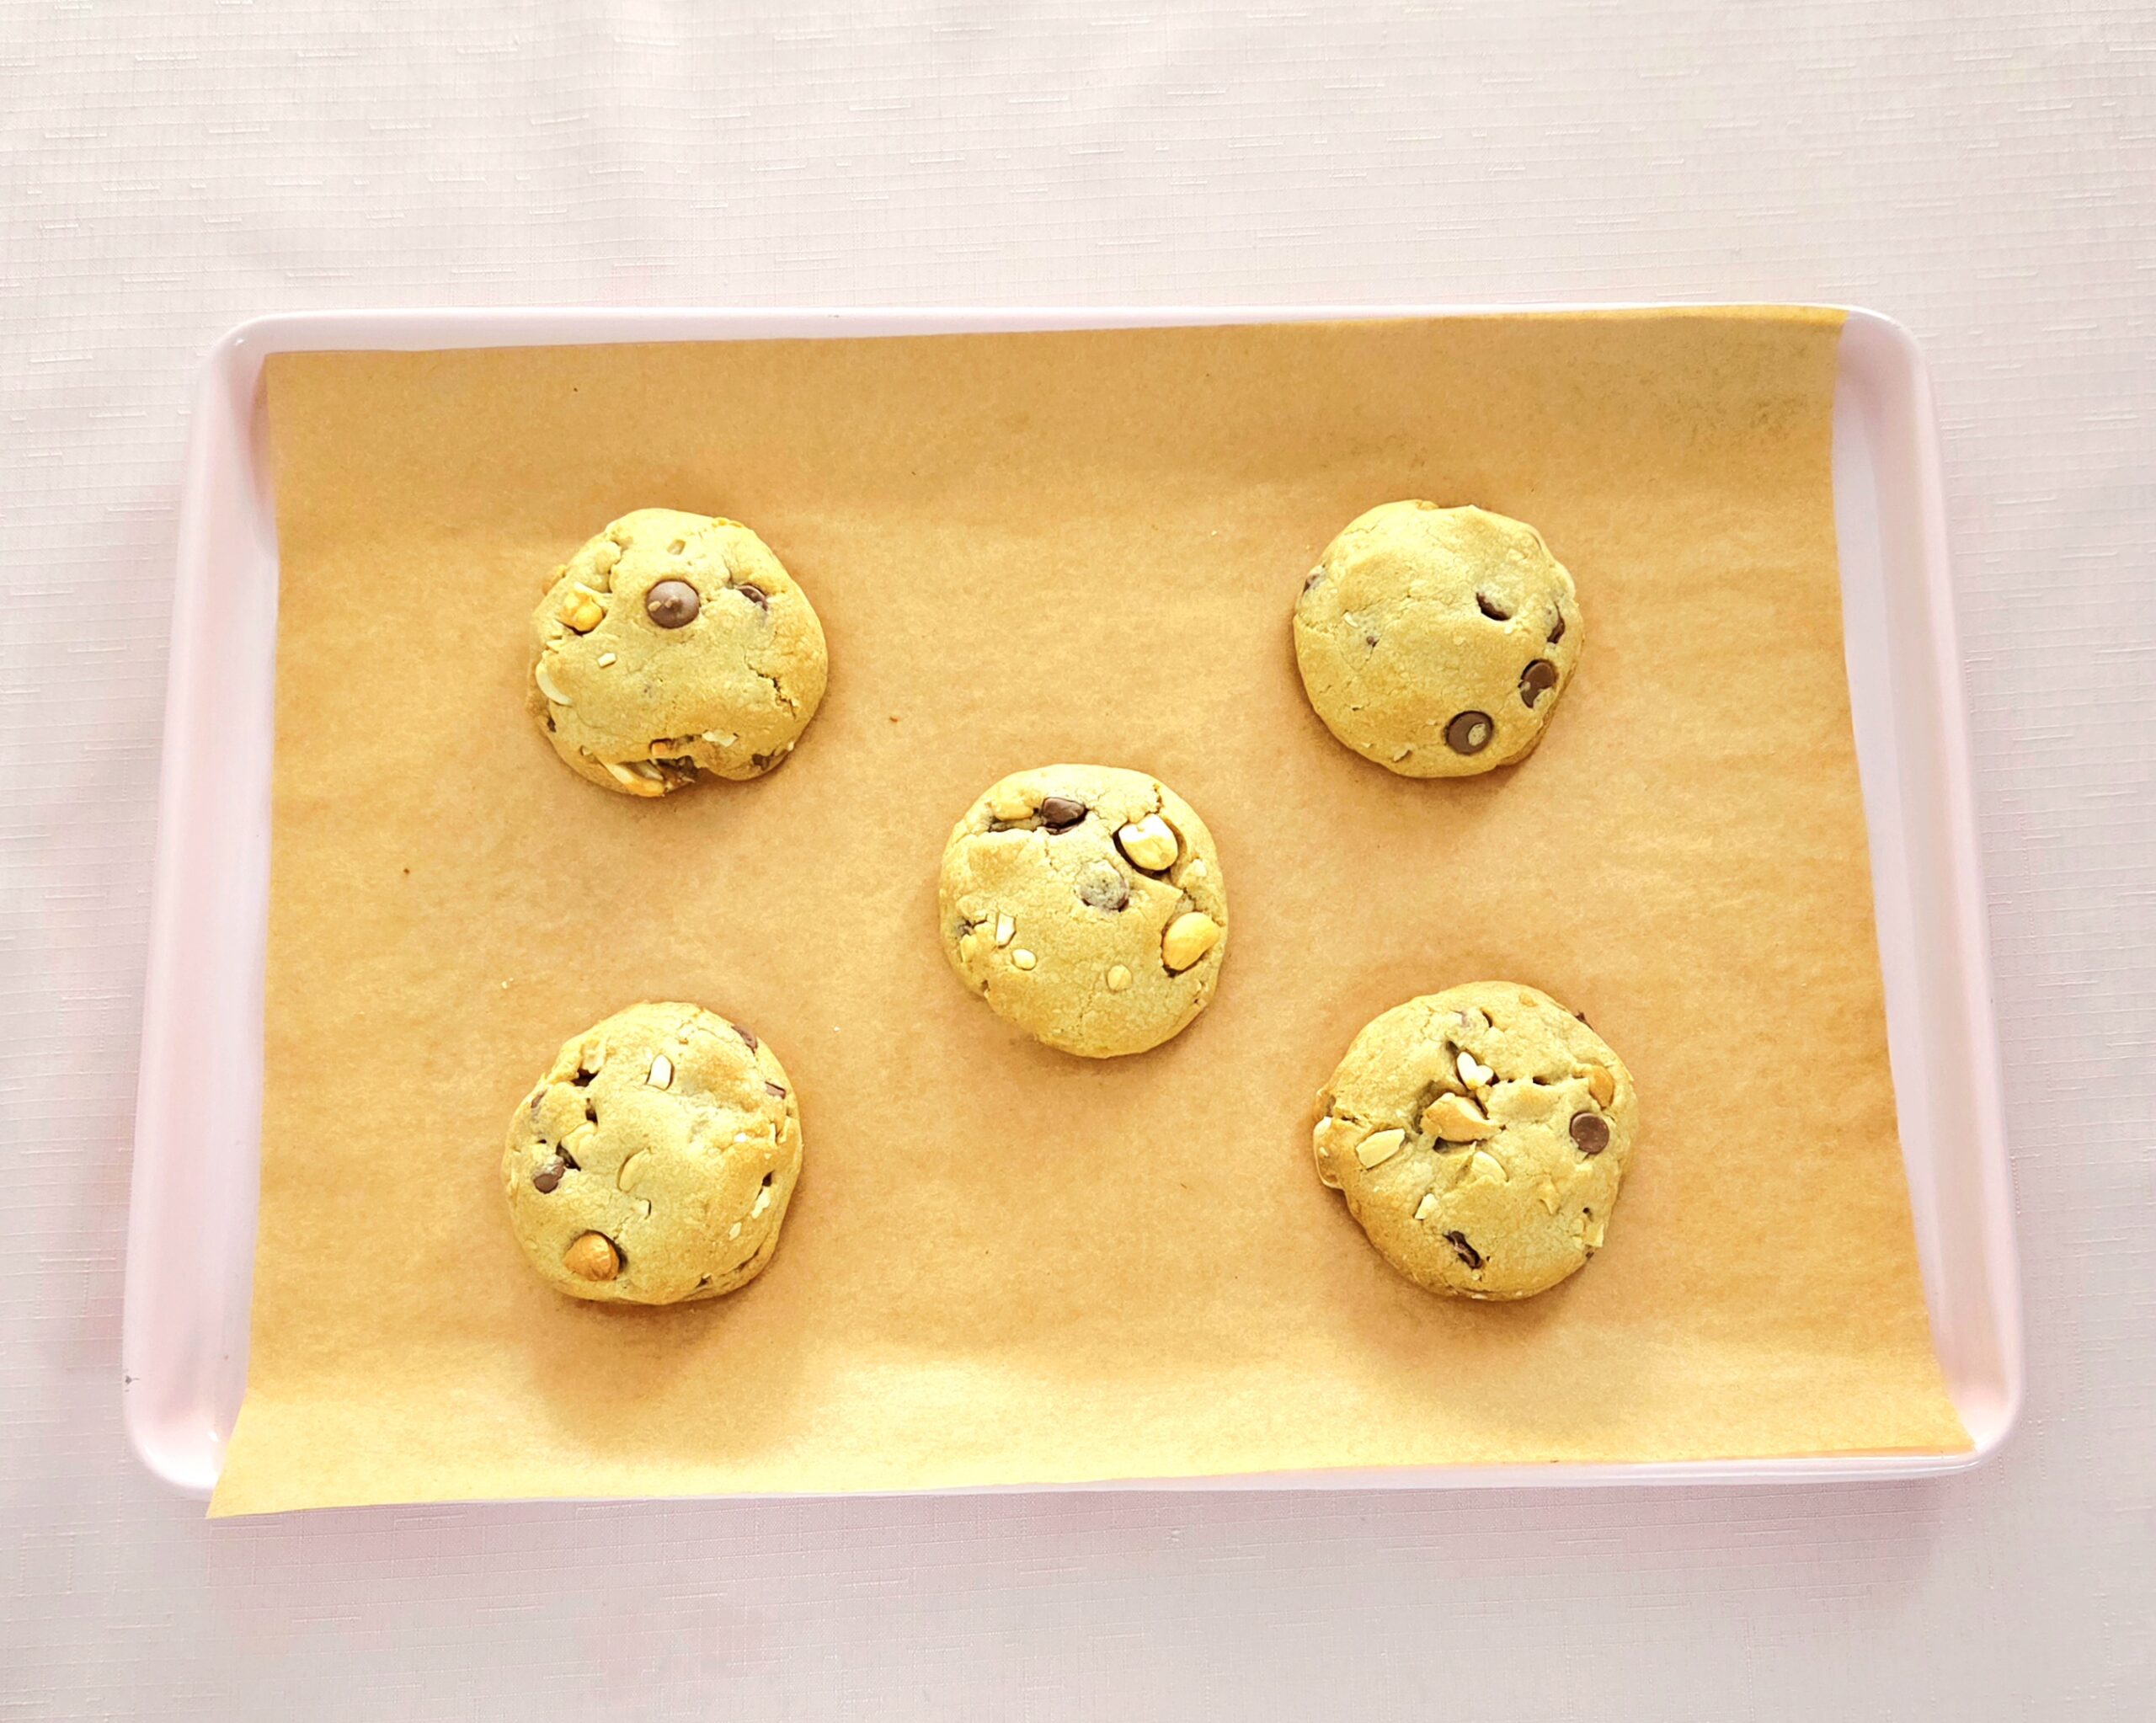
Scoop out 4-Tablespoon or ¼ cup portions of dough. Each pan will be able to handle about 5 cookies in one go, with proper spacing. Divide each portion of dough in half and flatten each half out by gently pressing it with your hands.
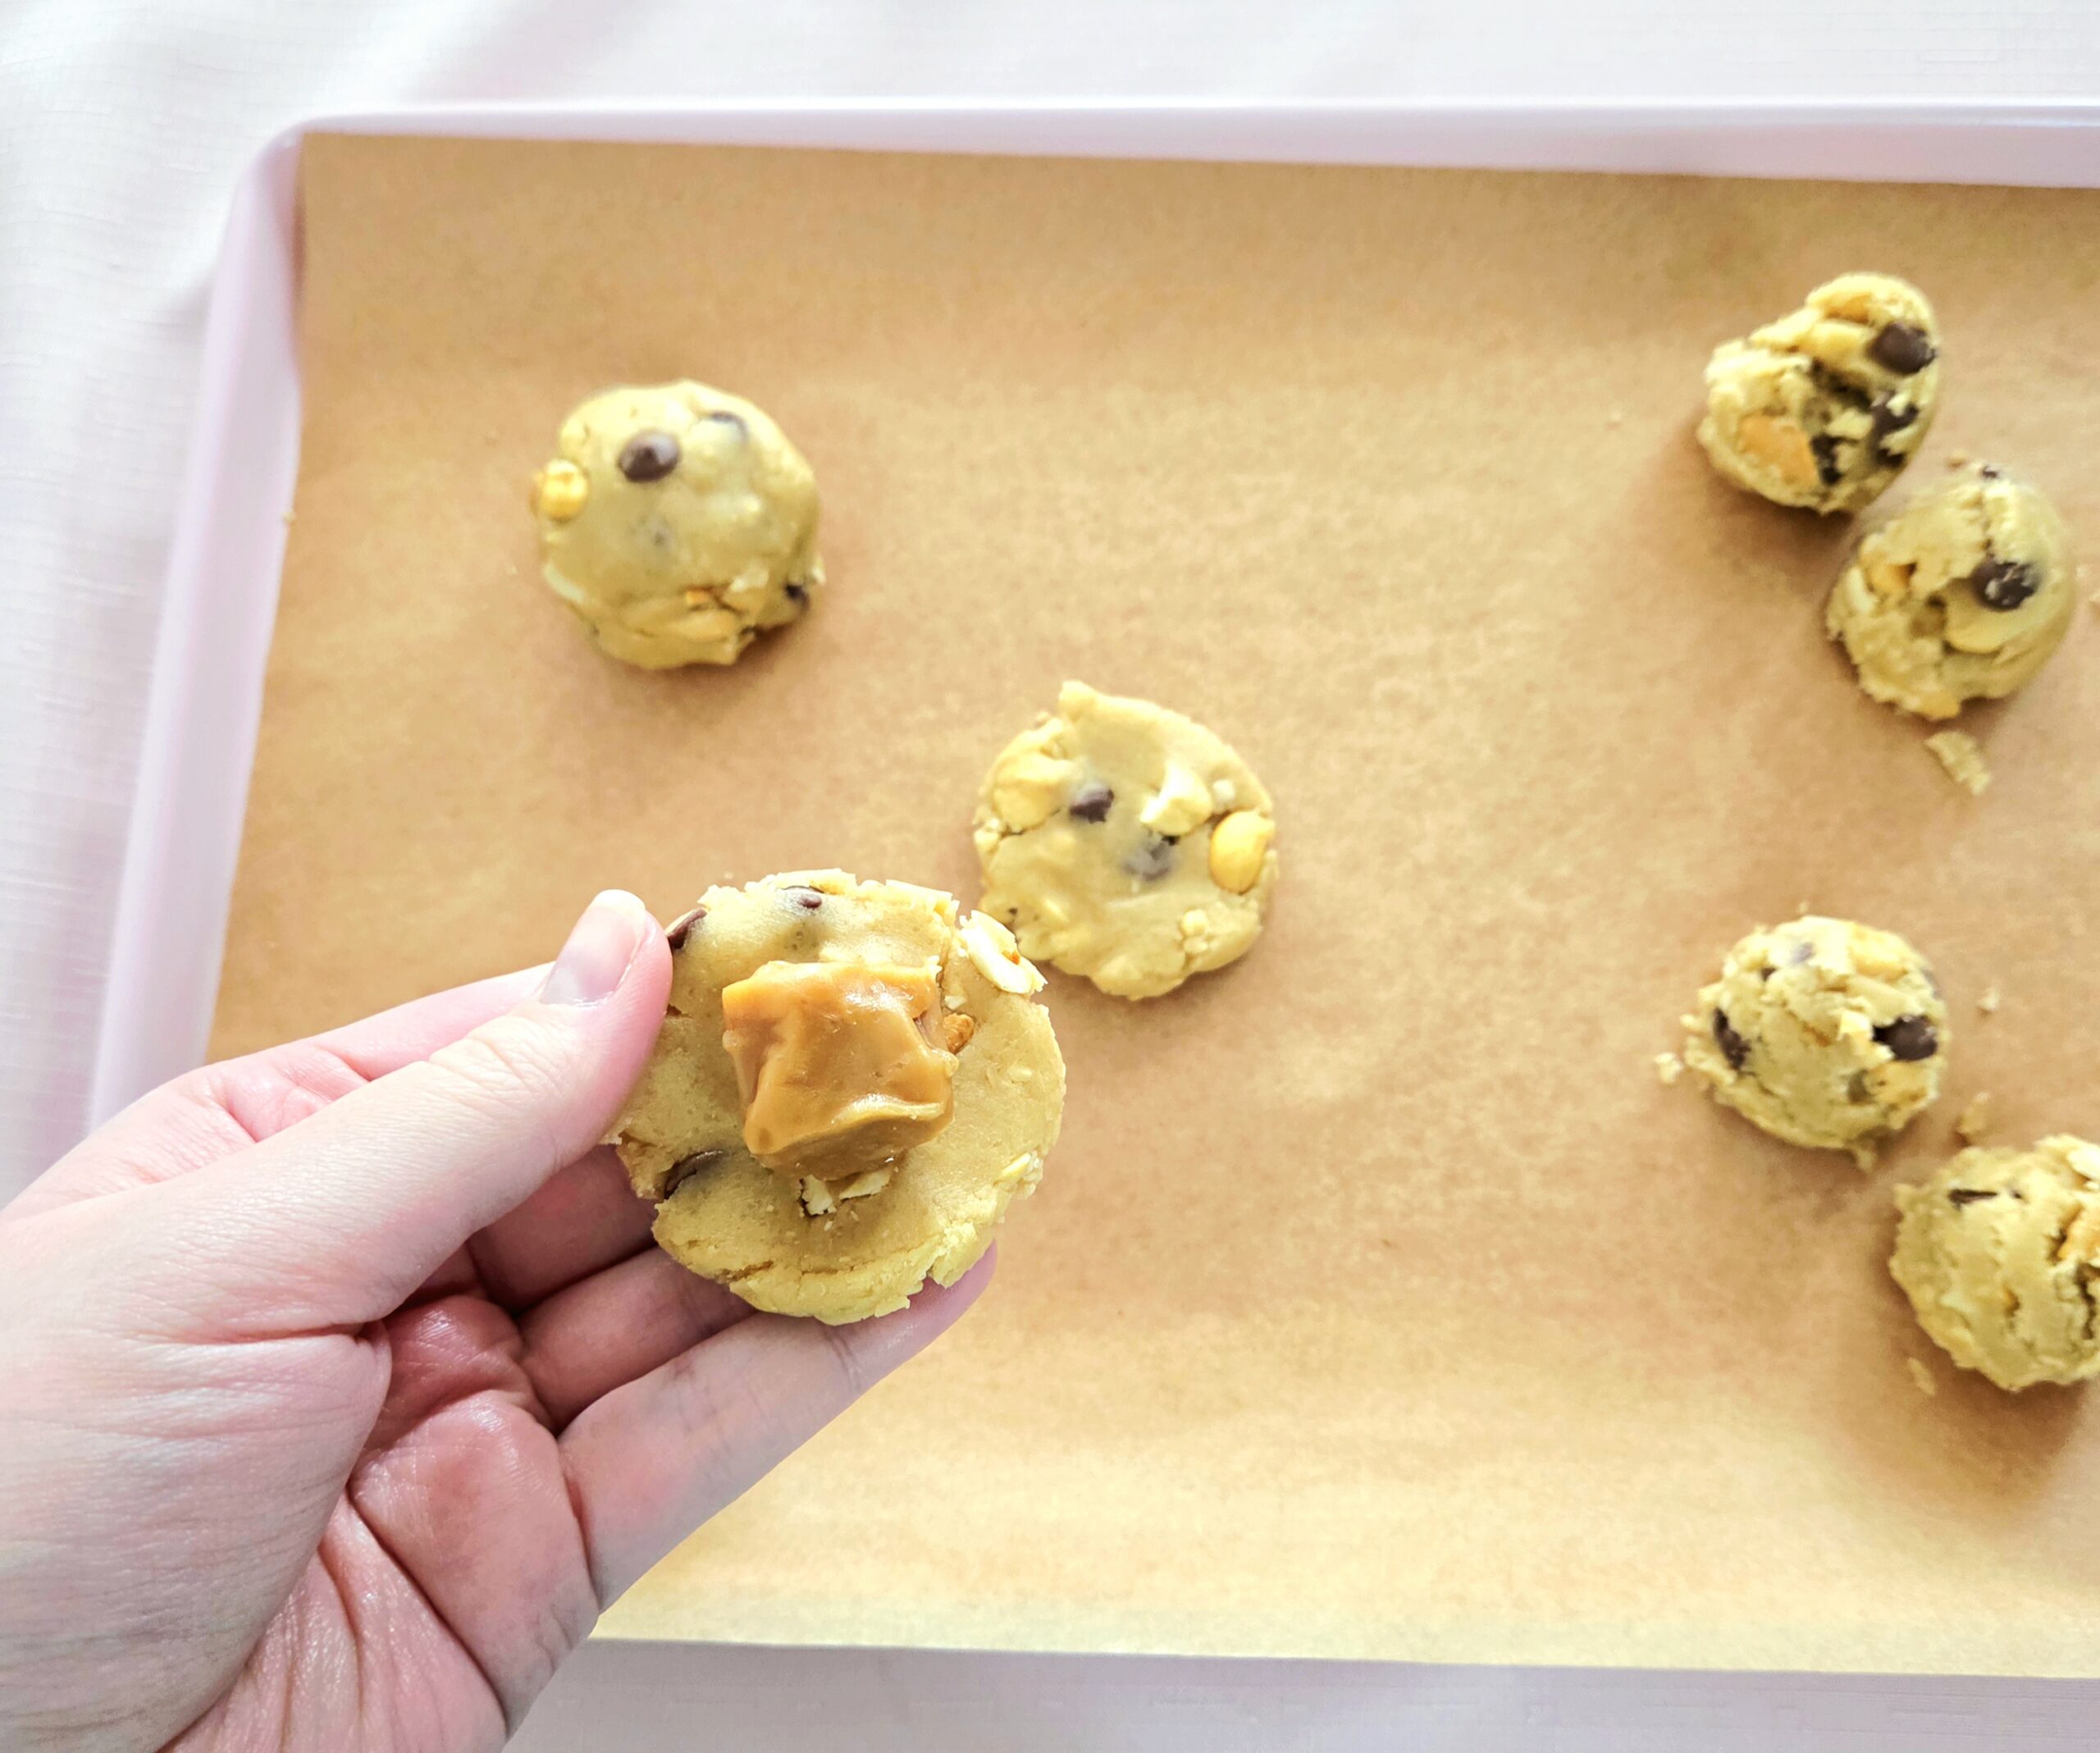
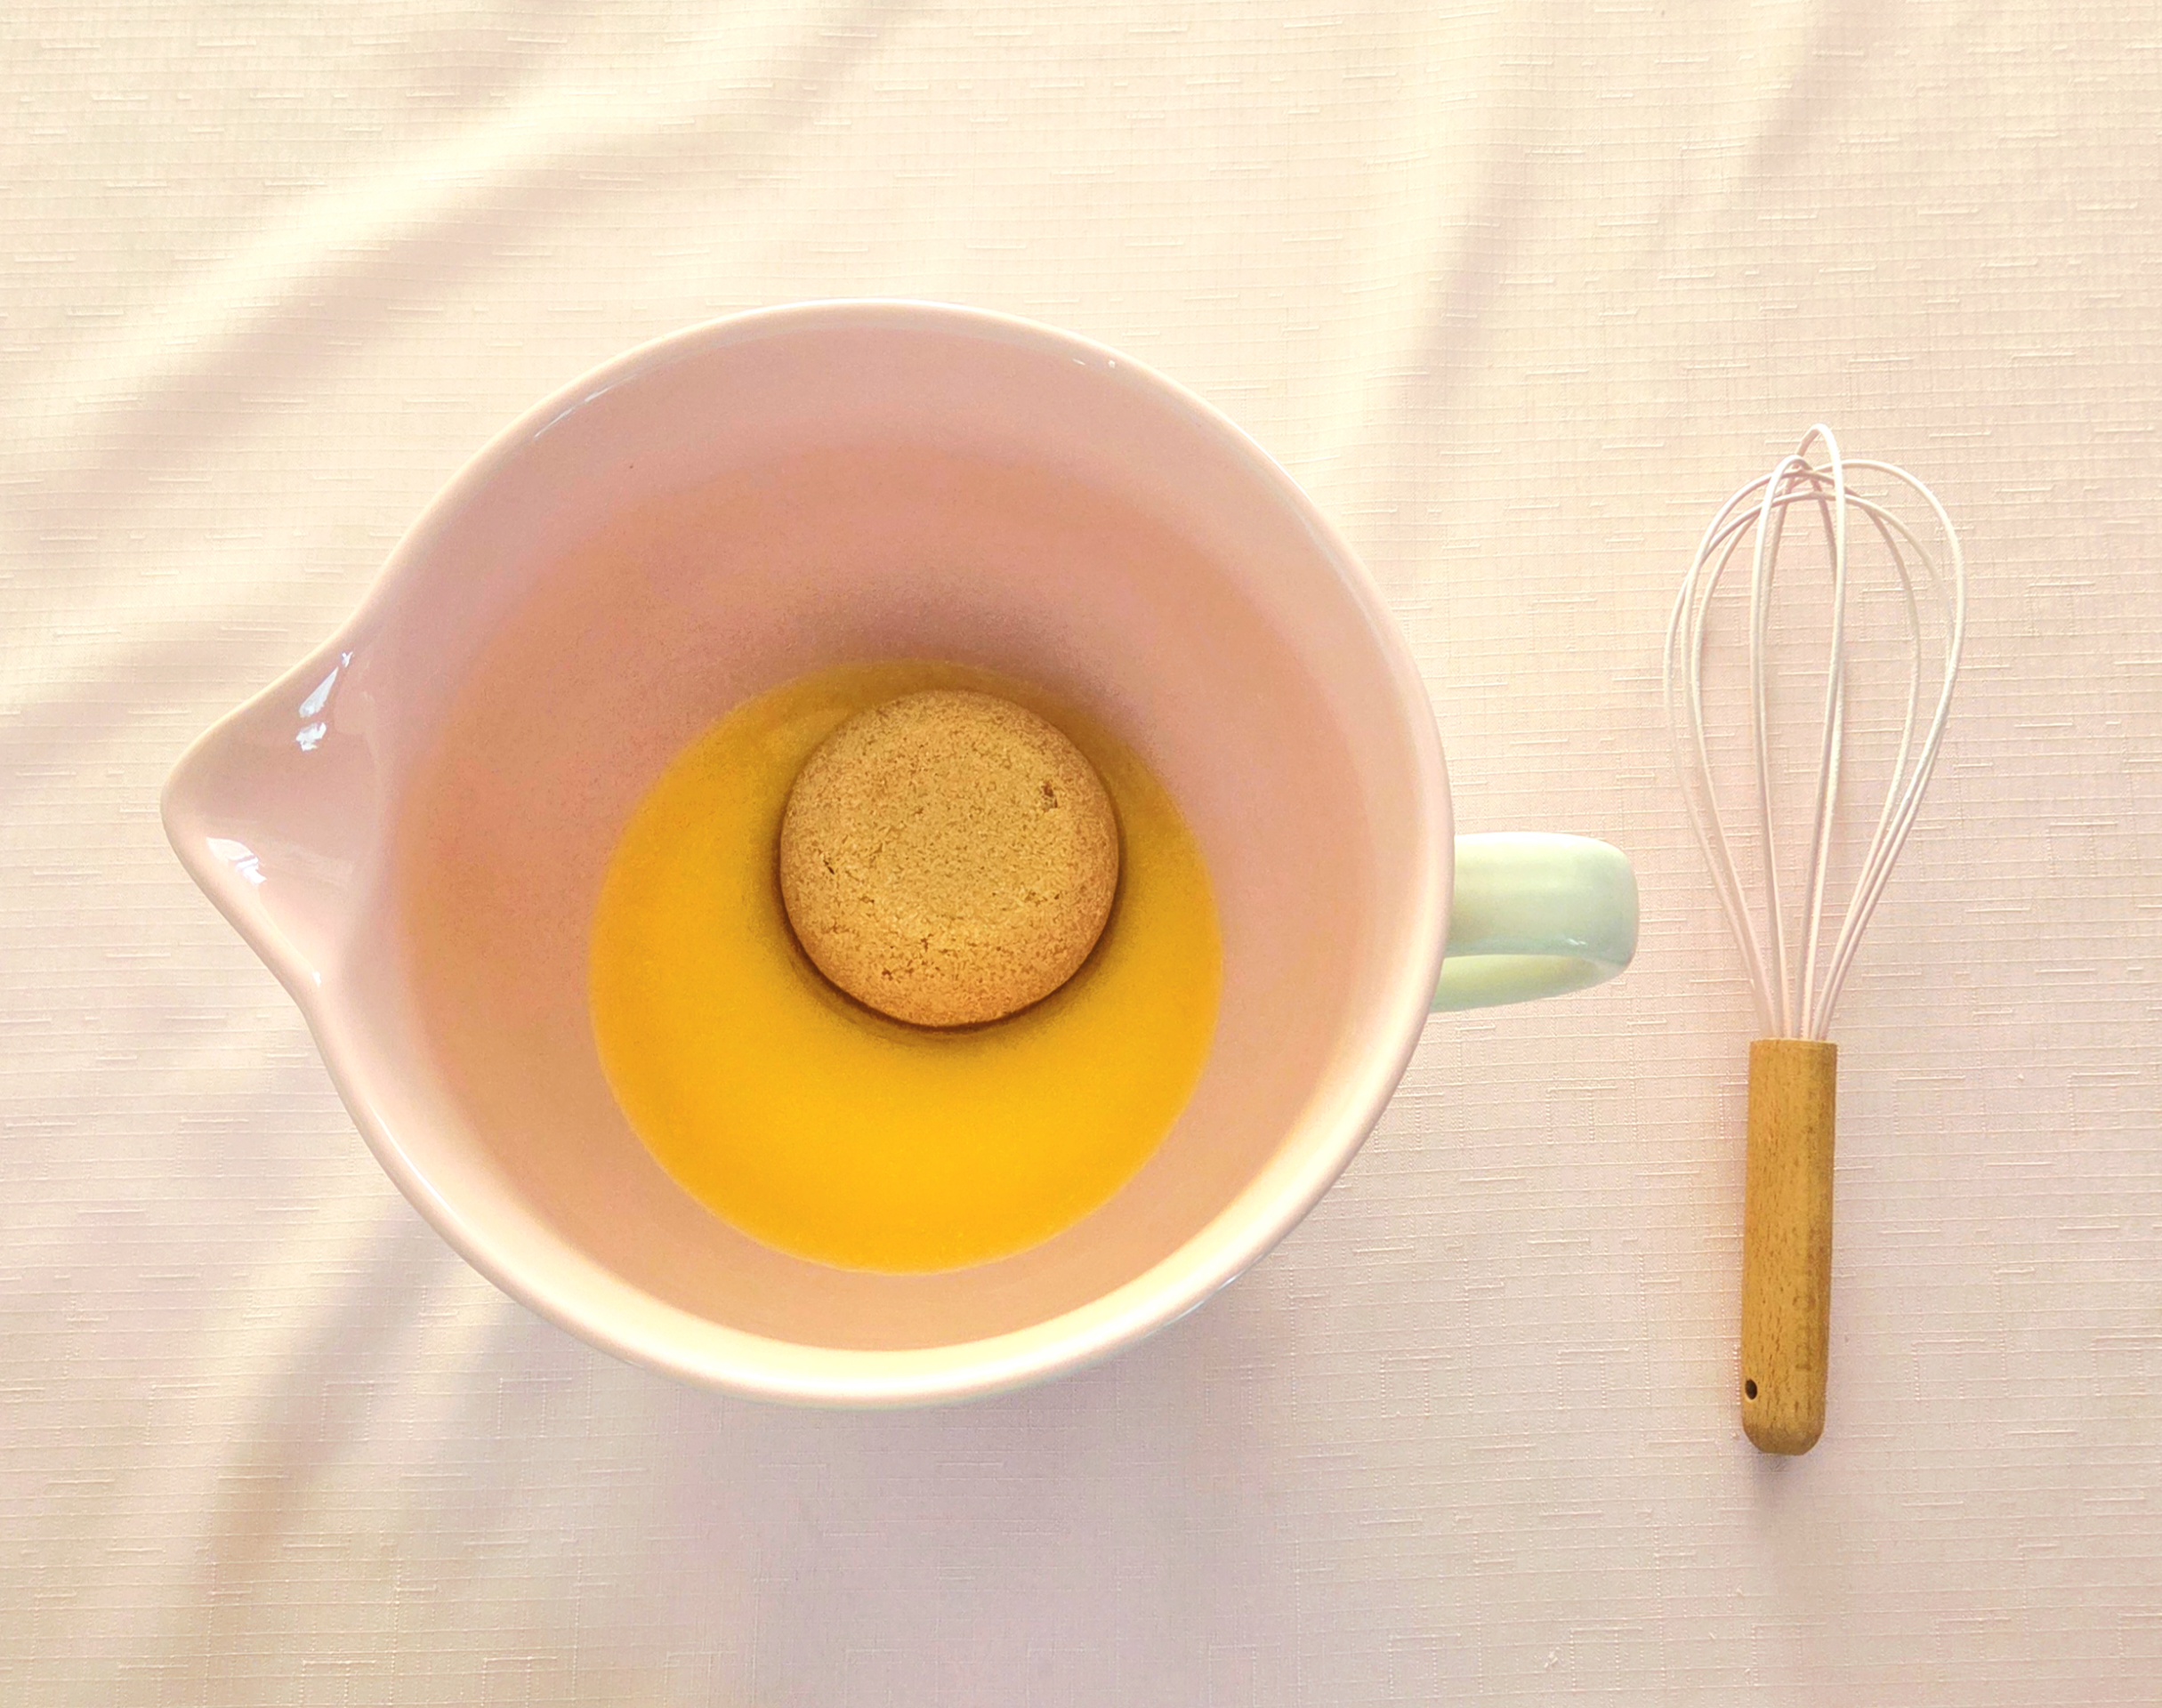
Place an unwrapped caramel in the center of one of the flattened halves, then cover it with the second half. Pinch the dough surrounding the caramel together, completely sealing it inside. If the caramel isn’t properly sealed, it’s much more likely to leak out while the cookies bake in the oven. Though honestly, it’s never a guarantee that a filled cookie won’t spring a leak when the filling gets hot enough. But do what you can to give them a fighting chance.

Roll the cookies between your hands to help trap the caramel. Lightly flatten each cookie, so it’s shaped more like a hockey puck. Space them around 2 inches apart on the pan, so there’s plenty of room for each one as they bake without running into each other.
Bake the cookies for 14 minutes, on the center rack of the oven, flipping the pan around halfway through baking. They should be a beautiful golden brown along the edges when finished. The caramel may leak a bit in the oven, it’s just in the nature of filled cookies. They’ll still be beautiful and delicious.
Let the cookies rest on the pan for a few minutes once they come out of the oven, before transferring them to a cooling rack. Freshly baked cookies are still incredibly malleable. If you attempt to move them too soon, they’ll only fall apart on you. Do not dispose of the parchment paper or clean the silicone mats yet.
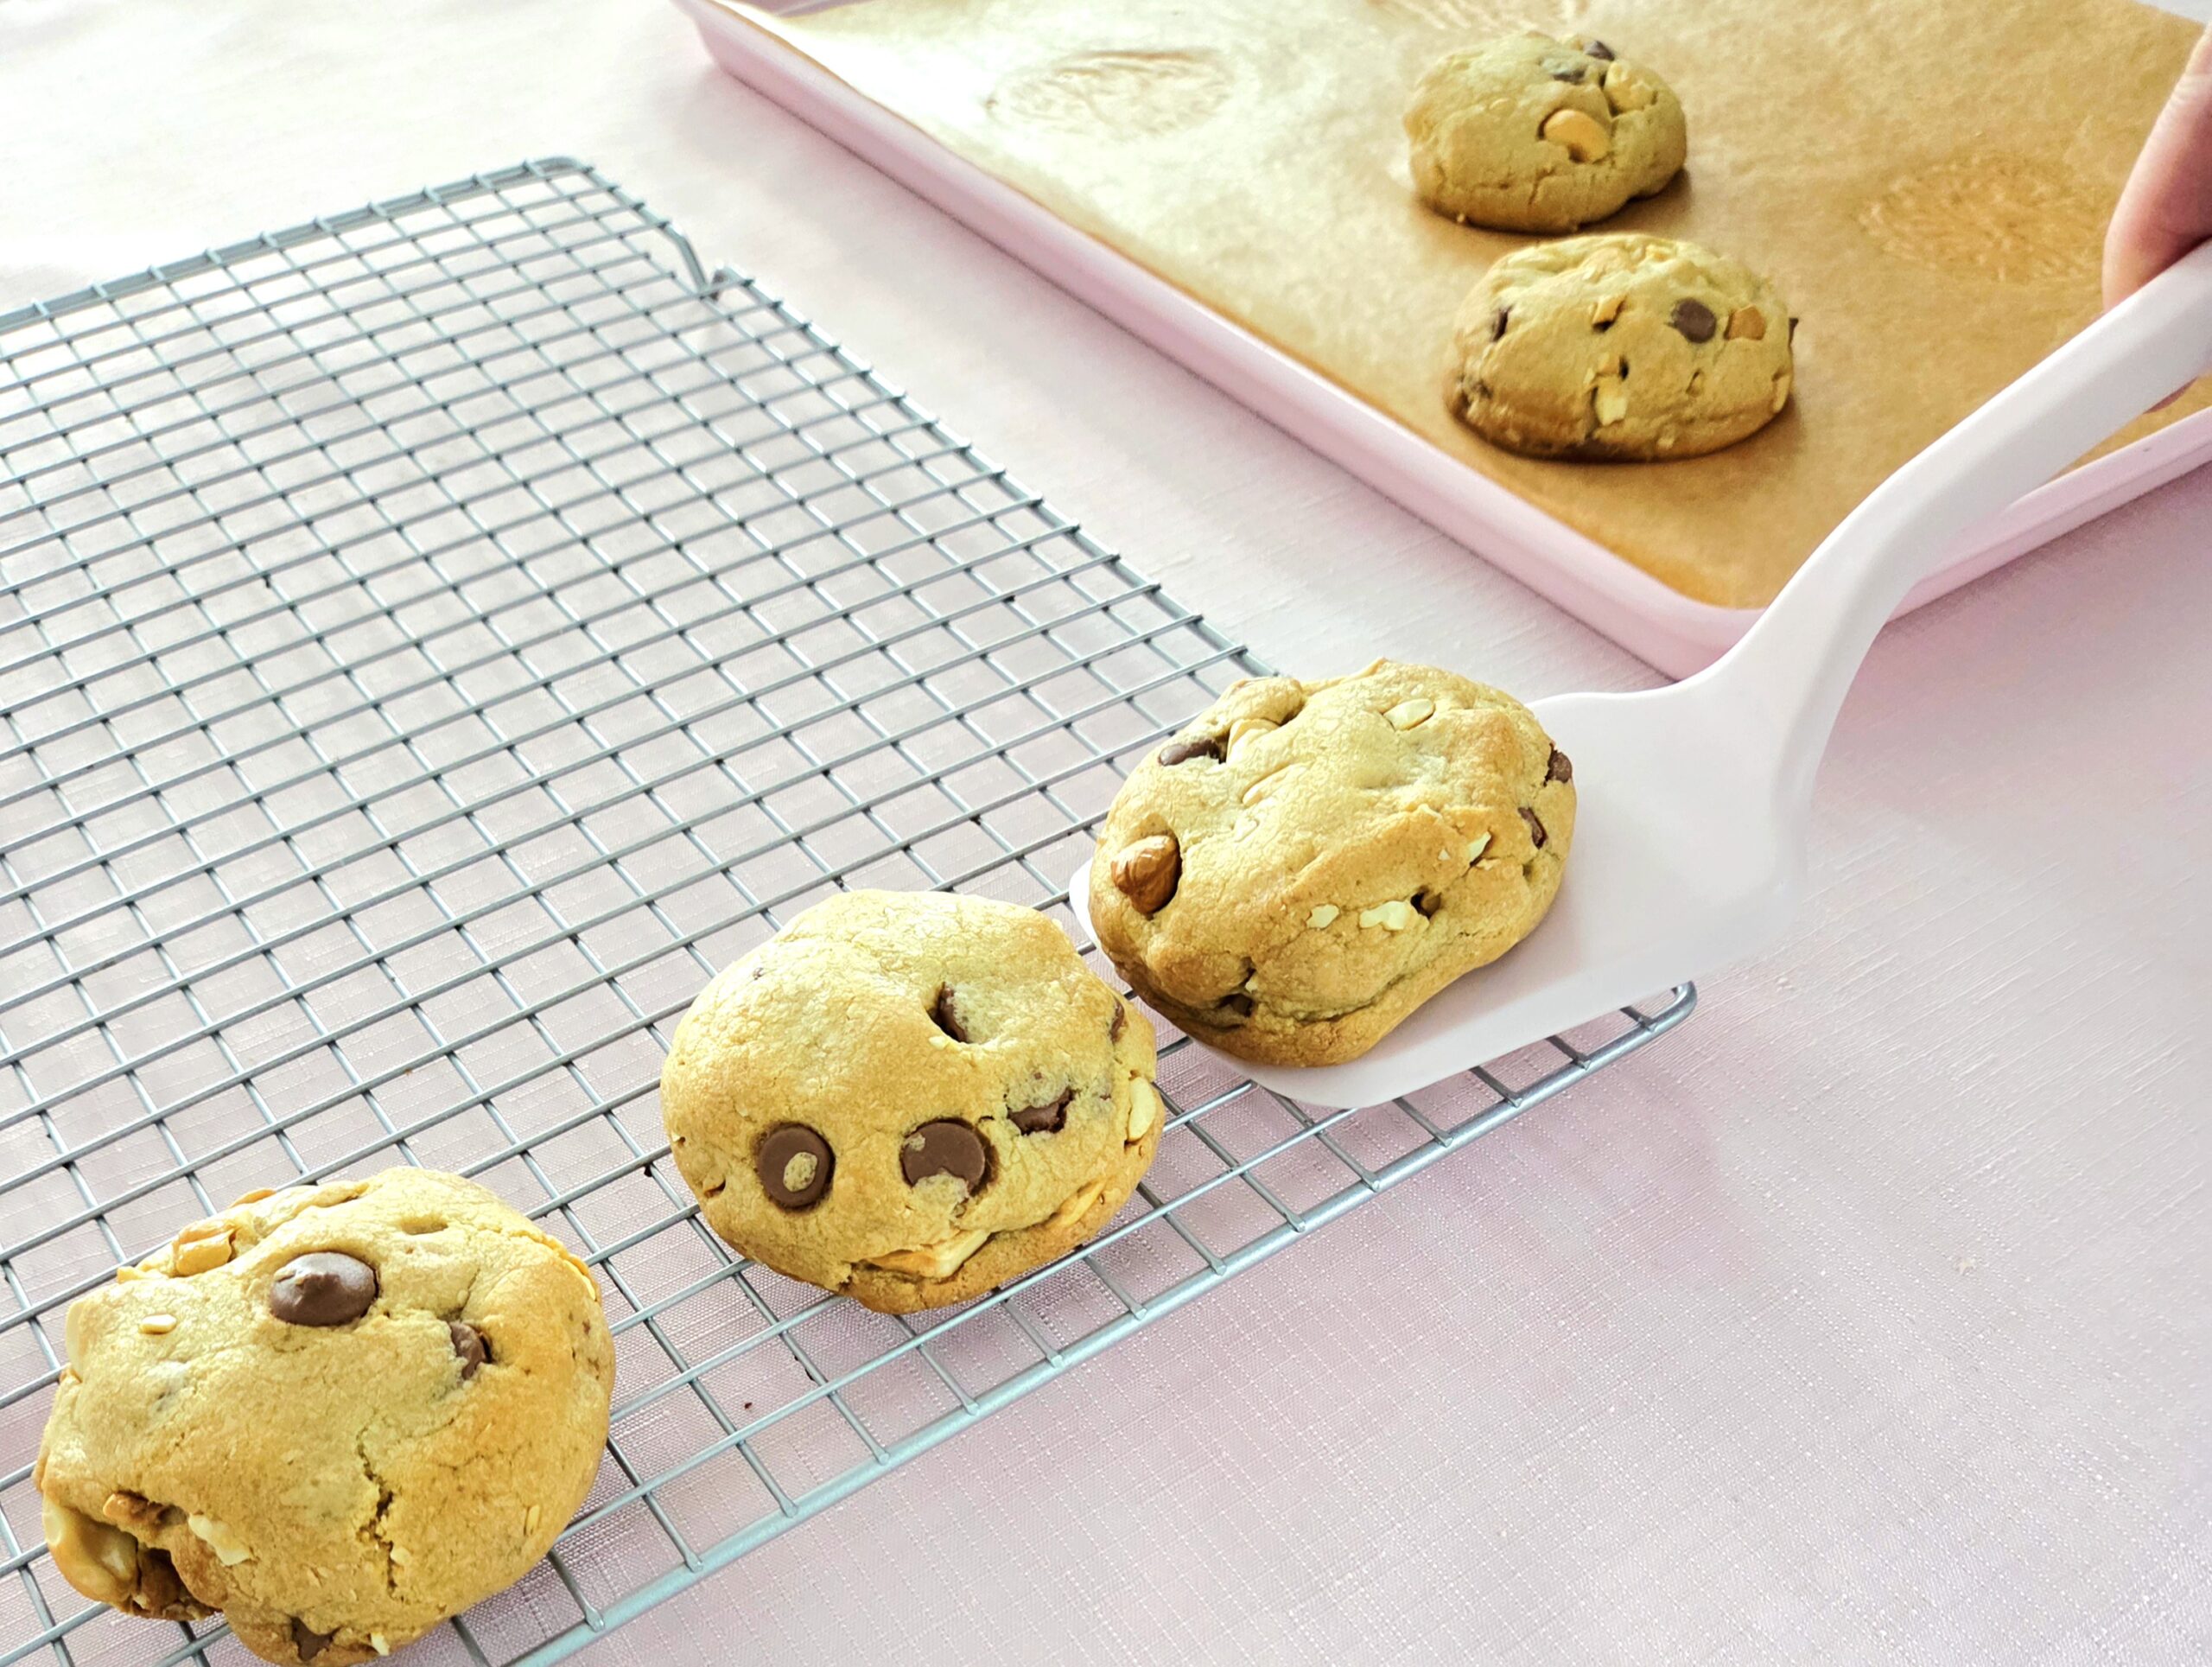
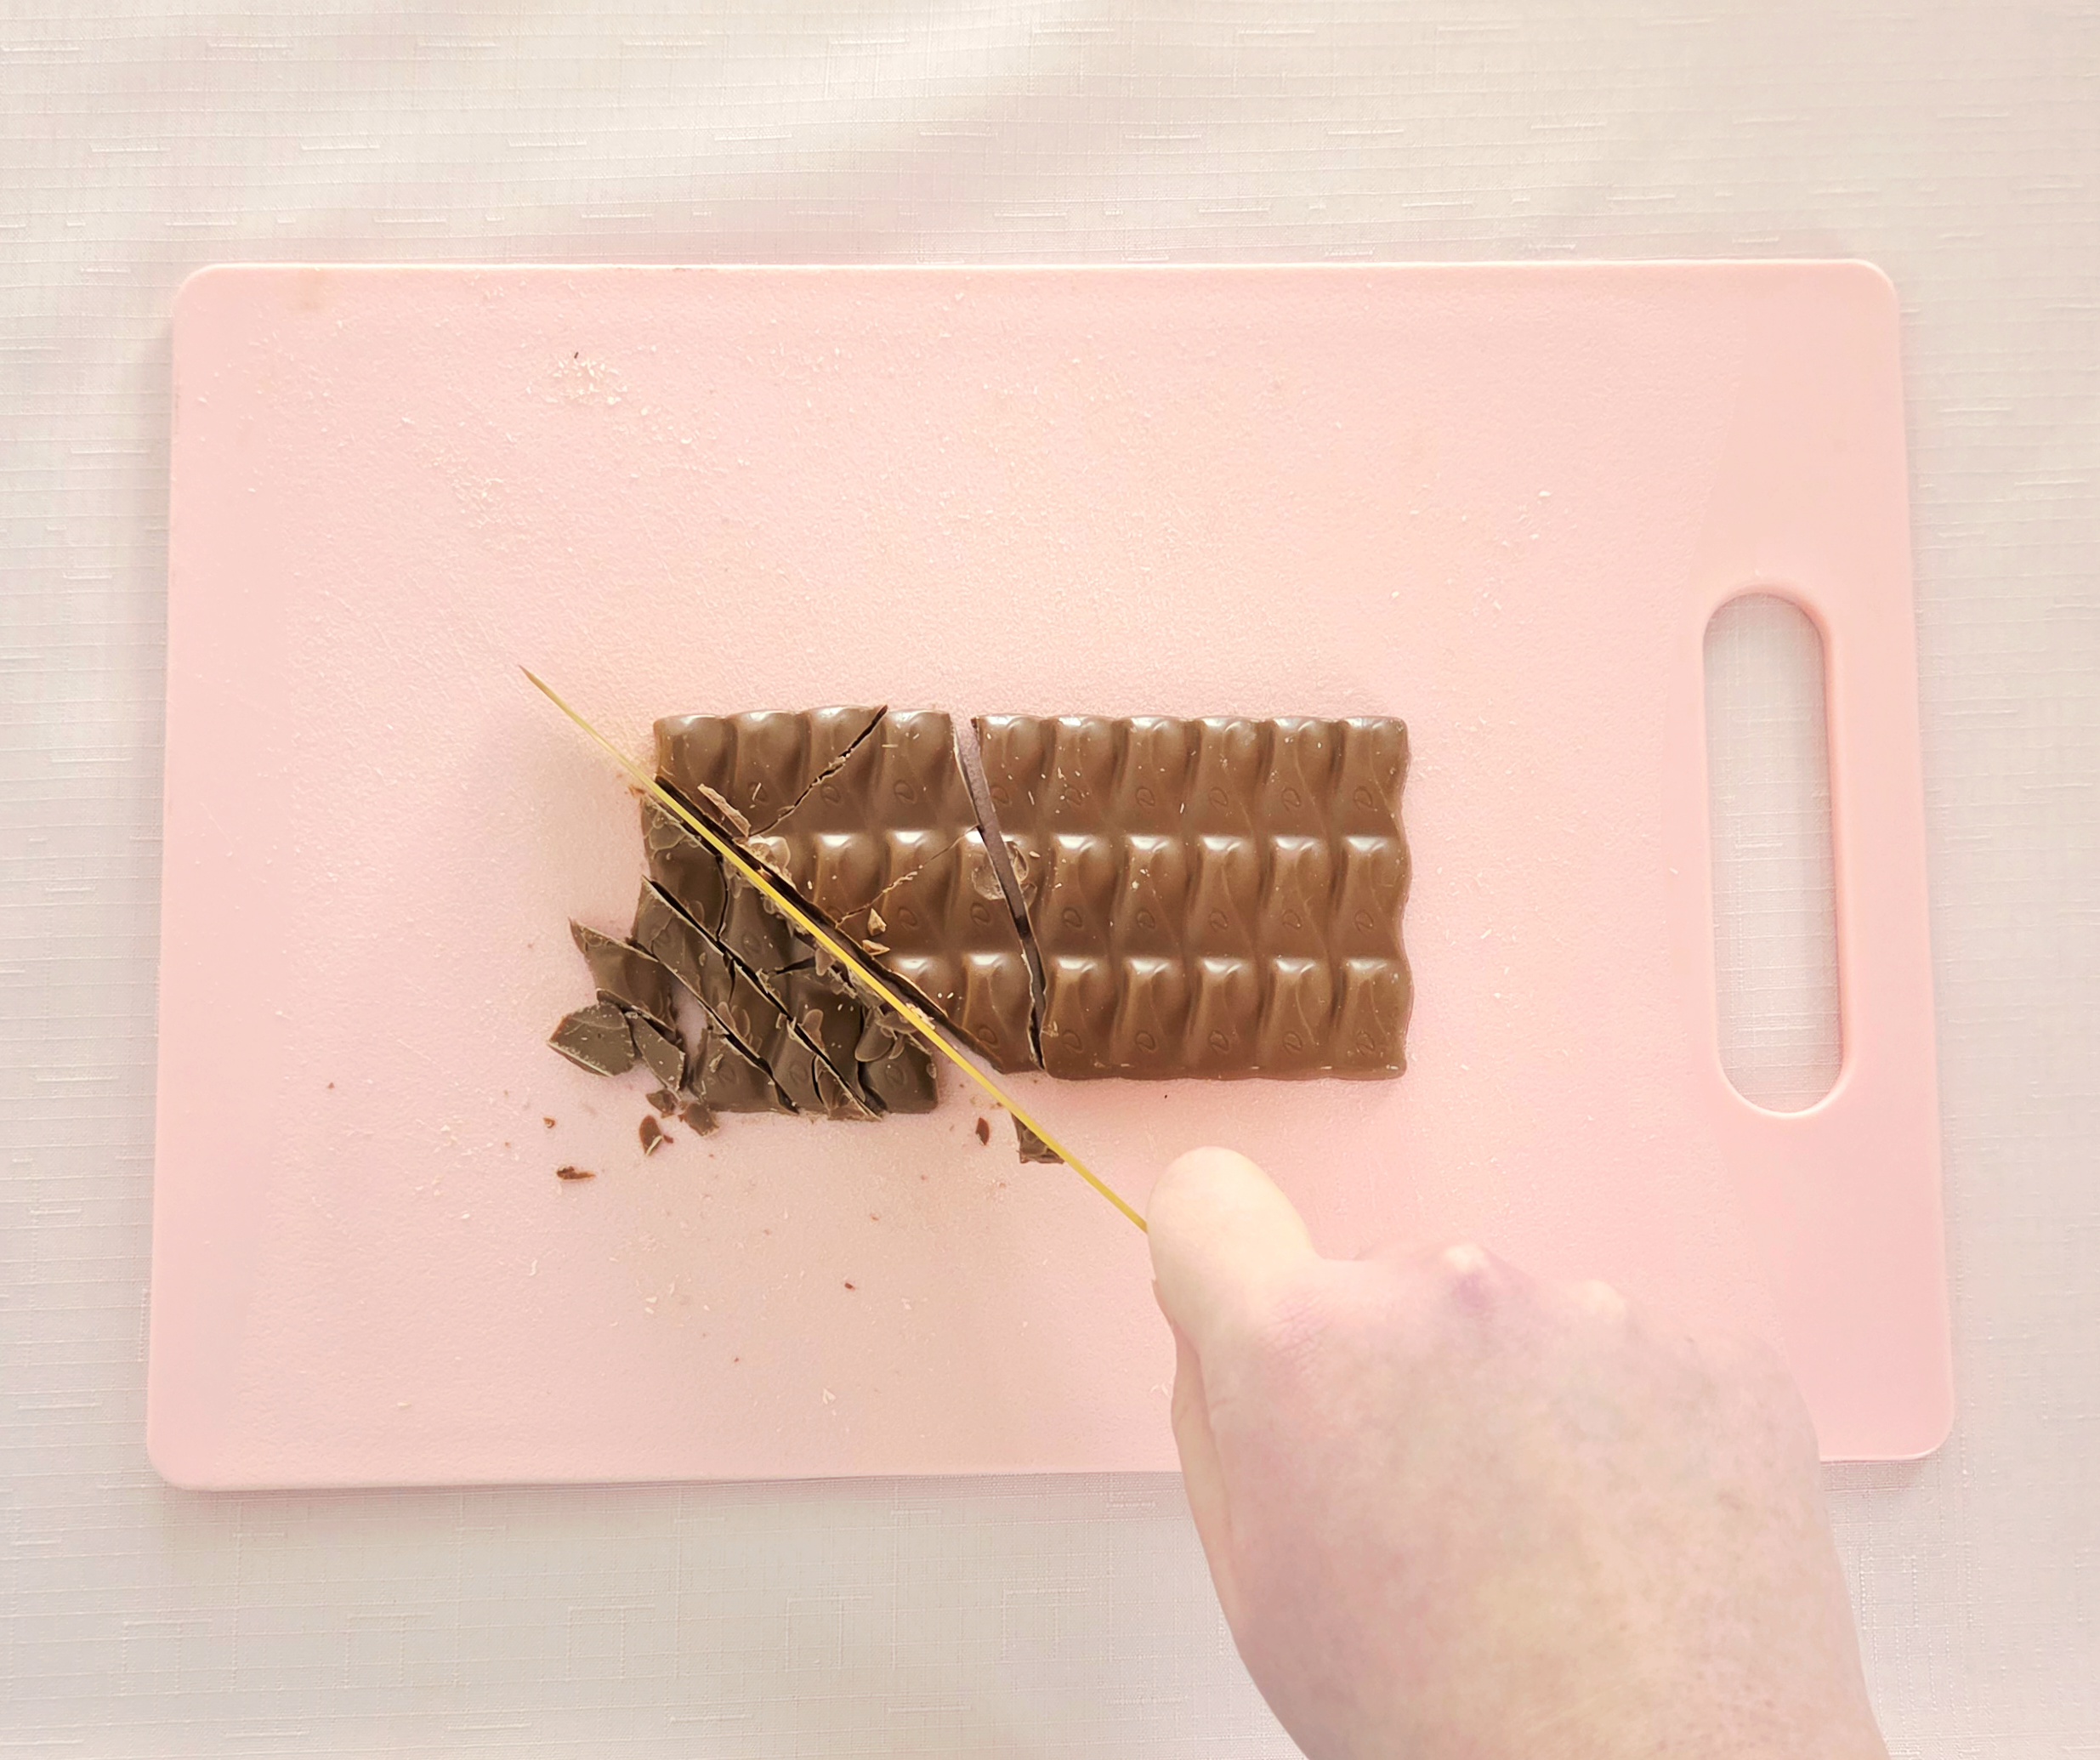
Once all of the cookies have fully cooled, prepare the chocolate for coating! Break up the chocolate bars and place them into a small heat-safe bowl. Heat it in the microwave in 30 second intervals, stirring with a spoon in between. Scoop 1-Tablespoon of chocolate onto the still lined baking sheet, spreading it around a bit.
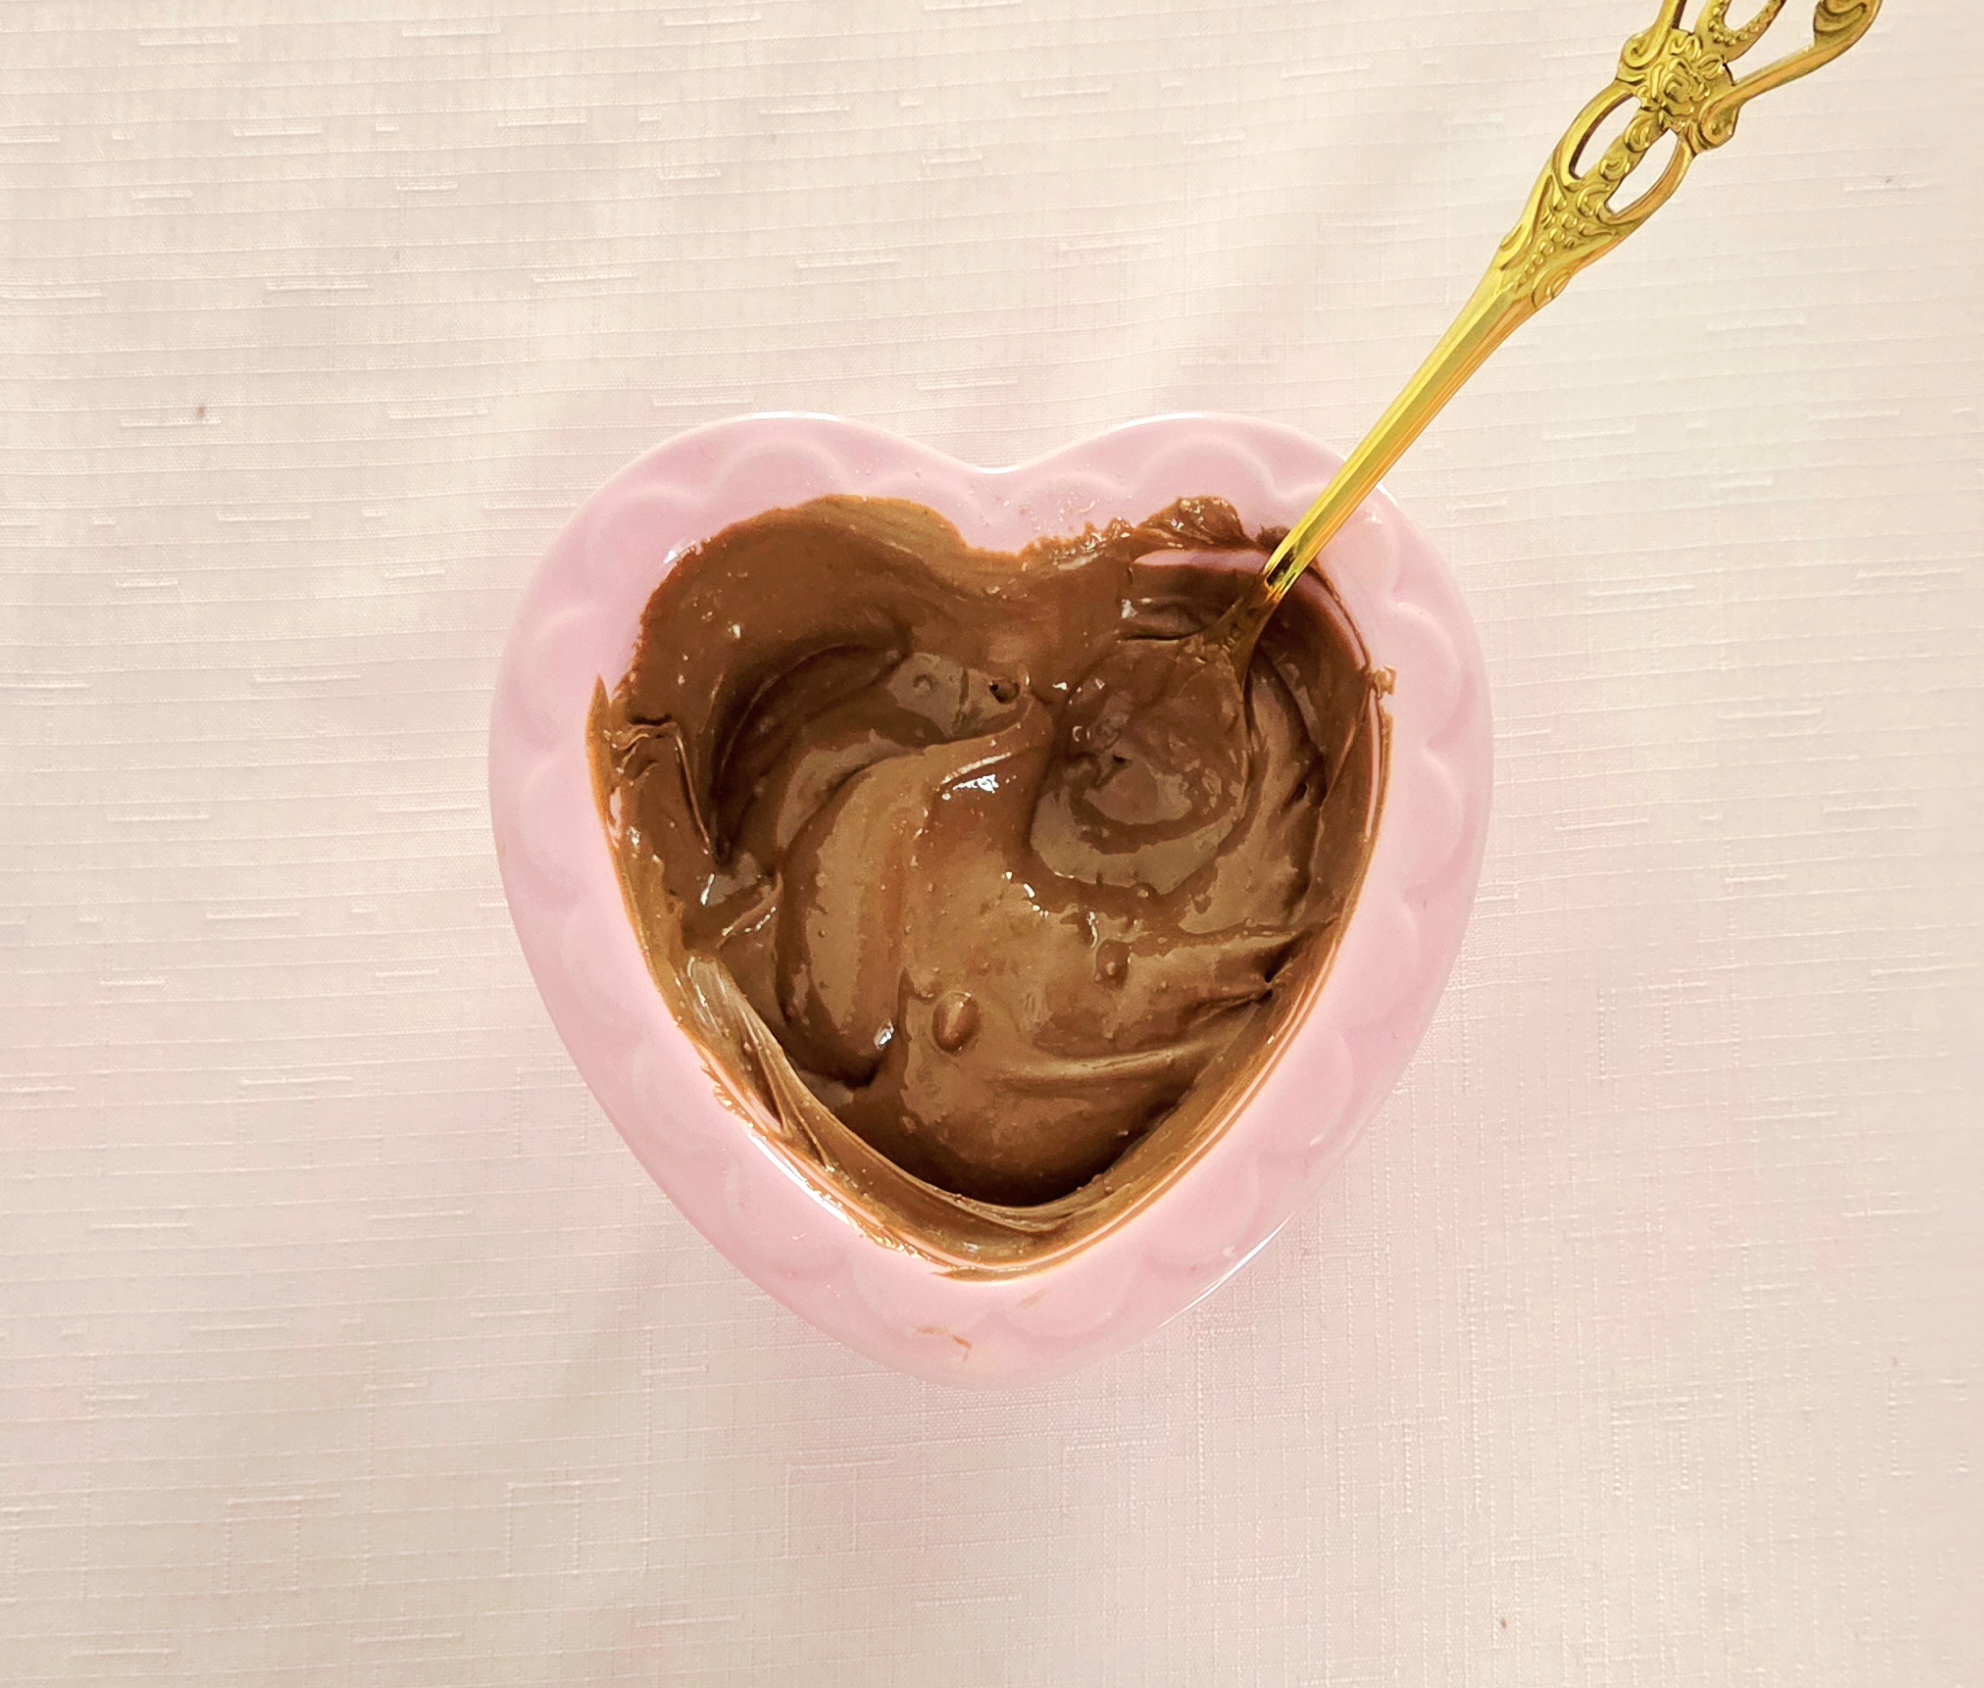
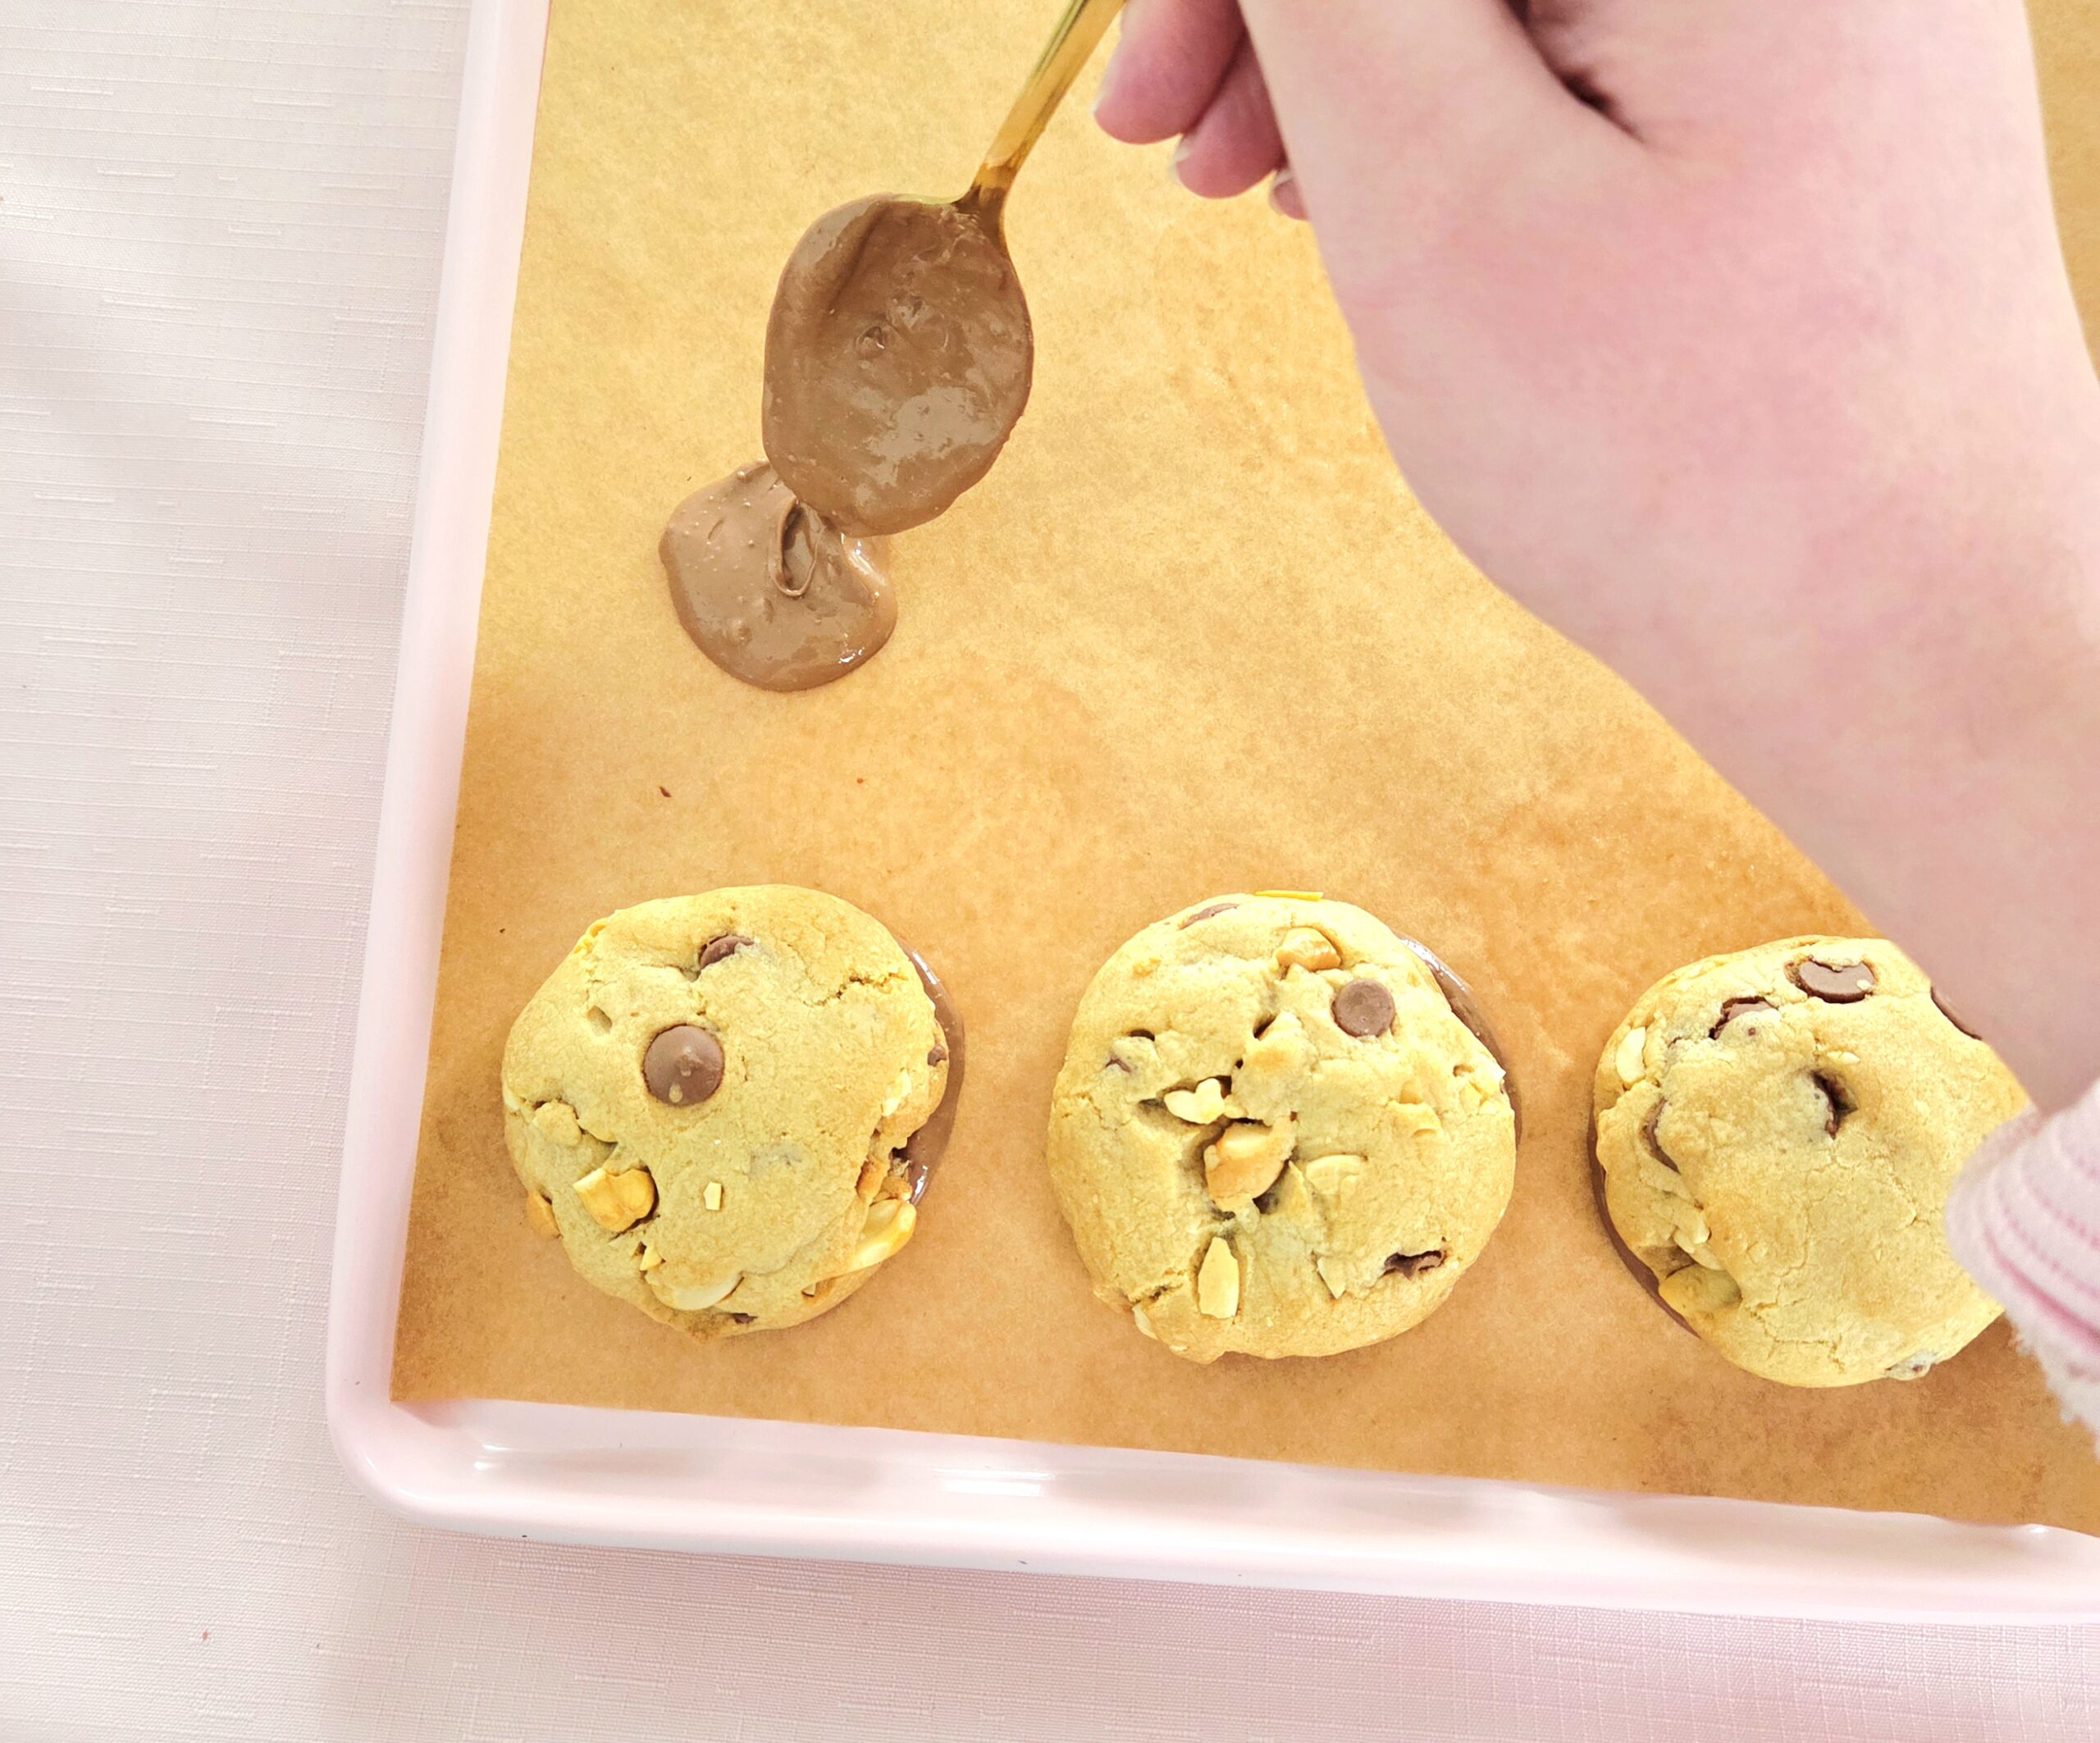
Take a cookie and place it onto the pool of chocolate, swirling it around to fully coat the bottom. Repeat with the rest of the chocolate and cookies, until each one has a chocolate coated bottom. I tested out dipping the entire cookie into chocolate, and found it to be completely overpowering. Only coating the bottom like this gives that creamy, delightful mouthfeel while still allowing the cashews and caramel to shine through.
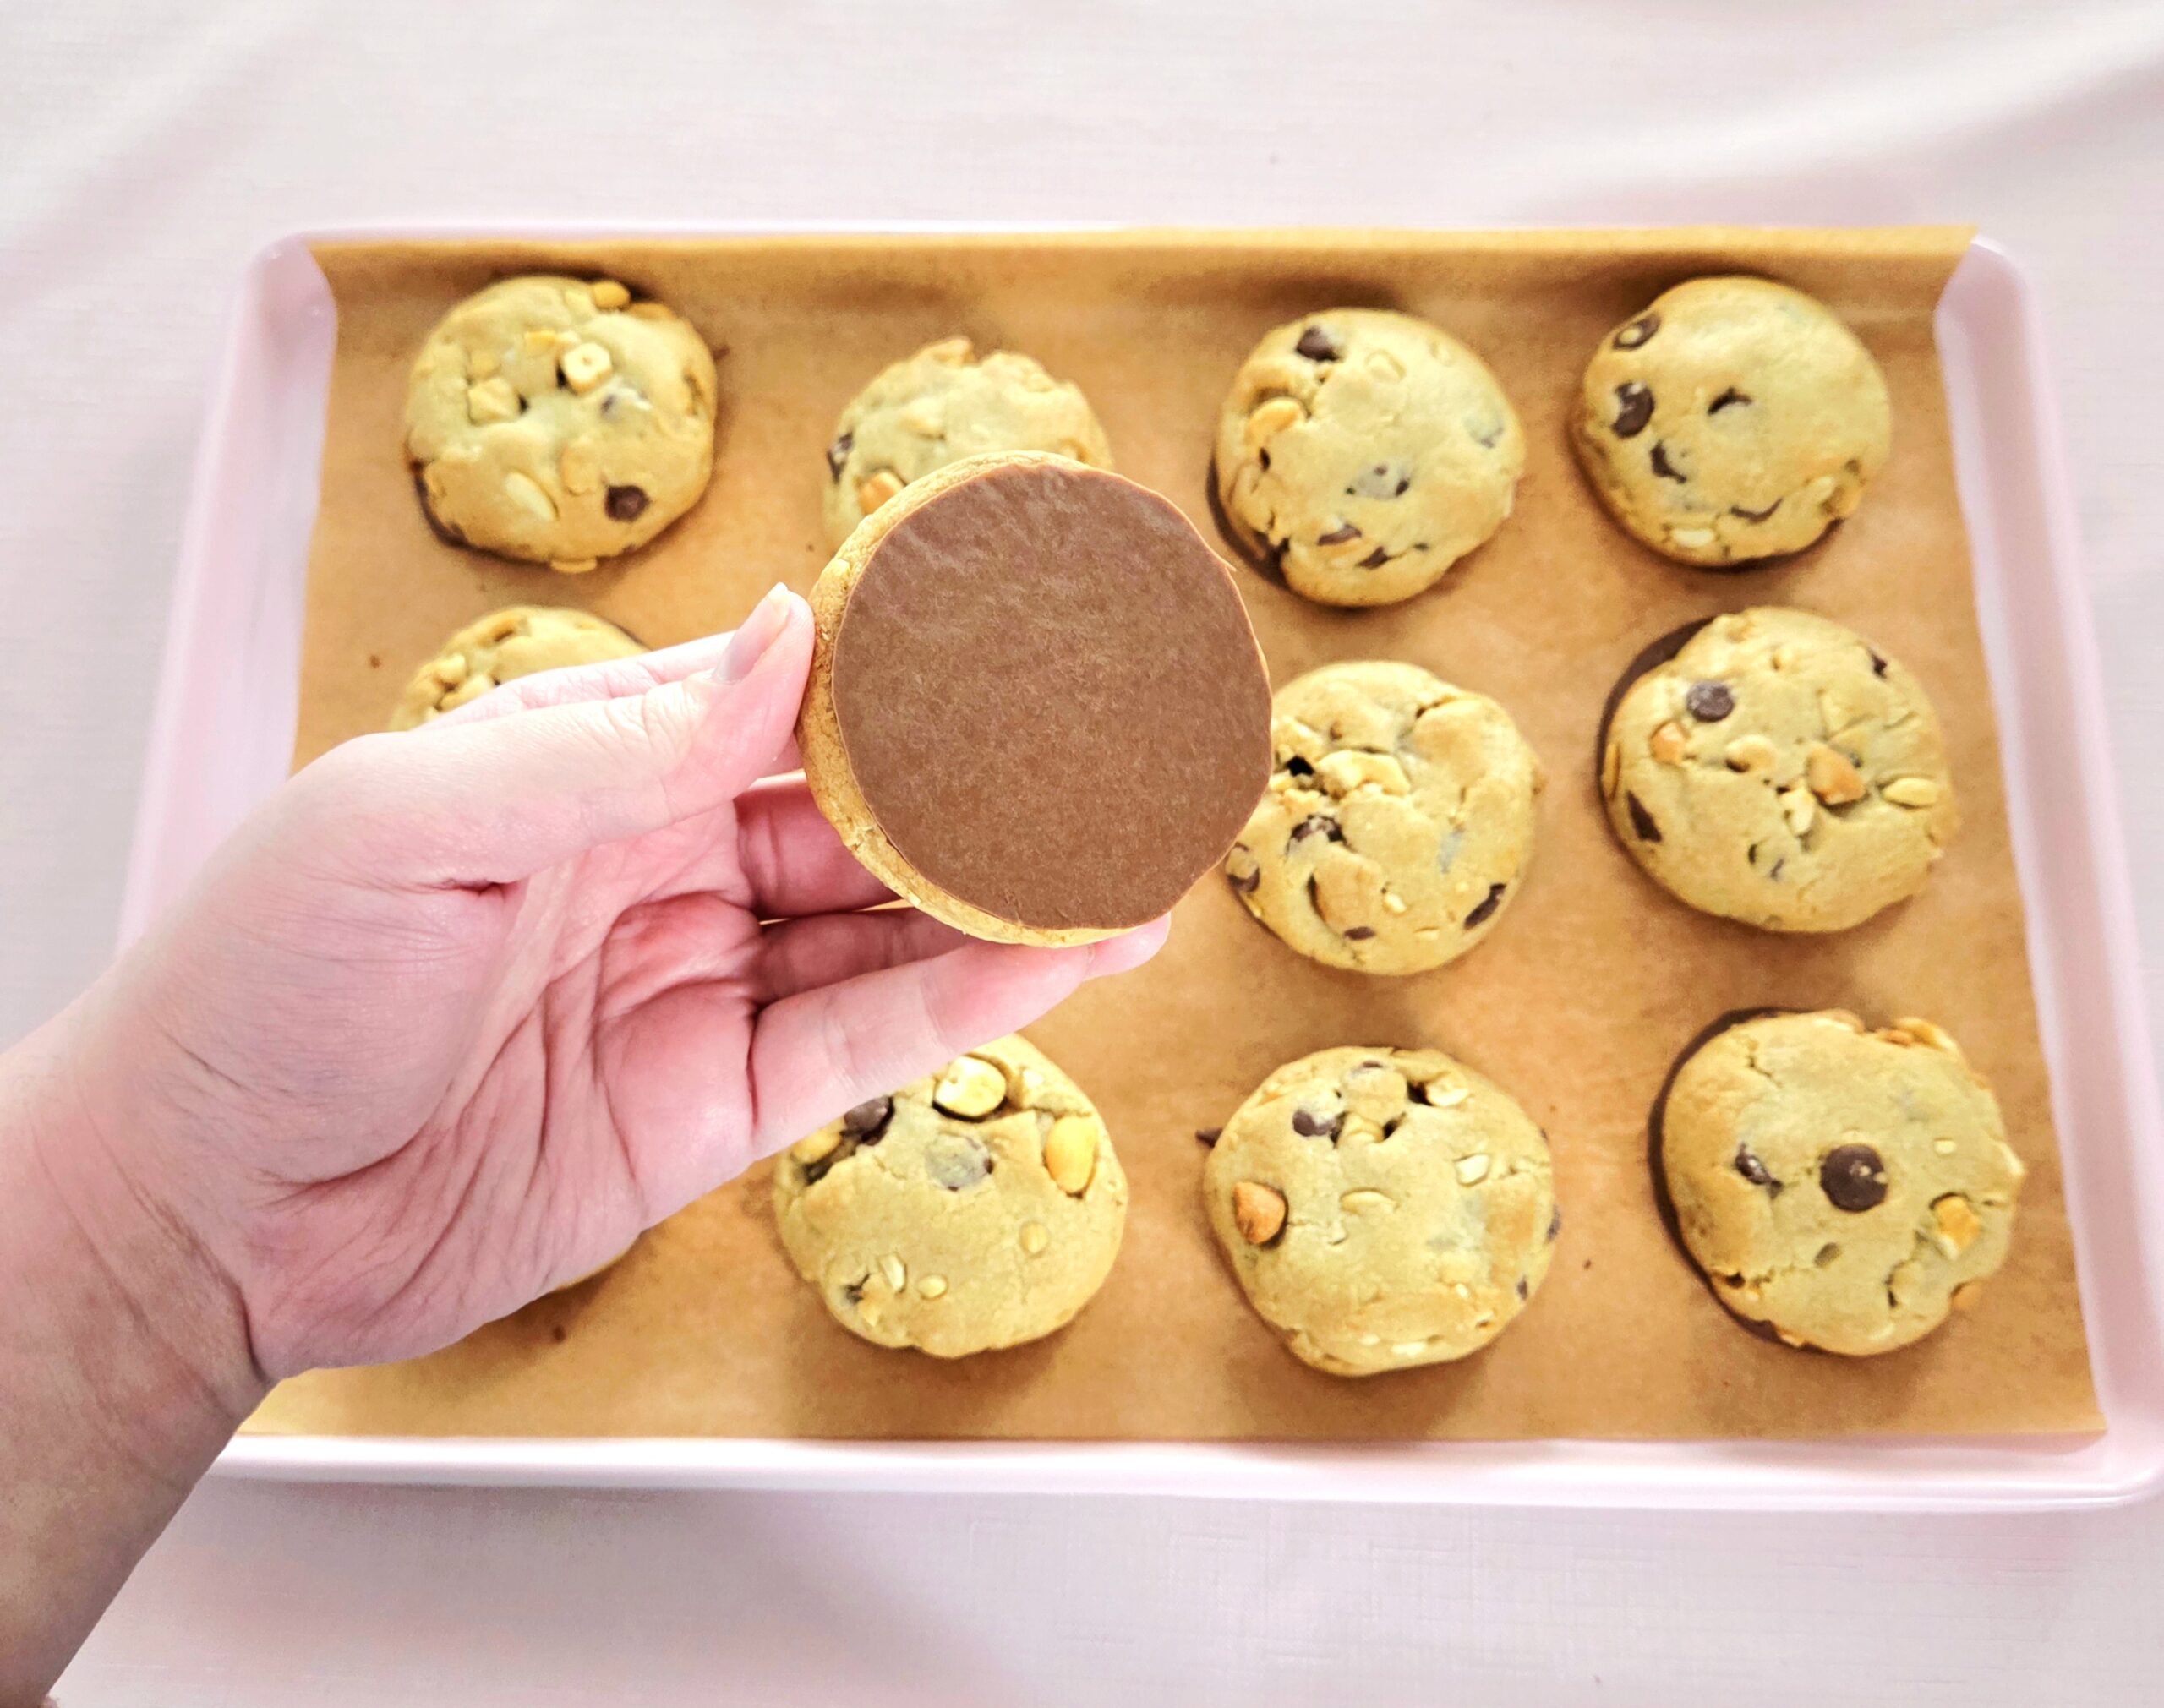
Allow the chocolate coating to set completely. Either leave them on the counter for a least an hour, or if you’d like to speed things along, place the pan of cookies into the fridge. When that bottom coat has set, dig in and enjoy! Store any left over cookies in either a gallon sized zip-top bag or large airtight container on the counter for up to two days.


Cashew Turtle Cookies
Bake Time: 350F for 14 minutes
Servings: 18 cookies
Total Time: 5 hours
Prep Time: 1 hour
Ingredients
- 2 ½ cups all-purpose flour
- 1 teaspoon salt
- 1 teaspoon baking soda
- 12 Tablespoons unsalted butter
- 1 cup light brown sugar
- 1 large egg, room temperature
- 1 large egg white, room temperature
- 2 teaspoons vanilla extract
- 1 ½ cups roasted cashews
- ⅔ cup milk chocolate chips
- 18 chewy caramels
- 8 oz milk chocolate bars
Directions
- Begin by giving the cashews a rough chop. The pieces should be sized anywhere between ½ inch-¼ inch when you’ve finished.
- Whisk together the flour, salt, and baking soda, in a medium mixing bowl. Set this bowl aside.
- In a large mixing bowl, heat the butter in the microwave until it’s just melted. Add in the brown sugar and thoroughly whisk them together. Crack in the egg, egg white, and pour in the vanilla extract, whisk them together until the mixture becomes homogeneous.
- All at once, dump the dry goods into the wet mixture. Using a rubber spatula, stir everything together until the dough has come together and only a few streaks of flour remain.
- Add the chopped cashews and chocolate chips, stirring them in until they’re evenly distributed and the flour has been absorbed. Cover the dough with a sheet of plastic wrap and place it into the fridge for a minimum of 3 hours, or up to 2 days.
- About half an hour before the cookies are ready to bake, preheat the oven to 350F, on the convection setting if possible. Line two baking sheets with either parchment paper or silicone baking mats, set them aside until they’re needed.
- Now to assemble, shape, and bake the cookies! Scoop out 4-Tablespoon or ¼ cup portions of dough. Divide the portions of dough in half and gently flatten them out. Place a chewy caramel in the center of one half, and cover it with the second half. Pinch the sides together to encase the caramel completely, and roll the dough between your hands to round it out. Lightly flatten the cookie into a puck shape and place it on one of the prepared baking sheets. Repeat with the other cookies, spacing them 2 inches apart.
- Place one pan on the center rack of the oven and bake the cookies for 14 minutes, flipping halfway through baking. Allow the cookies to rest on the pan for 5 minutes before transferring them to a cooling rack. Once all of the cookies have finished baking, do not dispose of the parchment or baking mat yet.
- After all of the cookies have cooled completely, break up the chocolate bars and place the pieces into a small heat-safe bowl. Heat the chocolate in 30 second intervals in the microwave, stirring in between so as to avoid burning it.
- Take spoonfuls of chocolate and dollop them onto the parchment or baking mat, about a tablespoon or so. Take a cookie and gently press it onto the chocolate, twisting it around to make sure the entire button is coated.
- Allow them to sit for half an hour or so, or until the chocolate sets completely. Alternatively, place the cookies in the fridge to speed up the process. Store any uneaten cookies in either a gallon sized zip top bag or airtight container for up to 3 days and enjoy!
Tips
- You can freeze unbaked cookies to pull and bake later on, at your discretion. Follow the recipe as written through step 7. Then, instead of spacing them out on a pan, line up each complete cookie directly next to each other. Place the pan into the freezer and once all of the cookies solidify, transfer them to a freezer safe bag for up to 3 months. Pull and bake at 350F for 16-18 minutes, then continue on with the recipe as written.


0 Comments